When I first got this flute I wanted to love it just as it was, but the way the fetishes sat off-center between the edge and the cord pass through made it difficult to keep the primary flute and drone in tune with one another.

Way back then, I tried my first idea: a leather wrap that would hold the birds in place without making any permanent modifications to the flute itself.

Unfortunately, this interfered with the flow of air and caused as much trouble as good, so after a long drawn out sewing project, I was back to square one. I played the flute as-is for about a year, letting ideas pass in and out of my mind for a while, but finally had one come to me that felt like a real winner.
I spent last week on vacation with my extended family, but before we left I came up with an idea for a second attempt at accomplishing my goal: I would use paint stirring sticks to make a fitting jig, sand the mating surface, glue it in place, then sand it all to match and stain it to finalize the addition.
I tried to grab everything I thought I might need to do this in a moment before we left; I did well, having only a few things that didn’t get used, and having had nearly everything I needed to start and finish the job.

Vacation vibes and all that - full disclosure - I didn’t take any process photos…I just chipped away at the job a little each time I got the chance, but mostly hung out on the beach and tasted local brews.


…but the whole plan started with some paint stirring sticks.

I cut three pieces, roughly 5” long, and glued them together side-by-side to make a panel. I cut this down to fit on top of the flute and marked the flute at both ends. Next, with the flute in good intonation, I measured the ends of the fetishes relative to my panel-edge markings, and marked the newly made panel accordingly.

I cut out the notches and put a round on the back end of the panel to fit nicely in the flute as is.

Once completed, I had a nice little panel with saddles cut out for the two fetishes.

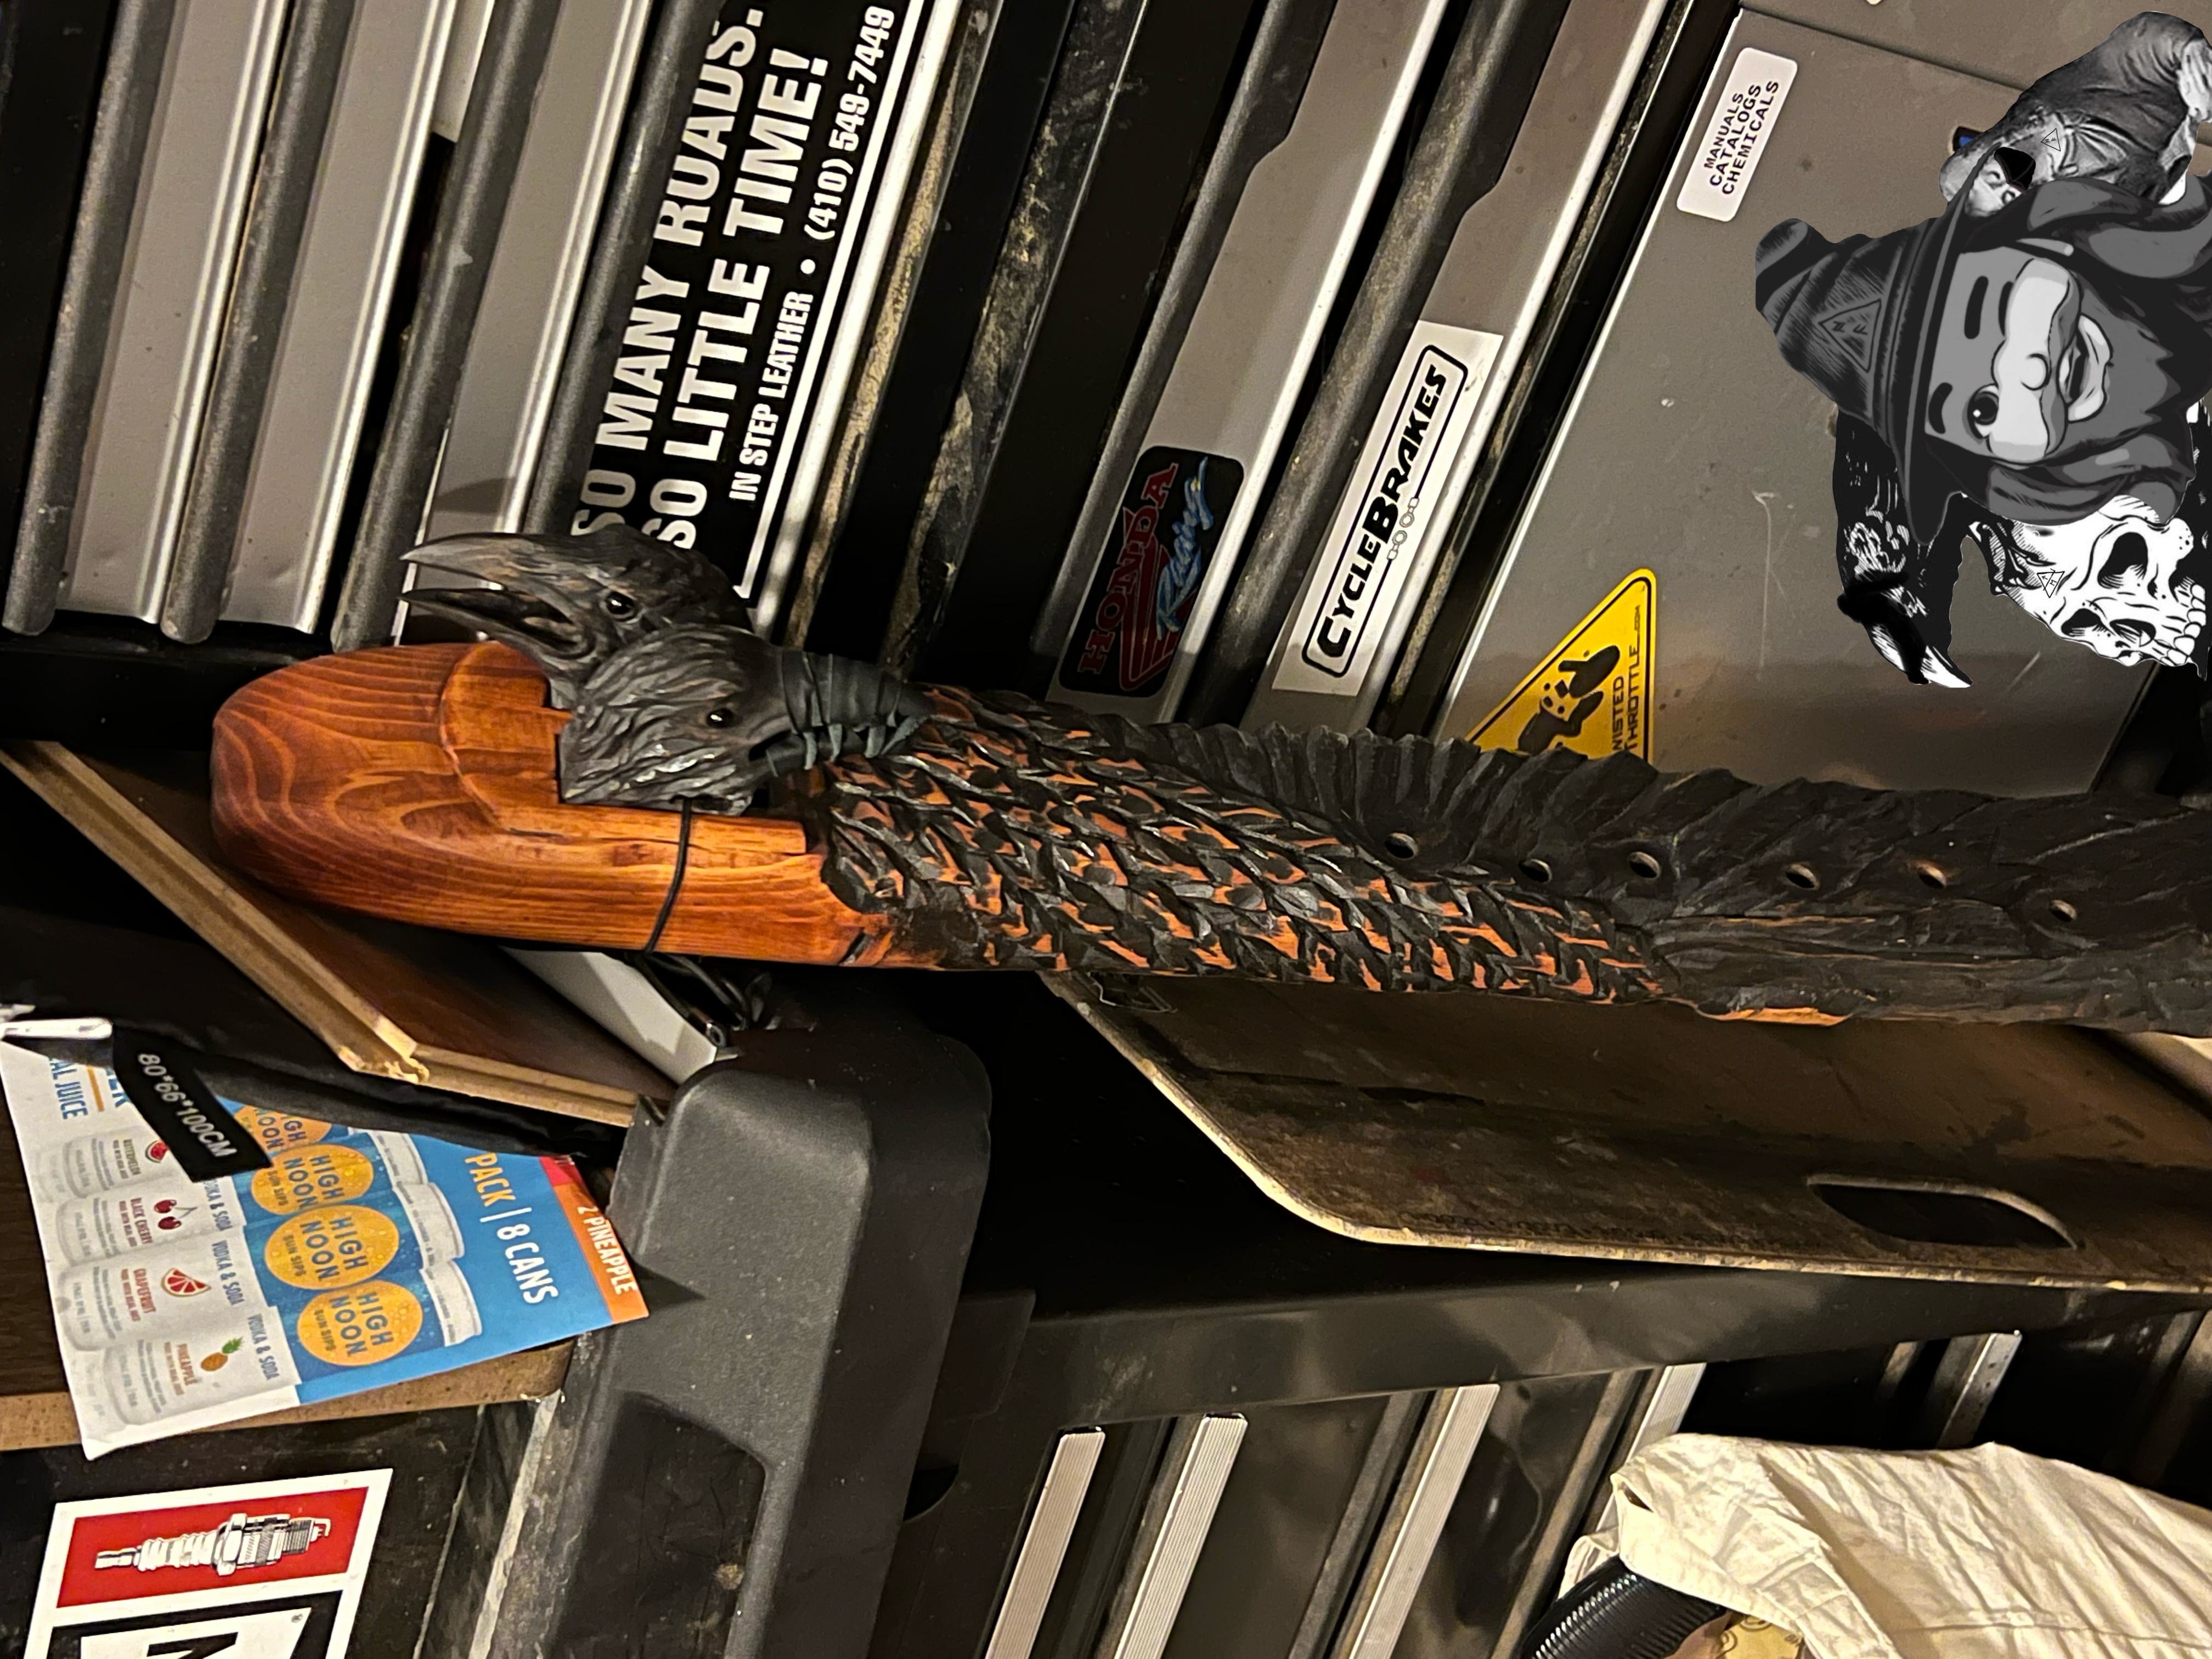
Before I could glue this new piece to the surface, I had to sand the finish off of the flute to reopen the wood’s pores. And, since I don’t have a stain to match, I decided to sand the whole end of the flute to bare wood. Although I didn’t take any pictures, the wood looks no different in color from the raw paint stirrers…so I decided to go with a fire and smoke look, allowing the ore-existing blackish finish to play with a cedar-red sort of tone. Also, this wood stain happened to be sitting in the basement where we stayed, so I used a small dabble to protect the wood temporarily but decided it looked good and kept it.

I used a chisel to carve my way through the middle for tying the fetishes down. Later this will need to be cleaned up with a file, but for now it needed only be functional.
The saddles wound up being about 1/8” to shallow; they must have moved slightly when I clamped it together to dry. So I used a chisel and utility knife to cut them back by about that same amount.

Finally, I lightly sanded some of the feathers leading to the modified end and stained them with the same Jarrah Brown stuff. I thought it might give it the look of smoke and fire intermingling, but at least it might clean up the transition from jet black to cedar red.


Thanks for checking out some more of my work! As always, I hope you enjoyed witnessing as much as I enjoyed creating!
© Photos and words by @albuslucimus, except where otherwise indicated.
If you enjoy my content, check out the Albus Index!
Here you’ll find links to various post-groupings, so you can find all posts related to a specific topic quickly. Topics include lists of brewing recipes, flutes, crypto talks, rucking posts and an index of all acoustic covers. The lists are updated as new content is added, so they can always be used to quickly navigate my content.
