
The process//El proceso
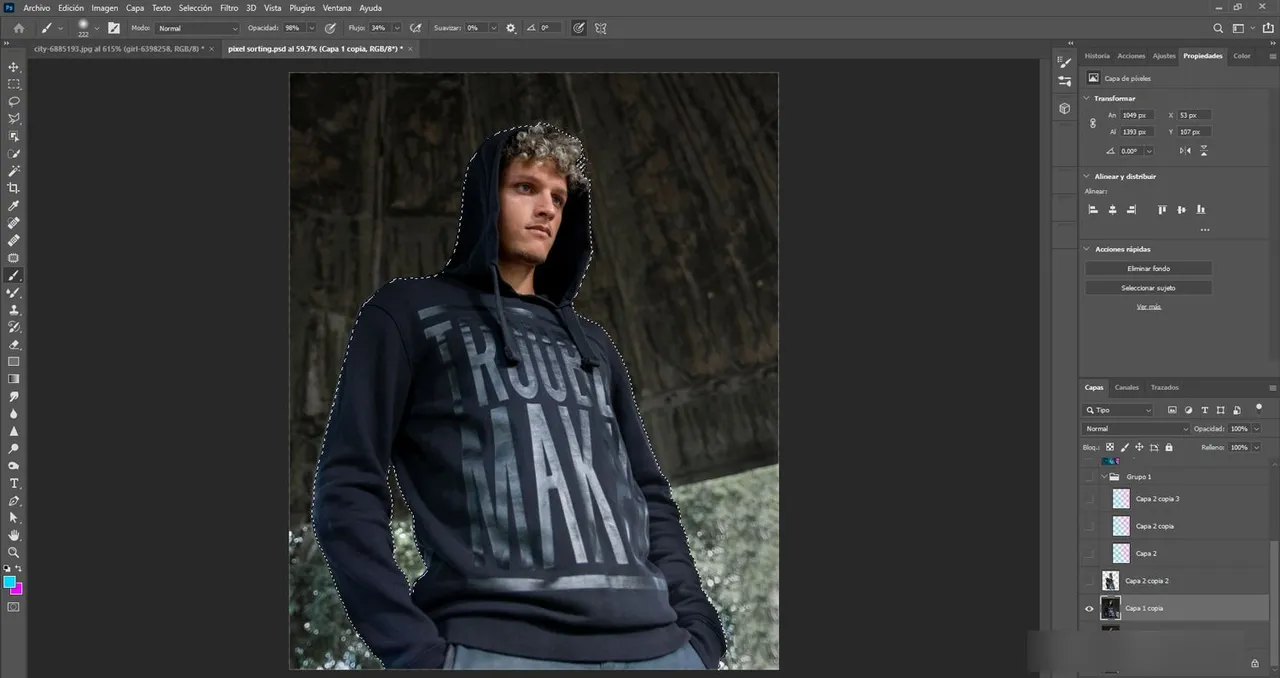
1- We take our photo or the one on which we are going to perform the effect, and crop the subject to a new layer
Tomamos nuestra foto o aquella en la que vayamos a realizar el efecto, y recortamos el sujeto hacia una capa nueva
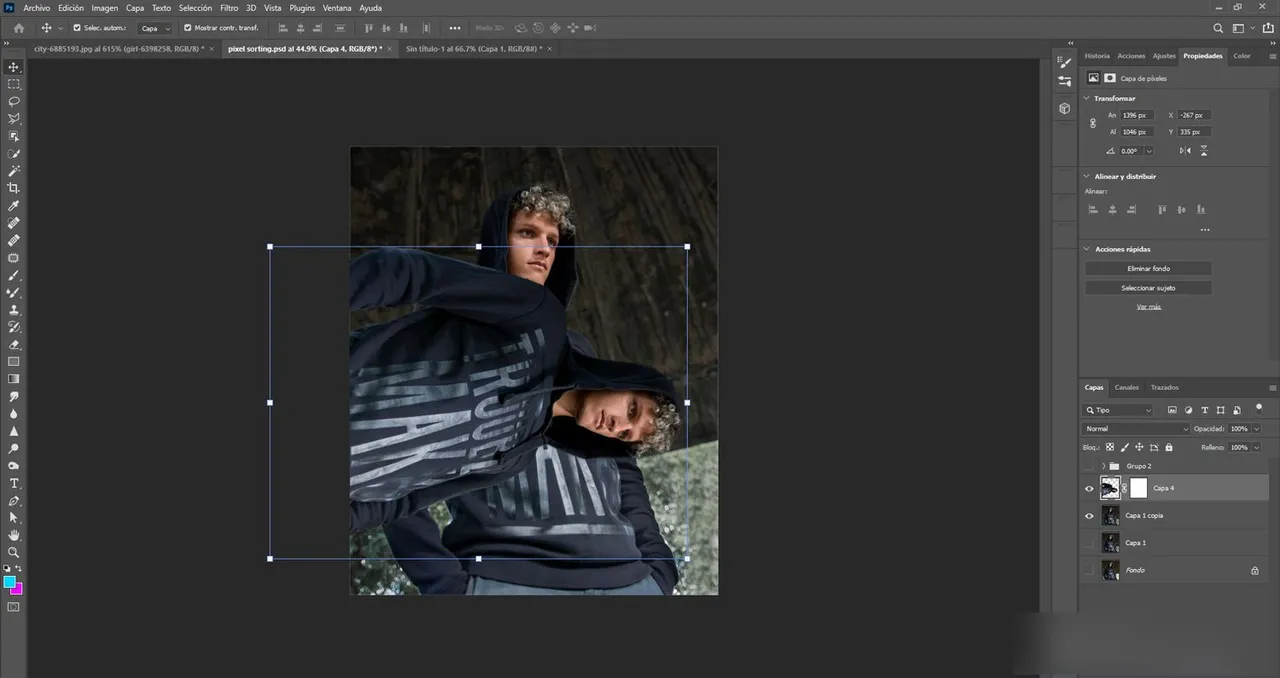
2- Rotate the new layer to the right 90 degrees.
Rotamos la nueva capa hacia la derecha 90 grados.
3-We turn off the back layer and apply a Filter to the new rotated layer.
- Filter/Stylize/Wind
Apagamos la capa posterior y a la nueva capa rotada le aplicamos un Filtro: Filtro/Estilizar/Viento
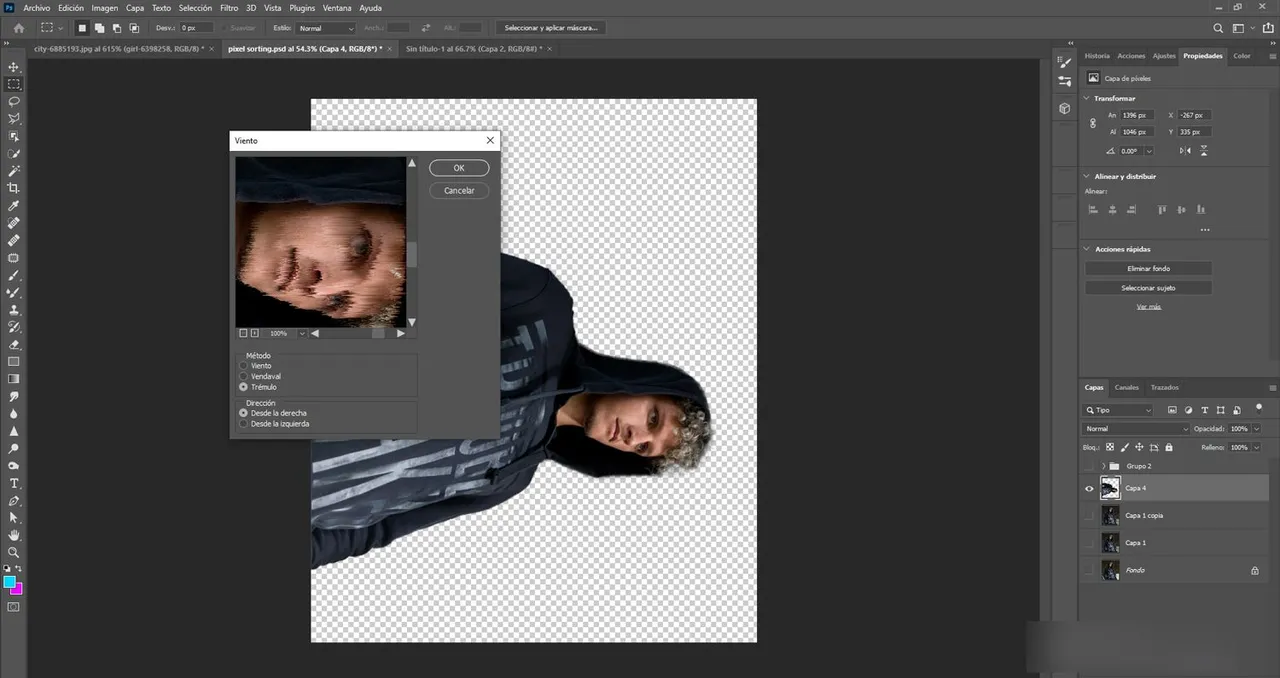
Here you must check the options: Tremulous and From right // Aquí deben marcarse las opciones : Trémulo y Desde a derecha
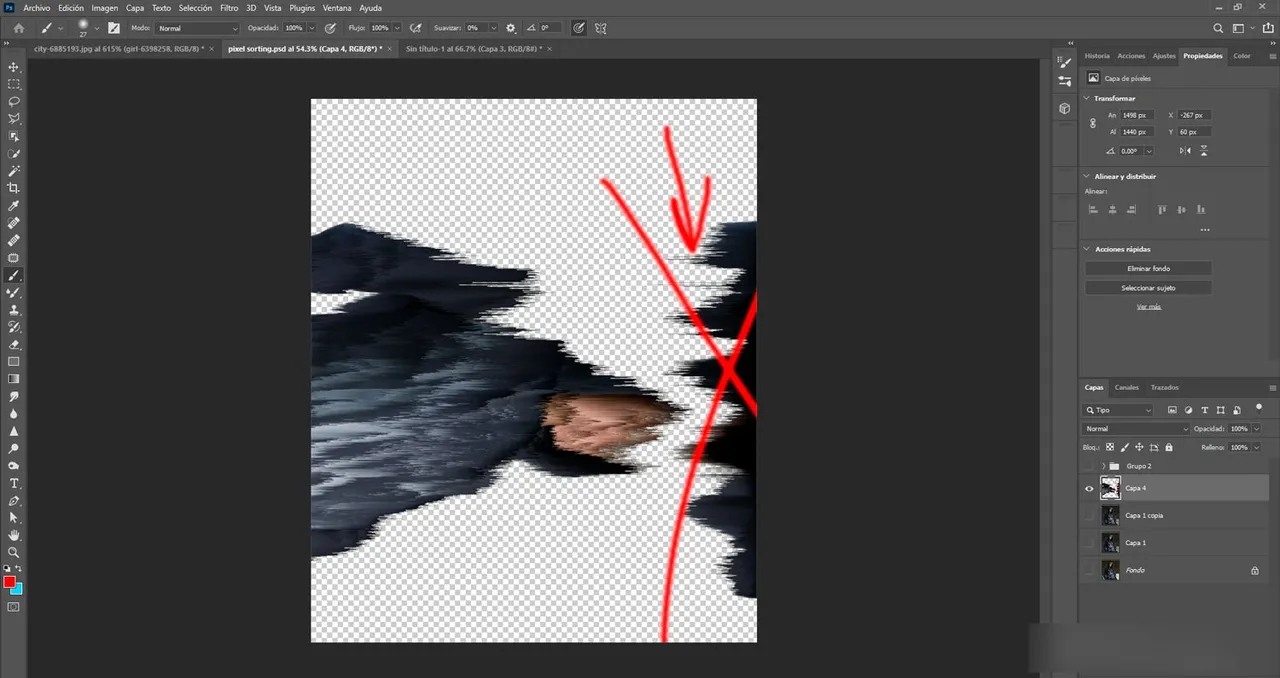
4- Repeat this filter until the desired result is achieved. You can make it easier by configuring a shortcut on your tablet, as it would only be a matter of pressing a button and Voilà!
Repetir este filtro hasta alcanzar e resultado deseado. Puedes facilitarlo, si configuras un atajo en tu tableta, pues solo seria cuestión de apretar un botón y Voilà!
Removes all the excess//Borra todo el sobrante
5- With the Pen tool, select the entire area in the original photo where you want to show the effect.
Con la herramienta Pluma, selecciona todo el área en la que querrás mostrar el efecto, en la foto original.
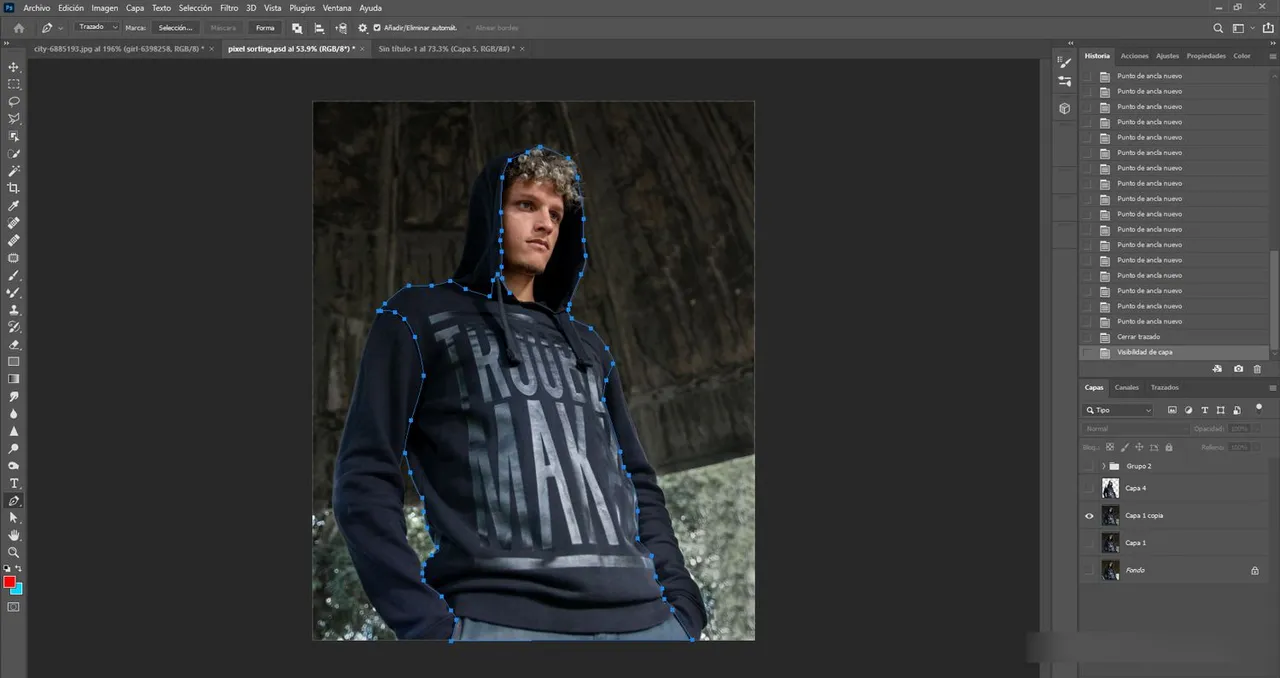
6- Create a layer mask with the selection on the image with the filter so that it looks like this.
Crea una mascara de capa con la selección en la imagen con el filtro de manera que quede así.
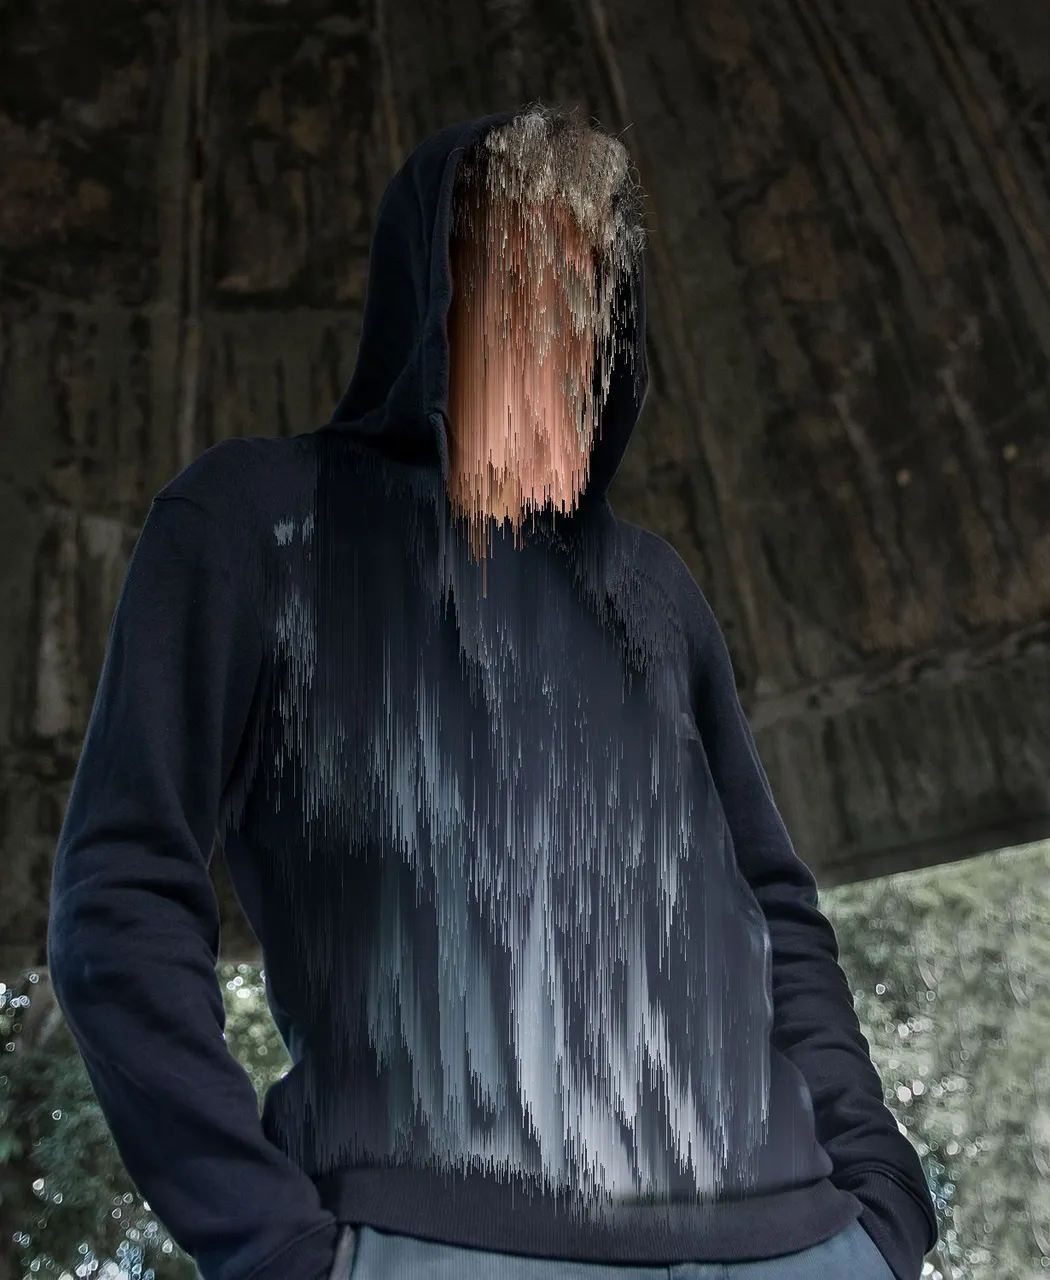
7- Erase the hardness of the edges and that's it! you have created the effect.
Borra las durezas de los bordes y listo! ya tienes e efecto creado.
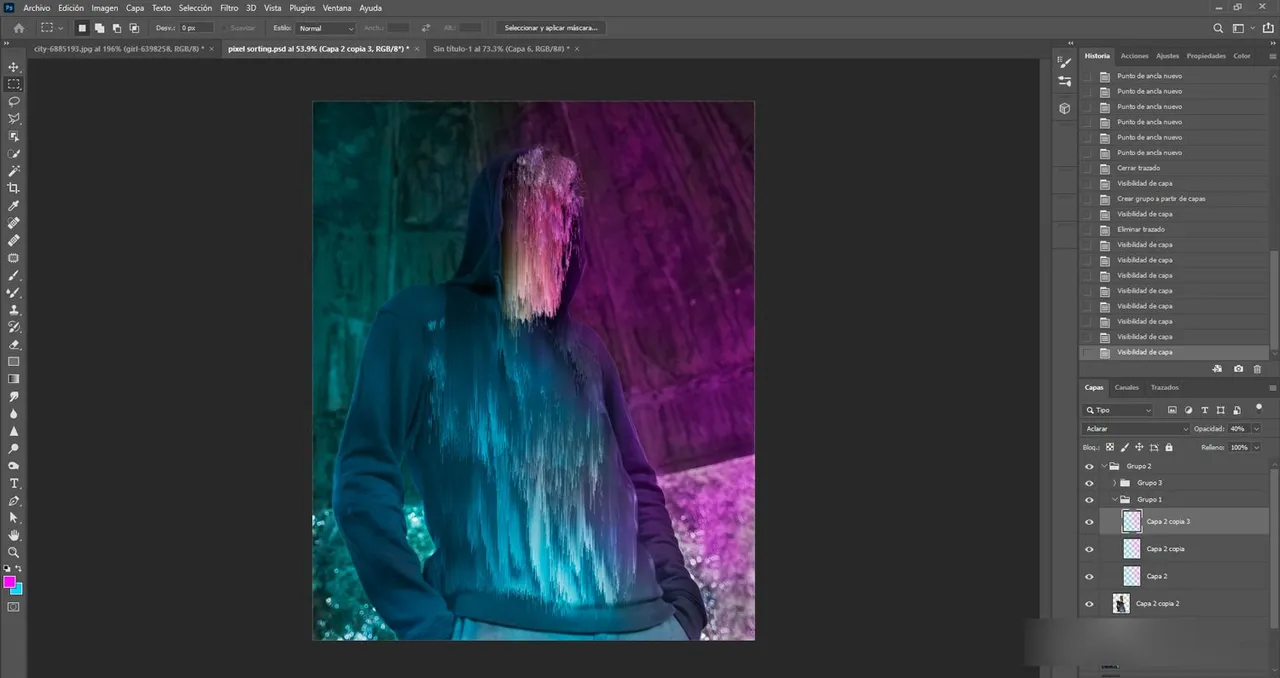
8- To give more life to the image and as I like neon colors, I added a new layer with two color spots as shown in the image. On this layer, I changed the blend mode to overlay and duplicated it. The second copy was also duplicated but I changed the blending mode to Lighten.
Para darle más vidilla a la imagen y como me gustan los colores neones, yo agregué una nueva capa con dos manchas de color como se muestra en la imagen. En esta capa cambié el modo de fusión a superponer y la dupliqué. A la segunda copia también la dupliqué pero le cambié el modo de fusión a Aclarar.
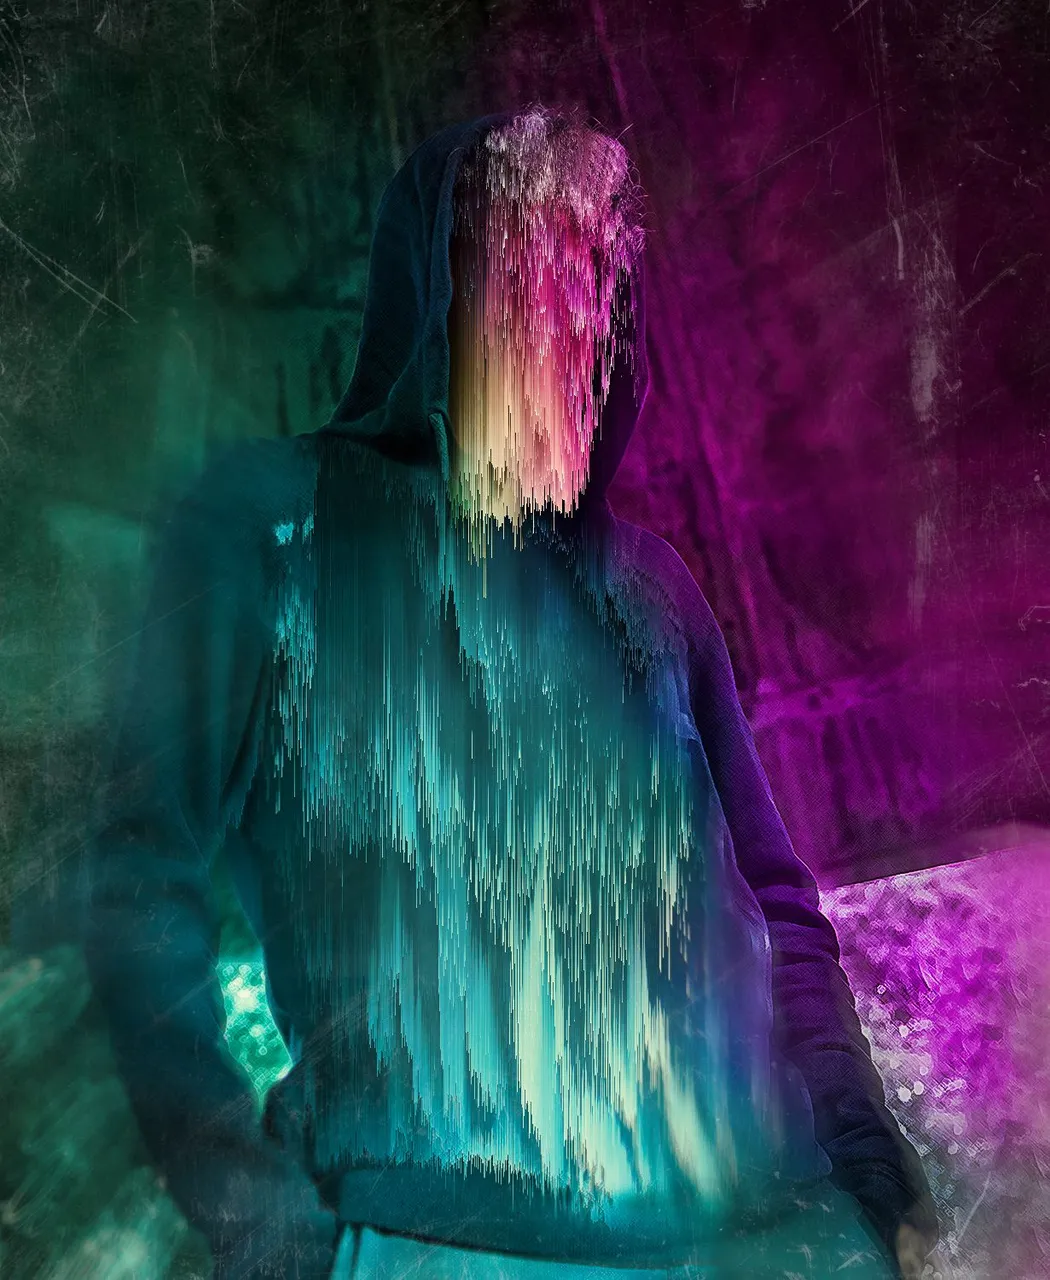
9- I made a new copy of this image and applied Filter/Shadow Brush Strokes, to give it a little bit of that painting style you see on the edges.
Hice una nueva copia de esta imagen y apliqué Filtro/ Trazos de Pincel Sombrado, para darle un poco ese estilo de pintura que se ve en los bordes.

To that layer I created an inverted mask to keep only the edges so that the center would be sharp. // A esa capa le cree una máscara invertida para solo quedarme con los bordes de manera que en el centro estuviera nítido.
10- Finally I used a Photoshop plugin, the Alien Skin Exposure, and applied effects such as Bokeh modification with a 10% zoom and Orvelays scratches 9.
Por último utilicé un plugins de Photoshop , el Alien Skin Exposure y apliqué efectos tales como modificación del Bokeh con un zoom al 10% y Orvelays Scratches 9.
RESULT

EQUIPMENT
- Nikon d750
-AF-S NIKKOR 50mm f/1.8
-Wacom Intuos pro Pen Tablet
-Asus PC
-Capture One Pro
-Adobe Photoshop CC 2022
-Translated in: Traductor DeepL
 |
|MIS REDES SOCIALES
INSTAGRAM ♦️ TWITTER ♦️ LINKEDIN