Arte Digital | Digital Art
Veamos un poco del proceso de creación siempre es bueno ver que hay detras del cada arte, compañame⏩⏩⏩...
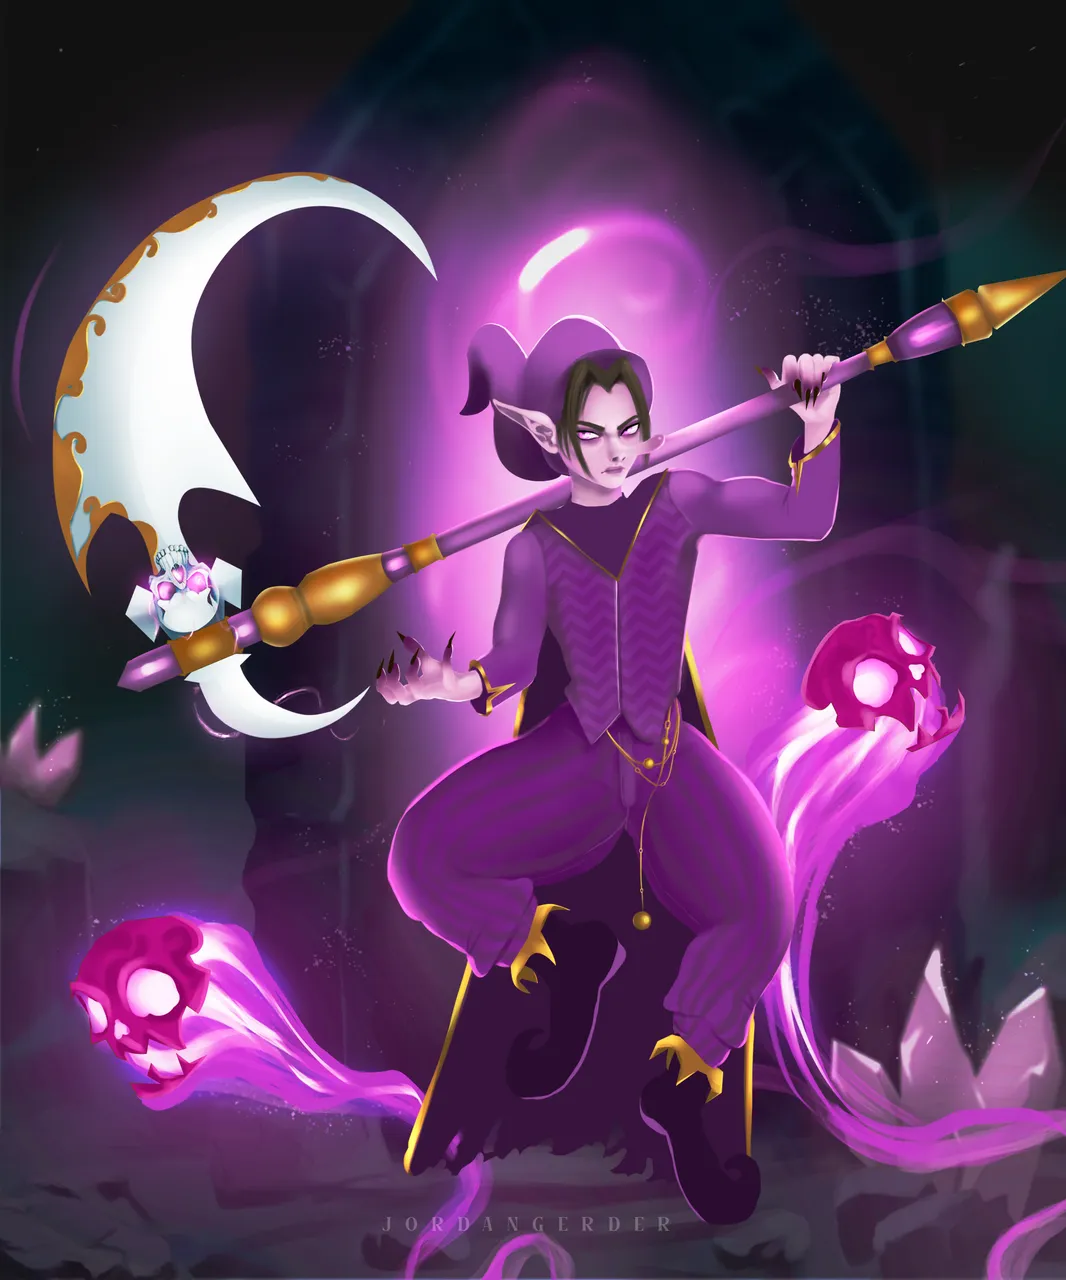
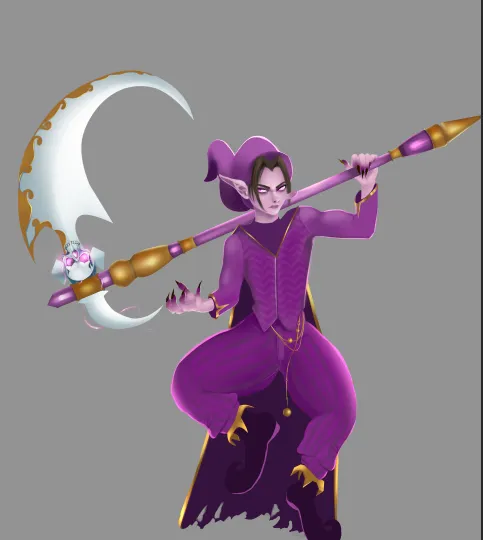
Hey everyone, how are you today? It's been a while since my last art post, and I want to share this new work with my beloved community. It's a wizard from the Runiverse world, where magic and vibrant colors are the stars of the entire scene...
Let's take a look at the creation process. It's always good to see what's behind each piece of art. Join me⏩⏩⏩...
Materiales | Materials
- Desktop computer
- Tableta Huion H950P
- Programa Adobe Photoshop 2019
- Ordenador de mesa
- Huion H950P tablet
- Adobe Photoshop 2019 program
Proceso | Process
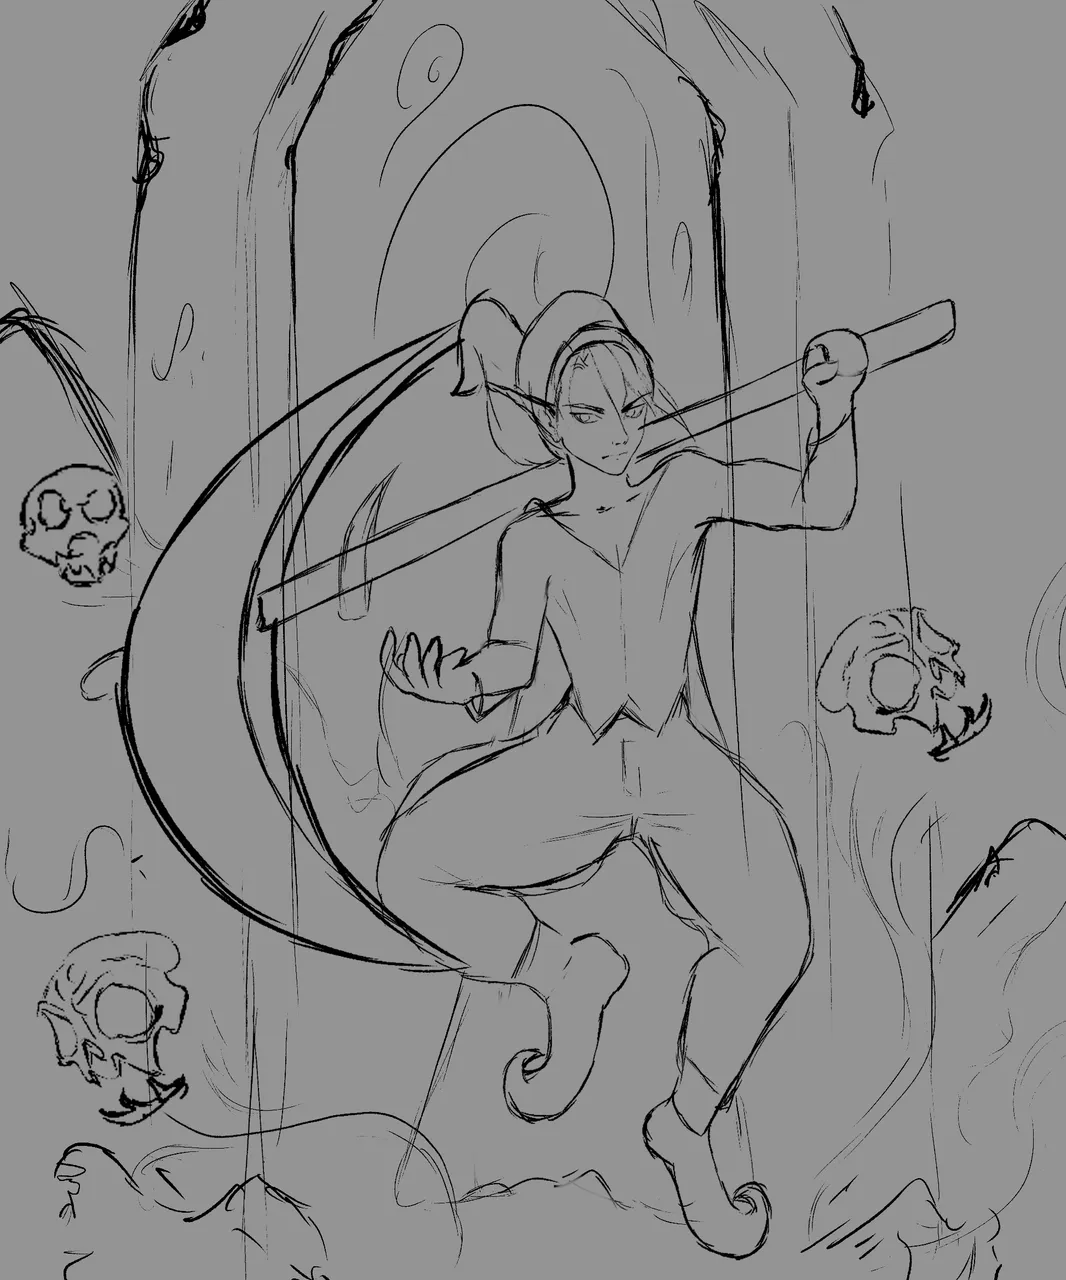
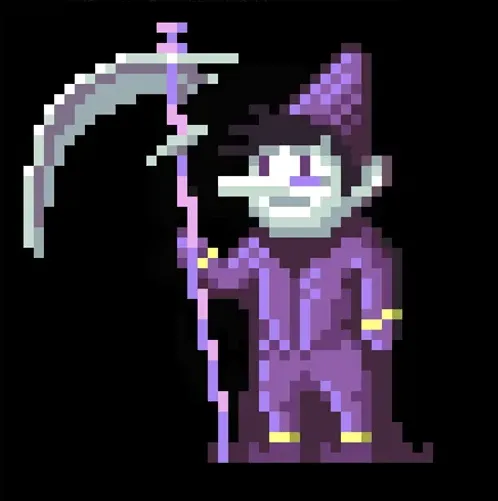
Paso 1
- Iniciamos con un bosquejo de lo que sería el personaje, creando una silueta y dejando que fluyan lineas sobre él, asi es como resulta mas facil su creación:
Step 1
- We start with a sketch of what the character would be, creating a silhouette and letting lines flow over it, this is how its creation is easier:
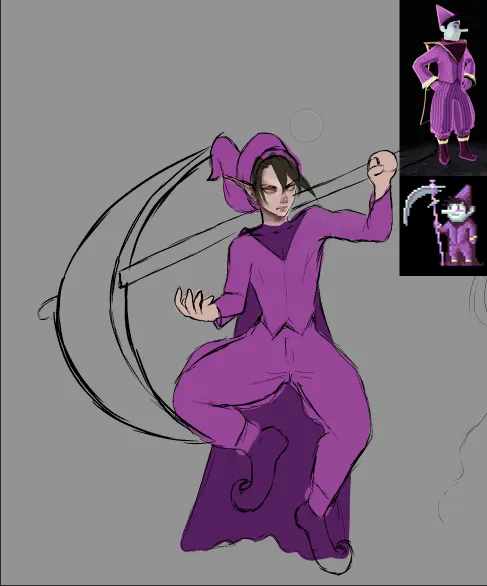
Paso 2
- Una ves que conseguimos un bosquejo mas claro, o donde se aprecie el personaje al cual agregaremos volumen y forma, agrego parches de tres colores no muy sataturados, una base, un color para identificar sus sombras y otro tono para identificar la luz o la parte alta del cuerpo:
Step 2
- Once we get a clearer sketch, or where the character to which we will add volume and shape can be seen, I add patches of three not very saturated colors, a base, a color to identify its shadows and another tone to identify the light or the part. body height:
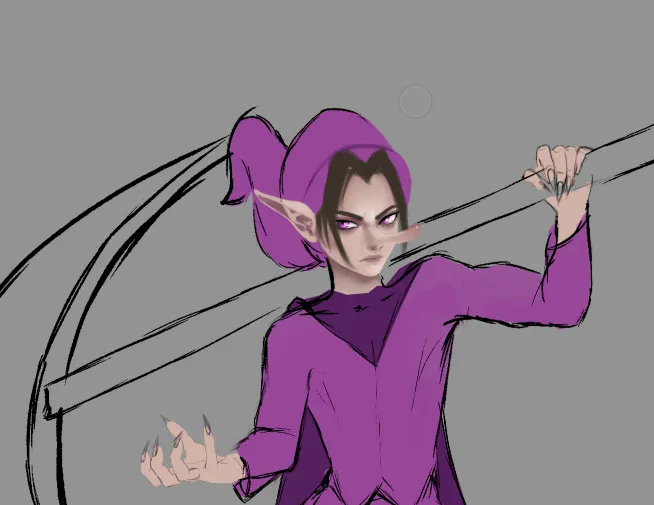
Paso 3
- Continué detallando sus ojitos queria que fueran luminosos y con mucho brillo, tambien cambie la forma del cabello, para darle mas forma al rostro:
Step 3
- I continued detailing her eyes. I wanted them to be bright and shiny. I also changed the shape of her hair to give more shape to her face:
Paso 4
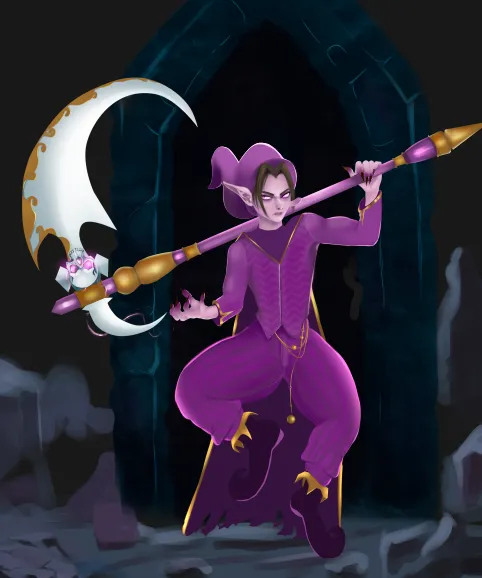
- Cambié el tono de color de su piel por uno mas frío debido a que el ambiente o escena es nocturna, Trabajé en su vestuario, detallando las lineas características de su pantalón y suéter para luego dar forma la guadaña con mucho mas detalles que el pixel original. Ya estaba todo listo para la creación del fondo, donde quería que estuviera oscuro para que los colores y la magia brillara y resaltara mucho mas...
Step 4
- I changed her skin tone to a cooler tone because the setting is nocturnal. I worked on her wardrobe, detailing the distinctive lines of her pants and sweater, and then crafted the scythe with much more detail than the original pixel. Everything was now ready for the background, which I wanted to keep dark so the colors and magic would shine and stand out even more...
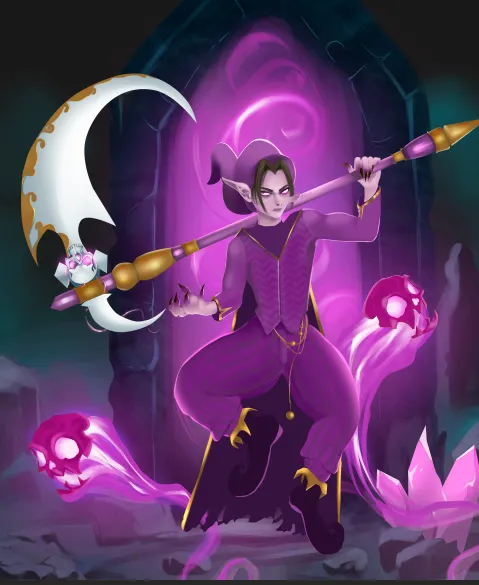
Paso final
- Para finalizar todo el proceso de creación agregué detalles finales como brillos, mas luces y ajustes totales de color.
Final step
- To finalize the entire creation process, I added final details such as highlights, more highlights and total color adjustments.
We got an incredible result, I really enjoyed the creation process. I hope you liked it, I have elaborated it with love for all the viewers who visit this publication, see you in the next one 😍
𝑮𝒓𝒂𝒄𝒊𝒂𝒔 𝒑𝒐𝒓 𝒗𝒊𝒔𝒊𝒕𝒂𝒓 𝒎𝒊 𝒃𝒍𝒐𝒈, 𝒂𝒑𝒓𝒆𝒄𝒊𝒐 𝒎𝒖𝒄𝒉𝒐 𝒕𝒖 𝒂𝒑𝒐𝒚𝒐 / 𝑻𝒉𝒂𝒏𝒌 𝒚𝒐𝒖 𝒇𝒐𝒓 𝒗𝒊𝒔𝒊𝒕𝒊𝒏𝒈 𝒎𝒚 𝒃𝒍𝒐𝒈, 𝑰 𝒓𝒆𝒂𝒍𝒍𝒚 𝒂𝒑𝒑𝒓𝒆𝒄𝒊𝒂𝒕𝒆 𝒚𝒐𝒖𝒓 𝒔𝒖𝒑𝒑𝒐𝒓𝒕.
▶
◀
TWITTER ⚪ NFT SHOWROOM ⚪ INSTAGRAM ⚪ DISCORD
