Post number 3 of “The Practical Google Sheets Guide”
These blog posts are part of research I’m doing for a potential new book, hopefully allowing me to further my love for spreadsheets. Theses posts are hoping to provide a practical cookbook of examples to the reader and allow me to learn what people are interested in and how to approach different subjects working with Google Sheets.
TLDR; This post walks you through the steps to create a Race Pace Calculator for your next Marathon or Half Marathon. In part 2, we will extend this example and create a pace band, using the pace calculations from our Google Sheet. The complete Google Sheet can be copied directly from the link:
https://docs.google.com/spreadsheets/d/1CCBpJd1vwX57BZ1tWQPH8UHl8ewuEW2SYaCApL8ZuXk/copy
I still see these types of pace calculators around for people to add in there chosen race distance and expected time, and the calculator gives them the specific pace per kilometre or mile they need to run at to achieve their goal time. The set up of the sheet is pretty simply, but sometimes things can get a little confusing when you try to work out the math behind running pace. But, that is what this post is about. We have all the details of how and the math behind the calculations.
The Math Behind Running Pace
The math behind running pace is pretty simply, but gets more complex when you bring in Google Sheets formulas. Pace is the number of minutes per kilometre or miles, so basically, all we need to do is simply divide the time by distance.
pace = time/distance
Things get a little more complex when we bring hours, minutes and seconds into the equation though. What we need to remember is that we need to change this value into minutes, or even a decimal value where 1 hour, would equal 1.0, or 1 hour and 30 minutes, would equal 1.5.
Why don’t we use an example to show this. In Google Sheets, I would ask the user to add the value of there desired time into a cell formatted as a Duration Number, ie hh:mm:ss.
In our example, lets say an athlete, wants to run a half marathon(21.1kms) in 1 hour and 30 minutes(01:30:00).
So our formula would look like this:
pace = 01:30:00/21.1
This will give us a weird answer as we need to change our time value into minutes. The Duration format we have in Google Sheets, needs to first be change from a 24 hour time to hours, so if we multiply 01:30:00 by 24, we get 1.5. Then to get the number of minutes, we multiply this by 60, which is now 90 minutes.
NOTE: If I was working this out in my head, I would instead, multiply the number of hours by 60, and then add the number of minutes.
So our formula should now show:
pace = 90/21.1
Hooray!!! 4.26 minutes per kilometre…or is it?
Once again that value is a decimal number. Which is fine, but if you want to find the exact minutes and seconds specifically, per kilometre. All we need to do is take the decimal value of .26 and multiply it by 60, which is 16, which gives us a pace of 4 minutes, 16 seconds per kilometre to finish a half marathon in 1 hour and 30 minutes.
In Google Sheets, we would take our previous answer of 4.26 and divide by 60, and then divide again by 24, to give use a number of time in the day. This would give us a number of 0.0029. Which again is a decimal value of a 24 hour day. So, once again formatting this value to a Duration Number, would give us:
00:04:16
Great. Now that we have the math down, we can now start to set up our Google Sheet to calculate our pace for Marathon or Half Marathon races.
What You Need To Know To Get This Done?
The sheet is a simply for that lets the user add their expected time, the race they want to do, for example a Marathon or Half Marathon, and let them choose what unit of pace the output will be presented in. Either Kilometres or Miles.
To get the pace calculator set up, you will need to be able to:
- Adjust the sheet formatting
- Create dropdown lists
- Use IF functions with calculations
All the functions mentioned can be found at the following reference page, in case you need to double check how the function works: @strava2hive/my-google-sheets-function-reference
The following steps will walk you through how to create
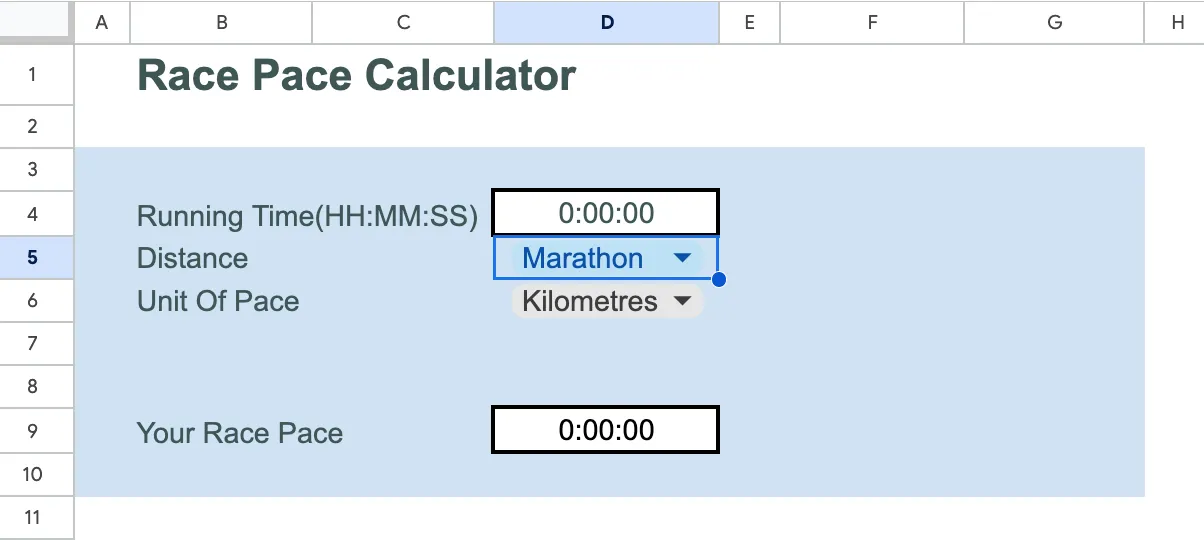
1.We can first start by mocking up little form to let people add in their goal running time, select the distance and unit of pace from a seperate drop down list, and then provide an area to display our results.
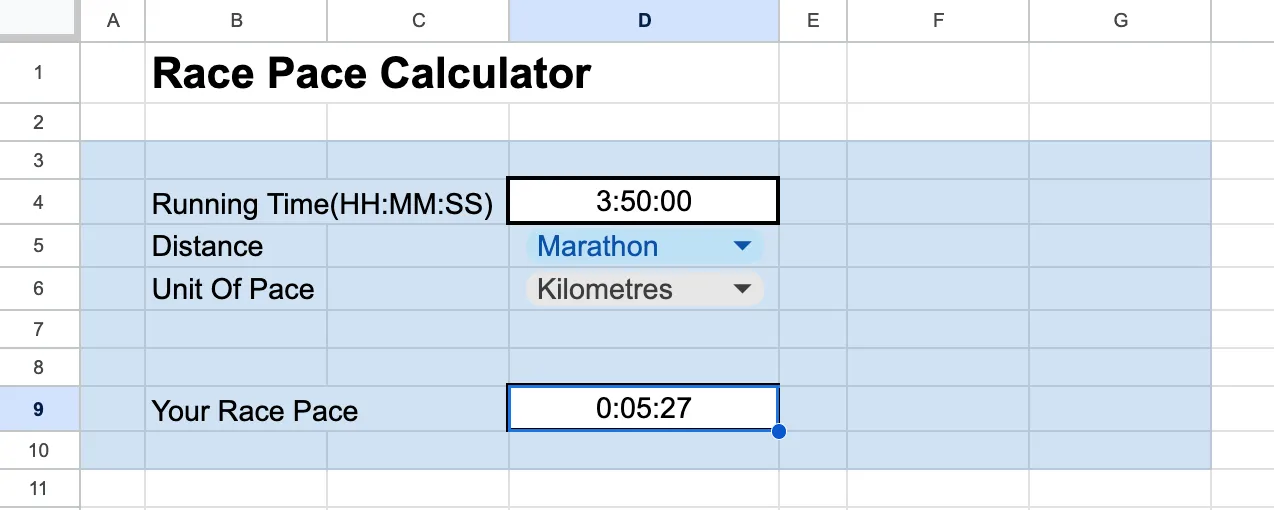
- Add “Running Time(HH:MM:SS)” to cell B4 to let users add in there goal time. We then let the user input the time in hours, minutes and seconds in cell D4. This cell is formatted as a Number and as Duration. So if someone wanted a goal marathon time of 3 hours and 50 minutes, they would enter 3:50:00.
- “Distance” has been added to cell B5, then letting users select from a dropdown list for the type of race, in this example, we are providing the selections of “Marathon” or “Half Marathon”.
- “Unit Of Pace” has been added to B6 and is also providing a dropdown list to let the user select “Kilometres” or “Miles”.
- Lastly we have the output we provide after the user adds in there details in row 9, with “Your Race Pace” and our results to be displayed in cell D9.
2.To work out the pace the user needs to run at to achieve their goal time, we need to get a bit of math sorted, which I use columns F(kms) and G(miles) for.

- We can start by setting up, how many kilometres are involved in each of the races. We do this by taking the value from cell D5, if it is a Marathon, it will be 42.2kms, for a Half Marathon, it will be 21.1kms:
=IF(D5="Marathon", 42.2, 21.1)
We can do the same with miles:
=IF(D5="Marathon", 26.2, 13.1) - We need to get our expected time from cell D4 into a value we can use for our calculations. For cells in row 5, we need to multiply the expected time by 24
=D4*(24) - The values in row 6 need to multiply the value above in row 5, again by 60 to give us total minutes:
=F5*60 - We can now use the value above to now be divided by the distance of our race:
=F6/F4 - We now reverse the above, so it can be presented again as a hh:mm:ss value. Row 8 the above value is divided by 24, and then by 60 in row 9.

From the image above, you can see we have also added in our column for miles in column G, so everything is the same as what we have discussed above
3.Lastly, we need to present the results to our user. We do this in cell D9. It is a simple IF formula, to firstly see what “Unit Of Pace” the user has selected, and select the results in F9 for “Kilometres” and G9 for “Miles”:
=IF(D6="Kilometres", F9, G9)
4.Once it is ready to be presented to the user, I would change the text colour of the data in columns F and G, to no longer be visible, just to look a little nicer.
Even though, we are only half way through this project, we already have a usable form that anyone wanting to run a marathon or half marathon, can entering their hopeful finish time, and get the pace they need to run at, to reach that goal. We started by going through a little math, to explain how we would get all the details and times you needed, we then went onto implementing a small form to allow the users to select their distance, unit of pace, and add in their goal time. We then added in all the formulas to work out our end result.
I think you will be impressed next week, when we add the pace band, as it will be a cool little project to finish off our work.
About The Author
The post is written by Vincent Sesto, a Aussie Software Engineer, living and working in Auckland, New Zealand. If you are interested in my authors page on Amazon, feel free to checked it out at the following link: https://us.amazon.com/stores/author/B073R3VW2G