Post number 9 of “The Practical Google Sheets Guide”
These blog posts are part of research I’m doing for a potential new book, hopefully allowing me to further my love for spreadsheets. Theses posts are hoping to provide a practical cookbook of examples to the reader and allow me to learn what people are interested in and how to approach different subjects working with Google Sheets.
TLDR: This post will walk through how you can create Forms to then interact with your Google Sheets. This post is only going to focus on Forms, including how you create and configure them for your specific requirements. The complete Form in this post can be accessed from the following link:
https://docs.google.com/forms/d/1jct39zeEk9Ss-no6MZGGAzzm9qUNl1Eqv-B46e2NQkI/template/preview
Introduction
In this article we are going to introduce working with Forms when using Google Sheets. Forms are a powerful and easy way to allow you to collect data and deliver it directly into your sheet. Forms are really easy to use and in this post we will look at creating a simple form to allow you to track the runs you are doing every week.
In following posts, we will use the data gathered by our Form to creating a basic dashboard showing the weekly milage and activity. Although Forms are listed as a seperate application in the suite of Google apps, I feel it works perfectly with sheets and can make things so simple.
What You Need To Know To Get This Done?
In this post we will be using Forms, which as long as you have a Google account, you will be able to have access to Forms. There is sample data, you can also use to speed up your own work. The formulas we are using will be pretty basic and we will walk you though them as we go.
Creating A New Form
We will start by setting up our form to enter our data into Google Sheets. We will be collecting information like Date and Time of our run, the distance, duration of the run, the running shoes we are wearing, the title of the run, and a brief description.
- Start by accessing the Forms app. You can do this from the Google apps menu, or by going to the following URL:
https://docs.google.com/forms - Click on the “Start a new form” button
Alternative ways to create your form
You can also create a new form directly from the spreadsheet you are working from, so your new form will feed directly into the sheet you are working on. From the sheet you are working on, select “Create a new form” from the Tools menu. To work with an existing form, you can instead select “Manage form” from the Tools menu.
When you bring up a new Form, you will see a page similar to the one below, which looks pretty basic but can let us do a lot of different things.

We have added numbers to all the different parts of the Forms interface, to give you all the highlights and guide you through how it works.
- Menu and settings - These are the main menus for your Form. This area allows you to toggle between the Questions, Responses and Settings, as well as allowing you to share and publish the Form
- Form title and description - This is where you can add a nice title and description for your form.
- Form question - This is the start of the question area where you can set up and configure how your Form question will be answered by your user. In the image above it is showing as “Untitled Question”. We will show you how to change this shortly.
- Question format - The Form provides a dropdown list of possibly formats that the person filling out the Form can answer. These can be short answers, time, date, or as it is set by default in our image above, “Multiple choice”.
- Extra question settings - The options on the far right allow you to create a new question, and add in things like images, videos or change the font.
- Question workspace - This allows you to add more detail to your question, for example if you have more than one multiple choice question, you can add these details here.
- Further questions settings - This includes copying or deleting the question, setting if the question is “Required” where the user cannot complete the Form without answering that question, and also allow you to set rules for the way someone answers the questions.
Setting Up The New Form
Once you create the new form, you will be presented with a basic form and only one question ready for you to edit.
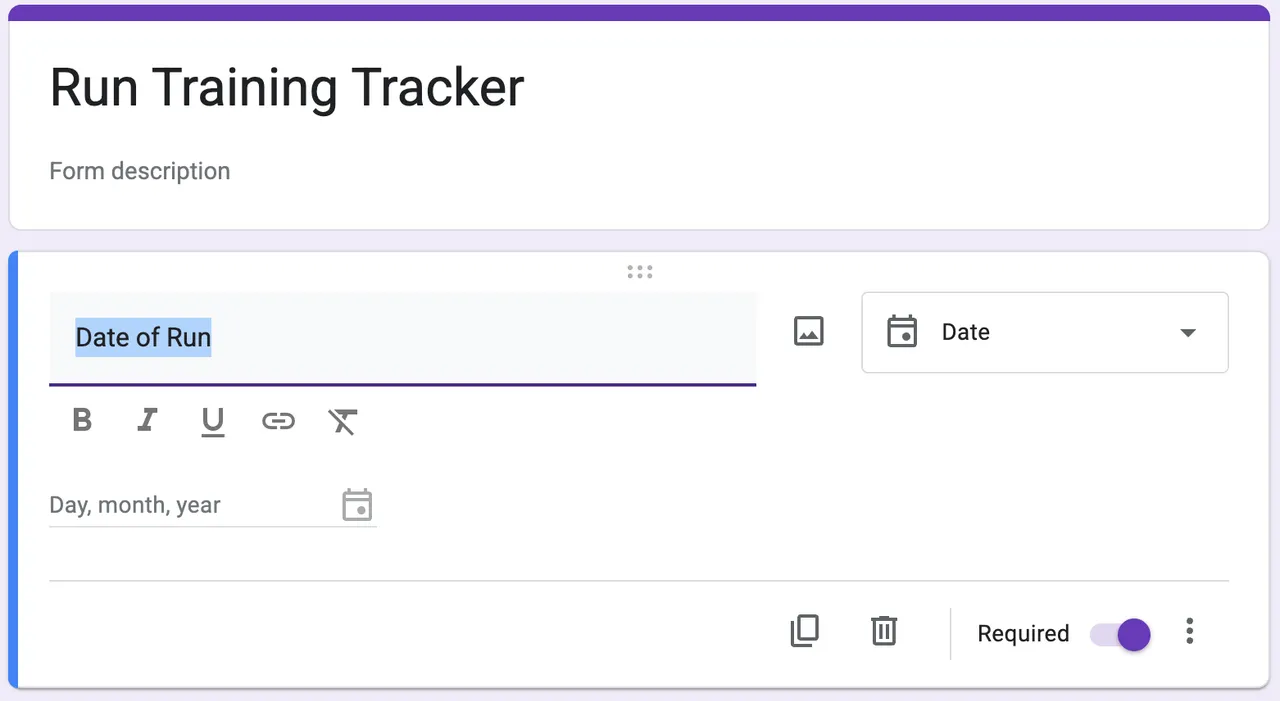
- Start by giving your form a Title. Similar to giving our spreadsheets a title, as we have in the image below, we have used the title of “Run Training Tracker”. You can also give the form a description, to let people know a bit more about the form.
- For our first question, we will start with the date of the run. In the image below, we have highlighted were we name our question, so click in the question title area and add “Date of Run”.
- To make things easy for our users to select the date, the right menu allows us to select the type of input. Click on the drop down and select Date as we have in the image below. This will give us a date picker, so users will not need to enter a date, possibly in an incorrect format.
- At the bottom right of the question, select the “Required” toggle to make sure this question is needed to be answered before people move on. We will have all our questions as “Required” from now on.
Continue setting up the form, in this section we will set up the time of run, the title, distance and duration.
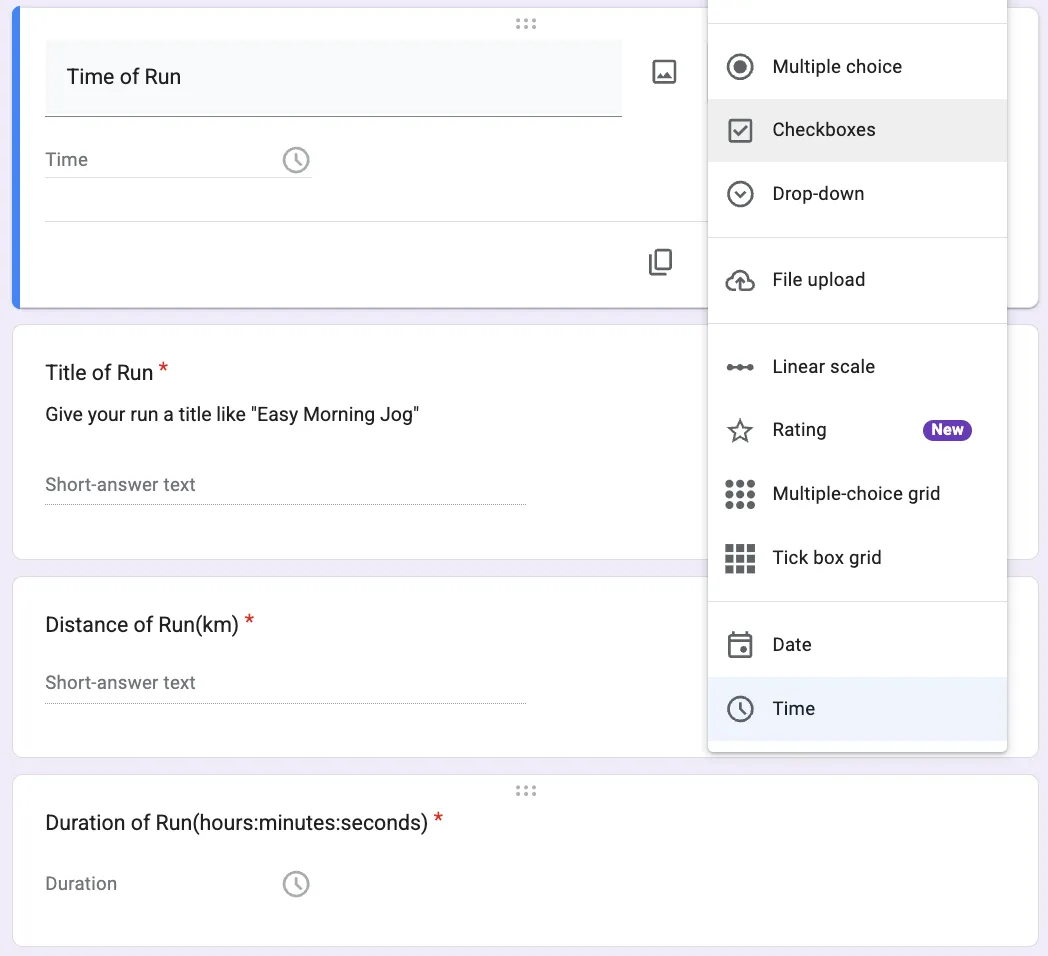
- We can add a new question by clicking on the plus(+) button on the right side of the question you are working on. Click that now and you should be presented with a new bank question below.
- Name the next question “Time of Run” and as you can see in the image below, choose “Time” from the dropdown menu on the right.
- Click on plus button again to create a new question, this time name it “Title of Run”. In this instance, we will select “Short-answer text” from the dropdown list
- Create a new question, this time give it the title of “Distance of Run(km)”, again use “Short-answer text”
- For the next question, name it “Duration of Run(hours:minutes:seconds)”. As this needs to be a time value, select Time from the drop down menu.
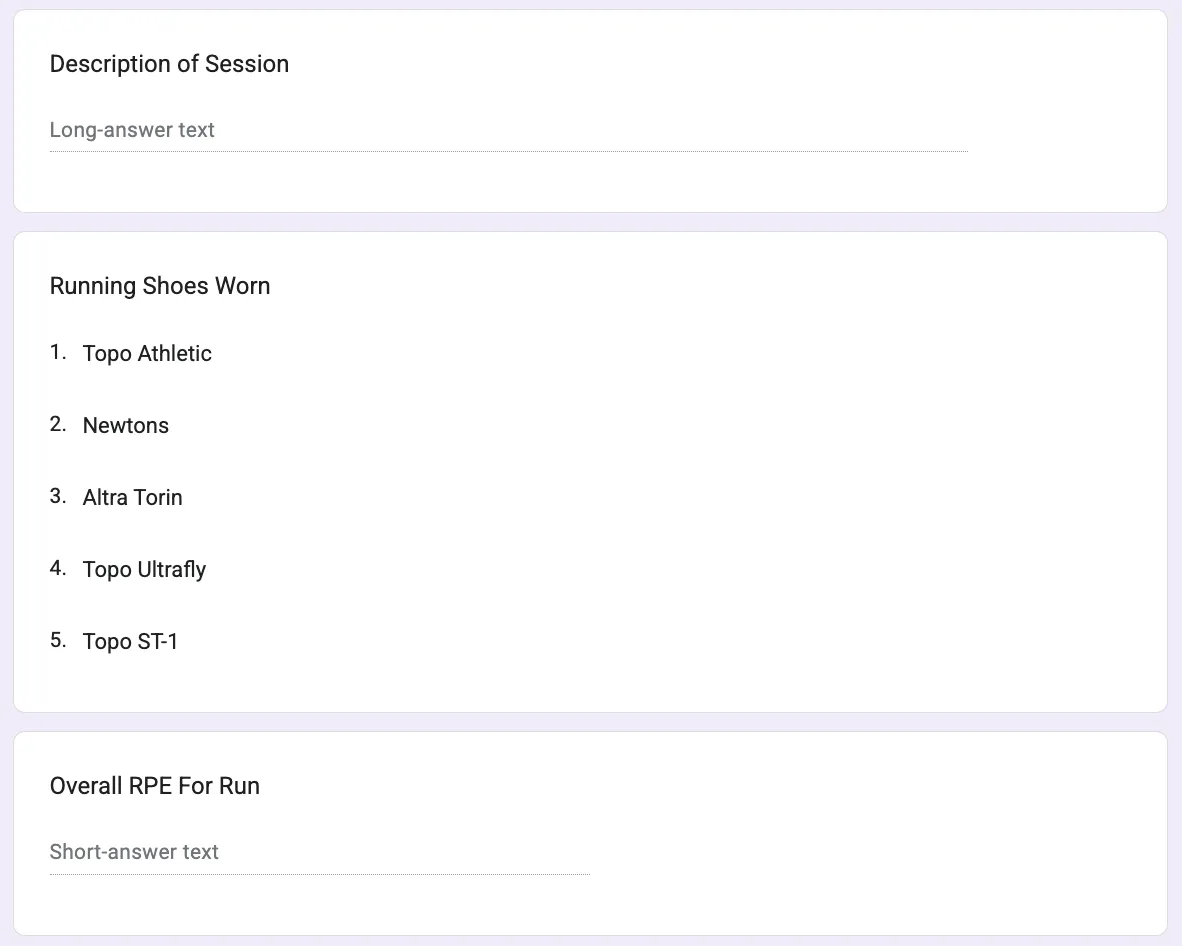
We can now set up the final questions of our form. As you can see in the image below, we have three more questions, Description, Running Shoes and Perceived Exertion.
- For our next question of Description, this one will have the type as a “Long-answer text”. This means the “Description of Session” question will allow the user to type a bit more and give some more detail.
- Add a new question, this time, select “Dropdown” from the dropdown list. In the working area, I have then added the different types of shoes I am currently wearing. These will be displayed as a dropdown to the user allowing them to choose only one from the list.
- Lastly, add the final question as “Overall RPE For Run” which is the “Rate of Perceived Exertion” or how hard the run was, on a scale of 1 - 10.
Set Up Response Validation
Sometimes, we want to make sure we are getting the exact data we need, and we can set up a validation rule for our final question to make sure we only get numbers back as a response.
- Click on the three dots at the bottom right of our question, and select “Response validation”.
- In the questions work area, you will get some extra configuration presented as we have in the image below. Select “Number” from the first option, “Greater than” as our second option, and then add the number “0” in the next part of the configuration.
- You should also repeat this for the “Distance of Run(km) question we added earlier.

Publish Your Form And Start Collecting Responses
Once you are happy with the way your Form looks and the questions you are asking, you will need to Publish the Form before you can start to gather responses.
- To publish your Form, there is a specific button at the top right of the screen, with Publish. Click the button to publish your From. Don’t worry, you can still make changes to your Form if you need to once it is published.
- You can now share a link to the Form to allow you to start gathering responses. To get a link for your newly published Form, click on the link button at the top of the screen as we have in the image below. As you can see, you will have a dialog box drop down and provide a link for you to share out to users.

Viewing Responses In Forms And Google Sheets
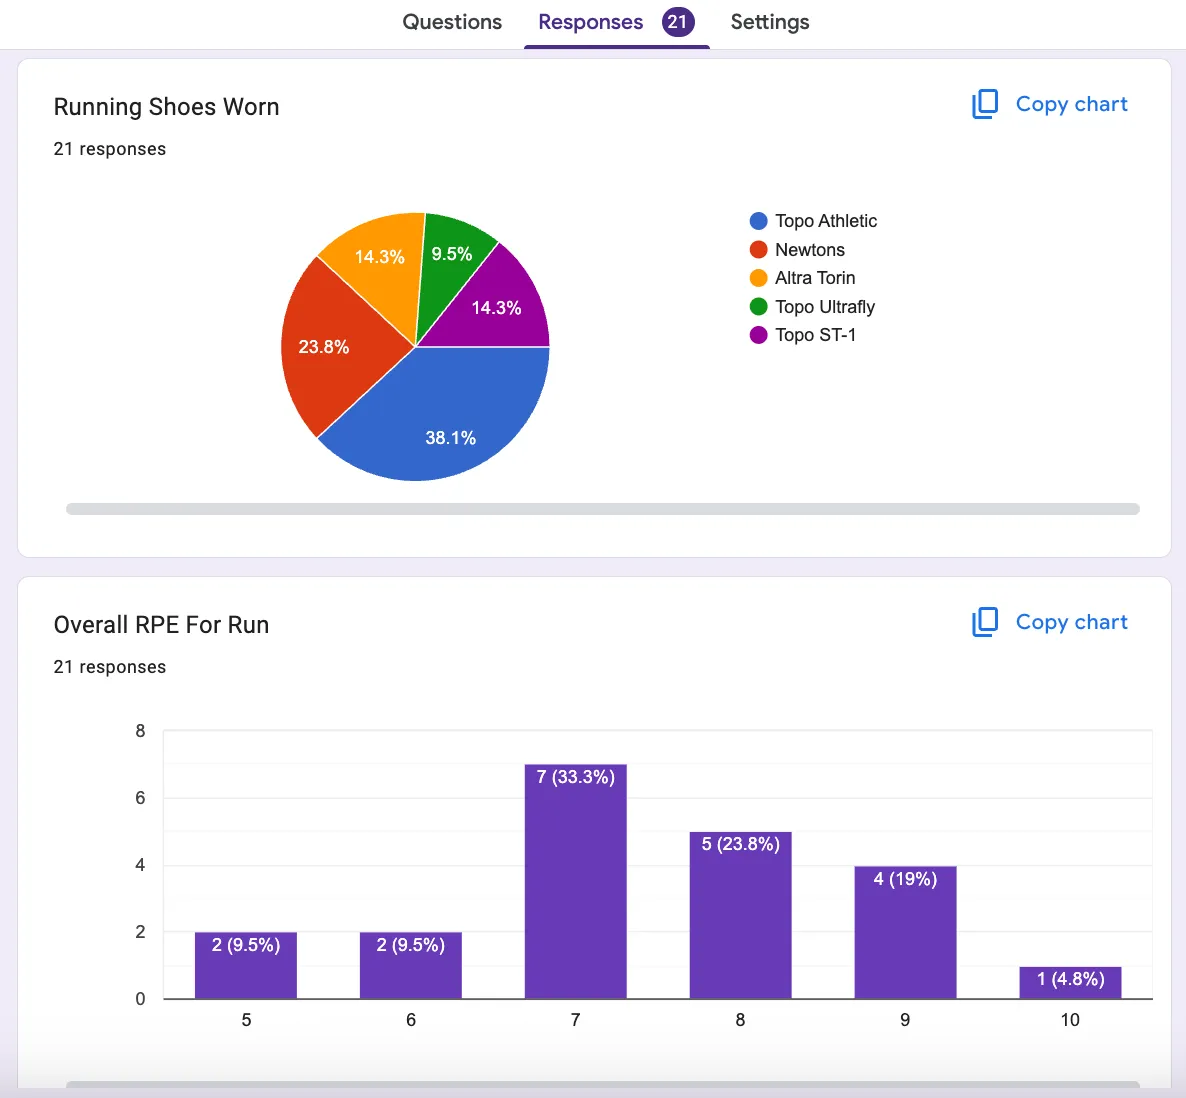
Even though we will be working with Google Sheets to view our responses, you may have noticed already that Forms provides you with a way to view responses directly from the Forms page. As you can see in the image below, we have selected the Responses option from the top three links at the top of the page. Forms does a really nice job of presenting the results we have in visual format, and will determine the best way to present the data.
In the image below, we can see some of the later questions being displayed as both pie charts and column graphs.
If we now want to either view our responses from an existing Google Sheets spreadsheet or a new spreadsheet, you can do this from the Responses tab in your Forms page. Up the top of the Responses, you should see a “View in sheets” option. When you click on it, you will be given a similar option as the one below:
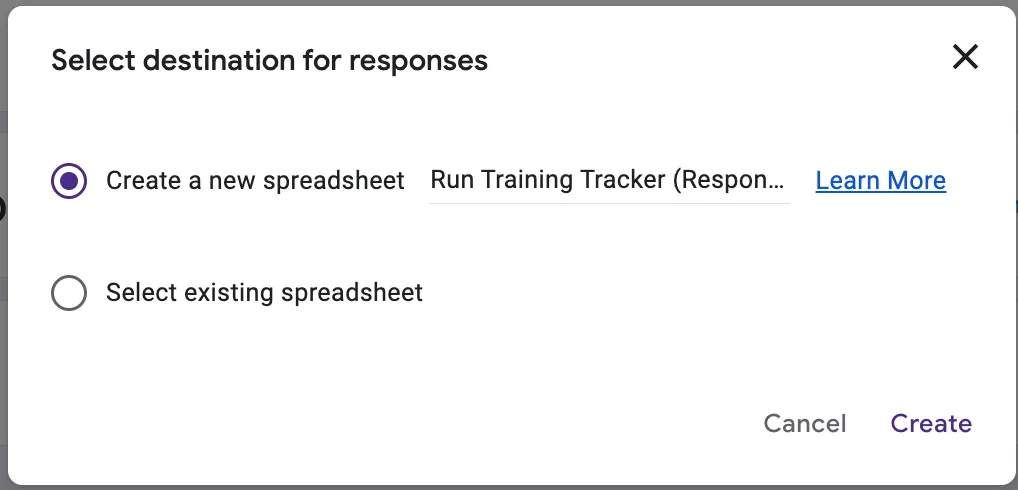
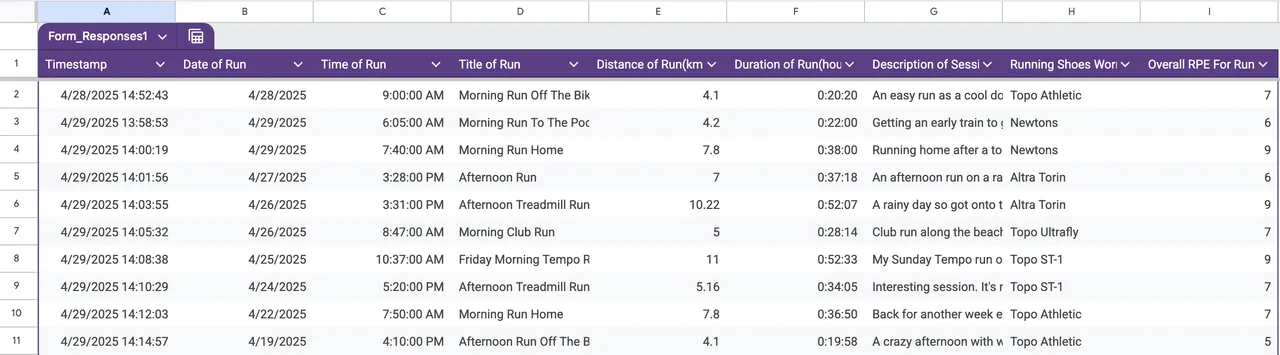
Weather you create a new sheet or use an existing one, your data will be opened up in a spreadsheet similar to the one below where you can start working with the data as you normally would in Google Sheets.
Summing Up
Even though we’ve done little work with Google Sheets, I am sure by now you can see how Forms are a great way to gather the data you need. We did a great job in this post introducing Google Forms, how to use the interface and add different questions and configure question types. We also showed you how to set up response validation, and how to publish your Forms to be used to collect data.
We then showed you how to view responses in both Forms, as well as opening up responses in Google Sheets. In our next post, we are going to start using our data to create some nice dashboards using our responses we’ve collected in our Forms.
Some of our earlier posts include:
About The Author
The post is written by Vincent Sesto, a Aussie Software Engineer, living and working in Auckland, New Zealand. If you are interested in my authors page on Amazon, feel free to checked it out at the following link:
https://us.amazon.com/stores/author/B073R3VW2G