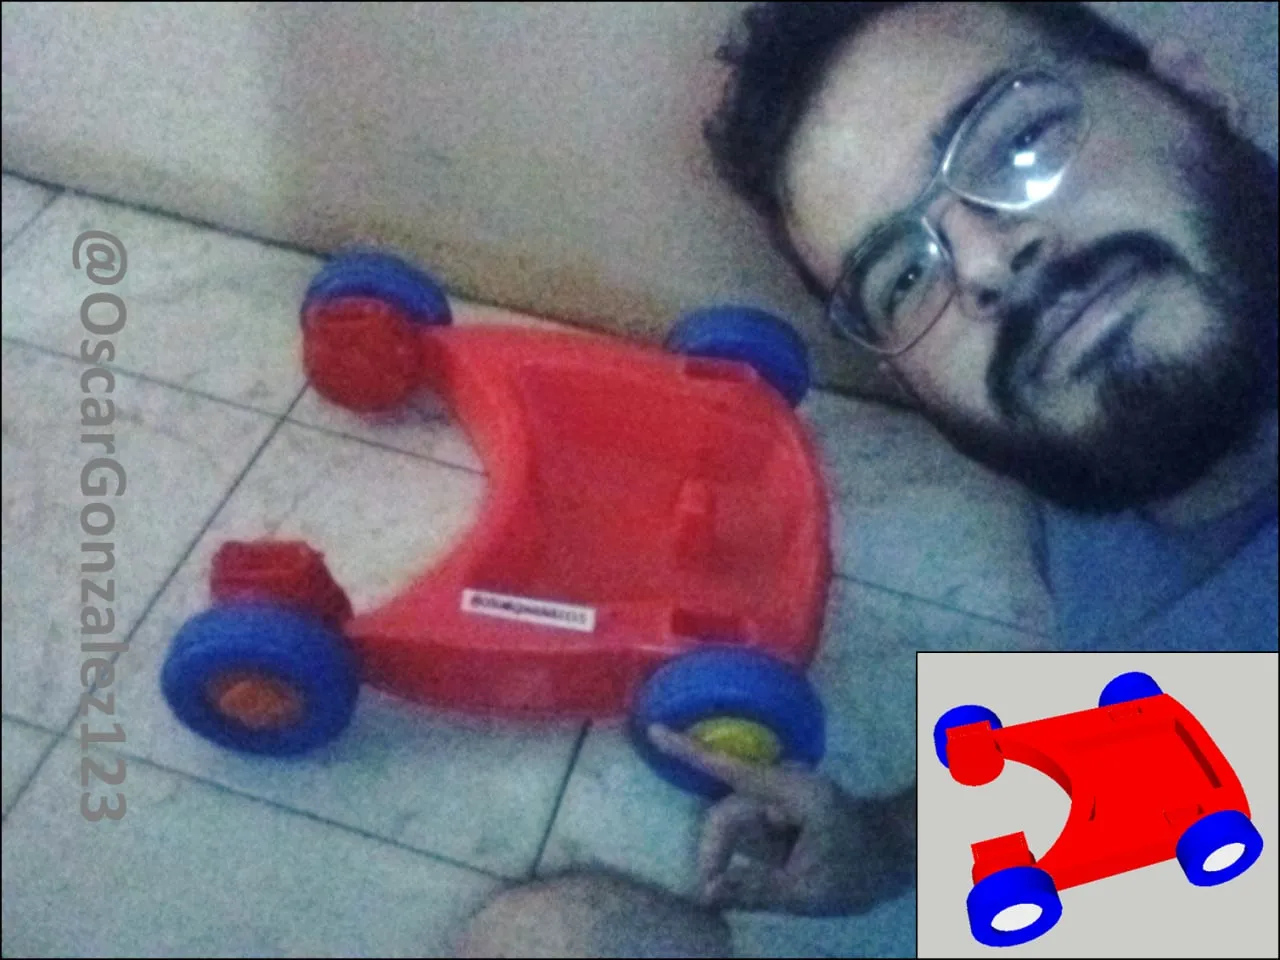
Hoy voy a enseñar rapidamente como hacer una maqueta en Sketchup 2016, que es para mi gusto el programa de modelado en 3D mas facil de utilizar, eso sin mencionar que corre practicamente en cualquier pc y es gratis. Si tu tienes un laptop exclusiva para tu trabajo, descarga las versiones mas nuevas, en mi caso tengo pc de mesa y suelo llevar mis diseños a todos lados en un disco duro externo junto con el programa en su version 2016, asi me aseguro de poder mostrar el diseño en cualquier sitio y en cualquier computadora.
Today I am going to quickly teach you how to make a model in Sketchup 2016, which is for my taste the easiest 3D modeling program to use, not to mention that it runs on practically any pc and is free. If you have an exclusive laptop for your work, download the newer versions, in my case I have a desktop pc and I usually carry my designs everywhere on an external hard drive along with the program in its 2016 version, so I make sure I can display the design anywhere and on any computer.
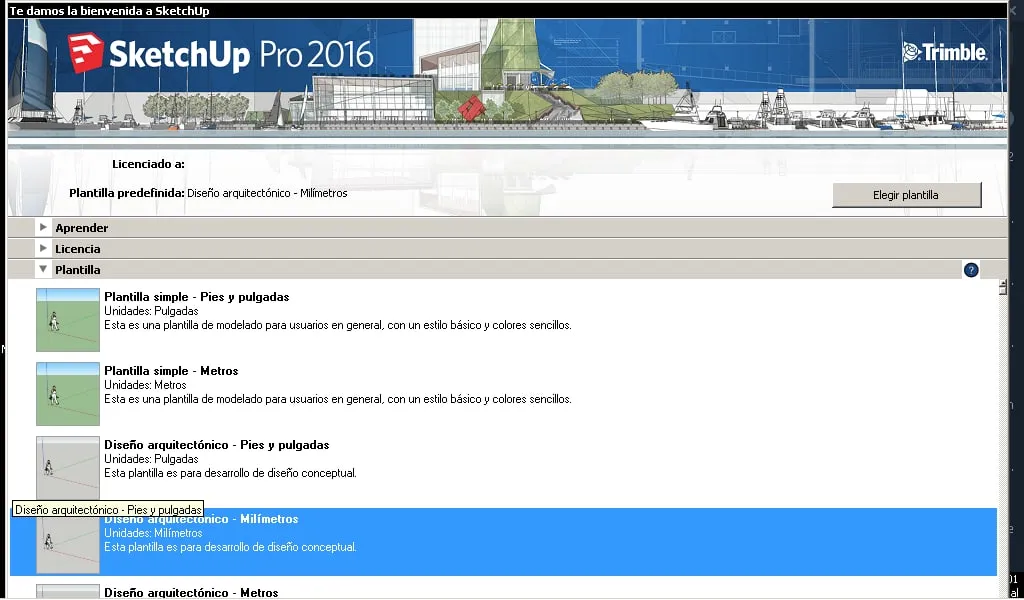
El primer error que solemos cometer cuando comenzamos a modelar en Sketchup es utilizar la plantilla en centimetros. Debemos tener en cuenta que elegir esta opcion quiere decir que el margen de error de un diseño será de 1 centimetro, que parece poco, pero cuando debemos ensamblar varias piezas entre si, se vuelve un problema. Yo recomiendo utilizar la plantilla en milimetros y acostumbrarnos a los numeros que esto implica, es decir, acostumbrarnos a que cuando veamos "10" se refiere a 10 milimetros (1 centimetro).
The first mistake we usually make when we start to model in Sketchup is to use the template in centimeters. We must bear in mind that choosing this option means that the margin of error of a design will be 1 centimeter, which seems little, but when we must assemble several pieces together, it becomes a problem. I recommend using the template in millimeters and getting used to the numbers that this implies, that is, getting used to the fact that when we see "10" it refers to 10 millimeters (1 centimeter).
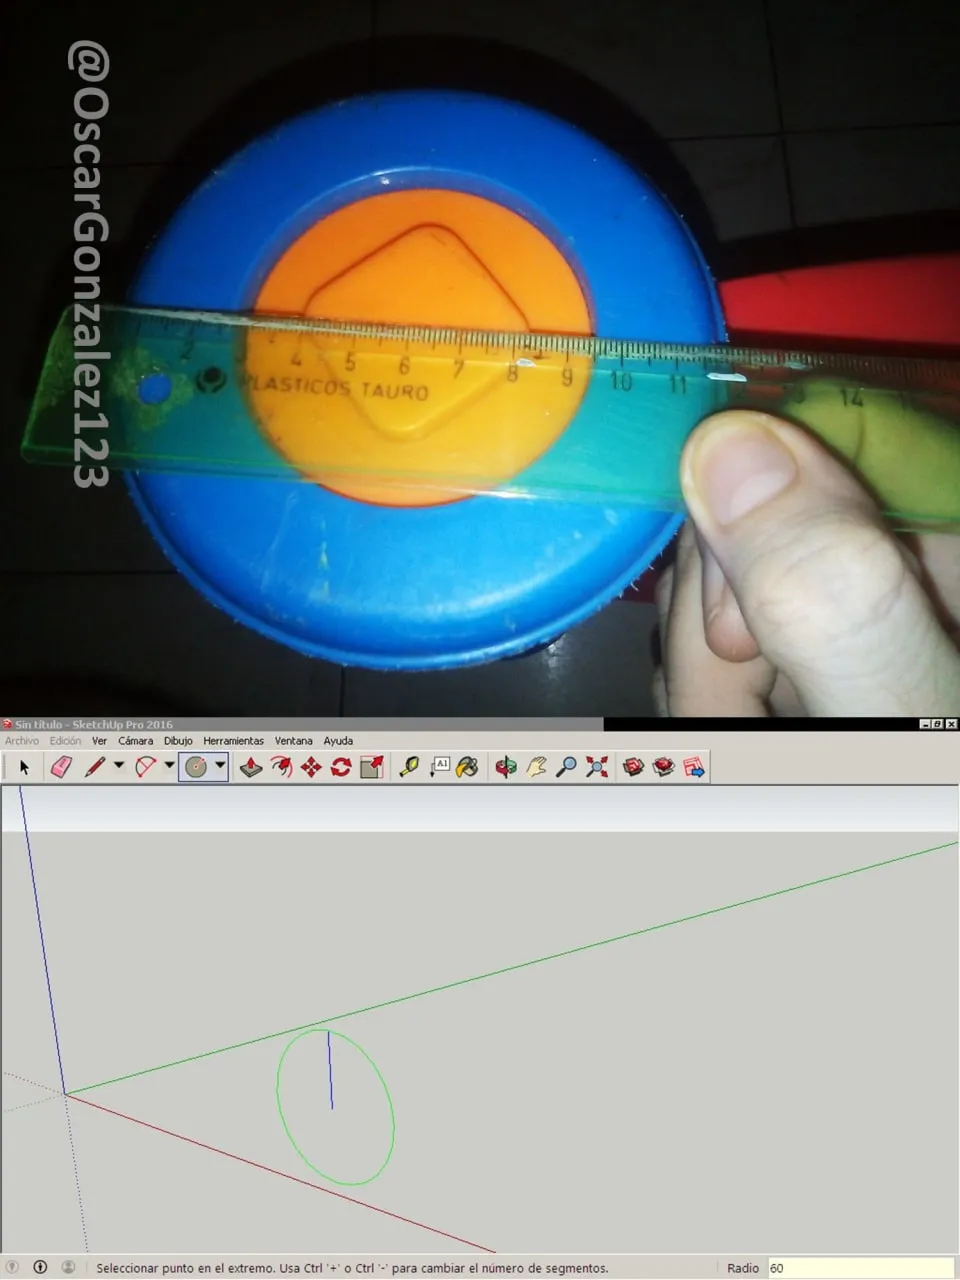
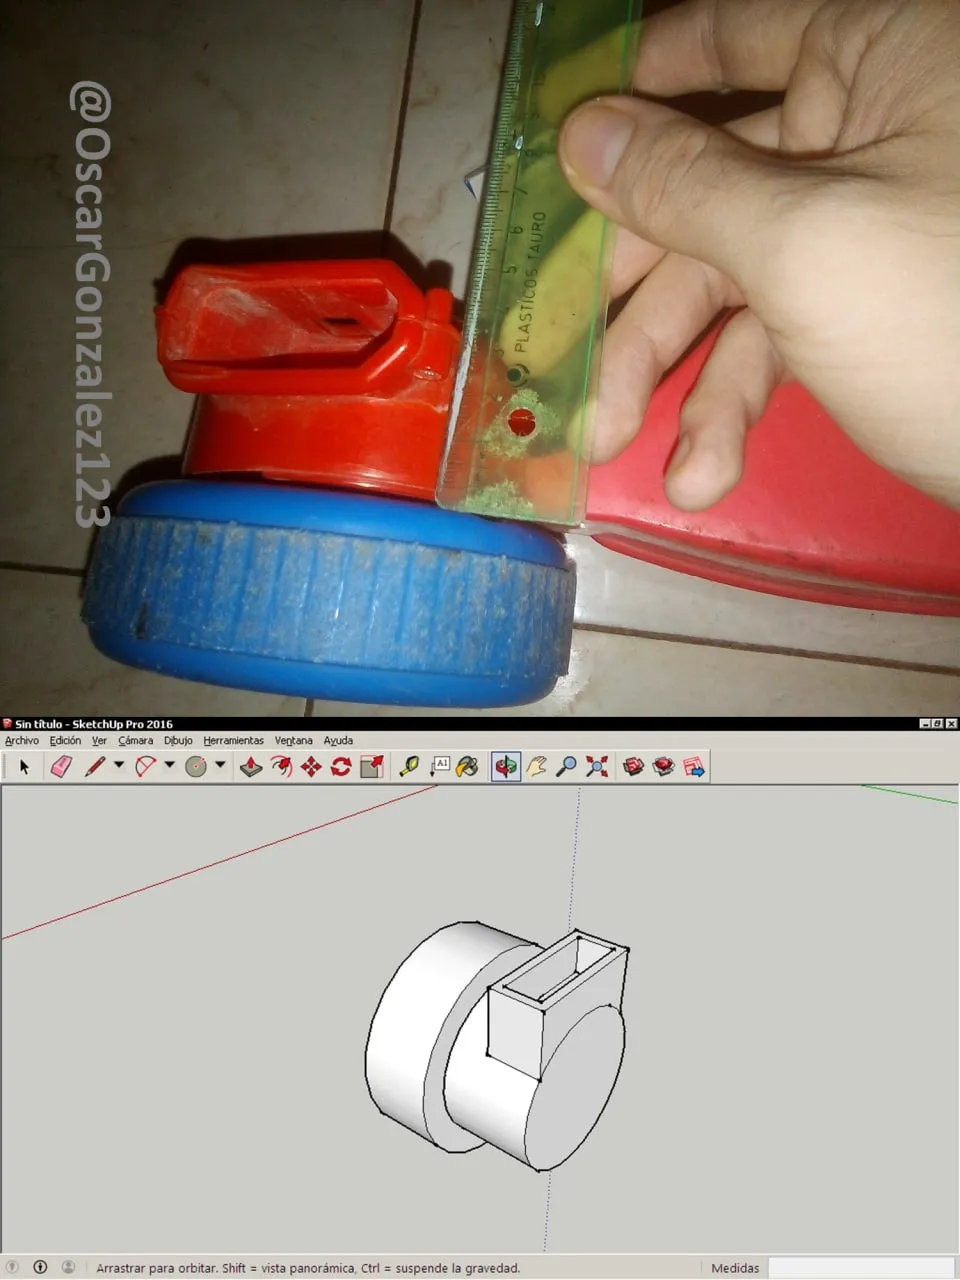
Como pueden ver, utilizando la opcion de "Formas" en la seccion circulos, empezarémos haciendo las ruedas de nuestro juguete. En la parte inferior derecha ven que coloqué 60 milimetros, esto se refiere al radio del circulo, es decir, la medida desde el centro hasta uno de los bordes. Como mi rueda tiene 120 milimetros de diametro, pues para conseguir el radio, solo divido entre dos. Se que suena complicado, pero luego de un rato se acostumbraran.
As you can see, using the "Shapes" option in the circles section, we will start by making the wheels for our toy. In the lower right part you can see that I placed 60 millimeters, this refers to the radius of the circle, that is, the measurement from the center to one of the edges. Since my wheel is 120 millimeters in diameter, so to get the radius, I only divide by two. I know it sounds complicated, but after a while you will get used to it.

Simplemente haciendo circulos y logramos hacer la maqueta de nuestra rueda y si seleccionamos toda la pieza dando doble click sobre la misma y luego damos click derecho, podremos ver la opcion de "Crear grupo", esto envuelve a todo el conjunto en una pieza que no va a sufrir modificaciones si modelamos mas objetos pegados a ella.
Simply by making circles and we manage to make the model of our wheel and if we select the entire piece by double clicking on it and then right clicking, we will be able to see the option "Create group", this wraps the entire set in a piece that does not it will undergo modifications if we model more objects glued to it.
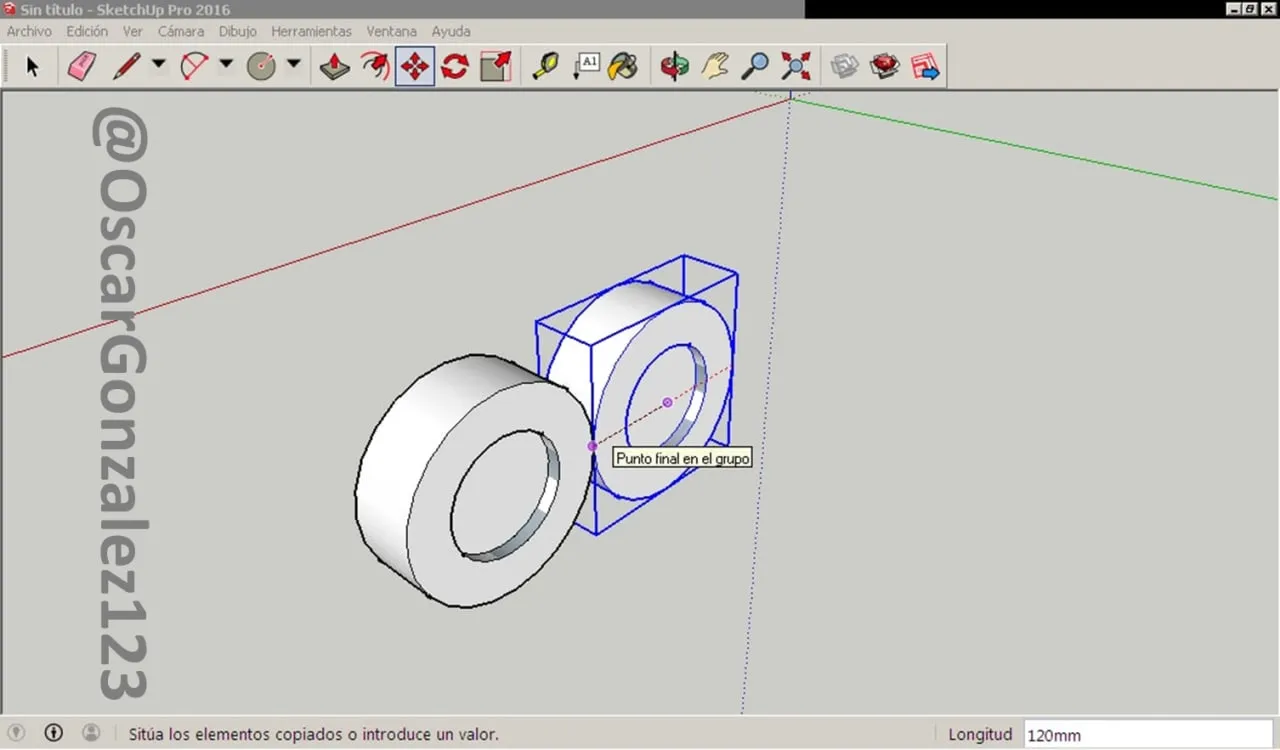
Utilizando la herramienta mover y apretando la tecla control una vez, puedo crear una copia exacta de la rueda que ya hice anteriormente, y luego lo que hice fué moverla hasta tener la separacion que necesitaba.
Using the move tool and pressing the control key once, I can create an exact copy of the wheel that I already made before, and then what I did was move it until I had the separation that I needed.
Una vez separadas las ruedas, añadí mas partes, estas no deben quedar perfectas, ya que en este caso lo utlizaré como una maqueta solamente.
Once the wheels are separated, I add more parts, these should not be perfect, since in this case I will use it as a model only.
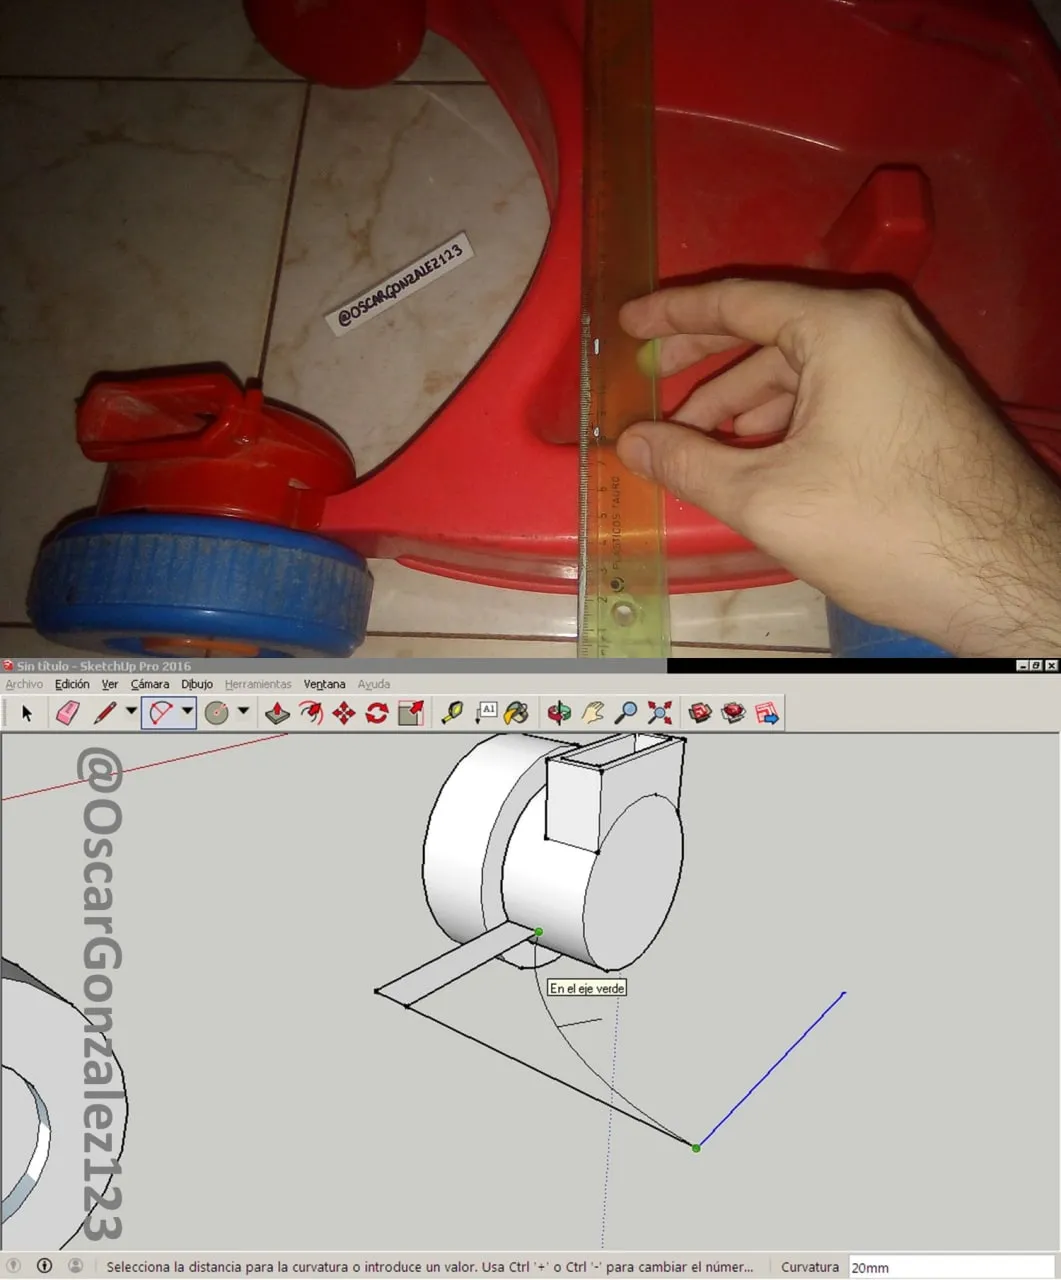
Utilizando el arco de dos puntos, hice la curvatura que se muestra en el diseño, repito, para este caso no necesito que sea exacto.
Using the two point arc, I made the curvature shown in the design, again, for this case I don't need it to be exact.
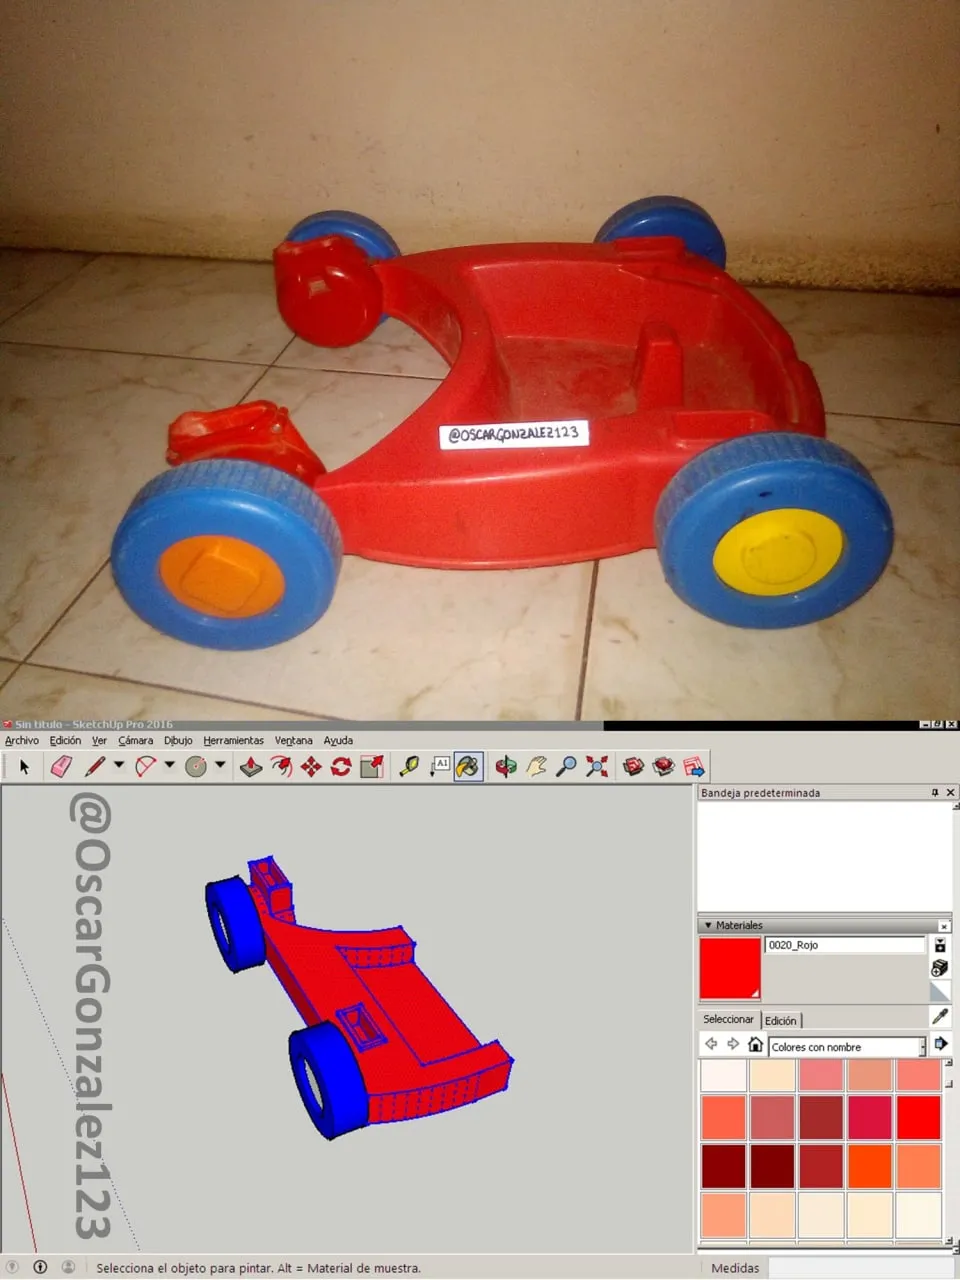
Utilizando la herramienta pintar pintamos, valga la redundancia. Como ven solo tengo la mitad del diseño, aunque es mas que suficiente a que la mayoria de los objetos que tenemos a nuestro al rededor son cimetricos aunque no lo parezcan. Es decir, simplemente deberé duplicar esta mitad y tendré un diseño completo.
Using the paint tool we paint, forgive the redundancy. As you can see, I only have half of the design, although it is more than enough because most of the objects that we have around us are cimetric even though they may not seem so. That is, I will simply have to duplicate this half and I will have a complete design.
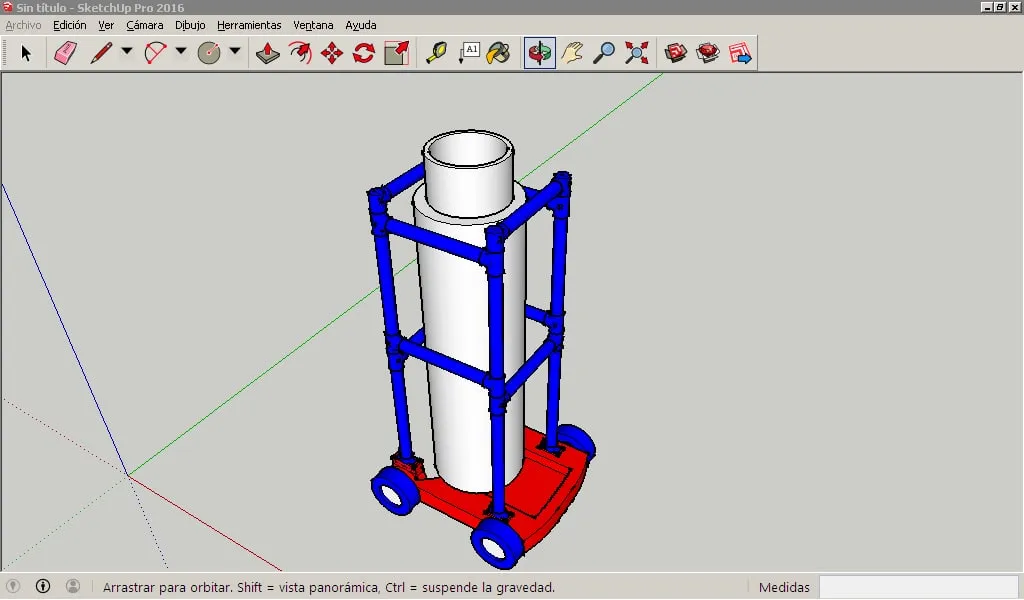
Asi dariamos por terminado nuestro diseño. Como ven, en este caso a mi me va a servir para llevar una bombona de gas de un sitio a otro sin tener que alzarla. Ahora, debo aclarar varias cosas, la importancia de aprender a modelar en 3d no es para ver que tan bonito se verá algo, sino para saber si un proyecto es posible o no, cuanto será el gasto de material y que materiales deberan usarse en dicho proyecto. Yo recomiendo a todos que practiquen y aprendan asi sea lo mas basico, todos hemos pedido muebles a medida alguna vez y nunca son como queremos, modelandolos nosotros mismos el constructor podra darnos justo lo que necesitamos ya que tendrá un modelo con medidas exactas que seguir.
So we would finish our design. As you can see, in this case it will help me to carry a gas cylinder from one place to another without having to lift it. Now, I must clarify several things, the importance of learning to model in 3d is not to see how nice something will look like, but to know if a project is possible or not, how much material will be spent and what materials should be used in said project. draft. I recommend everyone to practice and learn, even if it is the most basic, we have all ordered custom-made furniture at some time and it is never what we want, modeling it ourselves, the builder will be able to give us just what we need since he will have a model with exact measurements to follow.