

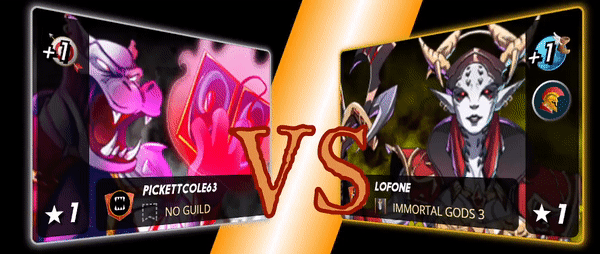
The Battle
Ruleset

Armored Up: All monsters have 2 Armor in addition to their normal Armor stat.
The available mana cap is unlimited and we can play all classes except Water.

Summoner Selection
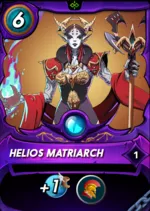
The summoner that I chose for this battle was Helios Matriarch. A pretty interesting summoner that I used for the first time and of course, the main reason that I did that was that it allows the use of a Gladiator card in battle and also the fact that it gives +1 Speed to all of my formations. The only downside was the cost of the card but in this situation, I could afford it. I would recommend using this card if you have some good Gladiator options.
Teams' Formation

Team presentation
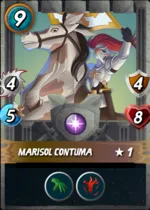
The second card that I decide to use in my formation was the Marisol Contuma and it's part of the Gladiator set of cards and one of the best solutions that you can think of when you want to play a monster with the ability "Reach". It's not the first time that we are going to see this card being played by me because I showcased it again in a Brawl report a couple of months back but I am really excited that I am able to use this monster in the ladder too. I don't believe that I should explain more about the reasons that drove me to select this card because you can clearly understand them just by looking at the pic to the left!

My second entry for the battle was one of my favorite cards Silvershield Knight. The reason I chose this monster is his abilities and more specifically the Inspire ability. As I explained earlier in this matchup all of my cards are at level 1 and of course, you shouldn't play them at this state if you are at a higher rank. That buff on my melee monsters is going to play a significant role in this matchup and help me to achieve victory.
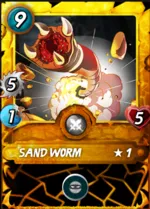
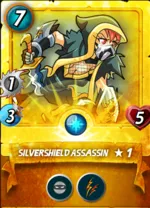
So when we are talking about putting pressure on your opponent's backline and Life Class the answer is pretty obvious and has the name Silvershield Assasin. This card in combination with our formation can deal 4 damage per turn on my opponent's highest-damage dealers. In combination with Sand worm they can completely destroy an entire team all by themselves. Personally, I believe that this card also works pretty well in various formations and battles.
Watch the Action!
Now you can see the battle below without having an account at Splinterlands! If you want to see the battle at the game, I will leave a link below! I hope you will enjoy the battle and if you have any questions or suggestions please leave a comment!
- Here is also a link for the battle on the Splinterlands platform: LINK
Don't forget to leave your thoughts and questions in the comment section!
If you want to see more of my posts and take participate in future giveaways I am planning, you should follow me.
I will distribute some @lolztoken in the comments!
Also, you can check out the @thgaming community for more amazing content and rewards!
Make sure to stop by the @thealliance and their discord server, you will find plenty of help and many rewards waiting for you!
Images used in this post are owned and open-sourced by splinterlands.com
Thumbnail was made on canva.com
If you didn't join SPLINTERLANDS yet here is my referral link:
https://splinterlands.com?ref=lofone

