Blessed day everyone, greetings from Philippines!
I'm one of the newbees who just came here in hive platform, one of those aspiring bloggers who are just starting to write their interests as well as beginning to build their reputation by actively engaging with other bloggers out there.
I am really hoping that someday this new account will grow.
I made this account supposedly named Mochi Blogs as my own brand name. The purpose of this account will be for journaling, lifestyle, and clay sculpture.
I have mentioned in my introduction post that I do clay arts, shaping polymer clays into cute mini icons with varying styles that will be made as phone and bag charms, and I make this kind of art during my free times not only as a hobby to do out of boredom but mainly because I want to pursue sculpting clay charms as a small business. But since I just started trying out this hobby, I often fail to make a quality design.
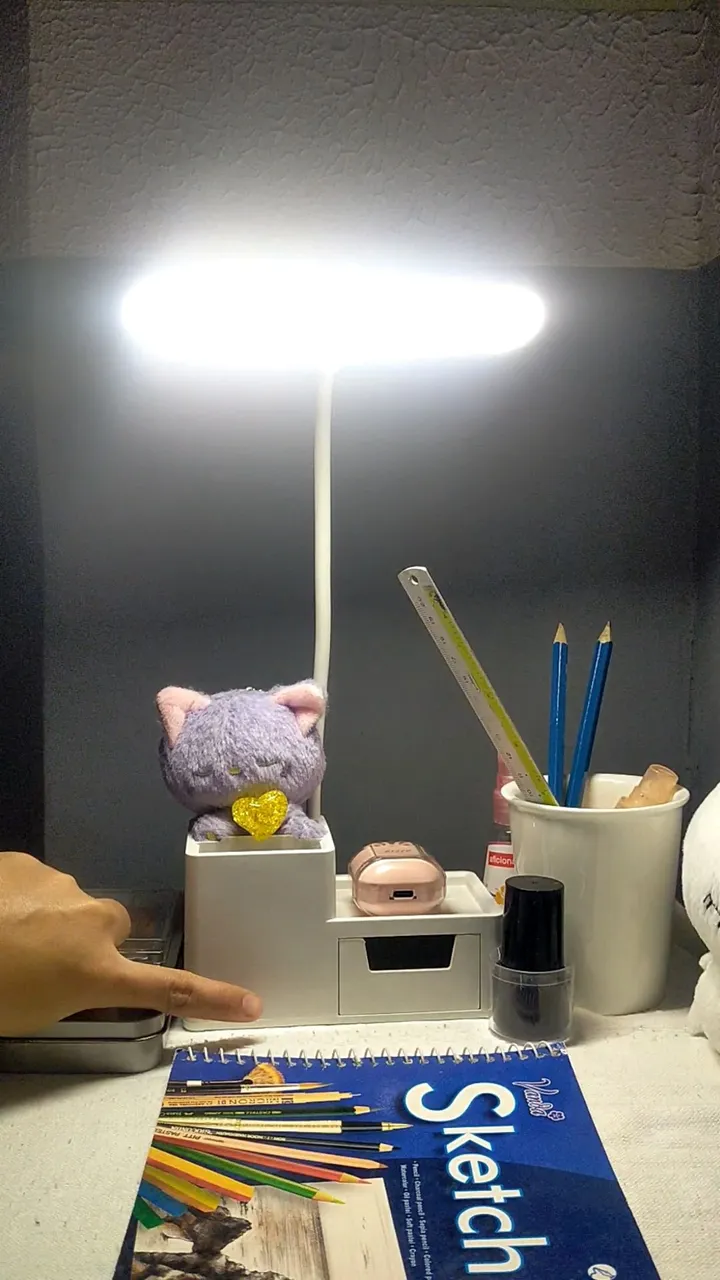
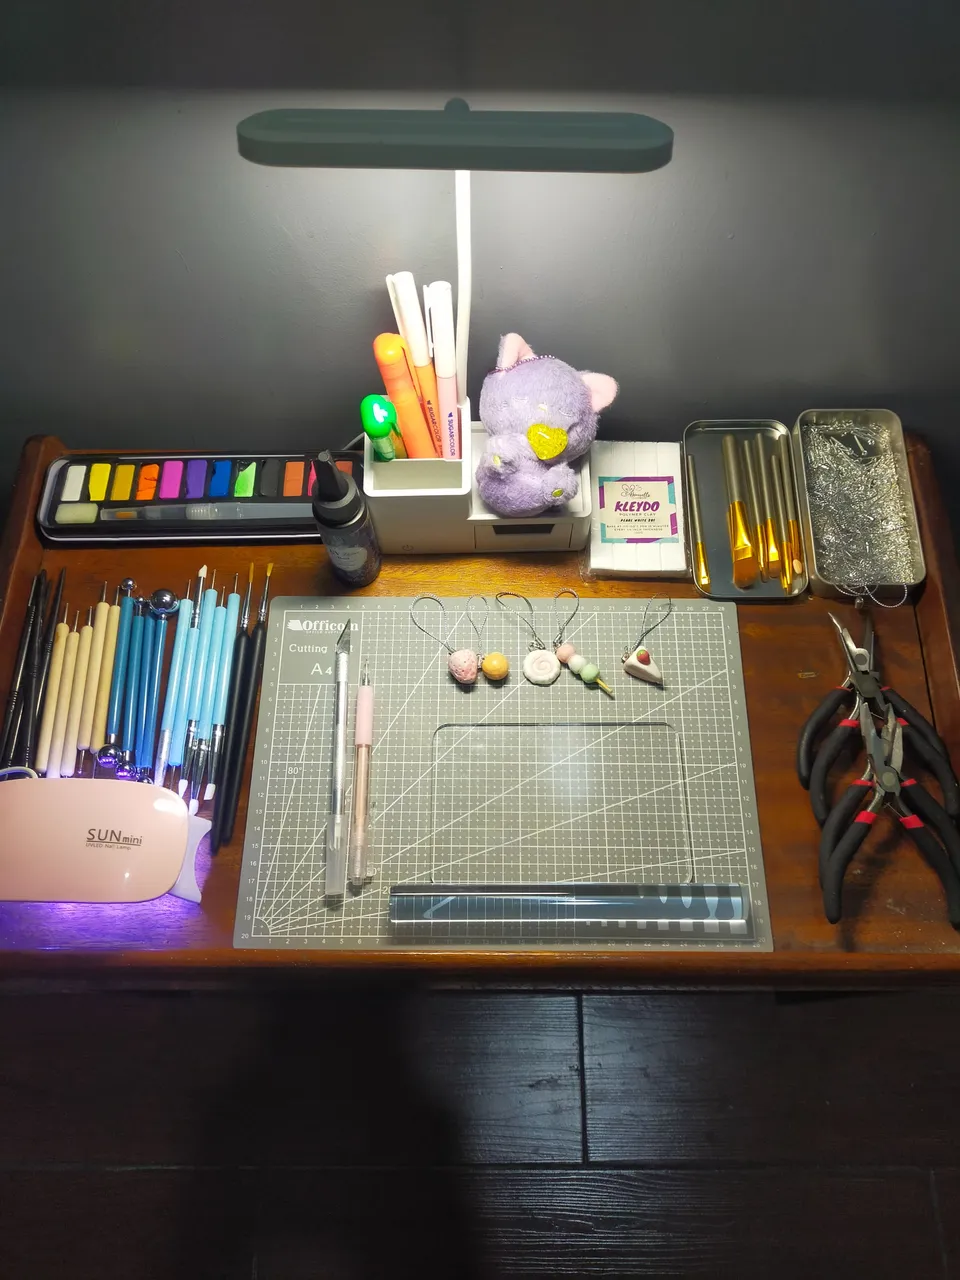
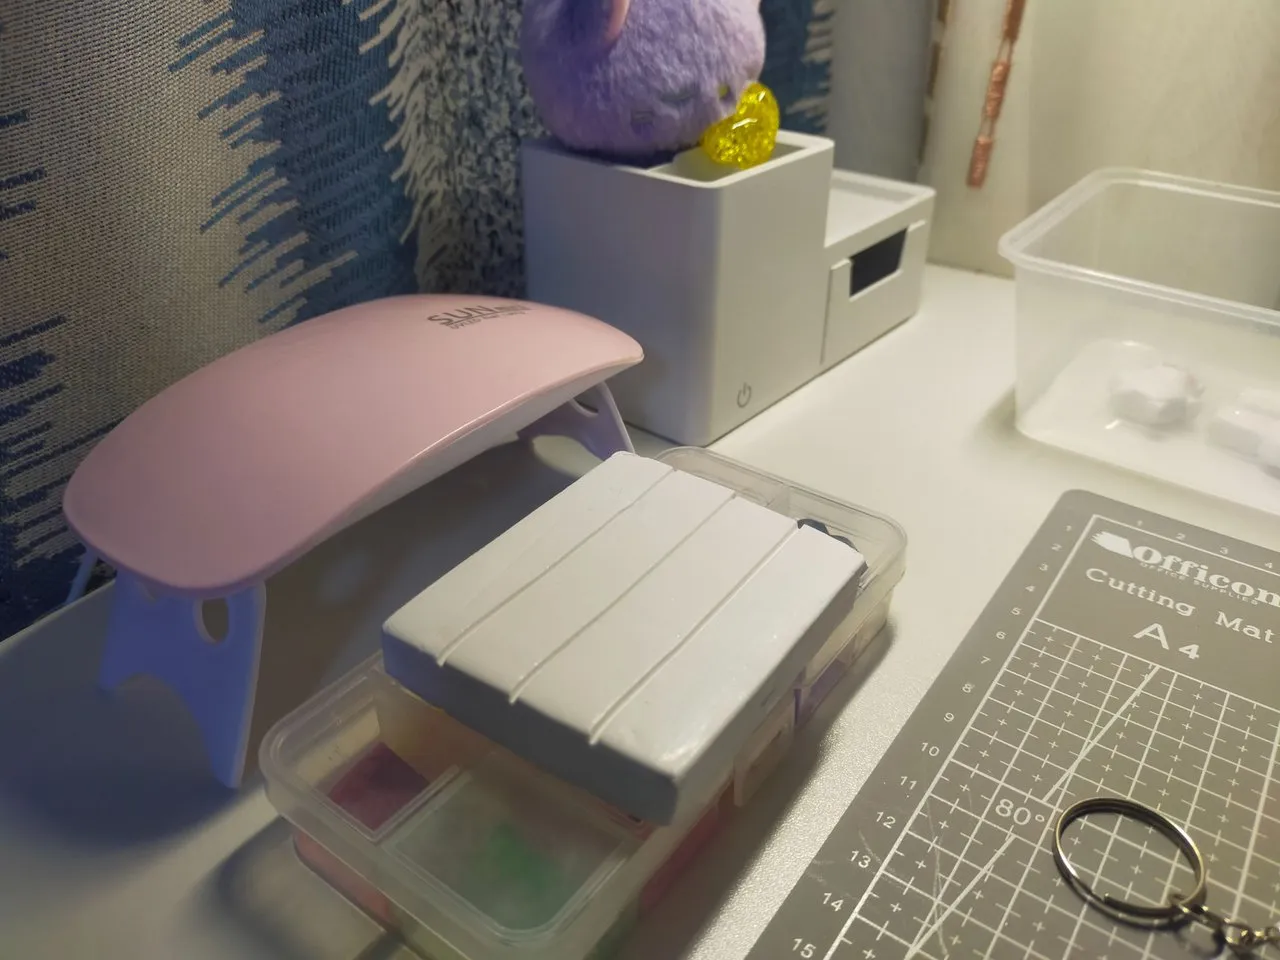
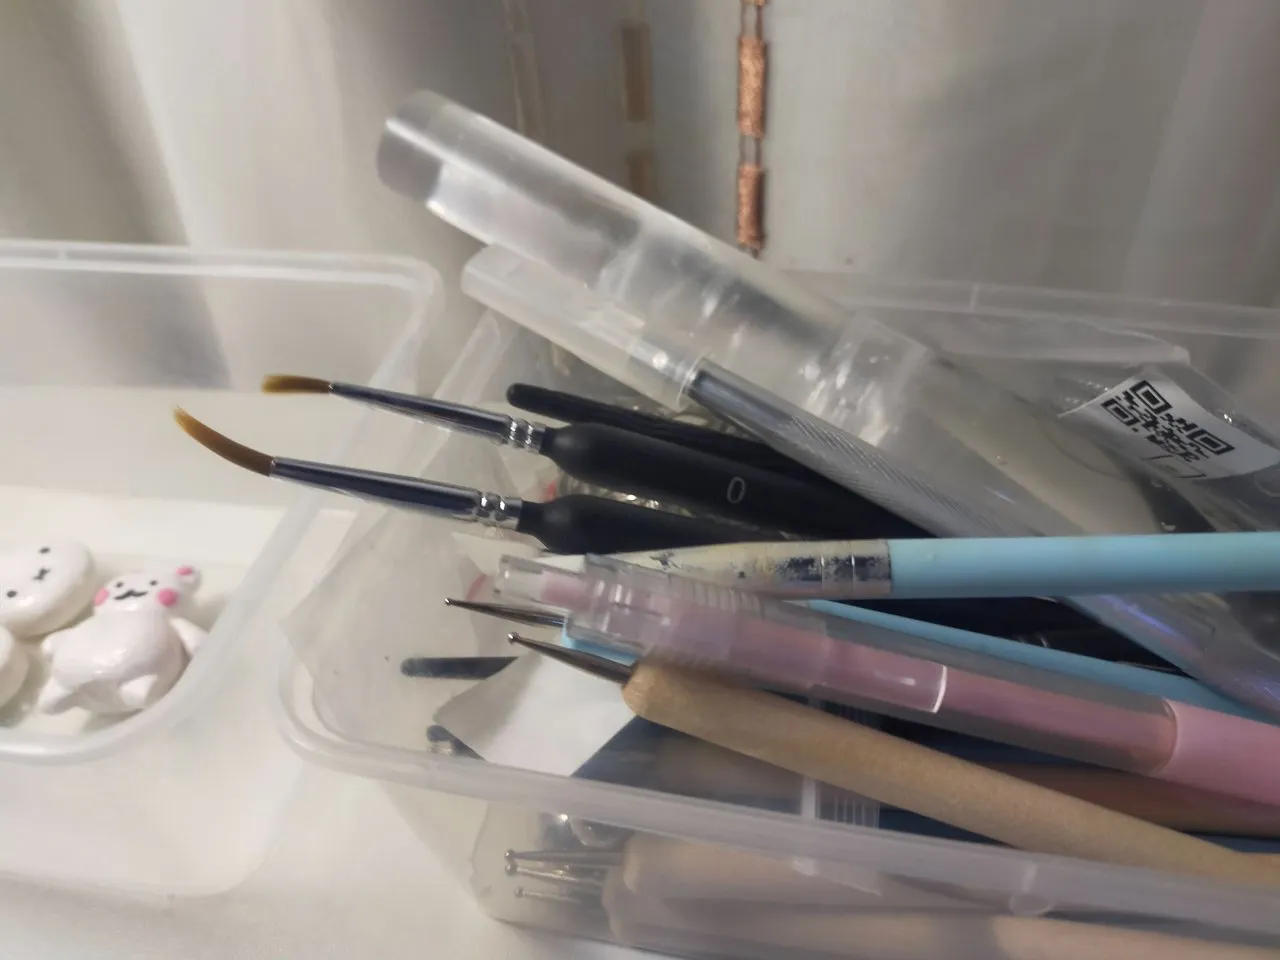
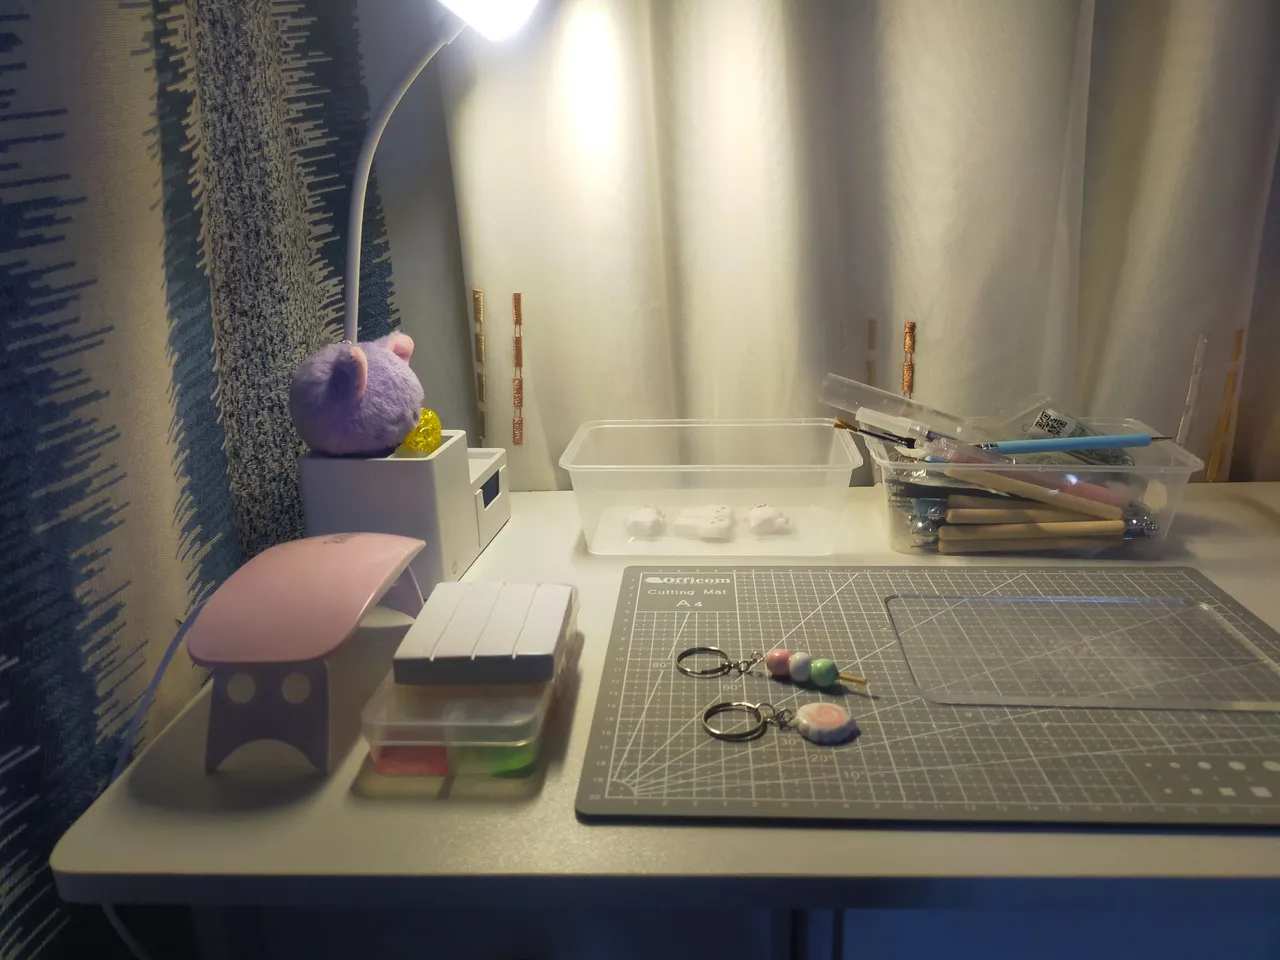
Starting a side hustle like this cost me about PHP 2, 000 for buying the starter pack materials like polymer clay, rolling pin and board, self healing mat, cutter pen, sculpting tools, uv resin, uv lamp, chalk pigment, eyepins, lanyard string and jewelry making pliers set. It is also an essential component to buy your own desk organizer for a much motivating space to work at so I ordered worth of PHP 1, 300 desk on tiktok.

As for me, I don't let this side hustle to interfere with my main job so I put this aside during weekdays and set a schedule for doing it by weekends or any free times because managing a small business with time balance and focus is necessary so that the time you spend making quality charms would be worth it and you get a better outcome for your efforts.
So let me share how I make clay charms.
Preparation:
Let's clean up our desk first because clays are prone to collecting dust. I also wiped my sculpting tools and materials that was stored in a box, mainly the cutting mat, acrylic rolling pin and board and the shaping tools. We also need to light up the desk for filming the process. So let's start the method.
Method:
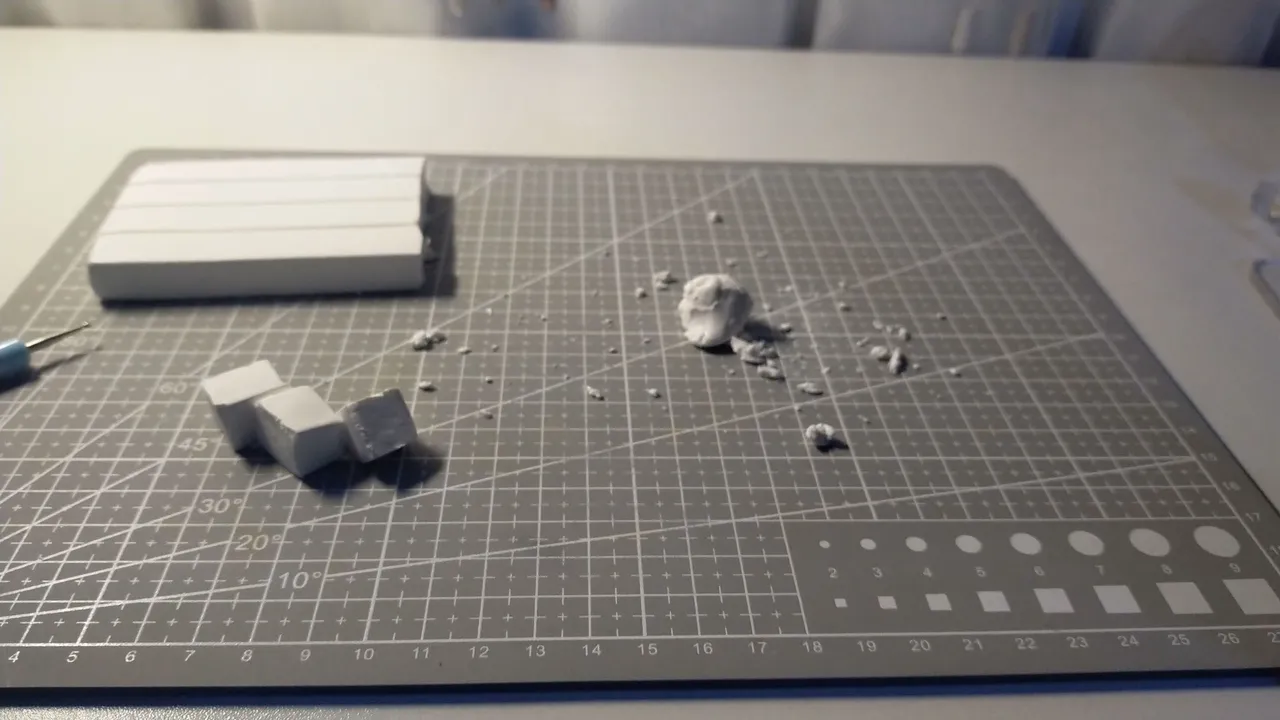
• Cut a slice of clay depends on the size you want to make as a charm.
• Knead the sliced clay on the mat using the acrylic rolling pin. [The polymer clay I used here was hard. It also breaks down that's why I put just one drop of baby oil in it to become soft.]
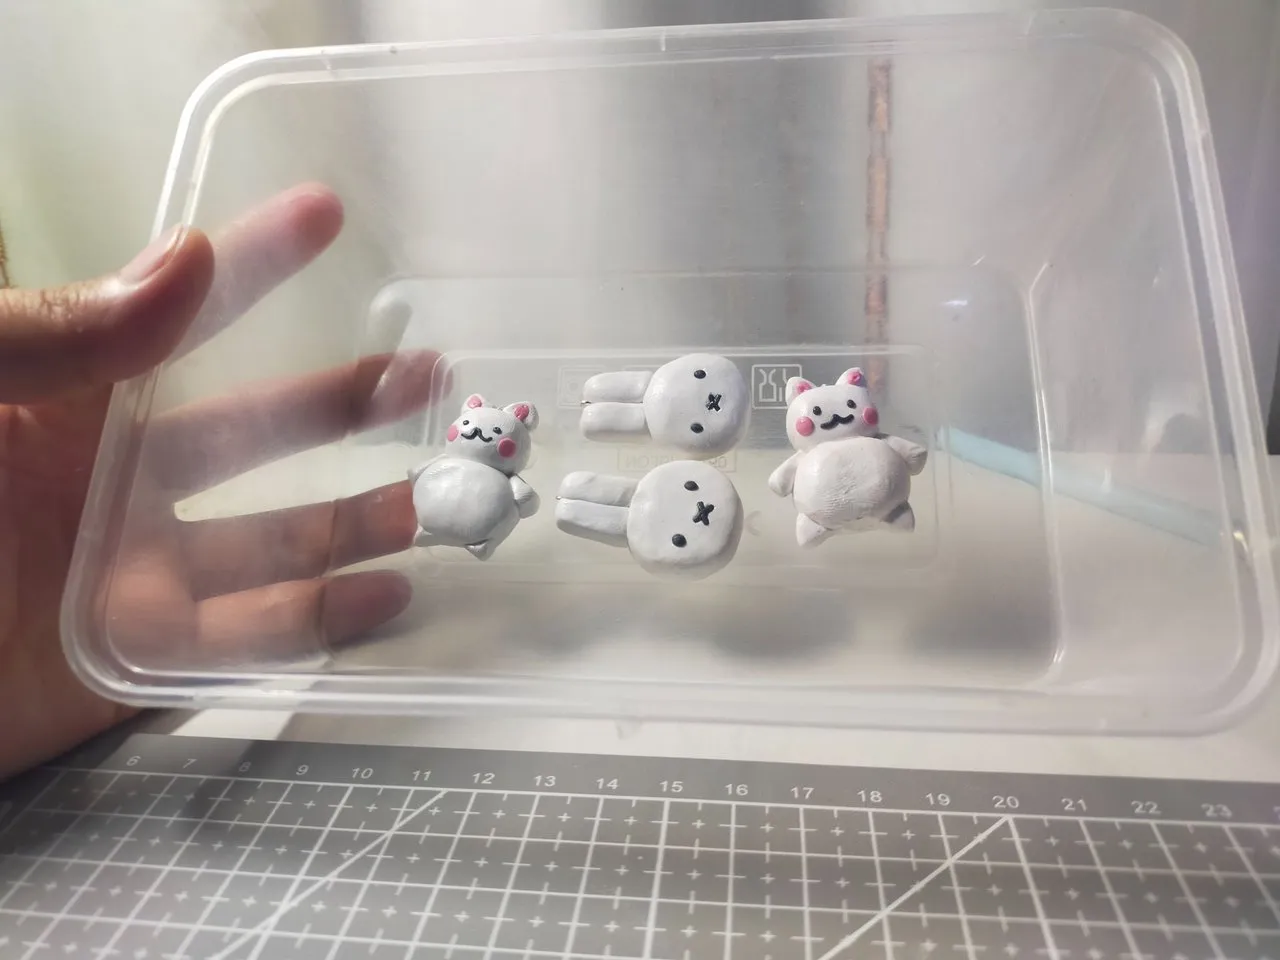
• After kneading thoroughly, divide the clay by their parts. So as for my miffy charm, I set aside three parts according to their sizes — the two ears and the face.

I also kneaded black clay for miffy's eyes and nose.

As for my bunny charm, I divided the parts into eight — these are the pair of ears, pair of feet, pair of hands, the face, and the body. I also kneaded pink clay for the ear part and the blush on.
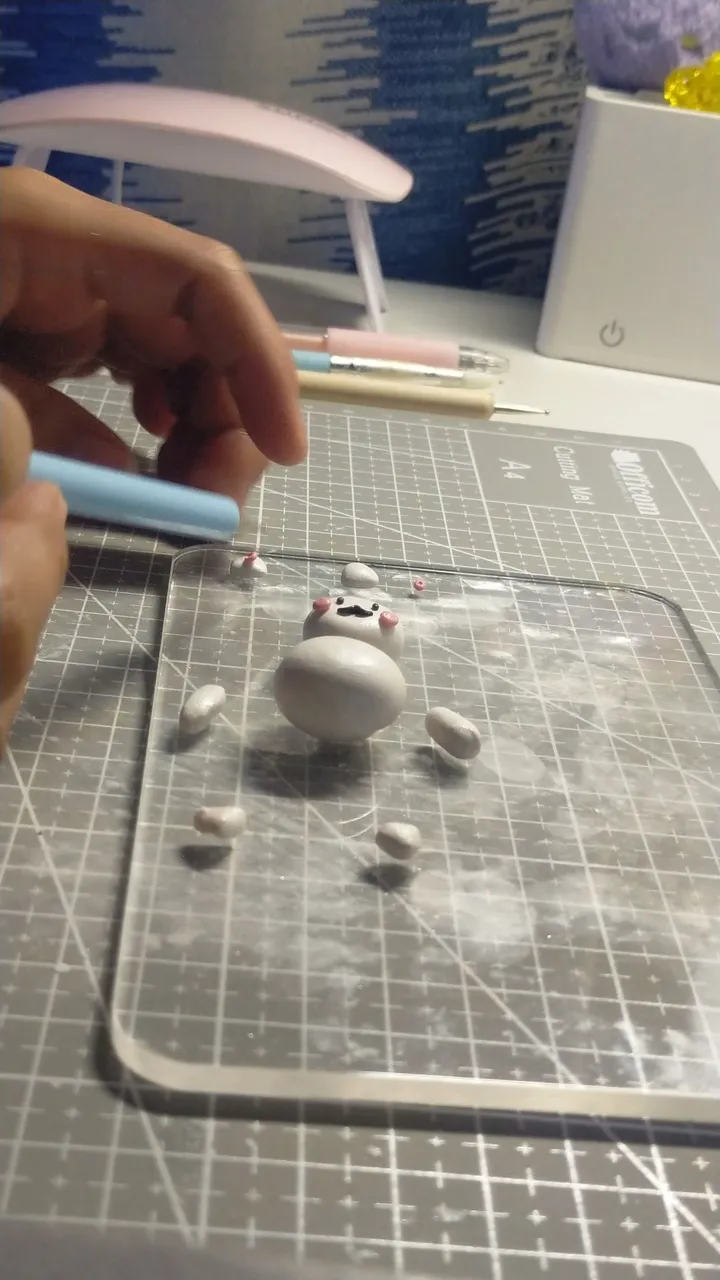
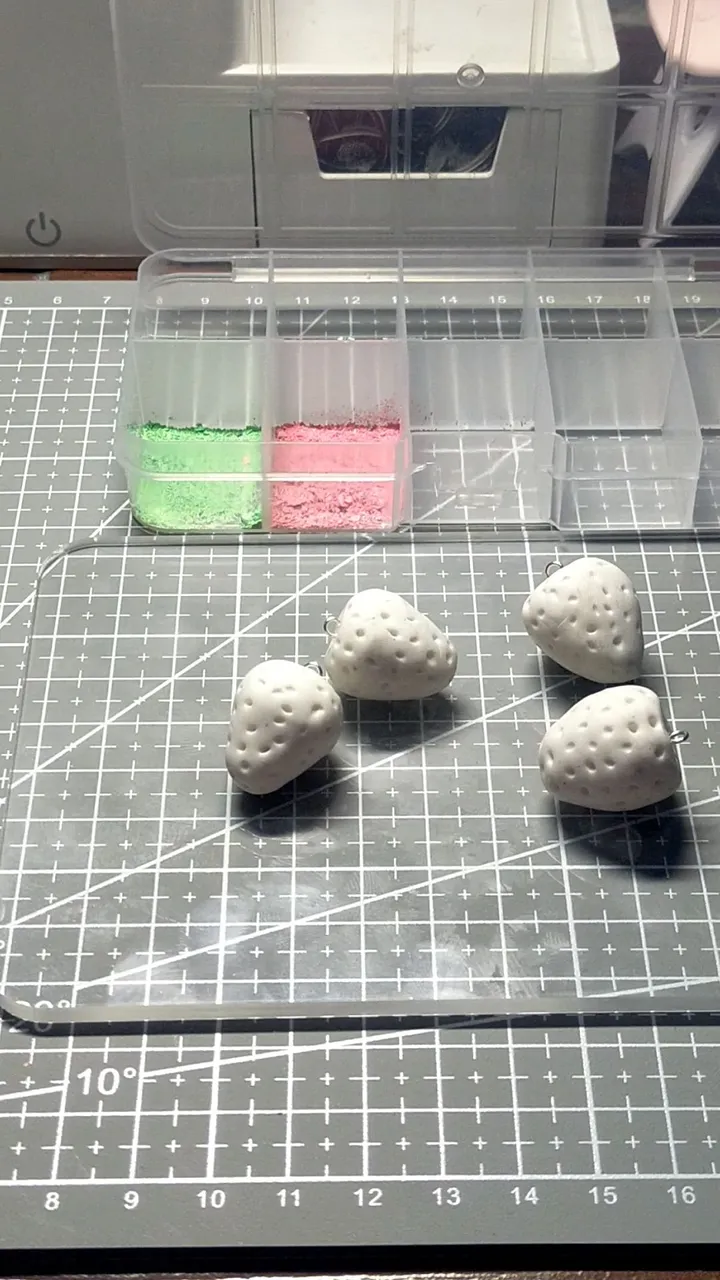
• After kneading and shaping the parts, I stick them together to make a whole miffy and a whole bunny. When the pieces are formed as whole, attach the eyepin at the clay charm then we can now gently clean the whole clay with cotton buds and alcohol to remove the dusts and fingerprints.
• For the next method, I haven't done it yet but this will be the process. Bake the clay in the oven (convection oven is a must) according to the temperature and duration suggested in the clay brand.
• When done baking, the clay hardens so we can now attach the keychain and the clay charm.
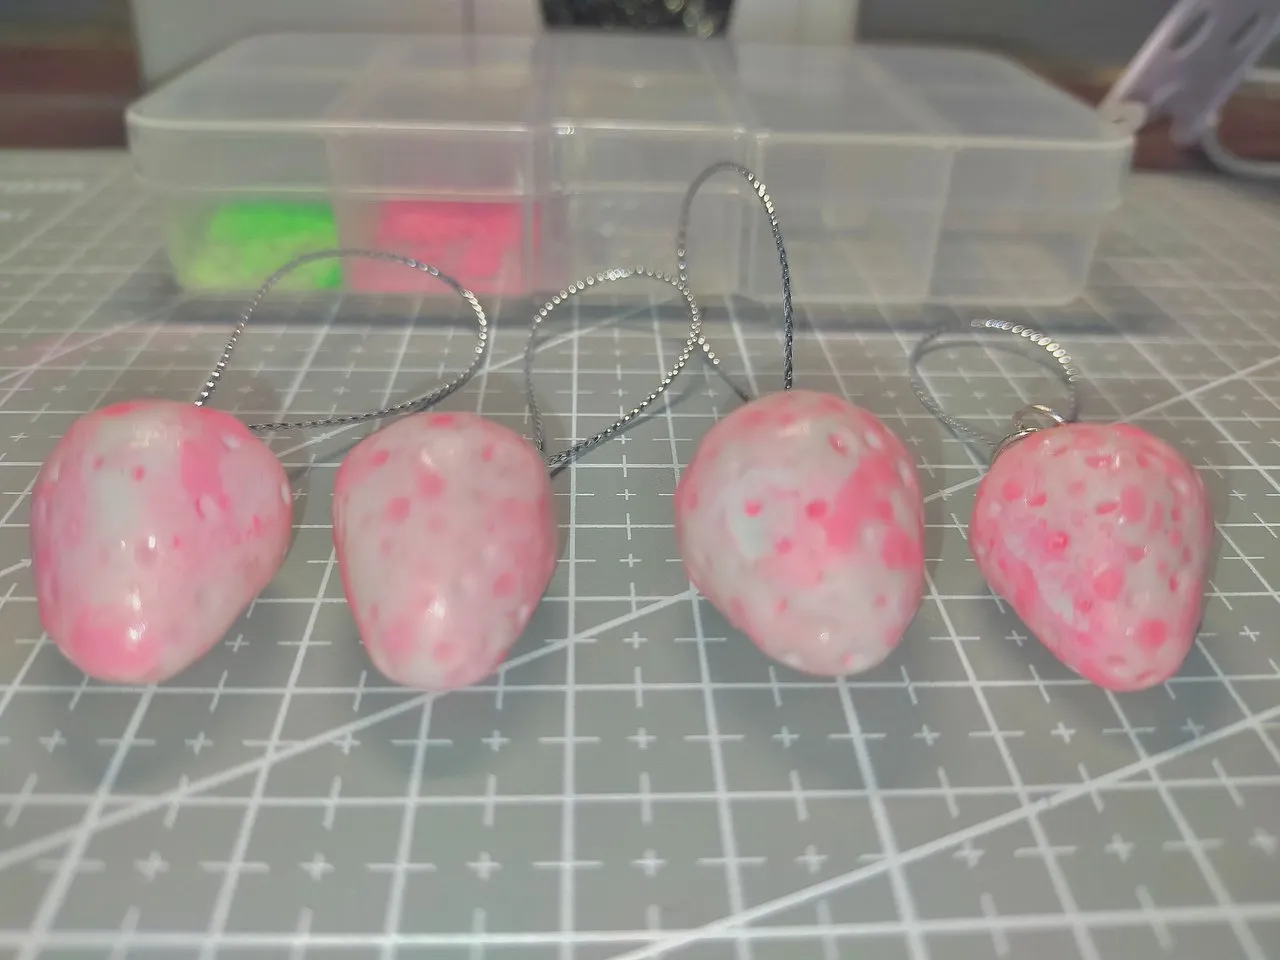
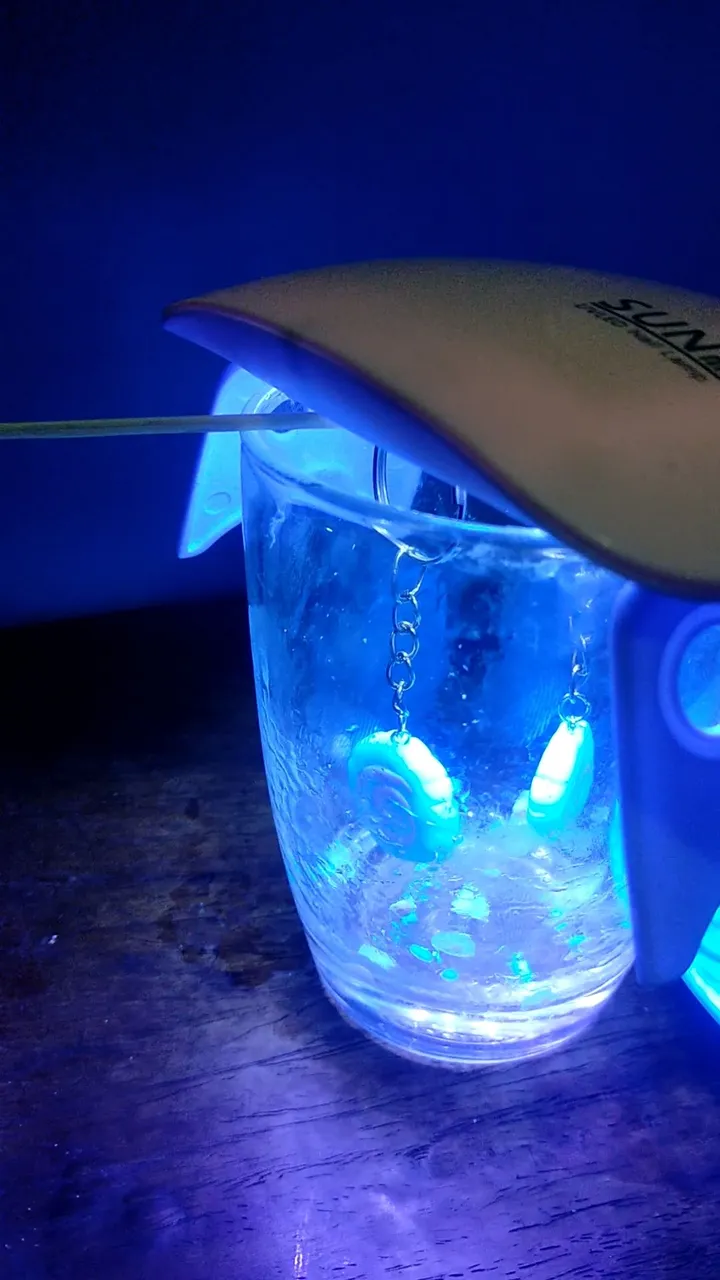
• After that, we need to apply UV Resin to make it shiny. To dry it instantly, use UV lamp.
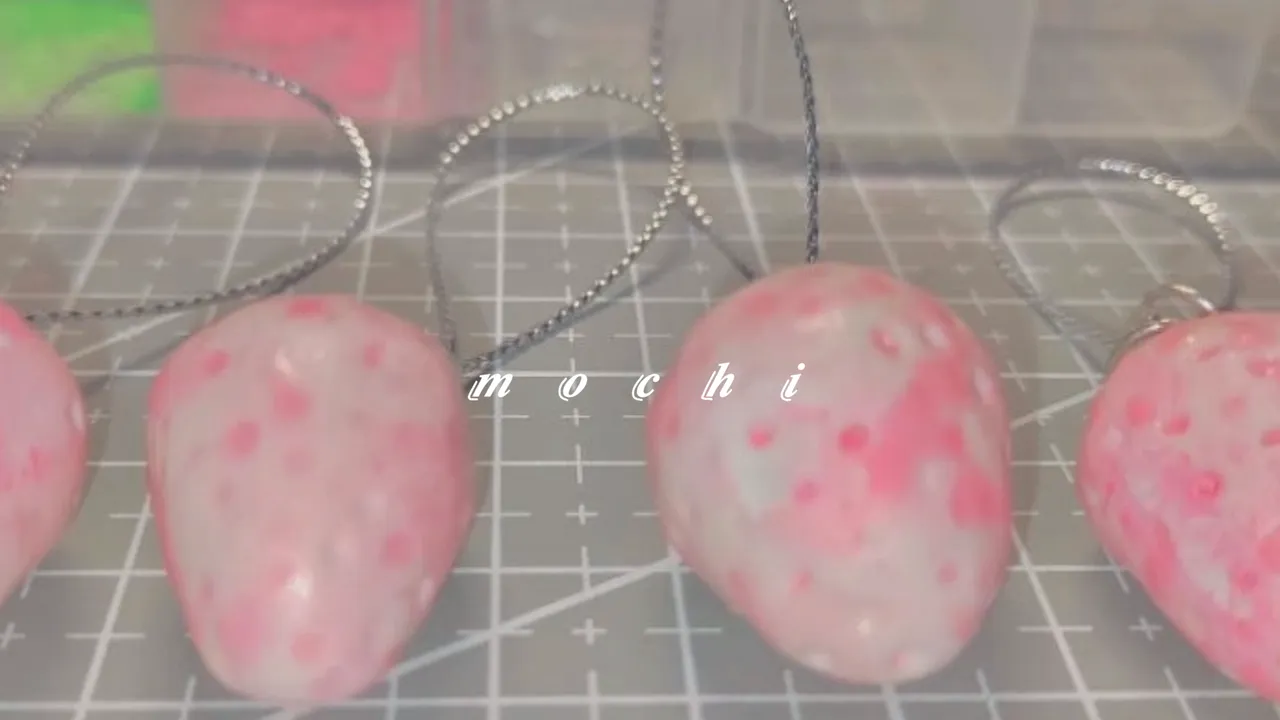
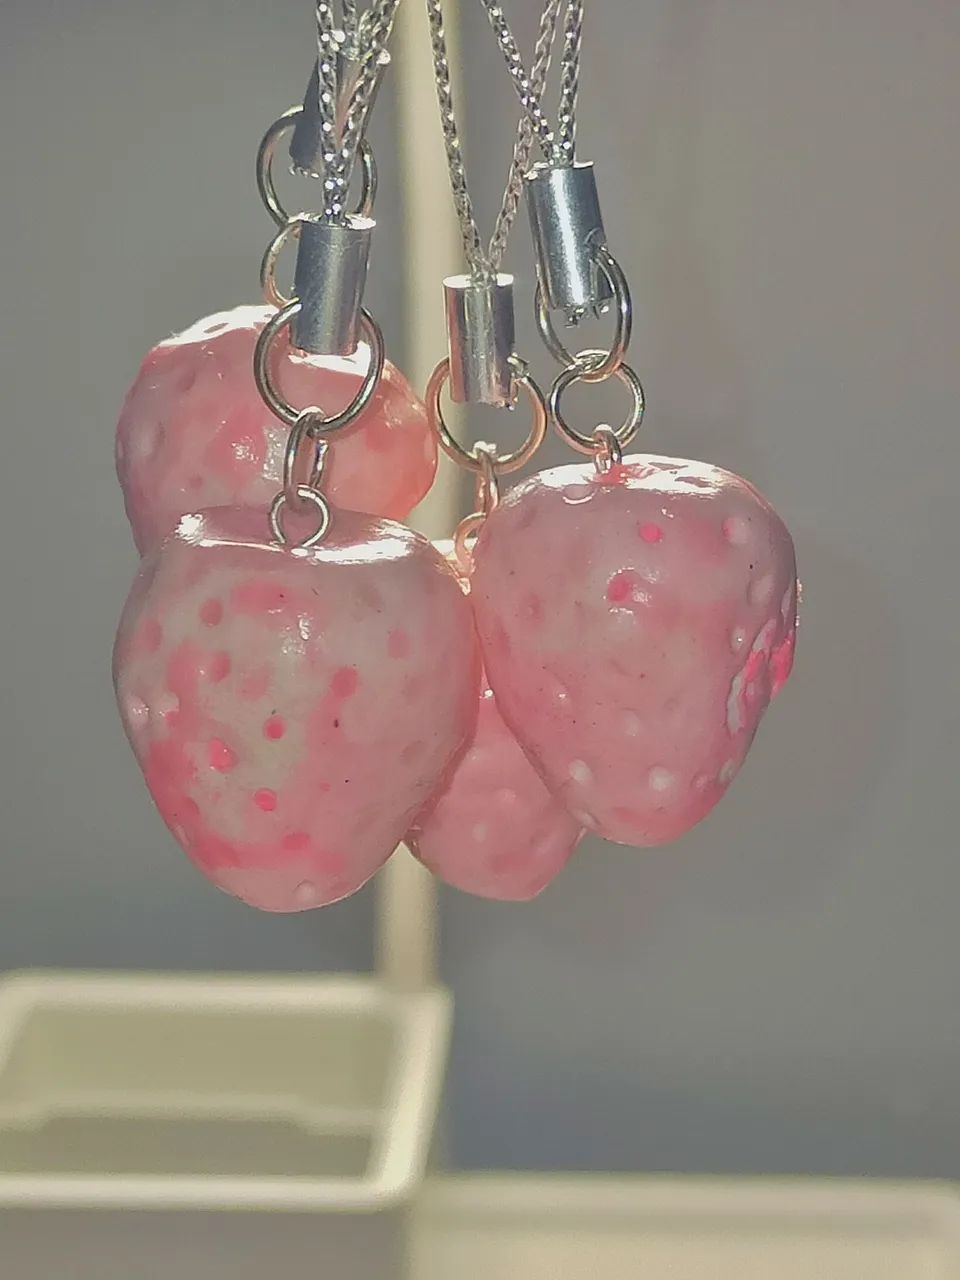
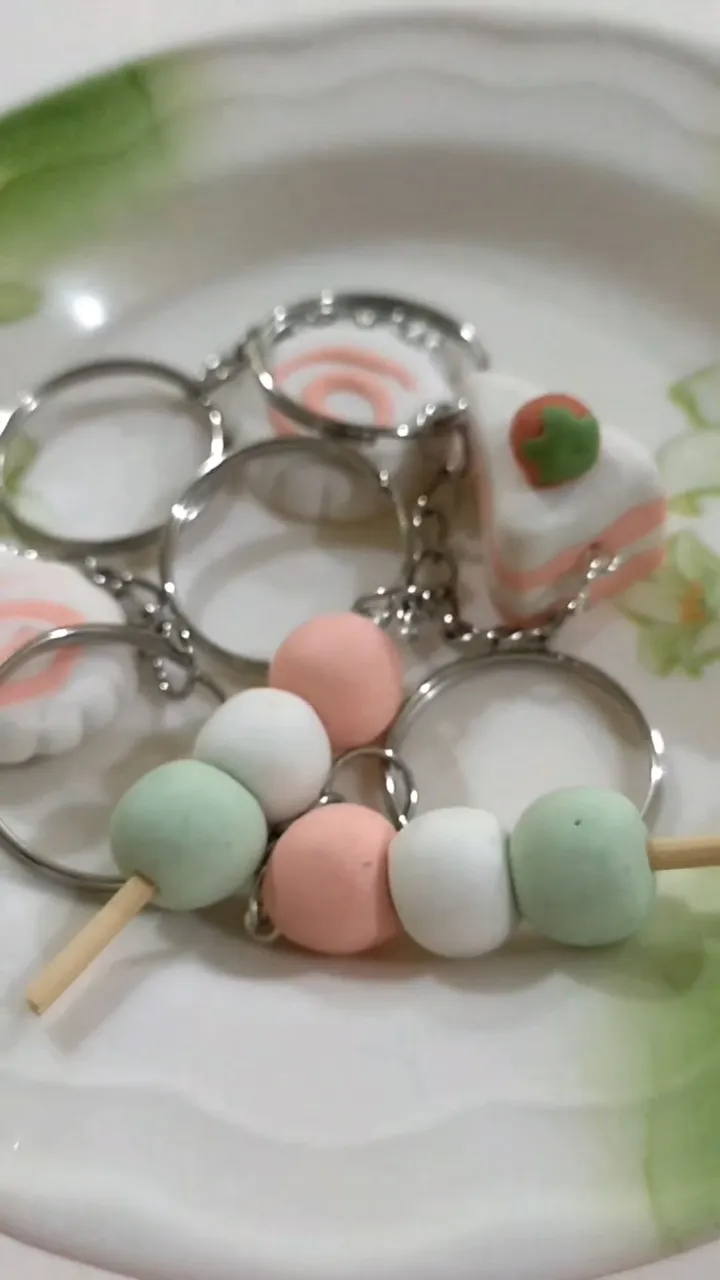
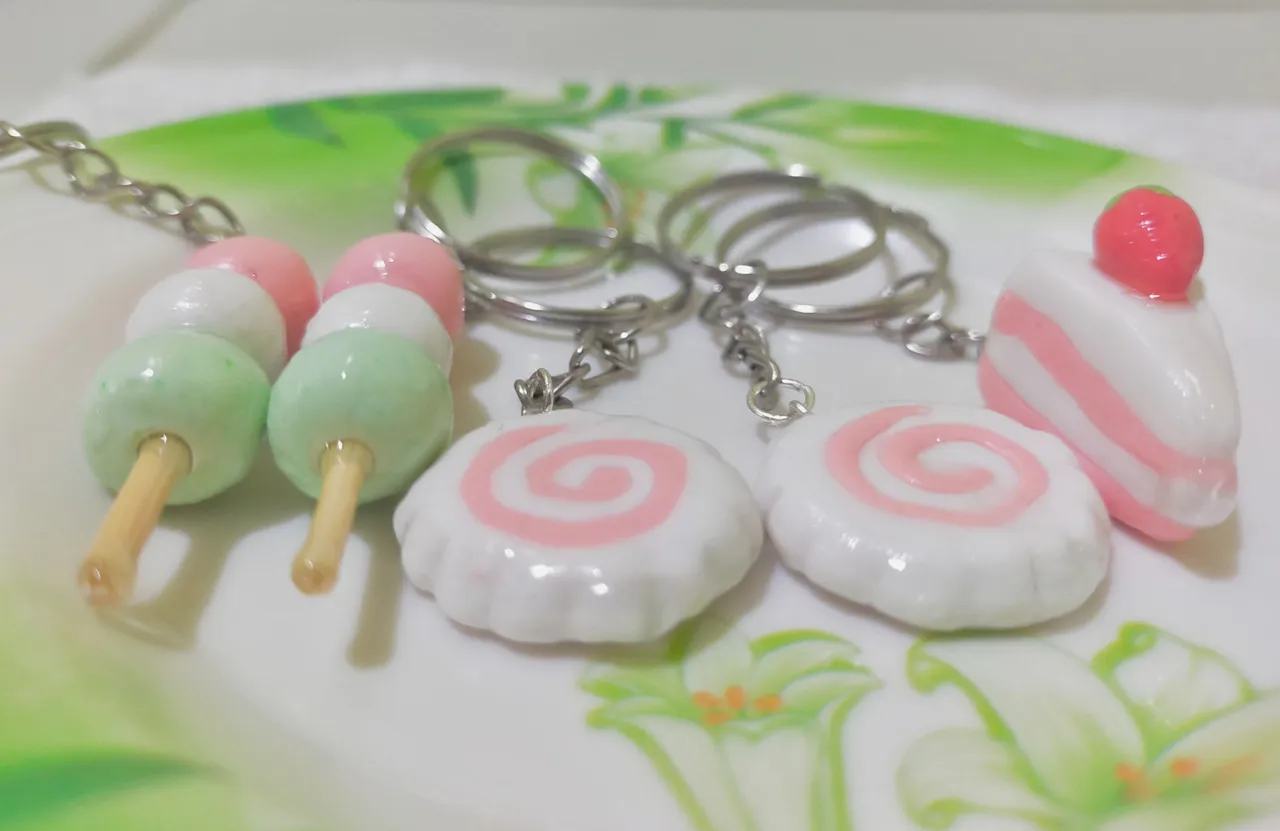
To show a sample of my completely done clay charm, here are my first works and designs. The pink berry, tangerine, fishcake, shortcake and dango.
That's how I make clay charms. As for the packaging, I'm still planning and thinking about it and maybe I'll purchase packaging materials soon when I attract more customers.
To my fellow business owners here who are just starting, hoping and manifesting that we can do it even if little by little.
That's all, thank you everyone! Have a great day!