Welcome to the next post in a series where I describe the adventures during a 5th Edition Dungeons & Dragons campaign I ran a little while ago.
Trigger warning - this post contains disturbing concepts like human sacrifice and murder of young people. Not in graphic detail, but don't read on if you have nightmares about that kind of thing !
In the last post, the characters ventured into the woods to try to find the lair of the hags who had been secretly making life miserable in Tuadun. They persuaded Johann, a captured brigand, to act as their guide. This was a mistake. He led them astray, straight to a pool which was the lair of a young black dragon, Clovermeld.
The dragon very much handed their posteriors to them. They retired to lick their wounds and think up a better plan. By this stage they were without a guide as Morson Blackmont (the party's paladin, of all people !) had casually murdered Johann as they withdrew.

Finding the Lair
If the party didn't come up with a logical, coherent plan to find the lair, then my notes were just that they'd wander the awful swampy forest until they get bored and go home.
But despite having no guide, they did come up with a plan. They worked out that there was an area about 6 miles in diameter where things grew steadily more twisted and blighted the closer to the centre they got. Following a fetid trickle of a stinking stream appeared to be their best way in, so they followed it.
This was, of course correct. The closer to the lair they got, the more blighted the land became.
A Nasty Little Creature
There were plenty of magpies watching the party with their beady little eyes, but little other life. The magpies didn't mock the party as they had before, because they only do that when the hag Claw is with them, and she was a it busy, as we shall see in a minute.
However, as they rounded a bend in the stream, a small and very angry figure ran at them. He totally ignored the majority of the characters, charged directly at Morson Blackmont, and started giving him a really vicious and violent kicking.
This creature was a Redcap (from Volo's Guide To Monsters, page 188). They are rage personified, created due to acts of murder in the Feywild. Heimial Woods aren't technically Feywild, but the blasted forest around the Hag's Lair is certainly unnatural, and Morson's murder of Johann definitely deserved some divine retribution !
Eventually the party were able to put the Recap down, with some difficulty, and then had to rest up after healing Morson's many wounds. He didn't understand why he had been singled out as the object of it's rage....
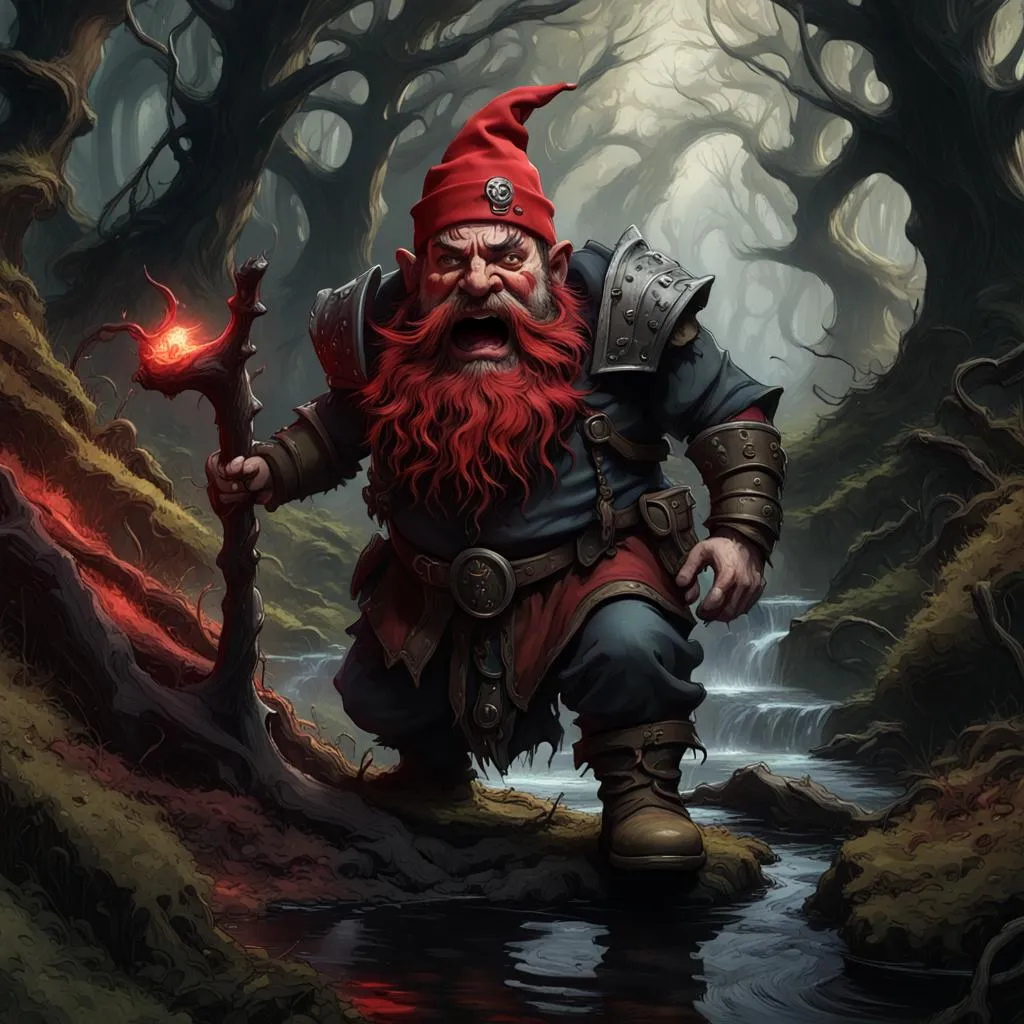
Image created in Nightcafe Studio
The Hags' Lair
The Coven Cave is in a part of the woods which is twisted and dying. Within that area, the ground is broken and hazardous. The trees have vines which snake down to attack travellers, and there are sinkholes and pits of black sucking mud to snag the unwary. There is a profusion of magpies, which will caw and flap loudly, acting as a very effective alarm system.
The cavern entrance is the source of a black, lifeless stream. The cave takes the form of a long, winding passageway with the stream running down it. The air at the entrance is a poisonous fog (DC12, fail = D6 strength loss, 2nd fail = unconscious).
Within are the three hags, Black, White and Claw. They are Green Hags, just as per the Monster Manual.
At the far end is a large cavern with three smaller ones off it (one for each hag). In the centre is a huge cauldron almost full with black blood. It only needs the blood of a single victim… and that victim is Samad, the teenage daughter of the murdered shepherd Mirag. She is firmly chained with bronze chains in Claw’s cave.
If it comes to a fight, Claw will try to kill Samad and drain her blood into the cauldron while Black and White hold off the party. With a few second’s preparation, Claw can be at the cauldron with Samad using her as a human shield, and can complete the ritual (and kill Samad) with a single action.
Black (this time using the name Noira) will be around the corner and within a few feet. She’ll enable magical support, but from out of sight. If seen, she has disguised herself appear to be another chained captive, but will escape if the fight appears to be going the wrong way. It seems that the hags only have limited loyalty to each other !
White will just fade out without being seen. She's not daft.
In the event, the party were successful at gaining entrance and storming the lair. Black slowed them up quite a bit before making good her escape. This gave time for Claw to murder Samad and empty her blood into the cauldron. The ritual is completed by Samad's death, at which point, Claw falls to the ground only to rise again a few moments later transformed into a Nighthag.
Cackling wildly, the newly "promoted" hag escapes by fading into the Ethereal Plane, with the last thing the characters hear from her being that now things will really start to get unpleasant for the people of Tuadun.
The Hags’ Loot
Naturally, the characters searched and looted the lair ! Each hag collects something different in her cavern;
Black: Charms and things with mirrors or highly reflective. Prized possessions include a small mirrored compact, which when the word “Baladar” is spoken will show what the person you are looking at most wants in the world right now. A triple charm necklace; 3 sheeps-head charms which will turn into a fabulous feast for all assembled but only when Mina* is full. Any other time, the feast will be amazing and next day everyone who touches it will go down with the worst case of norovirus ever. About 500gp worth of actual jewellery – diamond bracelets etc.
- Mina is the smaller of the two moons of Argull. Yes, I've got tables showing the phases of the moon....
White: Herbs, bits of animal (medicinal, but that may not be obvious). Prized possessions include a wand of Cure Light Wounds which does so by sucking the HP from the nearest 3 people. 5 vials of antitoxin, 5 vials (visually identical to the antitoxins) of highly potent toxin.
Claw: all kinds of trikets linked to demon-lore. Curses of all kinds. Magpie things. About 600gp of gold and orichalcum coinage. A ring of demon summoning (1-2 = Vrock, 3-4 = Hezrou, 5 = Glabrezu, 6 = Nalfeshnee, 7 = Marilith, 8 = Yochlol*). But of course, you’d also need the knowledge to draw the correct circle and triangle on the floor and the details of the ritual to actually control the summoned demon – the ring has a compartment with chalk in.
Next time..... a journey to Filrath....
Previous posts in this series;
The Tarak D&D Campaign - Setting Part 1
The Tarak D&D Campaign - Setting Part 2
The Tarak D&D Campaign - Setting Part 3
The Tarak D&D Campaign - Player Creation and Briefing
The Tarak D&D Campaign - Arrival At Tuadun
The Tarak D&D Campaign - Mayor Gerd's Problems
The Tarak D&D Campaign - Saving Shepherd Mirag
The Tarak D&D Campaign - Mother White and Sister Raben
The Tarak D&D Campaign - The First Venture Into the Heimial Forest
The Tarak D&D Campaign - An Unpleasant Encounter
The Tarak D&D Campaign - Back to the Woods, and an Important Discovery
The Tarak D&D Campaign - Back Into The Bad Woods