Hello everyone... ✨
Hello to my dear Hivers and the dear community of artists,#Jewelry as always very pleased and excited to be here again, showing you my work made with love and especially for you.
Greetings to the Splinterlands community, and everyone who lives there, I'm here to join the Splinterlands Social Media Challenge!
Today I am with you again to show you my art, I love every week to go through this wonderful world of magic, color, and lots of Splinterlands characters to look for new elements or characters to build different crafts such as jewelry, accessories, 3D figures and other things that motivate me, inspire me and activate my creativity and thus be able to create for you.
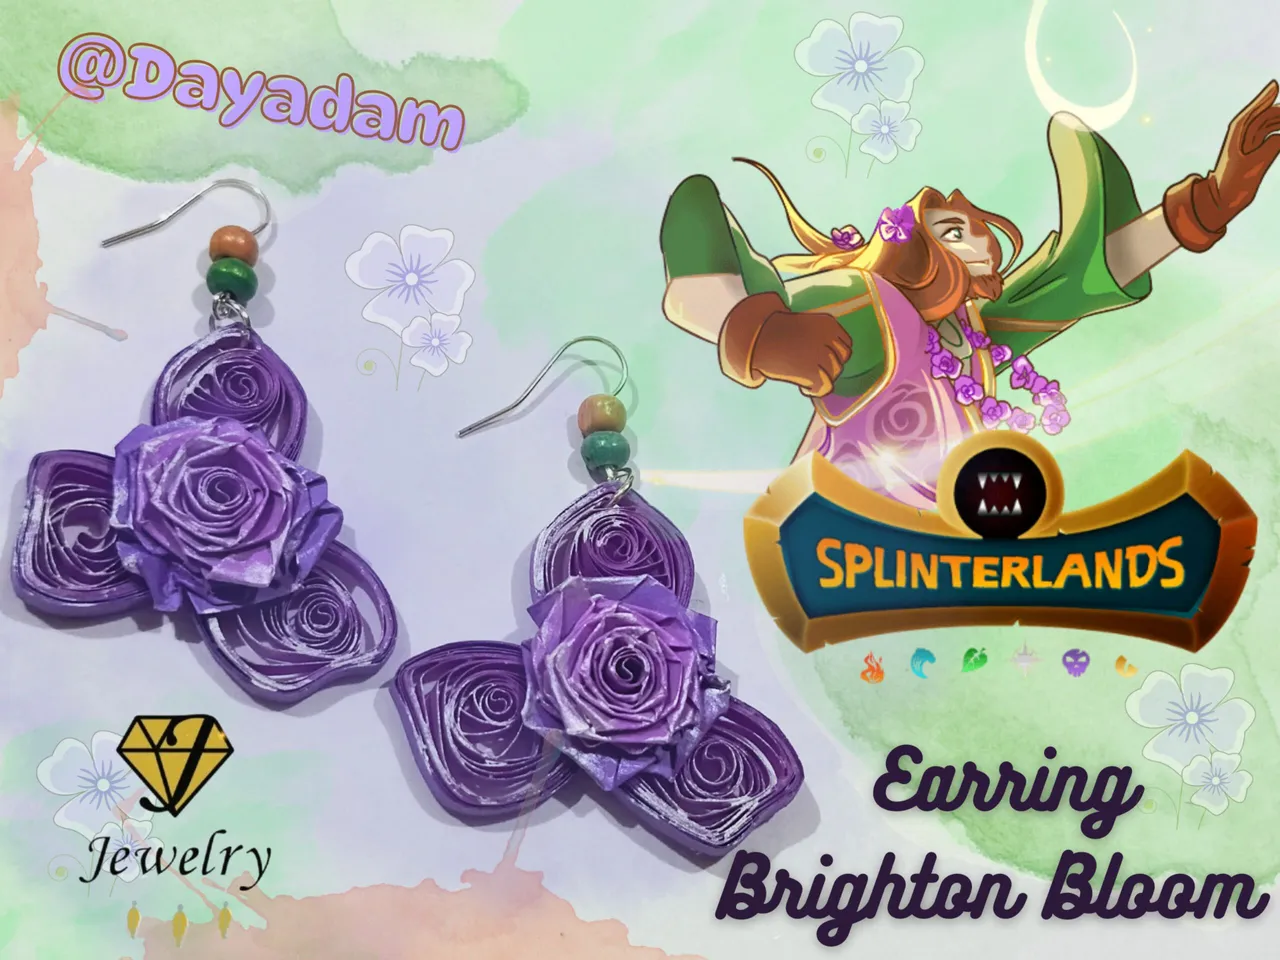
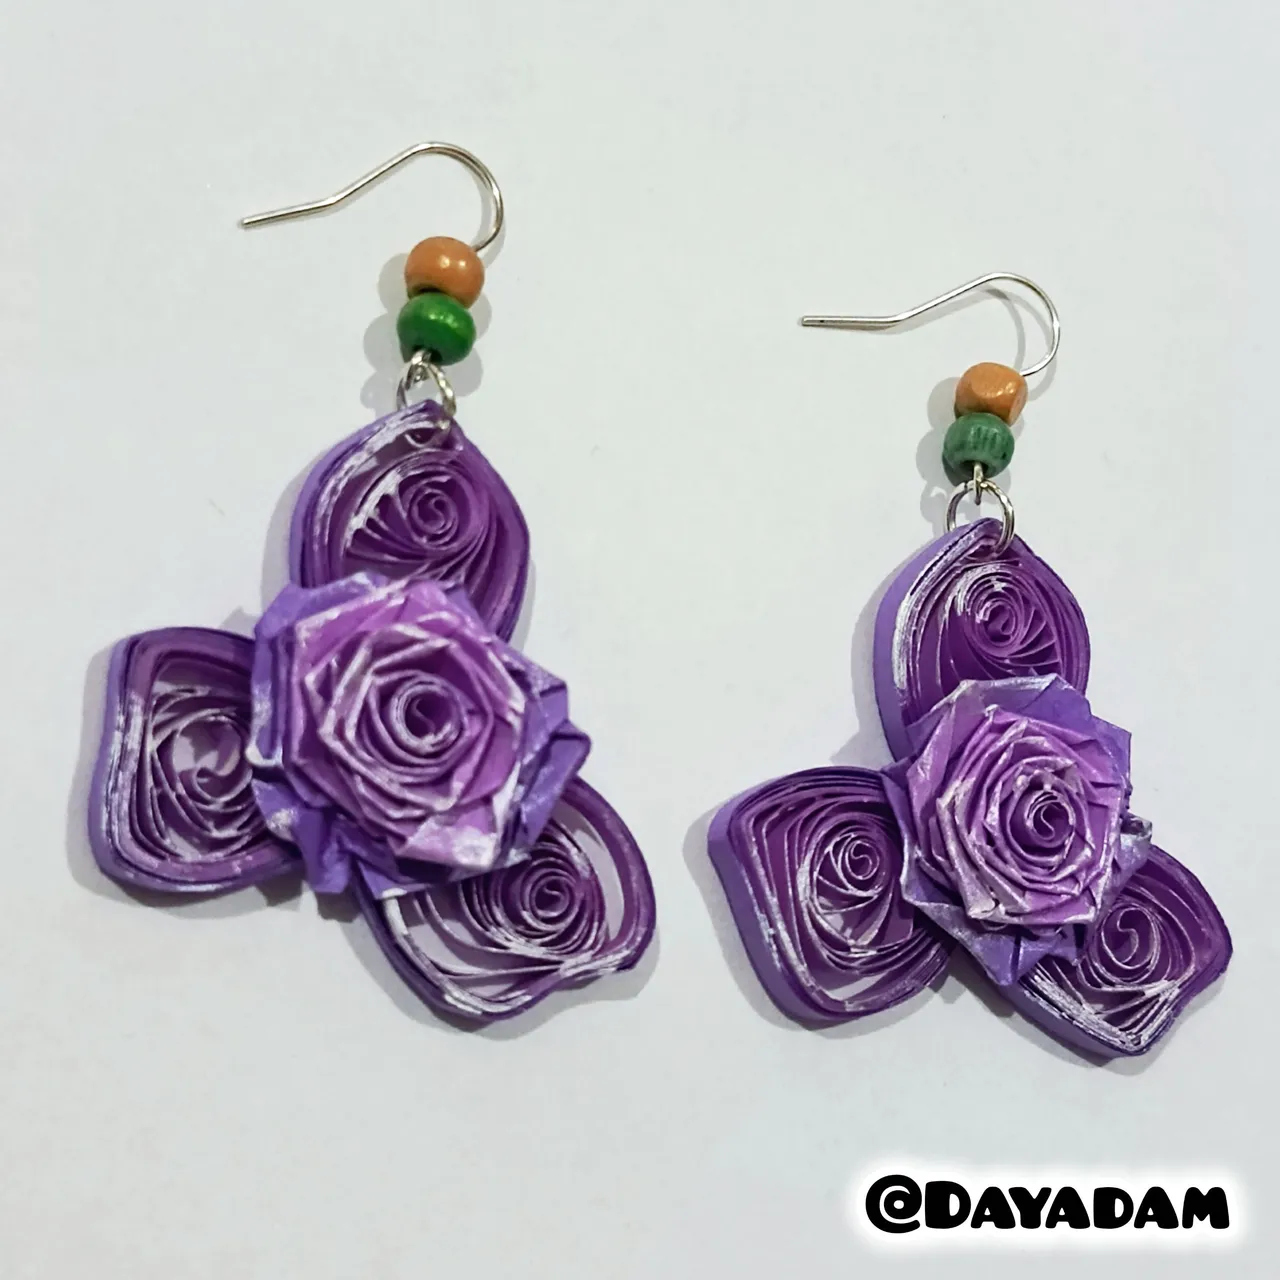
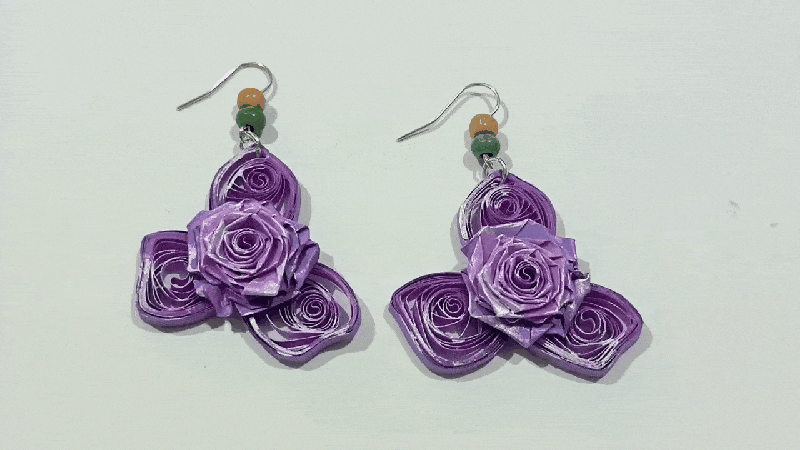
Today I bring you a new piece of art. I wanted to make a pair of dangling earrings inspired by elements from the card, “Brighton Bloom”, using the quilling technique.
If you want to know more about the game, I leave you my reference link to enter it and navigate through this wonderful world: https://splinterlands.com?ref=dayadam
Hoping you like my work, without further ado, I leave you with my creative process.
Let's start:😃

Hola a Todos...✨
Hola a mis queridos Hivers y a la querida comunidad de artistas #Jewelry, como siempre muy complacida y emocionada de encontrarme por acá nuevamente, mostrándole mi trabajo hecho con mucho amor y especialmente para ustedes.
Un saludo para la comunidad de Splinterlands, y todos los que hacen vida por allí, estoy por acá para unirme al reto Splinterlands Social Media Challenge!
Hoy estoy con ustedes nuevamente para mostrarles mi arte, me encanta semana a semana pasar por ese maravilloso mundo de magia, color, y muchísimos personajes de Splinterlands para buscar nuevos elementos o personajes para construir diversas manualidades bien sean bisutería, accesorios, figuras en 3D entre otras cosas que me motiven, inspiren y activen mi creatividad y de esa manera poder crear para ustedes.
Para hoy les traigo un nuevo trabajo de arte, quise realizar un par de zarcillos colgantes inspirados en elementos de la carta, "Brighton Bloom" en la técnica de quilling.
Si quieren saber más con respecto al juego les dejo mi enlace de referencia para que ingresen en él, y naveguen por este maravilloso mundo: https://splinterlands.com?ref=dayadam
Esperando les guste mi trabajo, sin más preámbulos, les dejo mi proceso creativo.
Comencemos:😃
 |
 |
 |

• Cintas para quilling moradas de 2 tonos.
• Aguja para quilling.
• Pintura metalizada color perla.
• Argollas de bisutería.
• Bases para zarcillos colgantes (anzuelos).
• Perlas de madera verdes y naranjas.
• Pega blanca extra fuerte (de carpintería).
• Tijera.
• Pincel.
• Alicate.
• Two-tone purple quilling strips.
• Quilling needle.
• Pearl-colored metallic paint.
• Jewelry rings.
• Hooks for dangling earrings.
• Green and orange wooden beads.
• Extra-strong white glue (carpentry glue).
• Scissors.
• Paintbrush.
• Pliers.

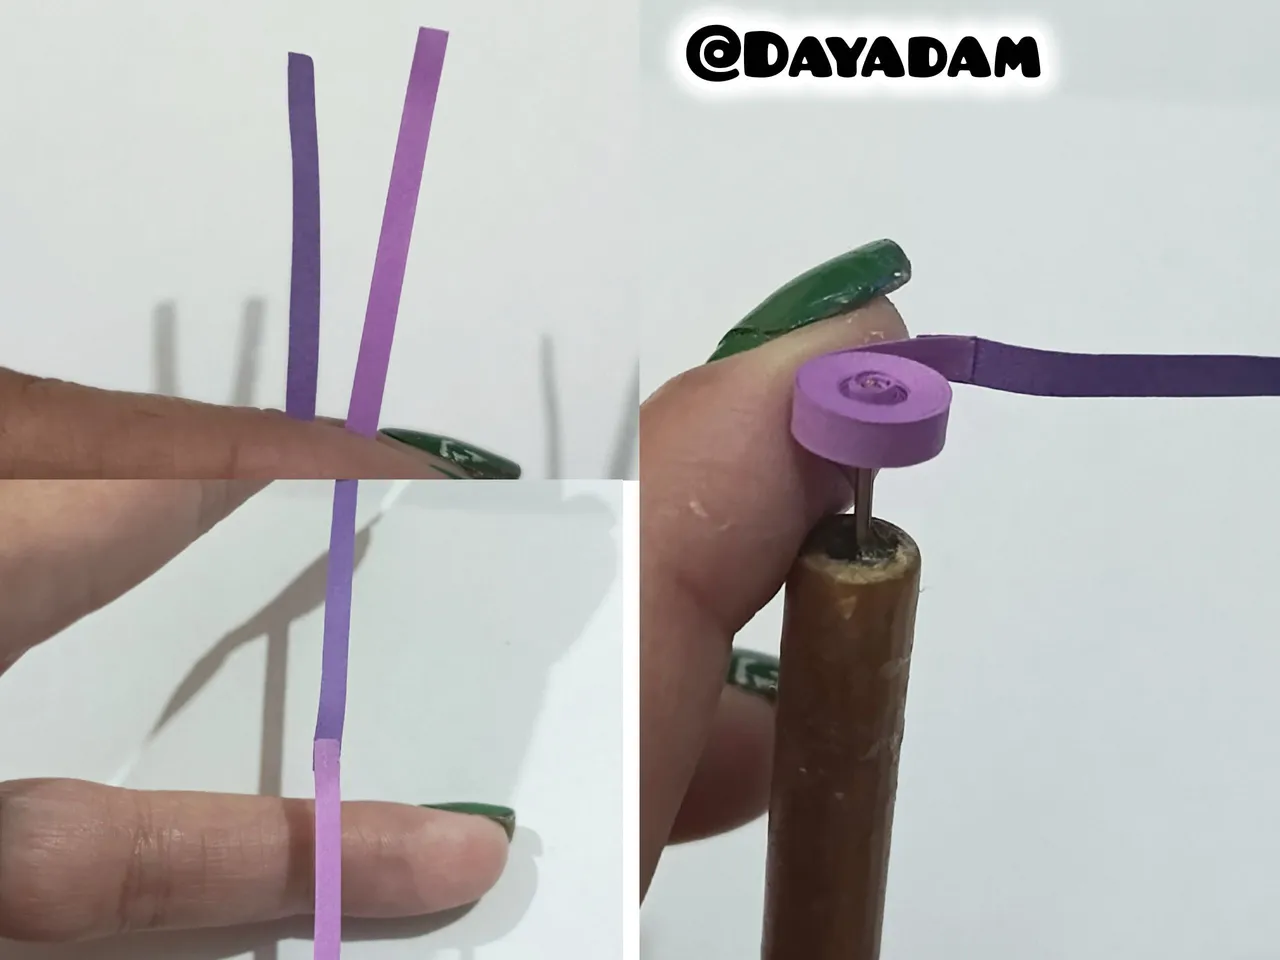
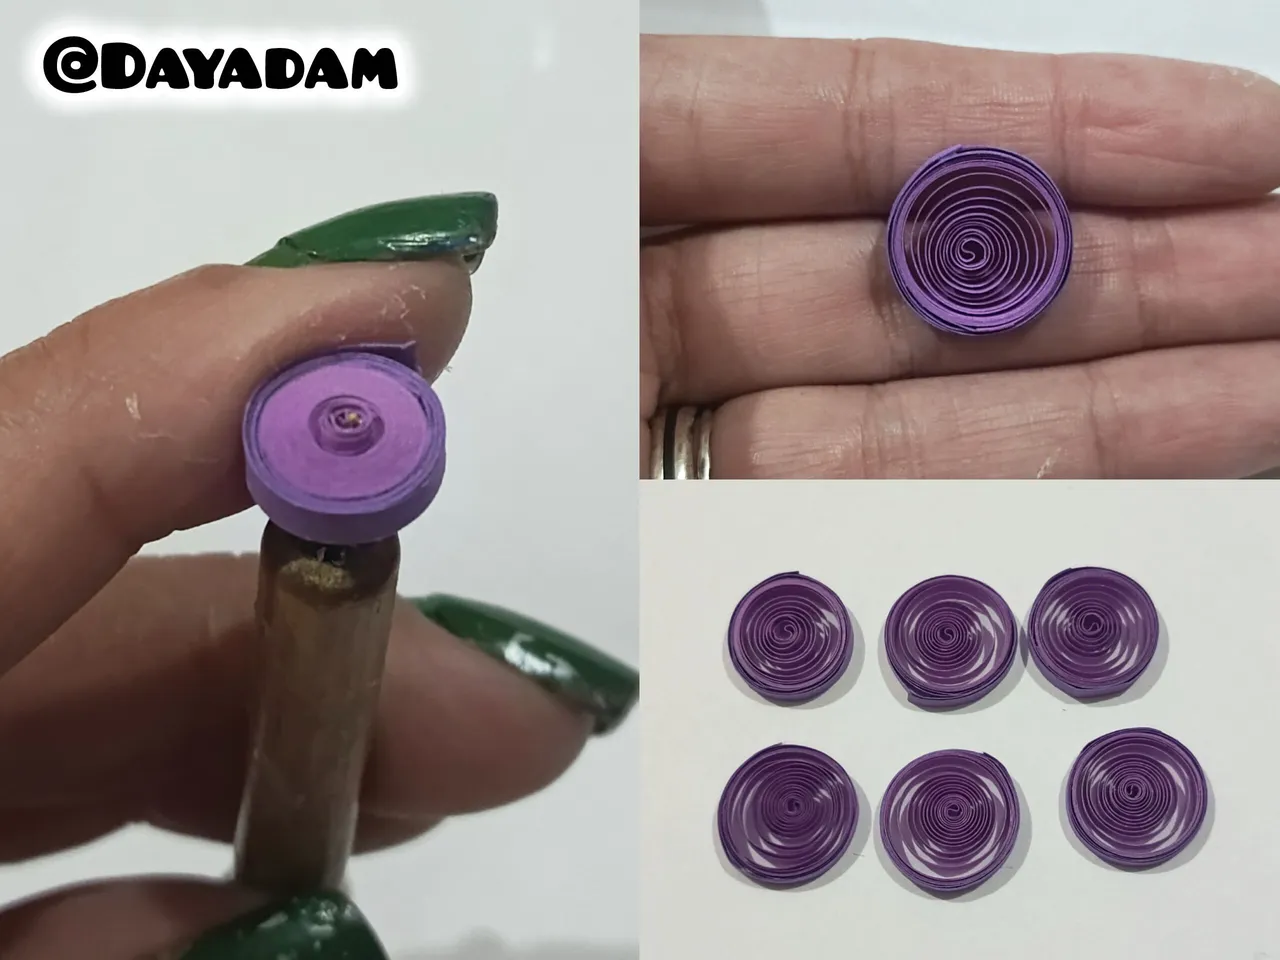
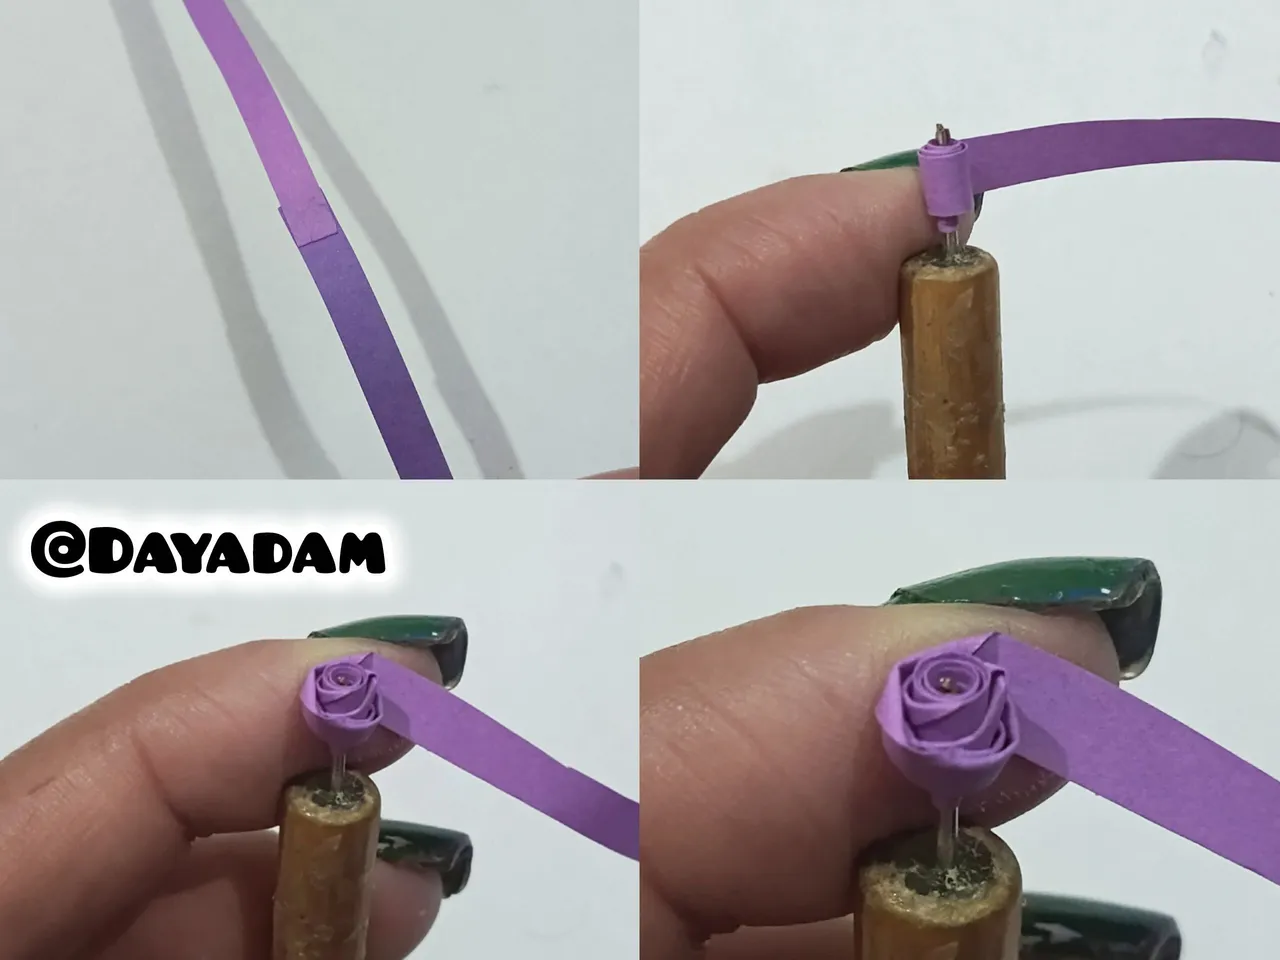
• I started by taking 3 mm wide quilling tape in two shades of light and dark purple, joined them together as if they were a single strip, and rolled them up with the quilling needle, starting with the light side and ending with the dark side. I removed the tape from the needle, loosened it a little, and sealed it with extra-strong white glue to create an open circle. To make two flowers, we will need six identical circles.
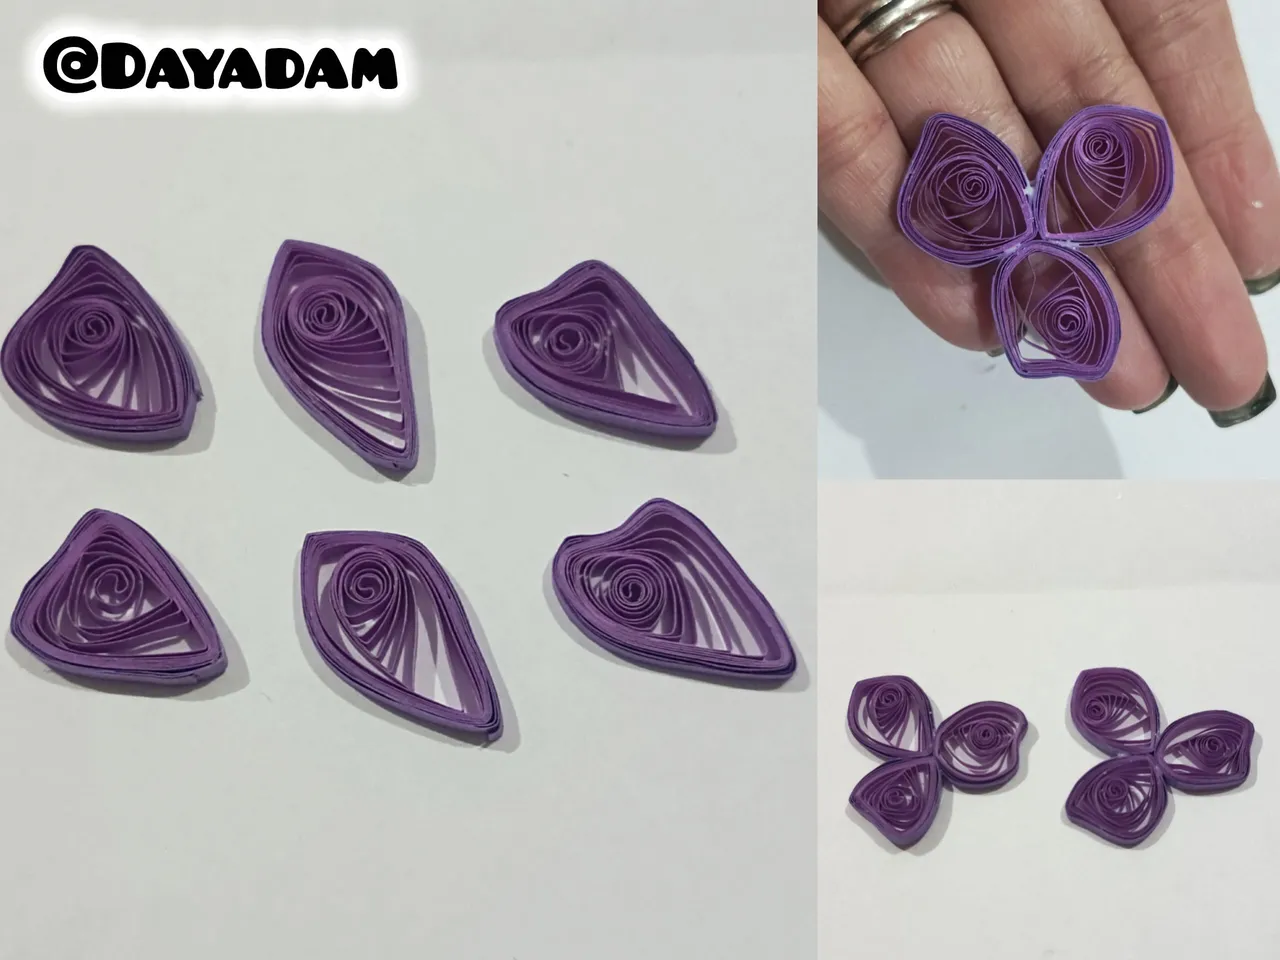
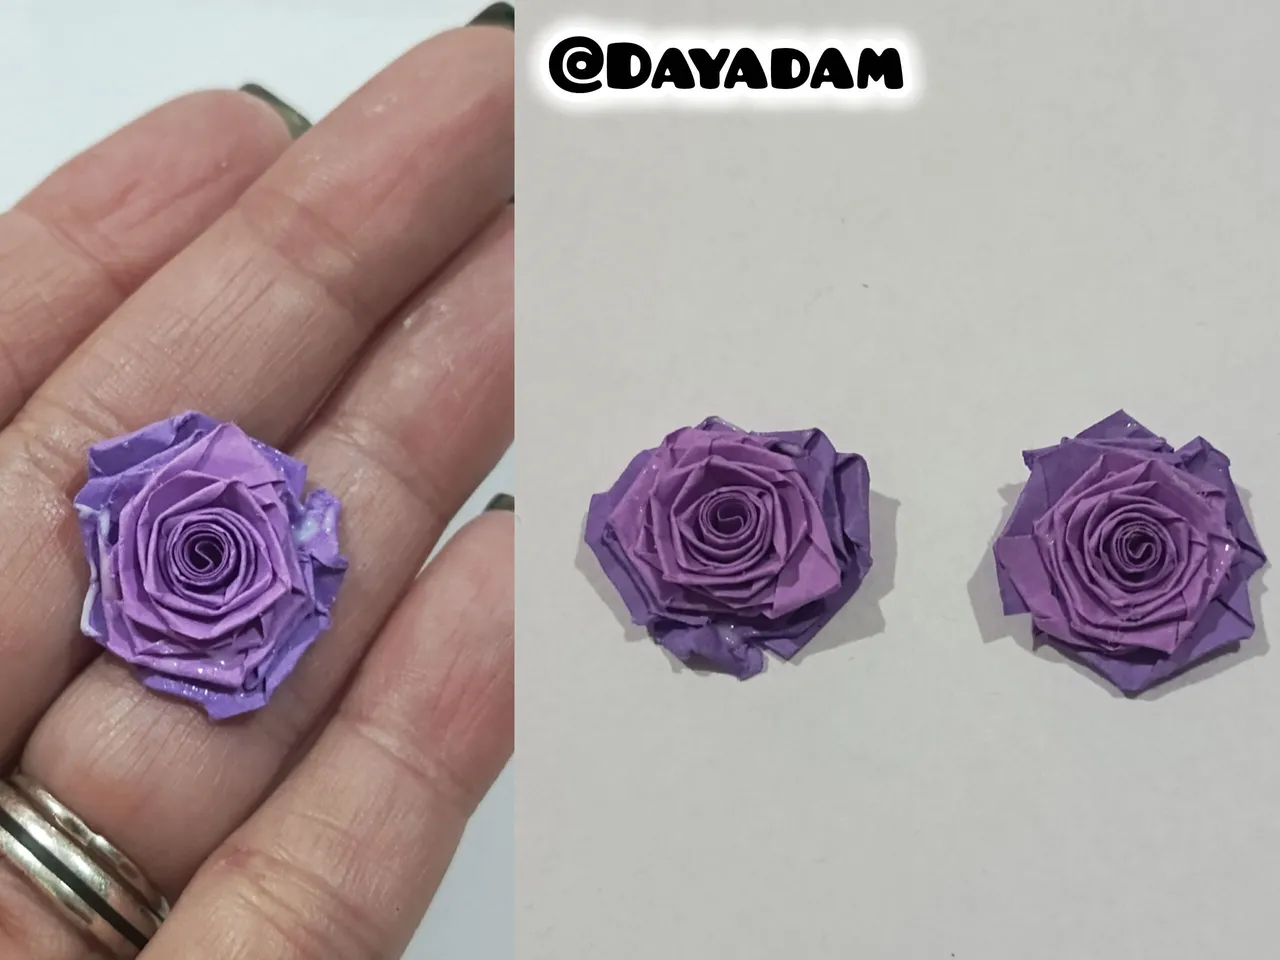
• Once the circles were ready, I proceeded to shape them as you can see in the image, then I glued them in groups of three to form the central pendant of the flower I want to make for the earrings.

• Comencé tomando cinta para quilling de 3 mm de ancho de 2 tonalidades de morado claro y oscuro, uní como si fuera una sola cinta, con la aguja para quilling enrollé comenzando por el lado claro hasta terminar con el oscuro, saqué de la aguja solté un poco y sellé con pega blanca extra fuerte, para conseguir un círculo abierto. Para realizar dos flores vamos a necesitar seis círculos iguales.
• Listos los círculos procedí a moldearlos tal y como pueden ver en la imagen, luego pegué en grupos de tres, para formar el dije central de la flor que quiero realizar para los aretes.
 |  |  |
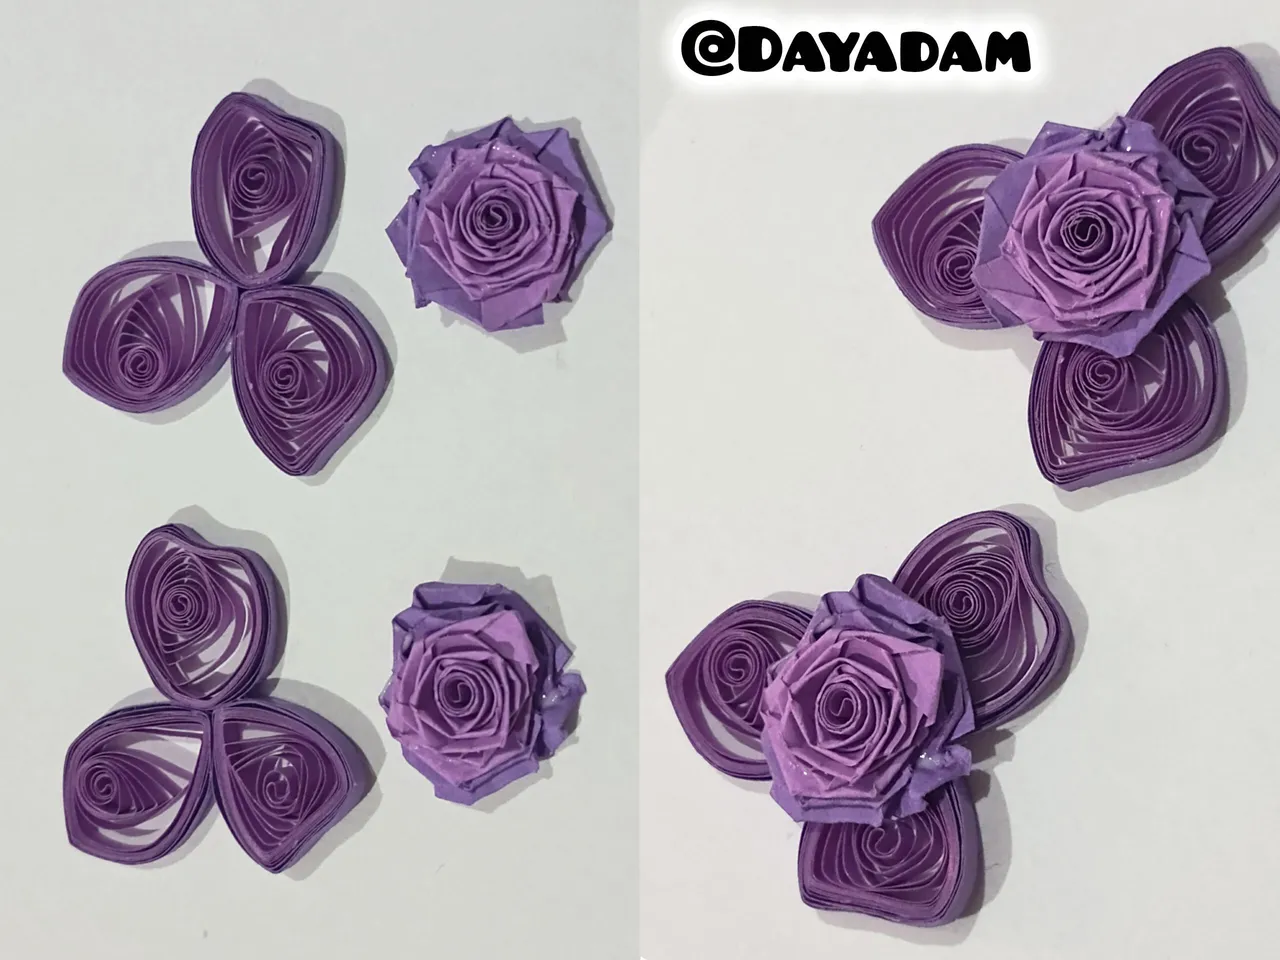
• This time, I made a rose using purple ribbons of both shades, 4 mm wide. Once the rose was ready, I glued it on top of the other petals I had made.
I had previously made roses using the quilling technique for a set of jewelry accessories. If you want to see the step-by-step process, you can do so at this link.
• Procedí a realizar una rosa esta vez con cintas moradas de ambas tonalidades de 4 mm de ancho, una vez lista la rosa La pegué arriba de los otros pétalos que realicé.
Con anterioridad realicé rosas materializadas en un set de accesorios de bisutería en la técnica de quilling, si quieres ver el paso a paso de la misma puedes hacerlo por este link.
 |  |  |
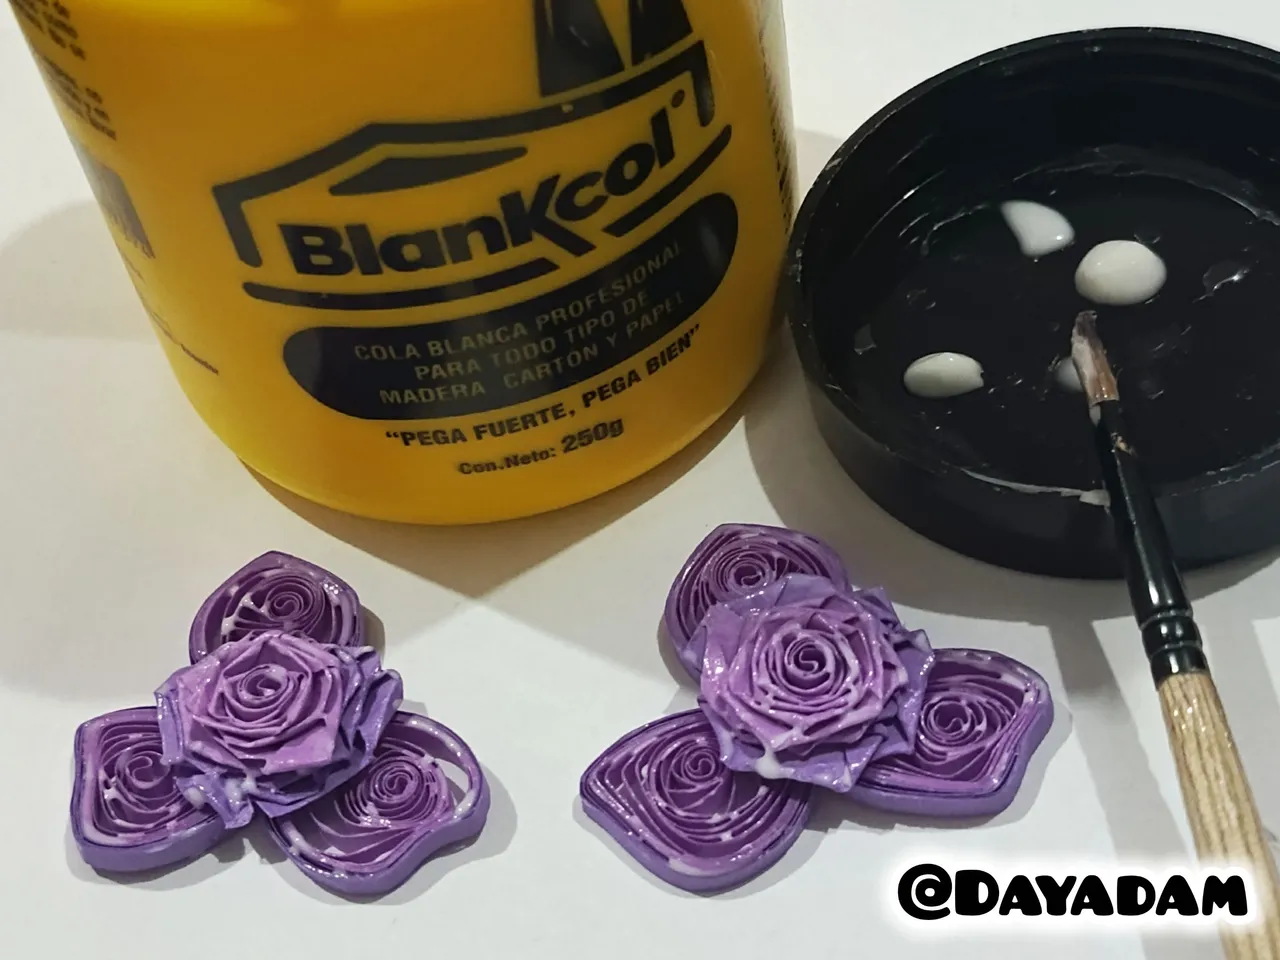
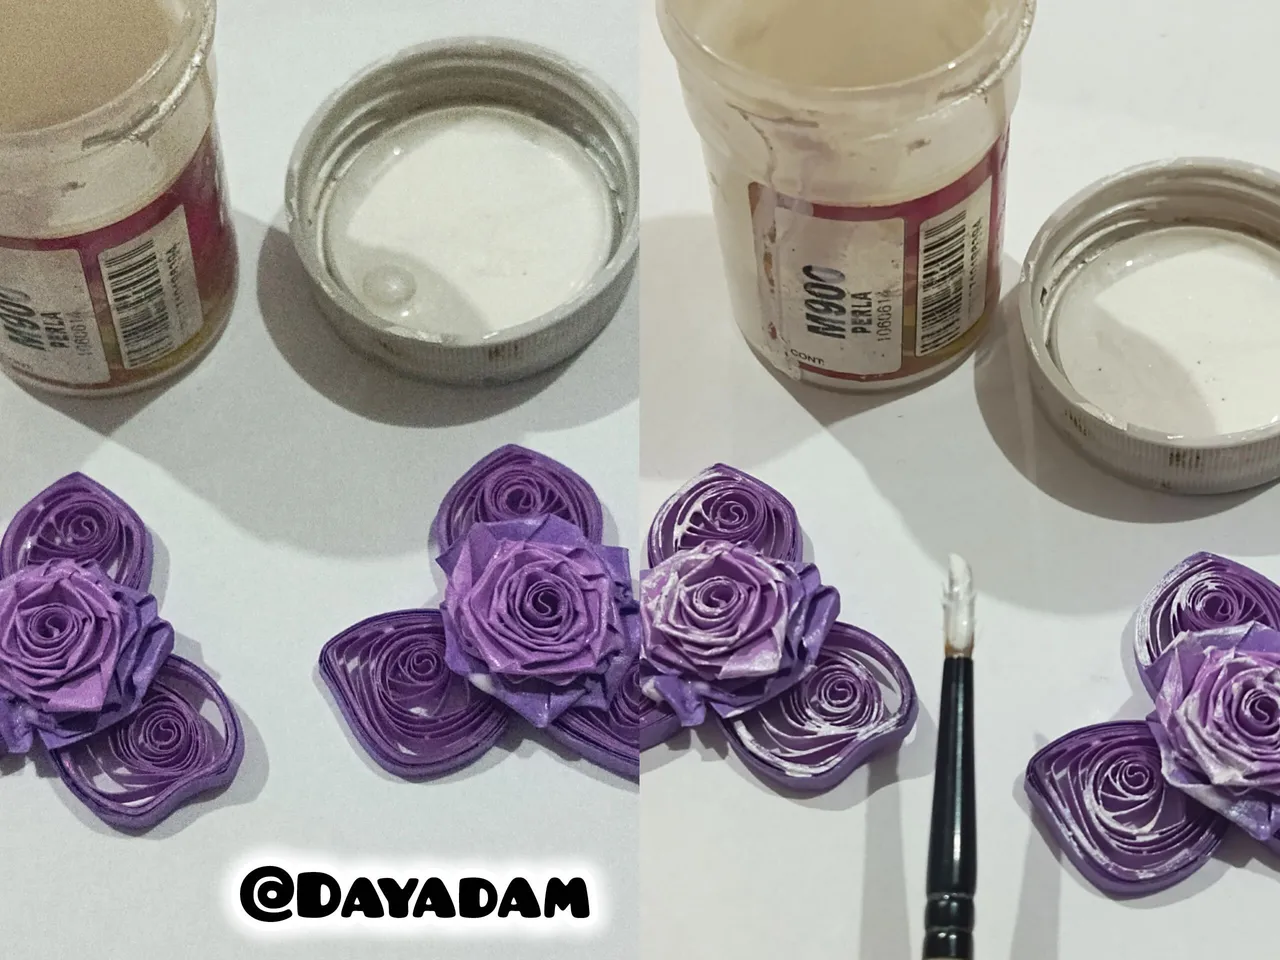
• To protect and laminate the flowers, I applied several layers of extra-strong white glue, allowing each layer to dry thoroughly between applications so that they would harden properly.
• Using pearlescent metallic paint, I added some highlights and details to the petals and roses, allowing them to dry thoroughly.
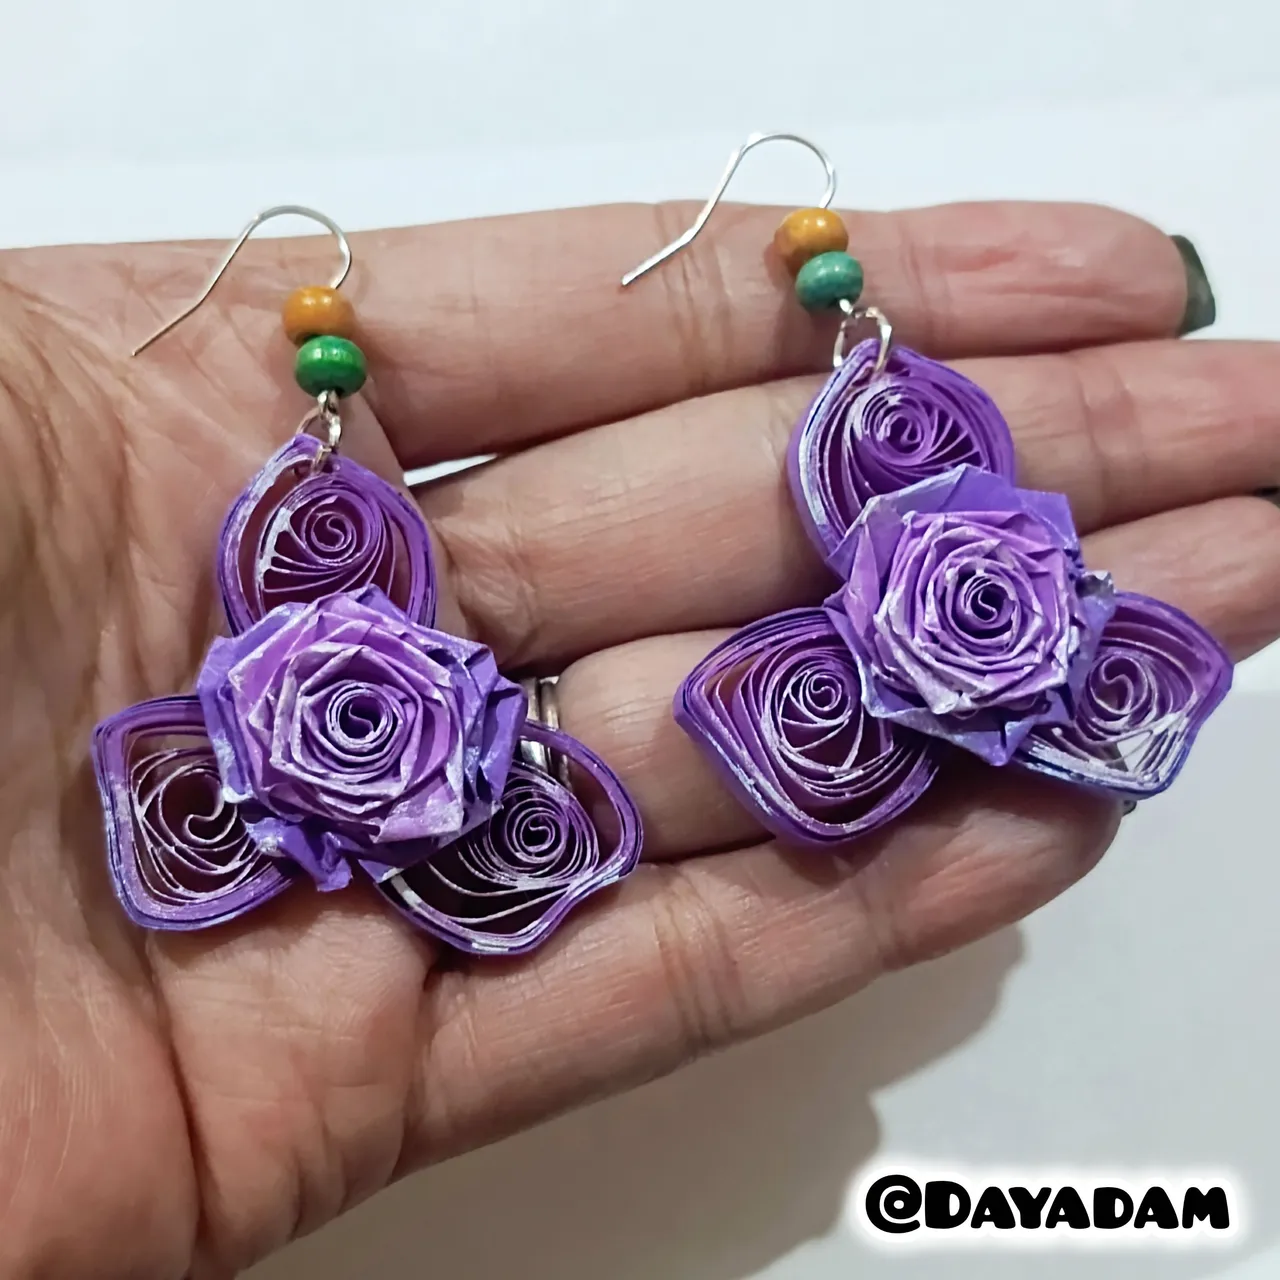
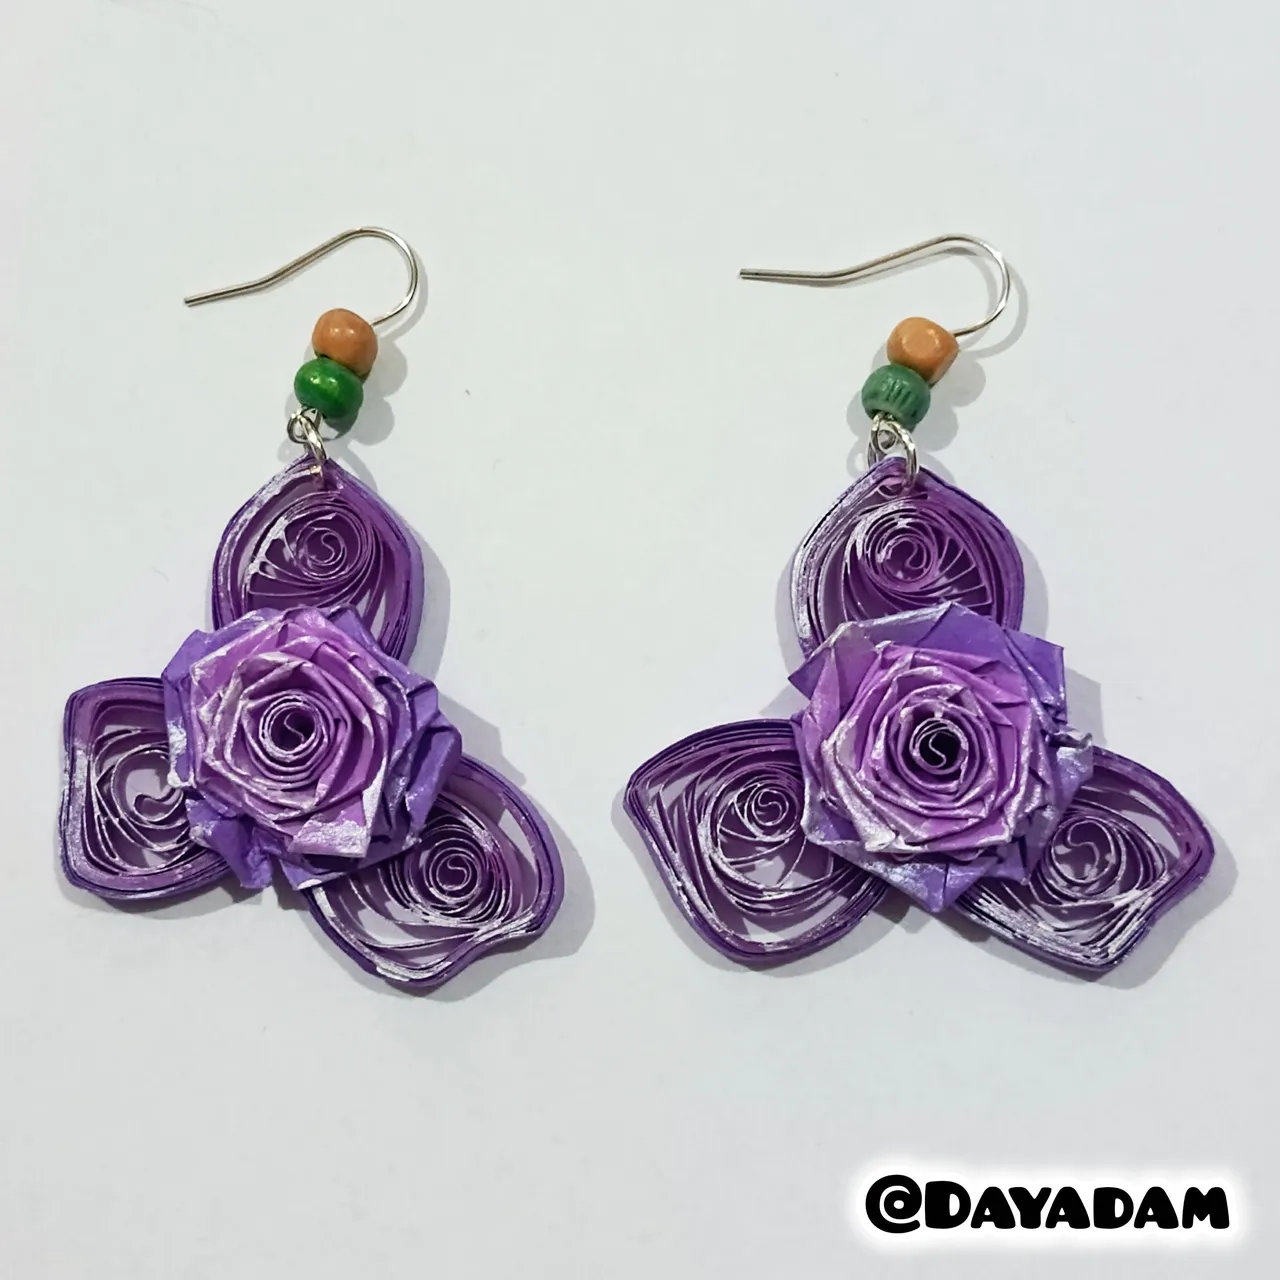
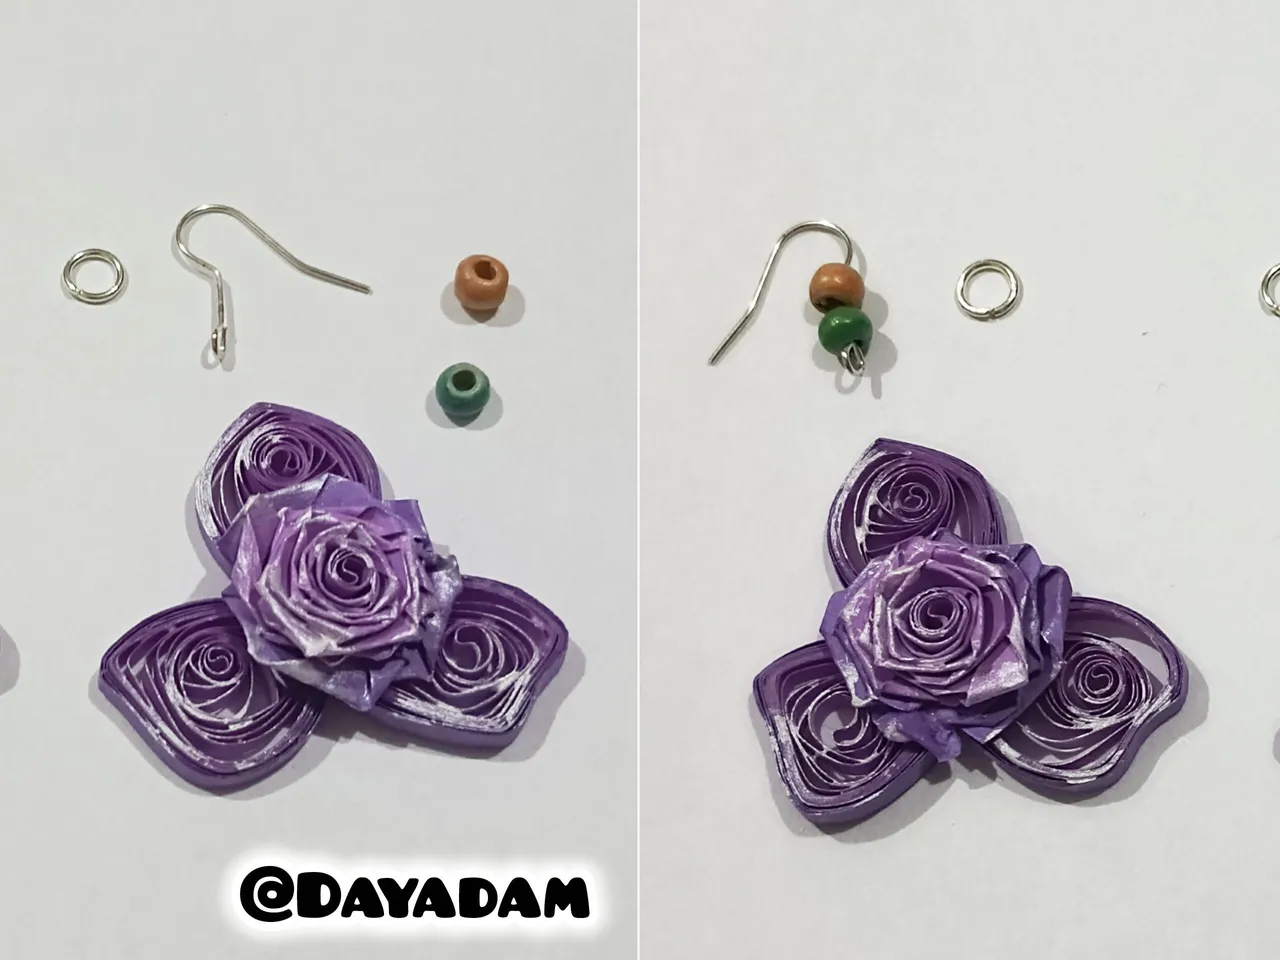
• To make the dangling earrings, I took the earring bases (hooks) and attached two wooden beads, one green and one orange, to contrast with the character's color and make the earrings more eye-catching.
• Once the bases were decorated, I attached a jewelry ring and hooked it onto the top of the flower.
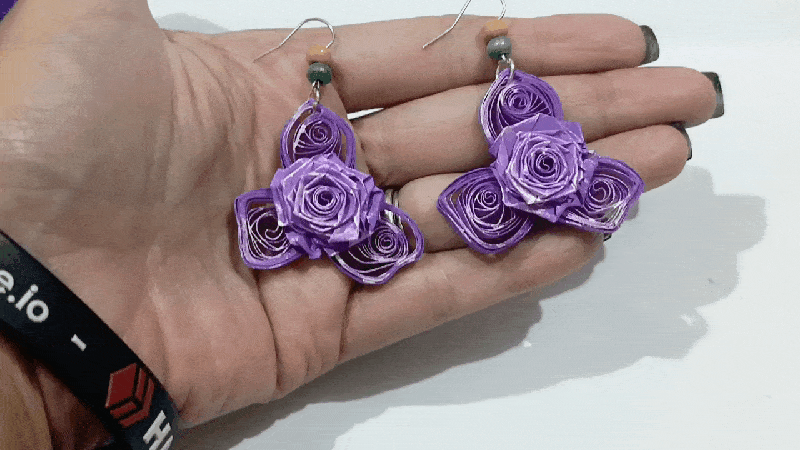
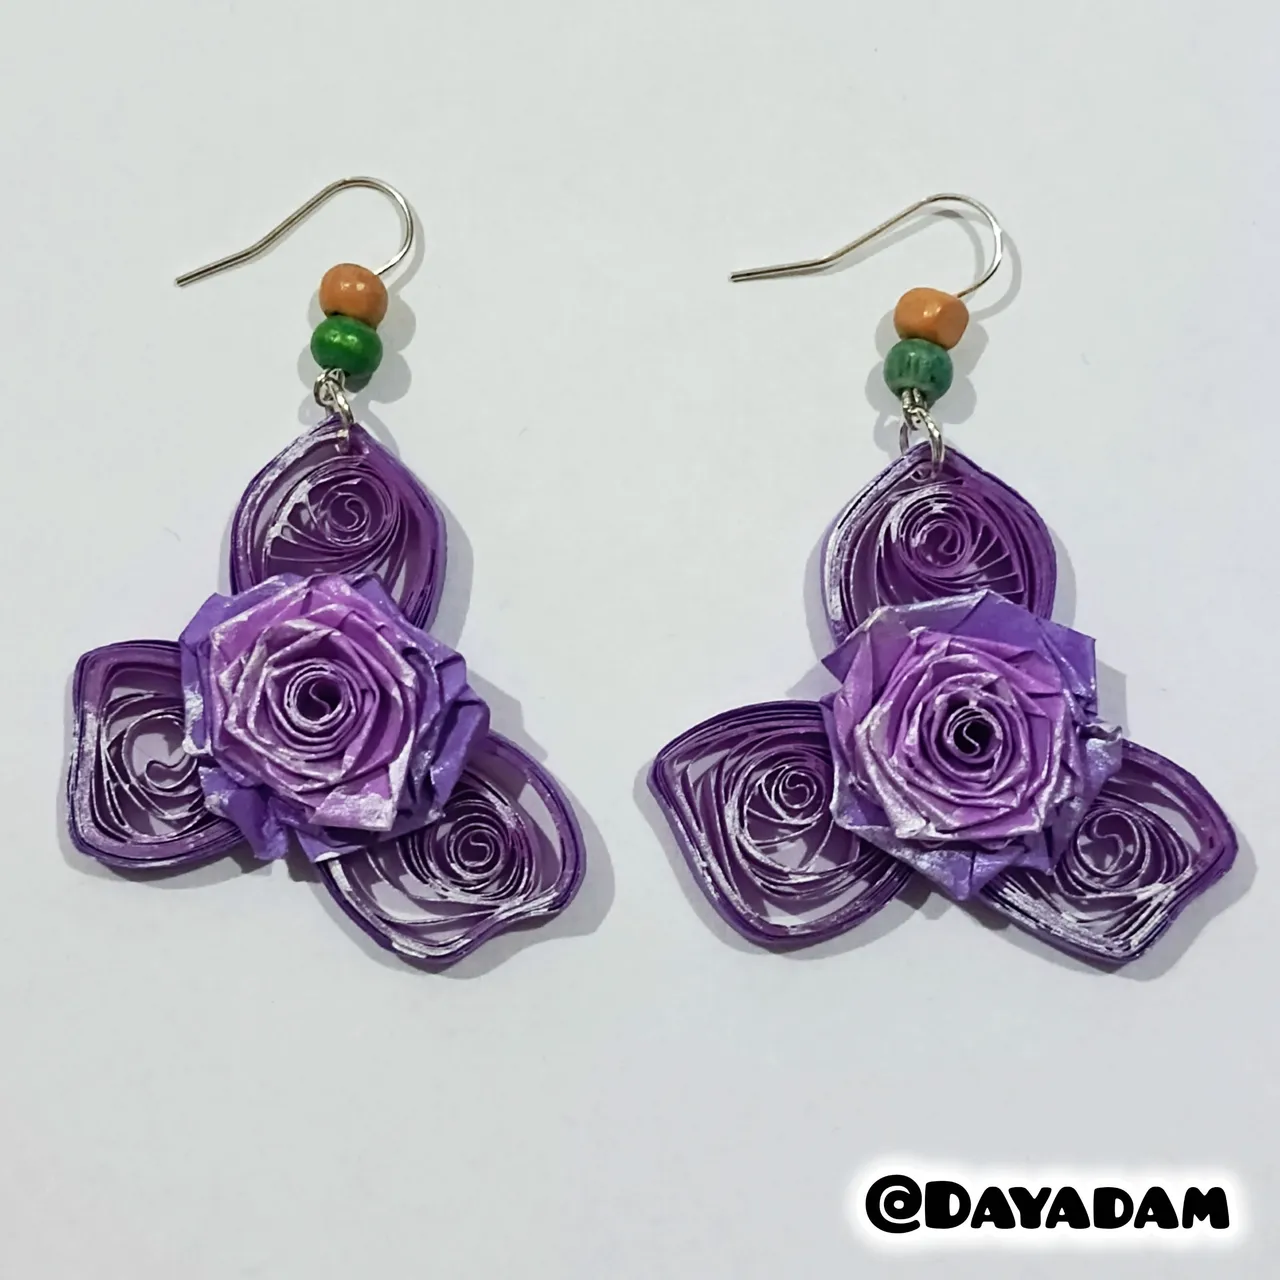
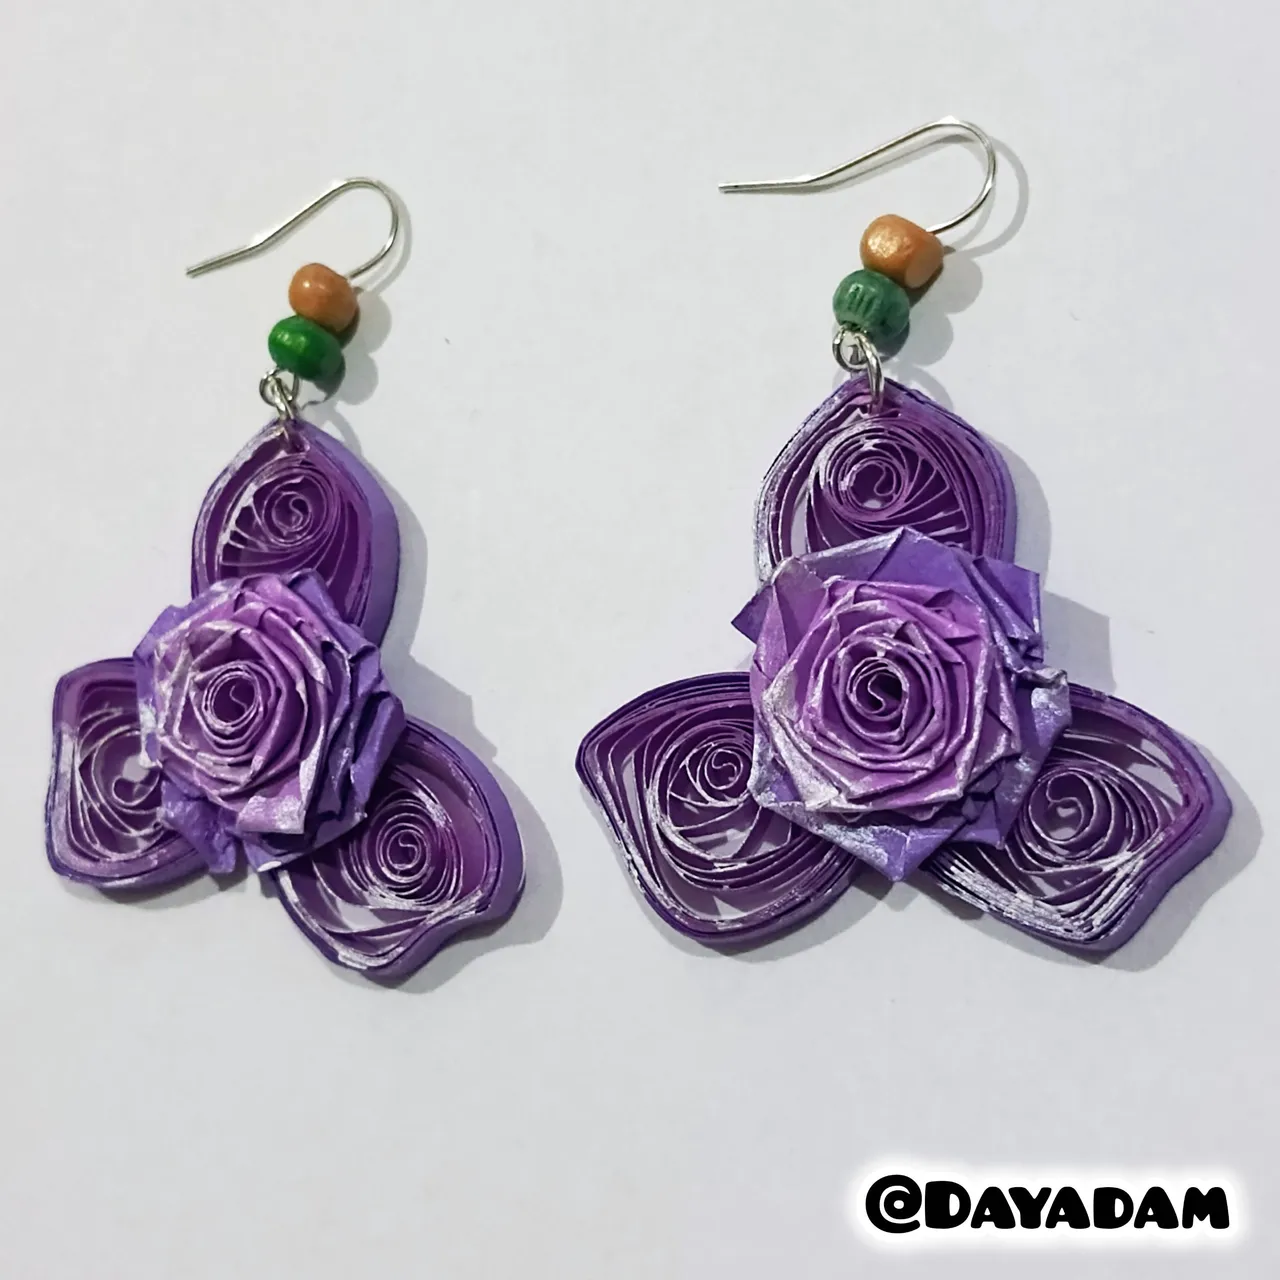
And that's how we finished this pair of dangling earrings, inspired by the flowers on the character from the card “Brighton Bloom”.
• Para proteger y plastificar las flores, procedí a aplicar varias capas de pega blanca extra fuerte, dejando secar entre una capa y otra para que endurezcan muy bien.
• Con pintura metálica color perlado realicé algunas luces y detalles a los pétalos y las rosas, deje secar muy bien.
• Para formar los aretes colgantes tomé las bases para zarcillos (anzuelos), a los cuales le coloqué dos perlas de madera una color verde y otra color naranja para que contraste con el color del personaje, y al mismo tiempo para darle mayor vistosidad al par de aretes.
• Decoradas las bases para finalizar, coloqué una argolla de bisutería y enganché en la parte de arriba de la flor.
De esta manera tenemos listo este par de zarcillos colgantes que elabore, inspirados en las flores del personaje de la carta "Brighton Bloom".
 |  |  |

 |
|  |
|
 |  |
 |

What did you think, did you like it?
I hope you did, I hope you liked my explanation, procedure and photos, I made them with love for you.
"Let out that muse that inspires you, and let your imagination fly".
Thank you all, see you next time.
¿Que les pareció, les gustó?
Espero que sí, que les haya gustado mi explicación, procedimiento y fotos, los hice con mucho cariño por y para ustedes.
"Deja salir esa musa que te inspira, y deja volar tu imaginación".
Gracias a todos, nos vemos en la próxima.
Banner y separador hecho por mí en Canva