Hola mis queridos y apreciados amigos ,feliz noche tengan todos ,espero que se encuentren bien, que hayan pasado un día agradable ,es un placer estar compartiendo nuevamente con ustedes, hoy les quiero compartir un tutorial de cortos pasos ,es la restauración de un cintillo en un modelo sencillo y básico pero lo más importante muy hermoso y delicado ,es ideal para las personas que están aprendiendo a crear ,sin más que decir a continuacion les mostraré los pasos y materiales que utilice,les invito que lleguen al final de el post y aprendan junto conmigo
Hello my dear and appreciated friends, happy evening have all, I hope you are well, you have had a nice day, it is a pleasure to be sharing again with you, today I want to share a tutorial of short steps, is the restoration of a headband in a simple and basic model but most importantly very beautiful and delicate, is ideal for people who are learning to create, without more to say below I will show the steps and materials used, I invite you to reach the end of the post and learn along with me

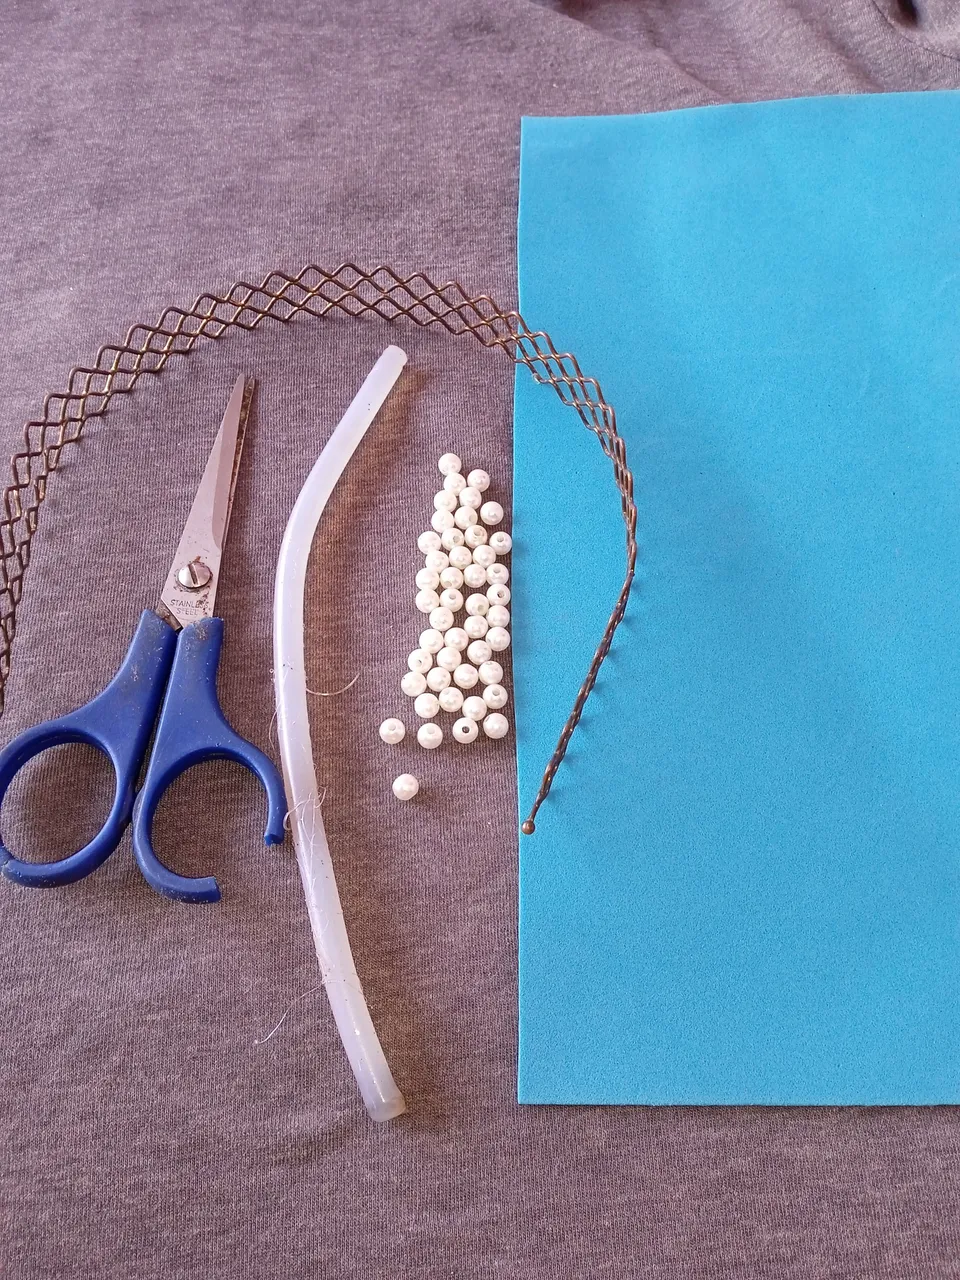
Materiales que utilice :
-Cintillo a restaurar
-Foamis
-Tijera
-Silicon
-Piedras plásticas torno perla
Materials I used :
-Cintillo to restore
-Foamis
-Scissors
-Silicon
-Plastic stones pearl lathe
A continuación los pasos a seguir:
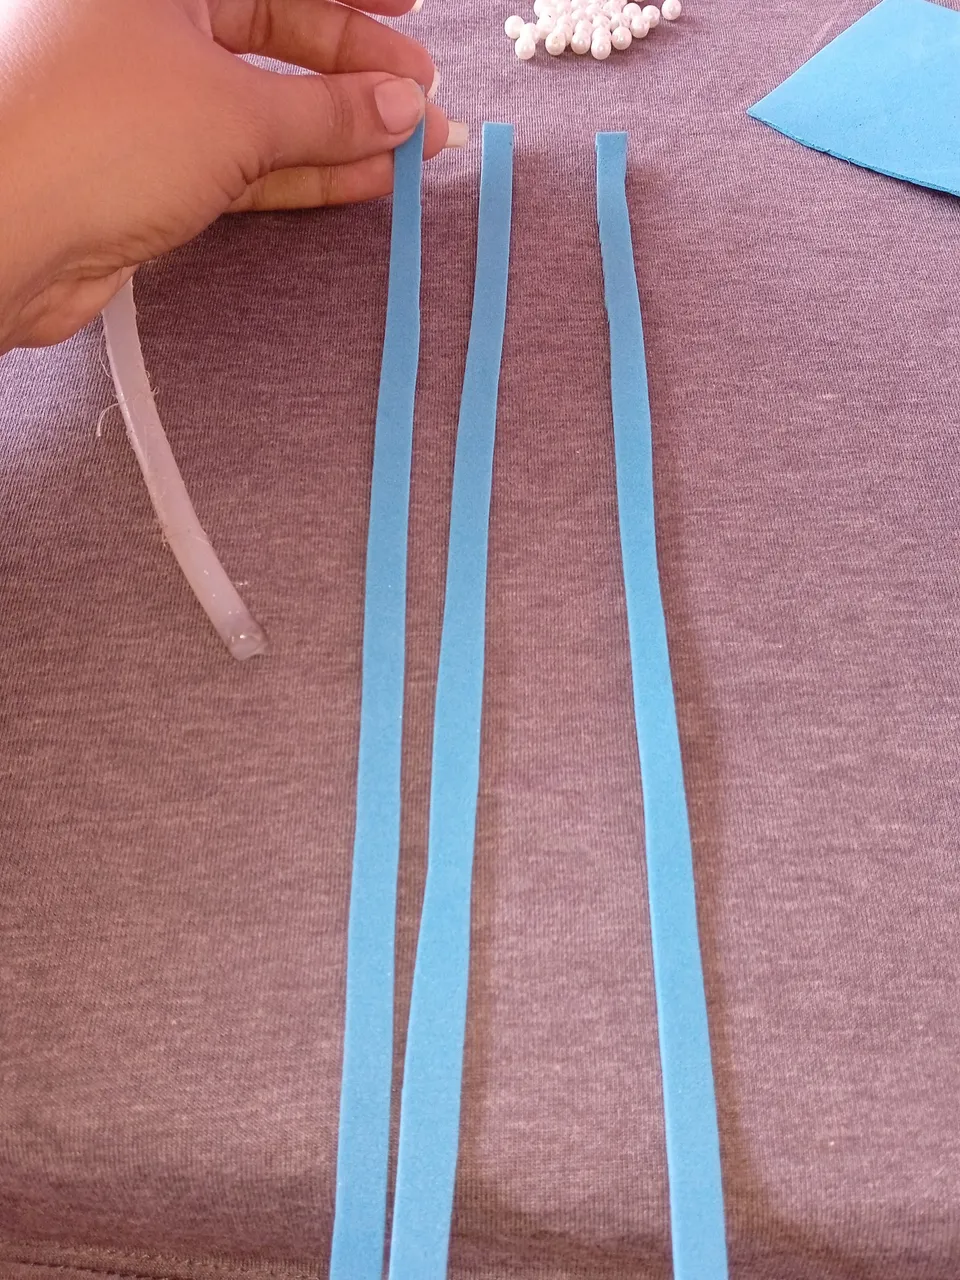
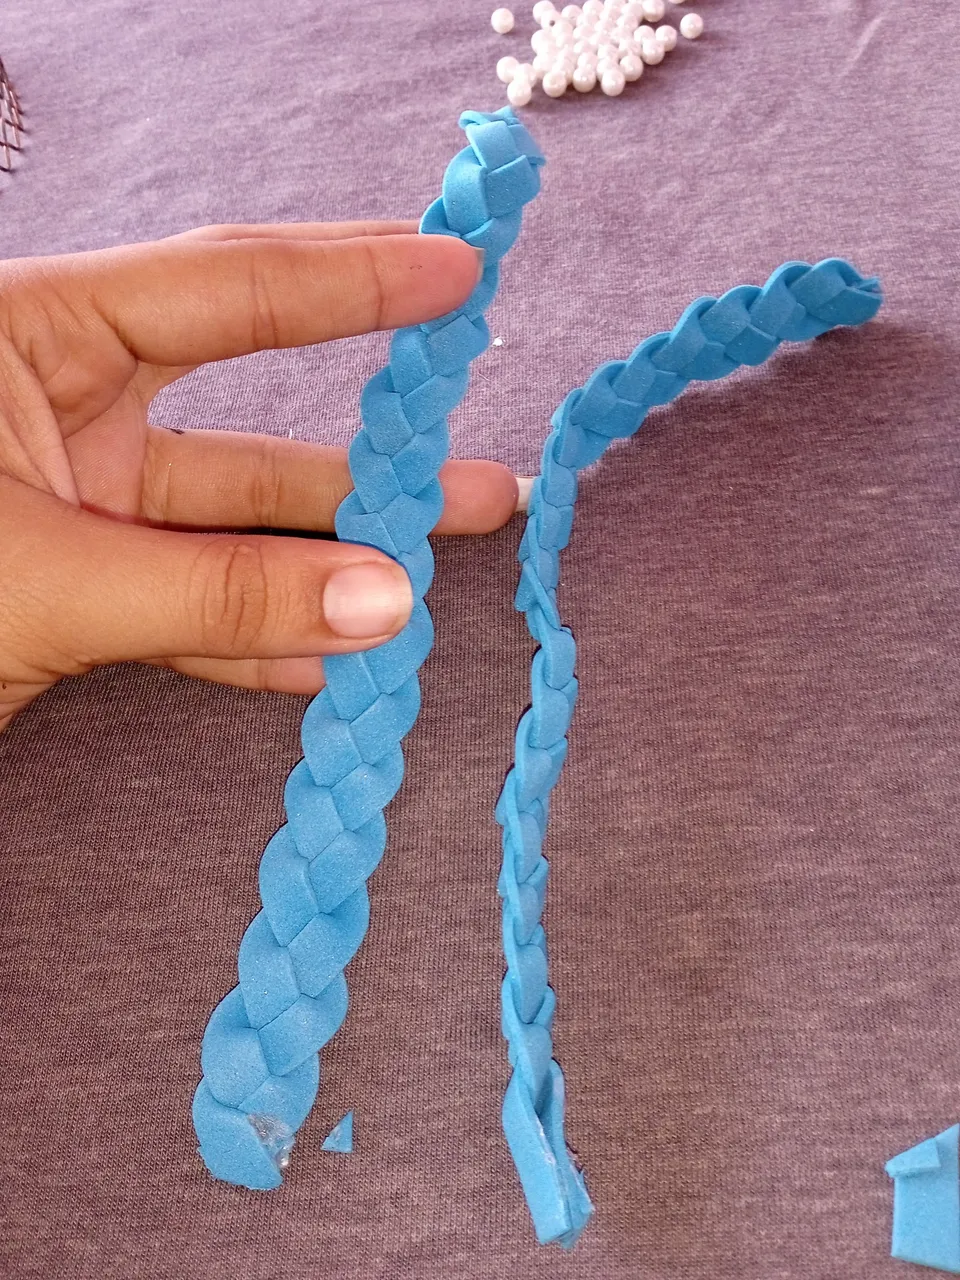
Iniciaremos con nuestro primer paso y el más importante ya que sin este paso no podremos realizar el modelo que deseamos , iniciaremos recortando seis tiras de un centímetro de ancho cada una,algo importante que resaltar es que les mencioné que son seis tiras por el motivo que el foamis es pequeño si fuera el foamis que viene más grande solo necesitaríamos tres tiras
Here are the steps to follow:
We will start with our first step and the most important because without this step we can not make the model we want, we will start cutting six strips of one centimeter wide each, something important to note is that I mentioned that there are six strips for the reason that the foamis is small if it were the foamis that comes larger we would only need three strips.
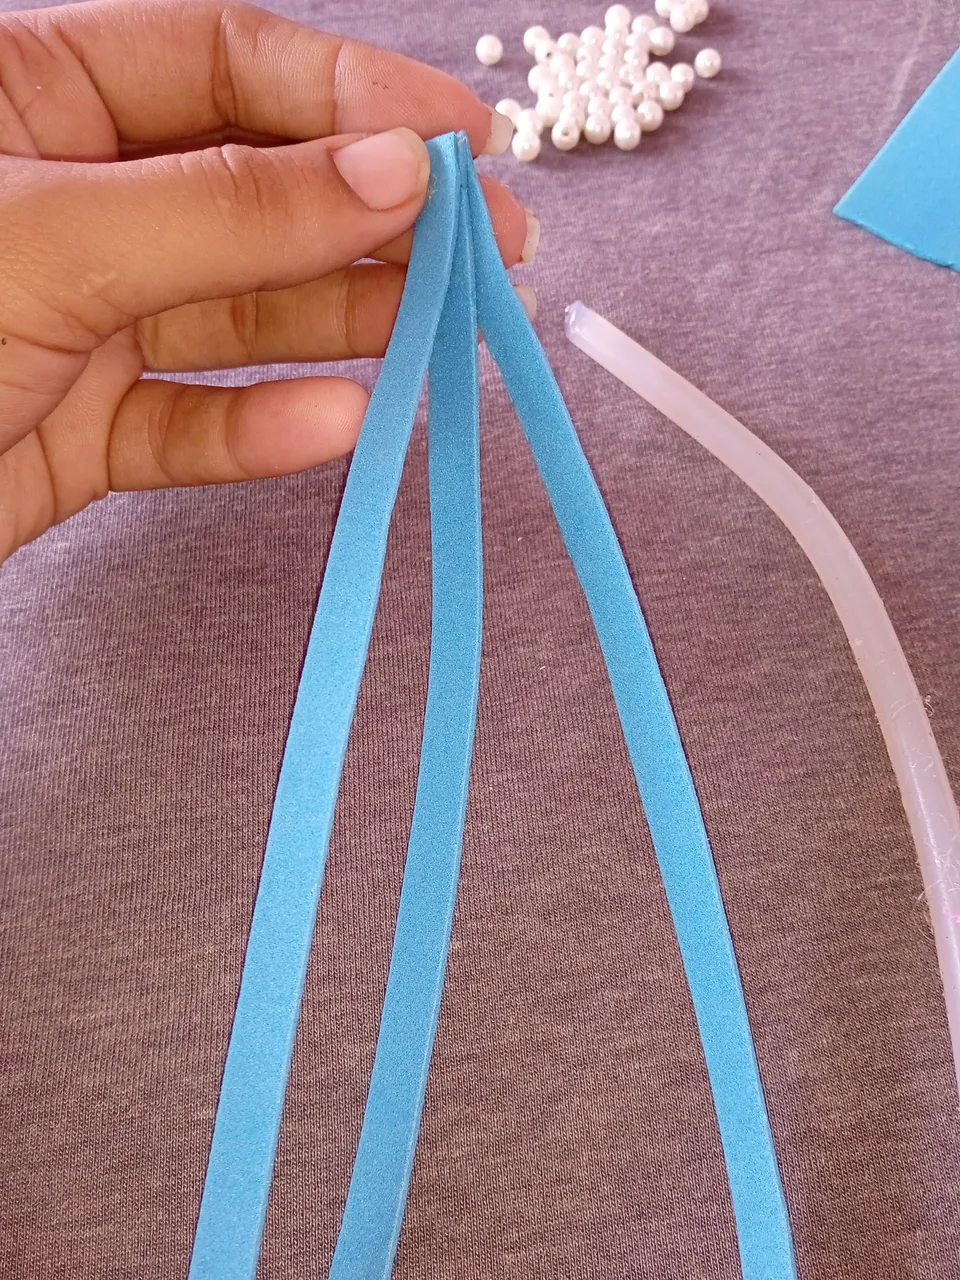
Una vez que tengamos nuestras tiras listas vamos a iniciar tomando tres tiras y la pegaremos punta con punta cada una ,tal y como pueden apreciar en la foto ,para poder tejer más adelante
Once we have our strips ready we are going to start taking three strips and we will glue them end to end each one, as you can see in the picture, to be able to weave later on.
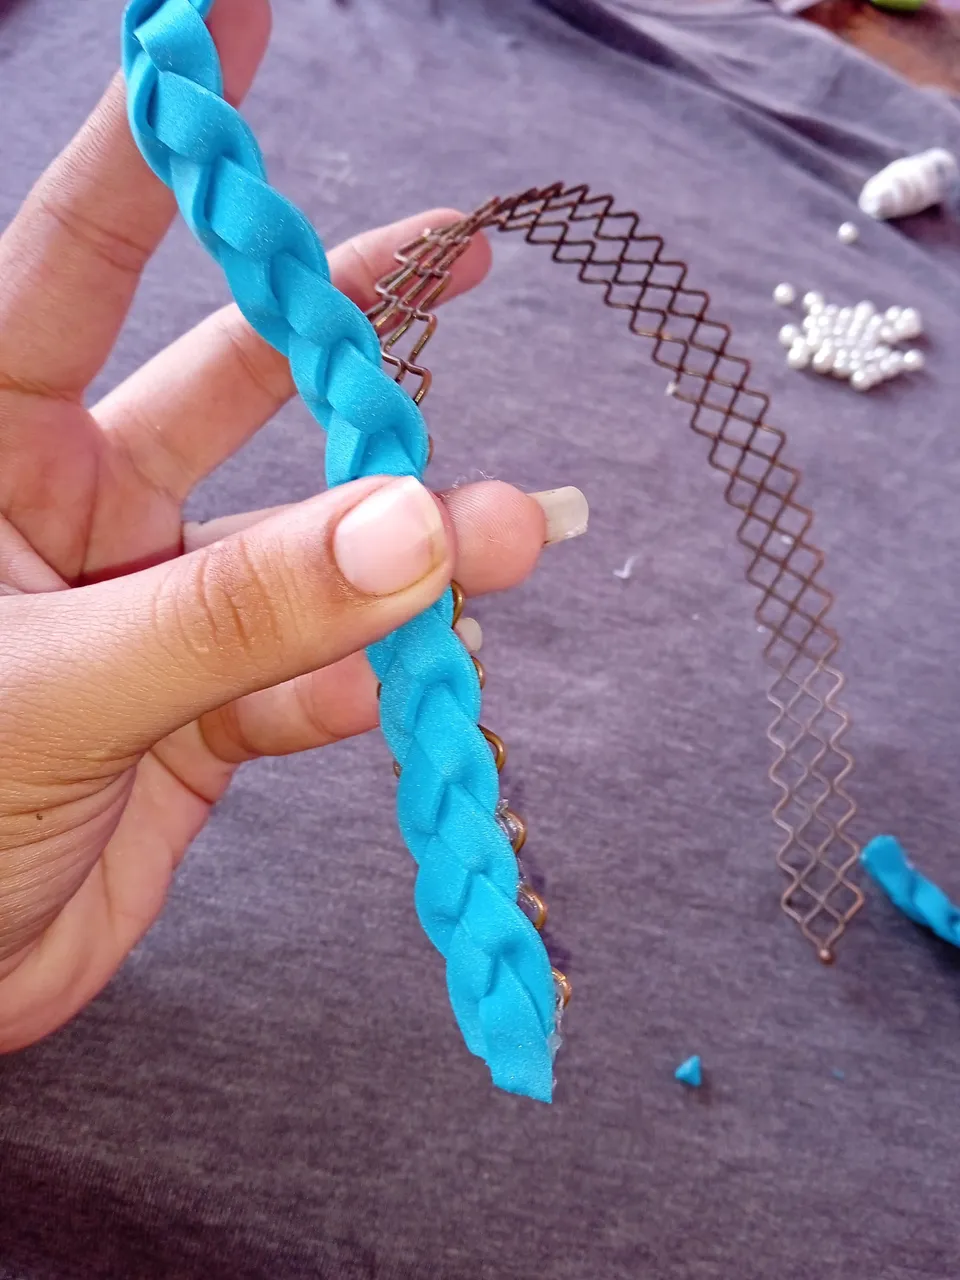
Una vez que tengamos nuestras tres puntas pegadas ,vamos a continuar tejiendo ,con una mano amiga que sostenga la punta ,continuaremos tejiendo ,la misma forma de la que tenemos nuestro cabello vamos a tejer nuestras tiras de foamis ya que el diseño ha realizar es así
Once we have our three ends glued together, we will continue weaving, with a helping hand holding the end, we will continue weaving, the same way we have our hair we will weave our foamis strips since the design is like this.

Una vez que tengamos listo nuestros moños tejidos ,vamos a continuar decorando el cintillo ,Iniciaremos pegando en la punta de el cintillo la punta de el tejido ,y continuaremos pegando ,cubriendo de abajo hacia arriba ,hasta finalizar con la decoración
Once we have our woven bows ready, we will continue decorating the headband, we will start by gluing the tip of the headband to the tip of the fabric, and we will continue gluing, covering from the bottom to the top, until we finish with the decoration.
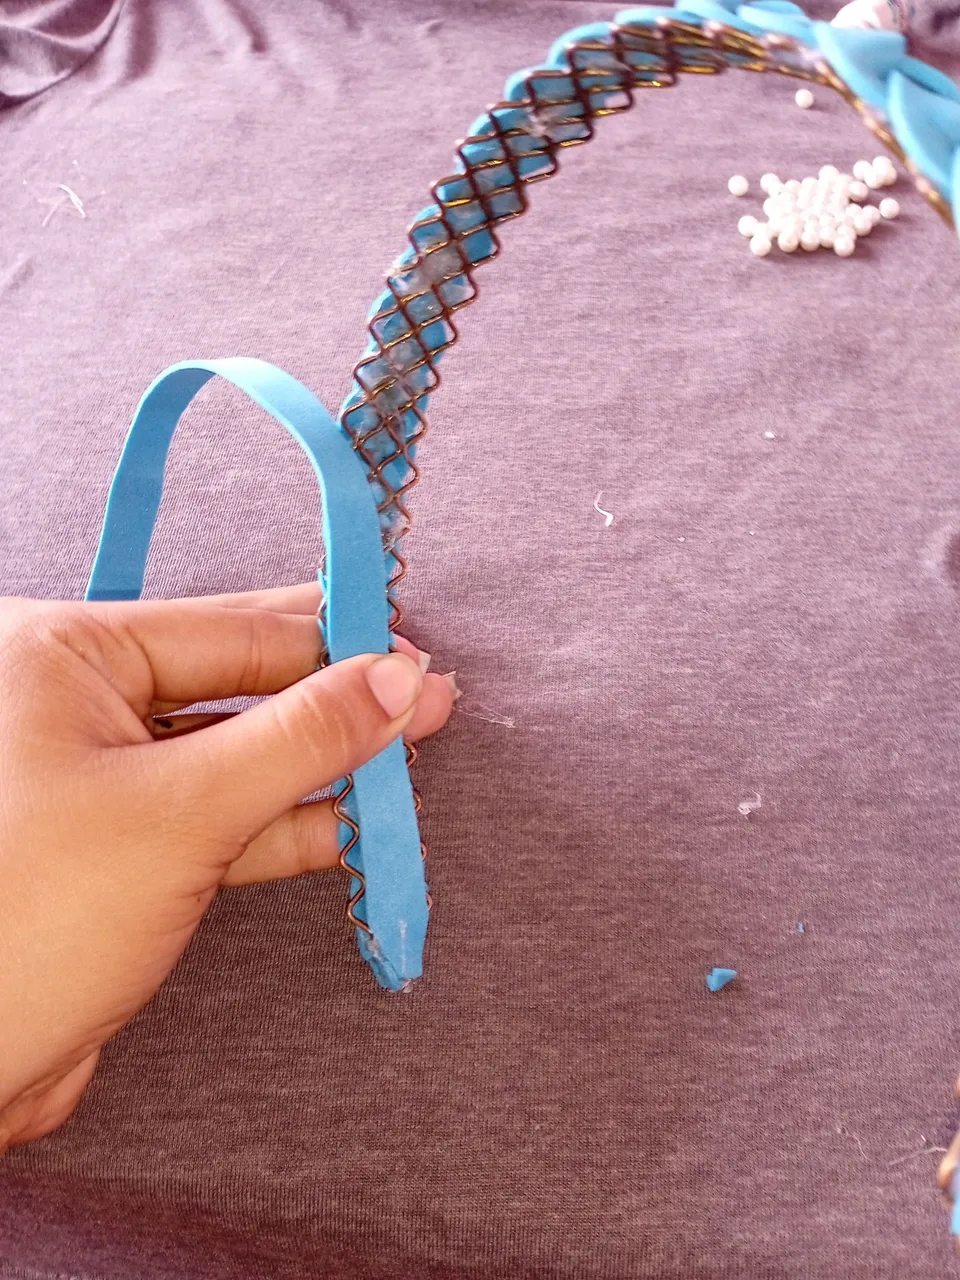
Una vez que tengamos el cintillo decorado ,vamos a continuar recortando una tira de foamis de el mismo color ,semi puntiagudas en las puntas ,para poder cubrir la parte de abajo de el Cintillo y no solo evite que este maltrate por ese lado ,sino que no se observe lo viejo de el cintillo
Once we have the headband decorated, we will continue cutting a strip of foamis of the same color, semi pointed at the tips, to cover the bottom of the headband and not only avoid that this maltreatment on that side, but not to observe the old of the headband.

Teniendo lista la tira de nuestro foamis ,vamos a continuar pegando lo en la parte de adentro de el cintillo ,al igual que como pegamos el tejido lo haremos en este procedimiento a diferencia que este va por dentro ,comenzamos de abajo hacia arriba hasta llegar al otro extremo de la punta de el cintillo
Having ready the strip of our foamis, we will continue gluing it on the inside of the headband, just as we glued the fabric we will do it in this procedure unlike this goes inside, we start from the bottom up to reach the other end of the tip of the headband.
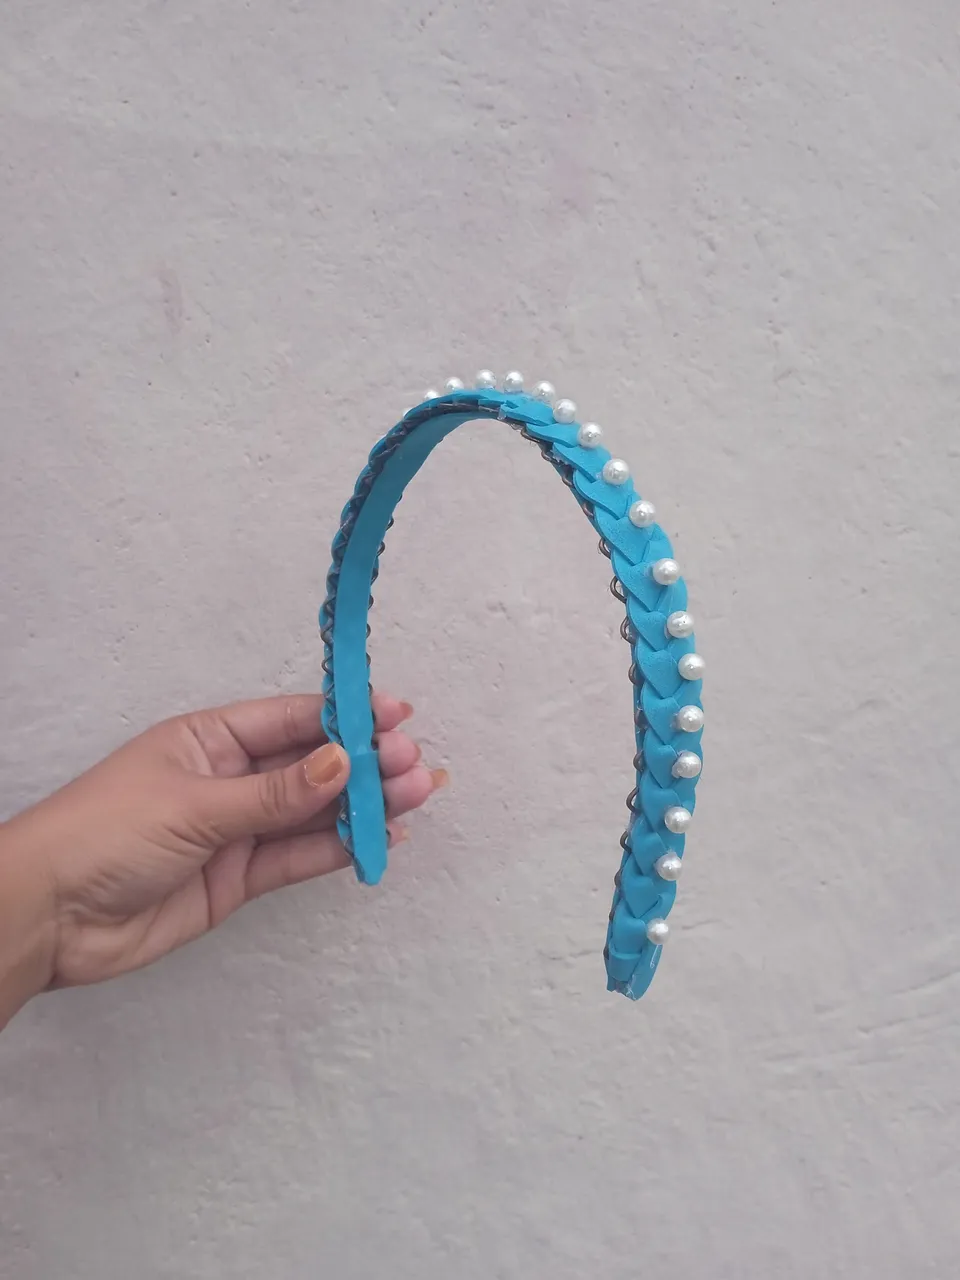
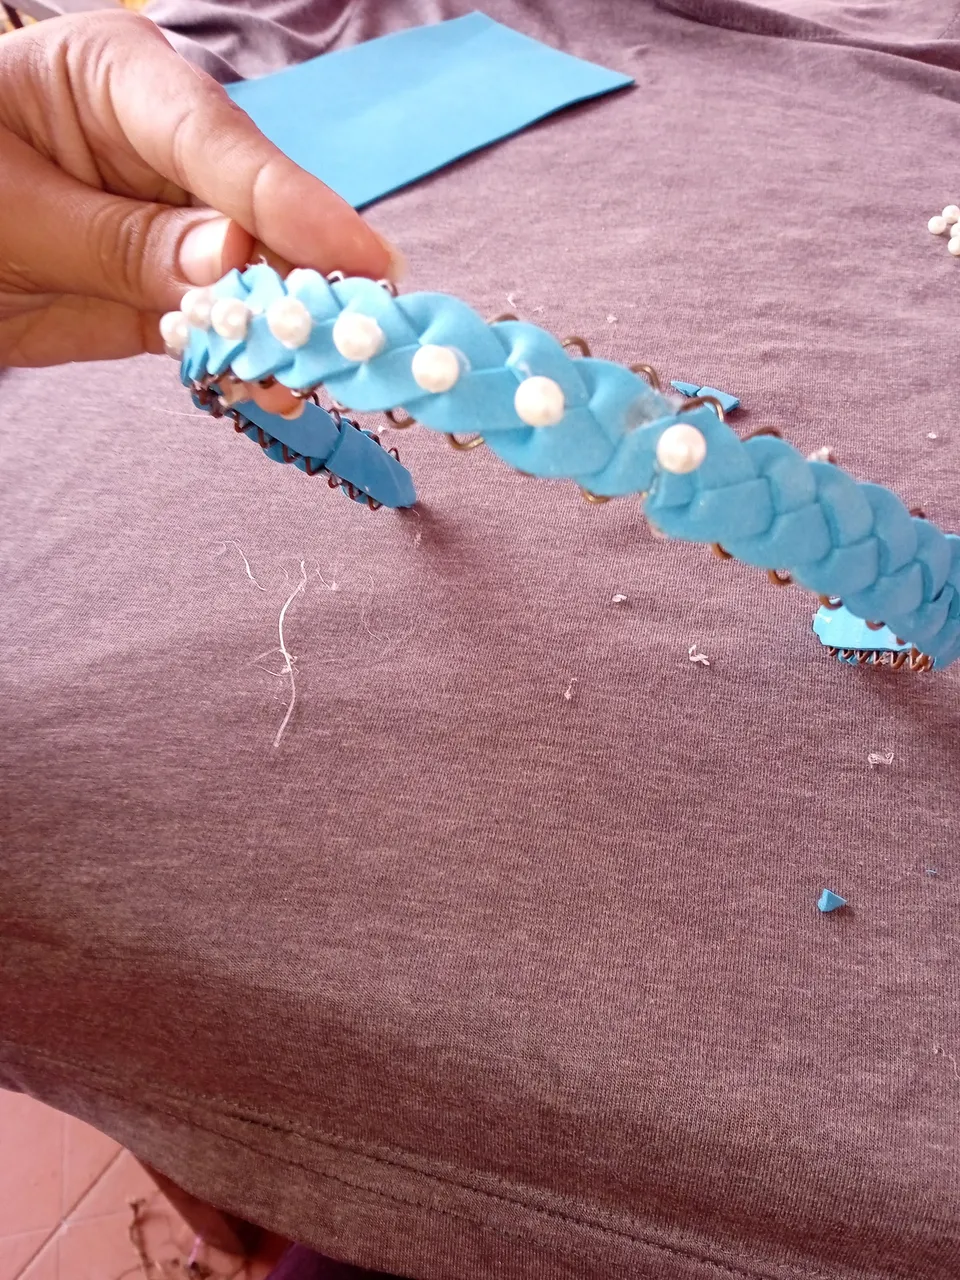
Una vez que finalicemos de cubrir el cintillo ,vamos a continuar dando el toque final a nuestra decoración ,vamos a tomar las piedras plásticas torno a perla y las pegaremos en todo el alrededor semi separadas ,calculando una distancia de medio centímetros ,dando por terminado nuestro trabajo
Once we finish covering the headband, we will continue giving the final touch to our decoration, we will take the plastic stones pearl lathe and glue them all around semi separated, calculating a distance of half a centimeter, giving finished our work.
Este es el resultado final de mi hermosa creación para personas que recientemente aprenden a restaurar cintillos , y decidan un mañana formar parte de un emprendimiento ,las fotos las tomé desde mi teléfono Redmi 9C y los textos los traduje con el traductor DeepL ,que pasen una bella noche ,hasta la próxima
This is the final result of my beautiful creation for people who recently learn to restore headbands, and decide one day to be part of an enterprise, the photos were taken from my Redmi 9C phone and the texts were translated with the translator DeepL, have a nice evening, until next time.