¡Bienvenido a mi blog!
Hola amigos que hacen vida en esta hermosa comunidad #joyas deseo que todos estén bien, el dia de hoy quiero mostrarle un proyecto muy bonito , fácil y económico:
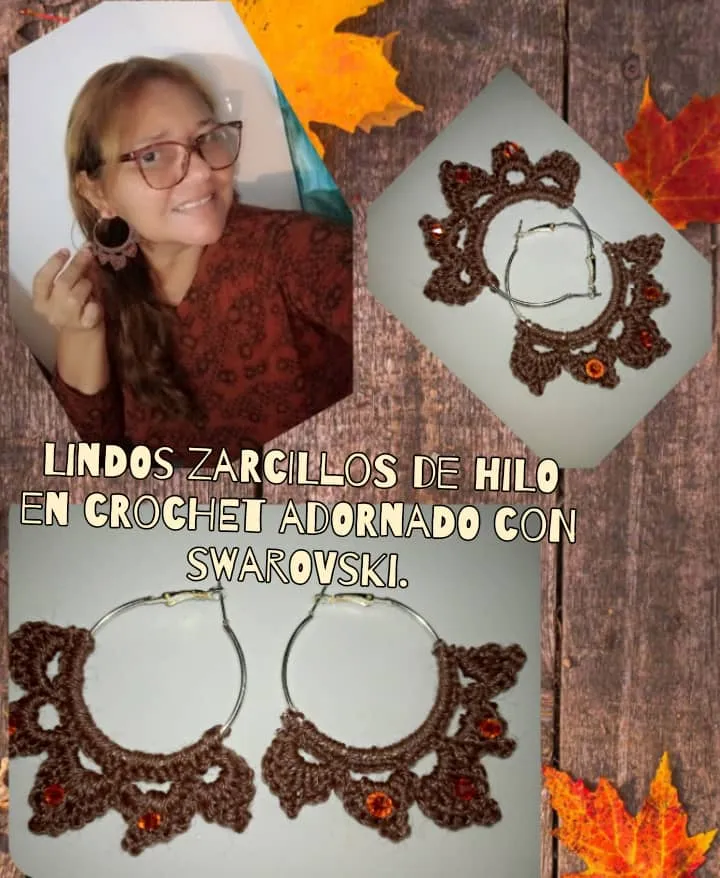
Zarcillos tejido en crochet adornados con piedras de Swarovski. Espero sea de tu agrado
Para realizarlo no necesitas ser un experto, solo ganas de trabajar y poner tu imaginación .
Estos zarcillos no son pesados , puedes llevarlo por muchas horas y no molestan, los realicé marrón ya que no me gustan de colores fosforescentes, pero tu eliges el color que te agrade, lo que puedo asegurar es que quedarán lindo en tu oreja y con estilo, ¡sin más, manos a la obra!
Hermosos zarcillos tejidos en crochet con piedras de Swarovski
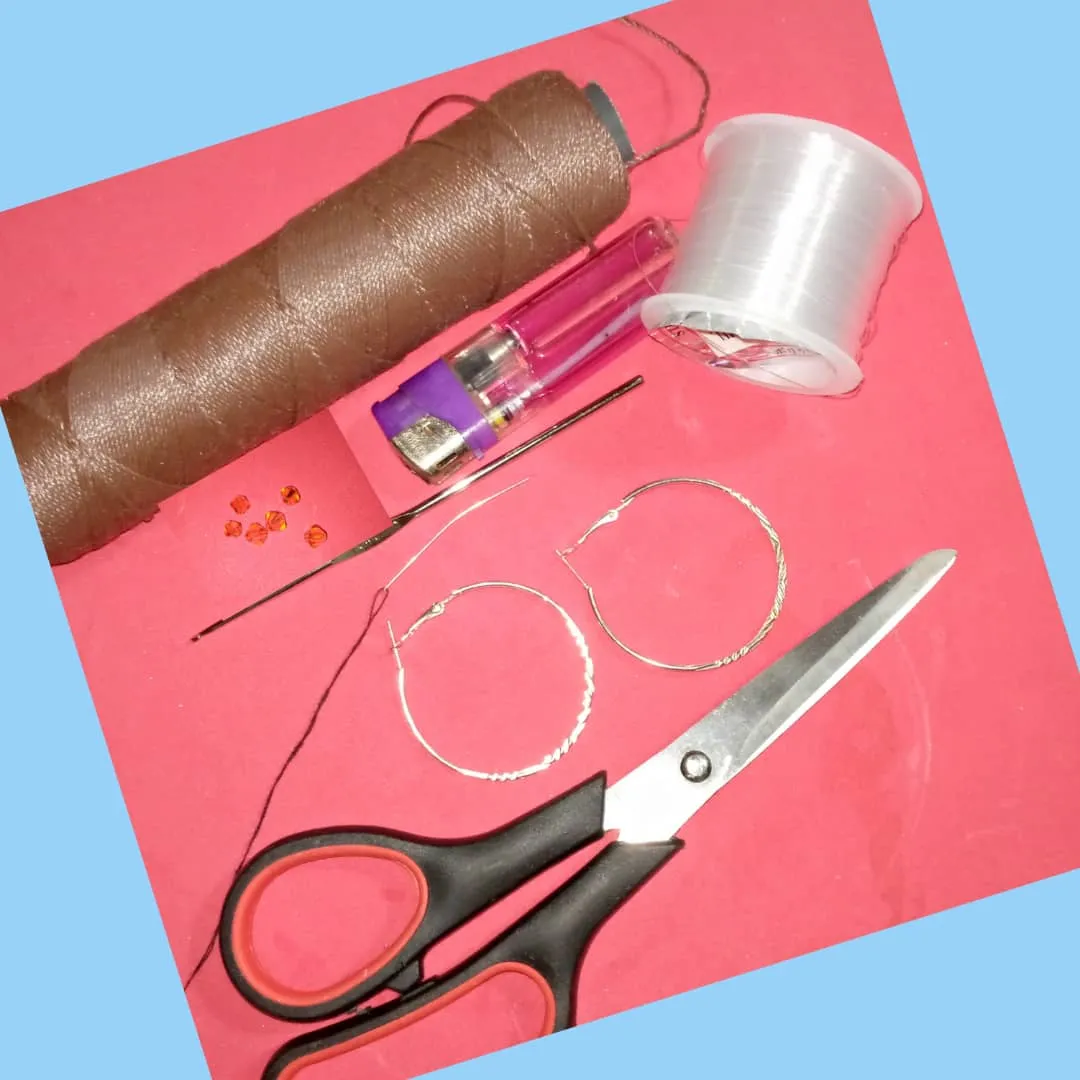
Materiales a utilizar para la realización del hermoso collar tejido:
- 1 par de argollas grandes.
- Ganchillo de 1,40 milímetros.
- Yesquero.
- Hilo de tejer Nylon color marrón.
- Tijeras.
- 6 piedras de Swarovski de color anaranjado.
- Hilo nylon transparente con aguja.
Paso a paso para realización de los zarcillos tejidos en crochet
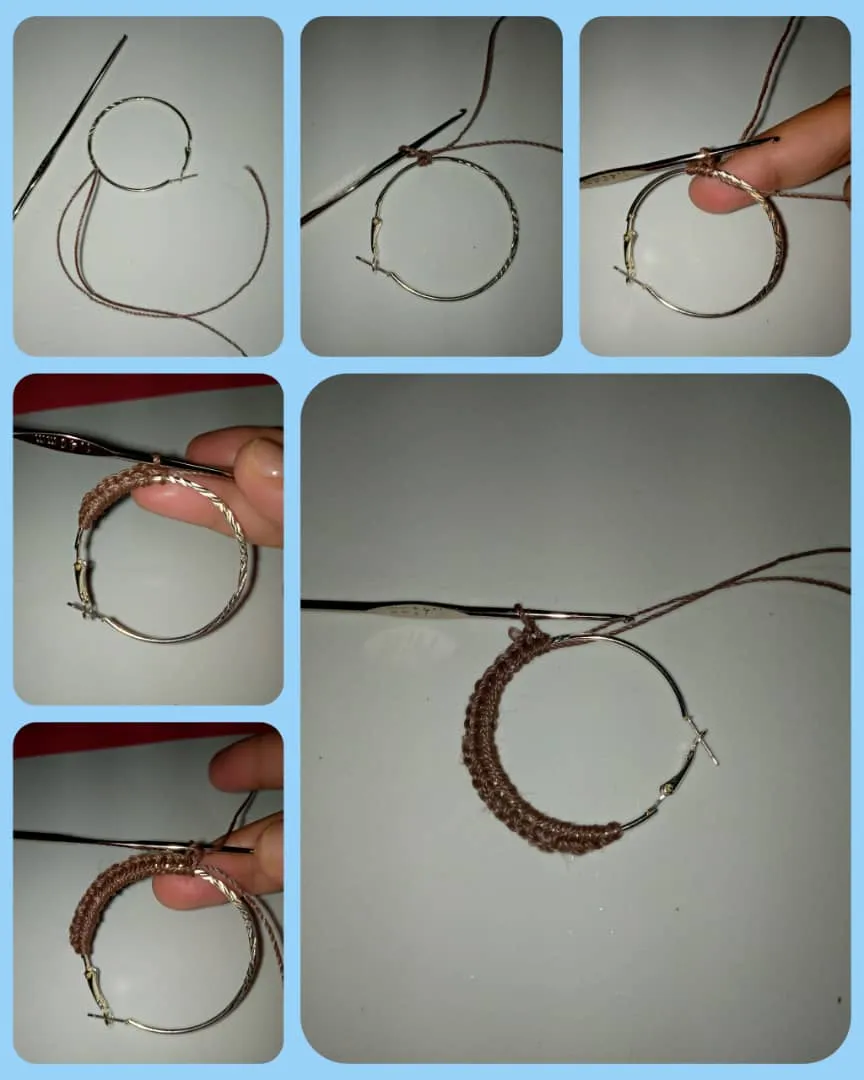
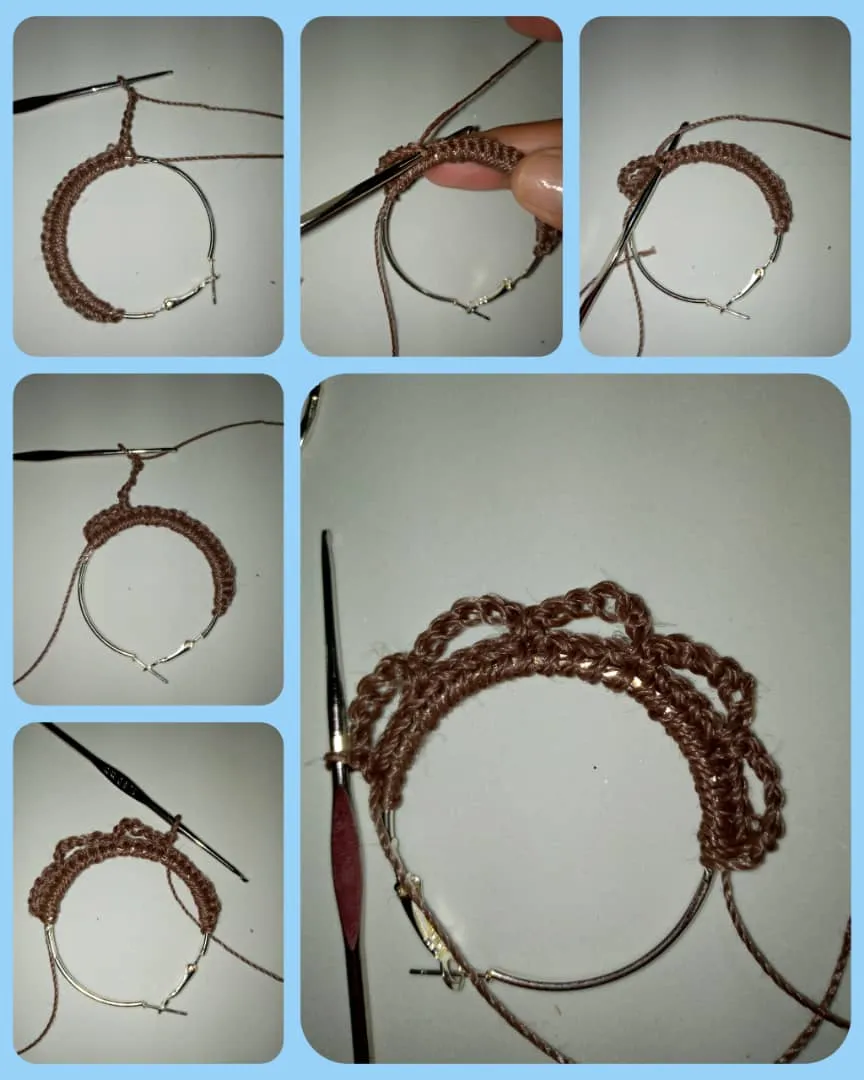
Primer paso: este primer paso lo vamos a llamar primera vuelta,comenzamos con una cadena agarrando el hilo dentro
de la argolla, luego hacemos 26 puntos bajos, teniendo en cuenta que la argolla debe quedar dentro, dejar un pedazo de hilo al principio , ese hilo se va ir metiendo dentro de los puntos bajos para esconderse, ya teniendo los 26 puntos bajos listos terminamos la primera vuelta.
Segundo paso:
Para realizar la segunda vuelta de la realización de la argolla, comenzamos haciendo 6 cadenetas, volteamos el tejido y metemos esas cadenetas en el punto número 5 luego la cerramos con un punto deslizado, se levantan 6 cadenetas más, nuevamente contamos 5 puntos y allí metemos la aguja, de la misma manera vamos a hacer 3 veces el mismo paso hasta completar los cinco espacios, pueden guiarse por la imagen.
Para terminar esta vuelta terminamos con un punto deslizado. Aquí podemos ver la segunda vuelta lista.
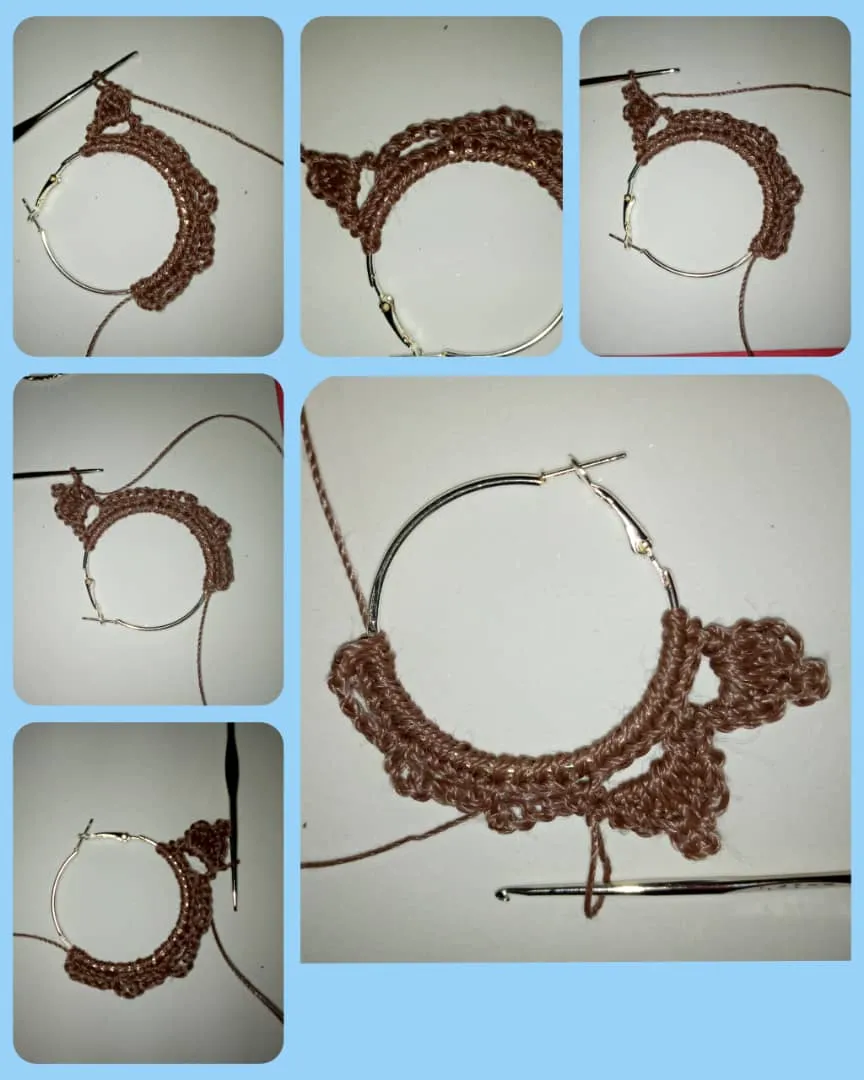
Tercer paso:
Para realizar la tercera vuelta, hacemos una cadeneta, volteamos el tejido, comenzamos con un punto bajo,un punto medio alto y tres puntos altos, entonce en este último punto, hacemos tres cadenetas , se cierra con un punto deslizado en la primera cadena, ahora seguimos con un punto alto, un punto medio alto y un punto bajo y cerrar con un punto deslizado.
Aquí podemos observar la primera hoja de la tercera vuelta, Para realizar la segunda hoja, hacemos un punto deslizado, levantar una cadena, repetir la misma secuencia como se viene trabajando, un punto bajo, un punto medio alto,tres `puntos altos, levanta tres cadenetas y la colocan en el primer punto de la cadeneta y cerramos con un punto deslizado, ya tenemos lista las dos hojas del zarcillo.
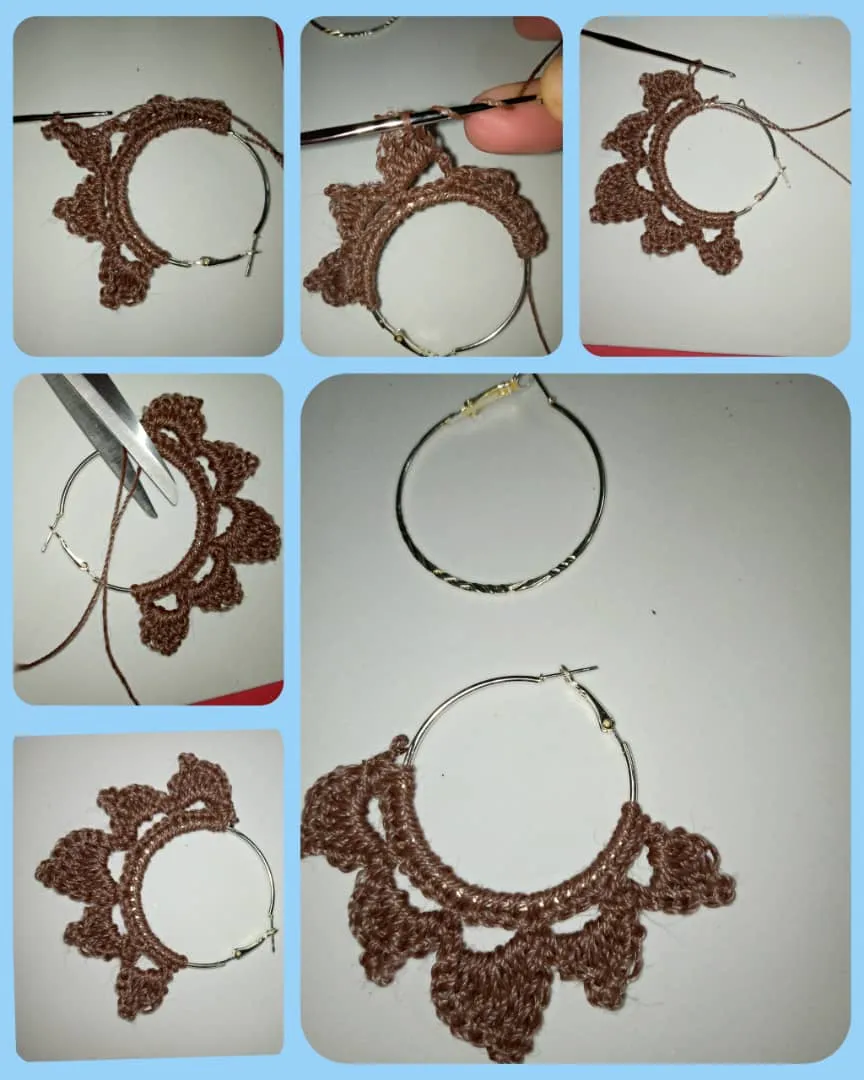
Para realizar la tercera hoja, continuamos con un punto deslizado, levanta una cadeneta, un punto bajo y un punto medio alto, dos puntos altos, dos puntos altos dobles,levantamos tres cadenetas , cerramos en la primera cadeneta con un punto deslizado, ahora hacemos dos puntos altos dobles, dos puntos altos, un punto medio alto y un punto bajo, culminamos con un punto deslizado, tenemos la tercera hoja, ven lo lindo que quedó.
Para hacer la cuarta hoja hacer un punto deslizado, luego una cadena, un punto bajo, un punto medio alto,un punto alto, levantar tres cadenetas y cerrar en la primera cadena con un punto deslizado , ahora hacer un tres puntos altos, un punto medio alto, un punto bajo y terminamos con un punto deslizado, ya lista la cuarta hoja ,así con el mismo procedimiento realizamos la quinta hoja.Ahora con las tijeras recorta el sobrante con mucho cuidado tratando de no cortar el hilo muy pegado ya que se puede deshacer el tejido, quemar las puntas con un yesquero.
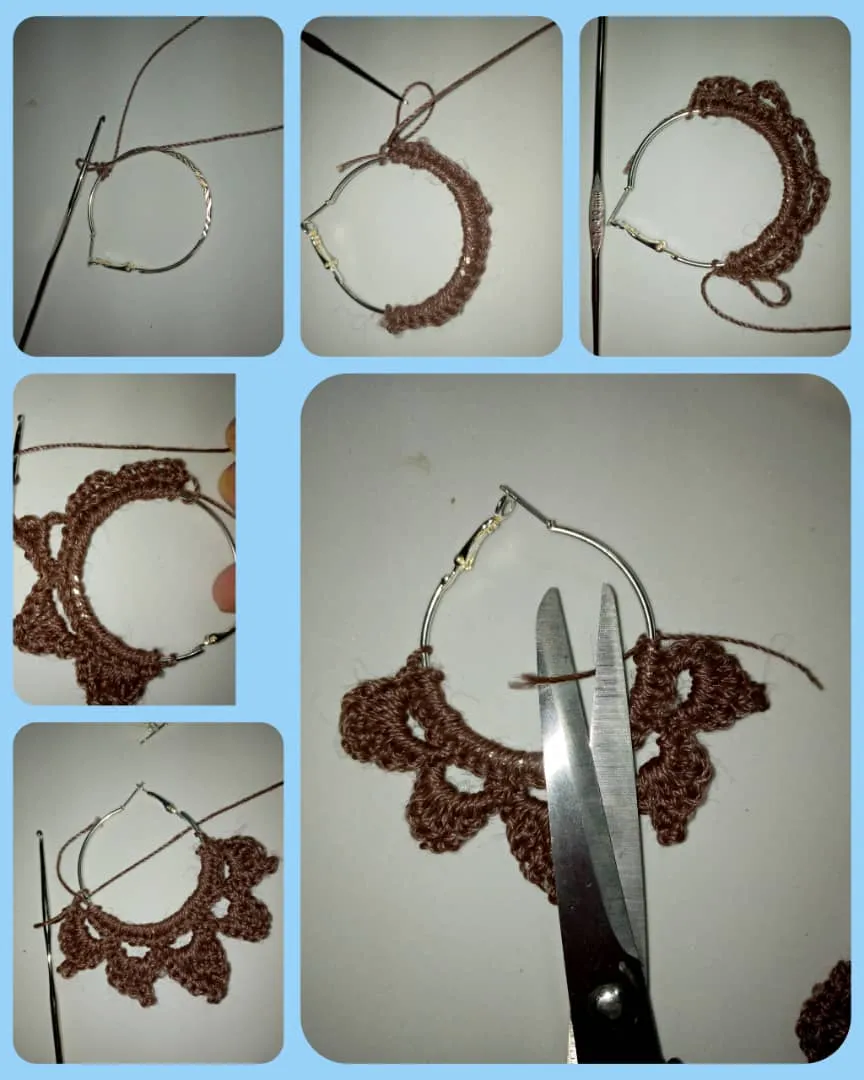
Aquí muestro imagen de la realización del otro zarcillo, es el mismo procedimiento ya antes mencionado.
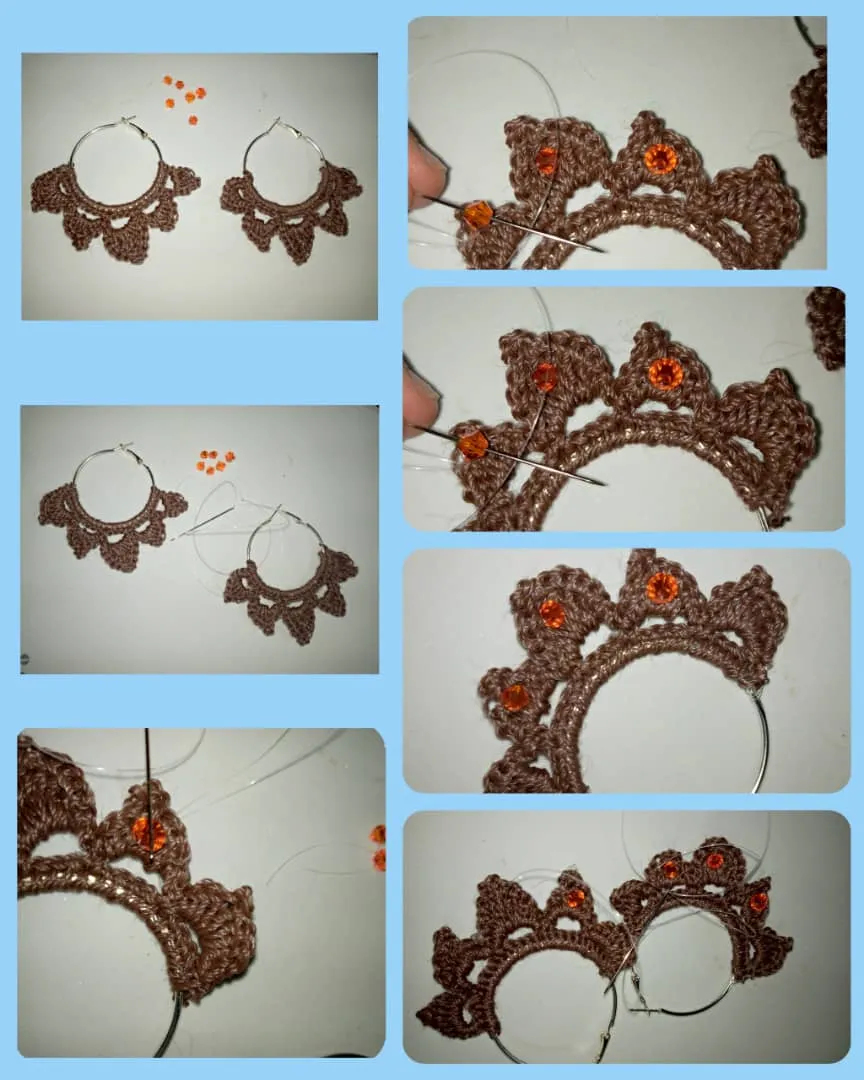
Ahora procedemos a colocar las piedras de Swarovski, comenzamos enhebrar una aguja con el hilo transparente, ir pegando poco a poco cada piedra ,tener cuidado de que el hilo no se vea.
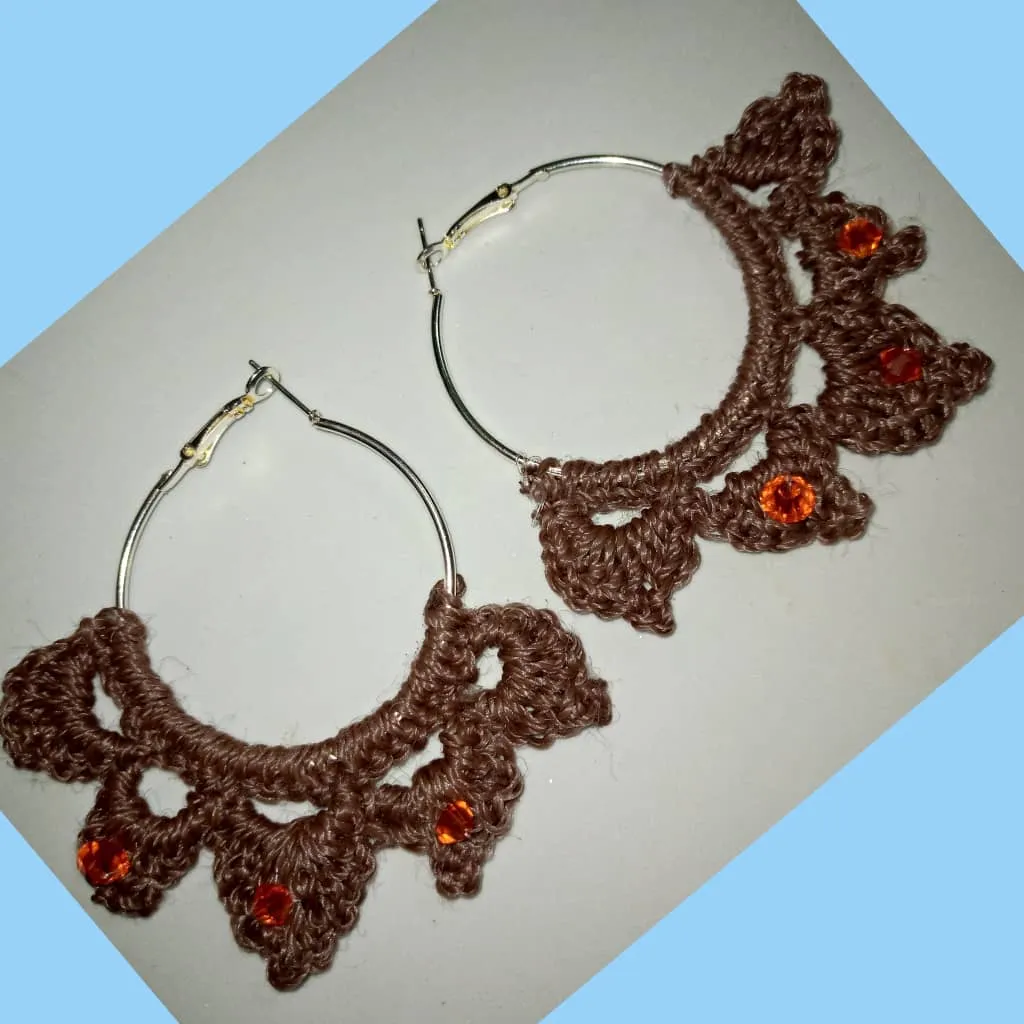
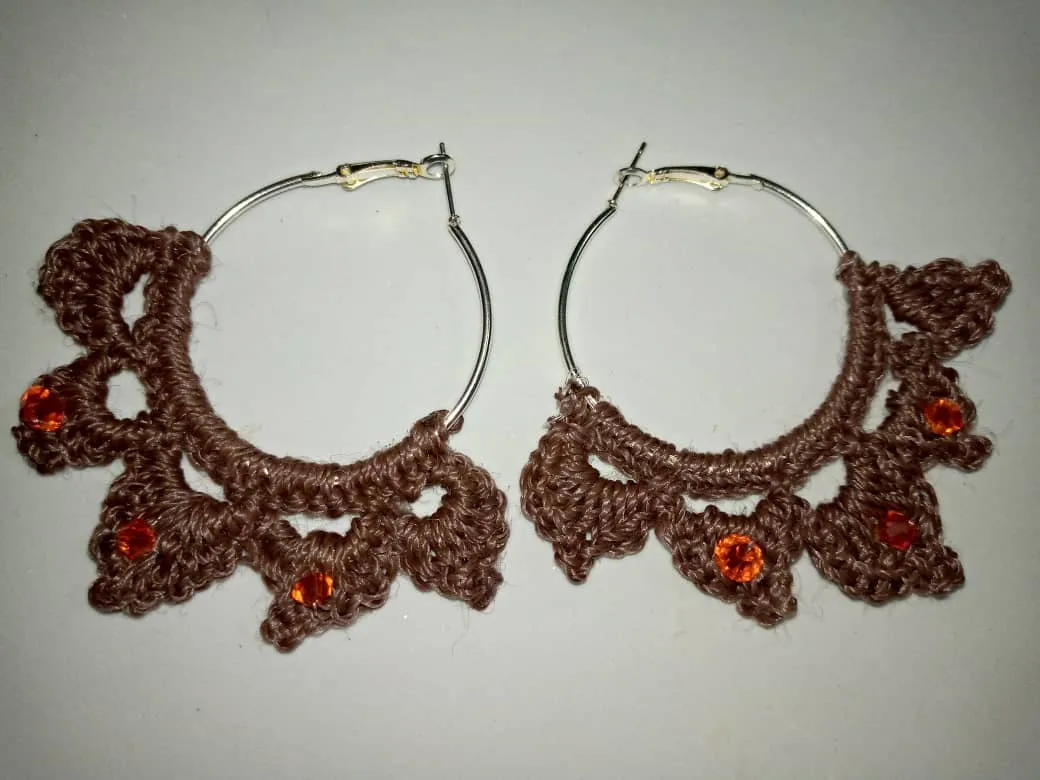
Lindos zarcillos en tejidos crochet.

¡Espero que sea de su agrado!Hasta la próxima.
ESPAÑOL
Welcome to my blog!
Hello friends who make life in this beautiful community #jewelry I wish you all well, today I want to show you a very nice , easy and economical project:
Crochet knitted earrings adorned with Swarovski stones. I hope you like it
To make it you don't need to be an expert, you just need to be willing to work and put your imagination.
These earrings are not heavy, you can wear it for many hours and do not bother, I made them brown because I do not like phosphorescent colors, but you choose the color that you like, what I can assure you is that they will be nice on your ear and stylish, Simply, let's get to work!.
Beautiful crocheted earrings with Swarovski stones !
Materials to be used for the realization of the beautiful knitted necklace:
- 1 pair of large hoops.
- Crochet hook of 1.40 millimeters.
- Tinder.
- Brown Nylon knitting yarn.
- Scissors.
- 6 orange Swarovski stones.
- Transparent nylon thread with needle.
Step by step for the realization of the crocheted tendrils.
First step: this first step we are going to call it first loop,we start with a chain by grabbing the yarn inside
of the ring, then we make 26 low stitches, taking into account that the ring must be inside, leave a piece of thread at the beginning, that thread will go inside the low stitches to hide, already having the 26 low stitches ready we finish the first round.
Second step:
To make the second round of making the ring, we start making 6 chain stitches, we turn the fabric and put those chain stitches in the stitch number 5 then we close it with a slipped stitch, 6 more chain stitches are lifted, again we count 5 stitches and there we put the needle, in the same way we are going to make 3 times the same step until completing the five spaces, you can be guided by the image.
To finish this row we finish with a slip stitch. Here we can see the second round ready.
Third step:
To make the third round, we make a chain stitch, we turn the fabric, we start with a single crochet, a medium high stitch and three high stitches, then in this last stitch, we make three chain stitches, we close with a slip stitch in the first chain, now we continue with a high stitch, a medium high stitch and a low stitch and close with a slip stitch.
Here we can see the first leaf of the third round, To make the second leaf, we make a slipped stitch, lift a chain, repeat the same sequence as it has been working, a low stitch, a medium high stitch, three `high stitches, lift three chains and place it in the first stitch of the chain and close with a slipped stitch, we have ready the two leaves of the tendril.
To make the third leaf, continue with a slip stitch, pick up a chain stitch, a single crochet and a double crochet, two double crochets, two double crochets, pick up three chain stitches, close on the first chain stitch with a slip stitch, now we make two double crochets, two double crochets, two double crochets, one double crochet and one single crochet, we finish with a slip stitch, we have the third leaf, see how nice it looked.
To make the fourth sheet make a slip stitch, then a chain, a single crochet, a single crochet, a double crochet, a single crochet, a single crochet, lift three chains and close the first chain with a slip stitch, now make three double crochets, a double crochet, a single crochet and finish with a slip stitch, the fourth sheet is ready, so with the same procedure we make the fifth sheet, now with the scissors cut the excess carefully trying not to cut the thread too close because it can undo the fabric, burn the ends with a tinder.
Here I show image of the realization of the other tendril, it is the same procedure already mentioned above.
Ahora procedemos a colocar las piedras de Swarovski, comenzamos enhebrar una aguja con el hilo transparente, ir pegando poco a poco cada piedra ,tener cuidado de que el hilo no se vea.
Lindos zarcillos en tejidos crochet.
¡Espero que sea de su agrado!Hasta la próxima.
  Las fotos son de mi propiedad capturadas con teléfono Infinix, editadas con incollage y traducida con DEEPL.

   The photos are my own, captured with Infinix phone, edited with incollage and translate with DEEPL.