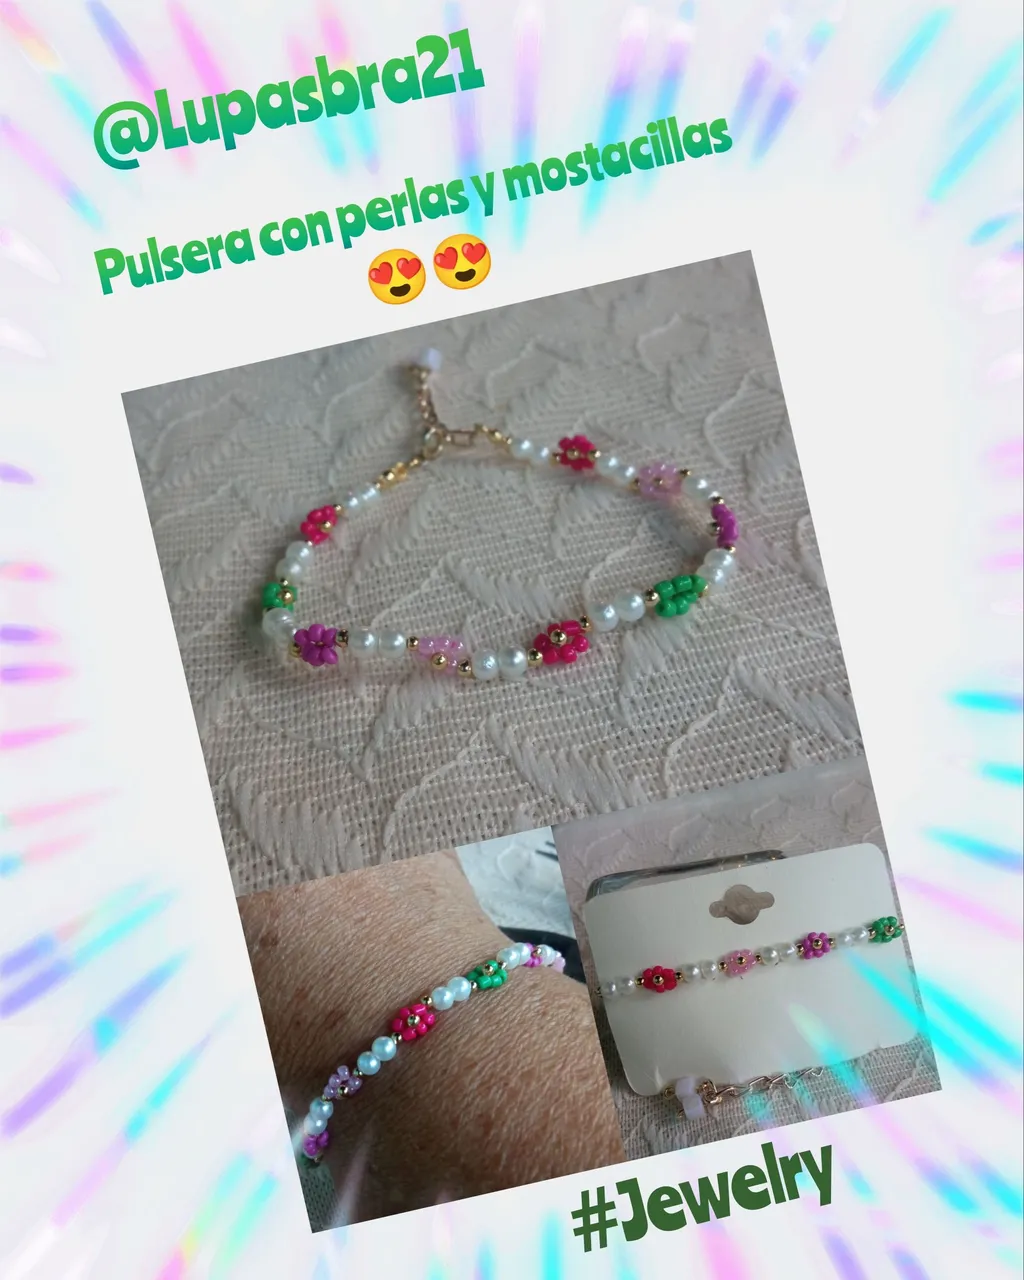
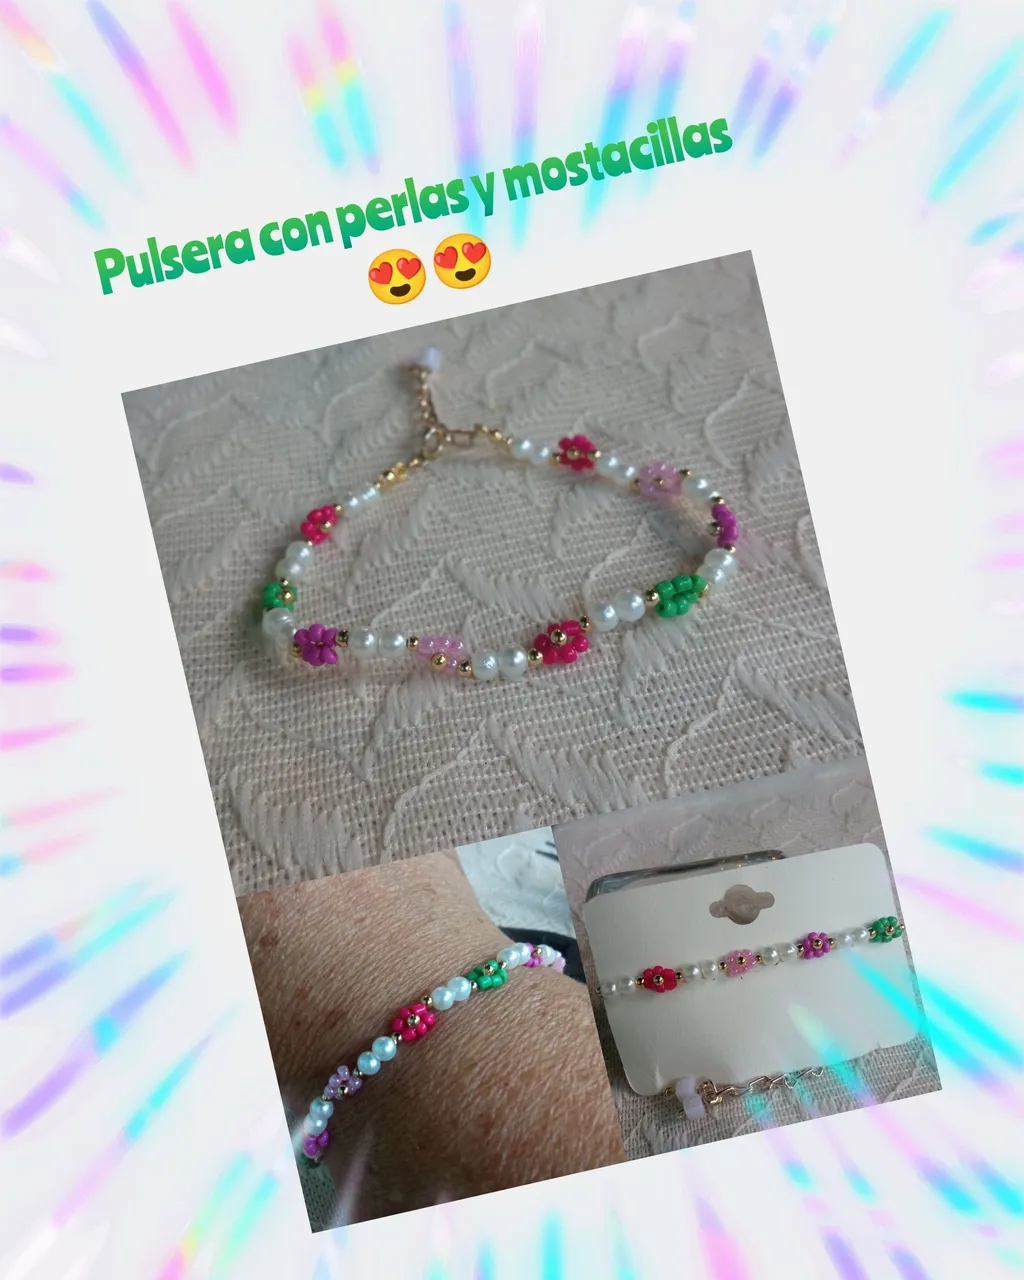
Hola , hola amigos de #Hive y de mi comunidad #Jewelry deseo estén todos bien , disfrutando de un feliz y bendecido día domingo..y disfrutando de lo que nos gusta hacer como lo es crear lindos accesorios bien sea para vender, regalar o lucir nunca están de más, por acá muy lluvioso pero muy agradable el clima , nuevamente con ustedes para compartirles el paso a paso de cómo realizar una bella pulsera colorida con perlas y mostacillas, sigo trabajando con perlas ya todos saben el porqué, quedan las piezas muy delicadas , elegantes y muy bonitas , este es un trabajo muy fácil de realizar pero con un resultado muy hermoso, a mi me encantó 🤭🤭🤭.. está pieza la acompañare con otra que ya tengo lista y haré un regalo a una amiga, que se sabrá apreciar el detalle así que sin más los invito a seguir hasta el final y ver el tutorial de dicha pieza, espero sea de su agrado
Hello, hello friends of #Hive and my community #Jewelry I wish you are all well, enjoying a happy and blessed day Sunday.... and enjoying what we like to do as it is to create beautiful accessories either to sell, give away or wear never hurt, here very rainy but very nice weather, again with you to share with you the step by step of how to make a beautiful colorful bracelet with pearls and beads, I continue working with pearls and everyone knows why, the pieces are very delicate, elegant and very beautiful, this is a very easy job to do but with a very beautiful result, I loved it 🤭🤭🤭🤭. . this piece will accompany it with another that I already have ready and I will make a gift to a friend, who will appreciate the detail so without further ado I invite you to follow to the end and see the tutorial of this piece, I hope you like it.
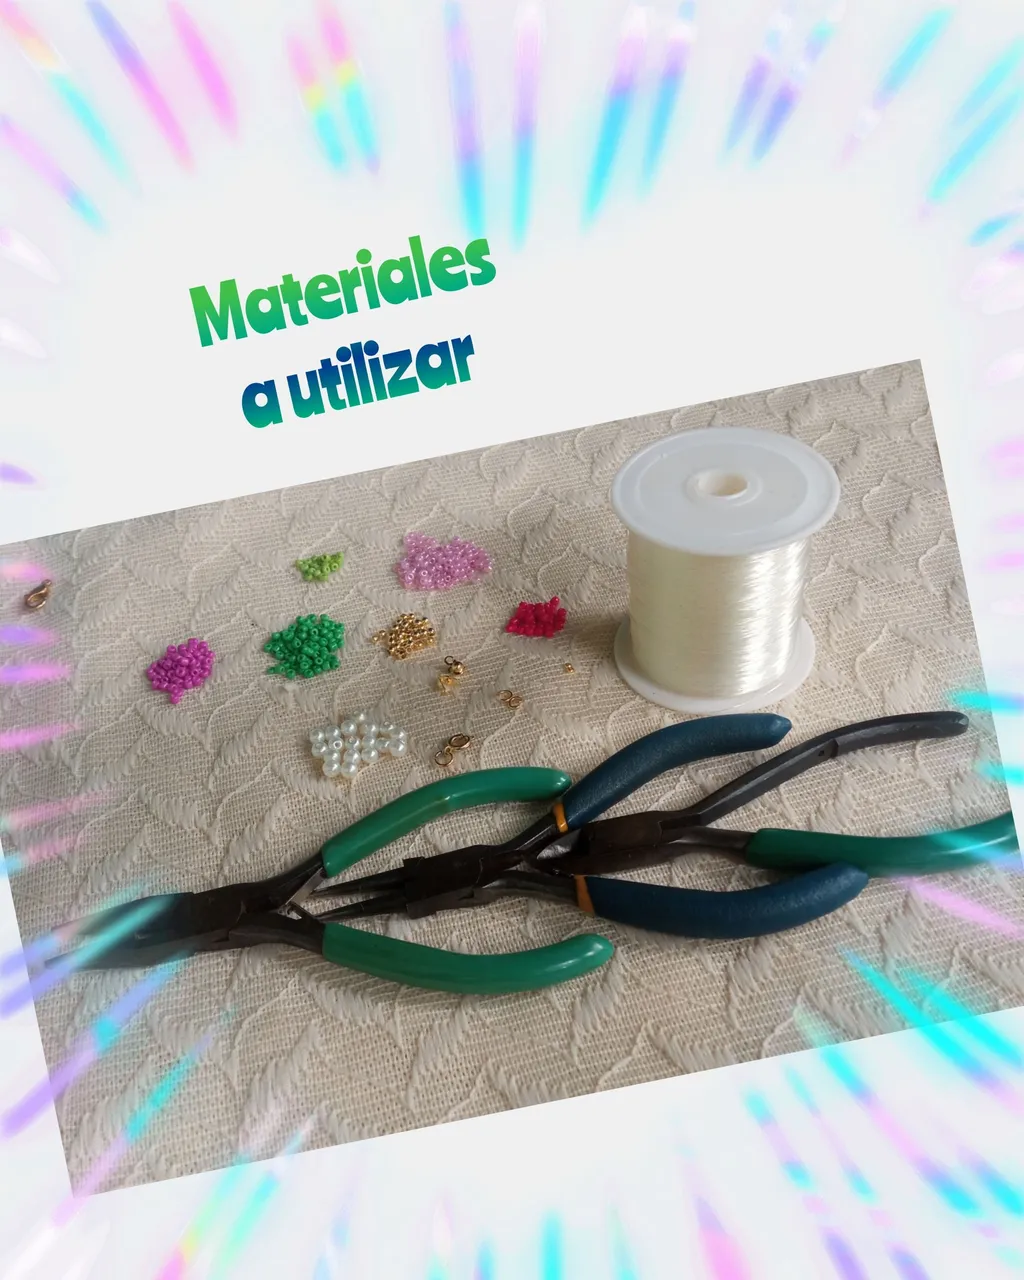
Materiales a utilizar
✔️ 20 perlas acrílicas No 6.
✔️ Mostacillas de diferentes colores usé verde , rosado, fucsia y púrpura.
✔️ Balines No 3 en goldfieeld.
✔️ Hilo nylon.
✔️ Un par de tapanudos en goldfieeld.
✔️ Un par de gracias o escarlachin en goldfieeld.
✔️ Un trancadero tipo salvavidas.
✔️ Dos argollas medianas.
✔️ 6 cm de cadena extensiva.
✔️ Unas cuentas engarzadas en color blanco .
✔️ Pinza punta redonda.
✔️ Pinza punta plana.
✔️ Tijeras.
Materials to use
✔️ 20 No 6 acrylic beads.
✔️ Beads of different colors I used green, pink, fuchsia and purple.
✔️ No 3 goldfieeld beads.
✔️ Nylon thread.
✔️ A pair of goldfieeld beads.
✔️ A pair of graces or scarlachin in goldfieeld.
✔️ One lifebuoy.
✔️ Two medium rings.
✔️ 6 cm of extender chain.
✔️ A set of white beads.
✔️ Round nose pliers.
✔️ Flat nose pliers.
✔️ Scissors.
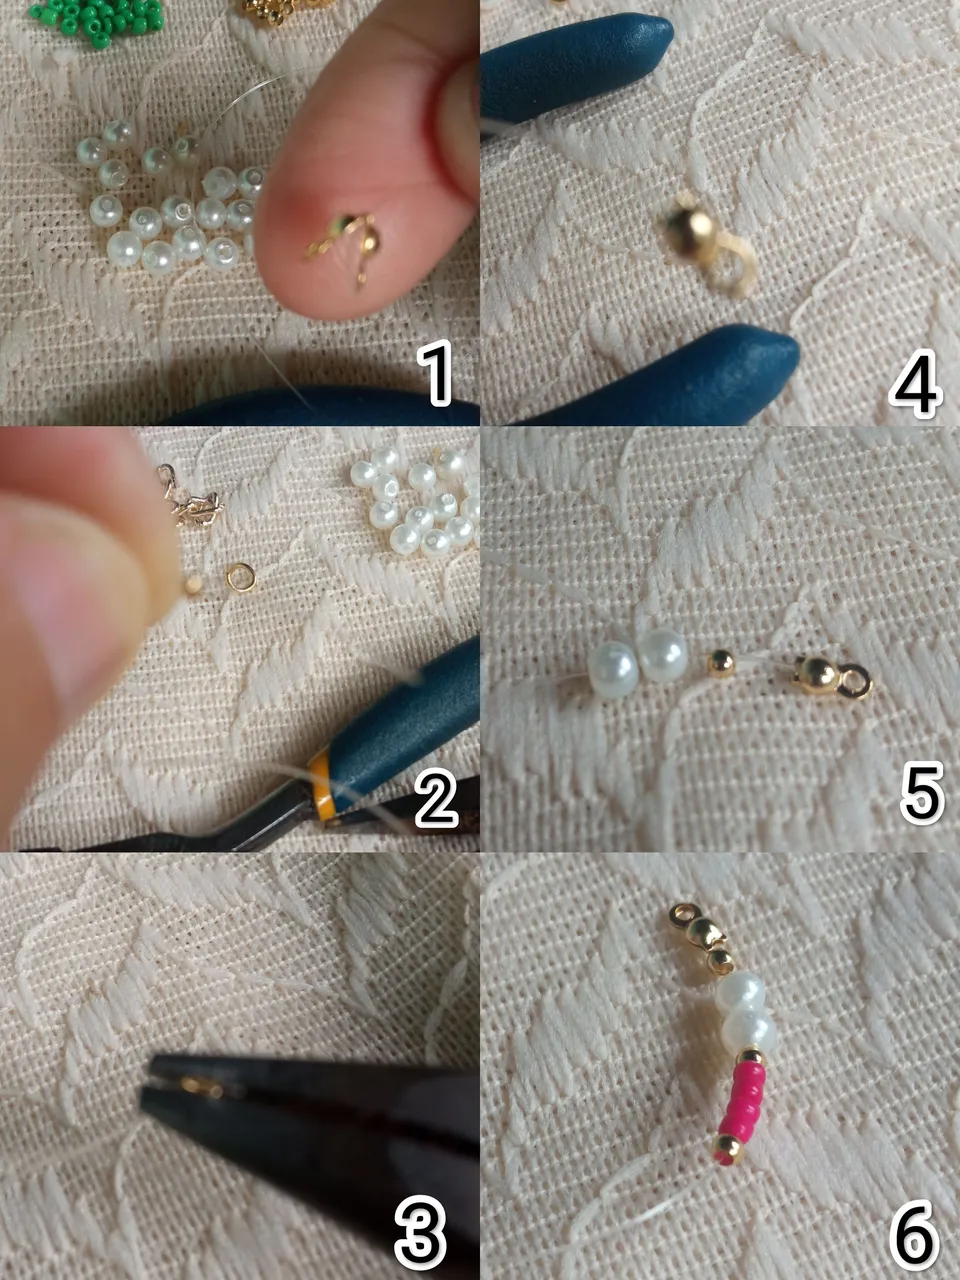
Paso a paso .
Comienzo cortando 45 cm de hilo nylon introduzco el tapanudos, luego el escarlachin o grapa aprieto con la pinza punta plana y cierro el tapanudos, luego introduzco un balín seguido de dos perlas , seguido de otro balín e introduzco 4 Mostacillas y un balín es un proceso fácil de realizar.(1 al 6).
Step by step.
I begin by cutting 45 cm of nylon thread, I introduce the knot-cover, then the scarlachin or staple I tighten with the flat tip pliers and close the knot-cover, then I introduce a ball followed by two pearls, followed by another ball and I introduce 4 beads and a ball is an easy process to perform (1 to 6).
Luego introduzco el hilo nylon por la primera mostacilla e introduzco dos mostacillas mas e introduzco el nylon por la cuarta mostacilla quedando el balín en el centro formando una linda y delicada flor 🌸, debo mantener presionado el hilo nylon entre dos dedos para evitar que se vaya al lado contrario , luego introduzco un balín, dos perlas, un balín, 4 Mostacillas de otro color y un balín (7 al 12).
Then I introduce the nylon thread through the first bead and introduce two more beads and introduce the nylon thread through the fourth bead, leaving the bead in the center forming a beautiful and delicate flower 🌸, I must keep the nylon thread pressed between two fingers to prevent it from going to the opposite side, then I introduce a bead, two beads, a bead, 4 beads of another color and a bead (7 to 12).

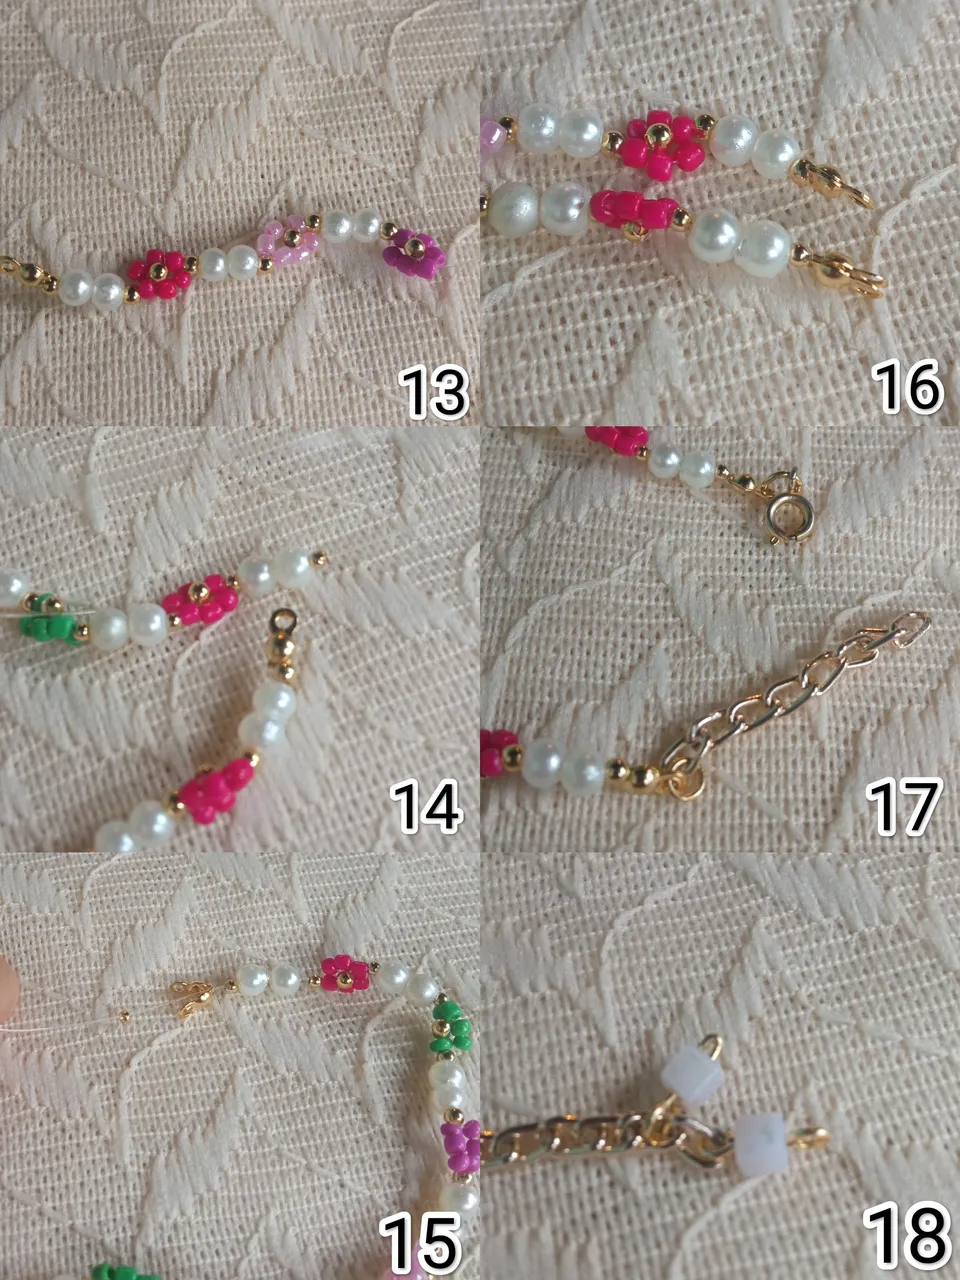
Repito el procedimiento hasta completar el largo deseado , introduzco el otro tapanudos, la grapa o escarlachin aprieta y cierro el tapanudos, luego en ambos extremos coloco una argolla y en un extremo coloco el trancadero y en el otro la cadena extensiva y al final coloco las piezas engarzadas, reviso que este todo bien y doy por terminada está hermosa pieza ( 13 al 18).
I repeat the procedure until I complete the desired length, I introduce the other knot-cover, the staple or scarlachin tightens and I close the knot-cover, then at both ends I place a ring and at one end I place the locking ring and at the other end the extensive chain and at the end I place the crimped pieces, I check that everything is all right and I consider this beautiful piece finished (13 to 18).
Espero les guste el trabajo realizado y una vez más agradecer su apoyo , espero estar muy pronto con ustedes por acá, les envío un abrazo a todos , esperando ir a carúpano a comprar un poco de material paraparticipar en el concurso navideño 🎄.
Las fotos son de mi propiedad @lupasbra21 , fueron tomadas con mi teléfono inteligente Redmi note.
Usé la aplicación polish para la edición de fotos.
Usé el traductor Deepl traslate.
I hope you like the work done and once again thank you for your support, I hope to be very soon with you here, I send you all a hug, waiting to go to Carúpano to buy some material to participate in the Christmas contest 🎄.
The photos are from my property @lupasbra21 , they were taken with my Redmi note smartphone.
I used polish app for photo editing.
I used the translator Deepl trasl
ate.