
Welcome || Bienvenidos
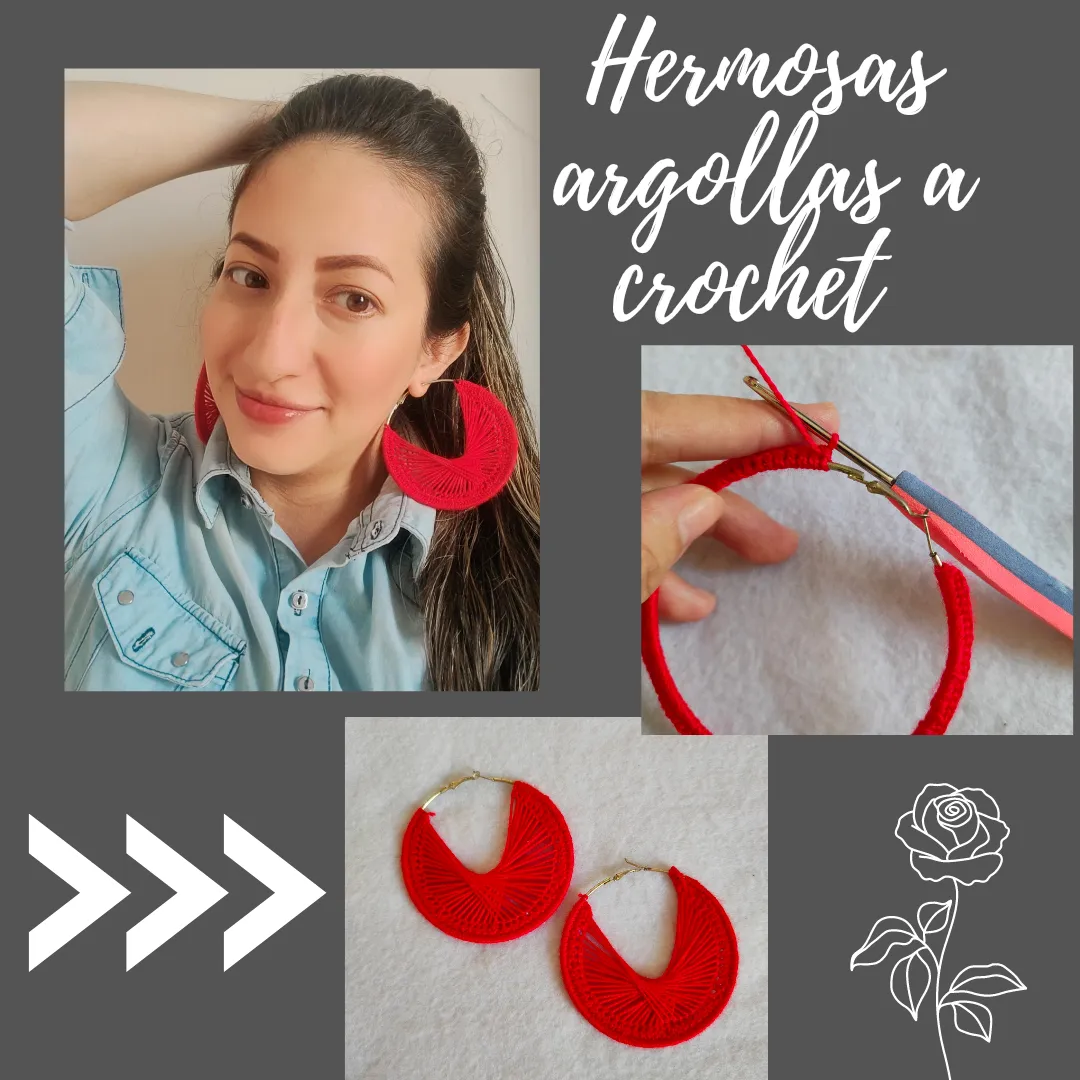
Feliz viernes a todos queridos amigos de Hive y familia de #Jewelry hoy estoy feliz de cerrar la semana compartiendo con ustedes mi último proyecto en cual vamos a darle un cambio radical a un par de argollas, se que como mujeres amamos muchas usar argollas pero siempre es genial tener de diferentes estilos en mi caso tenía estás argollas ya hace tiempo porque fue un regalo sin embargo las mimas se han deteriorado y ya nos las utilizaba así que pensé en personalizarlas y a su vez darle una segunda oportunidad pues no quería botarlas, así que puse mi mente a trabajar y manos a la obra así que con tan sola hilo o lana de tejer y un gancho de tejer trabaje hoy, así que quédense conmigo hasta el final y ver cómo pasó a paso se transforman estás argollas.
Happy Friday to all dear friends of Hive and #Jewelry family today I am happy to close the week sharing with you my last project in which we are going to give a radical change to a pair of rings, I know that as women we love to wear rings but it is always great to have different styles in my case I had these rings a long time ago because it was a gift however the same ones have deteriorated and I was not using them so I thought to personalize them and at the same time give them a second chance because I did not want to throw them away, so I put my mind to work and hands to work so with only yarn or knitting wool and a knitting hook I worked today, so stay with me until the end and see how step by step these rings are transformed.
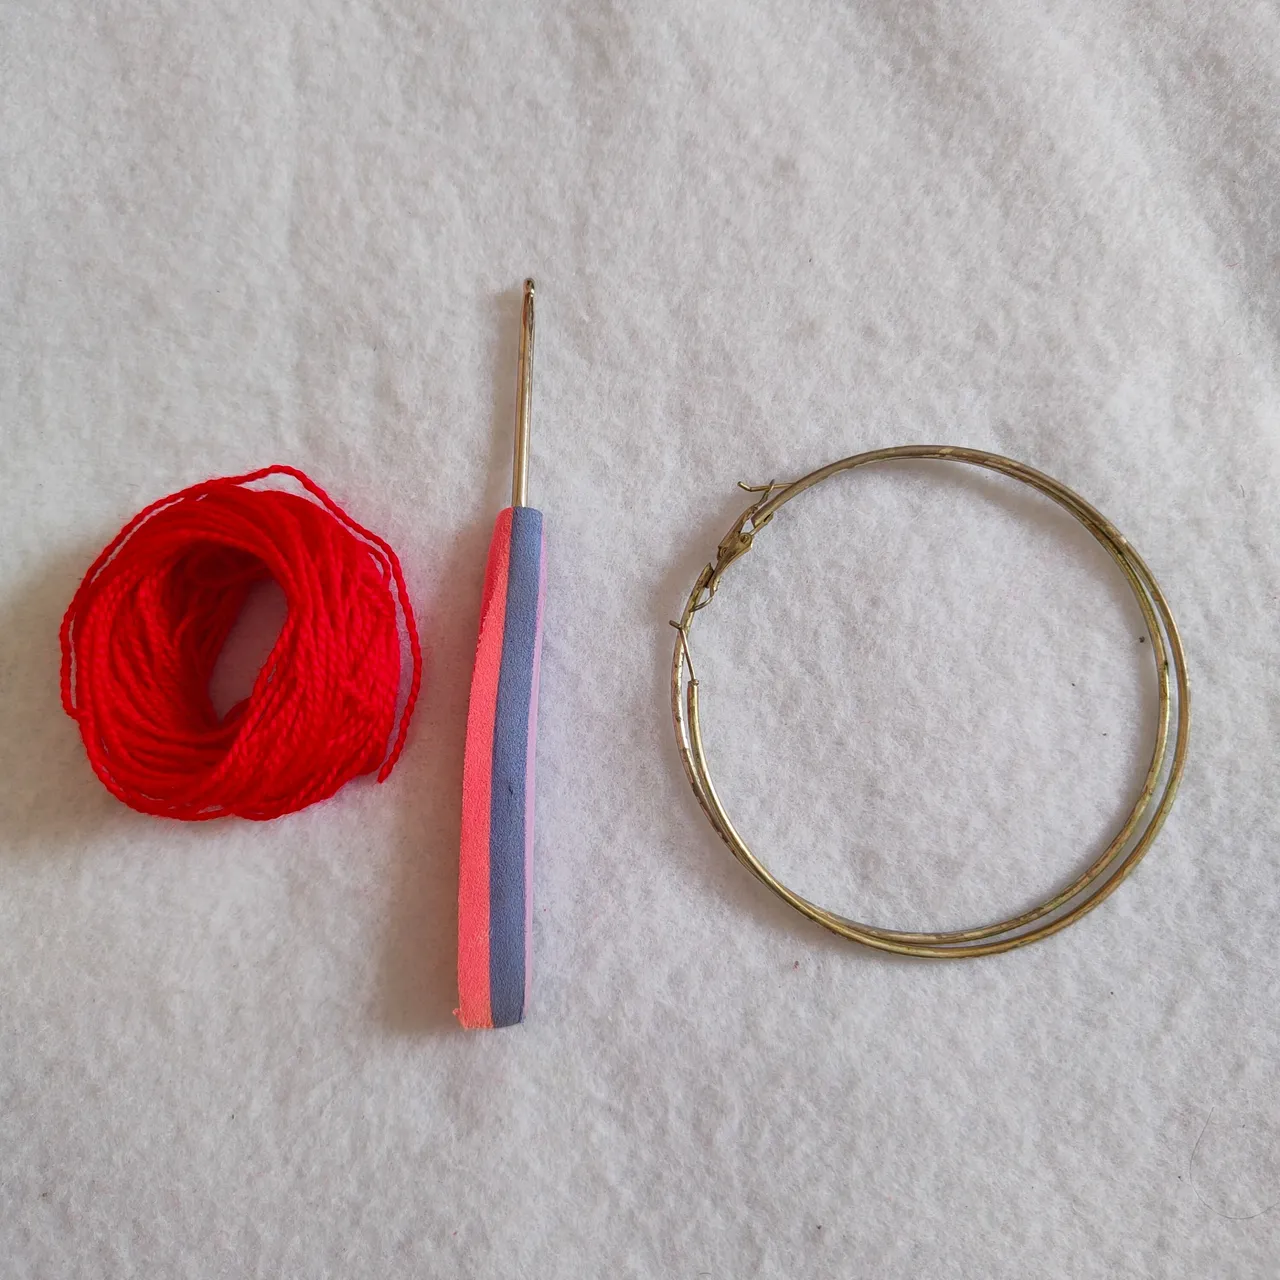
Materials || Materiales
🌹 Argollas.
🌹 Hilo o lana de tejer color rojo.
🌹 Tijera.
🌹 Aguja.
🌹 Ingenio. 💡🧠
🌹 Hoops.
🌹 Red knitting yarn or wool.
🌹 Scissors.
🌹 Needle.
🌹 Ingenuity. 💡🧠
Steps || Pasos.
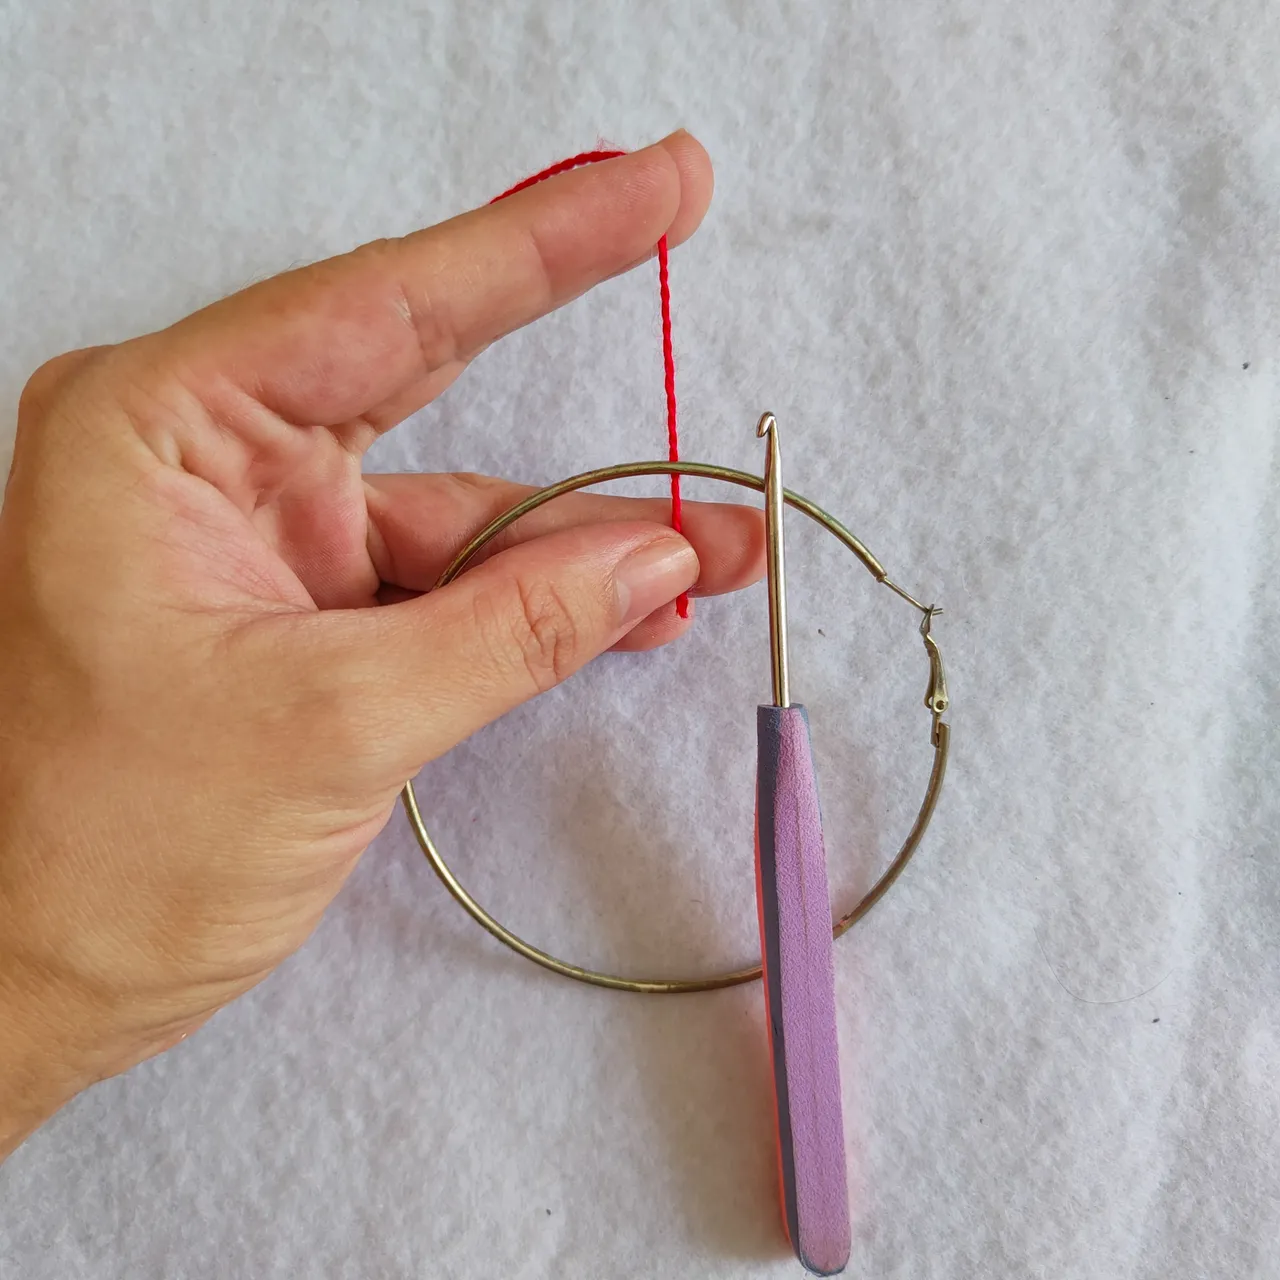
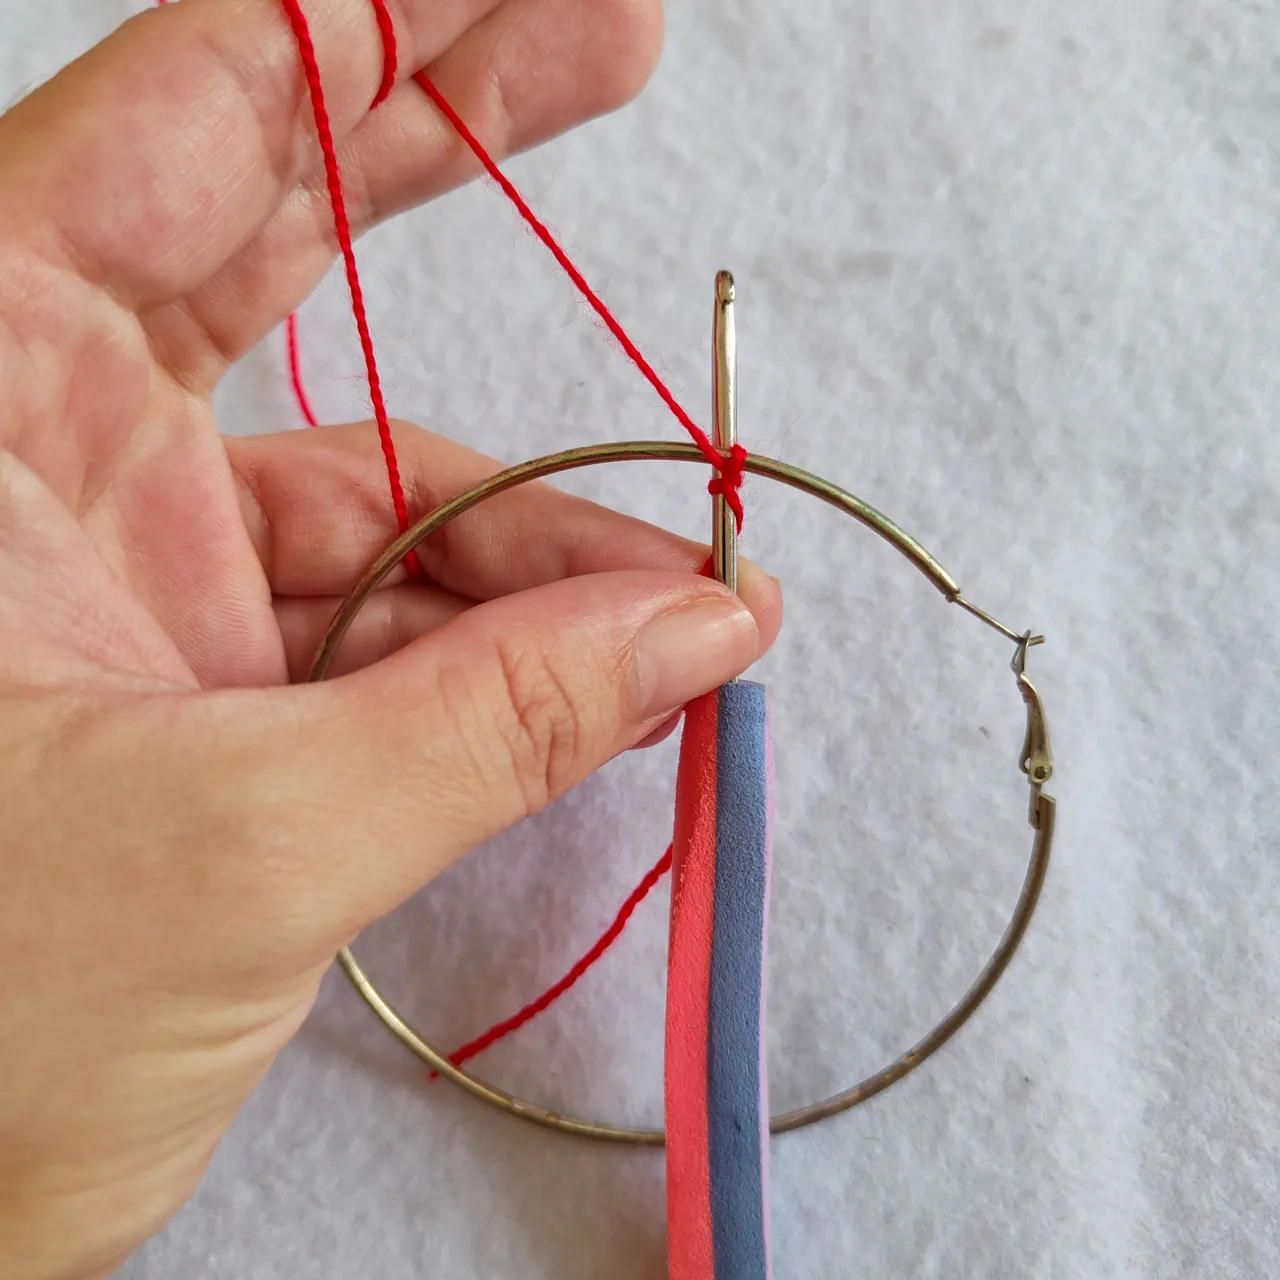
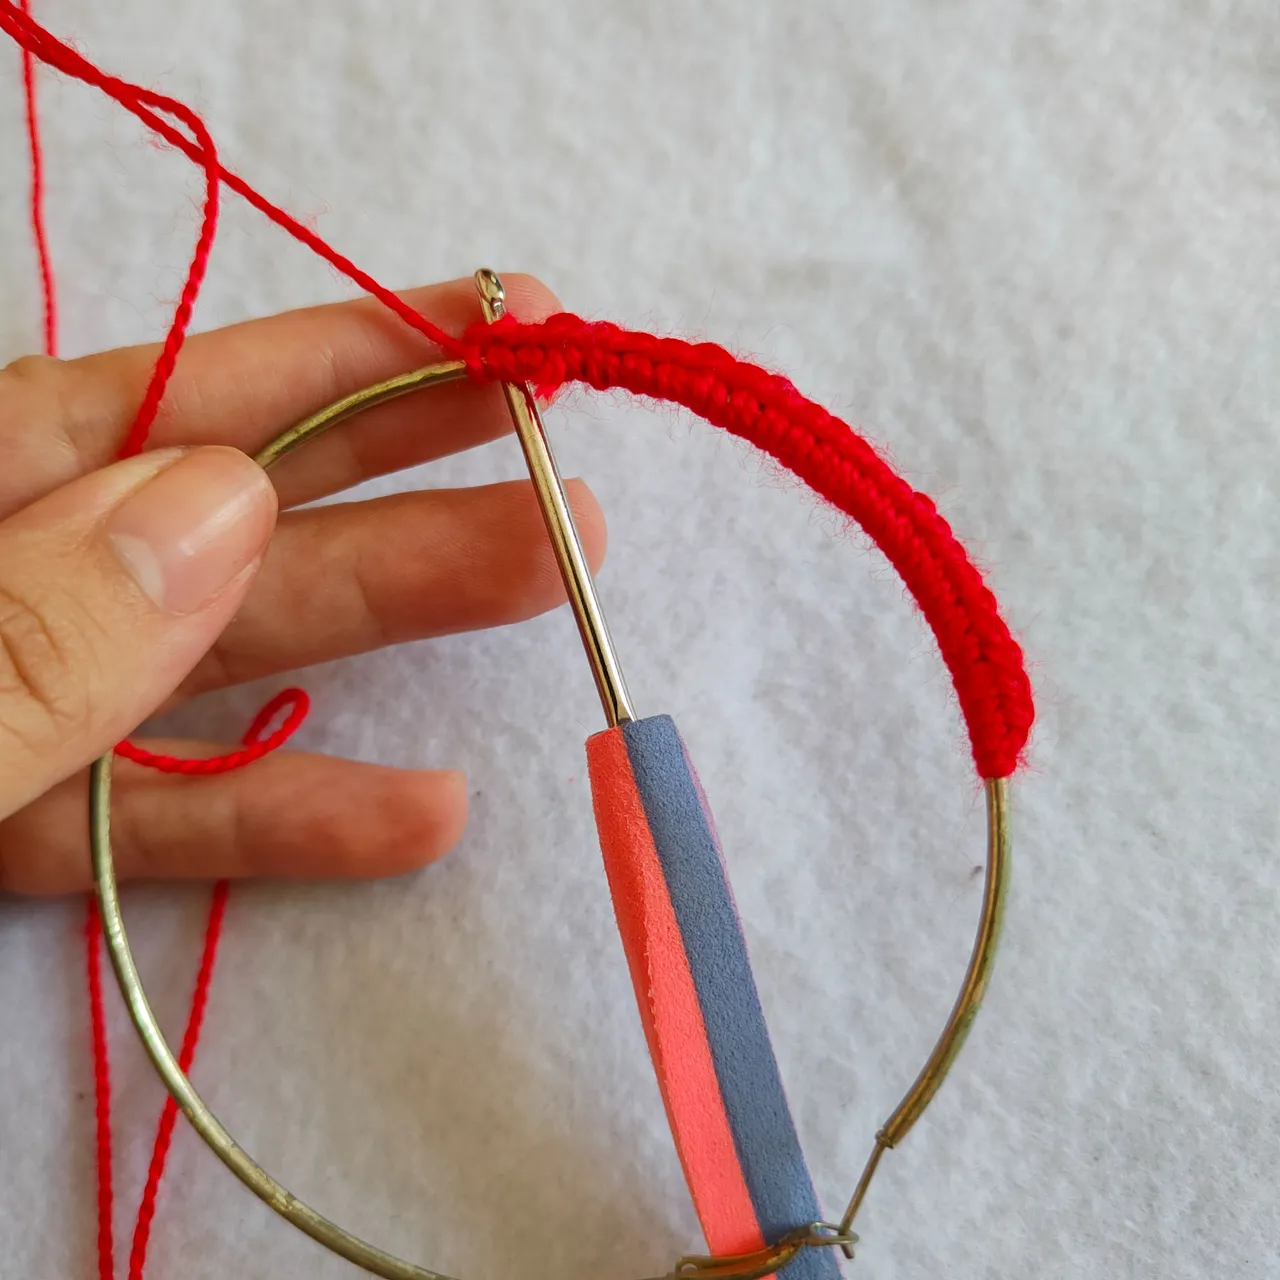
🌹 Paso 1. Lo primero que vamos hacer es tomar nuestra argolla y detrás de ella vamos a posicionar nuestra lana y con la otra mano vamos a tomar la aguja de tejer la cual vamos a posicionar por la parte de atrás de la argolla para así iniciar a tejer lo que serán puntos bajos, dependiendo del tamaño de la argollas vamos a tejer más puntos o menos puntos en mi caso las argollas son grandes así que vamos a ir contando cuanto puntos realizamos para cubrir la argolla.
🌹 Step 1. The first thing we are going to do is to take our ring and behind it we are going to position our yarn and with the other hand we are going to take the knitting needle which we are going to position on the back of the ring to start knitting what will be low stitches, depending on the size of the rings we are going to knit more stitches or less stitches in my case the rings are big so we are going to count how many stitches we make to cover the ring.

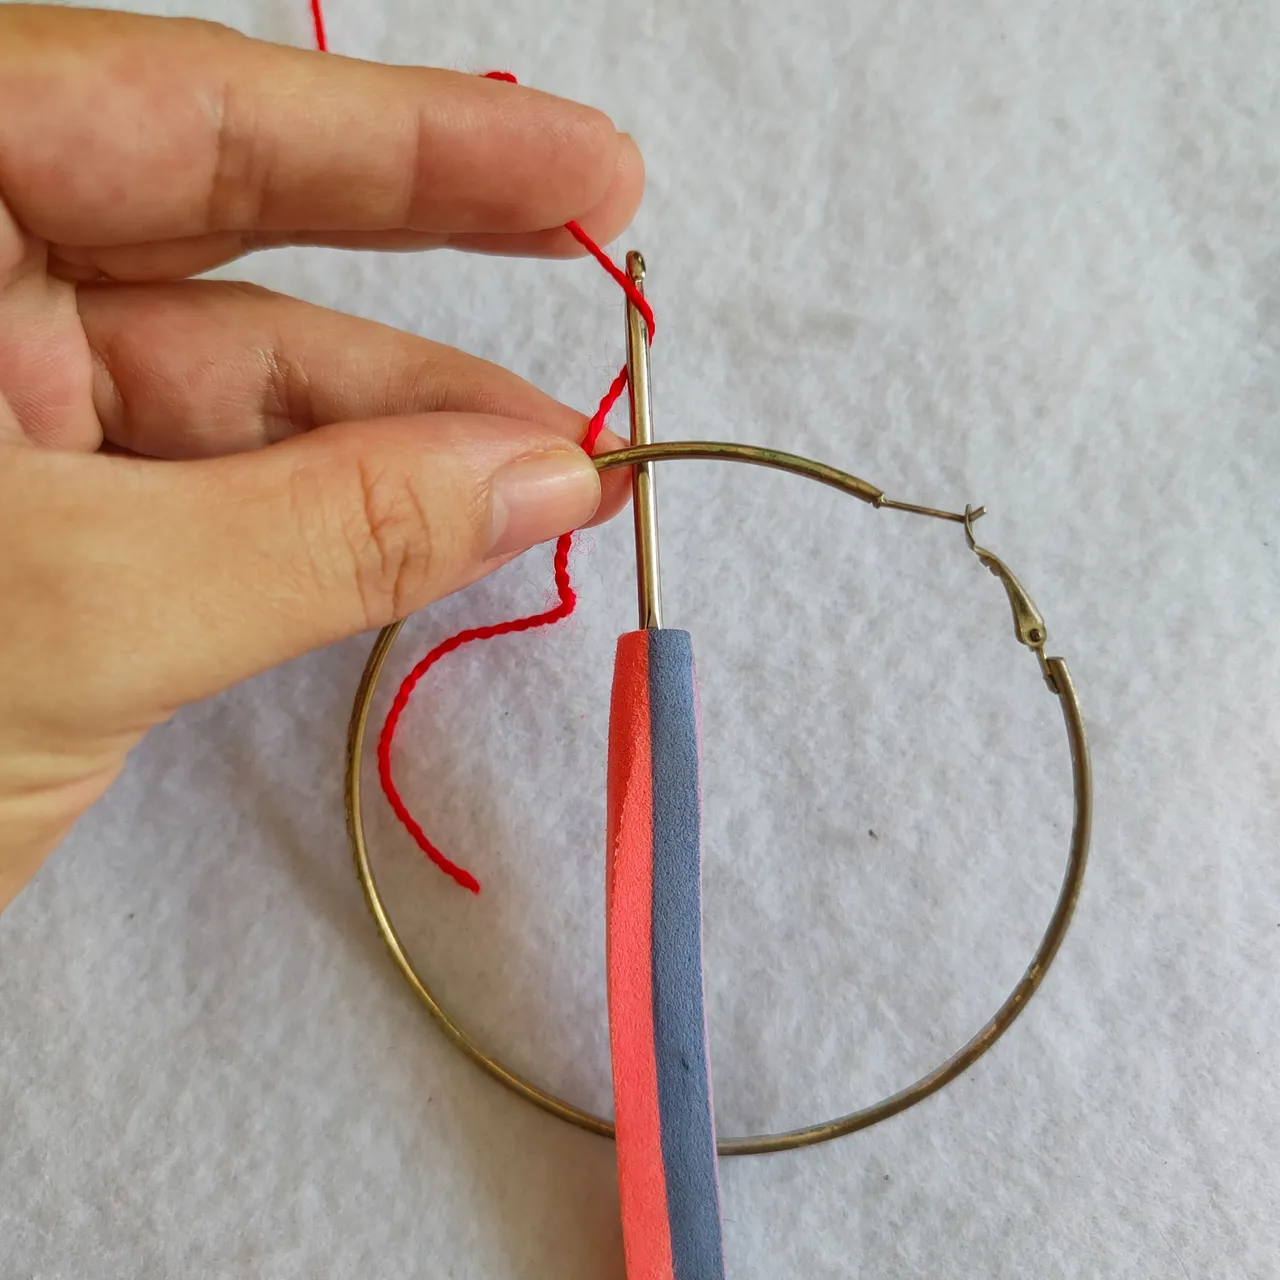
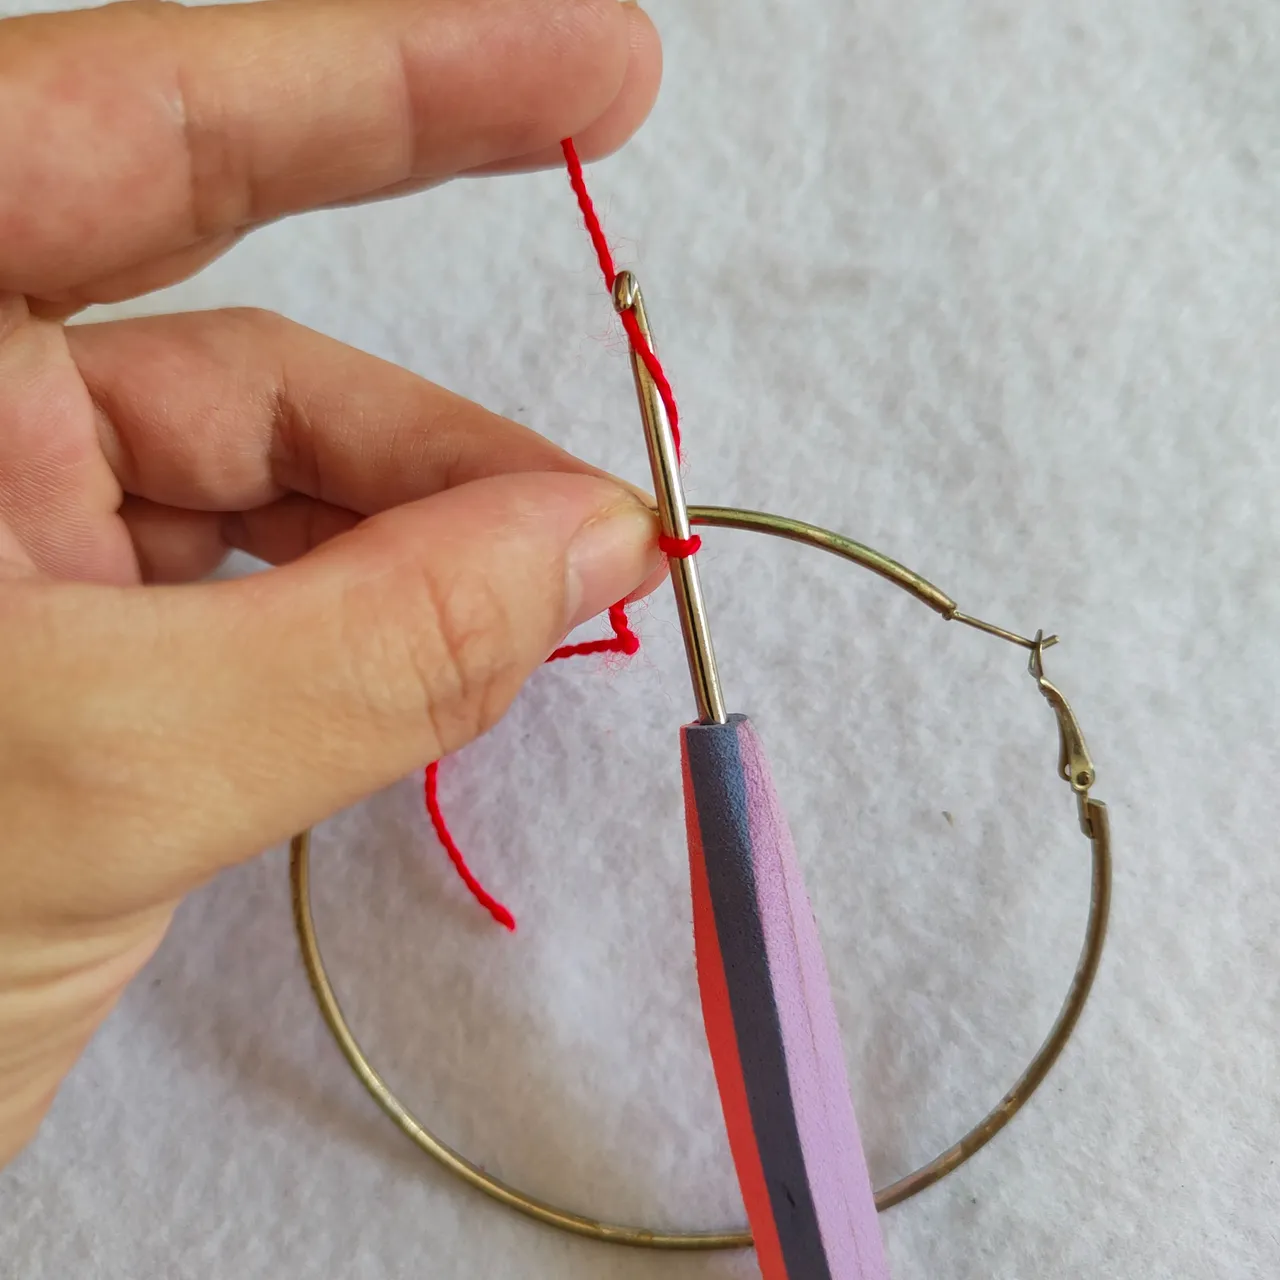
🌹 Paso 2. Es importante ir contando las puntas a medidas que las vamos realizando ya que es un trabajo que requiere precisión para obtener un resultado preciso y hermoso en esta primera vuelta que realizamos en la argolla fue un total de 100 puntos bajos, lo sé suena a una cantidad exagerada, pero no lo es, es importante dejar un pequeño espacio entre nuestro hilo de tejer y ambos extremos de nuestra argolla.
🌹Step 2. It is important to count the stitches as we are making them because it is a work that requires precision to obtain an accurate and beautiful result in this first round that we made in the ring was a total of 100 low stitches, I know it sounds like an exaggerated amount, but it is not, it is important to leave a small space between our knitting yarn and both ends of our ring.
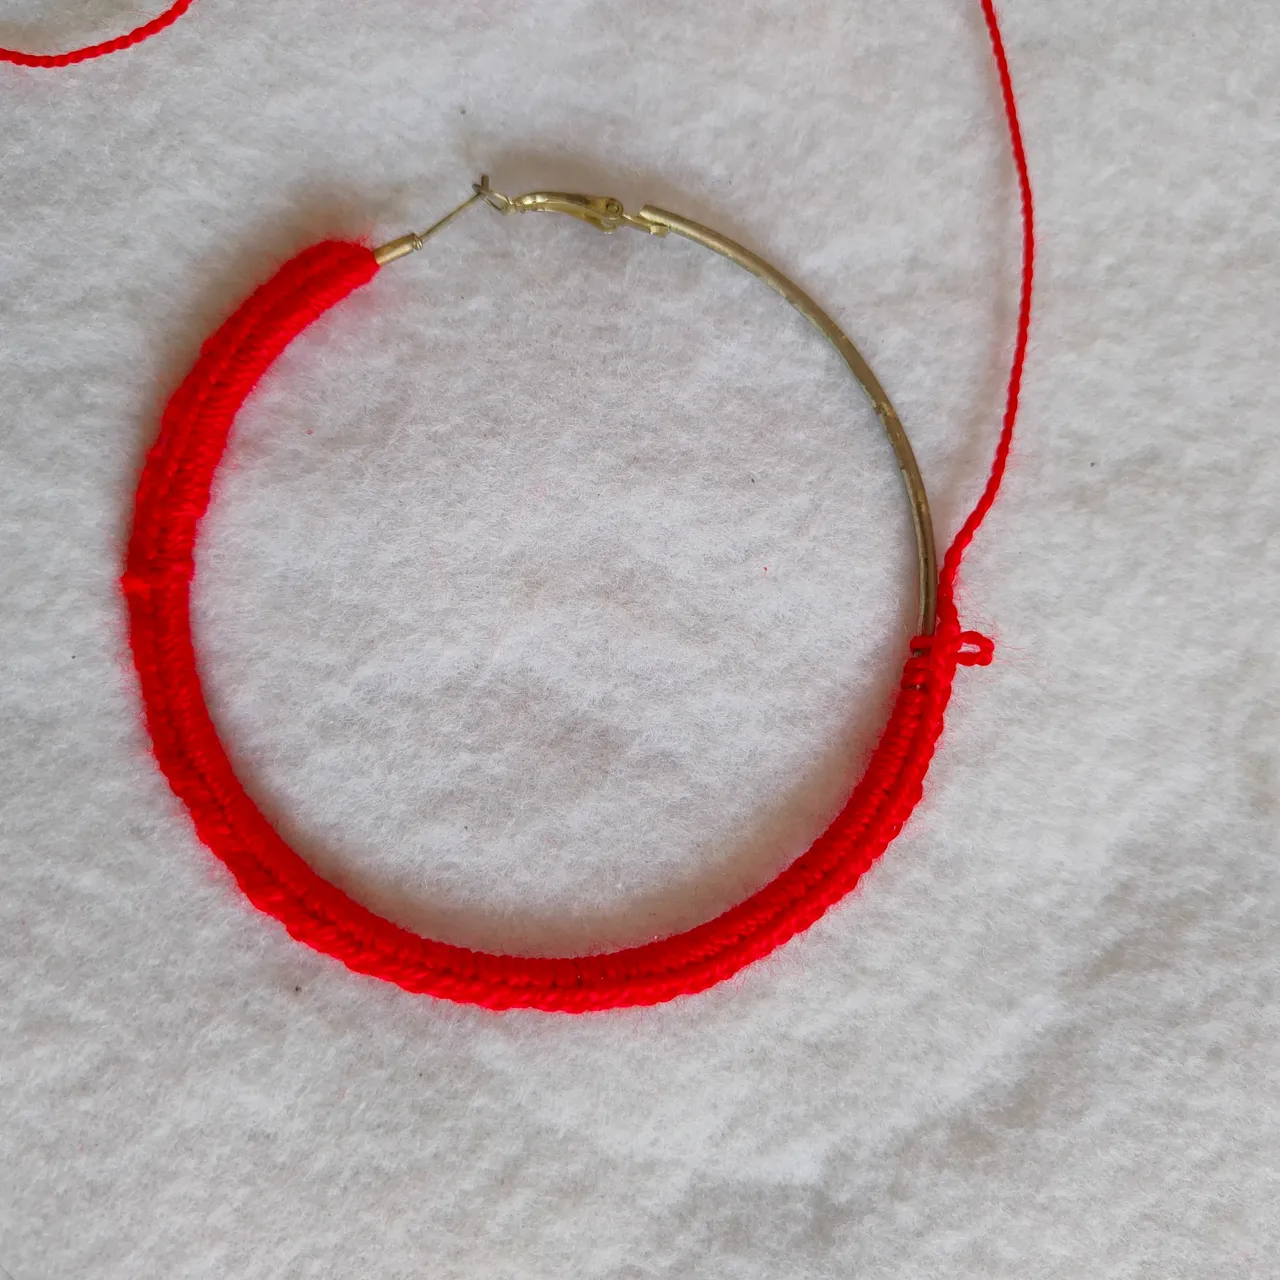
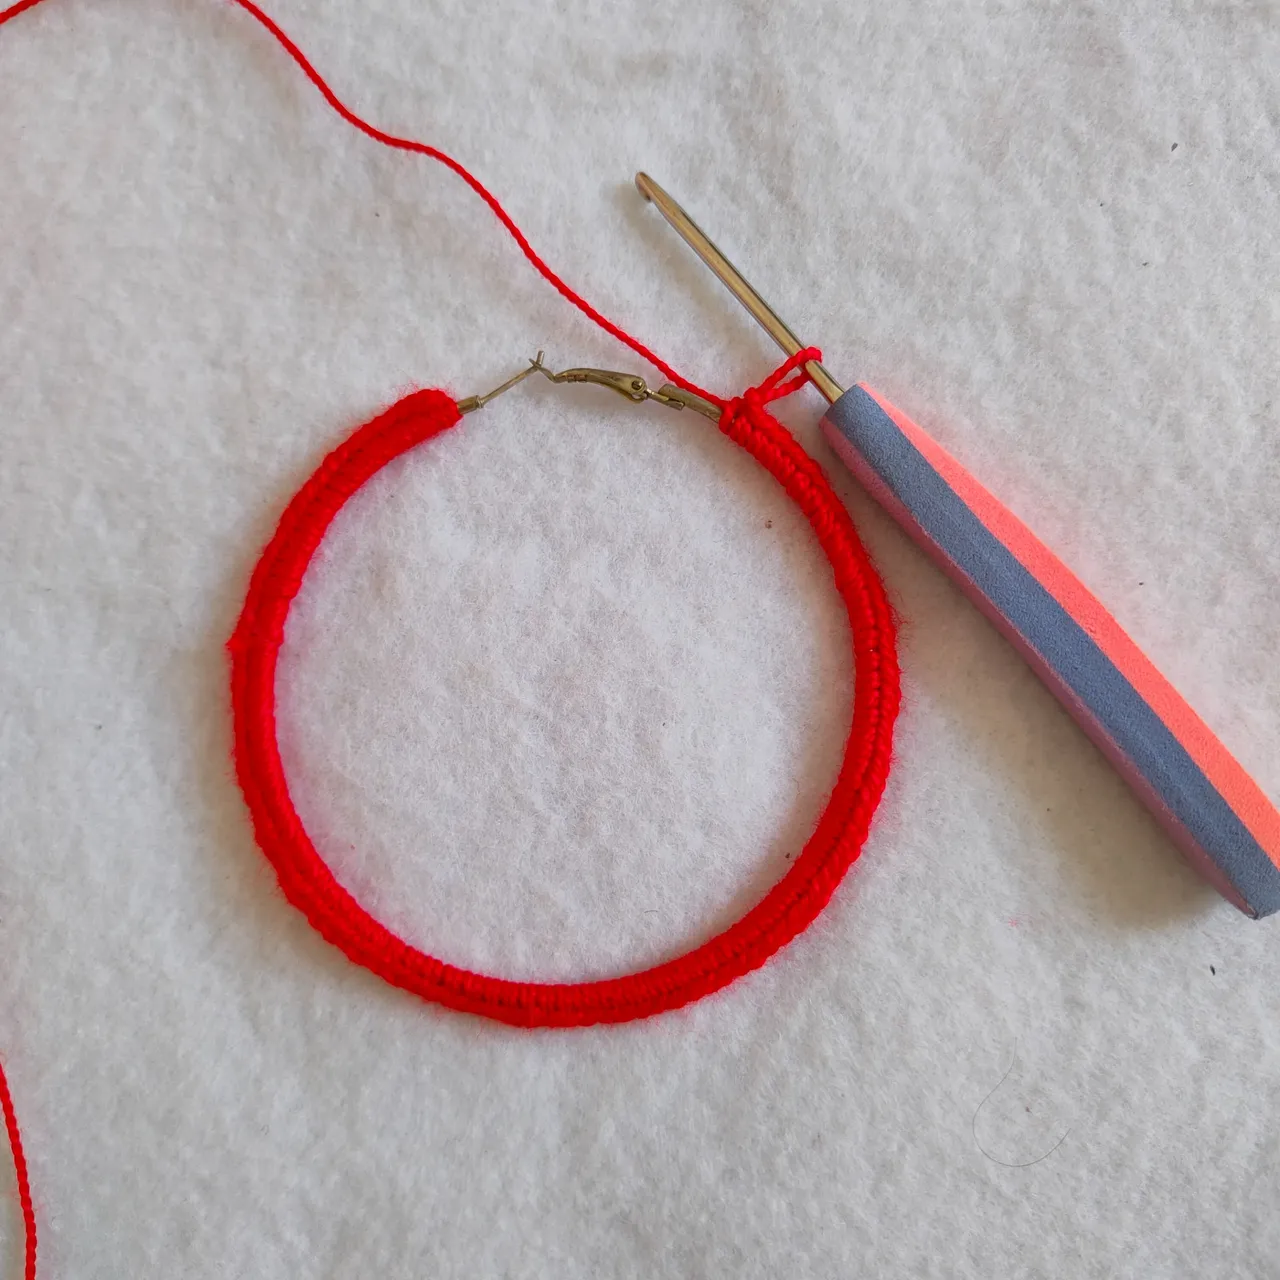
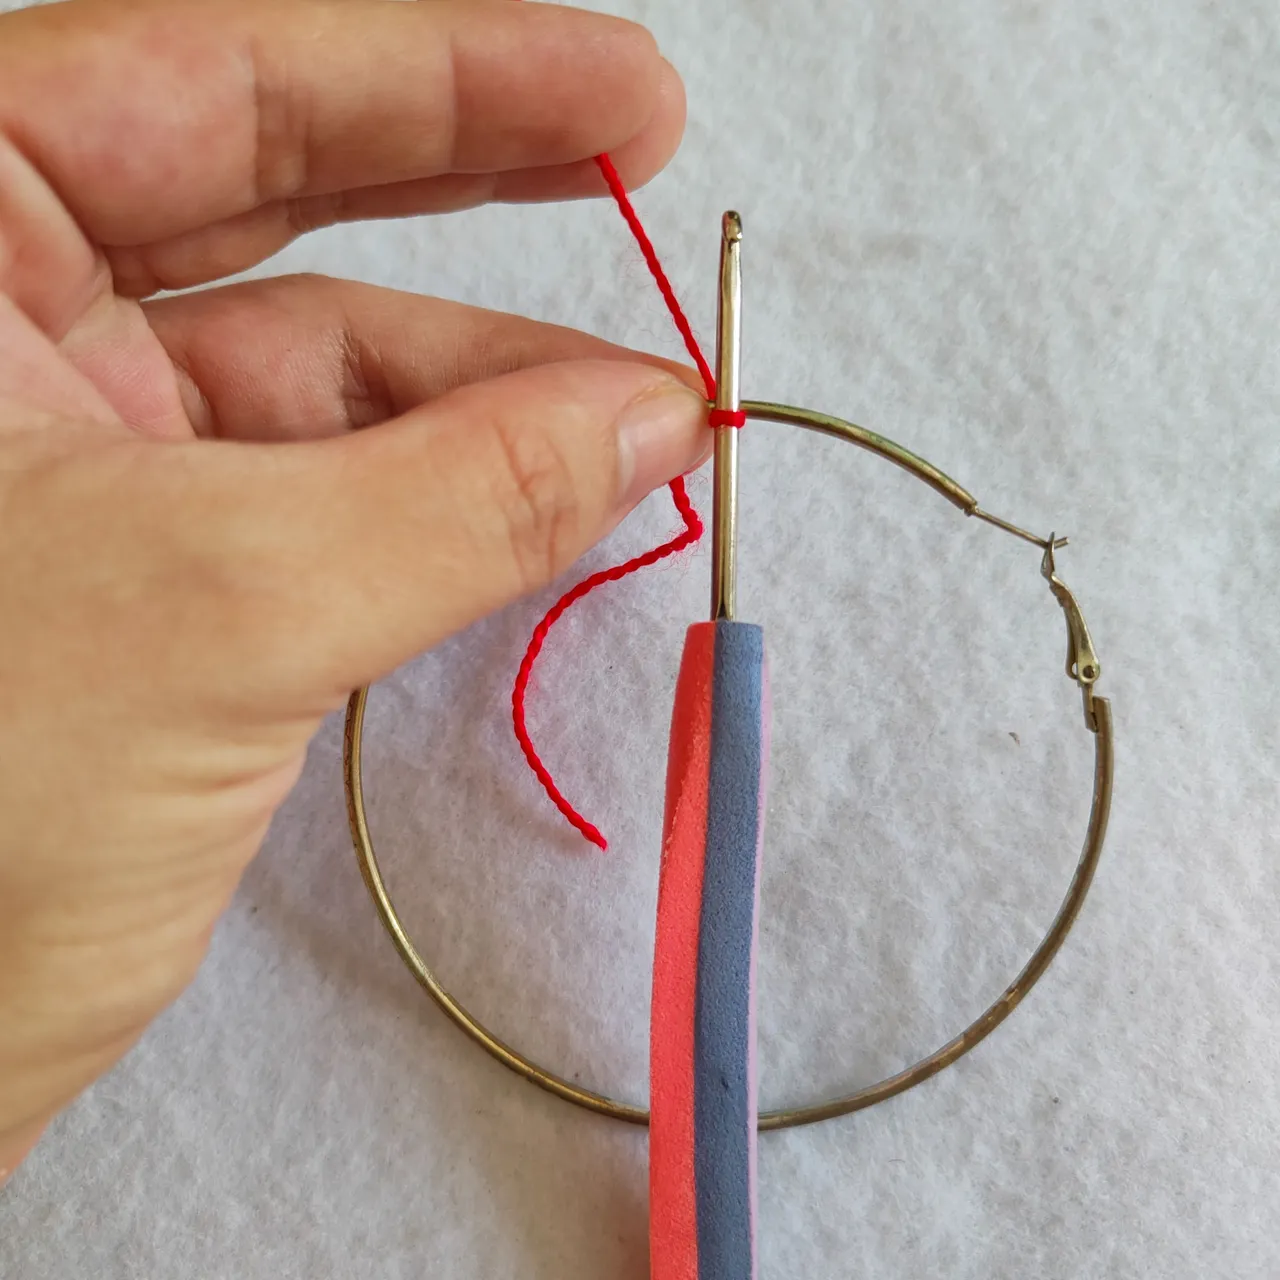
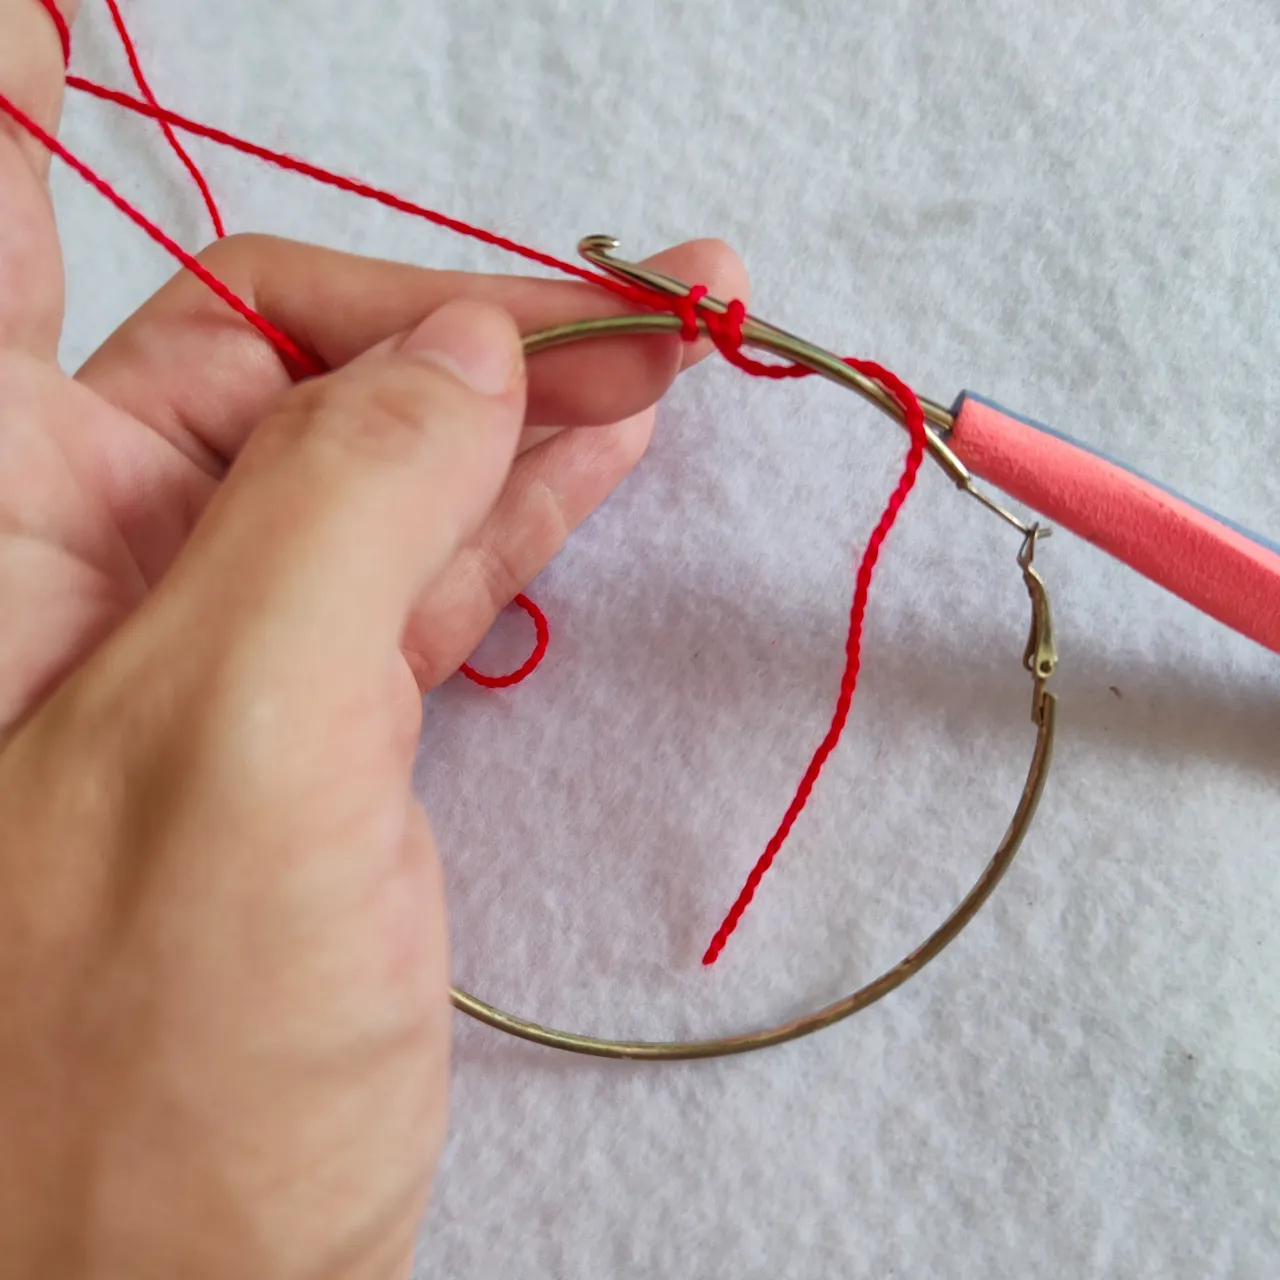
🌹 Paso 3. Una vez que culminamos nuestra primera hilera de puntos bajos, vamos a girar nuestra argolla de manera de darle continuidad al tejido con una segunda hilera la cual tambien constará de puntos bajos, con la diferencia que vamos hacer un punto bajo, dejamos un espacio y hacemos otro punto bajo, lo que quiere decir que vamos hacer la mita de puntos bajos que en el paso anterior, es decir que nuestra segunda hilera va contar de 50 puntos bajos.
🌹Step 3. Once we finish our first row of single crochet, we are going to turn our ring in order to give continuity to the knitting with a second row which will also consist of single crochet, with the difference that we are going to make a single crochet, leave a space and make another single crochet, which means that we are going to make half as many single crochet stitches as in the previous step, that is to say that our second row will have 50 single crochet stitches.
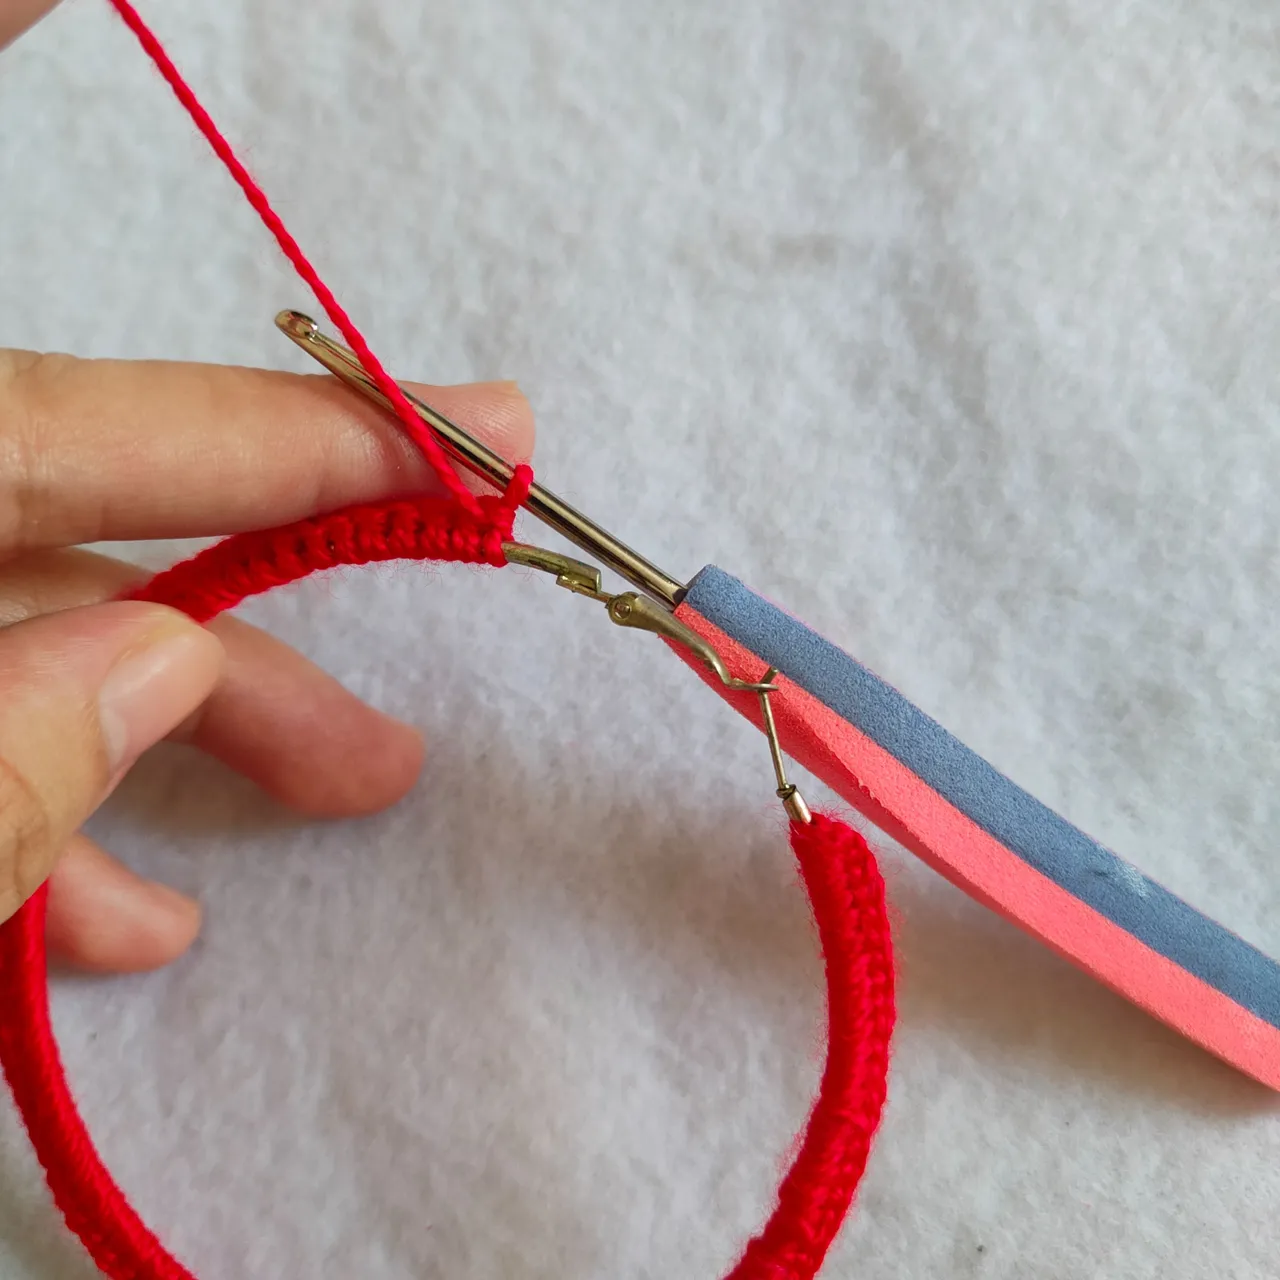
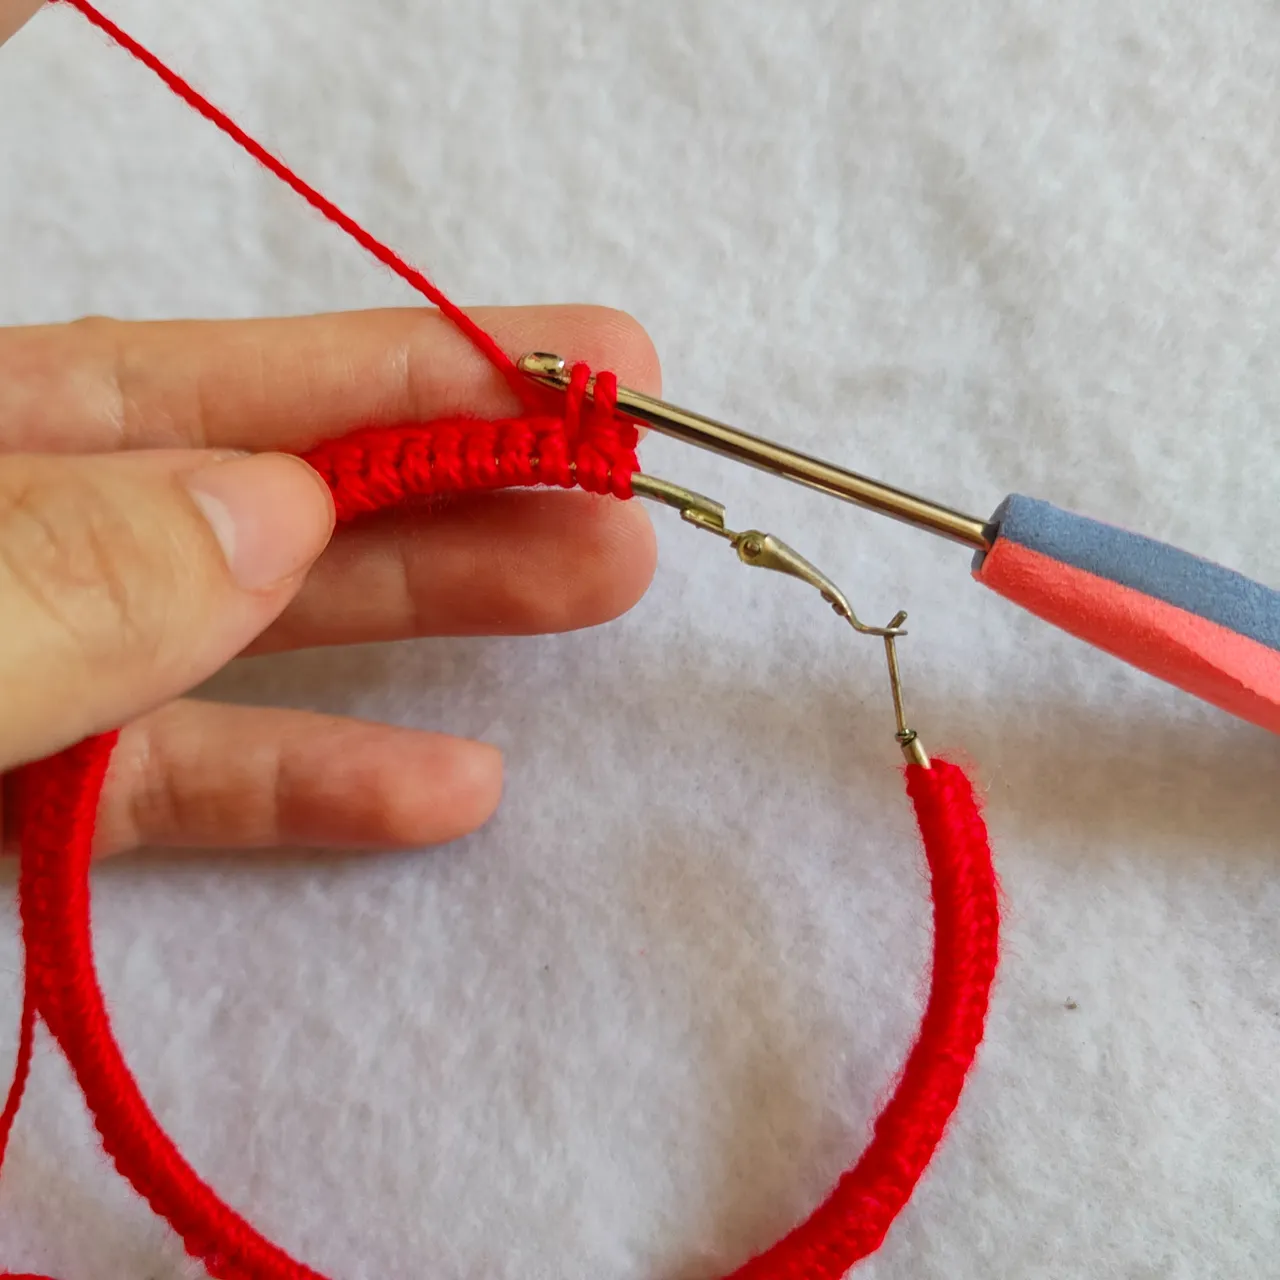
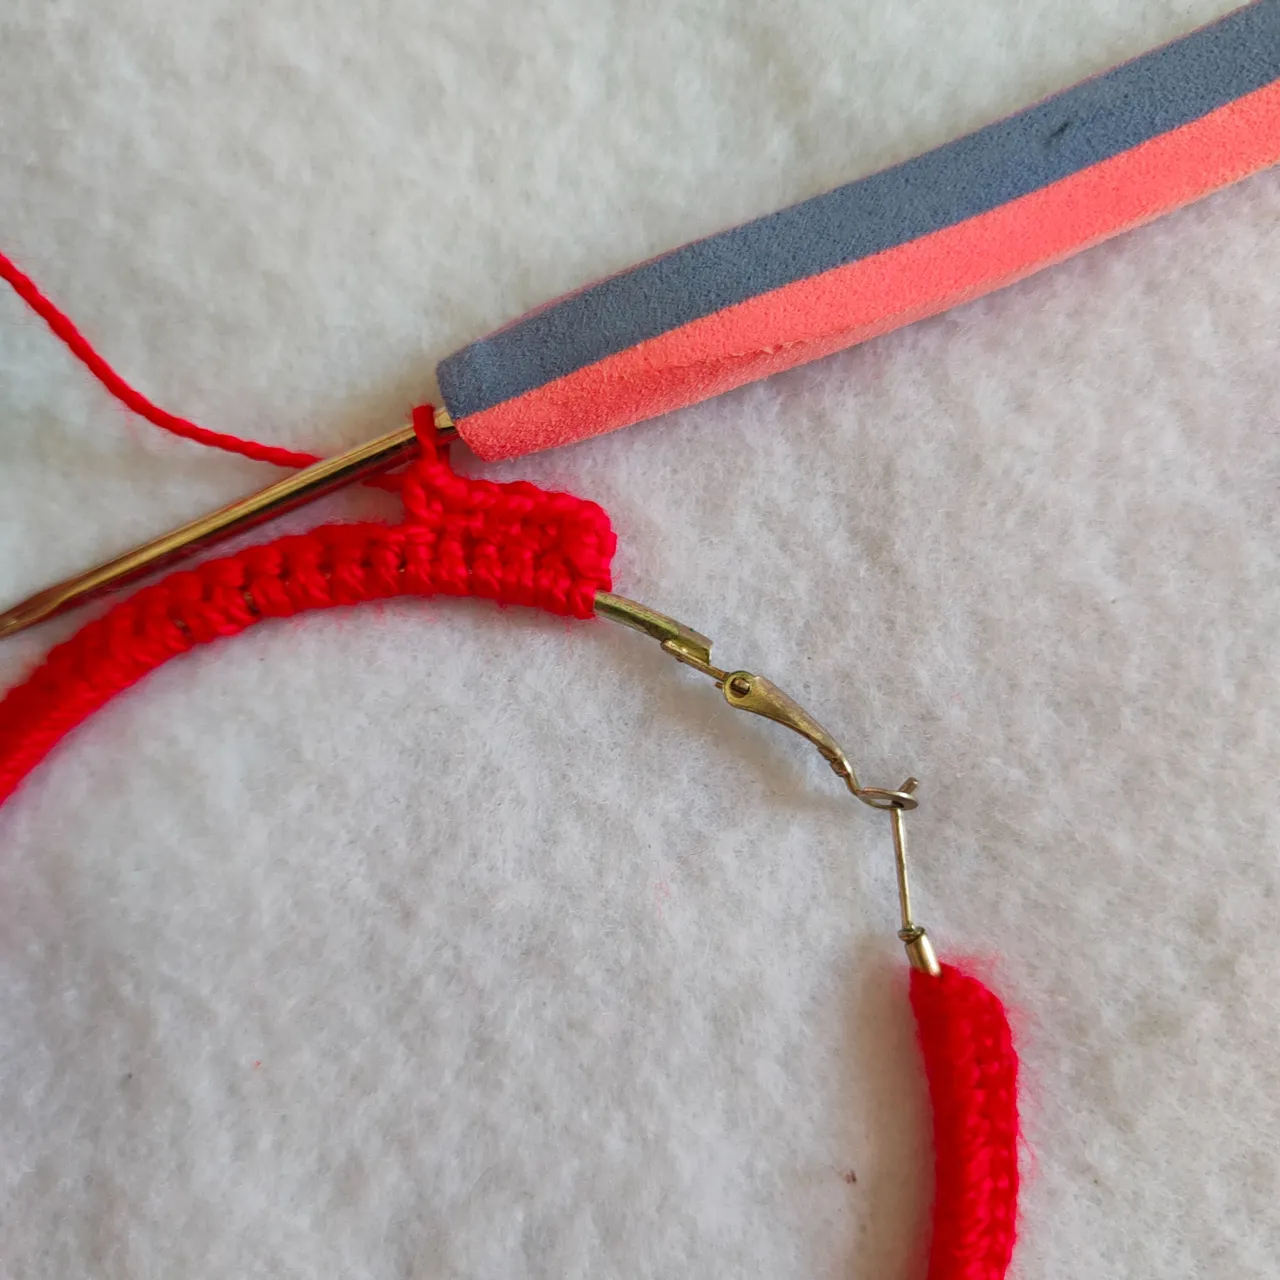
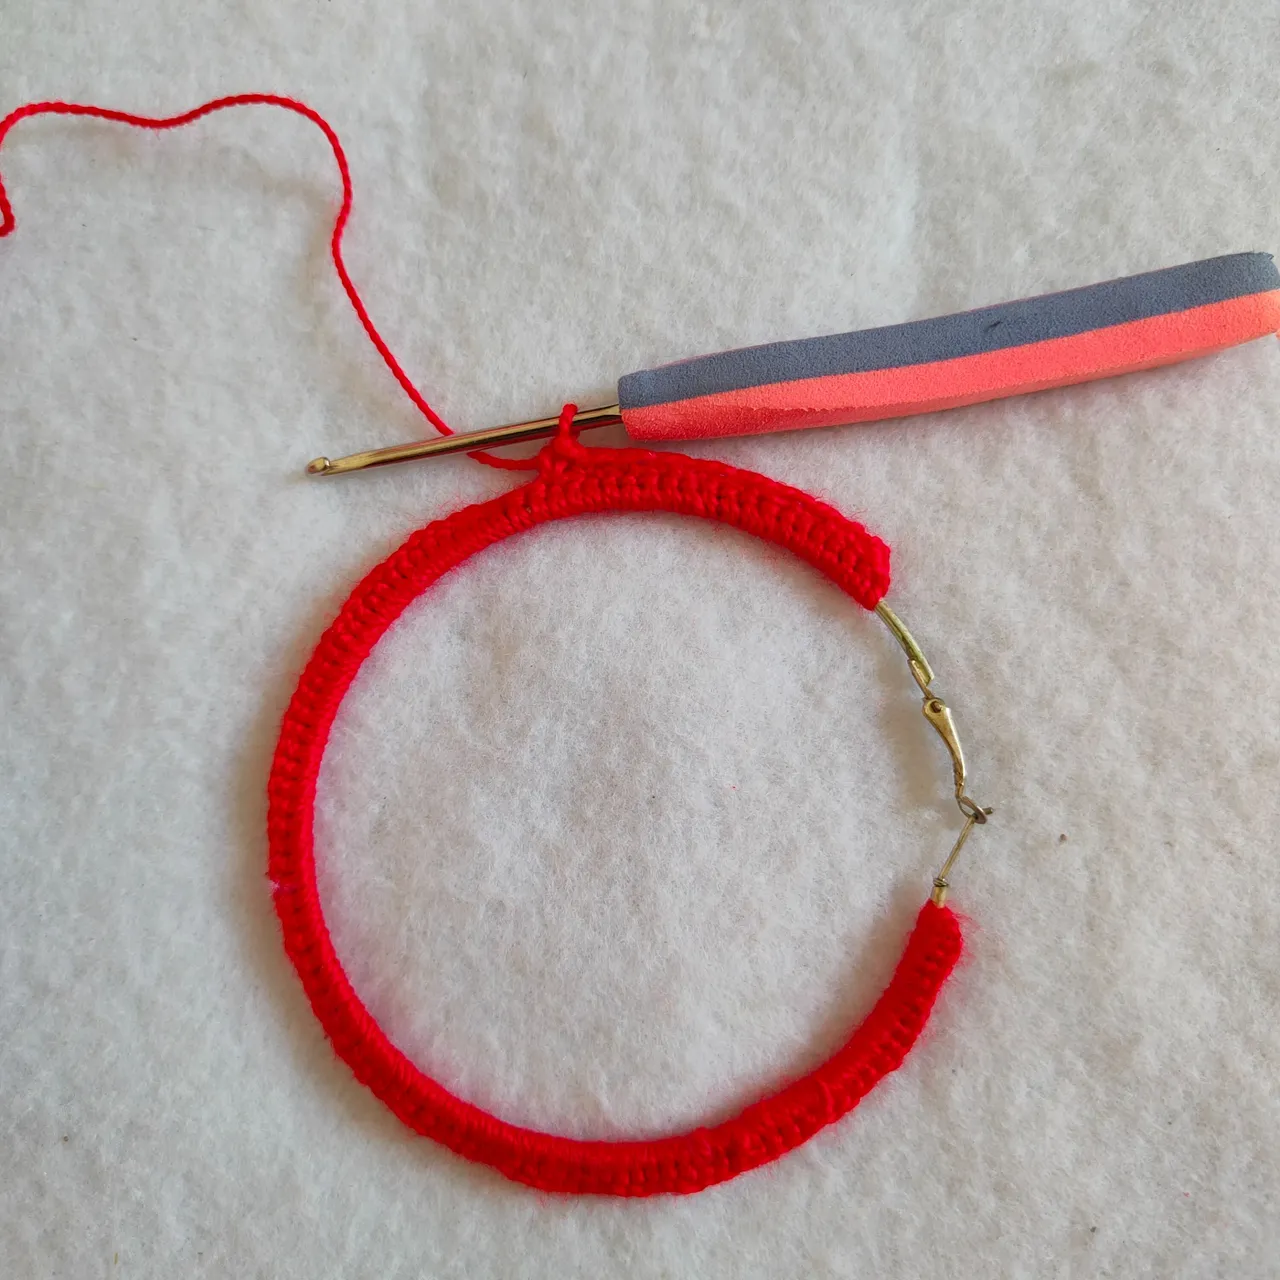
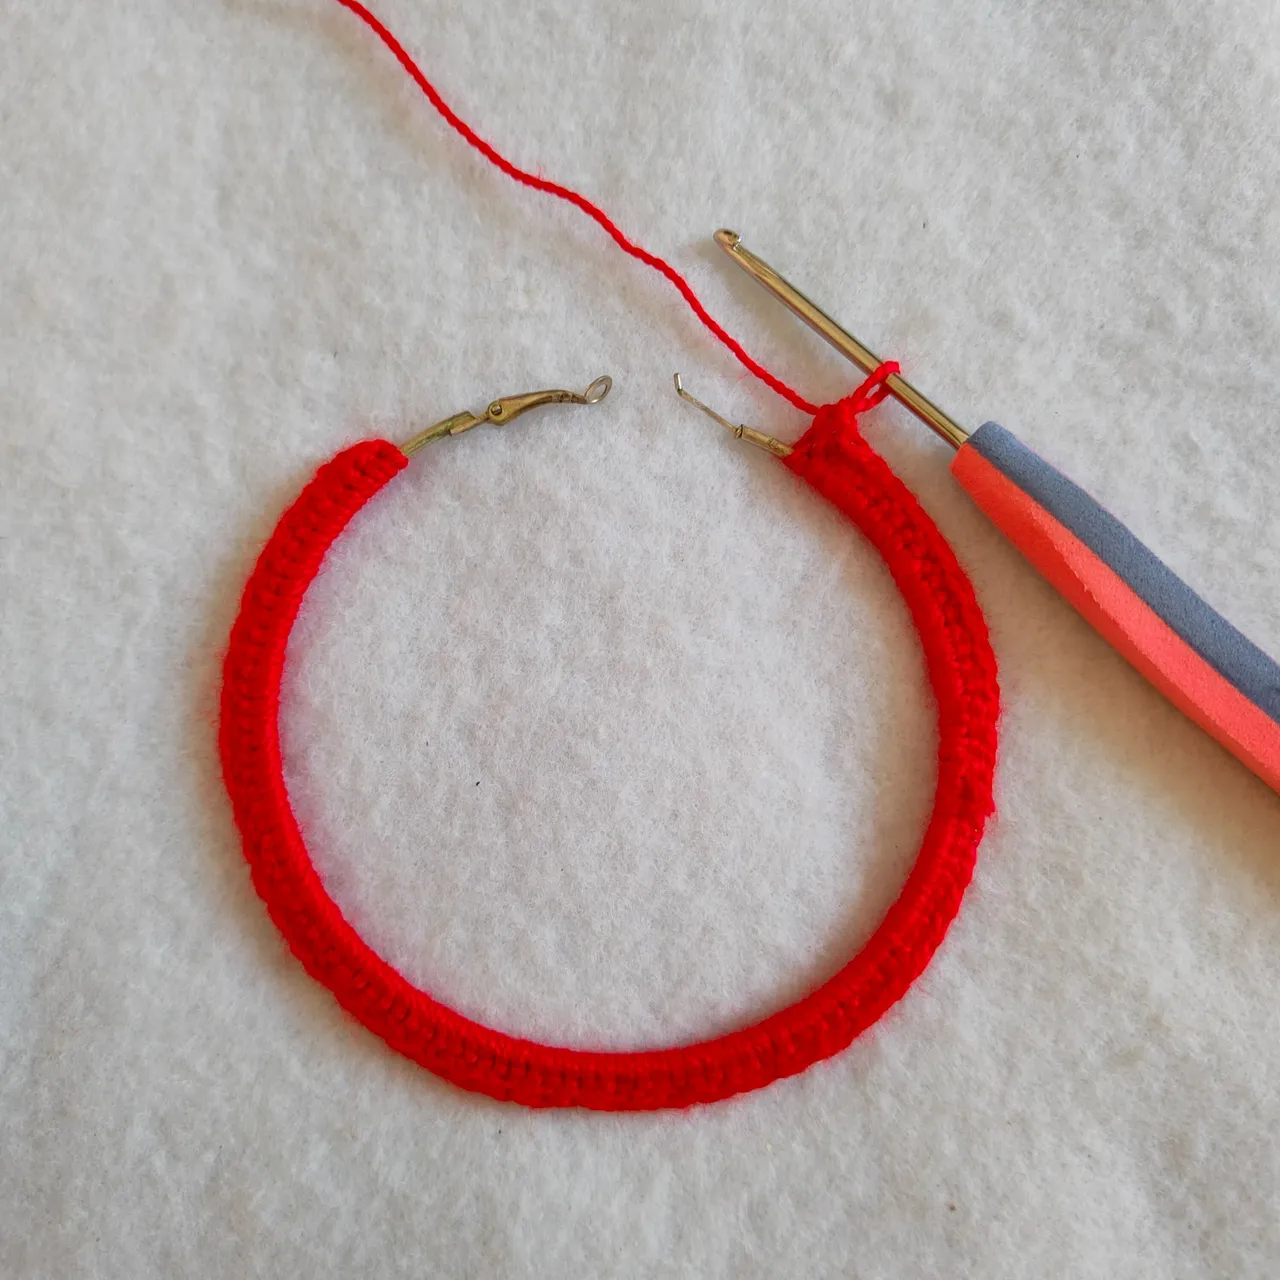
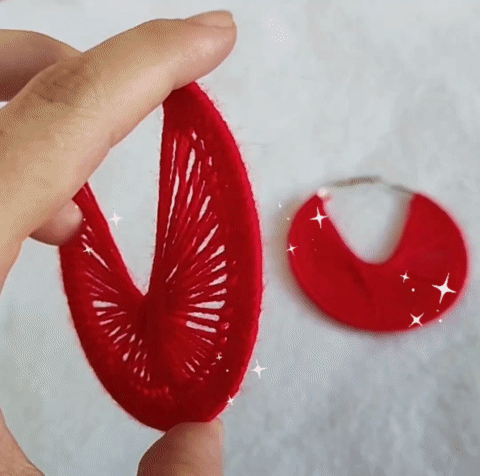
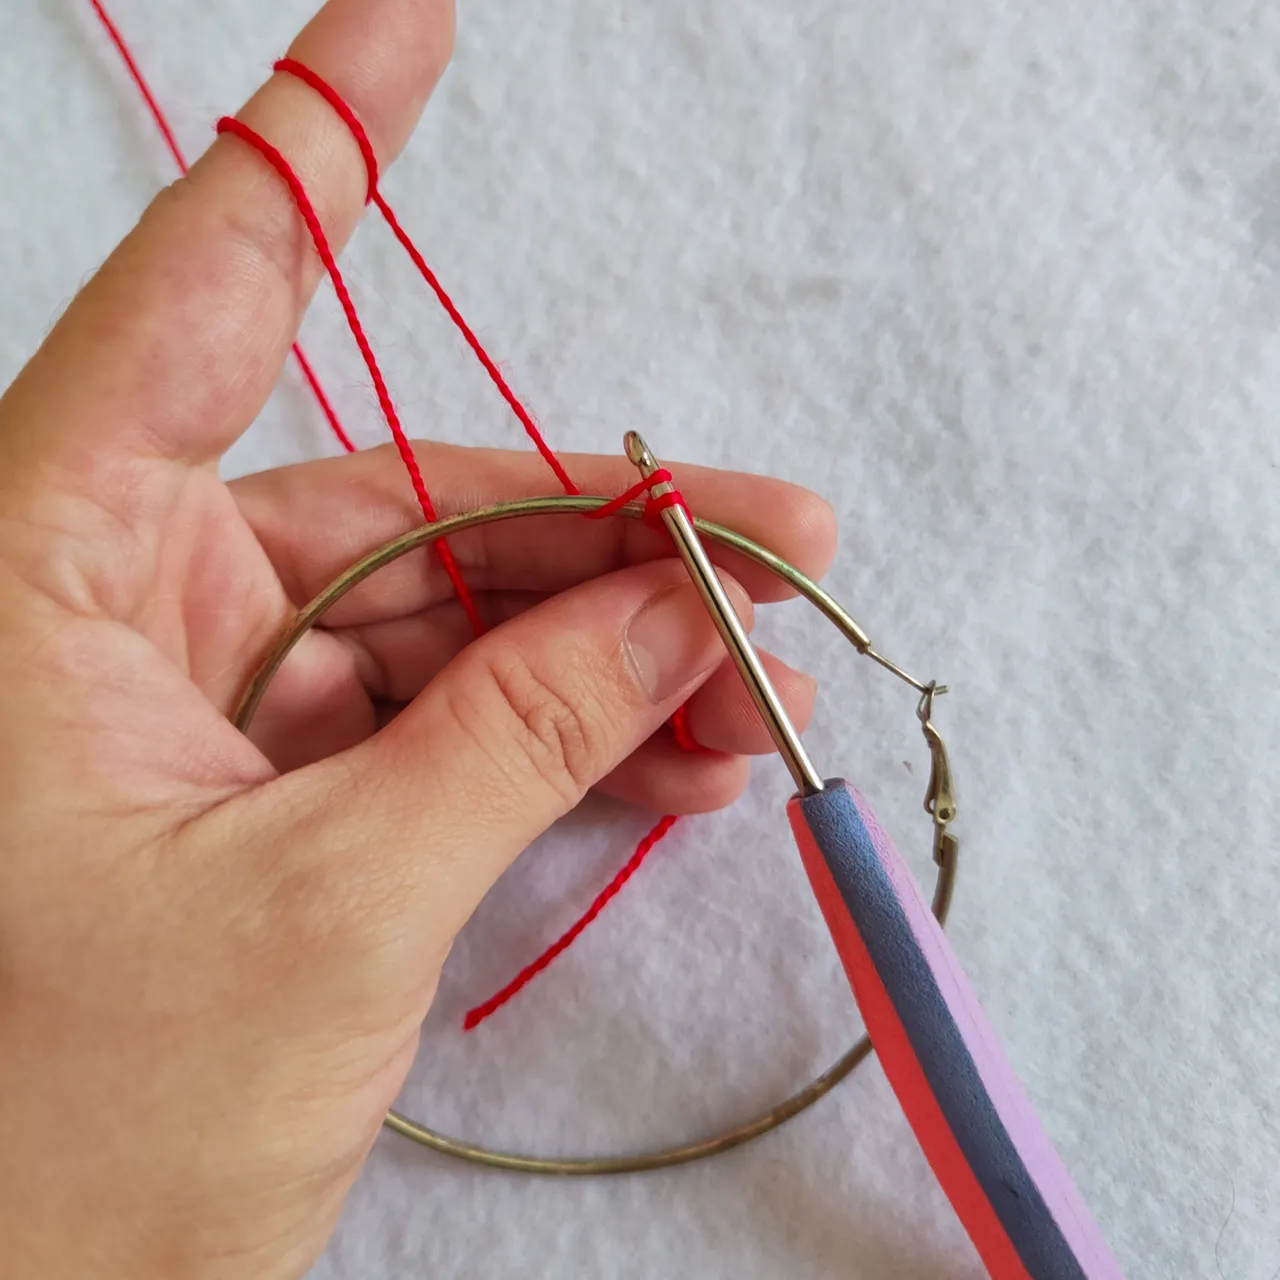
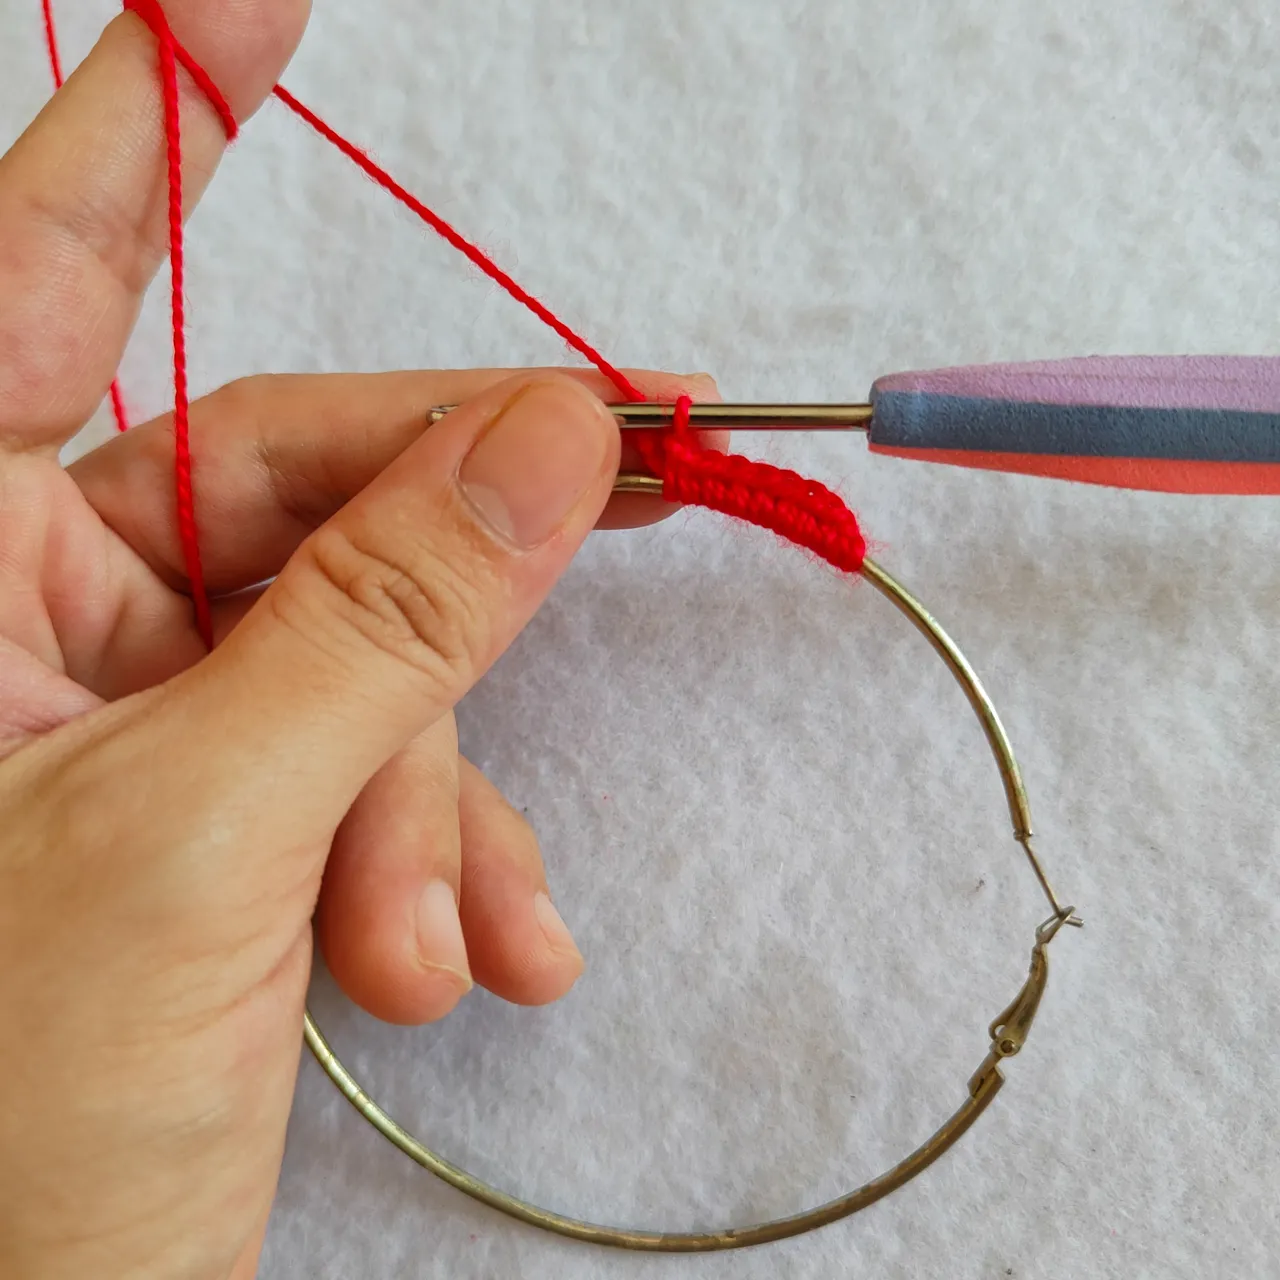
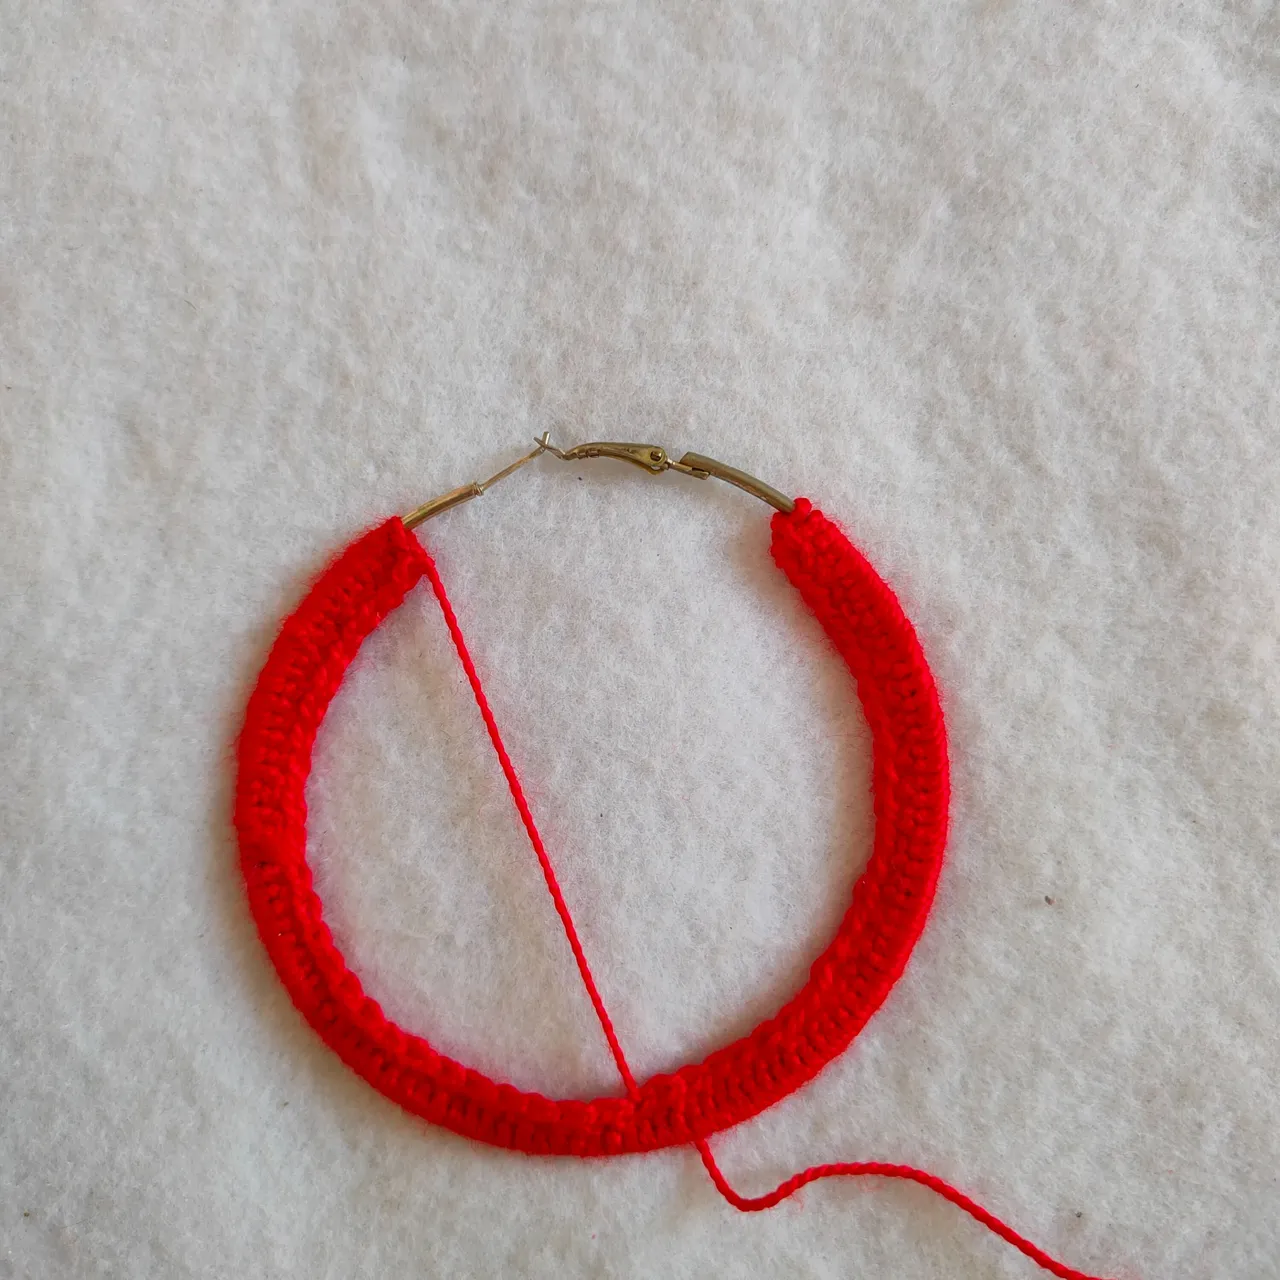
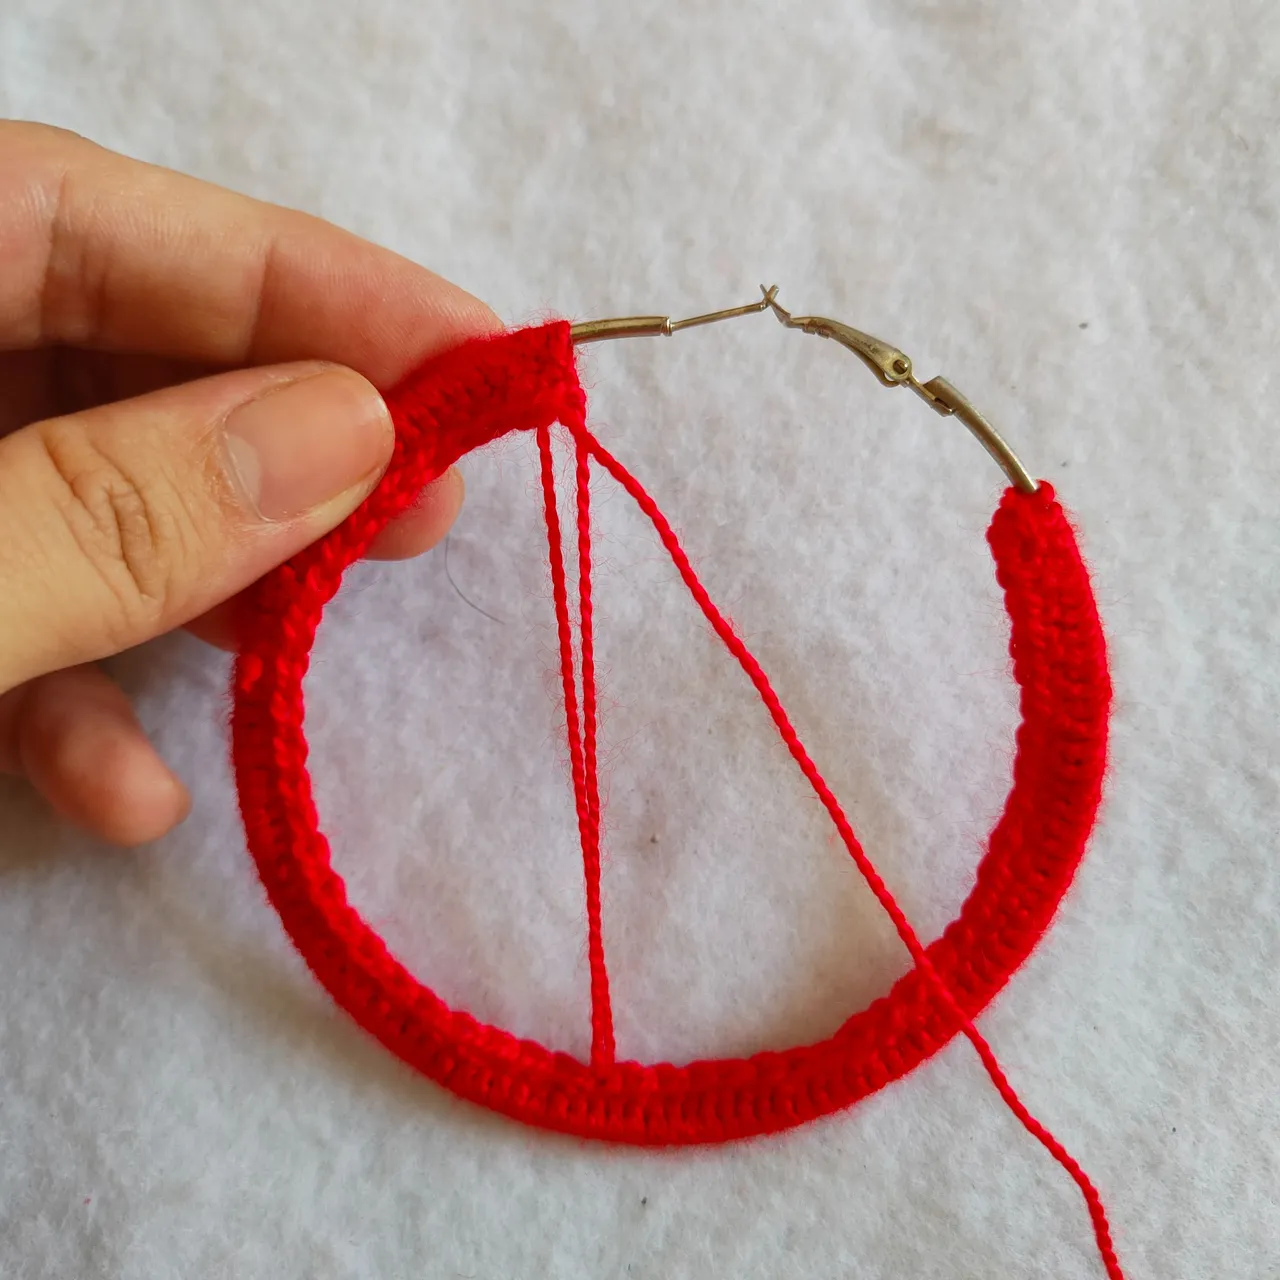
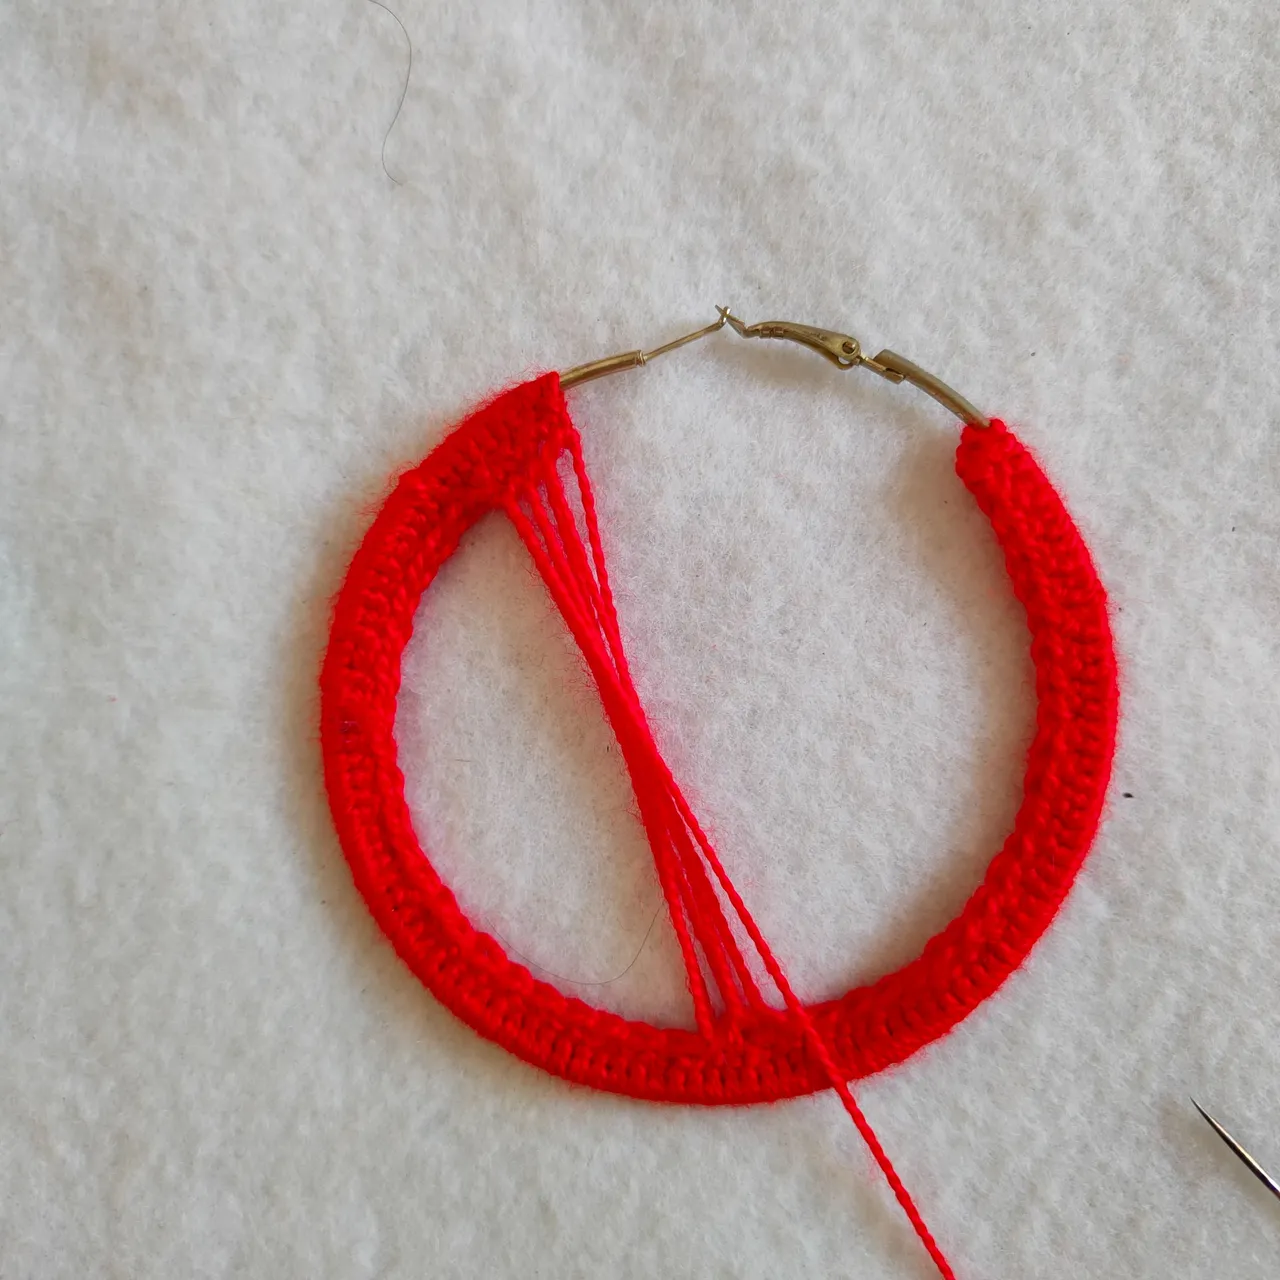
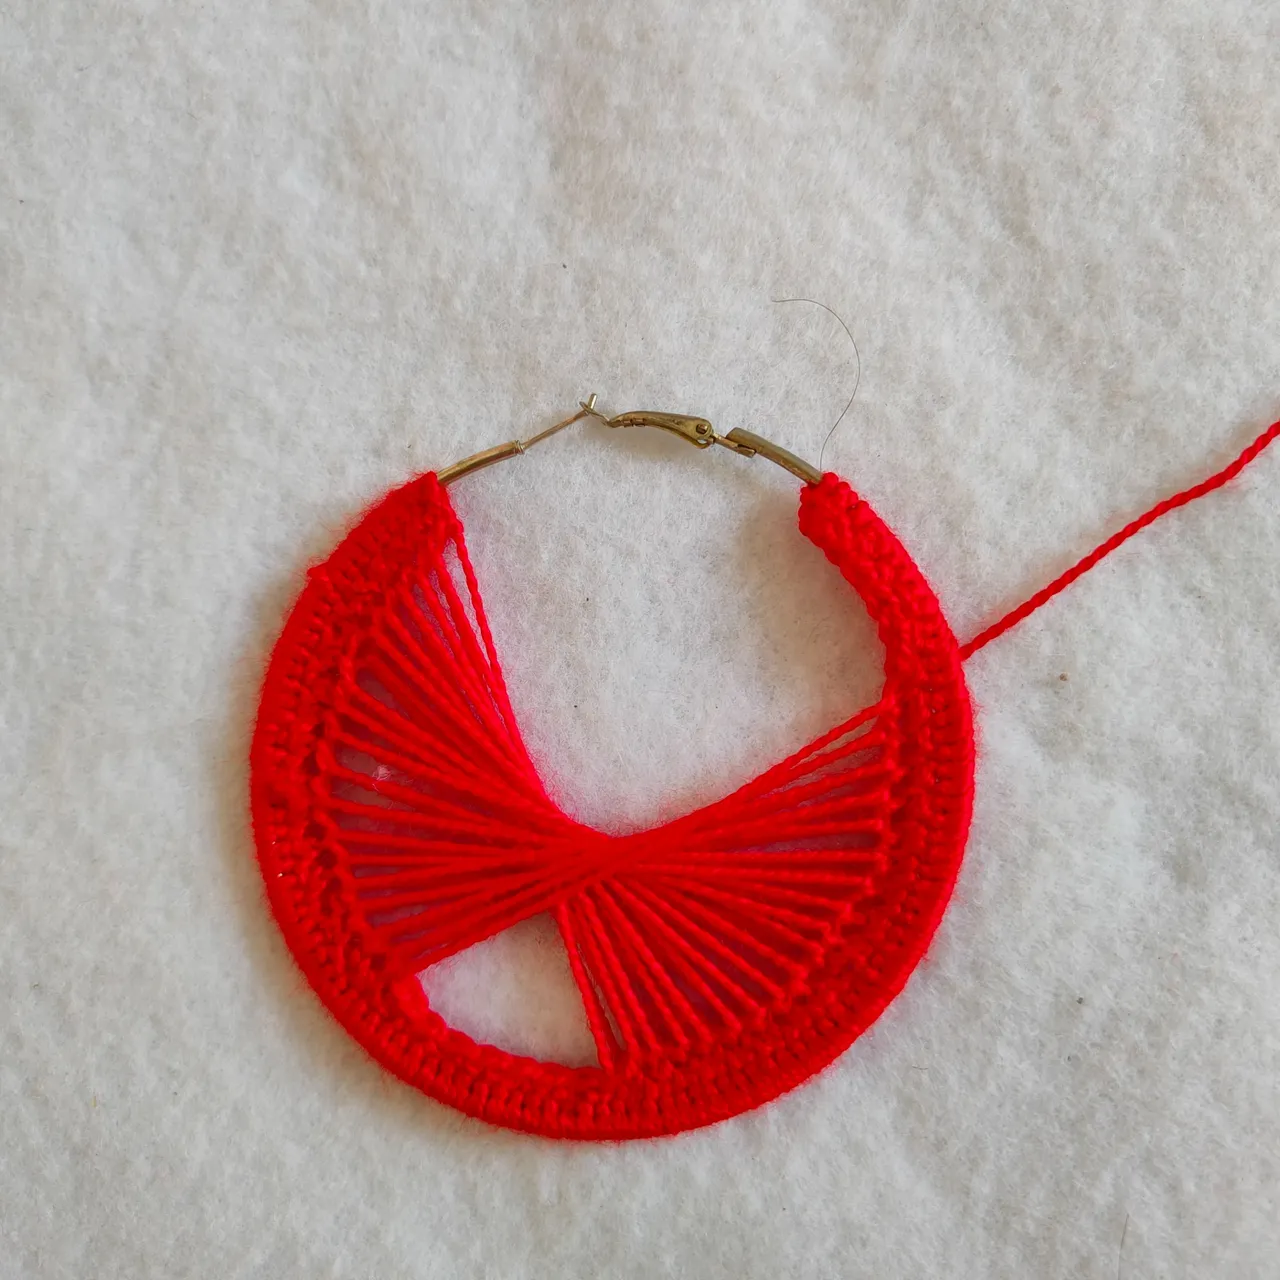
🌹 Paso 4. Una vez que culminamos la segunda hilera de nuestro tejido en la argolla vamos a llevar nuestro tejido que está en la parte externa de la argolla hacia la parte interna, en este punto vamos a dejar de utilizar la aguja de tejer y vamos a comenzar a utilizar la aguja de coser, así que vamos a inserta en la misma el hilo o lana de tejer y vamos a contar hasta dar con el punto que representa la mita de nuestros puntos tejidos en l segunda hilera en mi caso ubicaré el punto bajo número 25, una vez que ya lo tengo ubicado iniciaré insertando en mi puntada 1 el hilo de tejer y lo llevaré a la puntada 25 e insertar ahí el hilo dando así inicio a lo que será el tejido que adornará nuestras argollas, ajustamos el hilo y proseguimos con la puntada 2 y 26, y así sucesivamente va ser la relación entre puntadas hasta ocupar la totalidad de las mismas y eso por eso que es importante saber de cuántas puntas conta nuestro tejido ya que se requieren números pares para realizar esta última parte de las argollas.
🌹 Step 4. Once we finish the second row of our knitting in the ring we are going to take our knitting that is in the external part of the ring to the internal part, in this point we are going to stop using the knitting needle and we are going to start using the sewing needle, so we are going to insert in it the knitting yarn or wool and we are going to count until we find the stitch that represents the half of our knitted stitches in the second row in my case I will locate the single crochet stitch number 25, once I have it located I will start inserting in my stitch 1 the knitting yarn and I will take it to stitch 25 and insert the yarn there, thus starting what will be the fabric that will adorn our rings, we adjust the yarn and continue with stitch 2 and 26, and so on will be the relationship between stitches until all of them are occupied and that is why it is important to know how many stitches our fabric has since even numbers are required to perform this last part of the rings.


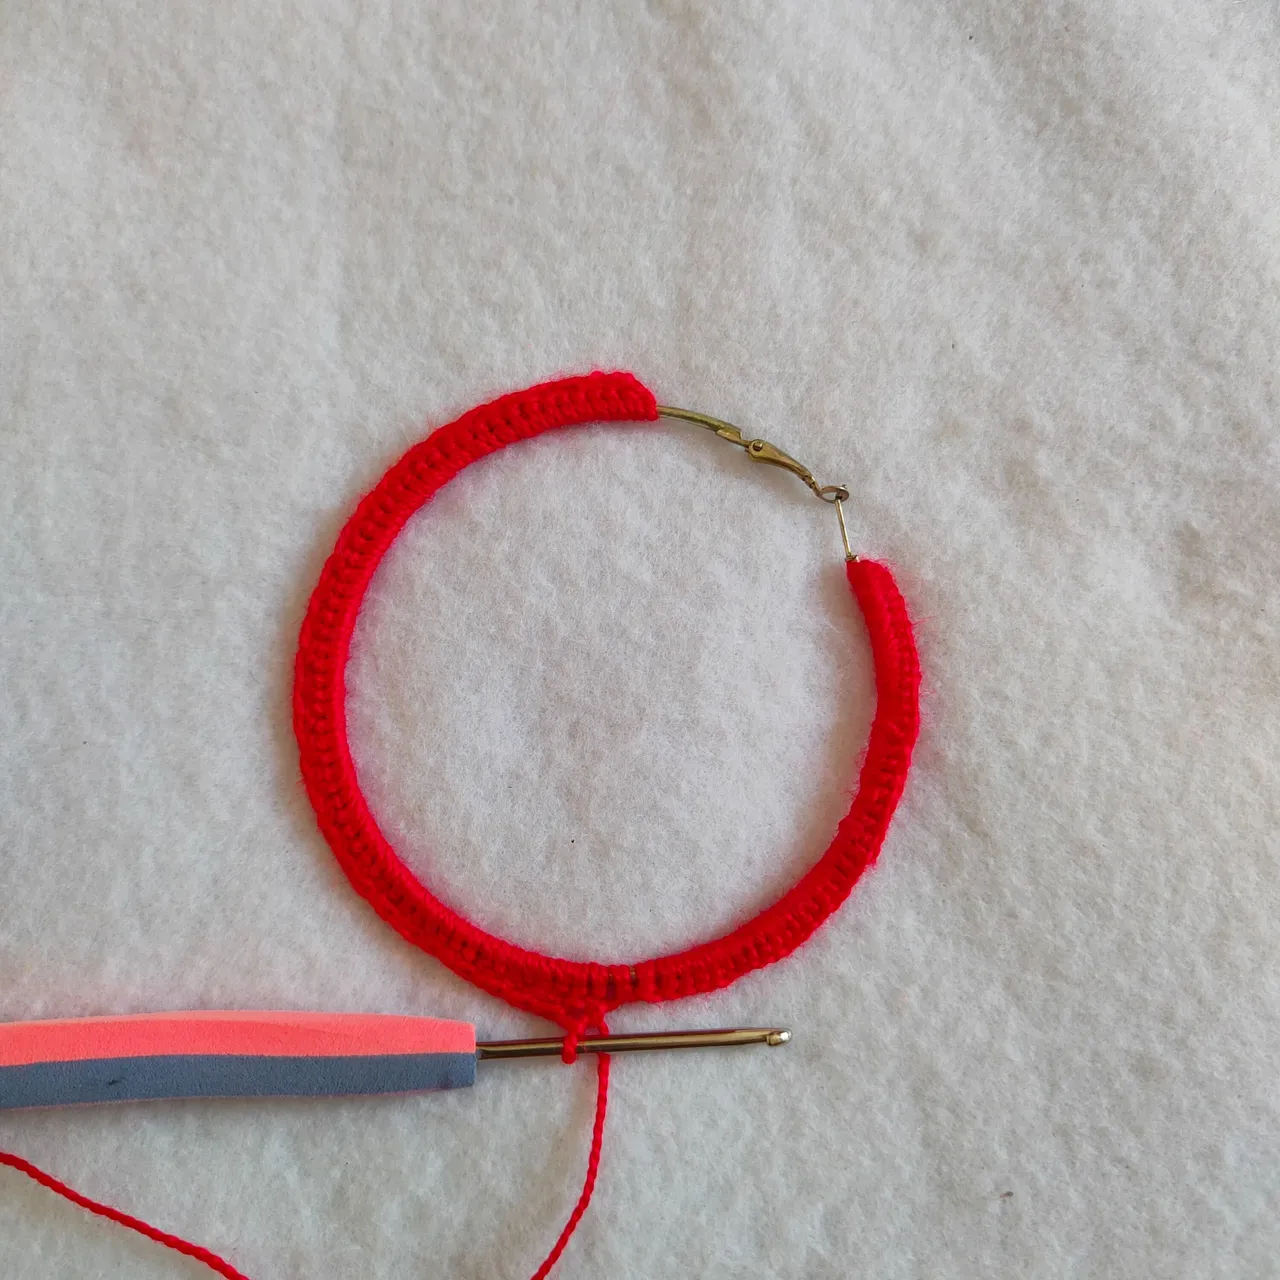
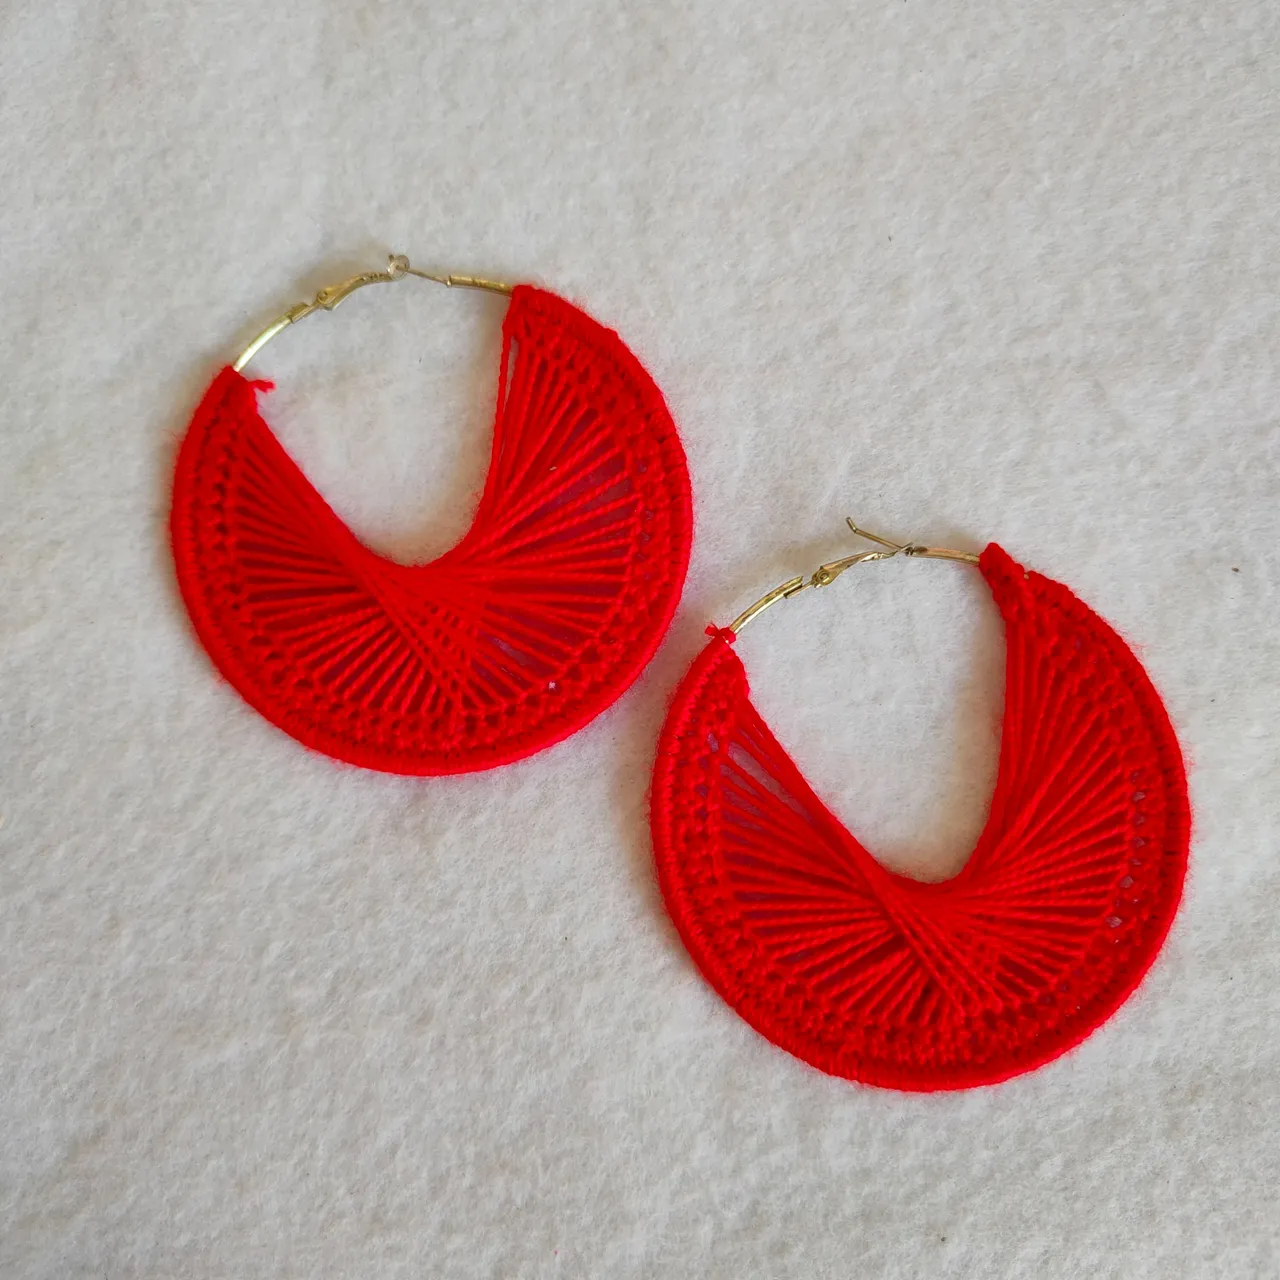
De esta manera culminamos nuestro trabajo con la primera argolla, todos los pasos anteriores los repetiremos con nuestra segunda argolla para tener así completo dar por culminado el proyecto del día de hoy que es darle un look diferentes a esas argollas que ya no usamos porque están feitas por tanto uso y el paso del tiempo, es una manera de darle una segunda oportunidad y que luzcan hermosas y diferente.
In this way we finish our work with the first ring, we will repeat all the previous steps with our second ring to complete today's project which is to give a different look to those rings that we no longer use because they are ugly due to so much use and the passage of time, it is a way to give them a second chance and make them look beautiful and different.
Result || Resultado
Que les pareció el proyecto del día de hoy, usarían este diseño de argollas ? Déjeme lo saber en la sección de comentarios, como siempre agradezco el tiempo dedicado a leer el post, comentar y apoyar, así mismo espero que hay sido de así agrado y claro de utilidad, esperando que tengan un fin de semana maravillo junto a su familia se despide su amiga hasta un próximo post.
What did you think of today's project, would you use this design of rings? Let me know in the comments section, as always I appreciate the time spent to read the post, comment and support, I hope it has been to your liking and of course useful, hoping you have a wonderful weekend with your family, your friend says goodbye until a next post.

🎥Imágenes y vídeo creados con: |Images and video created with: Youcut video| Bitmoji| Canva
🇪🇸 Traducido con DeepL