Saluditos Artistas Creativos de las Manualidades y la Joyería, cómo siempre espero que se encuentre rebosantes de salud y llenos de alegría disfrutando de un relajante fin de semana familiar; y ya estamos en agosto a solo cuatro meses para empezar con los preparativos de las navidades, y bueno gracias a Dios hasta hoy estuvimos en los eventos de fin del año escolar 2024-2025, terminamos con una celebración del trabajador cultural en reconocimiento a todos los que de una u otra manera a través de las distintas manifestaciones artísticas y culturales enriquecen la Cultura, también se recordó la llegada de Cristóbal Colón a Venezuela, fecha que ya no es muy celebrada en la actualidad, así que a disfrutar del merecido descanso vacacional 🤭.
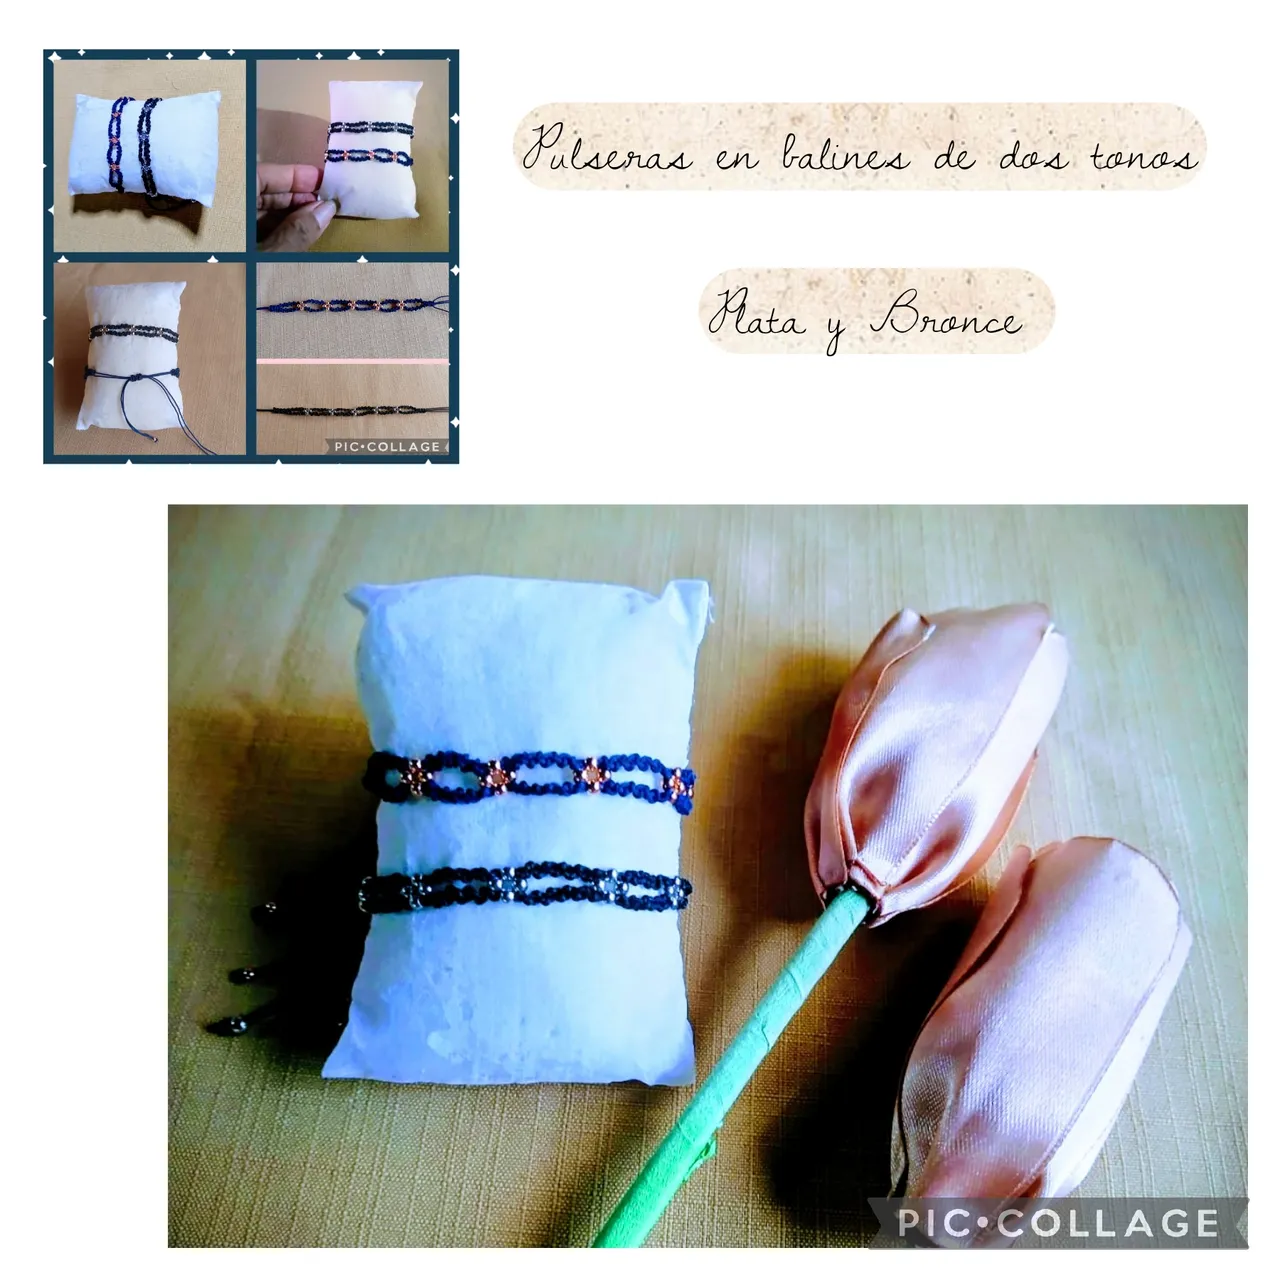
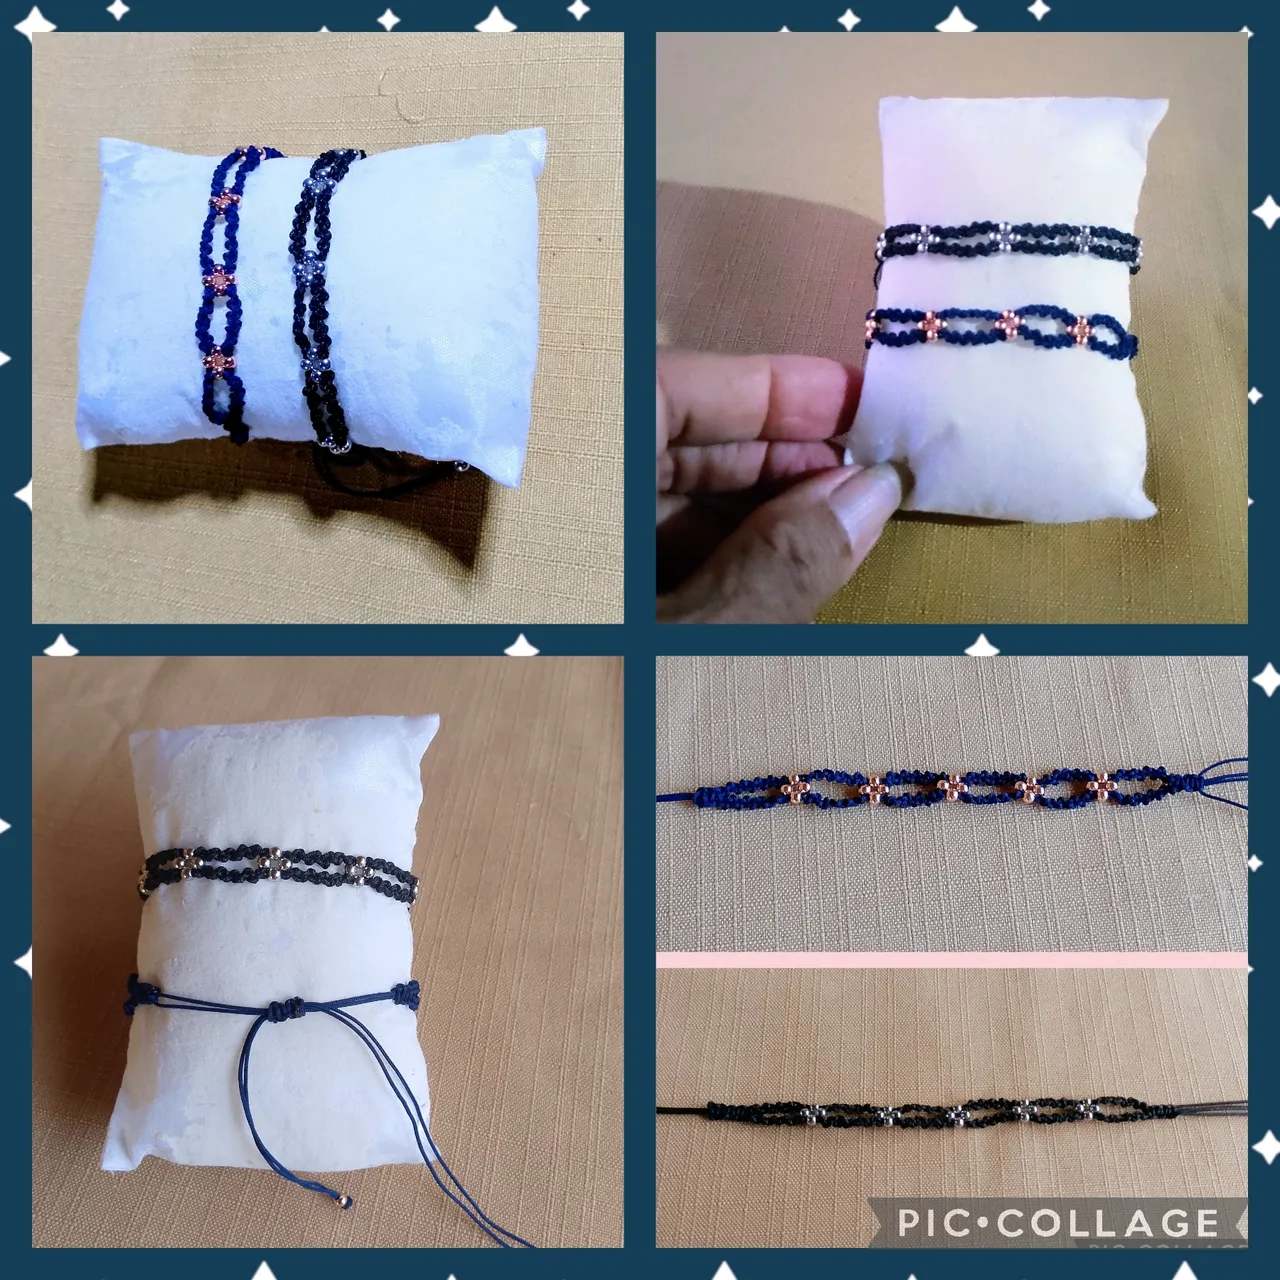
Cómo en realidad estos días fueron bastantes agotadores no tuve tiempo para las horas de relax que me proporciona mis creaciones, hoy me voy a desquitar, realicé para compartirles un par de pulseras que me sirvió de inspiración las joyas de la colección Trinyty de Cartier que están de nuevo en tendencia, como ustedes saben estas joyas están elaboradas en oro de tres colores amarillo, blanco, y rosado , Yo escogí balines color plateado y rosado para simular los colores del oro y las tejí con el nudo alondra de la técnica macramé.
Aquí los invito a seguir leyendo el paso a paso para que vean cómo las hice:
Greetings Creative Artists of Crafts and Jewelry, as always, I hope you are brimming with health and joy, enjoying a relaxing family weekend. August is here, just four months away from starting Christmas preparations. Thank God, we were able to attend the end-of-the-2024-2025 school year events today. We concluded with a celebration of cultural workers in recognition of all those who, in one way or another, enrich culture through various artistic and cultural events. We also commemorated the arrival of Christopher Columbus to Venezuela, a date that is no longer widely celebrated these days. So, enjoy your well-deserved vacation break 🤭.
Since these days were actually quite exhausting, I didn't have time for the relaxing hours my creations provide. Today I'm going to let loose. I made a pair of bracelets to share with you. Inspired by the jewelry from Cartier's Trinyty collection, which is back in style. As you know, these bracelets are crafted in tri-colored gold: yellow, white, and rose. I chose silver and rose-colored beads to simulate the colors of gold and woven them using the macramé lark's head knot.
Here, I invite you to continue reading the step-by-step instructions to see how I made them:
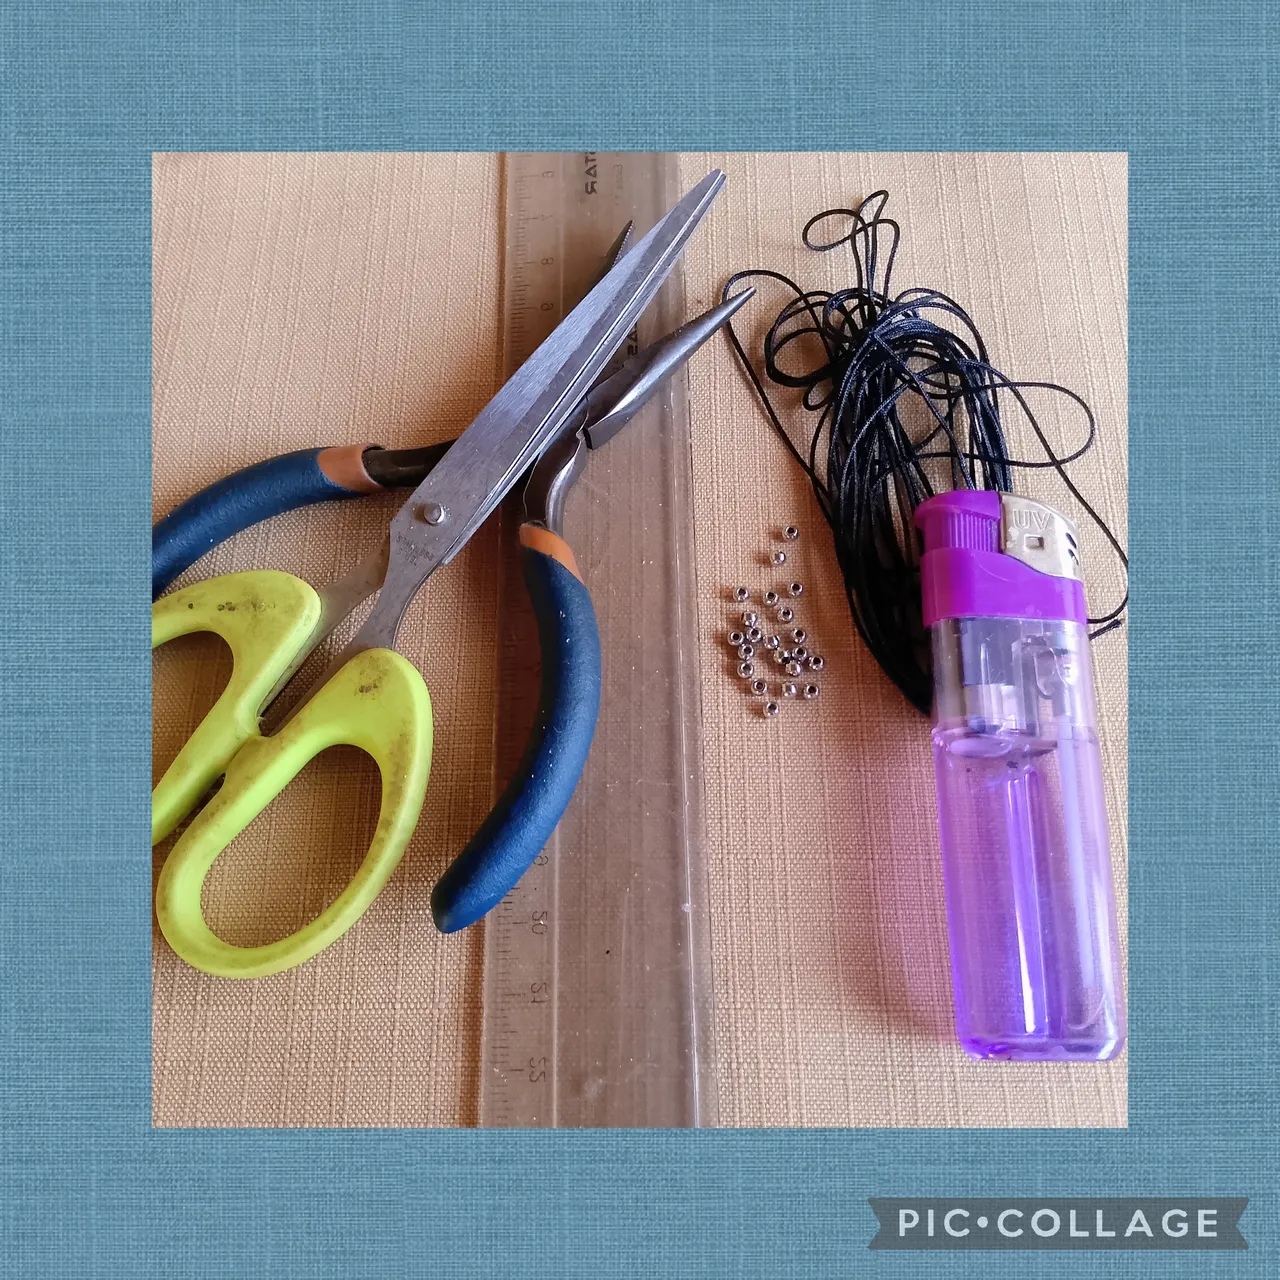
MATERIALES QUE UTILICÉ PARA ELABORAR ÉSTAS PULSERAS:
✓ Balines de dos milímetros color rosado.
✓ Balines de dos milímetros color plata.
✓ Tres metros de hilo chino 0,8 mm., color negro.
✓ Tres metros de hilo chino de 0,8 mm.,
Color azul marino.
✓ Tijeras.
✓ Encendedor.
✓ Regla.
✓ Pinza.
MATERIALS I USED TO MAKE THESE BRACELETS:
✓ Two-millimeter pink pellets.
✓ Two-millimeter silver pellets.
✓ Three meters of 0.8 mm black Chinese thread.
✓ Three meters of 0.8 mm navy blue Chinese thread.
✓ Scissors.
✓ Lighter.
✓ Ruler.
✓ Clamps.
PASOS UTILIZADOS EN LA ELABORACIÓN DE ESTE BONITICO PROYECTO:
PRIMER PASO:
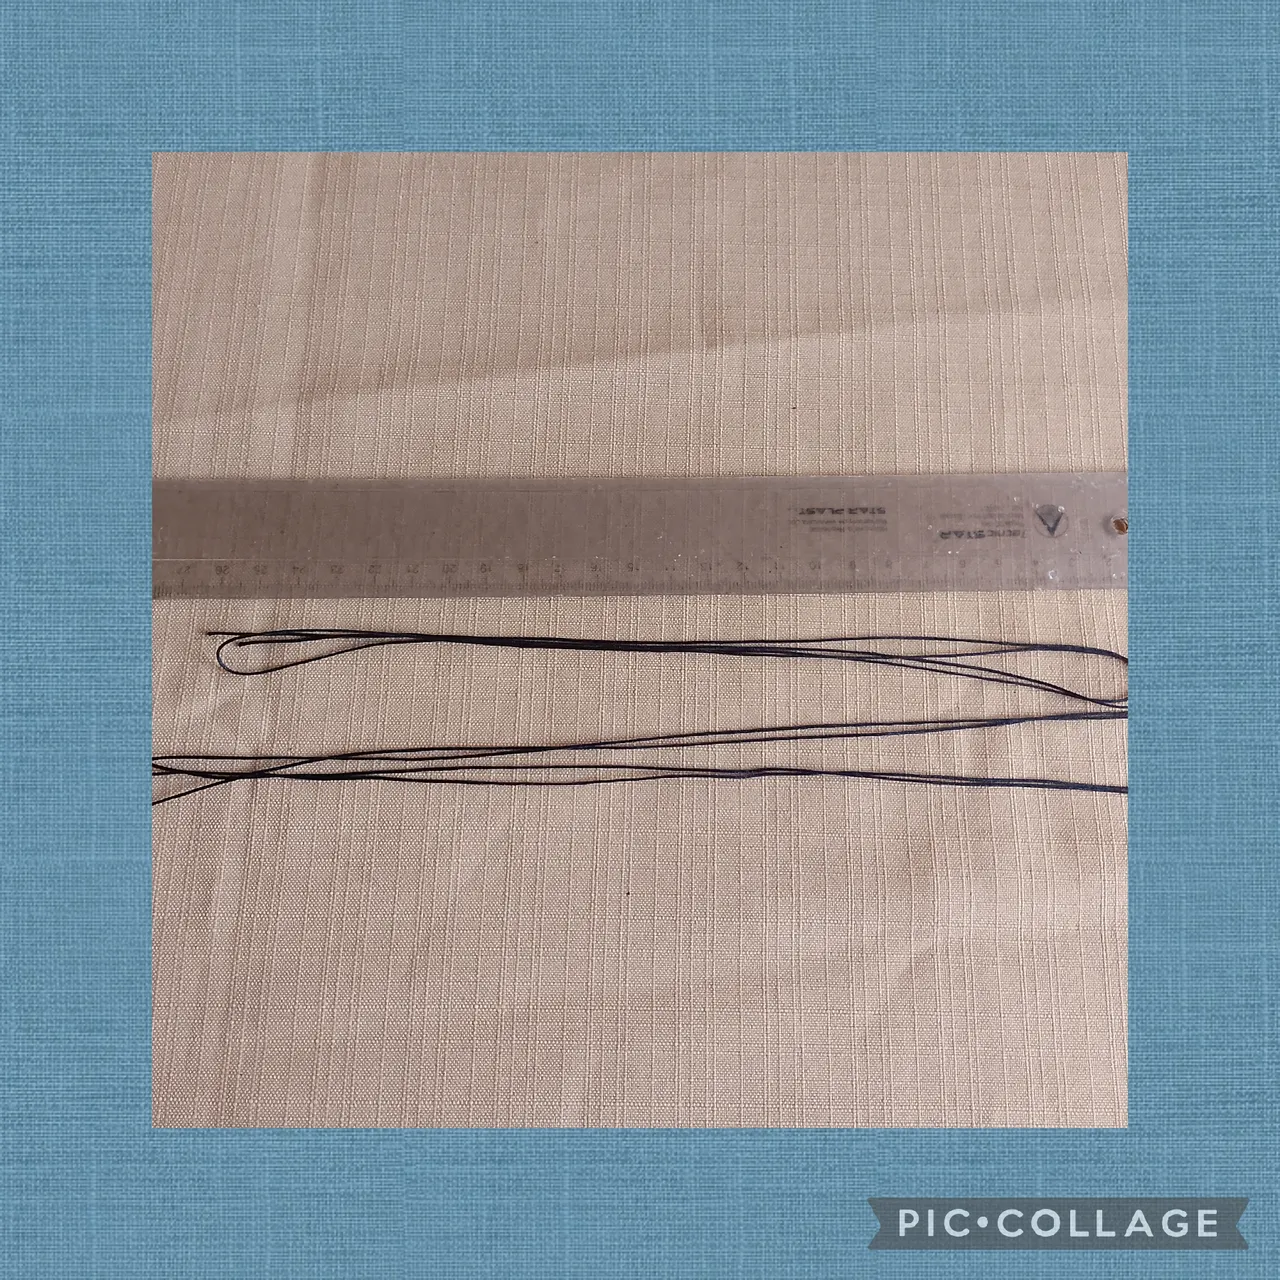
Cómo las pulseras son de un igual diseño y solo cambian los colores voy a mostrar como realicé una y pongo imágenes de las dos. Comienzo usando la regla para medir del hilo chino negro dos medidas de sesenta centímetros cada uno y un hilo de de un metro cuarenta centímetros de largo , corto con las tijeras, asi
STEPS USED IN THE CREATION OF THIS BEAUTIFUL PROJECT:
FIRST STEP:
Since the bracelets are the same design and only the colors vary, I'll show how I made one and include pictures of both. I start by using a ruler to measure two sixty-centimeter lengths of black Chinese thread and a meter-forty-centimeter-long thread. I cut it with scissors, like this:
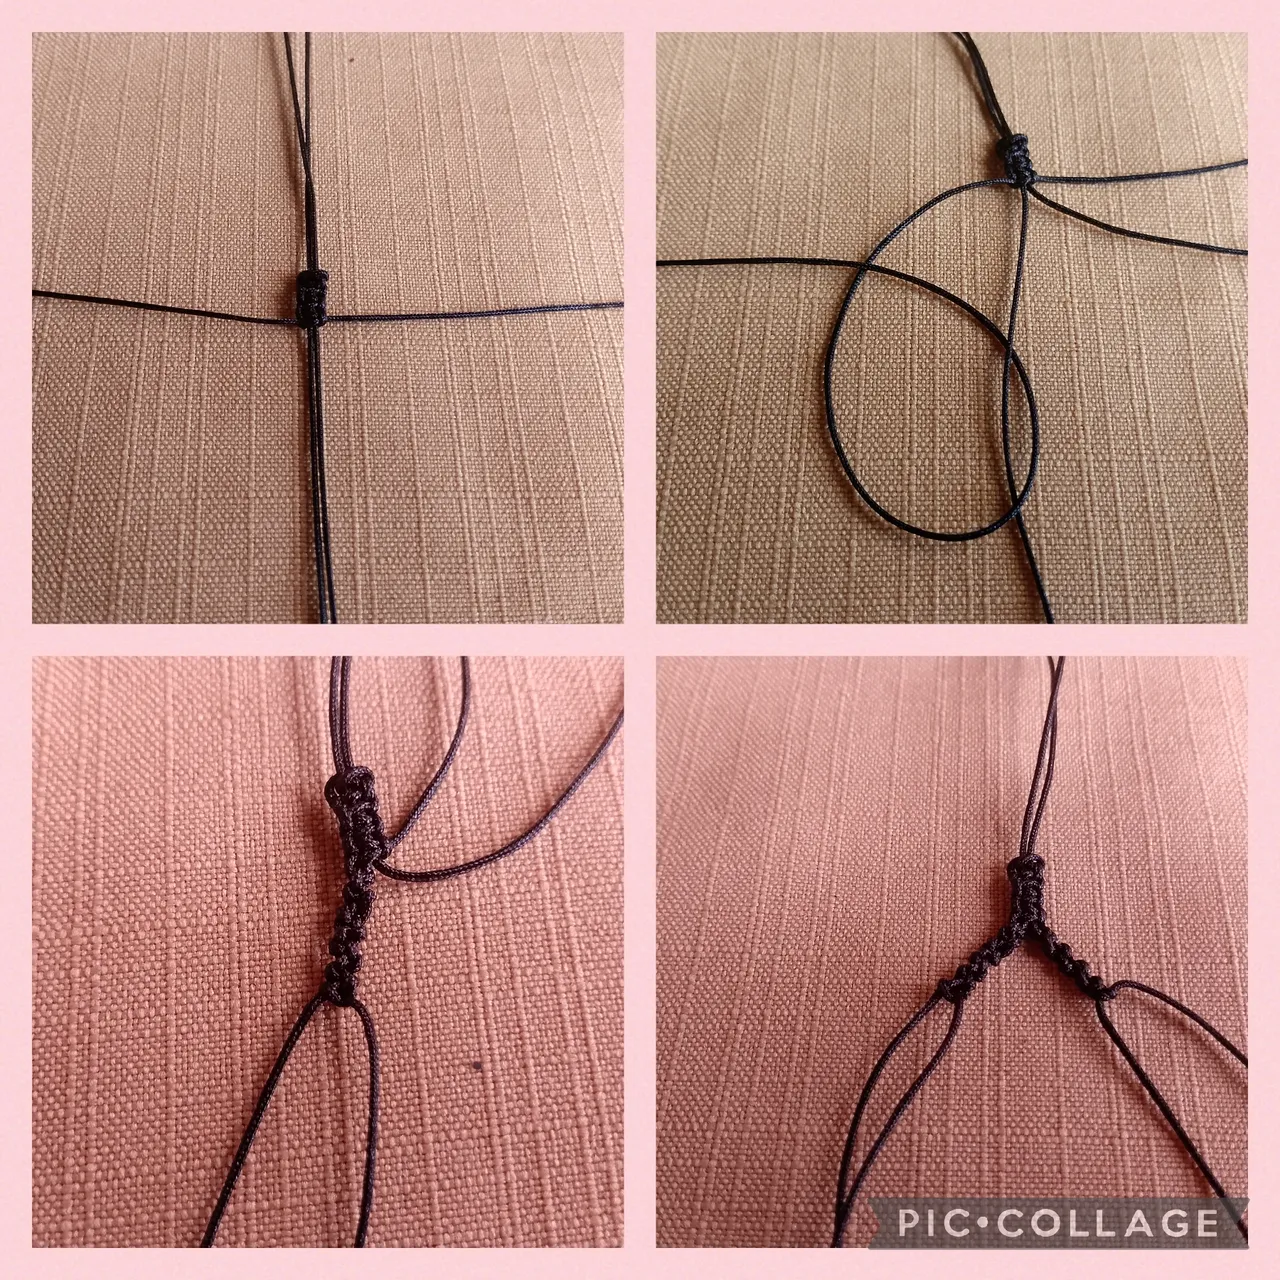
PASO DOS:
En este paso voy a usar los dos hilos de sesenta centímetros como centrales y el hilo de un metro cuarenta lo doblo a la mitad uniendo las puntas será el hilo anudador. Ahora con el encendedor quemo las puntas de todos los hilos para afilar de forma que pueda pasar los balines con facilidad.
Ahora uso la regla y mido doce centímetros de los hilos centrales que voy a dejar sin trabajar, los fijo en la tabla de gancho, luego coloco debajo de los hilos centrales el hilo de un metro cuarenta rectificando la medida uniendo las puntas y comienzo está labor tejiendo seis nudos planos, de la técnica macramé ( sino conocen este nudo pueden visitar mi blog y leer mis tutoriales anteriores dónde explico como hacerlo. Ahora divido la labor en dos partes dos hebras del lado izquierdo y dos del lado derecho y aquí voy a realizar nudo alondra. Pueden comenzar por cualquier lado Yo siempre empiezo mi labor del lado derecho tomo uno de los hilos que identifico como derecho y lo paso por encima del izquierdo formando una especie de P pasando la punta por debajo del hilo izquierdo y lo saco por el aro halo las puntas y aseguro, ahora hago de nuevo el nudo al contrario y así realizo un nudo alondra completo hago diez nudos y realizo otros diez nudos del lado izquierdo como muestro.
STEP TWO:
In this step, I'm going to use the two sixty-centimeter threads as the center threads, and I'll fold the one-meter-forty thread in half, joining the ends together. This will be the knotting thread. Now, with the lighter, I'll burn the tips of all the threads to sharpen them so they can be easily passed through the pellets.
Now I use the ruler and measure twelve centimeters of the central threads that I am going to leave unworked, I fix them on the hook table, then I place under the central threads the one meter forty thread, correcting the measurement joining the tips and I begin this work by weaving six flat knots, of the macramé technique (if you do not know this knot you can visit my blog and read my previous tutorials where I explain how to do it. Now I divide the work into two parts, two strands on the left side and two on the right side and here I am going to make a lark knot. You can start on either side. I always start my work on the right side, take one of the threads that I identify as right and pass it over the left forming a kind of P, passing the tip under the left thread and take it out through the ring, pull the tips and secure, now I make the knot again on the contrary and thus I make a complete lark knot, I make ten knots and make another ten knots on the left side as shown.
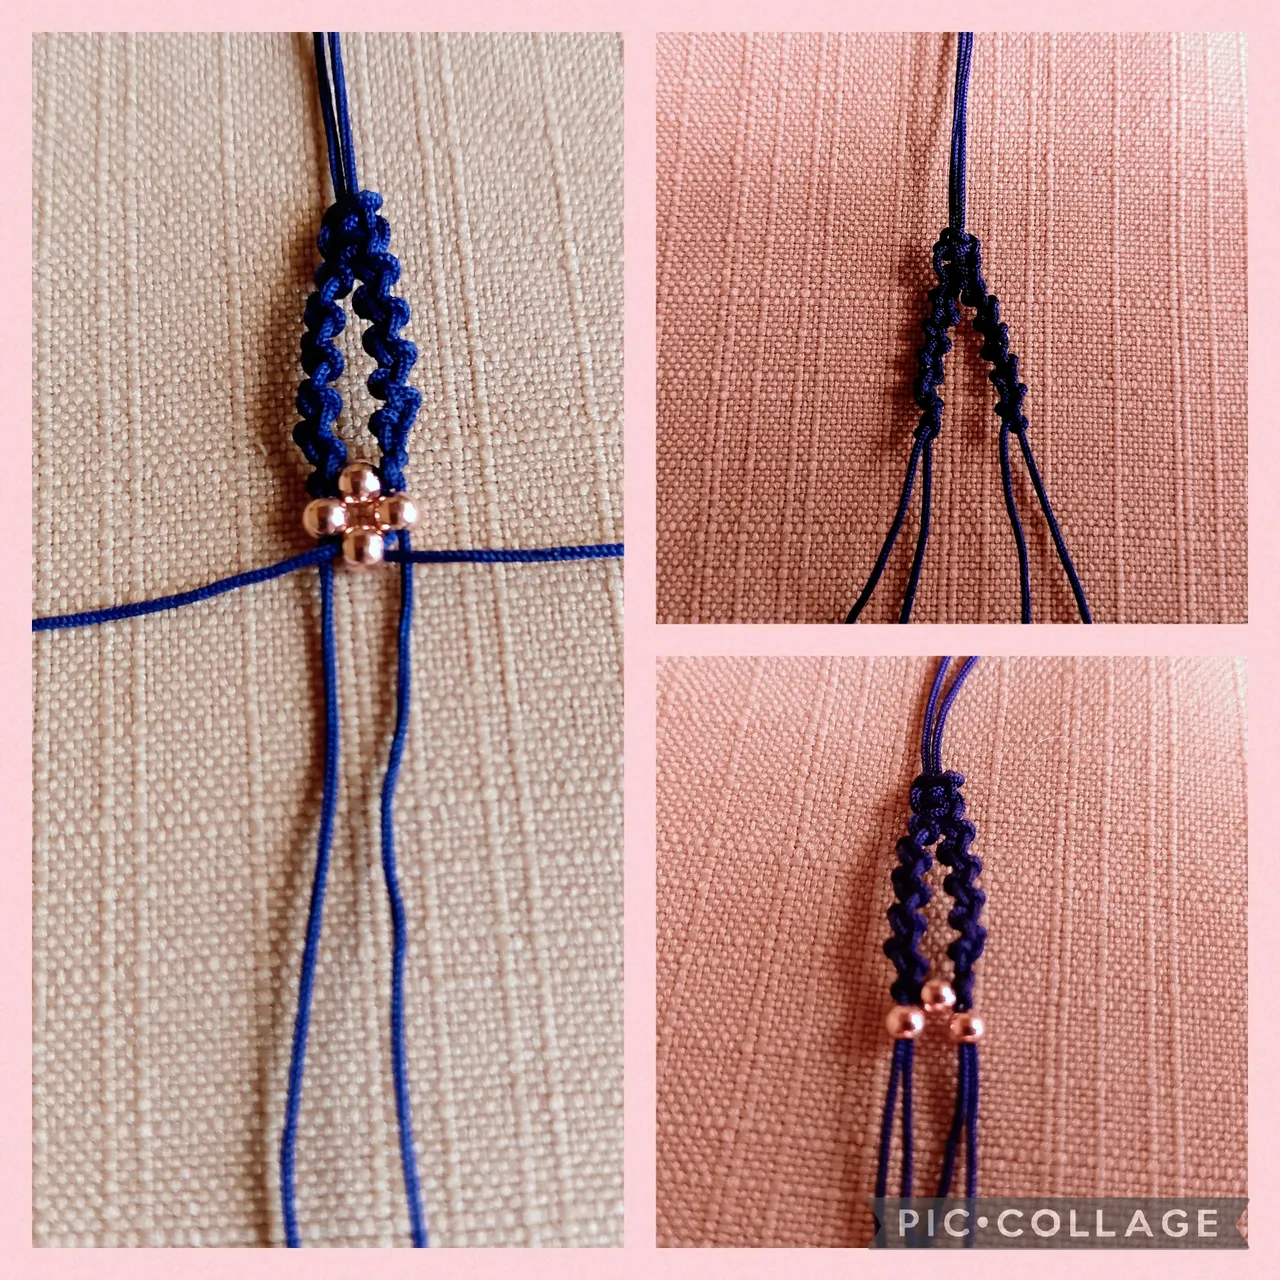
PASO TRES:
Ahora tomo los dos hilos centrales y en uno de los hilos inserto un balin plata que cruzo con el otro hilo, halo las dos puntas y ajusto, ahora tomo el hilo central y el hilo anudador del lado derecho y paso un balín que coloco al lado del central, hago lo mismo del otro lado y de nuevo cruzo un balín con los hilos centrales para firmar el diseño de una pequeña flor.
Una vez realizado este paso de nuevo hago diez nudos alondra de cada lado, así como en la imágen.
STEP THREE:
Now I take the two center threads and insert a silver ball into one of them, crossing it with the other thread. I pull the two ends and tighten them. Now I take the center thread and the knotting thread on the right side and insert a ball, which I place next to the center thread. I do the same on the other side and again cross a ball with the center threads to create a small flower design.
Once this step is complete, I tie ten lark's head knots on each side, just like in the image.
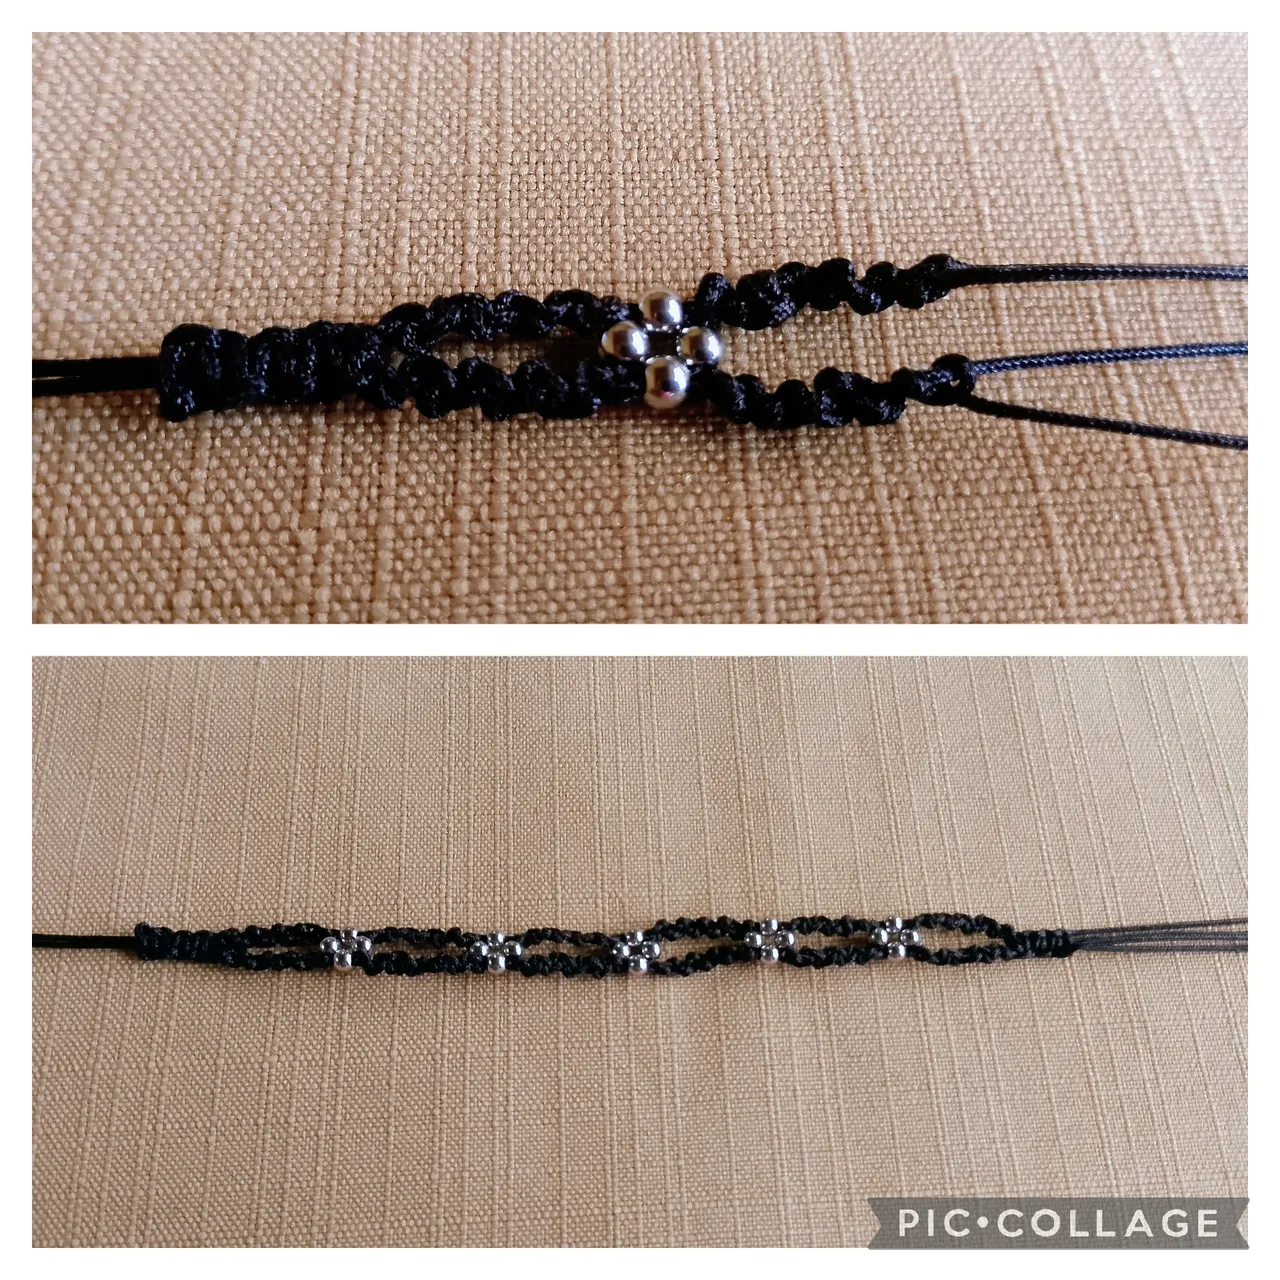
PASO CUATRO:
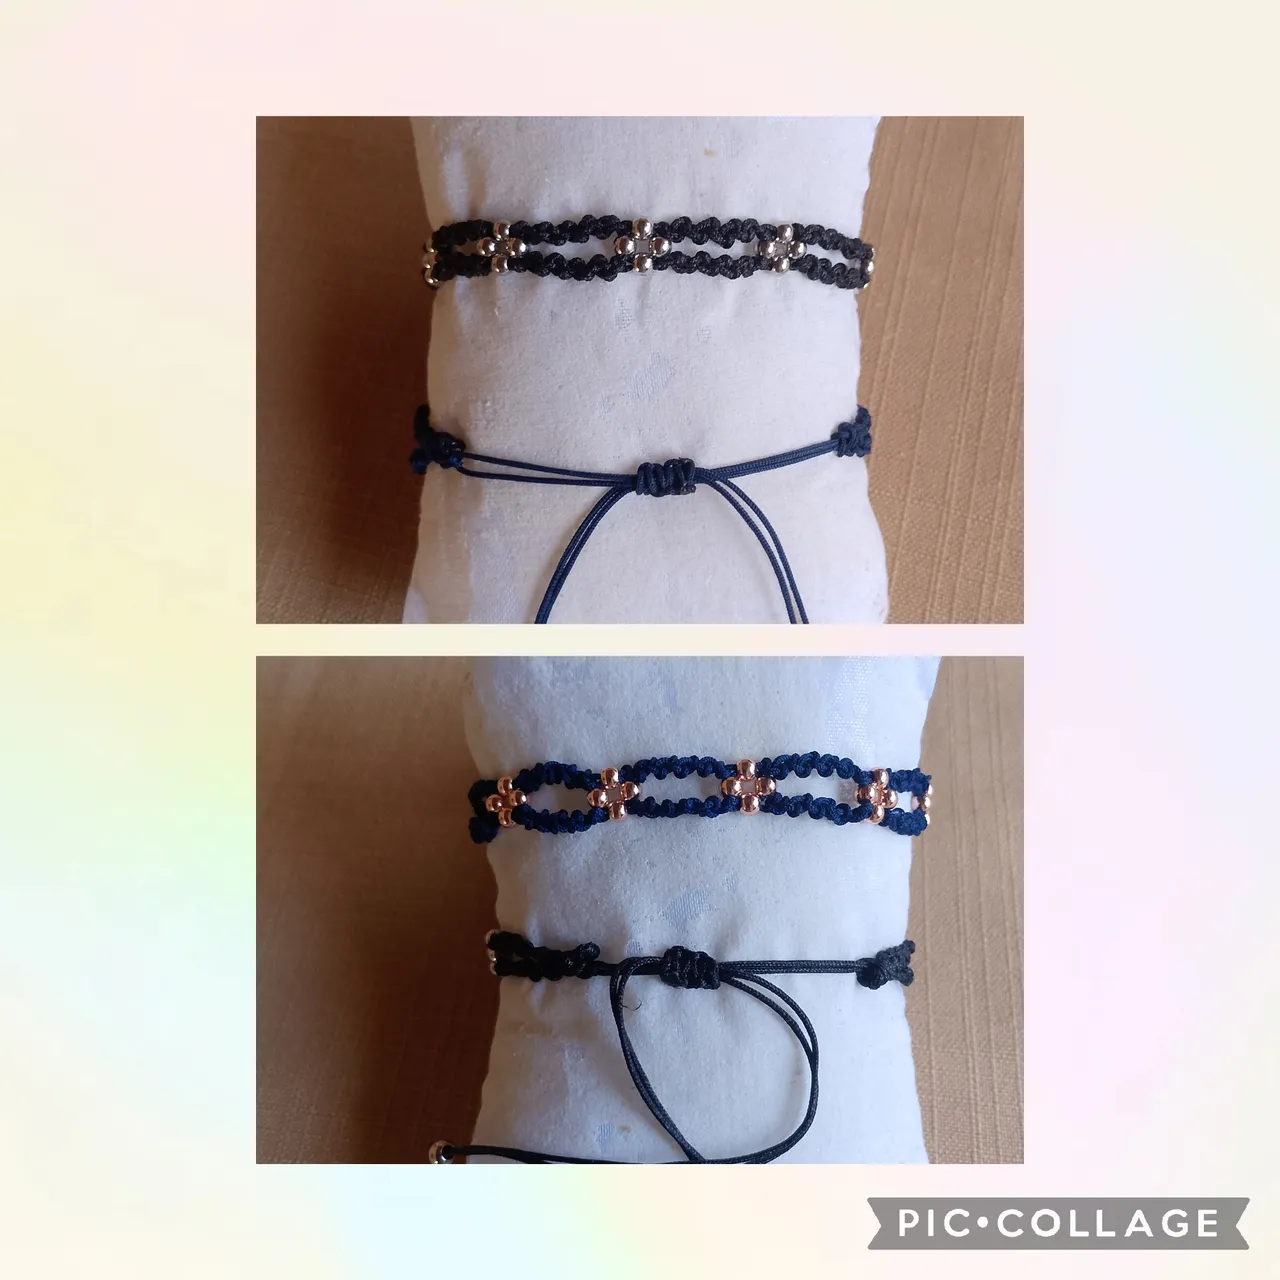
Con estos pasos continúo hasta realizar las cinco flores del diseño, hago seis nudos planos y corto los excedentes de los hilos anudadores y sello con el encendedor ahora mido doce centímetros de los hilos centrales y corto.
Para realizar el cierre lo hago con seis nudos planos y así queda
STEP FOUR:
Continue with these steps until you have completed all five flowers in the design. Make six flat knots, cut off the excess knotting threads, and seal with the lighter. Now measure 12 centimeters from the center threads and cut.
To close, make six flat knots, and this is how it looks.
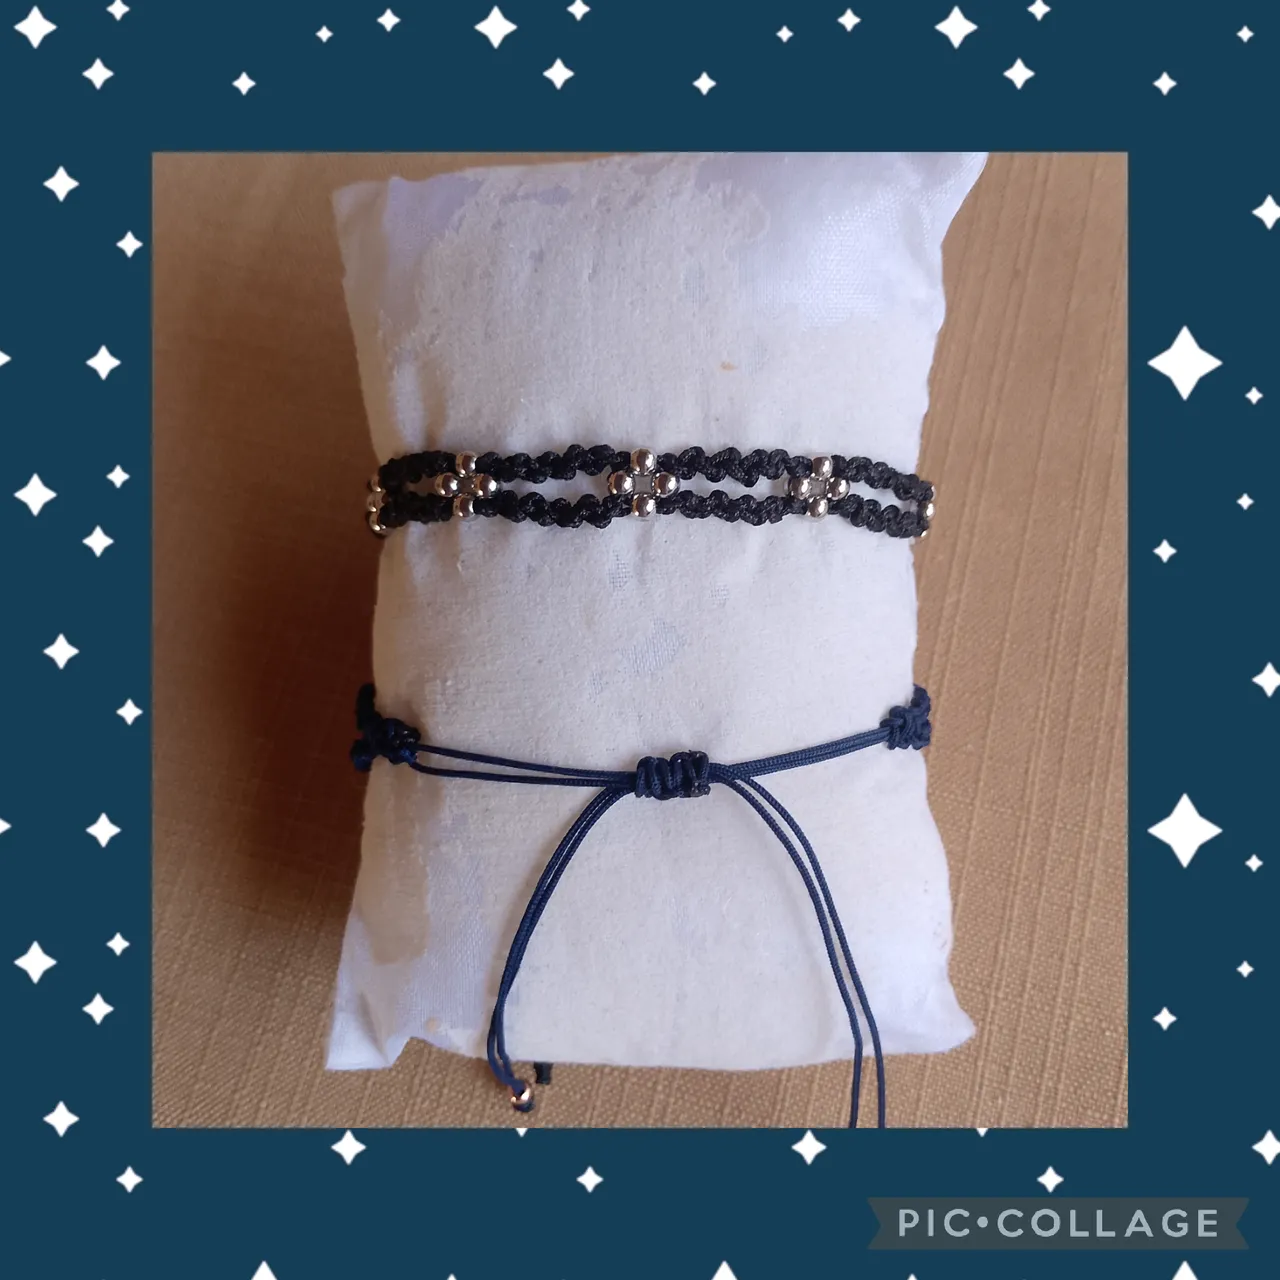
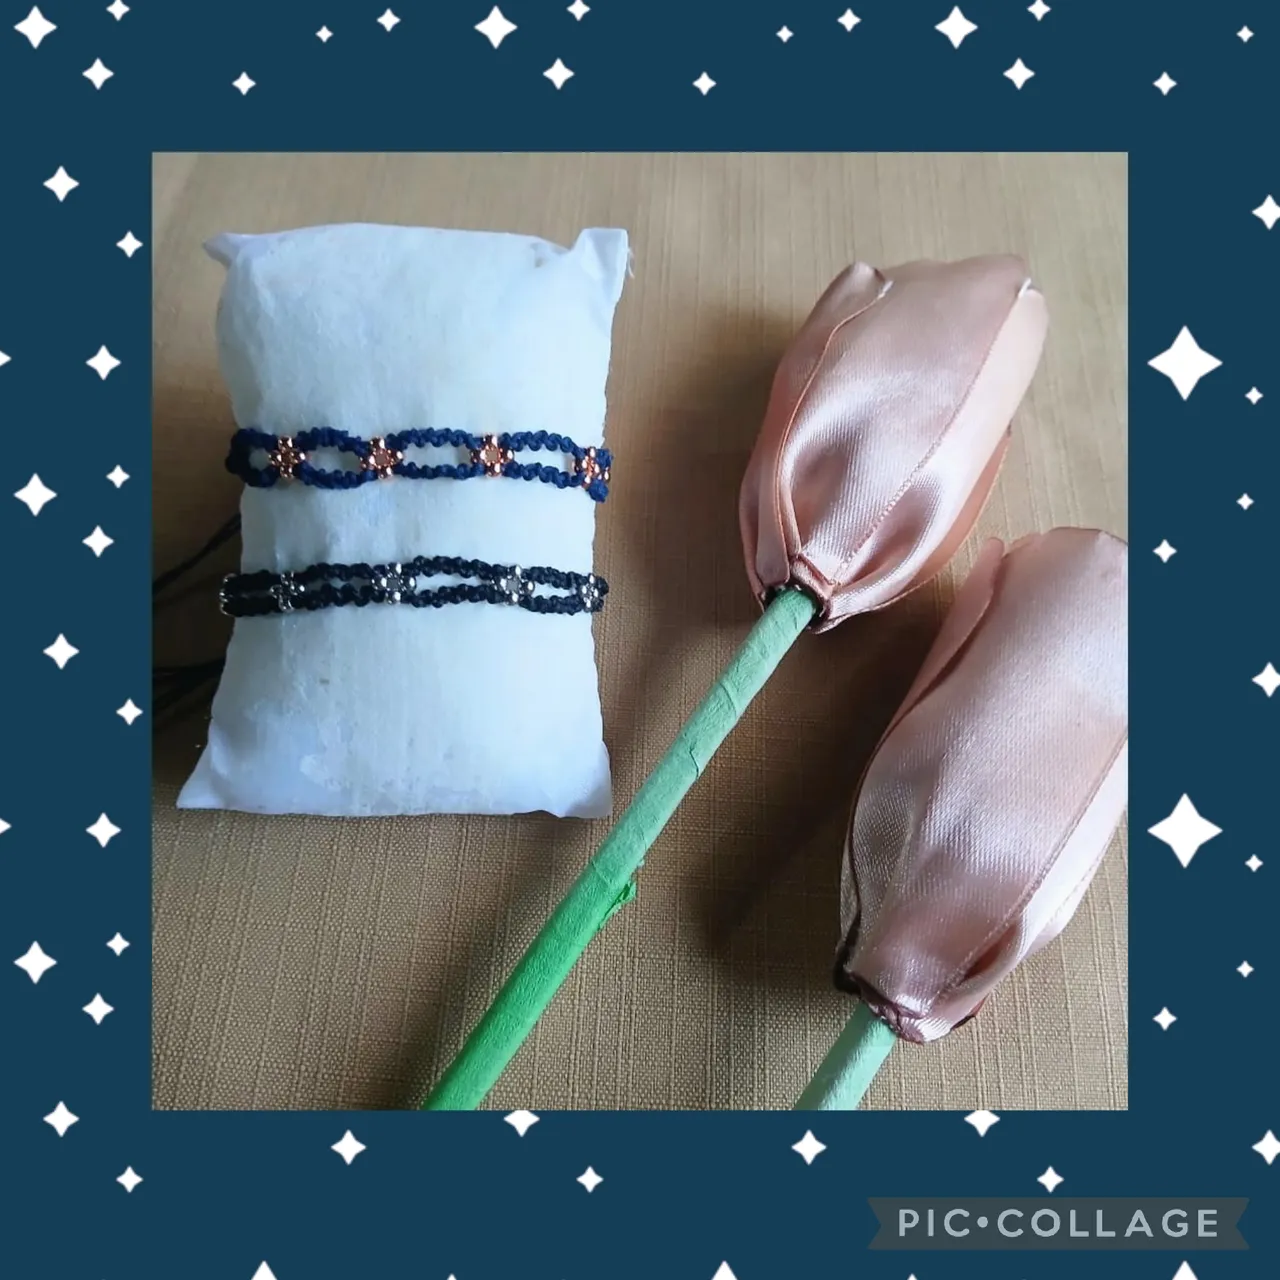
Artistas Creativos de las Manualidades y la Joyería, este es el resultado final de mi manualidad, espero que les guste está idea y que les sirva de apoyo para realizar sus creaciones con su toque personal, feliz noche y que tengan un maravilloso inicio de semana, nos vemos en la próxima manualidad , bye bye.
Creative Artists of Crafts and Jewelry, this is the final result of my craft, I hope you like this idea and that it helps you make your creations with your personal touch, happy night and have a wonderful start to the week, see you in the next craft, bye bye.
Las imágenes y redacción de este tutorial son de mi exclusiva propiedad, las fotos fueron tomadas con mi teléfono celular Tecno Spark Go 20 y las edite con una aplicación gratis del mismo.
Para traducir texto use Google traductor.
The images and writing in this tutorial are my exclusive property. The photos were taken with my Tecno Spark Go 20 cell phone and edited with a free app.
Use Google Translate to translate the text.