Saluditos y bendiciones para todos mis Artistas Creativos de las Manualidades y la Joyería, estamos iniciando el segundo fin de semana de este mes de julio que espero lo pasen muy bien a pesar de las tormentas naturales que están afectando al país.
Hoy es el Día Mundial de la Población, un día decretado por la Organización de las Naciones Unidas para crear conciencia sobre los temas relacionados con la planificación familiar, la igualdad de género y la salud publica entre otros.
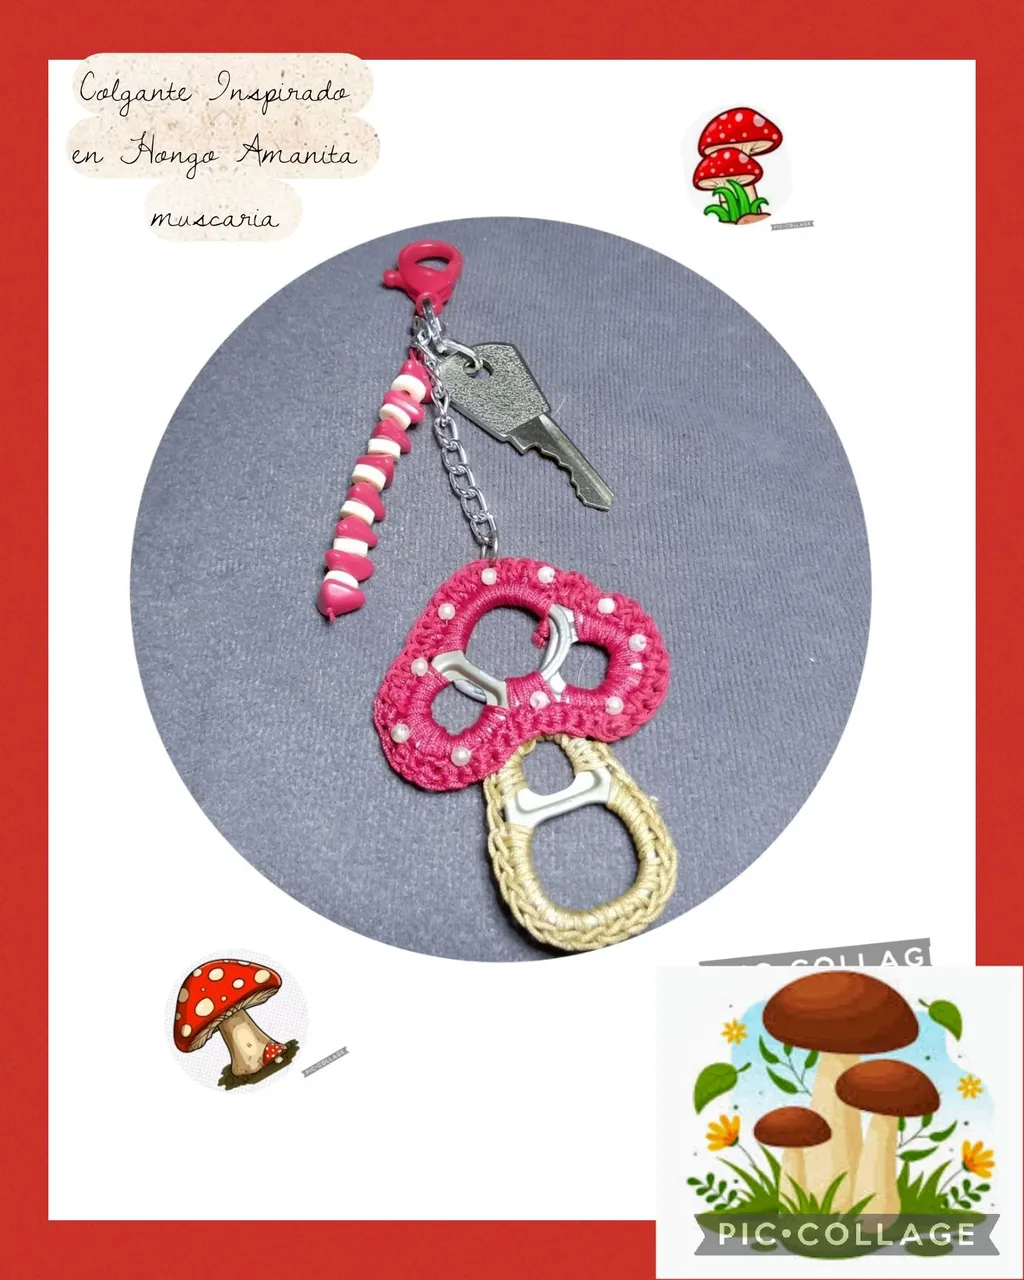
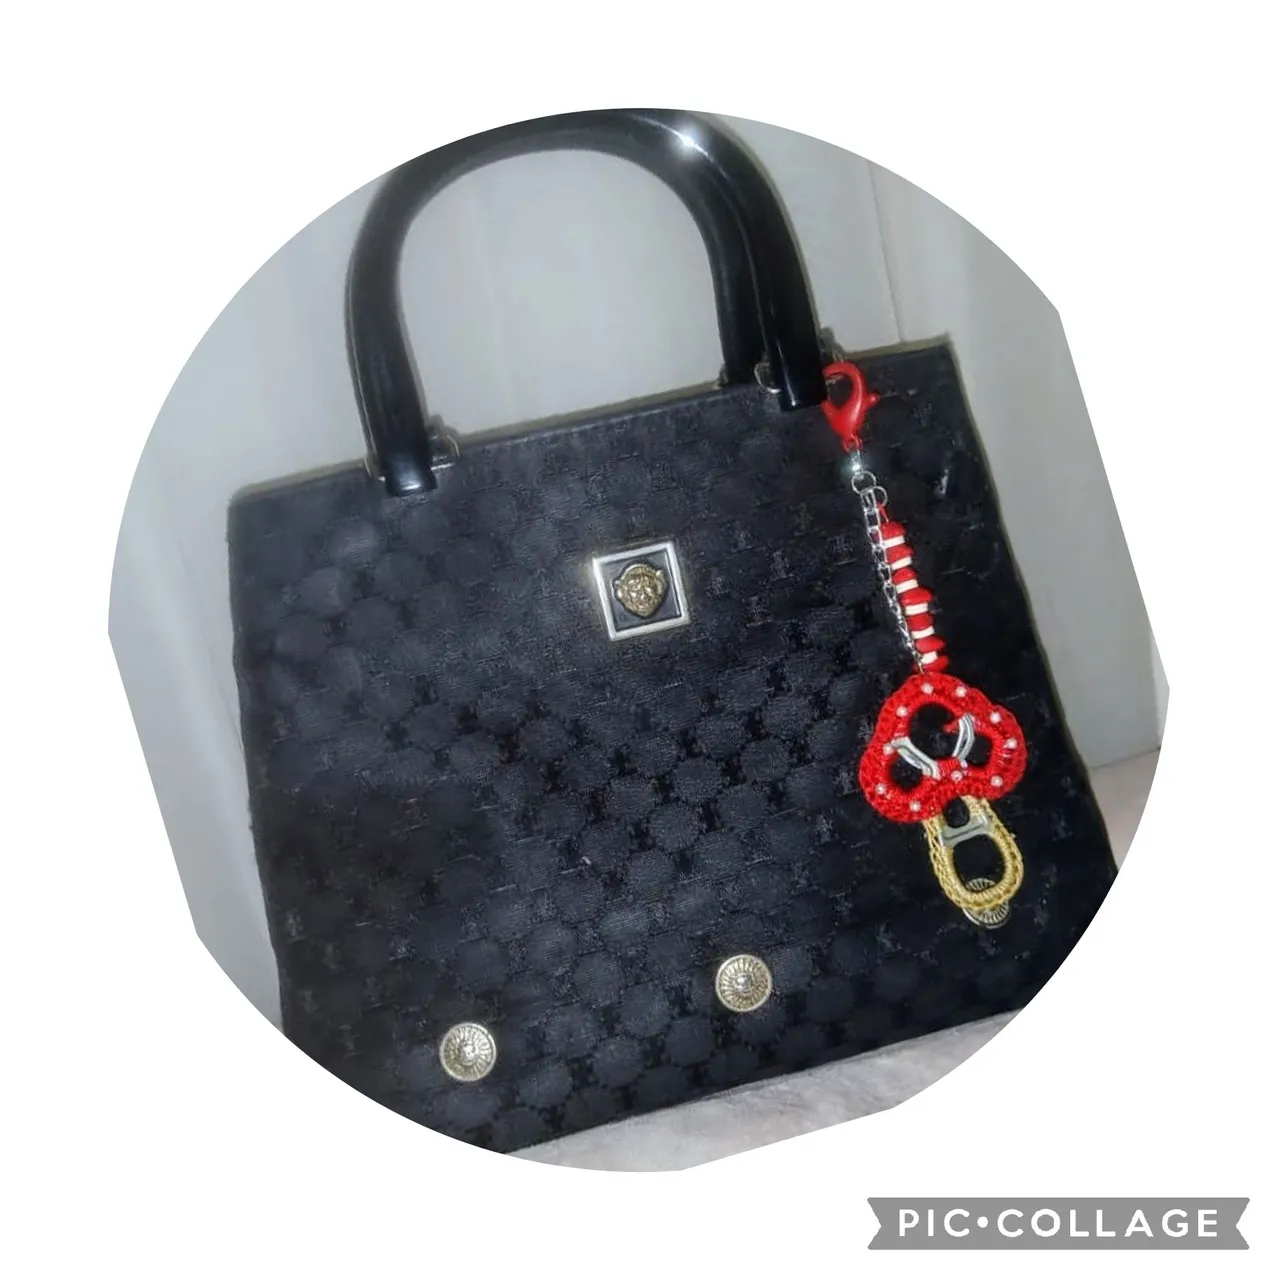
Hoy voy a compartir con ustedes la elaboración de un bonito accesorio para el cual me sirvió de inspiración un recorrido que hice en una maderera buscando retazos para realizar unos encargos pendientes; así me tropecé con unos troncos podridos por la humedad y de ellos brotaban unos cuantos hongos, la mayoría grises, marrones y blancos, tome una foto y me dispuse a regresar al hogar, pero ya llevaba una idea sobre mi proyecto a realizar un bonito colgante que se puede usar para adornar : bolsos, carteras, llaveros y más pequeños en aretes, dije para collar etc., usando un material de provecho como son las anillas de lata le di forma a un Amanita muscaria uno de los hongos mas llamativo por su colorido sombrero rojo con puntos blancos.
Los invito a seguir leyendo el paso a paso para que vean cómo lo hice:
Greetings and blessings to all my Creative Crafts and Jewelry Artists. We are starting the second weekend of July, and I hope you have a wonderful time despite the natural storms affecting the country.
Today is World Population Day, a day declared by the United Nations to raise awareness about issues related to family planning, gender equality, and public health, among others.
Today I'm going to share with you the creation of a beautiful accessory inspired by a trip I made to a lumberyard looking for scraps to complete some pending orders. So I stumbled upon some logs rotting from the humidity, and a few mushrooms were sprouting from them, mostly gray, brown, and white. I took a photo and prepared to return home. I already had an idea for my project: to make a pretty pendant that can be used to decorate bags, purses, keychains, and smaller ones, earrings, necklace charms, etc. Using a scrap material like tin rings, I shaped an Amanita muscaria, one of the most striking mushrooms due to its colorful red cap with white dots.
I invite you to continue reading the step-by-step instructions to see how I made it:
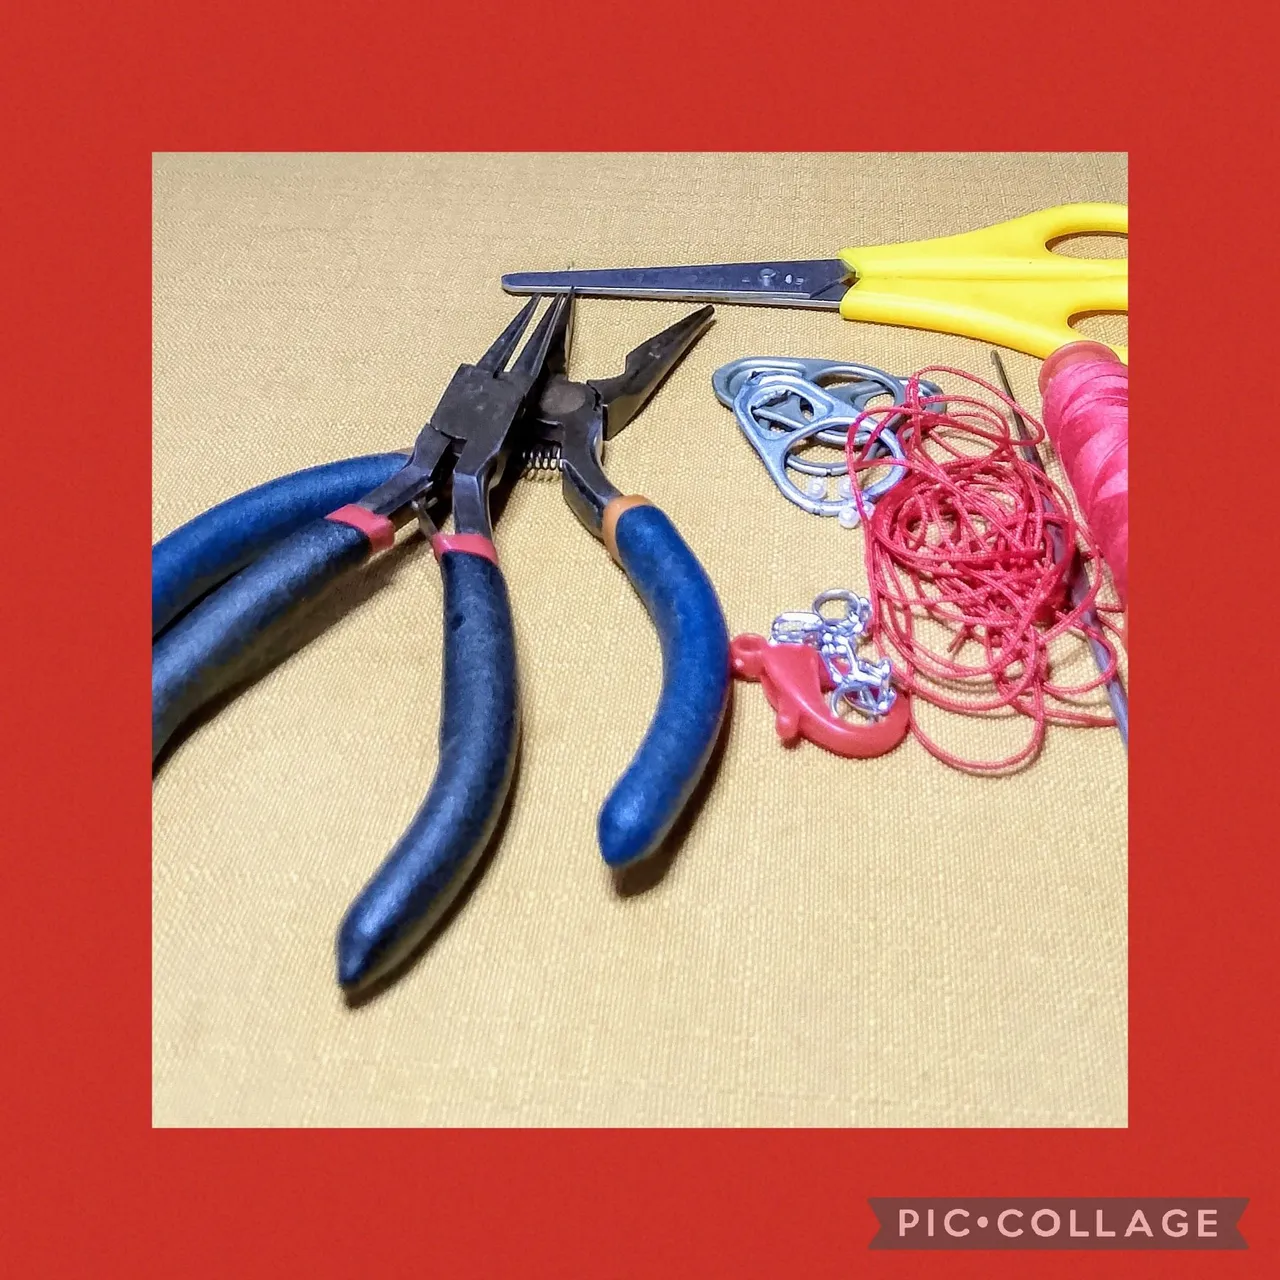
MATERIALES USADOS EN SU ELABORACIÓN:
✓ Dos metros de hilo coreano rojo.
✓ Un metro de hilo coreano beige
✓ Tres anillas de lata.
✓ Diez perlitas blancas.
✓ Hilo de coser rojo.
✓ Una aguja.
✓ Un ganchillo número 5.
✓ Tres argollas.
✓ Un cierre tipo caimán.
✓ Cinco centímetros de cadena plateada.
✓ Piedras de cuarzo rojo.
✓ Separadores blancos.
✓ Tijeras.
✓ Pinzas.
✓ Regla.
MATERIALS USED IN ITS PREPARATION:
✓ Two meters of red Korean thread.
✓ One meter of beige Korean thread.
✓ Three tin rings.
✓ Ten white pearls.
✓ Red sewing thread.
✓ One needle.
✓ One size 5 crochet hook.
✓ Three jump rings.
✓ One alligator clasp.
✓ Five centimeters of silver chain.
✓ Red quartz stones.
✓ White spacers.
✓ Scissors.
✓ Tweezers.
✓ Ruler.
PASOS SENCILLOS PARA ELABORAR ÉSTE PROYECTO :
PRIMER PASO:
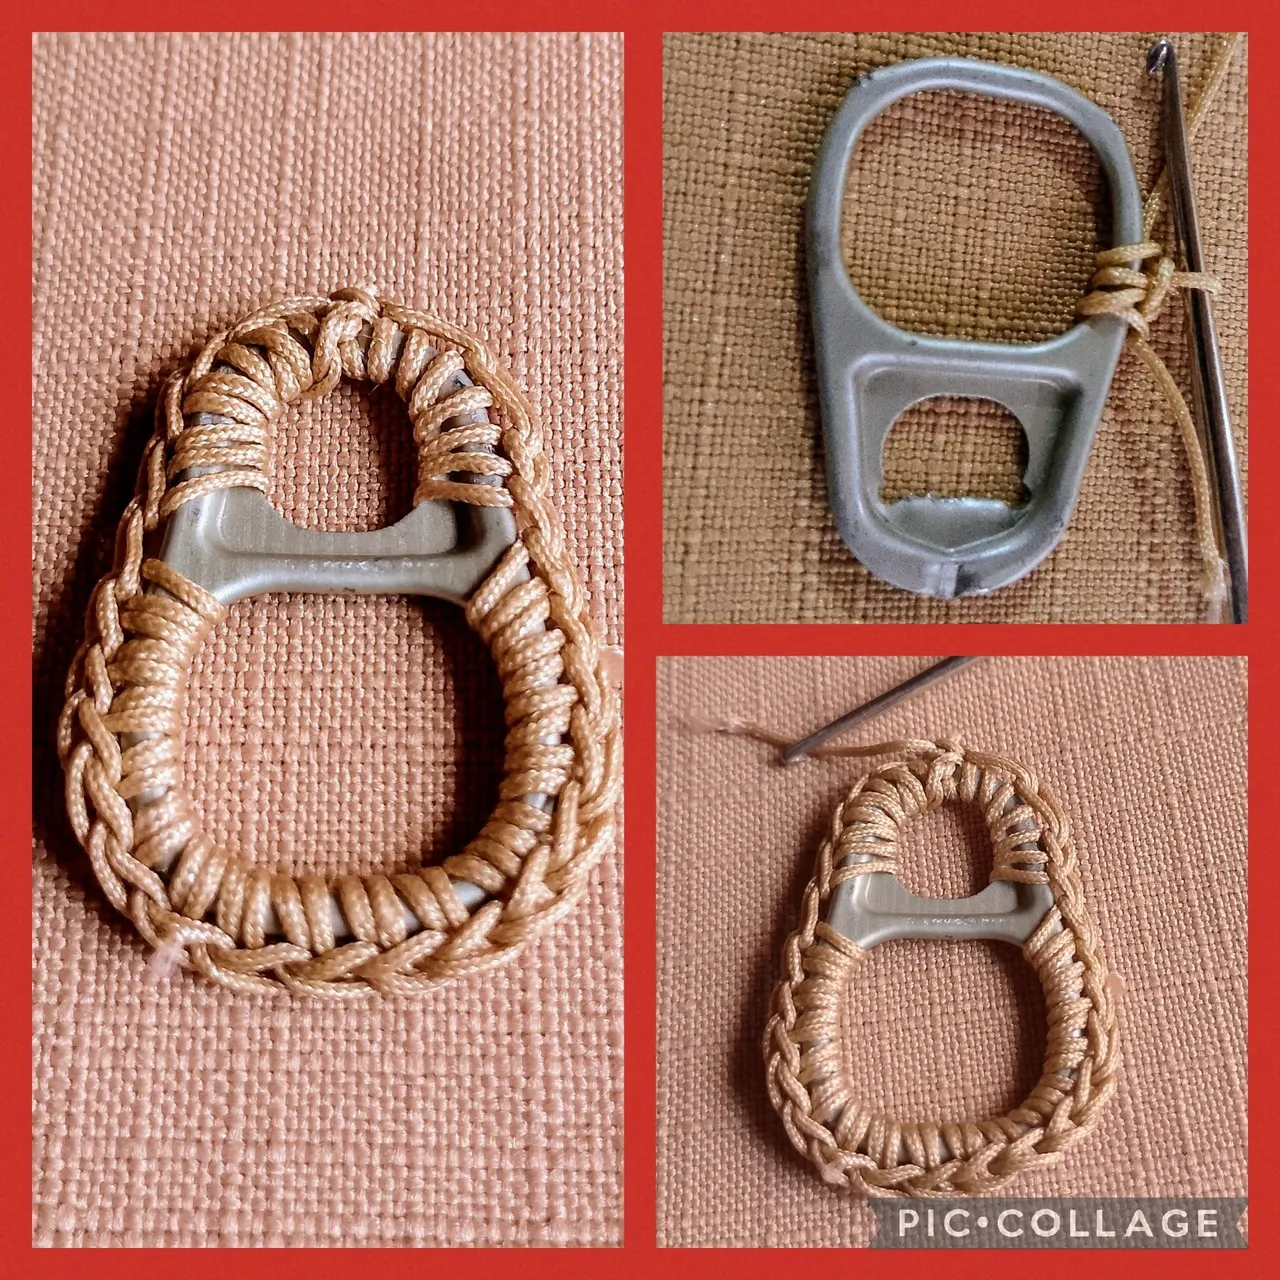
Comienzo la elaboración de este delicado y bonito colgante ocupando un par de anillas de lata que muestro en la imagen como las coloco en forma triangular para formar la especie de sombrero que es primera parte del hongo Amanita muscaria que escogí para mí diseño.
SIMPLE STEPS TO MAKE THIS PROJECT:
FIRST STEP:
I begin making this delicate and pretty pendant by using a pair of tin rings. I show in the image how I place them in a triangular shape to form the cap-like shape that is the first part of the Amanita muscaria mushroom I chose for my design.
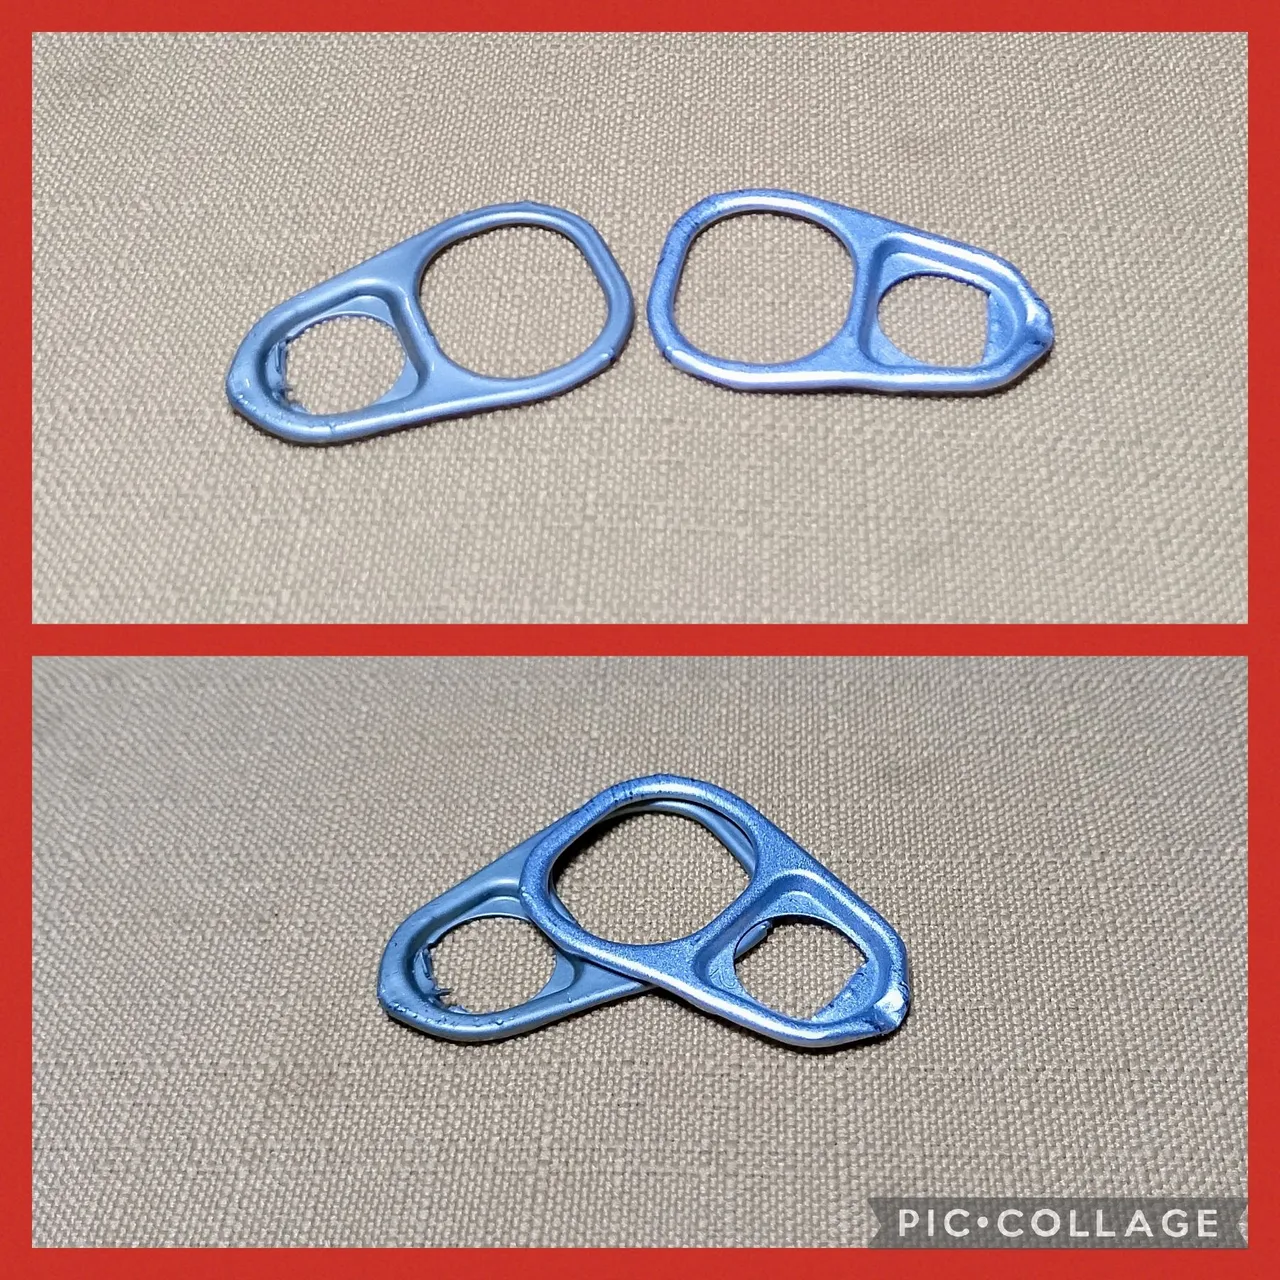
SEGUNDO PASO:
Aquí tomo las dos anillas y la coloco una encima de la otra formando un triángulo, y con la aguja de crochet o ganchillo empiezo a tejer medios puntos por todo el contorno de las anillas comenzando por la parte superior como muestra la imagen.
STEP TWO:
Here I take the two rings and place them one on top of the other to form a triangle. Using the crochet hook, I begin to crochet half stitches around the entire perimeter of the rings, starting from the top, as shown in the image.
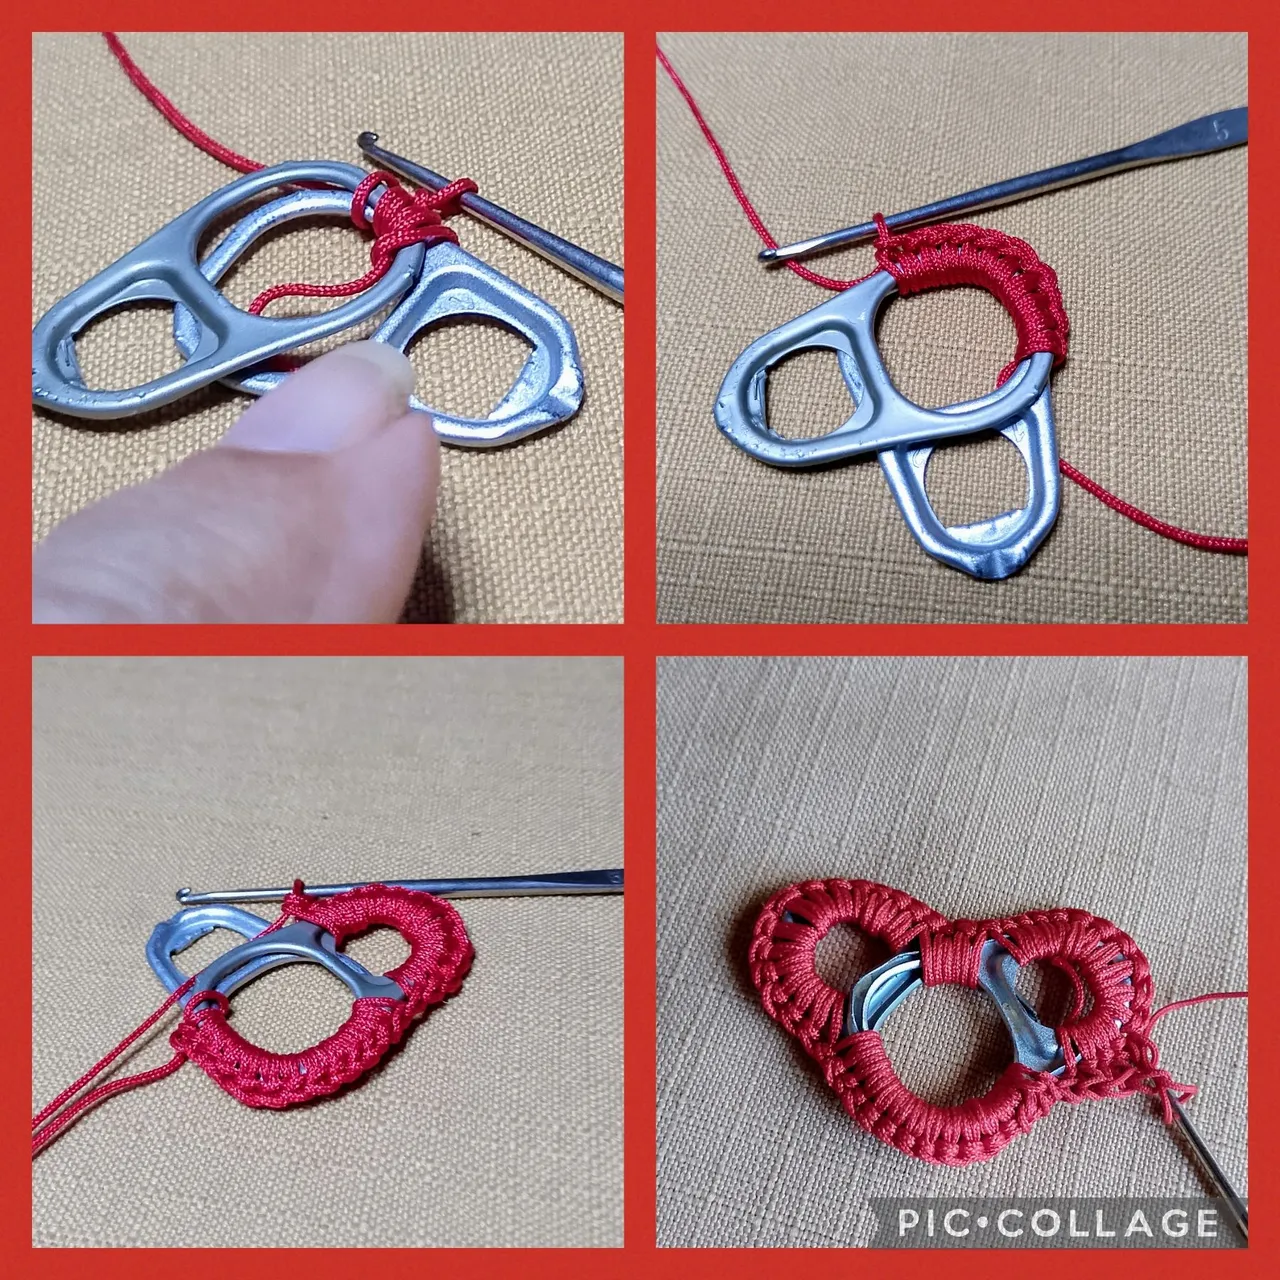
TERCER PASO:
Ahora continuo en este paso y una vez terminada la primera vuelta en el punto del comienzo me deslizó para seguir haciendo otra vuelta de medios puntos para darle forma al sombrero del hongo.
STEP THIRD:
Now I continue with this step, and once I've finished the first row at the starting stitch, I move on to continue making another row of half double crochets to shape the mushroom cap.
CUARTO PASO:
Sigo trabajando en la elaboración del colgante y una vez que terminó la primera y segunda vuelta de medios puntos en la parte superior, paso a formar la base del hongo, en esta ocasión uso una nueva anilla y con hilo coreano de color beige comienzo a tejer por todo el contorno de la base medios puntos hasta llenar la anilla aquí hago una sola vuelta, ahora uso las tijeras para cortar los excedentes del hilo y así va quedando
STEP FOUR:
I continue working on the pendant and once I've finished the first and second rounds of half double crochets at the top, I move on to forming the base of the mushroom. This time I use a new ring and with beige Korean yarn I begin to crochet around the entire outline of the base half double crochets until the ring is filled. Here I make a single round. Now I use scissors to cut off the excess yarn and this is how it looks.
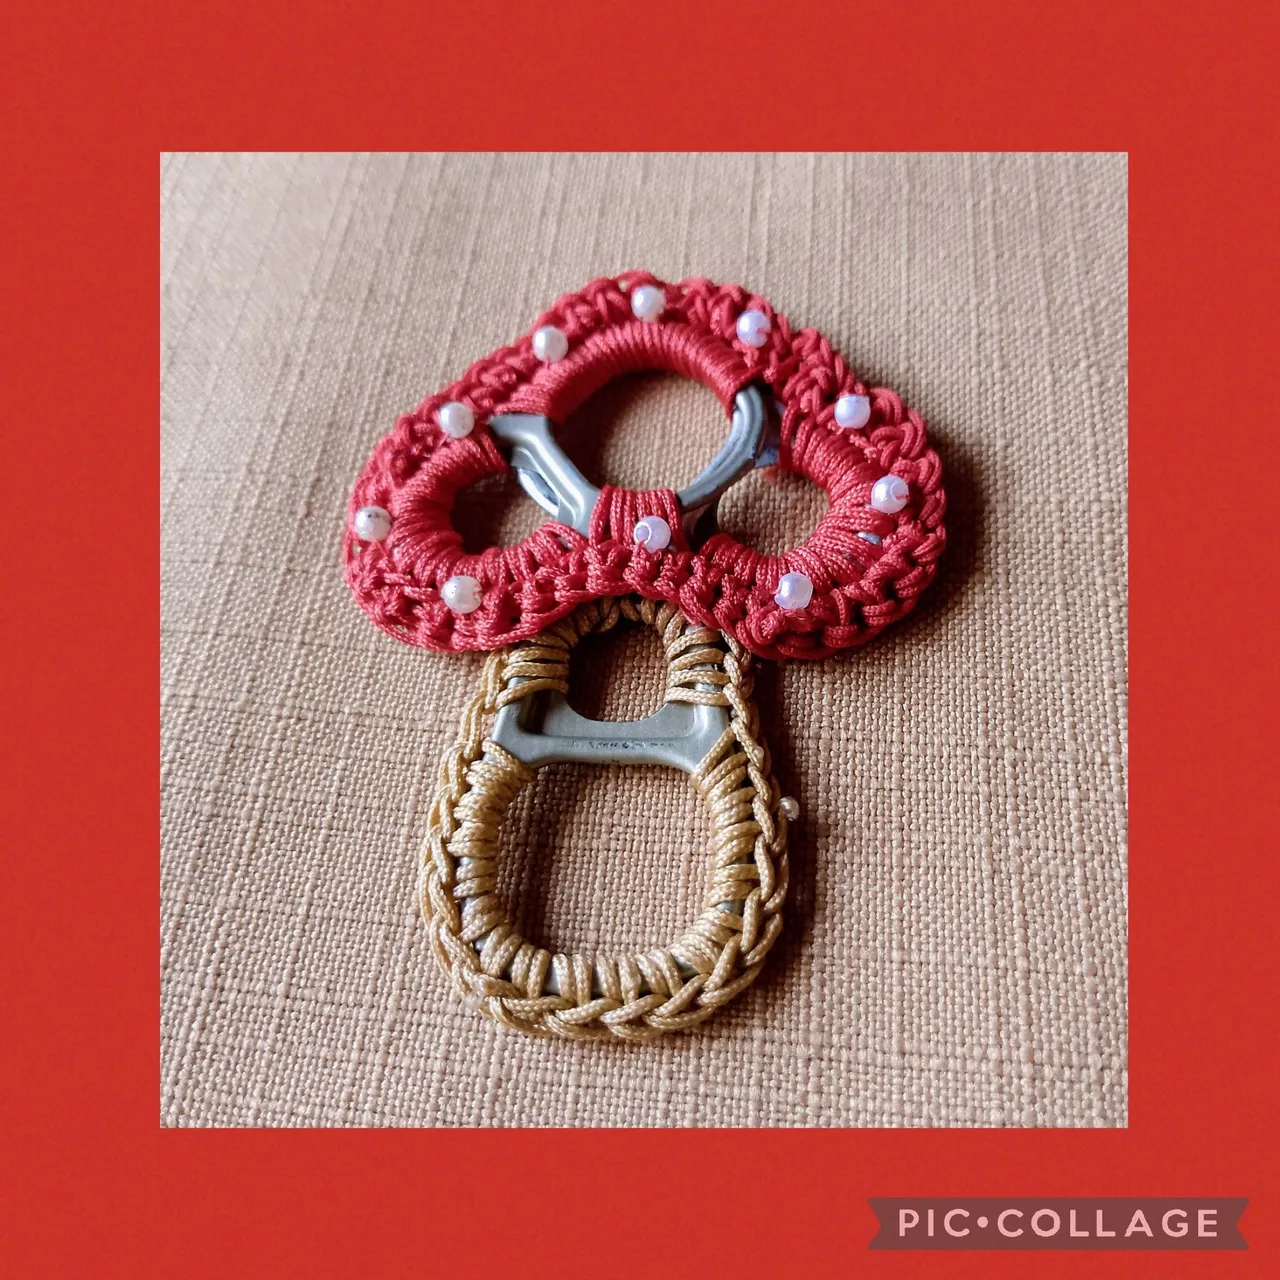
QUINTO PASO:
En este paso con la aguja de coser y el hilo rojo empiezo a decorar el sombrero del hongo colocando unas perlitas blancas, realizado este procedimiento con la misma aguja voy a unir las dos partes para este resultado.
STEP FIVE:
In this step, I use the sewing needle and red thread to decorate the mushroom cap by adding some white beads. After doing this, I'll join the two parts together using the same needle to create this result.

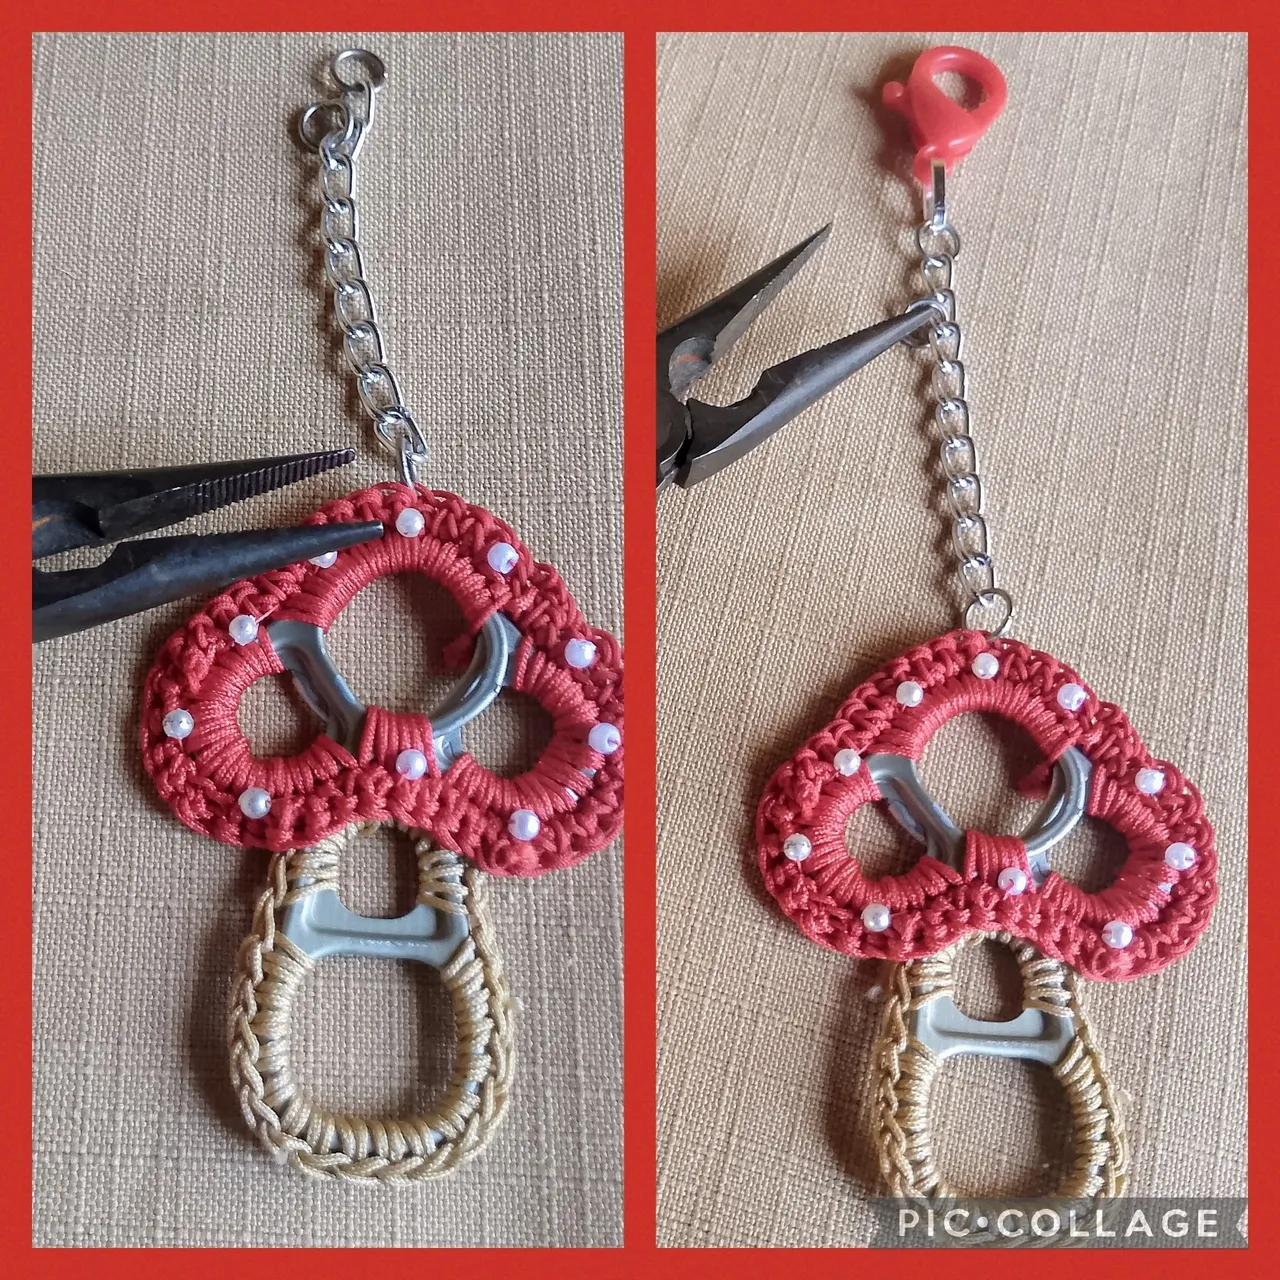
SEXTO PASO:
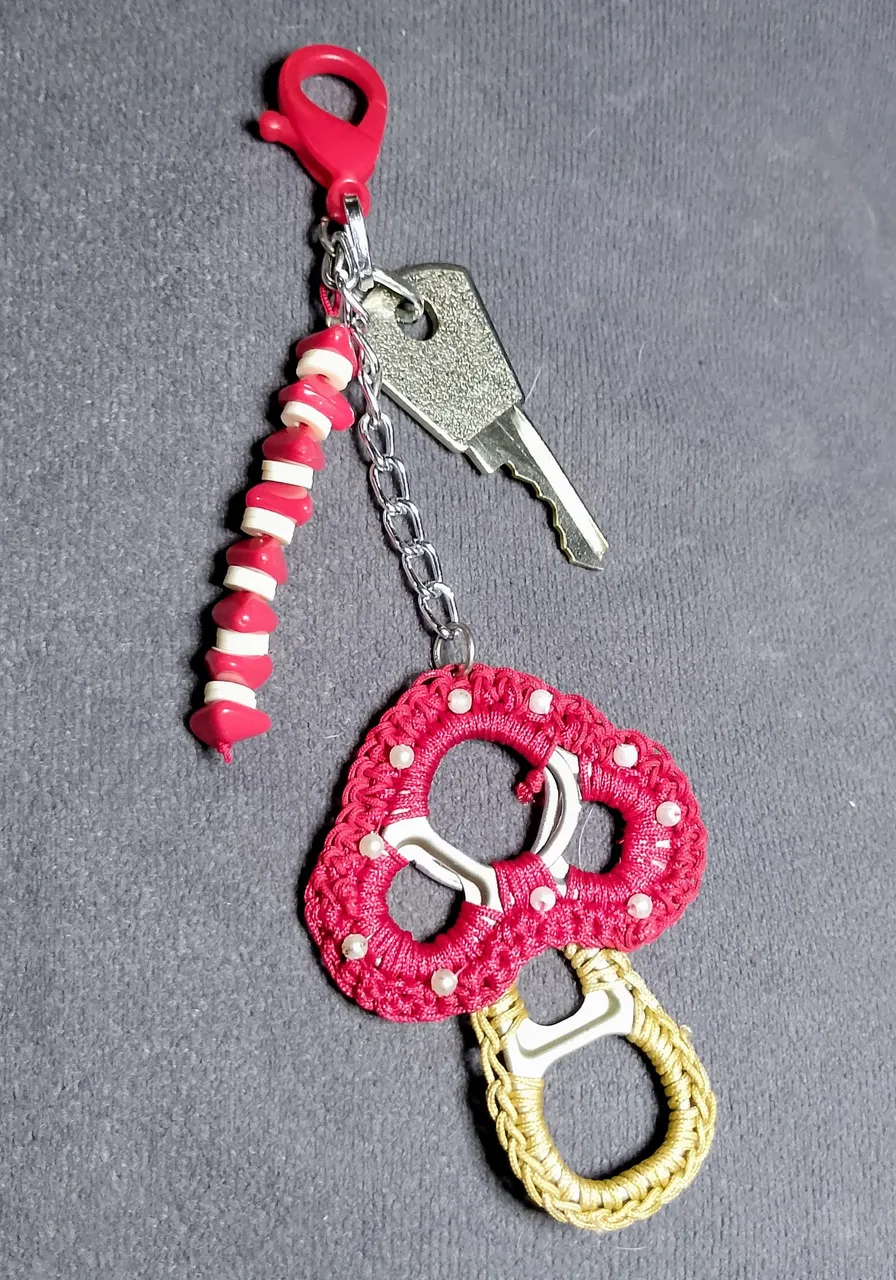
Ahora uso las pinzas para colocar los herrajes, en la parte superior pongo una argolla en el centro del hongo y ahí coloco una cadena de seis centímetros luego pongo el terminal rojo tipo caimán, ahora he realizado con anterioridad otro colgante de piedras de cuarzo rojo y separadores blancos que le pongo una pequeña argolla y la coloco en uno de los anillos de la cadena.
STEP SIX:
Now I use the pliers to attach the hardware. At the top, I place a ring in the center of the mushroom and attach a six-centimeter chain. Then, I add the red alligator-style end. I previously made another pendant with red quartz stones and white spacers. I attach a small ring to it and place it on one of the chain rings.
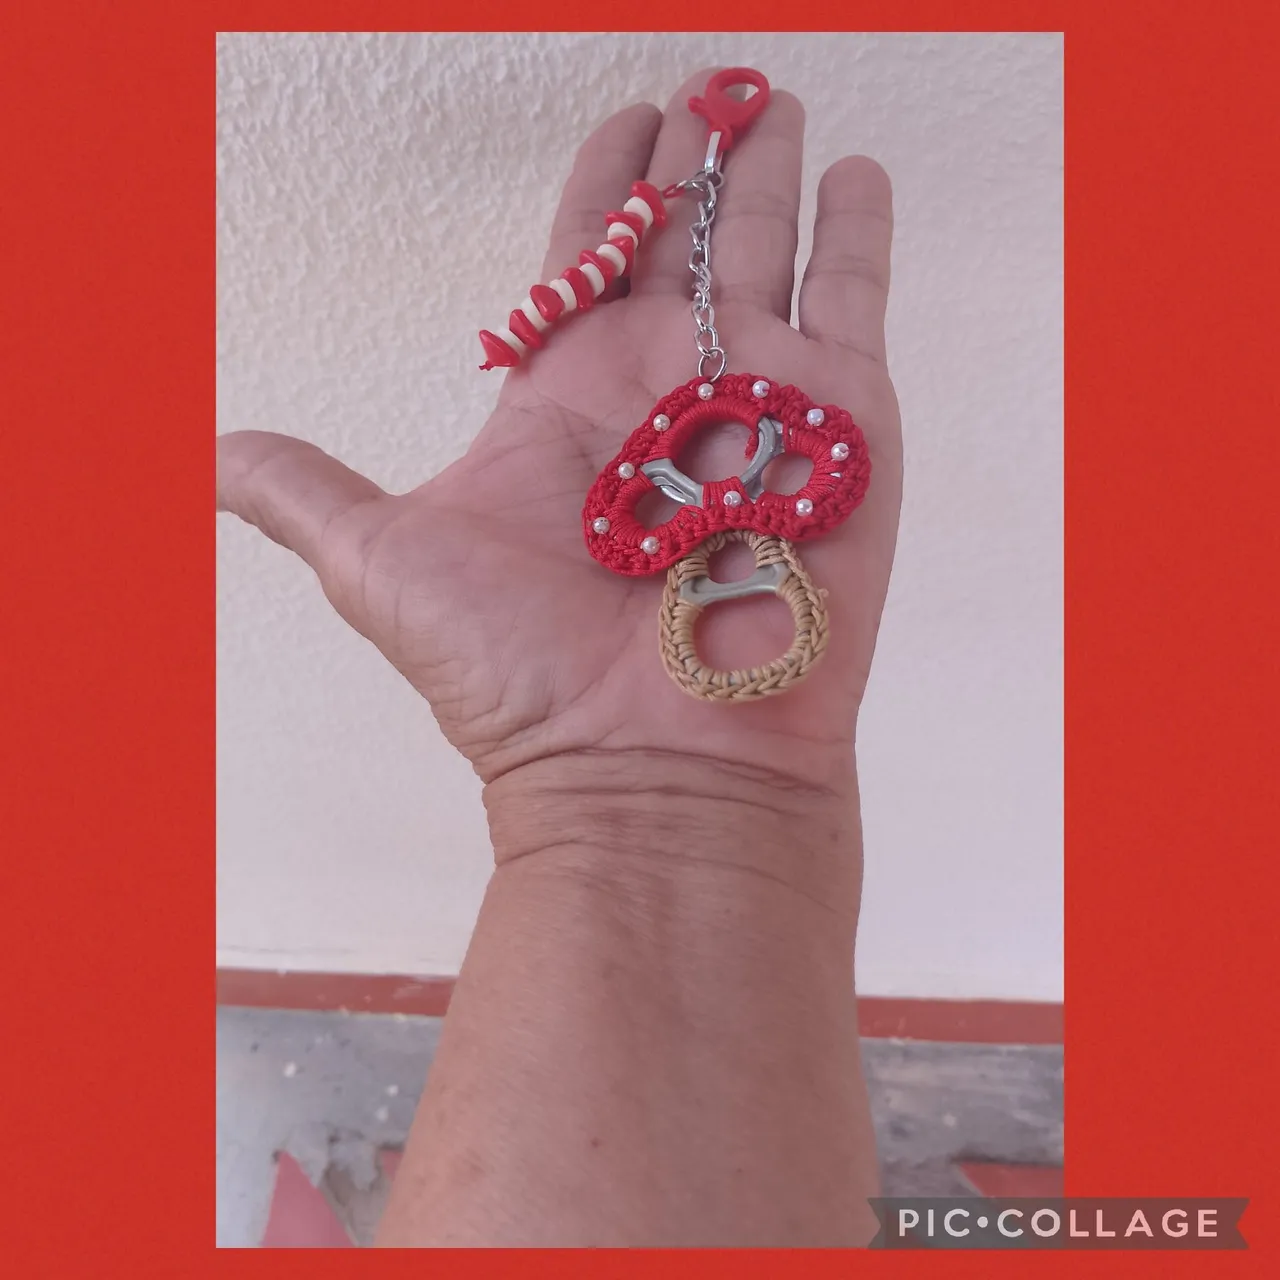
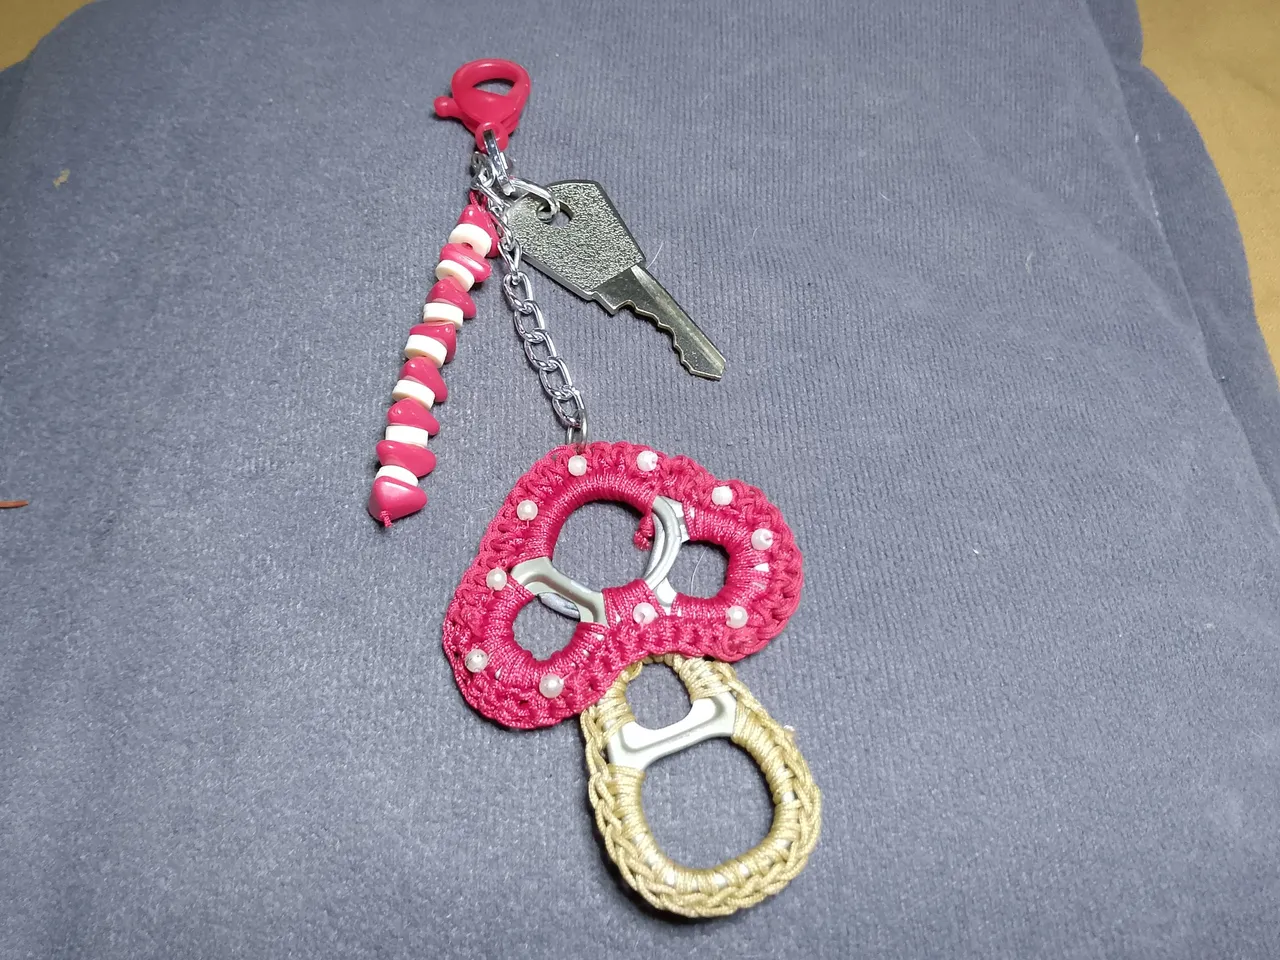
Bueno Artistas Creativos de las Manualidades y la Joyería este es el resultado final de este bonito colgante, me encantó está idea, espero que les guste y puedan desarrollar esa creatividad y le pongan sus tips personales, de verdad es muy bonito y sirve para solucionar esos pequeños detalles que nos llegan de imprevisto, como siempre agradecida con todos los que leen y ven mis publicaciones y me apoyan con sus valiosos comentarios.
Que tengan un feliz fin de semana y nos vemos en la próxima manualidad, bye bye.
Well, Creative Artists of Crafts and Jewelry, this is the final result of this beautiful pendant. I loved this idea. I hope you like it and can develop your creativity and add your own personal tips. It's really beautiful and helps solve those small details that come up unexpectedly. As always, I'm grateful to everyone who reads and views my posts and supports me with their valuable comments.
Have a happy weekend, and see you at the next craft!
Las imágenes y redacción de este tutorial son de mi exclusiva propiedad las fotos fueron tomadas con mi teléfono celular Tecno Spark Go 20 y fueron editadas con una aplicación gratis del mismo.
Para traducir texto use Google traductor.
The images and writing in this tutorial are my exclusive property. The photos were taken with my Tecno Spark Go 20 cell phone and edited with a free app.
Use Google Translate to translate text.