Hola amigos de la comunidad ,buenas noche tengan todos , una vez más quiero felicitar a todo los pertenecientes de esta gran familia ,por su gran desempeño y dedicación , he estado detallando cada participante de este nuevo concurso y son todos ganadores ,por su excelente trabajo ,hoy en esta noche quiero formar parte de este nuevo reto de este espectacular concurso ,dónde además de concursar podemos ver qué con pequeños materiales podemos realizar excelentes accesorios para nuestra piel , cabello o ropa ,hoy les presento unos pequeños zarcillos en forma de lazo que realice con tan solo pocos pasos
Hello friends of the community, good evening everyone, once again I want to congratulate all the members of this great family, for their great performance and dedication, I have been detailing each participant of this new contest and they are all winners, for their excellent work, tonight I want to be part of this new challenge of this spectacular contest, where in addition to compete we can see what with small materials we can make excellent accessories for our skin, hair or clothing, today I present a small tendrils in the form of loop that made with just a few steps
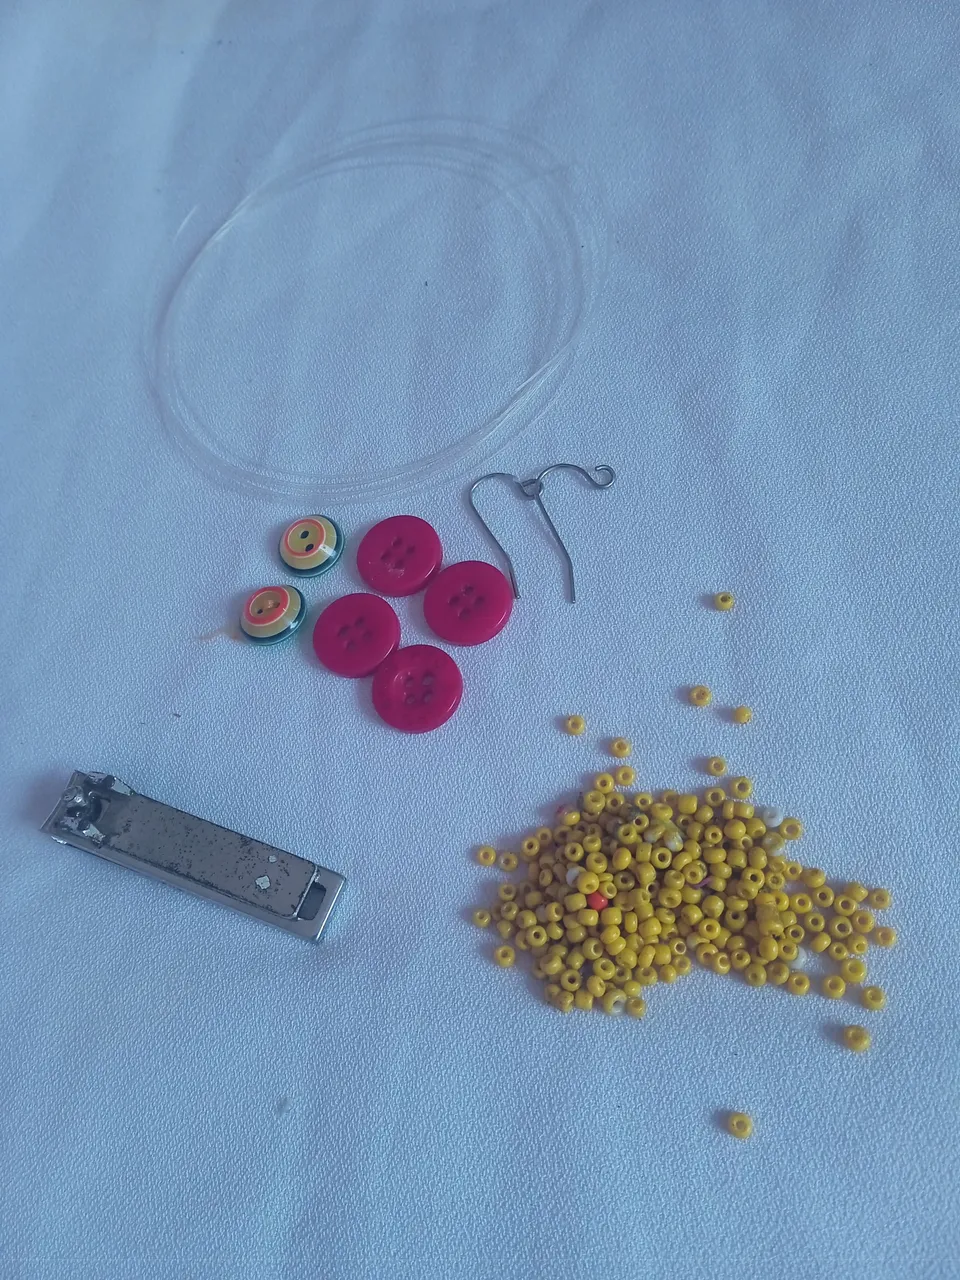
Materiales para realizar unos zarcillos :
-Botones (4 medianos y 2 pequeños)
-Canutillos amarillos
-Corta uñas
-Nailo
-Zarcillos
Materials to make some tendrils:
-Buttons (4 medium and 2 small)
-Yellow earrings
-Nail clippers
-Nailo
-Earrings
Pasos para realizar nuestros lindos lazos :
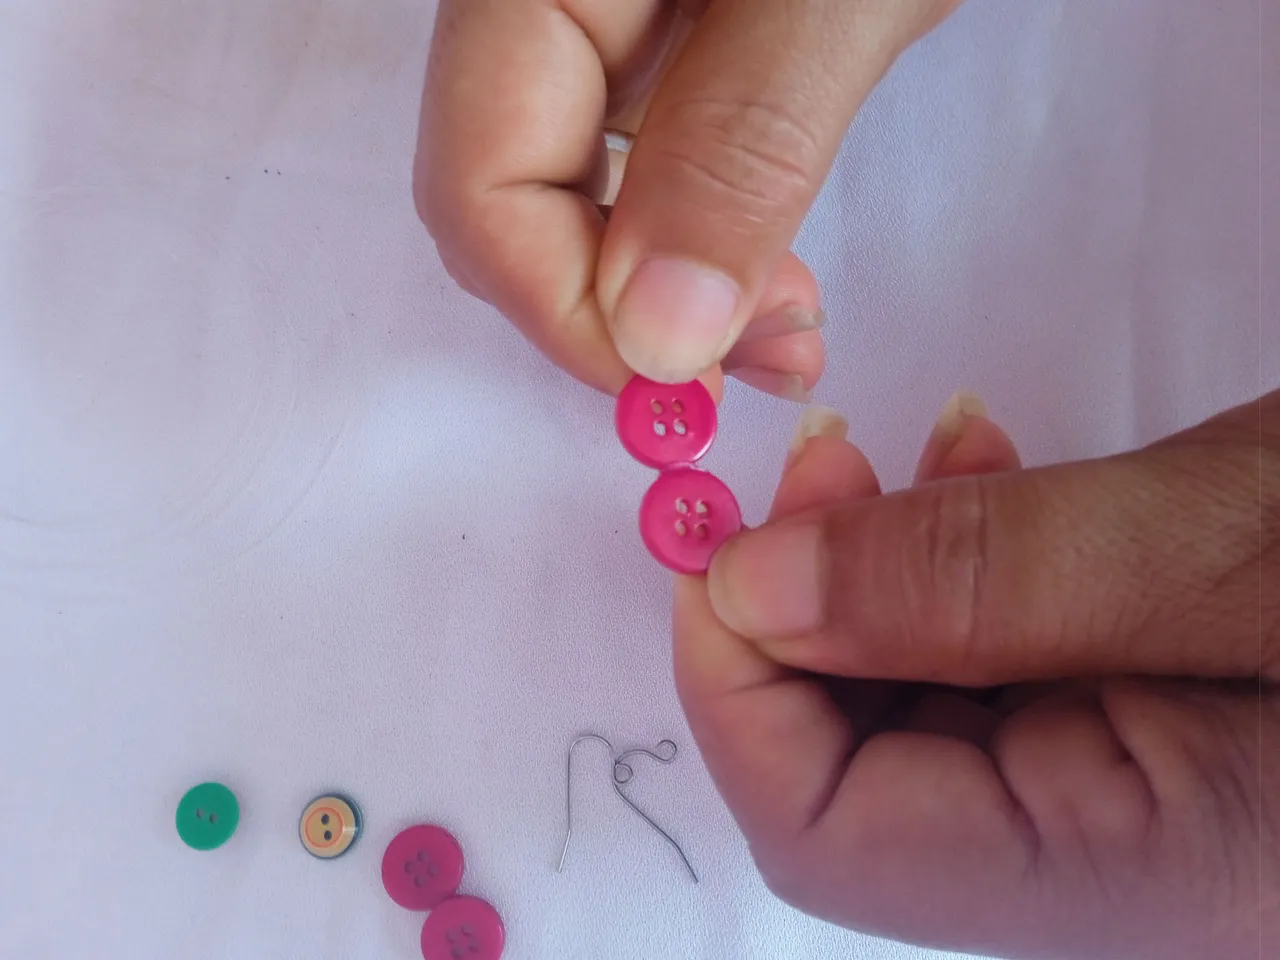
Paso número 1: comenzaremos realizando nuestro lazo ,o el cuerpo de el lazo , para esta pieza solo utilizaremos botones ,sabemos que algunos diseños son cuadrados otros redondos ,por eso utilice botones redondos , vamos a tomar dos ya que será por cada par de zarcillos dos , añadiremos silicon en el borde de nuestro botón , luego continuaremos tomando otro botón y formando nuestro lazo ,primer diseño
Steps to make our pretty bows:
Step number 1: we will start making our bow ,or the body of the bow , for this piece we will only use buttons ,we know that some designs are square others round ,so use round buttons , we will take two as it will be for each pair of tendrils two , we will add silicon on the edge of our button , then we will continue taking another button and forming our bow ,first design.
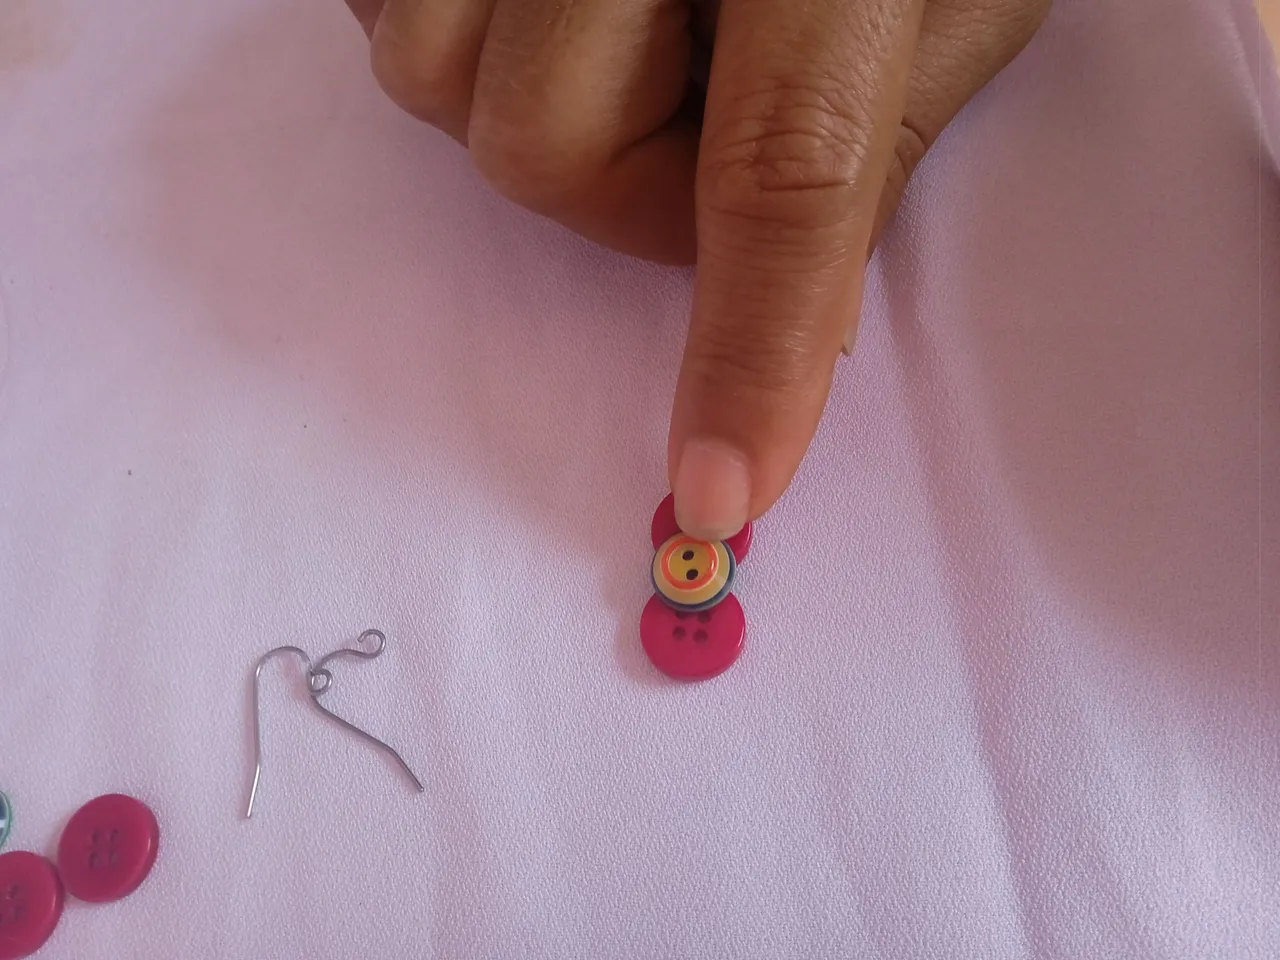
Paso número 2 : En este segundo paso luego que tengamos listo nuestro lazo ,vamos a continuar tomando un botón más pequeño de diferente color para que combine y resalte , este dicho botón lo pegaremos en todo el centro formando el paso final para nuestro lazo, aunque hasta acá no finaliza nuestra decoración , a continuación vamos a proceder a realizar el diseño de abajo
Step number 2: In this second step after we have our bow ready, we will continue taking a smaller button of a different color to match and highlight, this button will be glued around the center forming the final step for our bow, although this is not the end of our decoration, then we will proceed to make the design below.
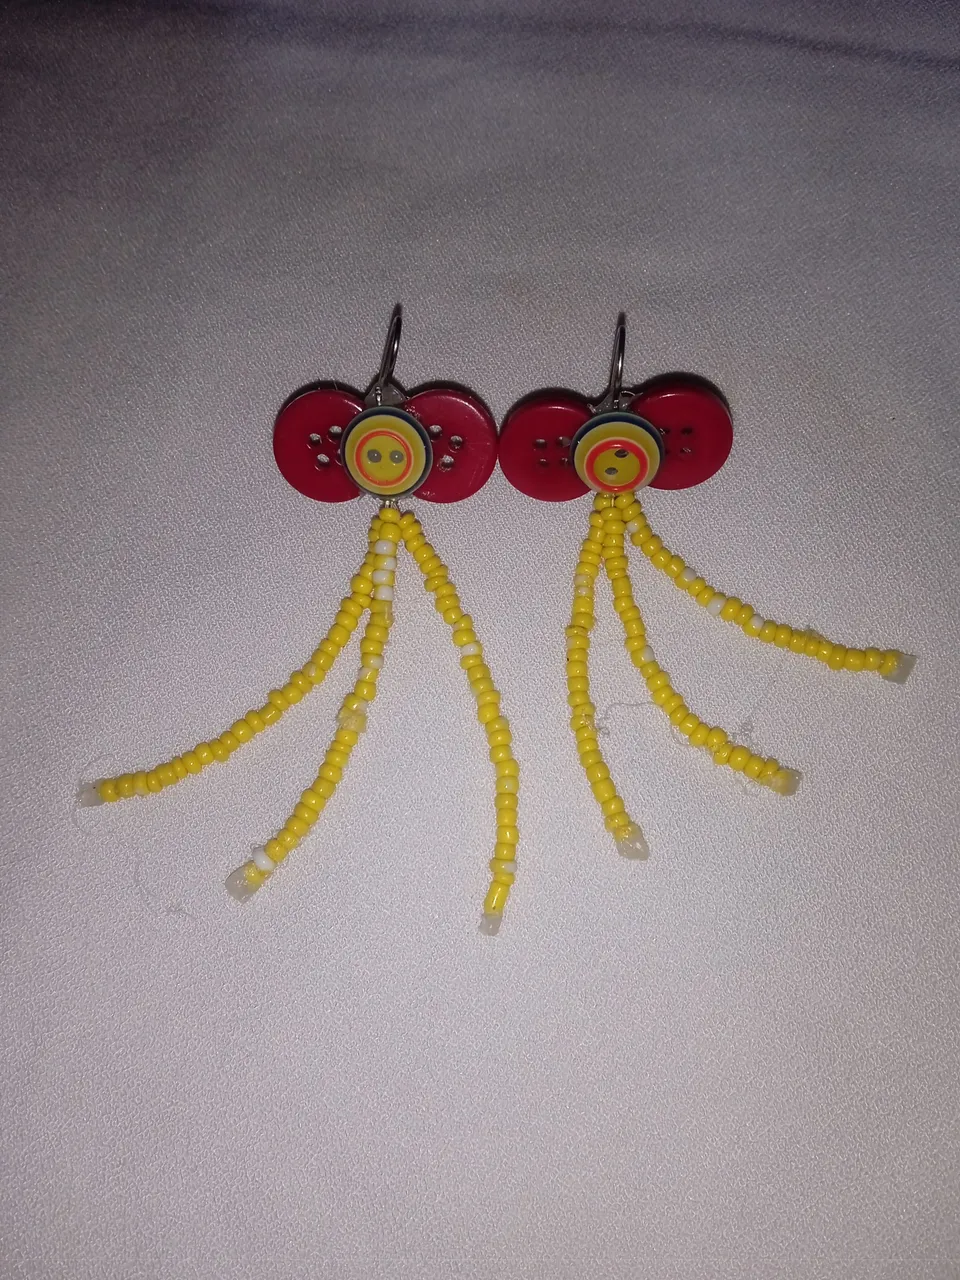
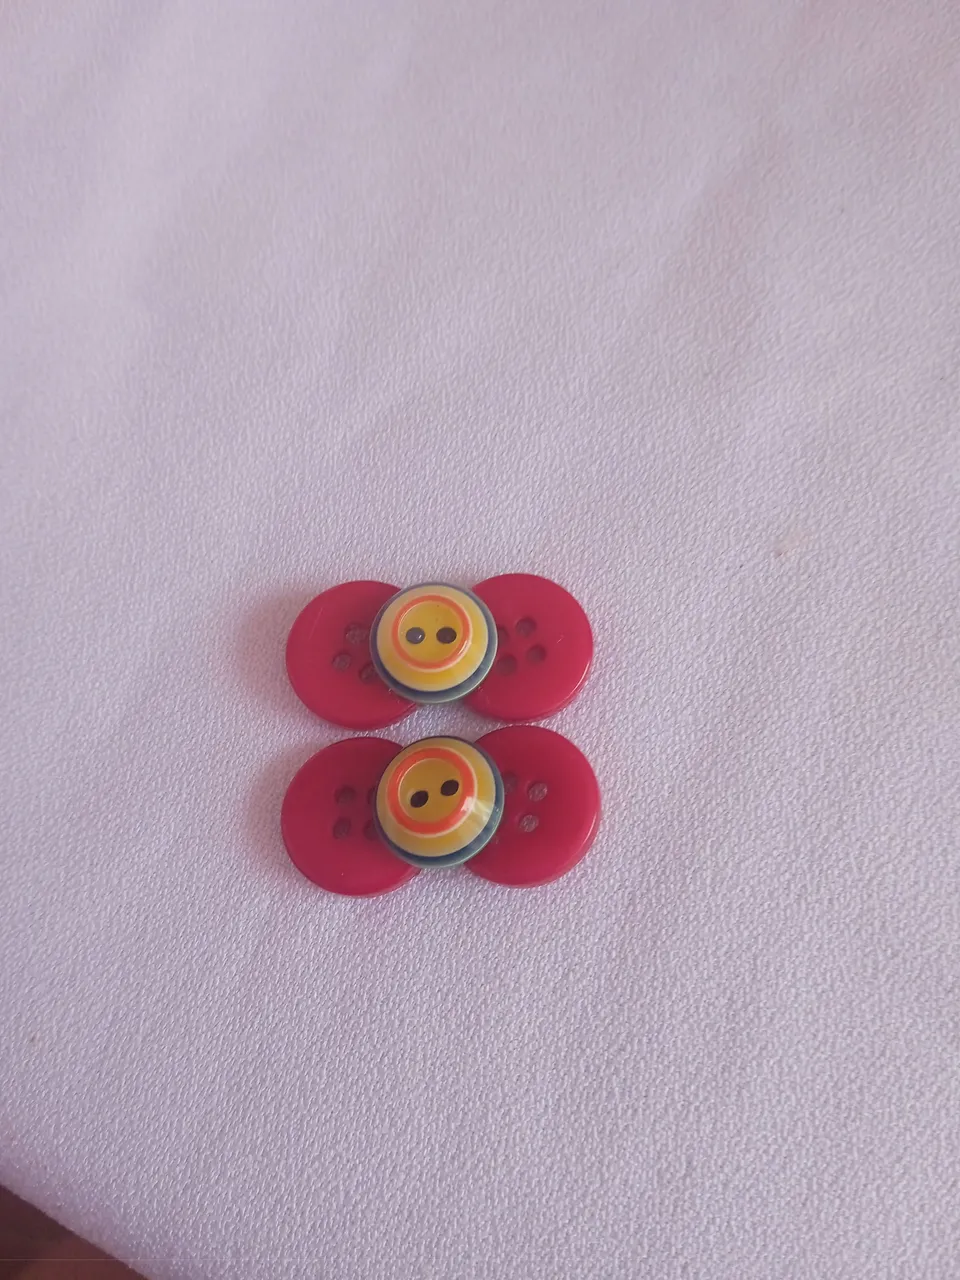
Paso número 3 :Nuestros pequeños lazos van a quedar de esta manera ,un diseño de lazo súper sencillo y coqueto ,la cual quiere decir que no pesará ni será molesto en nuestras orejas
Step number 3: Our little bows will look like this, a super simple and flirty bow design, which means that it will not be heavy or annoying in our ears.
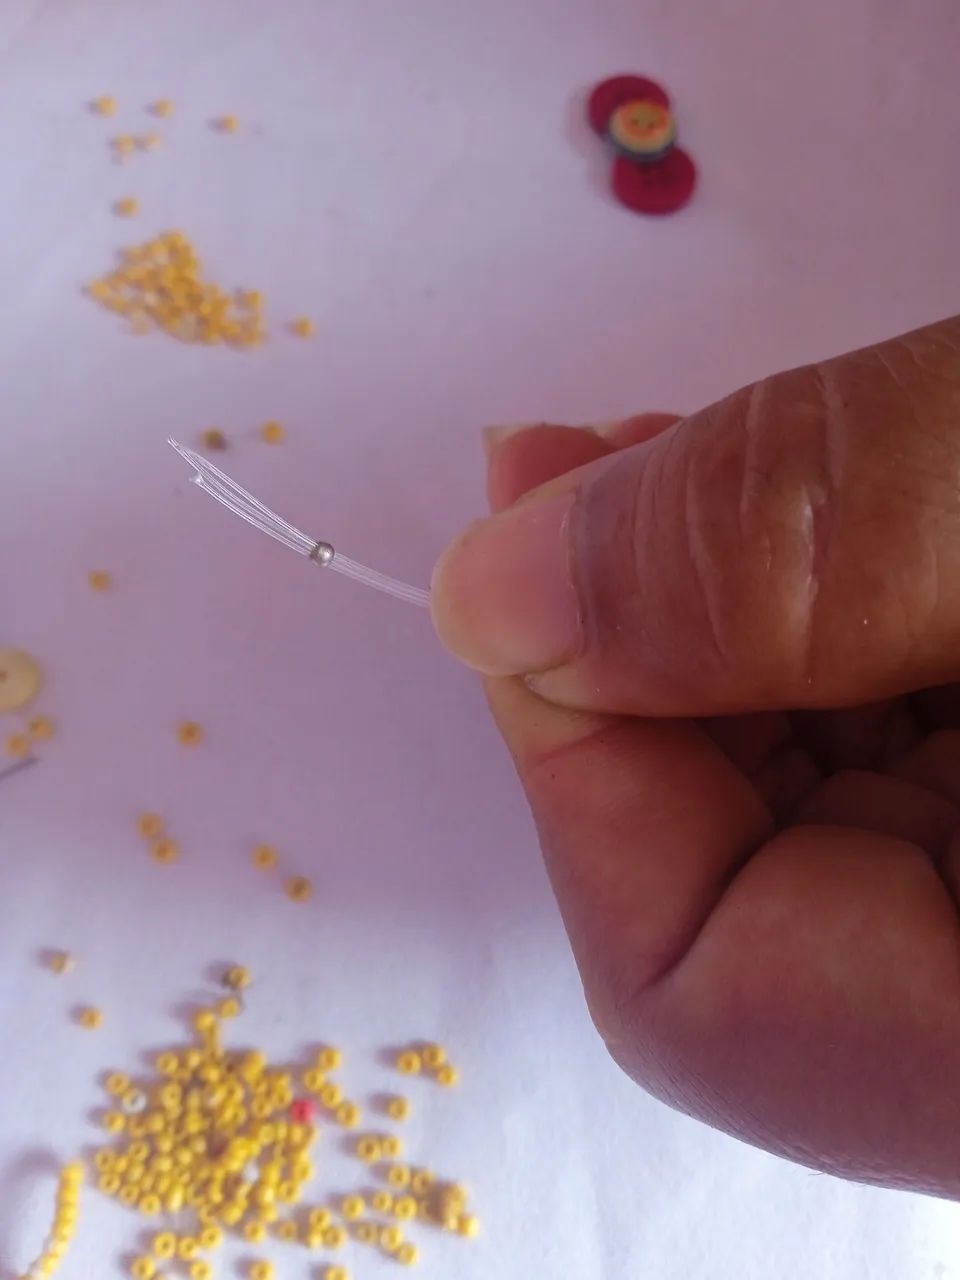
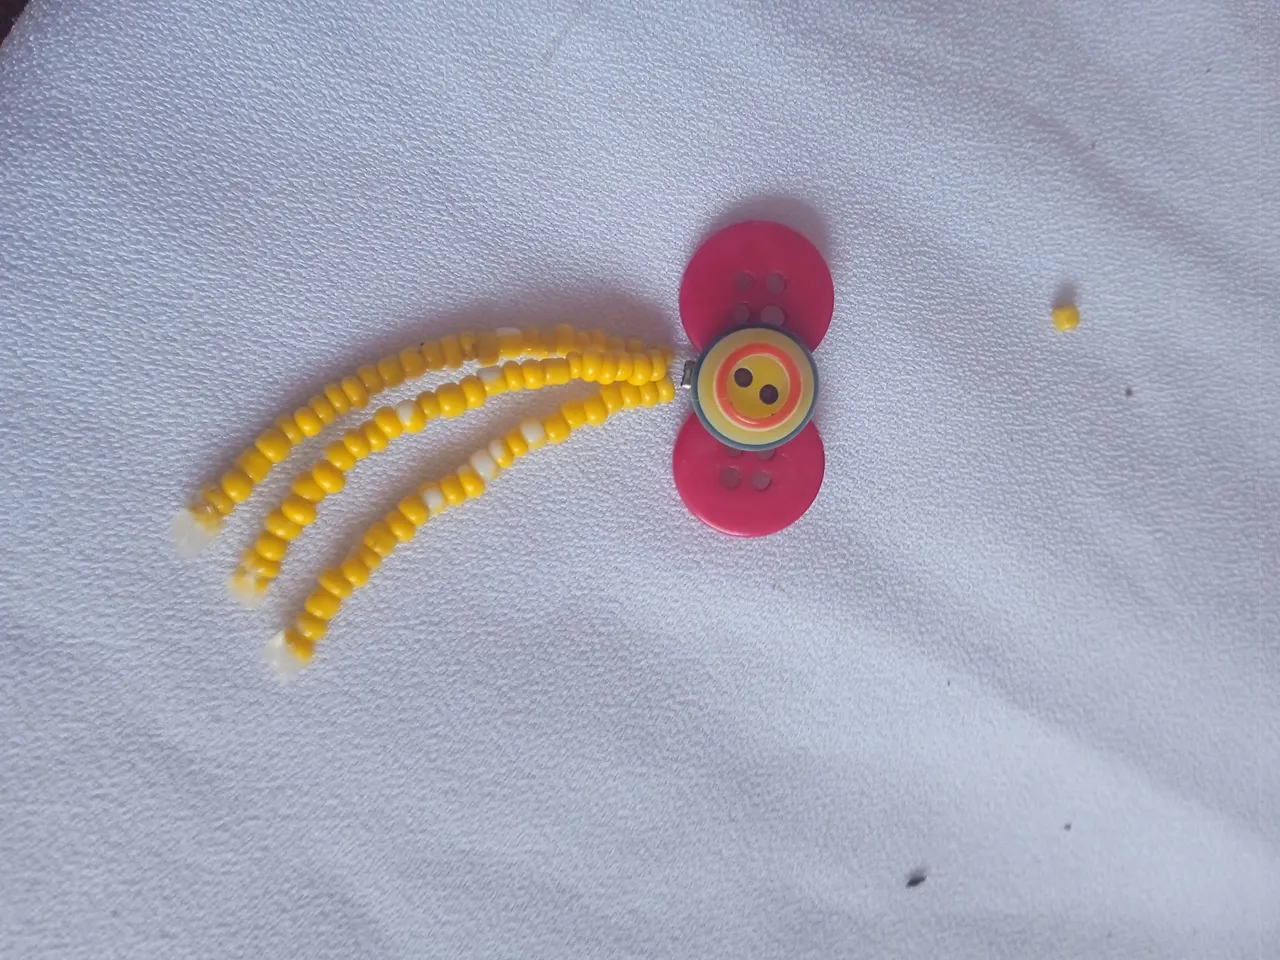
Paso número 4 : Seguidamente luego vamos a proceder a realizar el diseño final de nuestros zarcillos , esto vendrá siendo los flecos los cuales realizaremos con canutillos amarillos de modo que combine con el botón de el centro ,para esto tomaremos tres nailos de ocho centímetros por cada zarcillos ,introducimos un sellador para que ambos hilos queden sujetos y presionamos con el corta uñas
Step number 4: Next we will proceed to make the final design of our tendrils, this will be the bangs which will be made with yellow beads to match the button in the center, for this we will take three eight centimeters nails for each tendril, we introduce a sealant so that both threads are subject and press with the nail cutter.
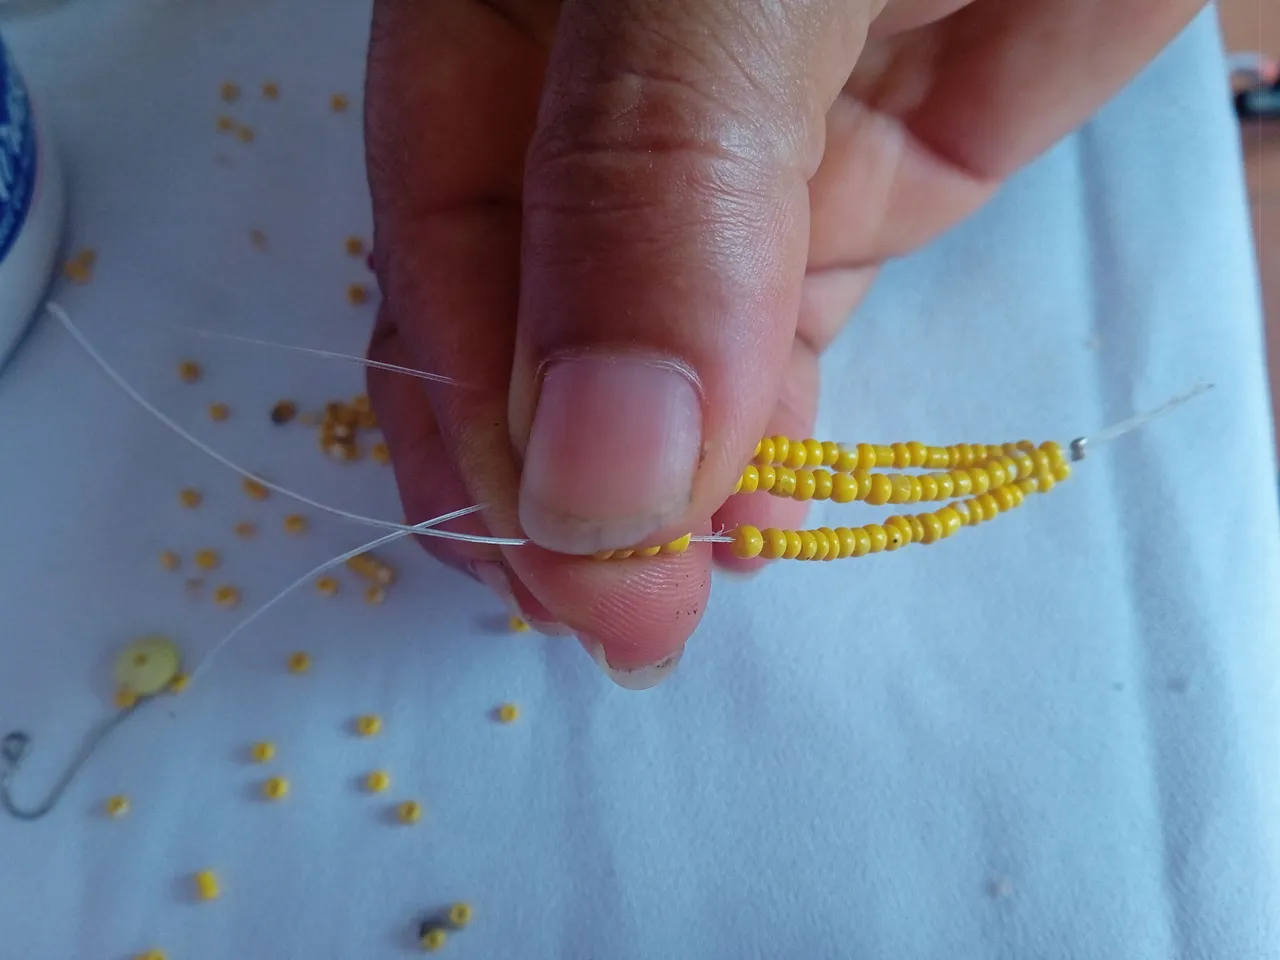
Paso número 5 : en nuestro quinto paso amigos , vamos a continuar introduciendo piedras plasticas amarillas ( canutillos) en los tres nailos que cortamos y sellamos ,realizando los flecos ,estos debemos tratar de que queden en el mismo lugar y tamaño
Step number 5: in our fifth step friends, we will continue introducing yellow plastic stones (canutillos) in the three nails that we cut and sealed, making the bangs, we must try to keep them in the same place and size.
Paso número 6 : una vez que introducimos nuestros canutillos ,vamos a proceder a pegarlo en la parte de abajo de nuestros zarcillos ubicados exactamente en el centro para que queden colgando y acompañe con el diseño queridos amigos
Step number 6: once we introduce our beads, we will proceed to glue them on the bottom of our tendrils located exactly in the center so that they are hanging and accompany the design dear friends.
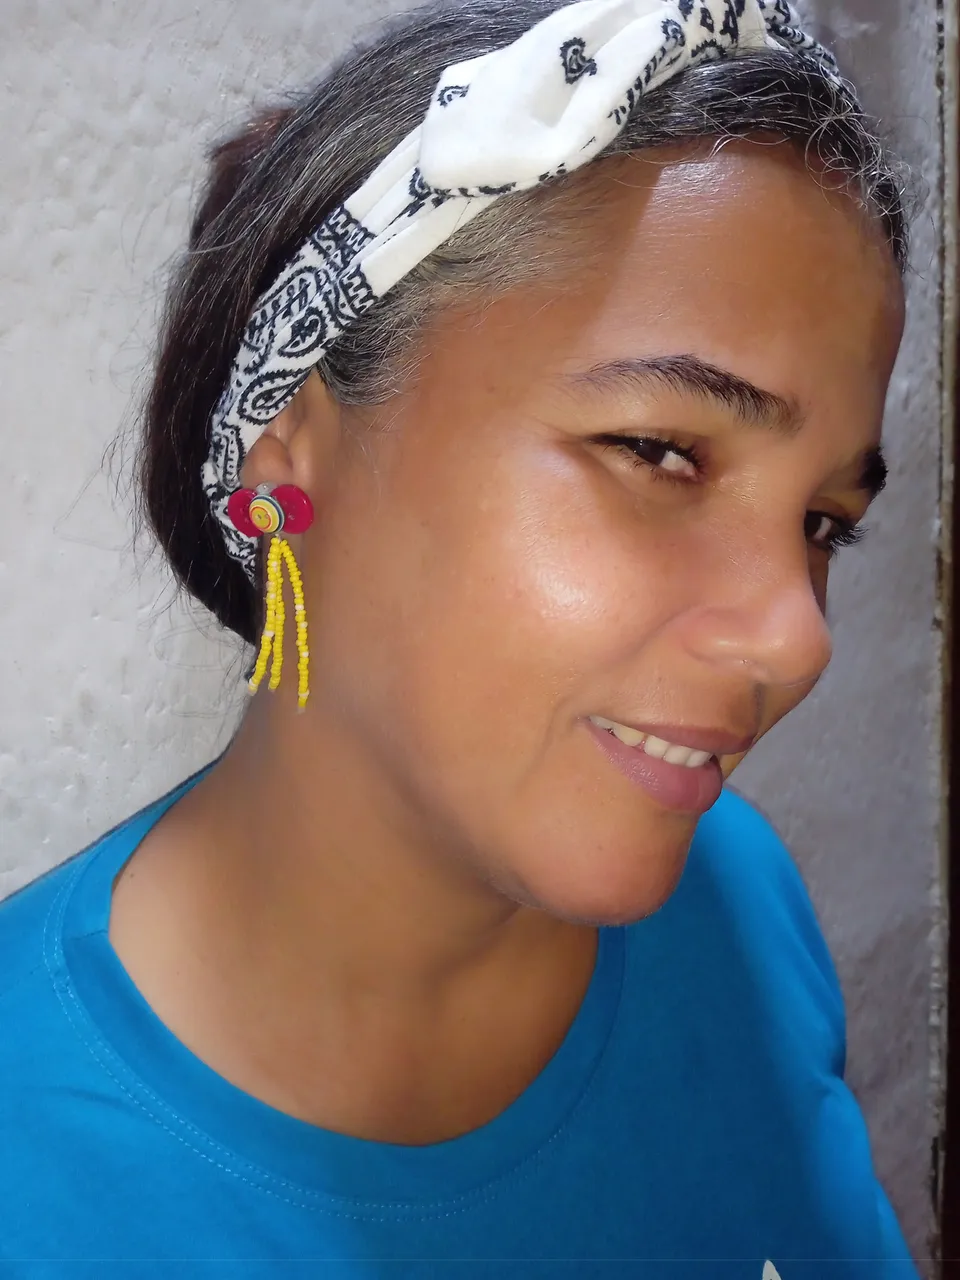
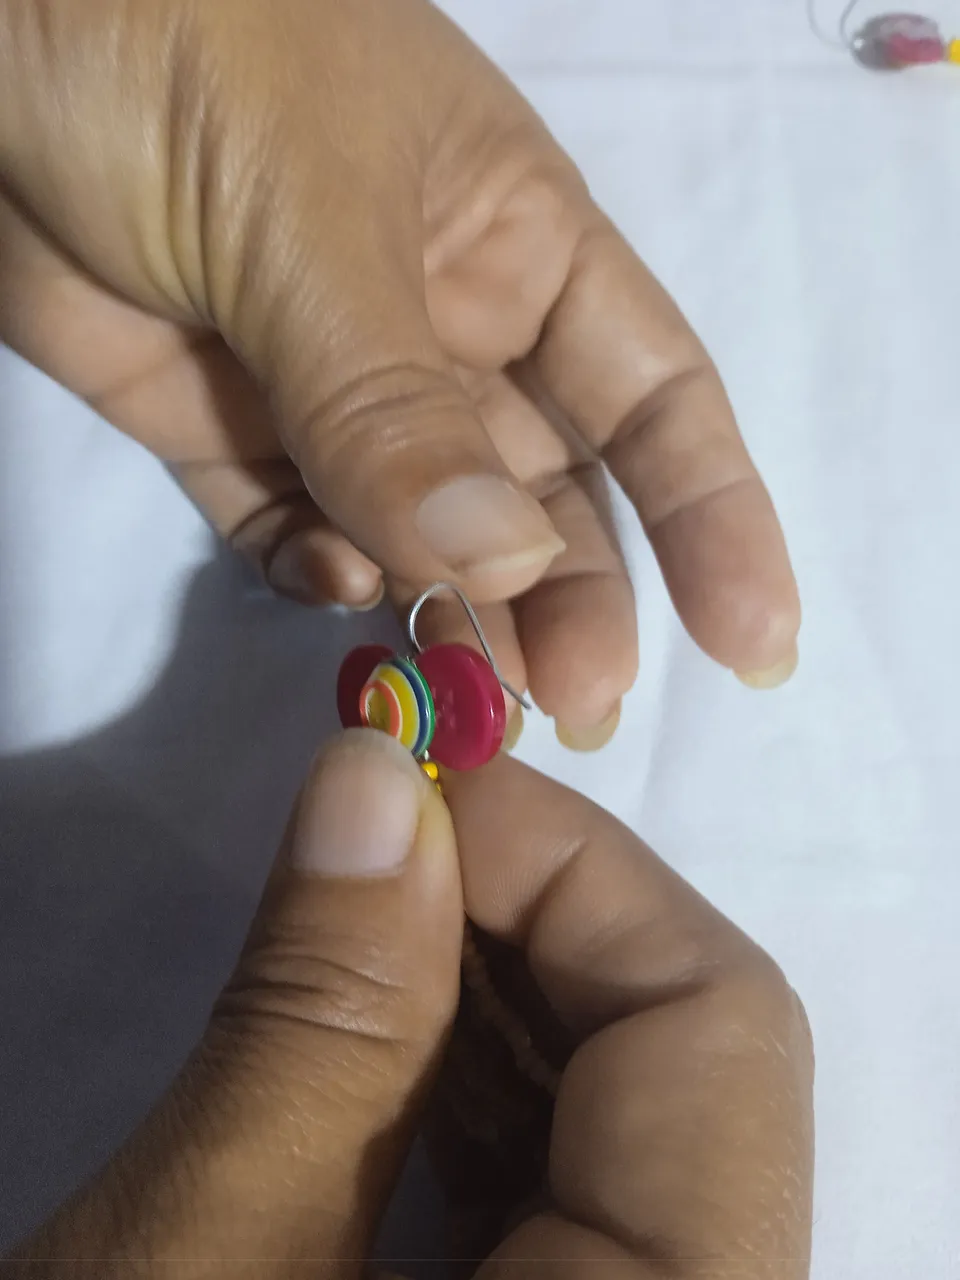
Paso número 7 : en nuestro siguiente paso el cual vendría siendo el paso final , teniendo ya listo nuestro diseño ,vamos a proceder a pegar el zarcillo en la parte de arriba de nuestro lazo ,cuidando que quede bien sujeto de modo que no se salga ni perdamos nuestro accesorio la cual realizamos con mucho esmero
Step number 7: in our next step which would be the final step, having our design ready, we will proceed to glue the tendril on the top of our bow, taking care that it is securely fastened so that it does not come off or lose our accessory which we made with great care.
Este fue todo el proceso de mi accesorio de el día de hoy , agradezco por su atención ,antes de finalizar con mi post ,le realizó la invitación a mis amigas para que puedan también concursar y vivir de esta linda experiencia @katiuskamata @margararivera @joskfiguera04 , que pasen una linda y bella noche ,hasta la próxima
This was the whole process of my accessory today, thank you for your attention, before ending my post, I made the invitation to my friends so that they can also compete and live this beautiful experience @katiuskamata @margararivera @joskfiguera04 , have a nice and beautiful night, until next time.