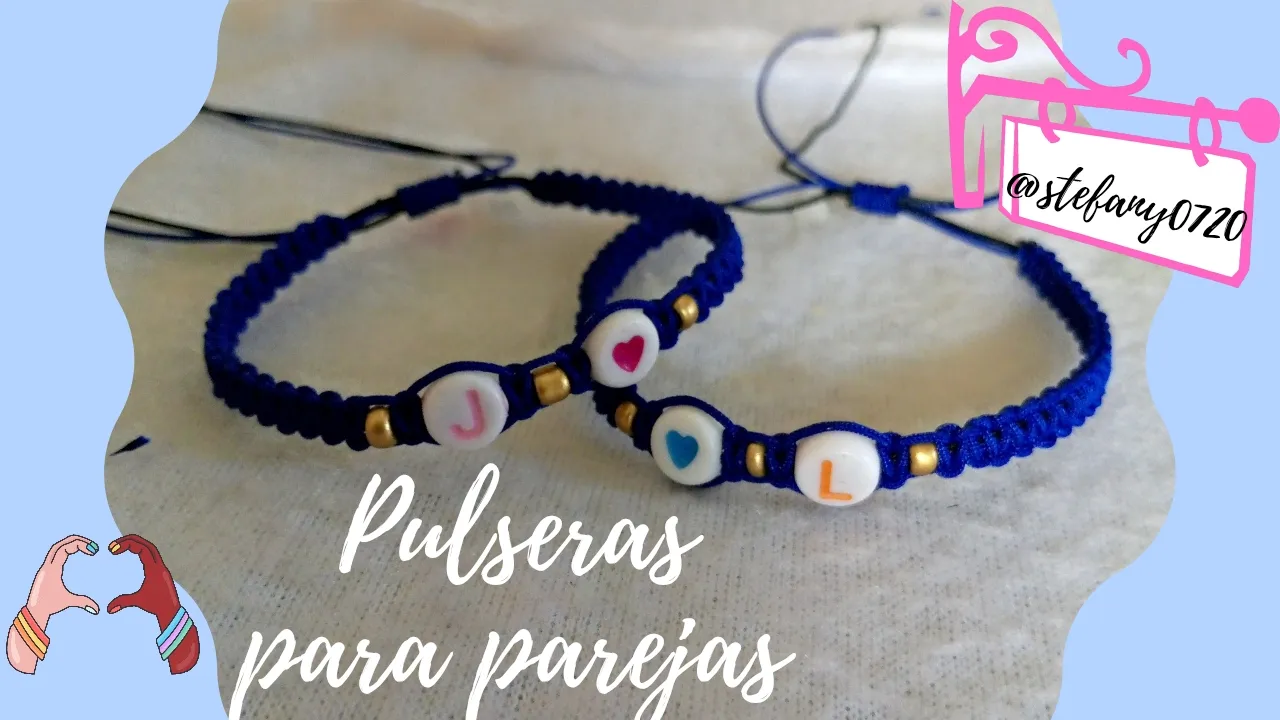
Hello, hello! How are you all, Jewelry friends? It's a pleasure to be here again and to be able to share with you a very special experience I recently had. I wanted to talk to you about the process of creating couples bracelets, a detail that has become increasingly significant in relationships. These bracelets aren't just an accessory; they represent an emotional bond between the people who wear them. I feel intensely grateful for the opportunity to make these bracelets, as each one carries a unique story and meaning.
This time, the bracelets are for my sister and her boyfriend. It's an exciting moment, as it's the first time they'll be wearing wedding bracelets. For them, this gesture symbolizes their love and commitment, and I hope they love them. The interesting thing about this project is that they themselves had the opportunity to choose the material and color that best represents them. This makes the bracelets even more special, as they reflect their personality and style.

(Materiales:)||(Materials:)
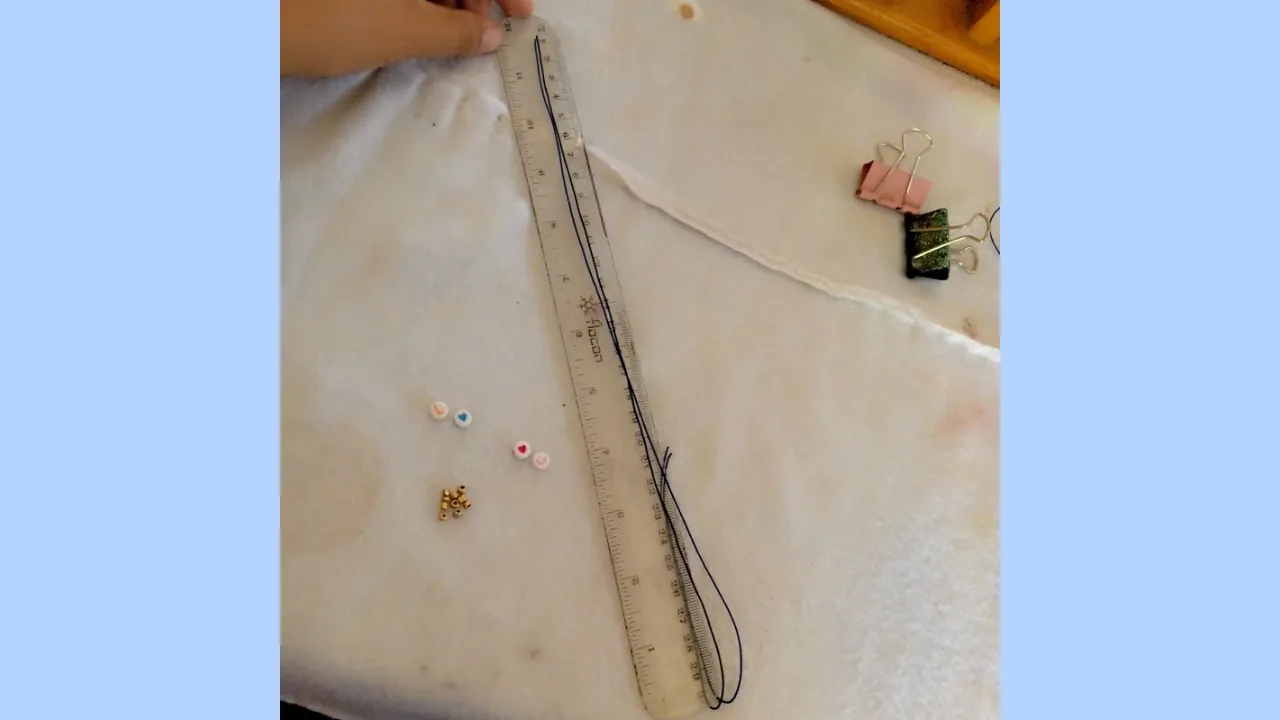
- Tres metros de hilo chino azul rey
- Tijeras
- 2 Cuentas con iniciales
- 2 Cuentas de corazón
- 10 Cuentas doradas
- Una regla
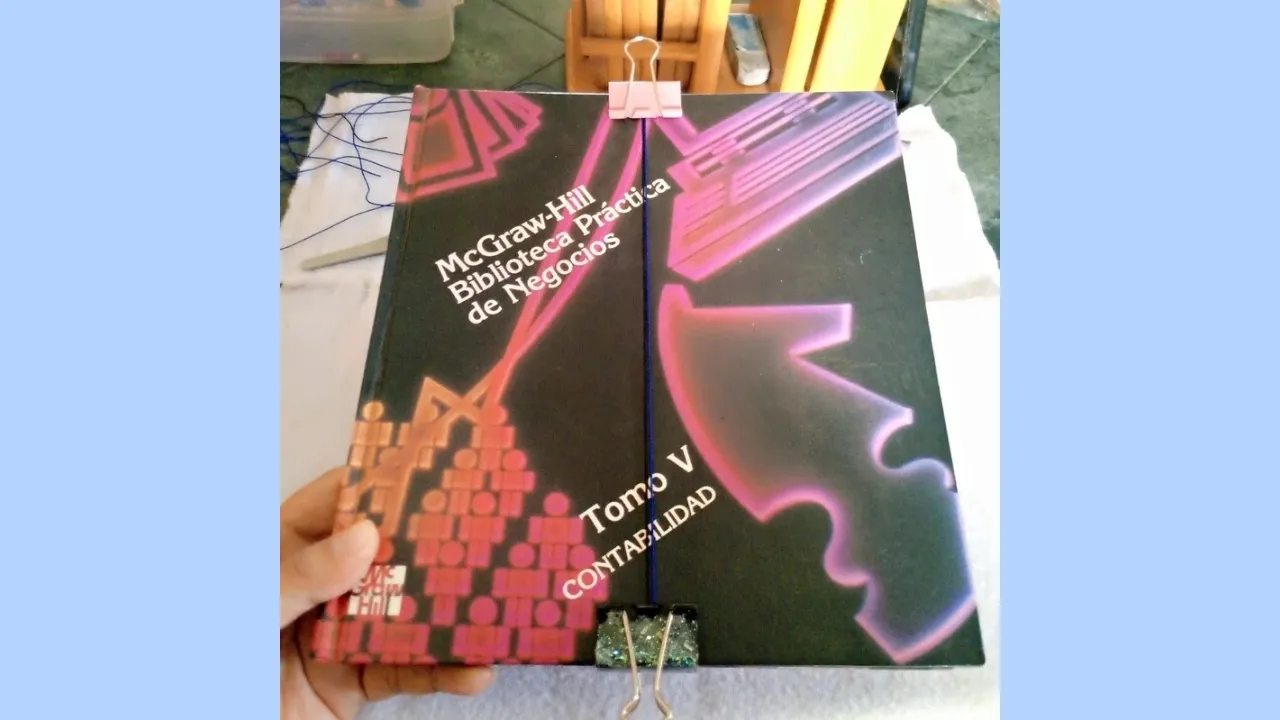
- Pinzas y un libro
- Three meters of royal blue Chinese thread
- Scissors
- 2 Initial beads
- 2 Heart beads
- 10 Gold beads
- A ruler
- Tweezers and a book
(Procedimiento:)||(Procedure:)
Paso nro 1
Paso nro 1
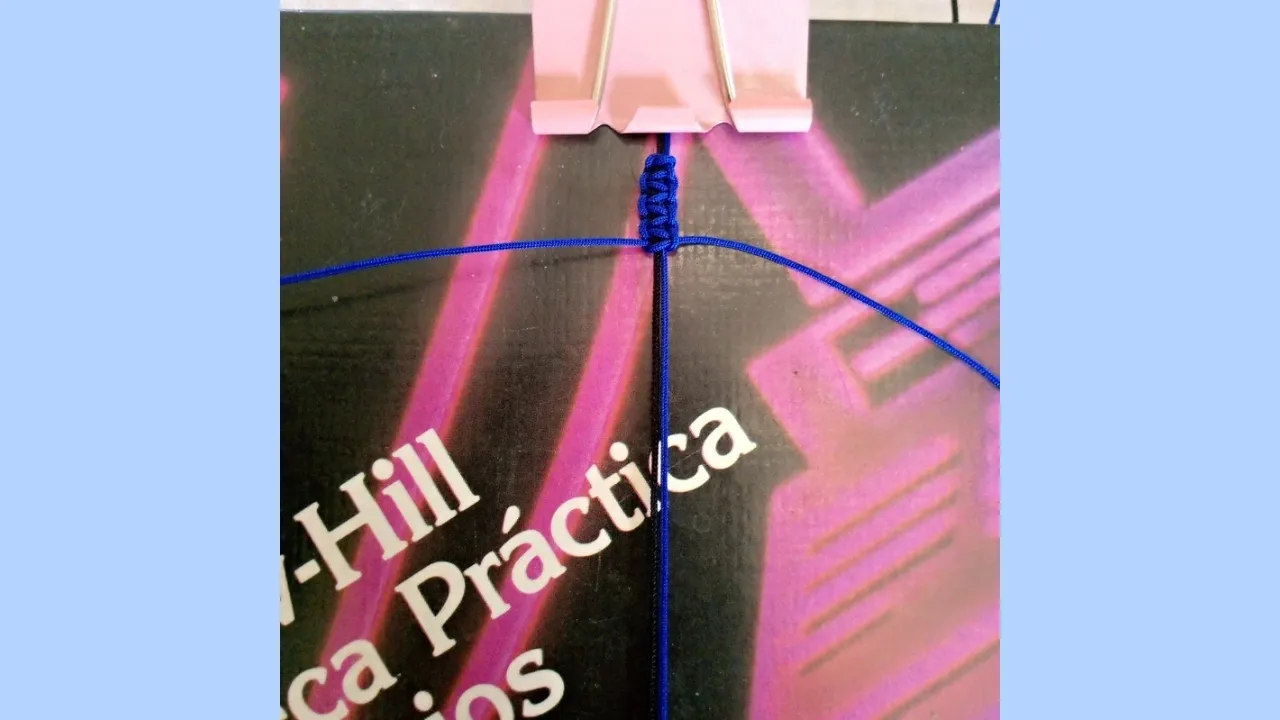
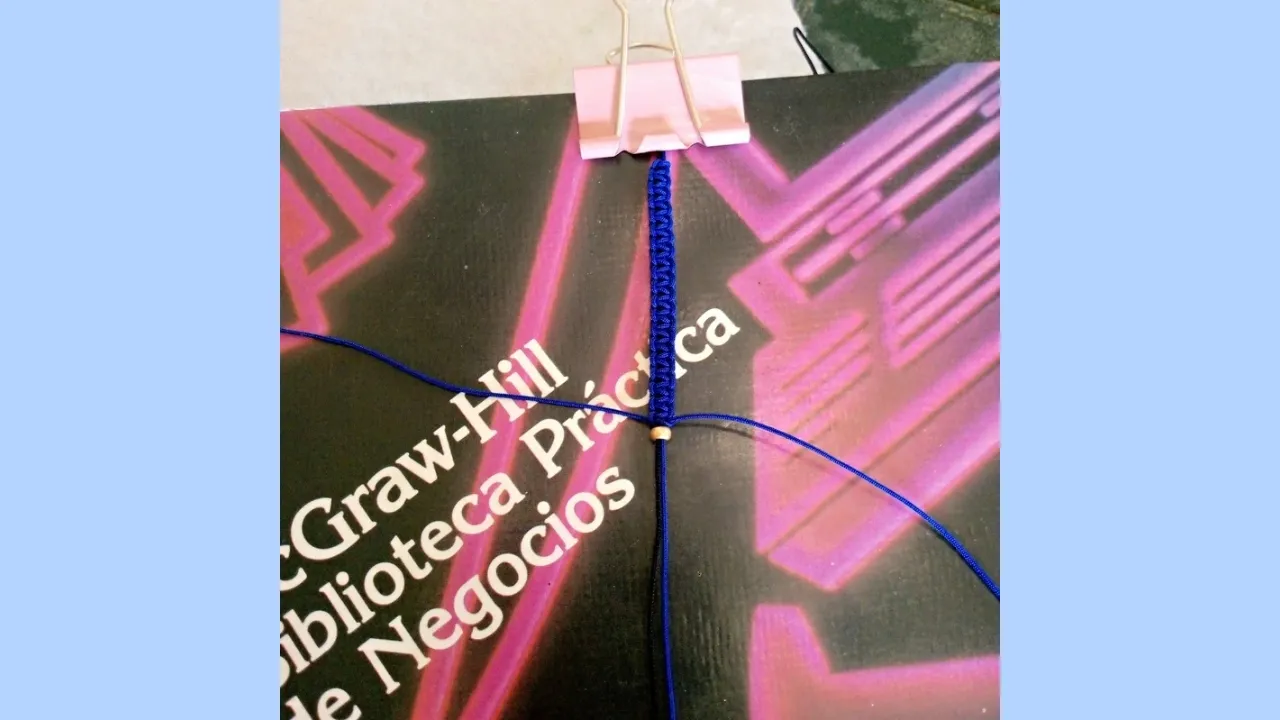
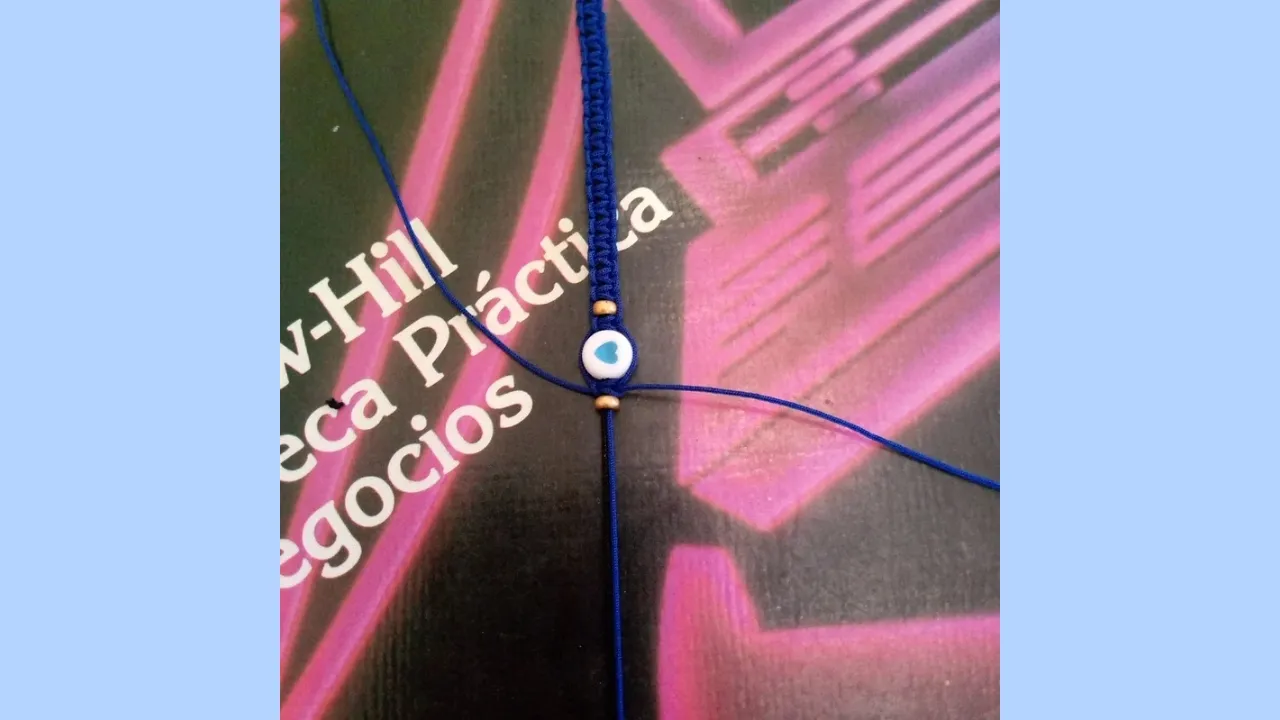
Now, before I begin the weaving process, I'm going to measure the Chinese knot I've chosen. It's a lovely blue color that I think you'll love. To make my job easier, I'm going to use a book and two clips to hold the thread in place. This will help me keep everything organized and measure the distance I'm going to weave. Although the challenge won't be the weaving itself, my goal is to have the final result perfectly centered. The type of weaving I'm going to do is a flat knot, which is both elegant and durable.
Paso nro 2
Paso nro 2
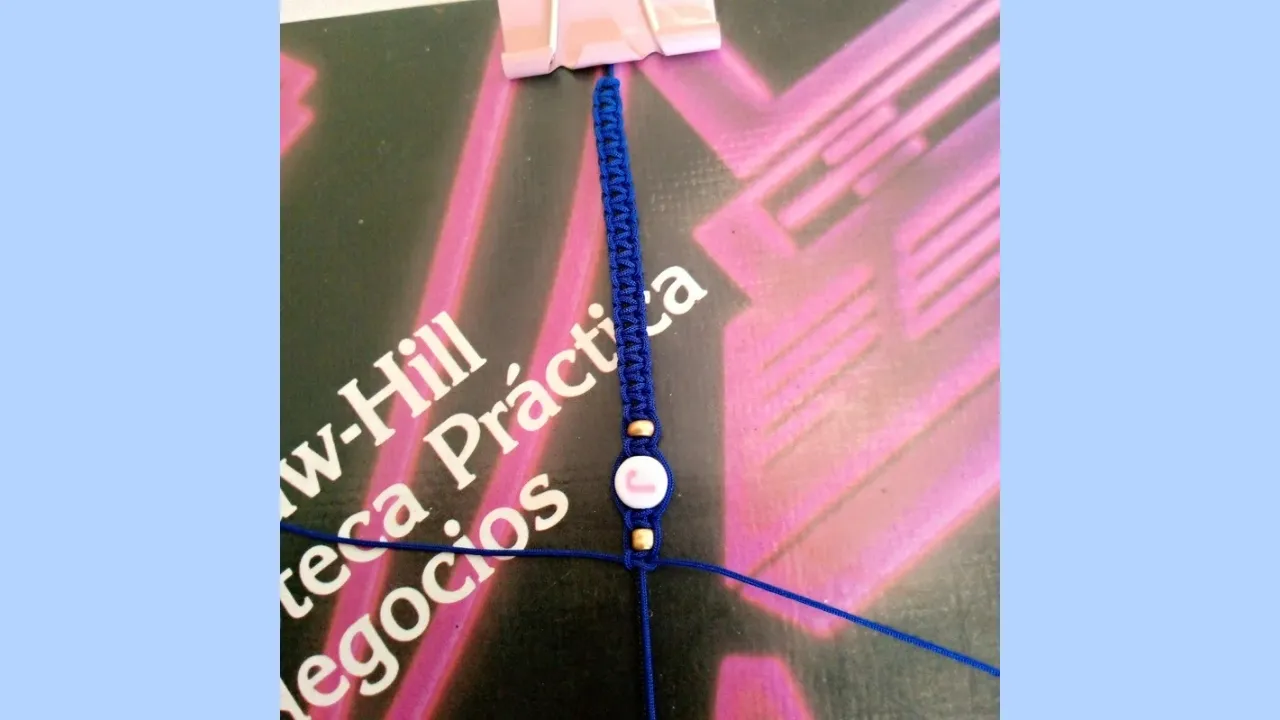
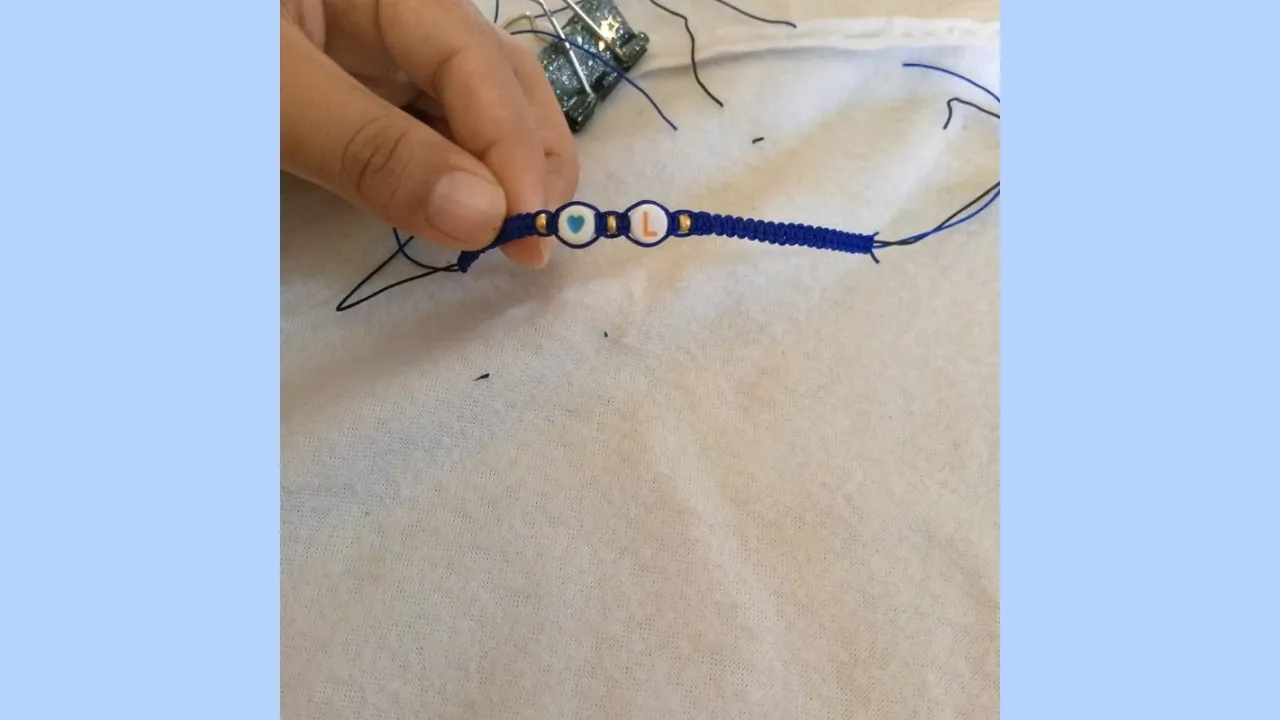
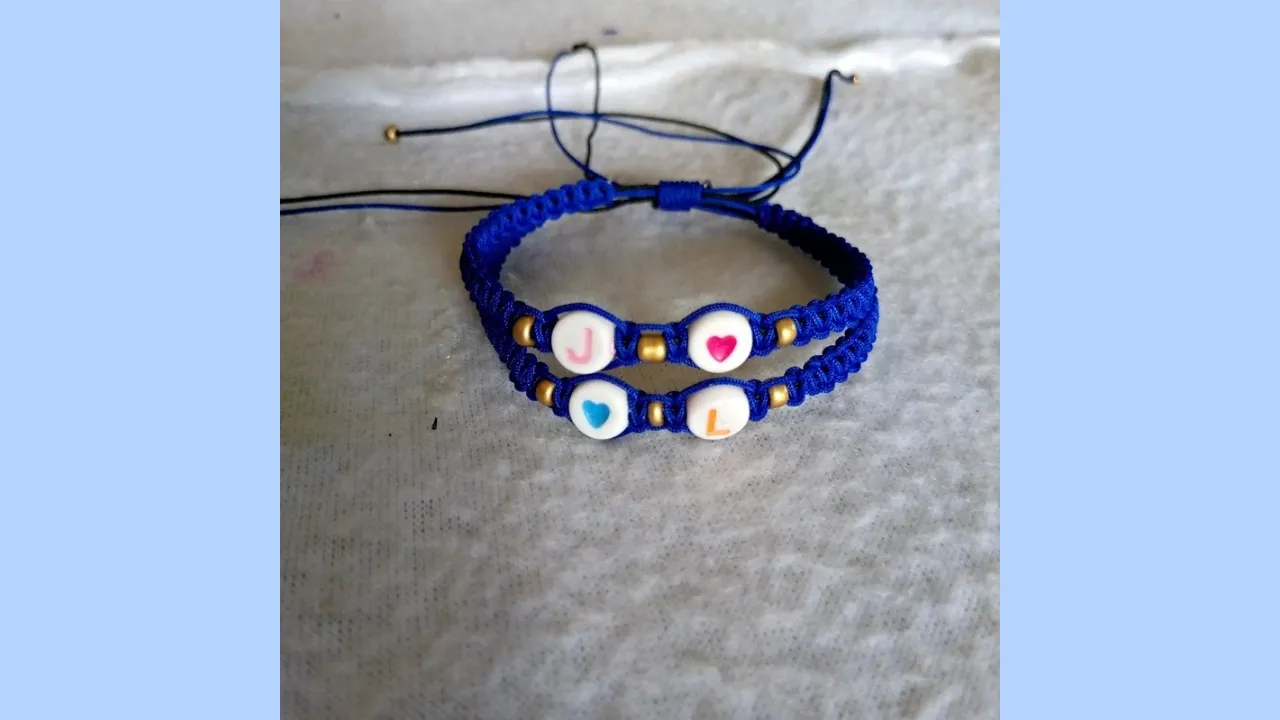
Now, I've started weaving and I'm going to start with my sister's bracelet first. For the decoration, I've decided to include the groom's initial, which will give it a personal and meaningful touch. I'll also add a heart, symbolizing their love, and some gold beads to divide each element. I think these small additions will make the bracelet even more special and unique.
Paso nro 3
Paso nro 3
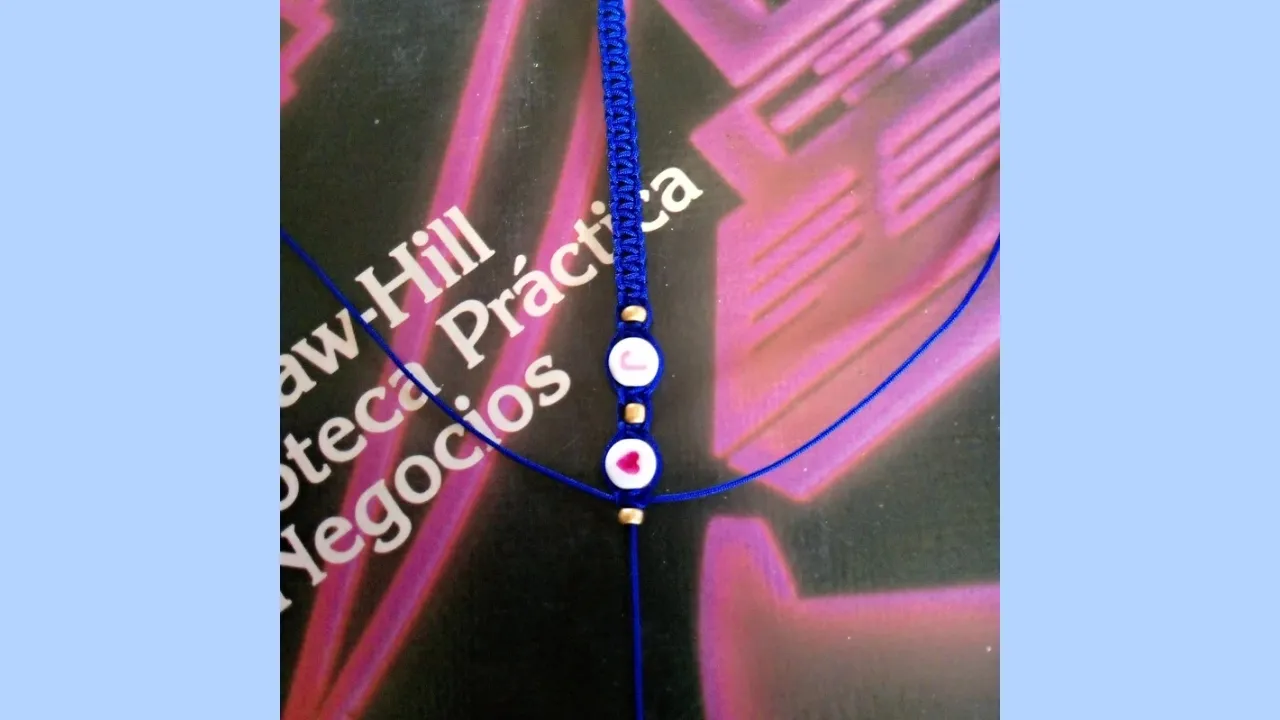
Now, I'm going to move on to making the groom's bracelet, which will bear my sister's initial. I'm excited to create something just as special for him. I'll keep the same style, but add a unique touch that represents his personality. I'll continue using the blue Chinese knot and continue with the flat knot, making sure everything is centered and harmonious.
Paso nro 4
Paso nro 4
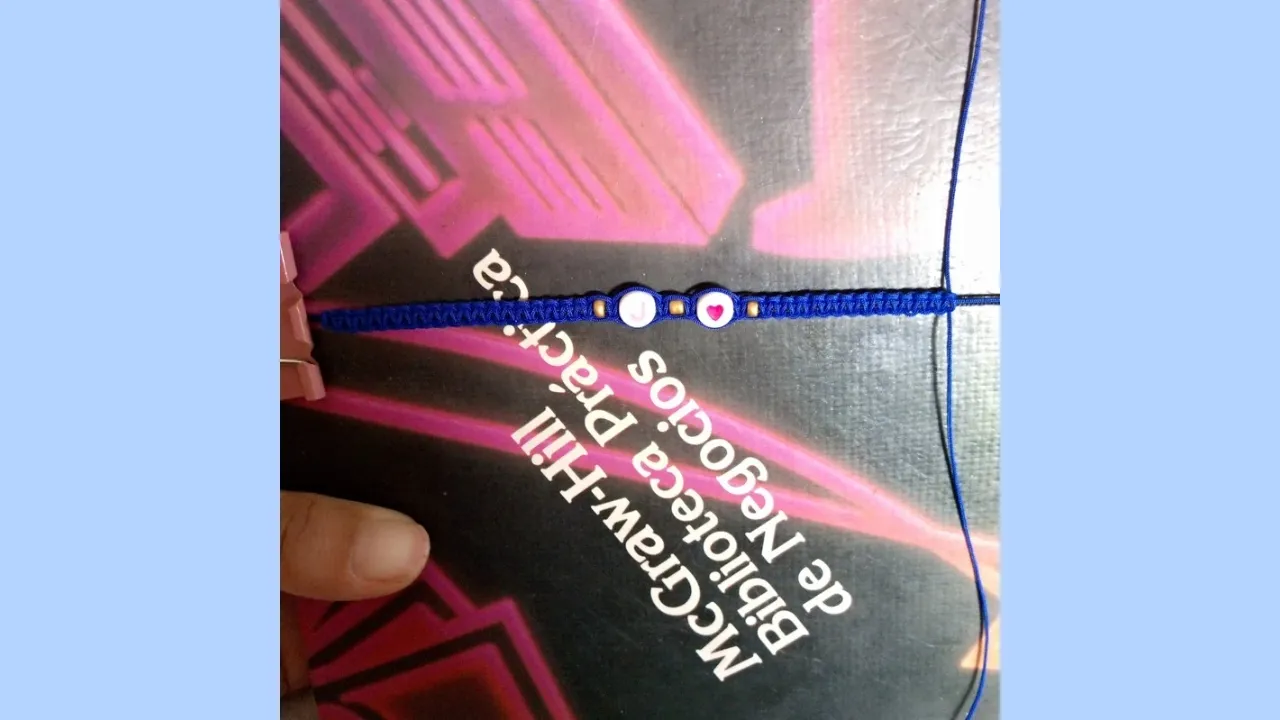
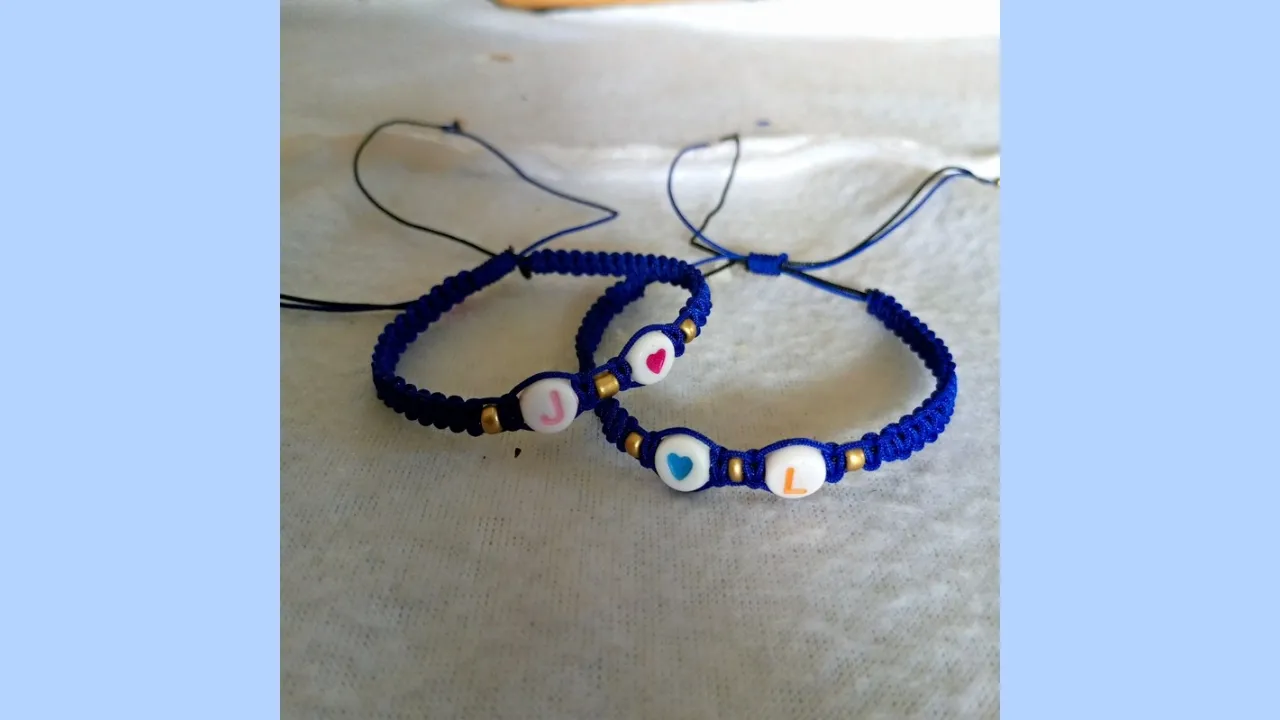
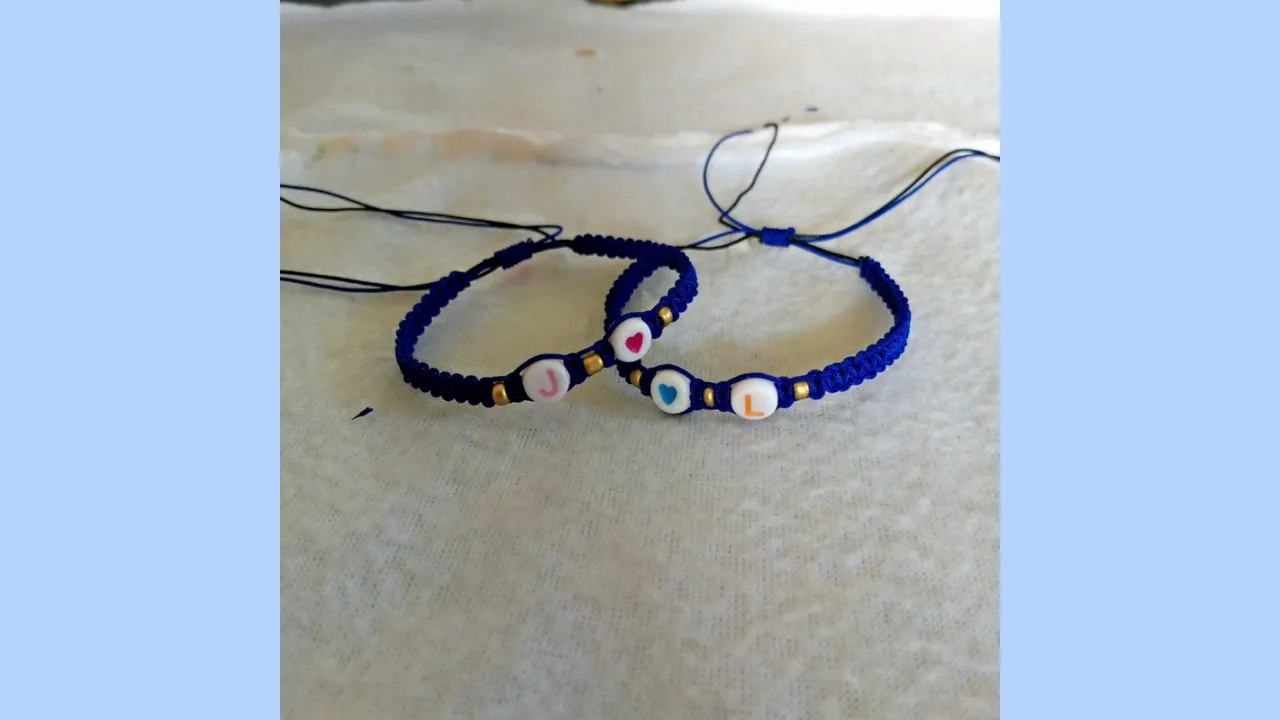
To finish both bracelets, I tied an adjustable knot and, with the help of a candle, sealed the ends of the threads to prevent them from fraying. I also placed gold beads on the ends of each bracelet, giving them an elegant and special finish. I'm very pleased with how both bracelets turned out. I hope my sister and her boyfriend enjoy them and that every time they wear them, they'll be reminded of the love and connection they represent.
(Resultado final:)||(Bottom line:)
I want to thank everyone for joining me on this beautiful creative journey. Making these bracelets has not only been a manual process, but also an act of love and dedication to my sister and her boyfriend. Every knot, every bead, and every detail carries a piece of my love. I hope these bracelets are a symbol of their union and that every time they look at them, they are reminded of how special their relationship is. I'm excited to see how they wear them and how these little works of art become part of their story together. Thank you for following me on this adventure. See you next time!
Las fotos de este blog son de mi propiedad|Las imágenes son editadas en canva|Fotografías tomadas en mi celular infinix Smart 7|El contenido está traducido en el traductor de Firefox.