(Photo Grid)
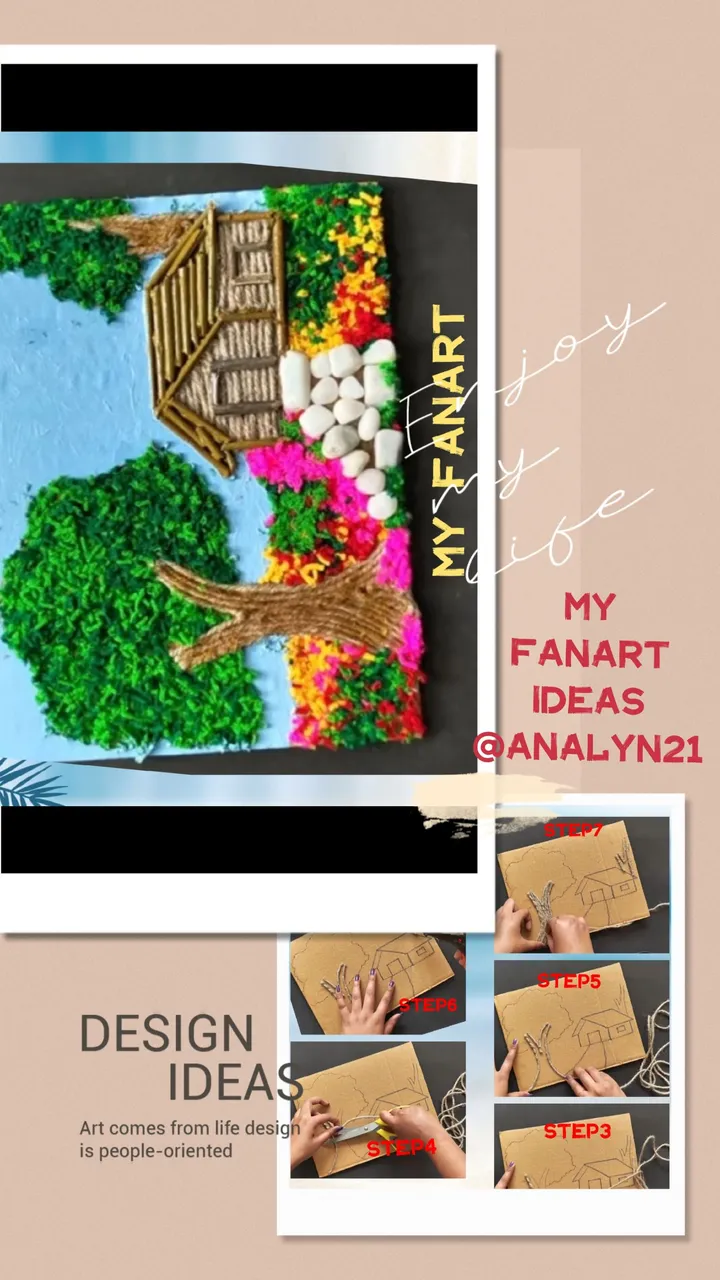
Hello!DIY Hub friends!This is my very first entry to the DIY Hub community contest,and I'm incredibly excited to share my creation with you all.
When I saw the contest rules and theme,a fun idea immediately sprang to mind,why not combine my love of crafting with a charming rustic scene?
And so,my journey to create a miniature cottage nestled amongst meticulously crafted trees began.
The inspiration for this piece came from a desire to capture the peaceful tranquility of a countryside setting.
I envisioned a cozy cottage,bathed in the warm glow of a setting sun,surrounded by lush,vibrant trees.
This vision translated into a detailed,step-by-step process,which I've documented meticulously in the accompanying images.
Step by step Creation Process:
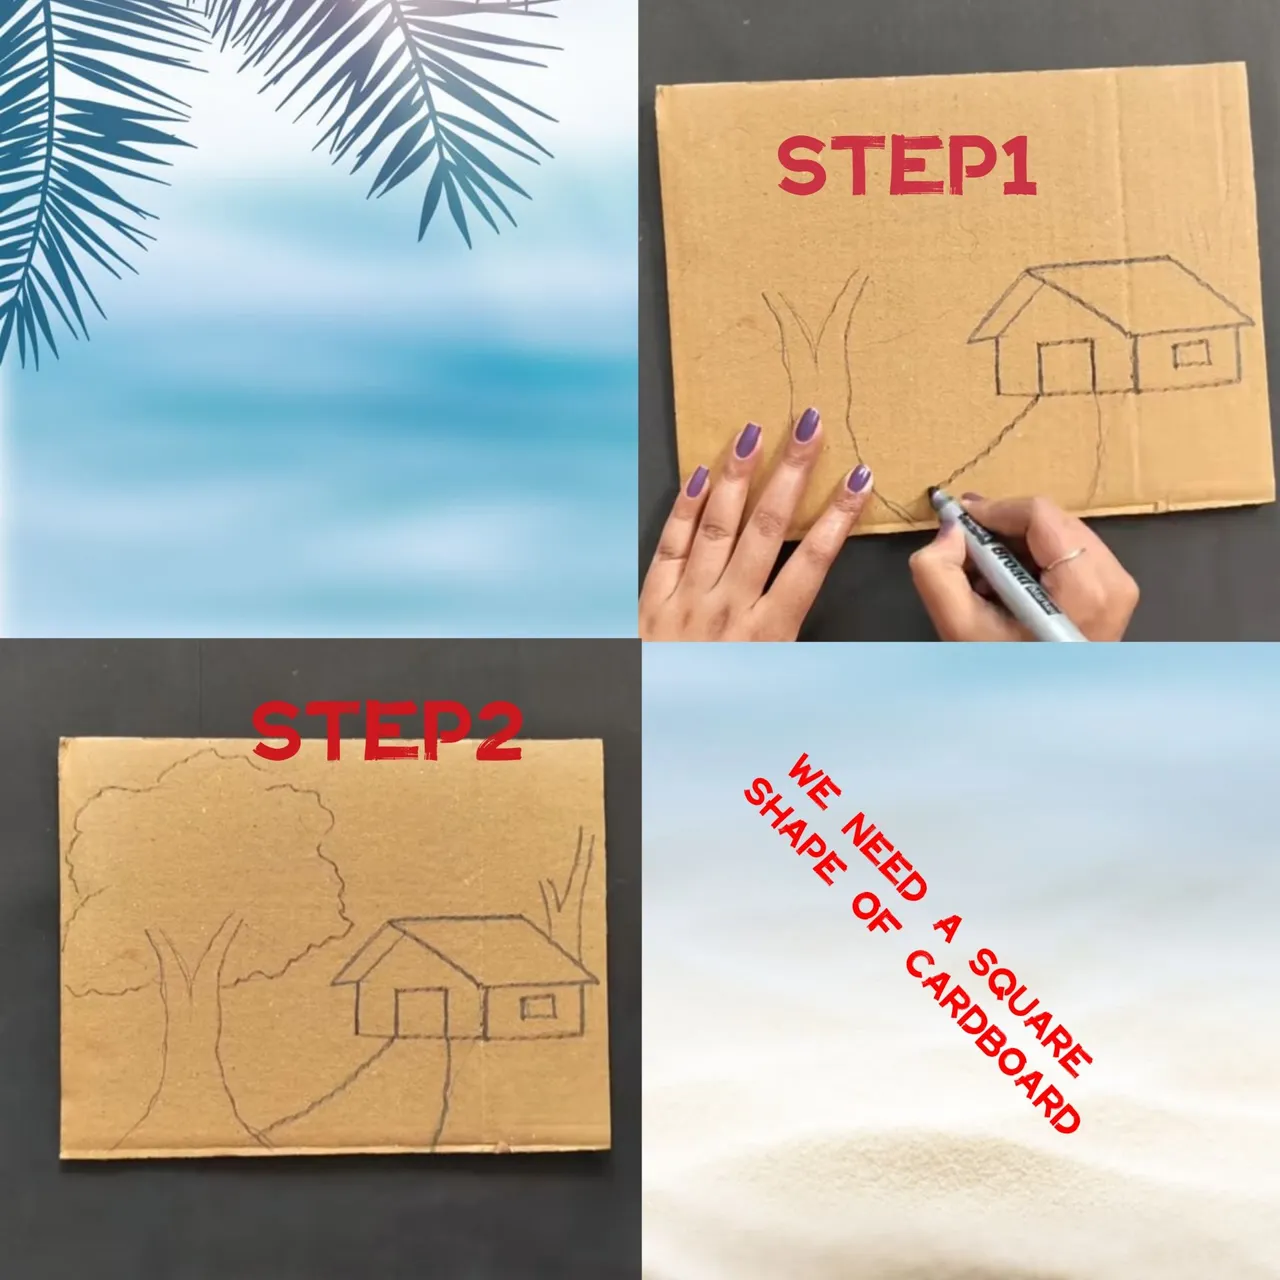
Sketching and Planning(STEP1-2):
I began by sketching the outline of the cottage and trees directly onto a piece of sturdy cardboard.This step was crucial for planning the overall composition and ensuring the elements were proportionally balanced.
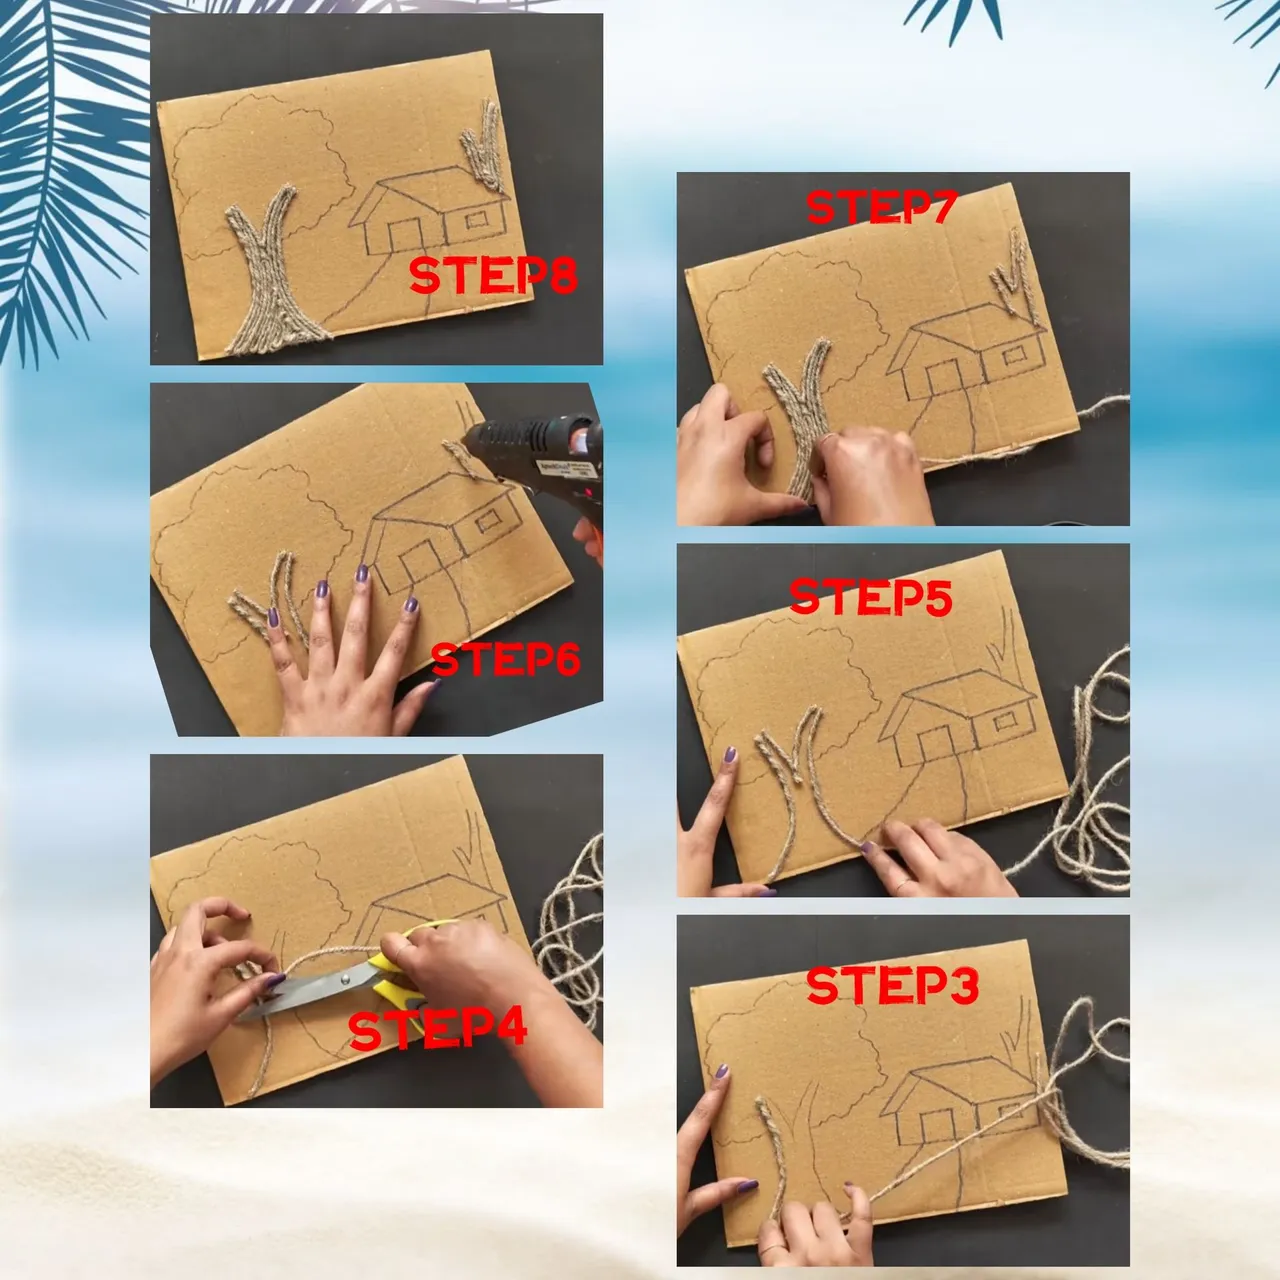
Base Preparation(STEP3-8):
I prepared the cardboard base.This ensured a clean and even surface for the subsequent steps.I carefully cut out small rope to form the walls,roof,and other structural elements of the cottage.I assembled these pieces using yarn,glue.
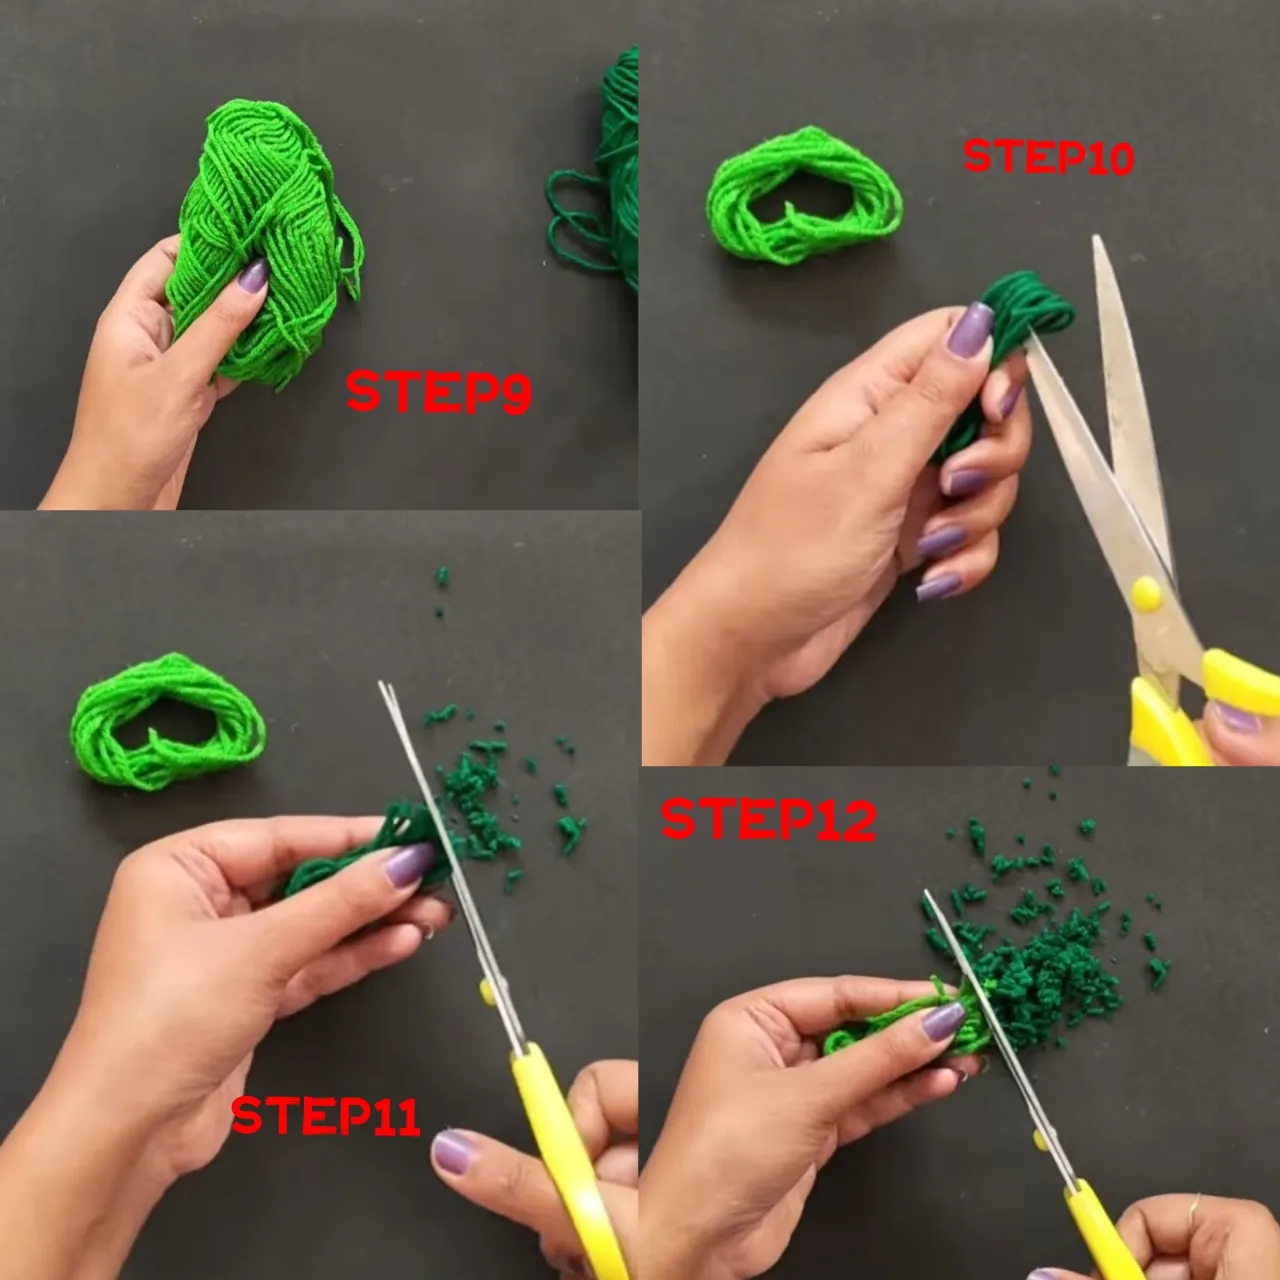
Tree Creation(STEP9-18):
This was a multi step process.First,I prepared small balls of green yarn, cutting into tiny pieces,rolling,then I carefully glued these yarn balls onto the cardboard to form the leaves of the trees,building up layers to create a full and realistic effect.I created the tree trunks and branches using thin twigs, brown yarn.I carefully glued these onto the cardboard base,ensuring they were positioned naturally.

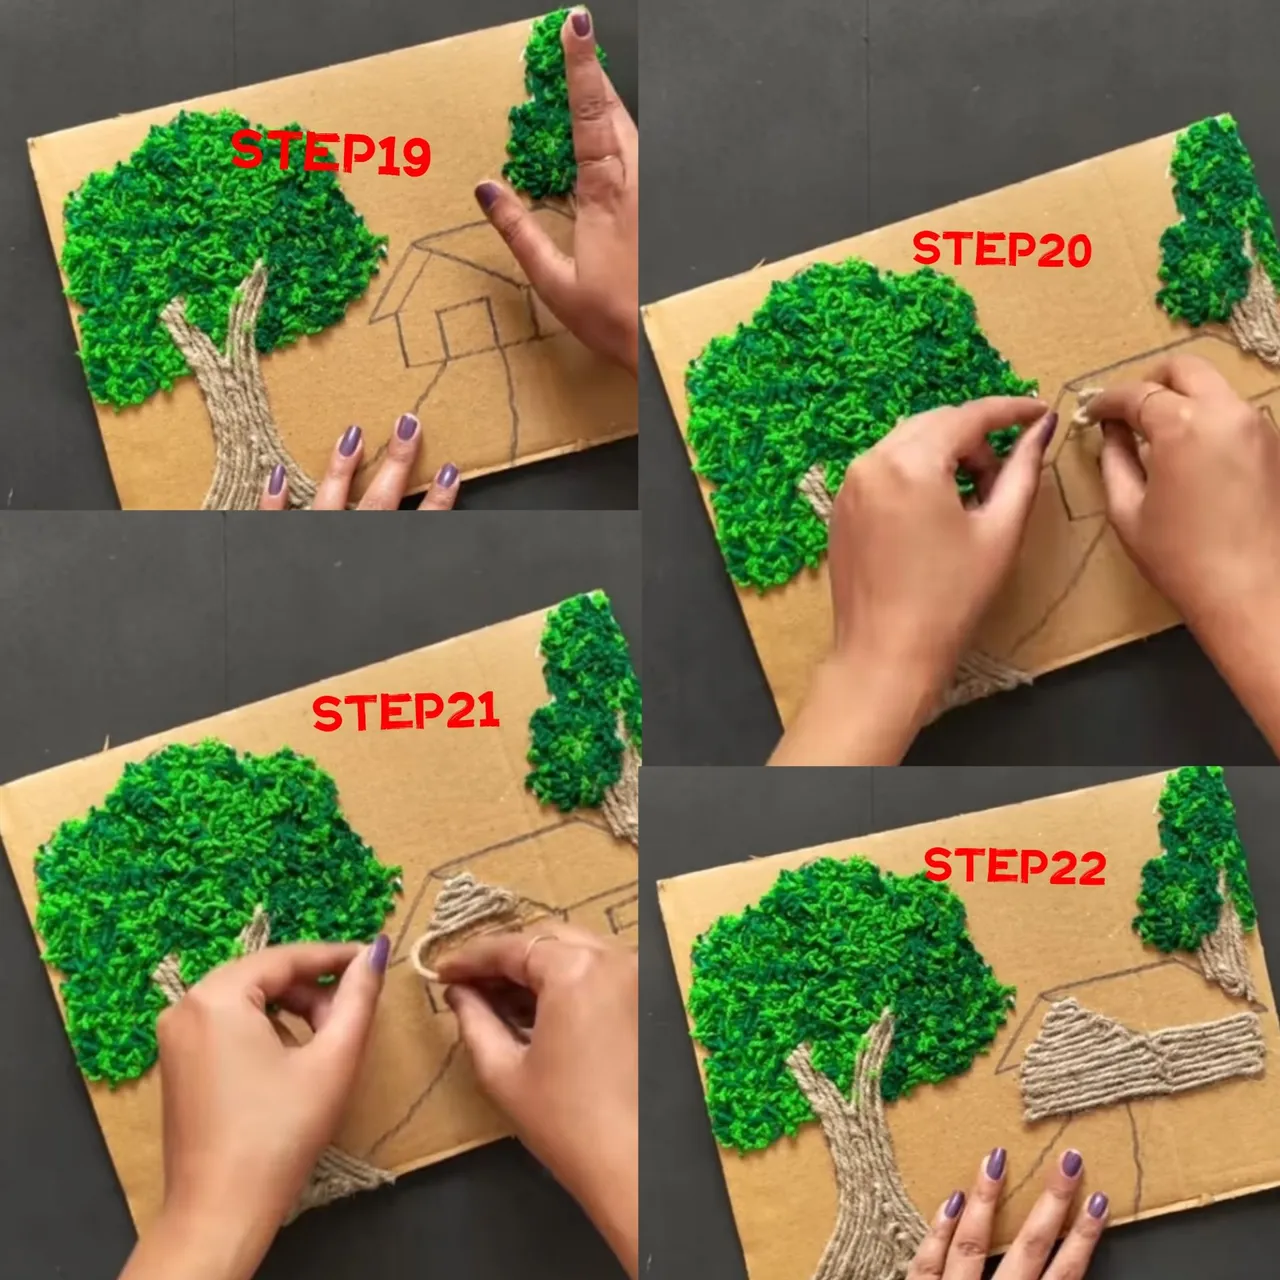
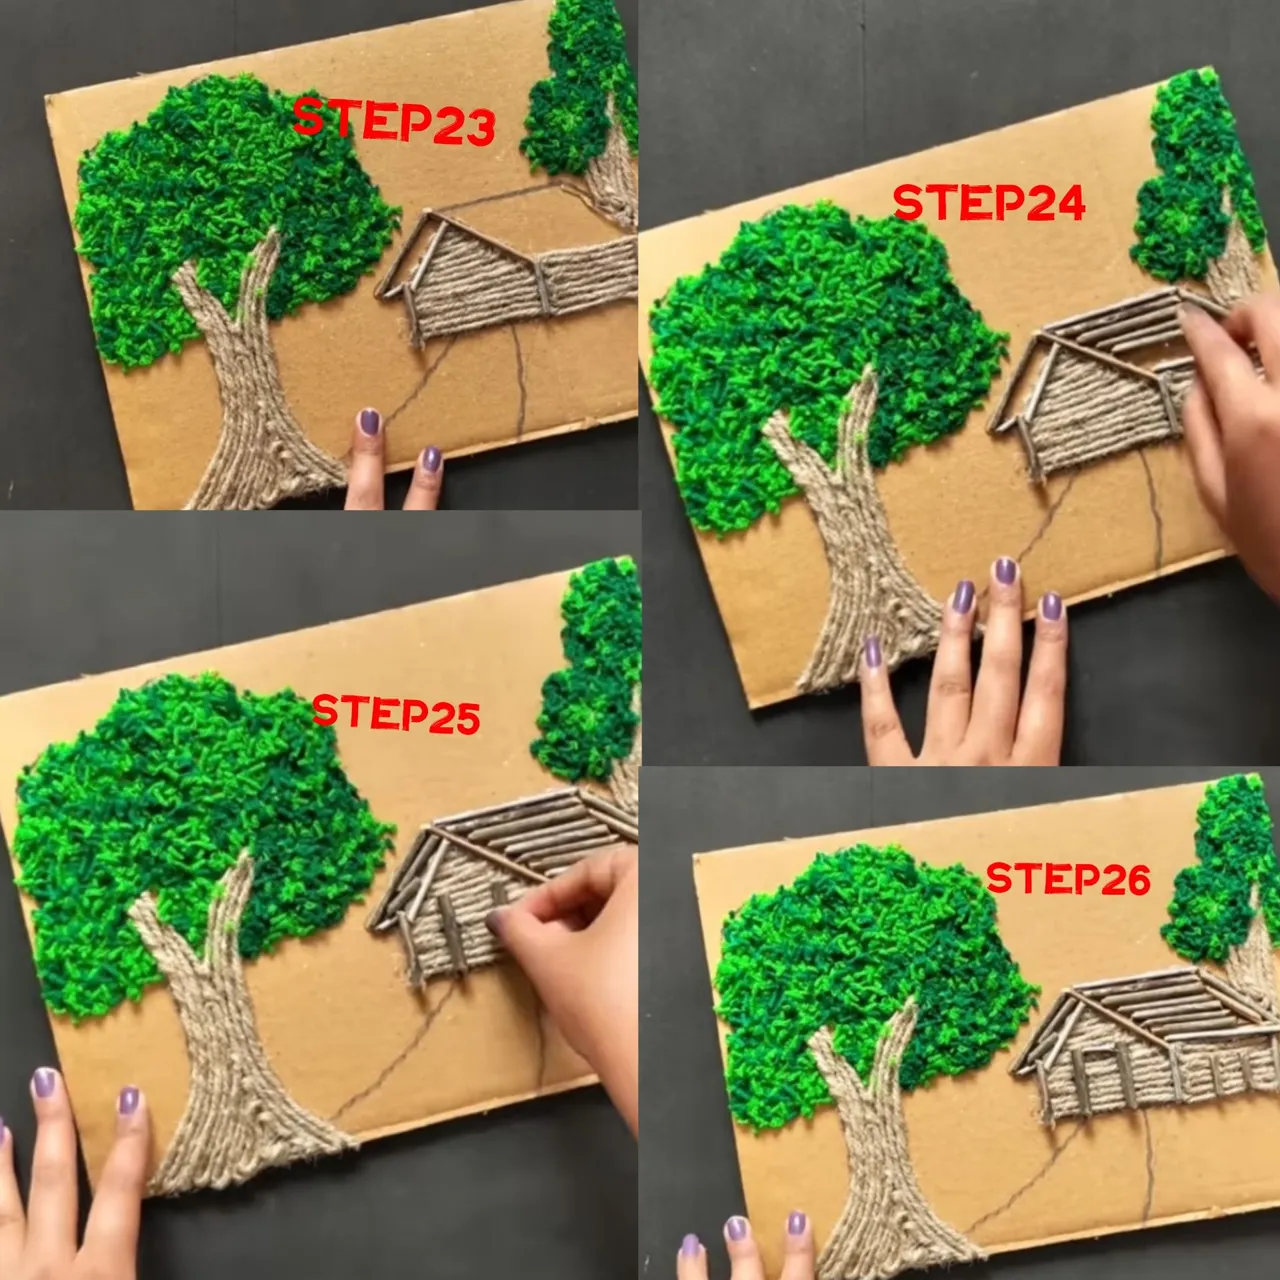
Adding Details to the Cottage(19-26)
I added small details to the cottage,such as a tiny door,windows,and a chimney.I further refined the trees by adding more yarn balls to fill in any gaps and ensuring a consistent,lush appearance.
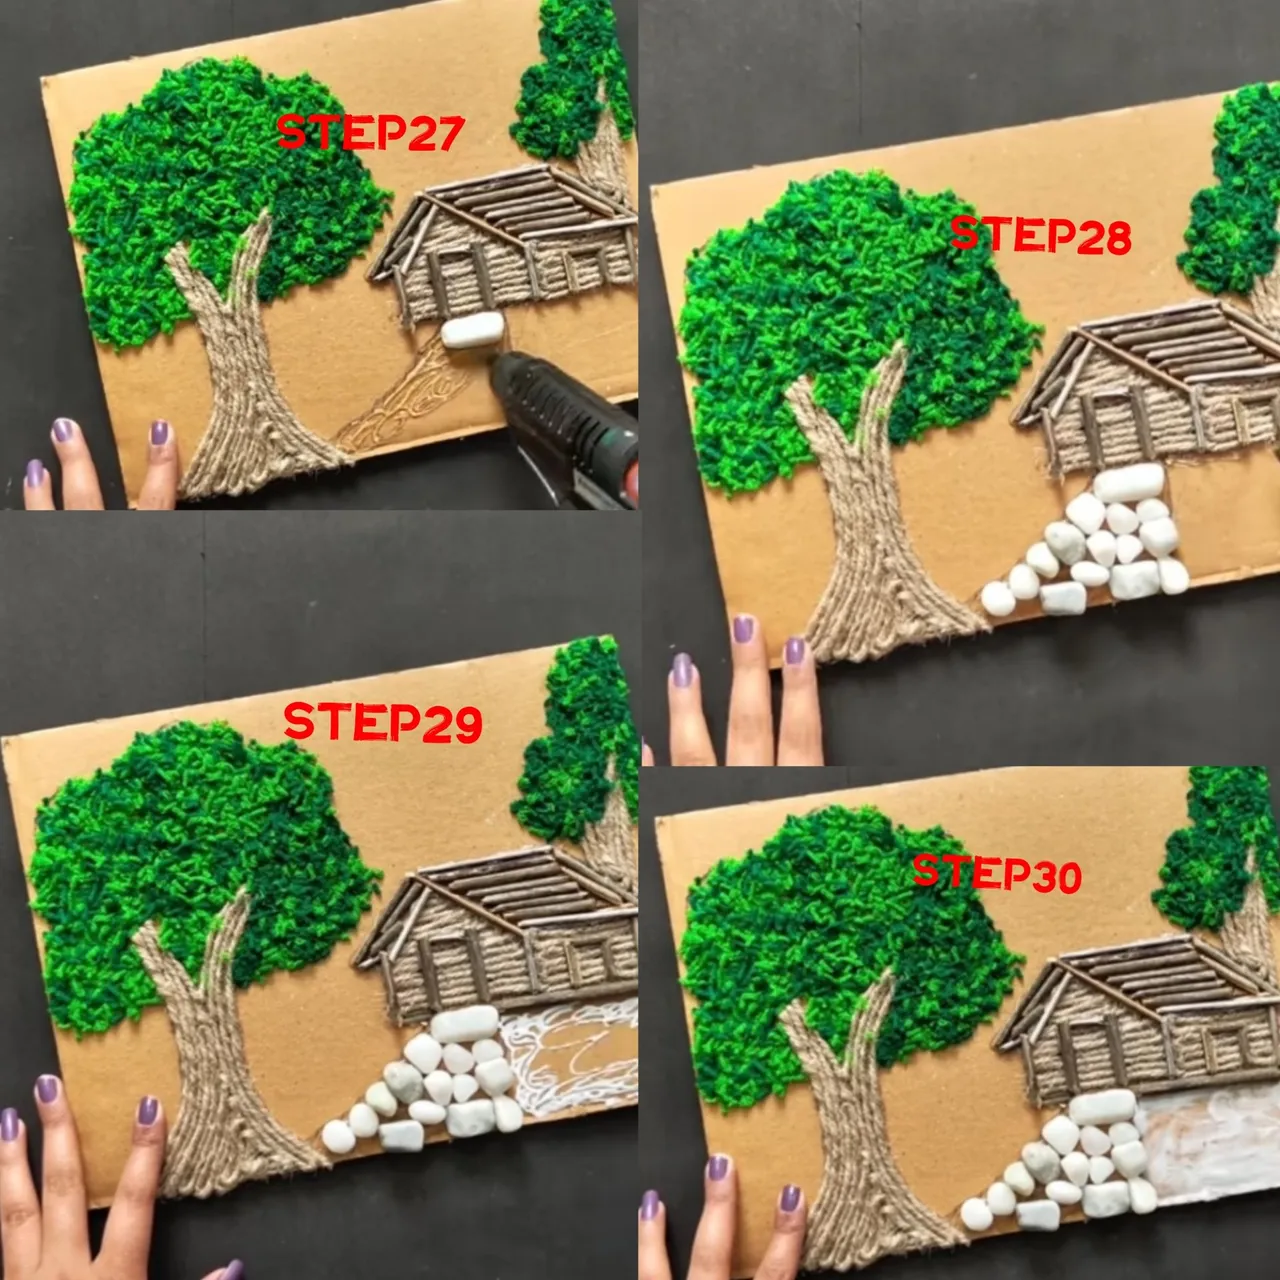
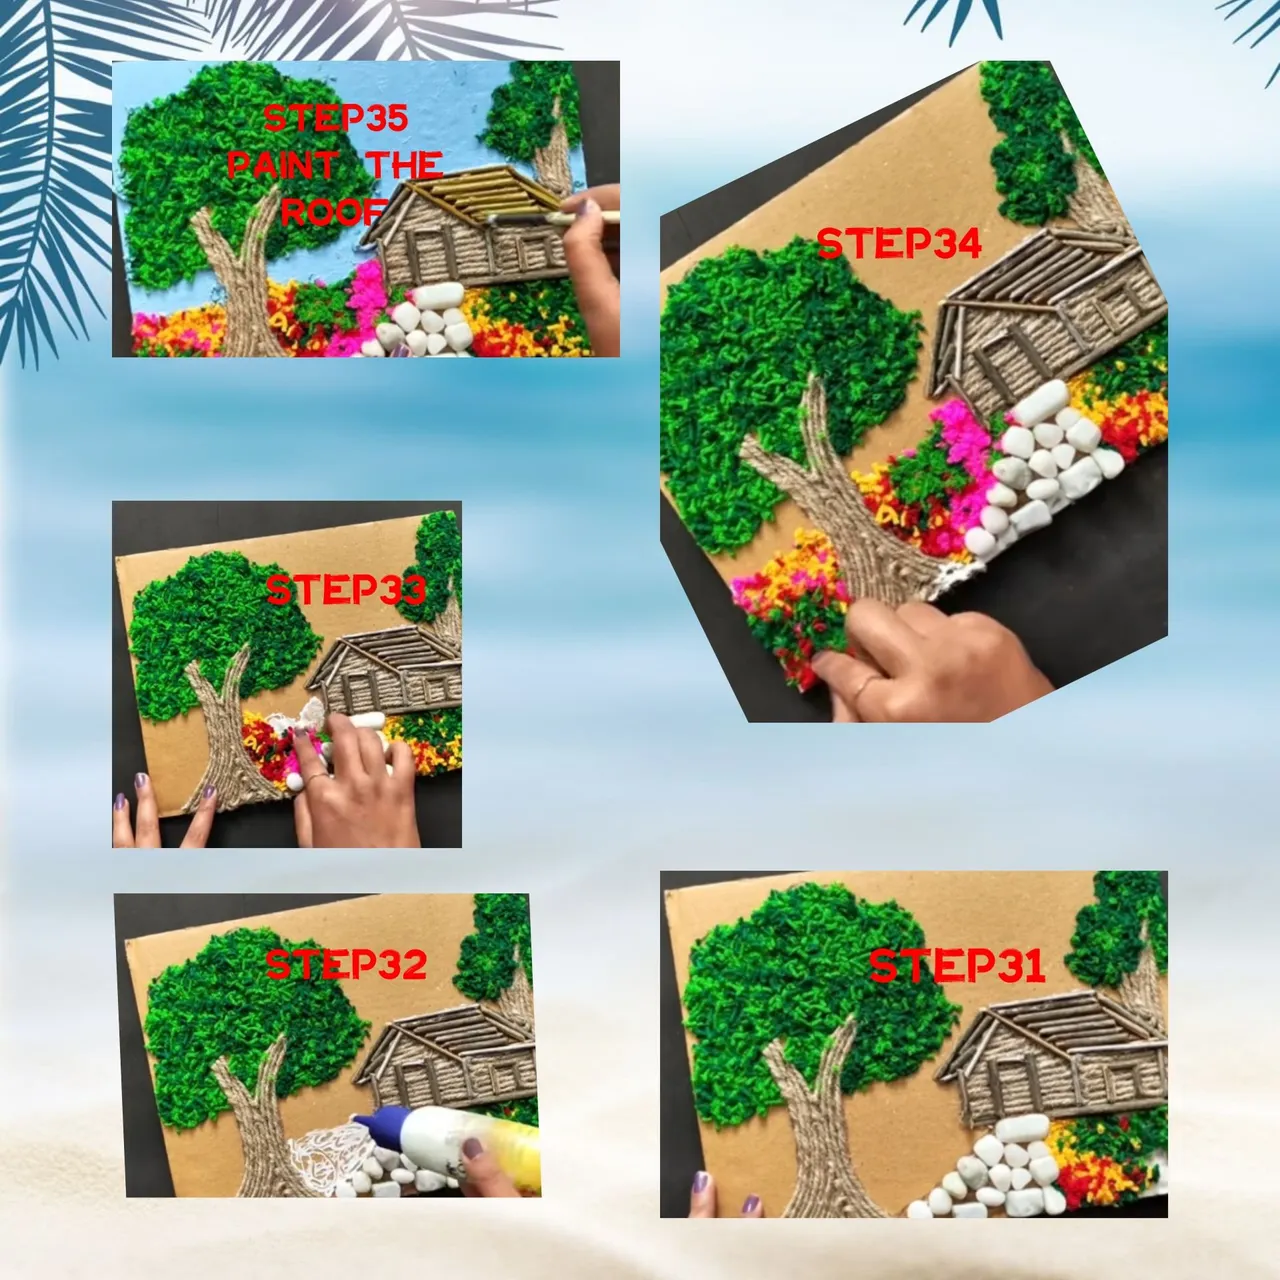
Background and Finishing Touches(STEP27-35):
I added a background element painted sky,and small details like pebbles for a pathway.This step brought the entire scene together.
Final Touches and Presentation (STEP 36-38):
I added any final touches,such as adjusting the placement of elements,and then carefully presented the finished artwork.

This project was more than just a contest entry!it was a journey of self discovery and creative expression.
It challenged me to push my creative boundaries,experiment with new techniques,and refine my craft.
The process itself was incredibly rewarding,and I'm immensely proud of the final product.
I hope you enjoy viewing my work as much as I enjoyed creating it.
I'm eager to hear your feedback and suggestions,and I look forward to participating in future DIY Hub contests!!!
Thank you for taking the time to appreciate my artistic endeavor!