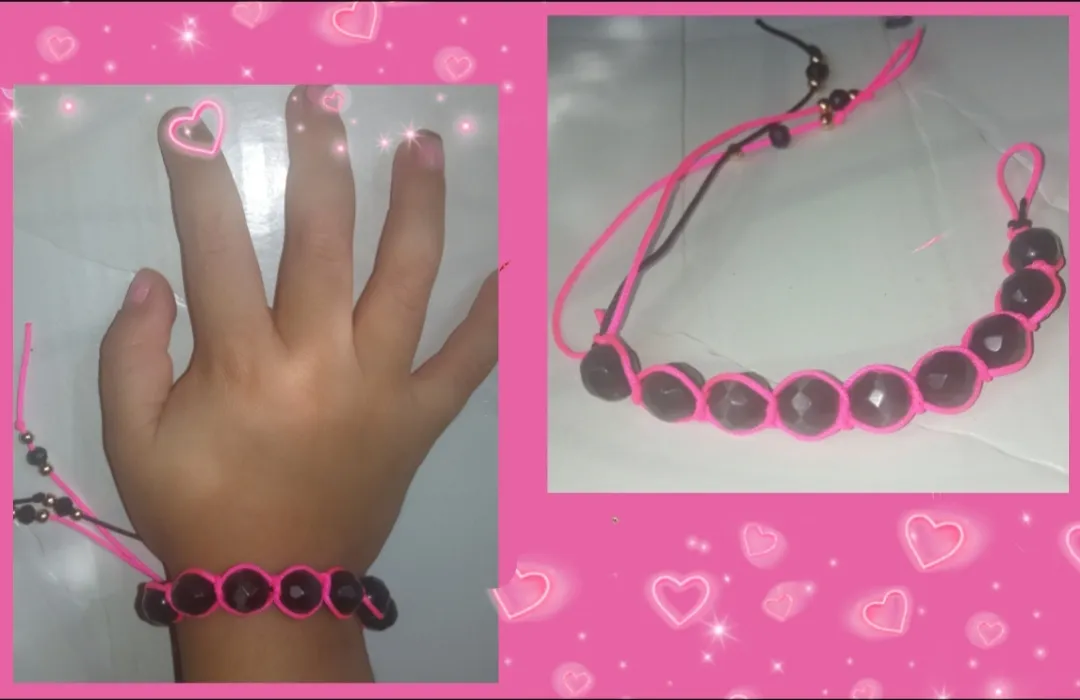
Have a happy and blessed night everyone, in many countries today we celebrate Three Kings Day, some of us used to give some party favors or gift to the little ones, something symbolic but special, so since I had no budget for a gift I decided to make something for my little girl at home with the materials I had on hand. I made a very simple, striking and beautiful creative bracelet with Chinese thread.
Feliz y bendecida noche tengan todos, en muchos países el día de hoy celebramos el día de Reyes, algunos acostumbramos a dar algún cotillón o detalle a los más pequeños, algo simbólico pero especial, así que como no tenía presupuesto para un regalo decidí elaborarle a mi pequeña algo en casa con los materiales que tenía a la mano.
Le Elabore una muy sencilla pulsera creativa, llamativa y hermosa, con hilo chino.
The elaboration process is very easy and simple and for all of you I elaborate a simple tutorial so that you can elaborate this design and pamper the little ones at home.
El proceso de elaboración es muy fácil y sencillo y para todos ustedes elabore un sencillo tutorial para que elaboren este diseño y consientan a las pequeñitas de casa.
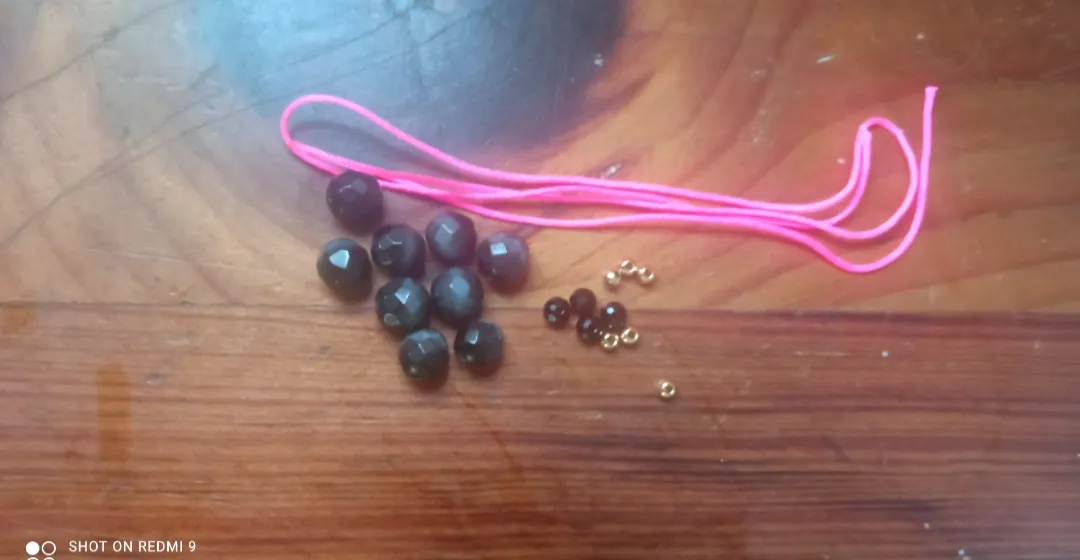
- Black Chinese thread.
- Fuchsia Chinese thread.
- Black rhinestones.
- small pellets.
- small black glitter stones.
- Scissors.
- tinderbox.
- Hilo chino negro.
- Hilo chino fucsia.
- Pedreria negra.
- balines pequeños.
- piedras brillantinas pequeñas negras.
- Tijera.
- yesquero.
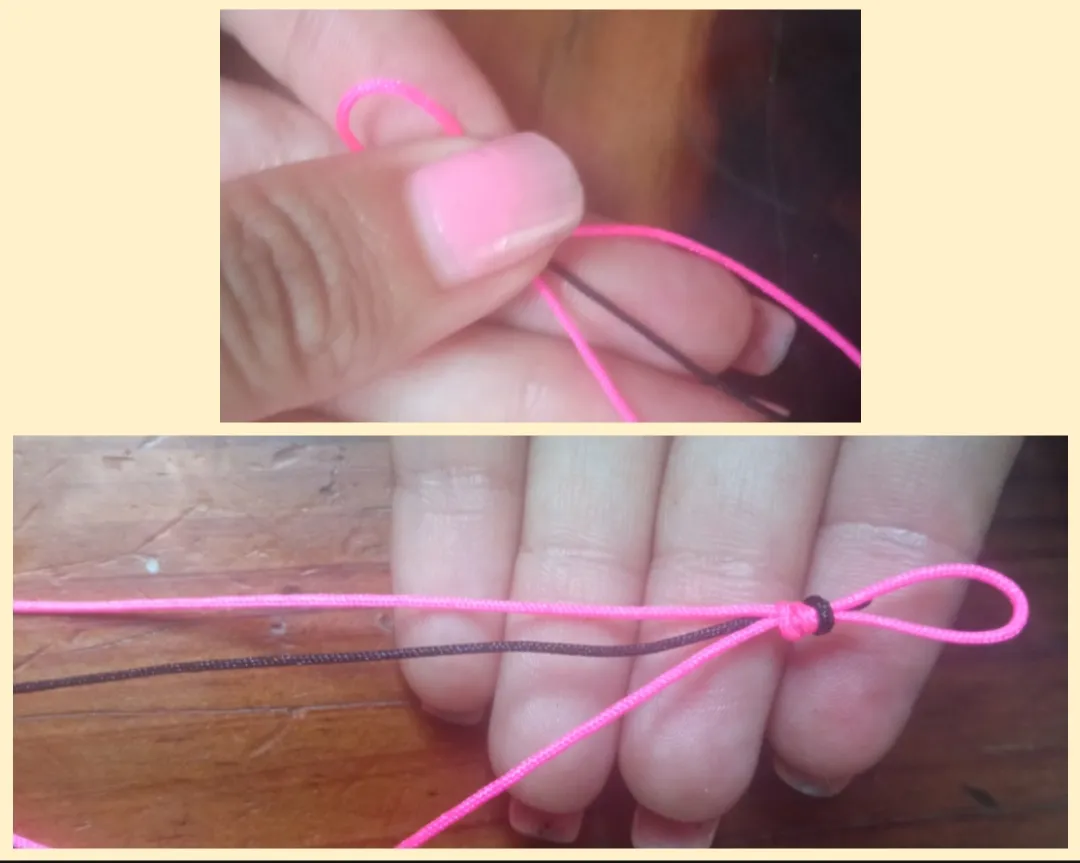
✴️ Step 1: to start our elaboration we will cut a 30 cm piece of fuchsia Chinese thread and a 15 cm piece of black Chinese thread. We will take the black Chinese thread and we will fold it in half turning it into two 15cm strips and we will take the piece of black Chinese thread and we will place it between these two fuchsia strips and we will make a small normal knot leaving a small opening in the initial part like you can see it in the photographs..
✴️ Paso 1: para iniciar nuestra elaboración cortaremos un pedazo de hilo chino fucsia de 30cm y uno de hilo chino negro de 15 cm.
Tomaremos el hilo chino negro y lo doblaremos a la mitad convirtiéndolo en dos tiras de 15cm y tomaremos el pedazo de hilo chino negro y lo colocaremos entre estás dos tiras fucsia y realizaremos un pequeño nudo normal y corriente dejando una pequeña apertura en la parte inicial como pueden notarlo en las fotografías..
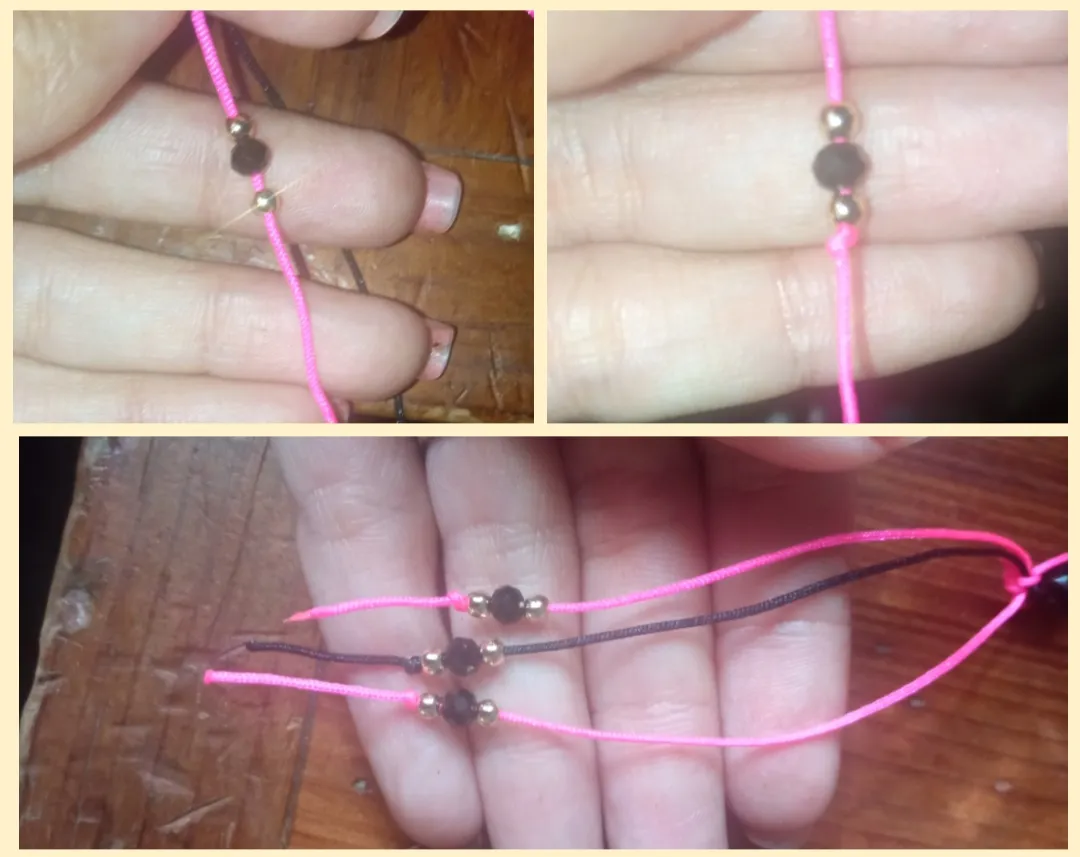
✴️ Step 2: to continue we will take a small black stone from the medians and introduce it through the black Chinese thread and take it to the knot made, then we will take both fuchsia strips, we will mold the lateral shape of the stone and we will make a knot only intertwining both strips as you can see and press the stone. Then we pass these 2 fuchsia strips back and we tie the knot again so that it is well attached.
✴️ Paso 2: para continuar tomaremos una piedrita negra de las medianas y la Introducimos por el hilo chino negro y la llevamos hasta el nudo realizado, Seguidamente tomaremos ambos tiras fucsia moldearemos la forma lateral de la piedra y realizaremos un nudo solo entrelazando ambas tiras como podrán observar y apretamos la piedra.
Luego pasamos estás 2 tiras fucsia hacia atrás y volvemos a realizar el nudo para que está quede bien sujeta.
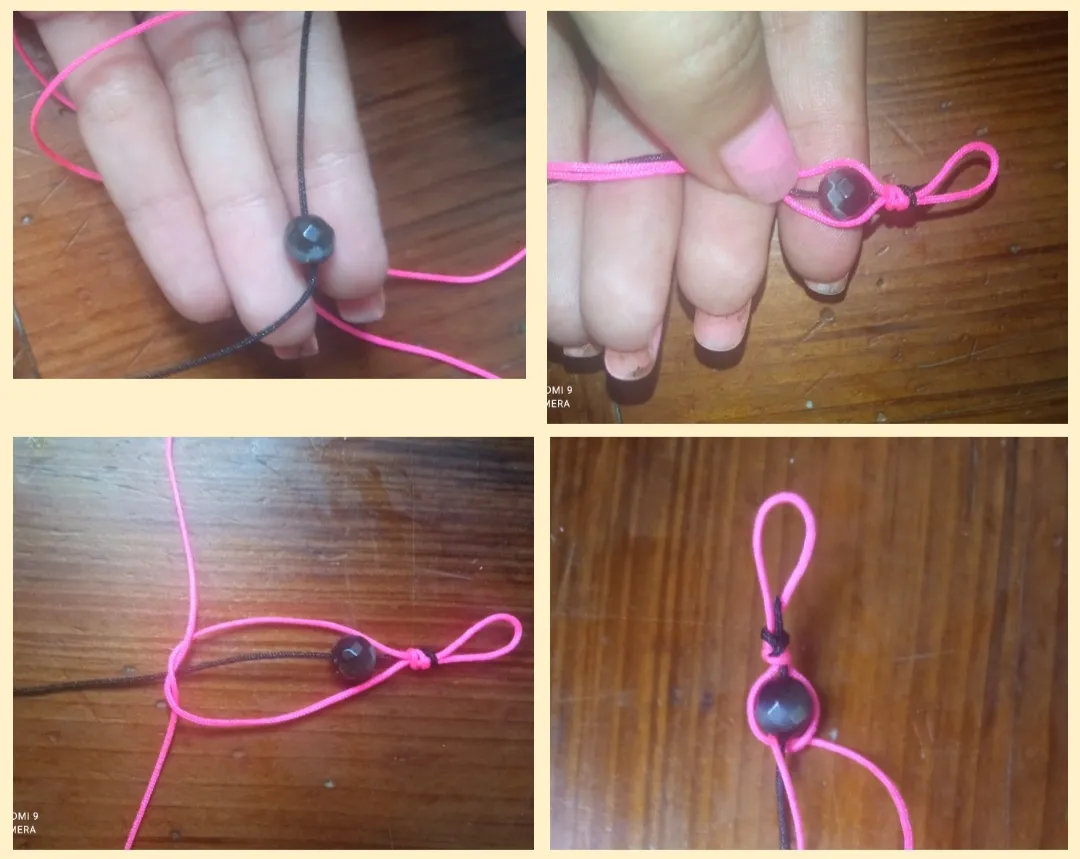
✴️ Step 3: we will repeat step two again, we introduce the rhinestones through the central thread, which is black, then we tie a knot under it and then through the back, we will do this repeatedly until we achieve the length desired, as in my case it is for my 2-year-old daughter, I made it very small.
✴️ Paso 3:el paso dos lo repetiremos nuevamente, Introducimos la pedrería por el hilo central que es el negro, luego hacemos un nudo debajo de esta y luego por la parte de atrás, esto lo realizaremos repetidas veces hasta lograr el largo deseado, como en mi caso es para mi hija de 2 años la realice muy pequeñita.

✴️ Step 4: When finishing the desired length and closing with the corresponding knot, we will take each one of the strips that should be left over and introduce a small pellet, a black glitter and another pellet and close with a small knot, we do this in the three ends and then we cut the excess thread and burn the end with the help of the tinderbox to prevent the thread from fraying.
✴️ Paso 4: Al terminar el largo deseado y cerrar con el nudo correspondiente tomaremos cada una de las tiras que debe sobrarnos e Introducimos un pequeño balín, una brillantina negra y otro balín y cerramos con un pequeño nudito, esto lo realizamos en las tres puntas y luego cortamos el exceso de hilo y quemamos la punta con ayuda del yesquero para evitar el hilo se deshilache.
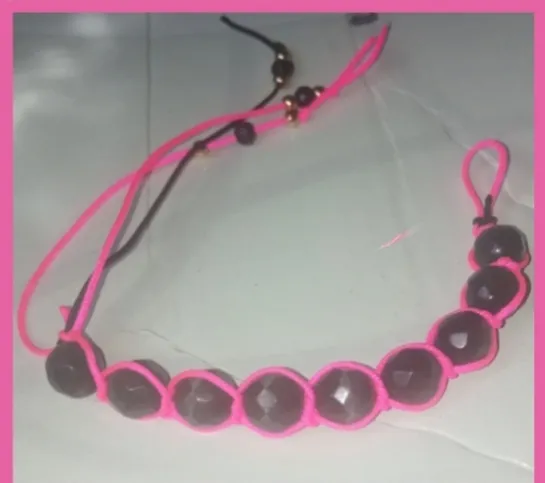
And so I did the small detail that I gave to my princess today, and she was very happy. My dear friends, I say goodbye on this occasion, thanking you for your attention and hoping that this presentation will be useful to you. Greetings and blessings.
All Photos are my authorship and were taken with my Redmi 9 Cellphone > Todas las Fotos son de mi autoría y fueron tomadas con mi Celular Redmi 9Y así realice el pequeño detalle que regale a mi princesa el día de hoy, y ella quedó muy contenta.
mis queridos amigos me despido por esta ocasión agradeciendo su atención y deseando que está presentación les sea de utilidad.
Saludos y bendiciones.