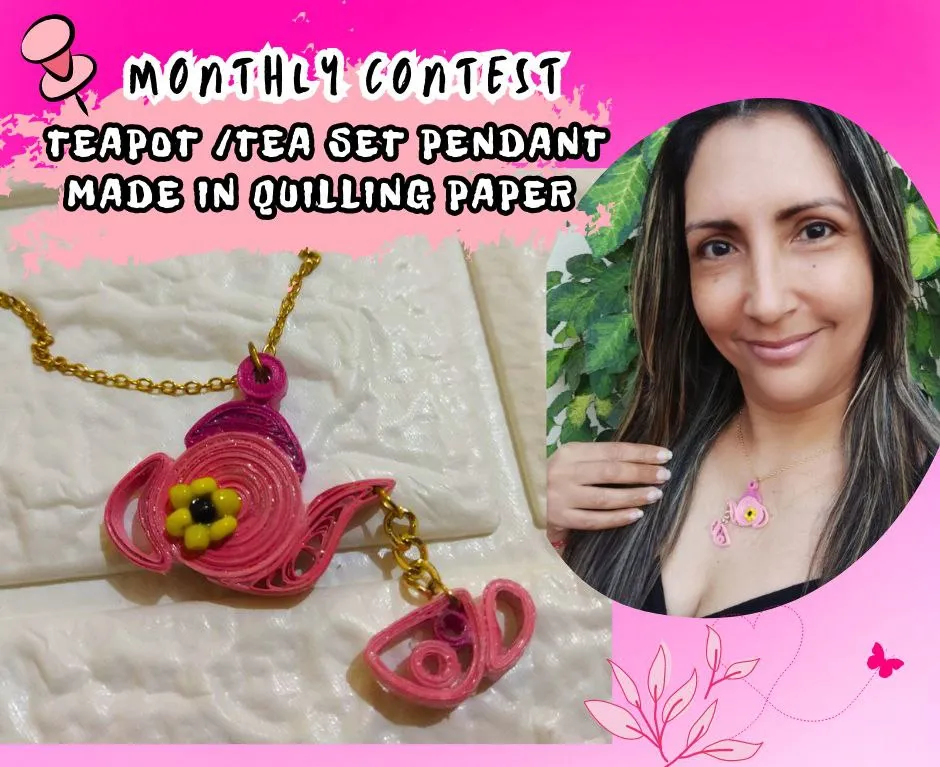
Un saludo mi querida comunidad @diyhub feliz día 💜 especialmente para todos los que nos encantan las artes manuales y artesanales. Con este nuevo concurso del mes, ya faltando pocas horas para terminar, hago mi primera publicación y que mejor manera de conocernos que participando en este concurso con un tema que pone nuestra imaginación a volar y se trata de las inolvidables teteras, nos devuelven a la infancia donde la mayoría amábamos tener pequeñas vajillas de teteras con tazas y por costumbre jugar con nuestras amigas y con solo agua nos imaginábamos preparar y luego sentarnos a conversar y tomar té, siempre guardo en mi memoria esos hermosos recuerdos. Por este razón me llamo la atención este concurso, estaba como niña elaborando lo que con mucho cariño les comparto hoy, se trata de un dije o colgante tetera y taza, elaborados utilizando la técnica de filigrana, en color rosa y fucsia con un pequeño girasol diseñado en mostacilla. Hay pequeños detalles que sin querer nos hacen recordar la parte mas hermosa de nuestro pasado como es la niñez y este momento fue uno de ellos. Así que no se diga mas y comencemos con este lindo proyecto, que les aseguro les va encantar.
Greetings my dear community @diyhub happy day 💜 especially for all of us who love handmade arts and crafts. With this new contest of the month, and missing a few hours to finish, I make my first publication and what better way to meet us than participating in this contest with a theme that puts our imagination to fly and it's about the unforgettable teapots, they take us back to childhood where most of us loved to have small teapot dishes with cups and by habit play with our friends and with only water we imagined to prepare and then sit down to talk and drink tea, I always keep in my memory those beautiful memories. For this reason this contest caught my attention, I was like a child making what I am sharing with much affection today, it is a pendant or pendant teapot and cup, made using the filigree technique, in pink and fuchsia with a small sunflower designed in clay. There are small details that unintentionally make us remember the most beautiful part of our past as childhood and this moment was one of them. So let's say no more and let's start with this beautiful project, which I assure you will love.


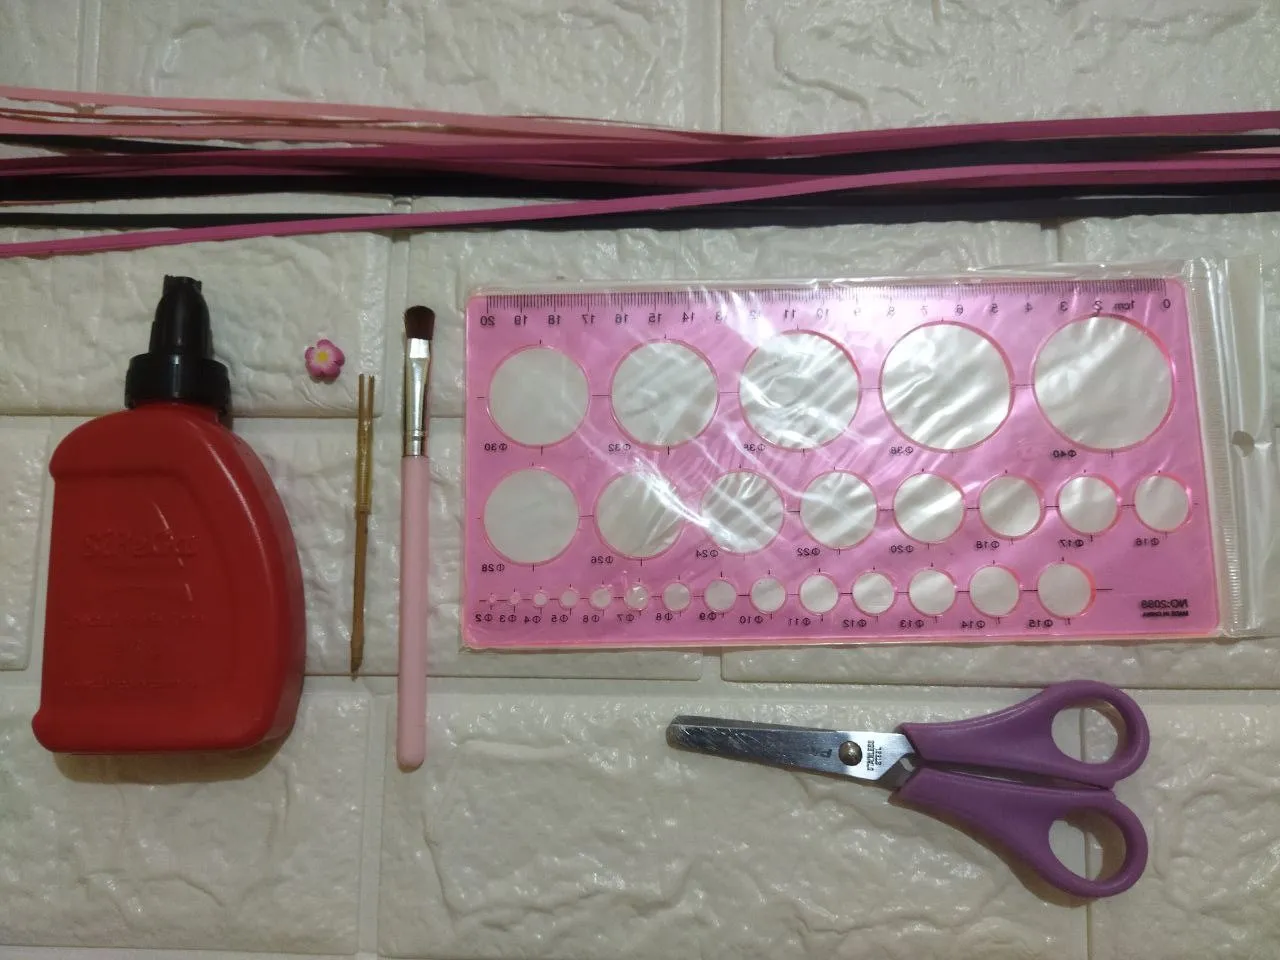
- Tiras de papel quilling de 3 milímetros de ancho color rosa y fucsia
- Cola blanca fuerte
- Aguja artesanal
- Regla de plantilla de círculos
- Pincel
- Tijera
- Mostacillas amarillas y negra
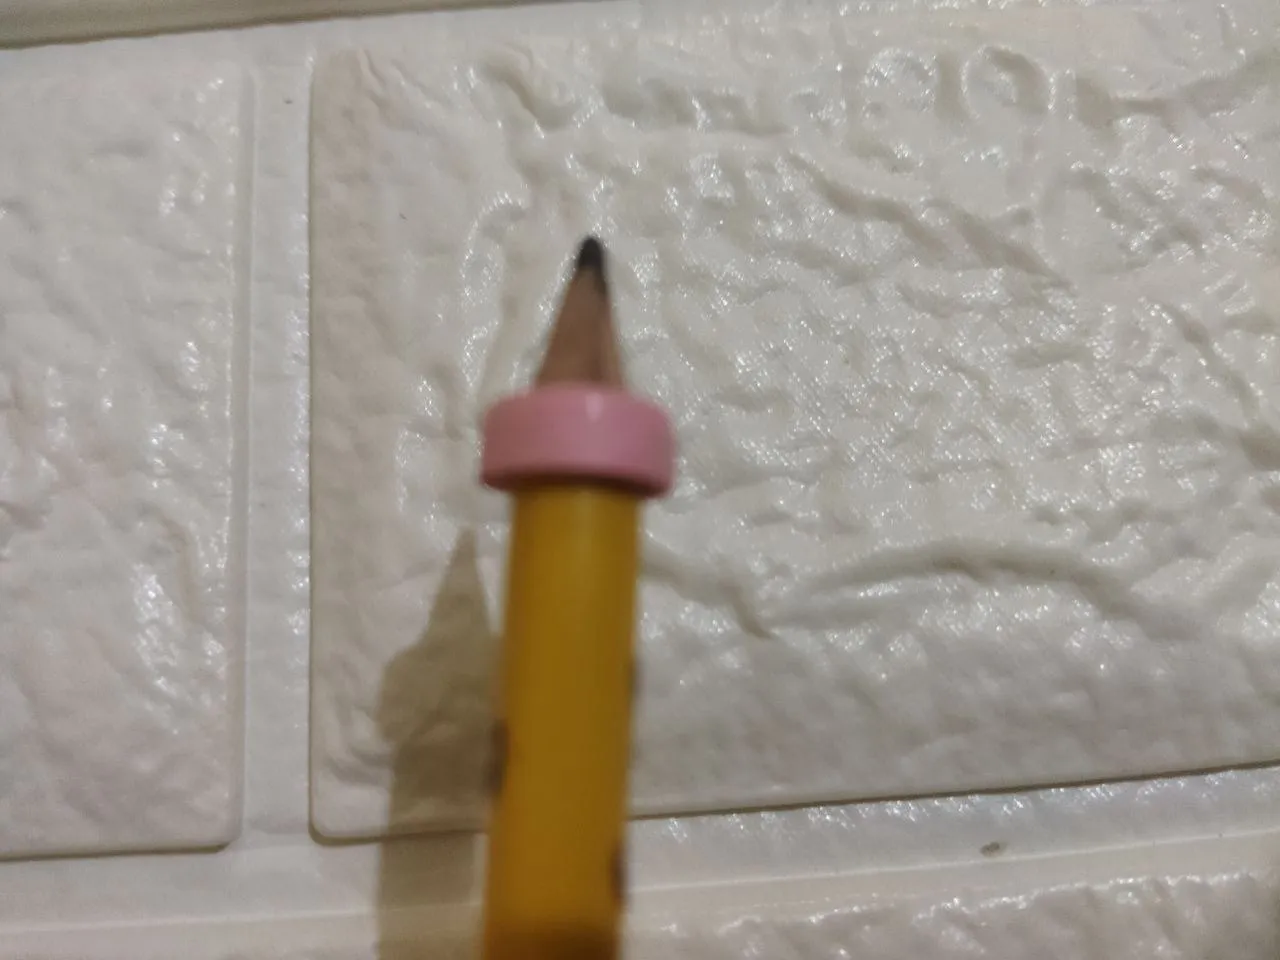
- Lápiz
- Marcador
- aros para bisutería
- 3 eslabones de Cadena
-- 3 mm wide strips of quilling paper in pink and fuchsia colors
- Strong white glue
- Craft needle
- Circles template ruler
- Paintbrush
- Scissors
- Yellow and black beads
- Pencil
- Marker pencil
- Jewelry earrings
- 3 links of chain

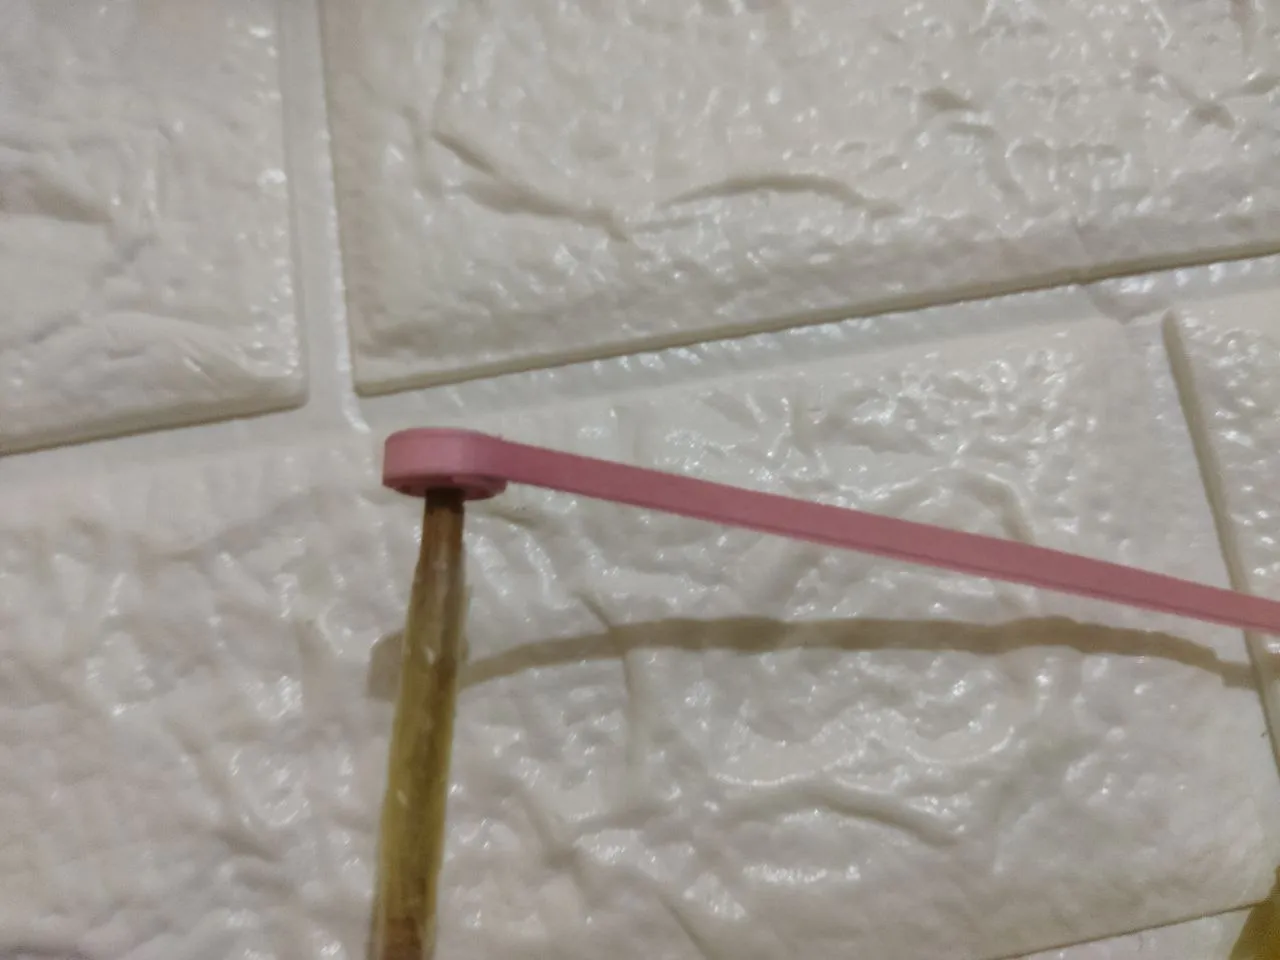
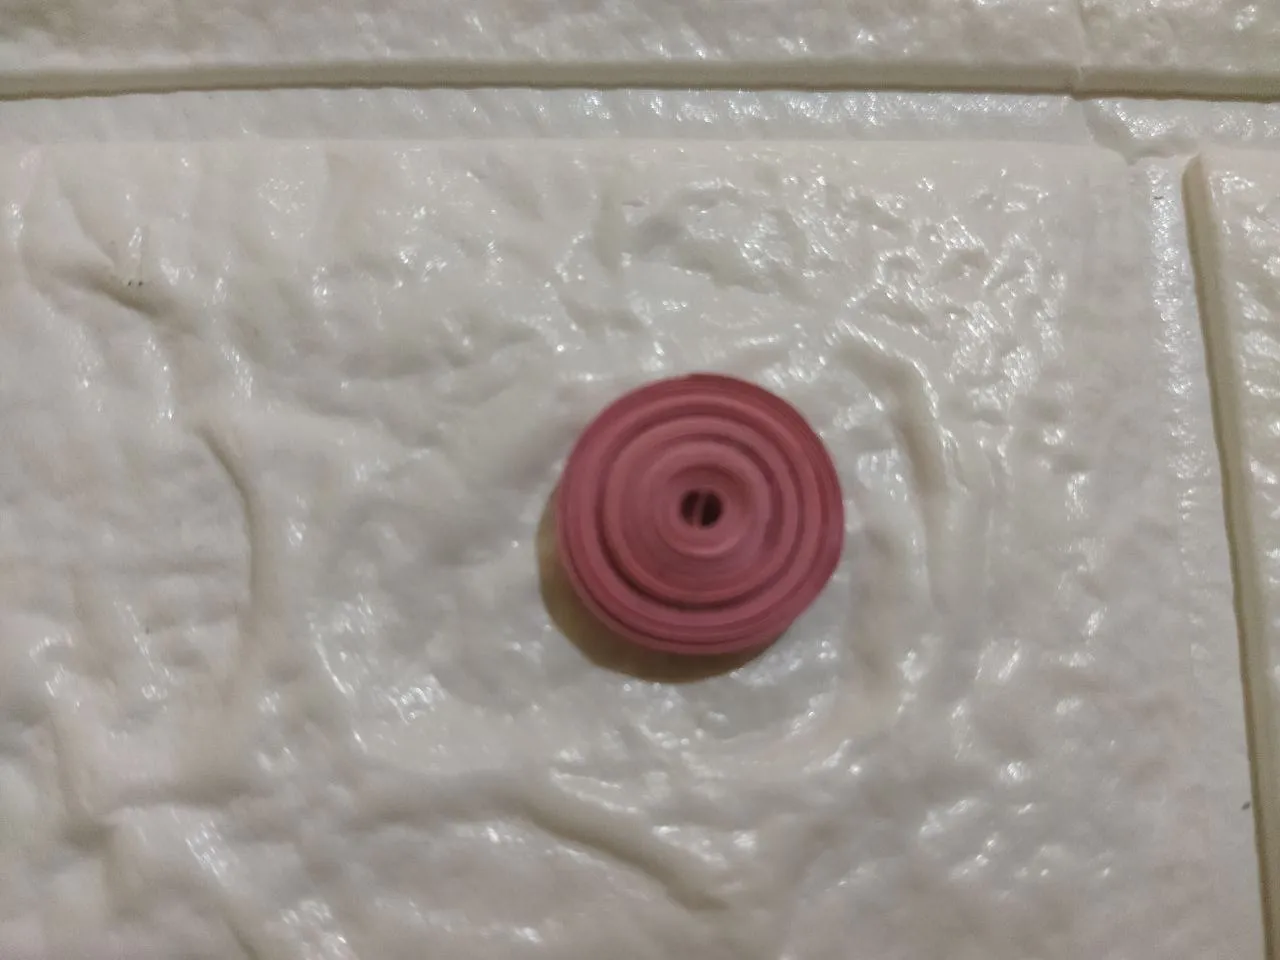
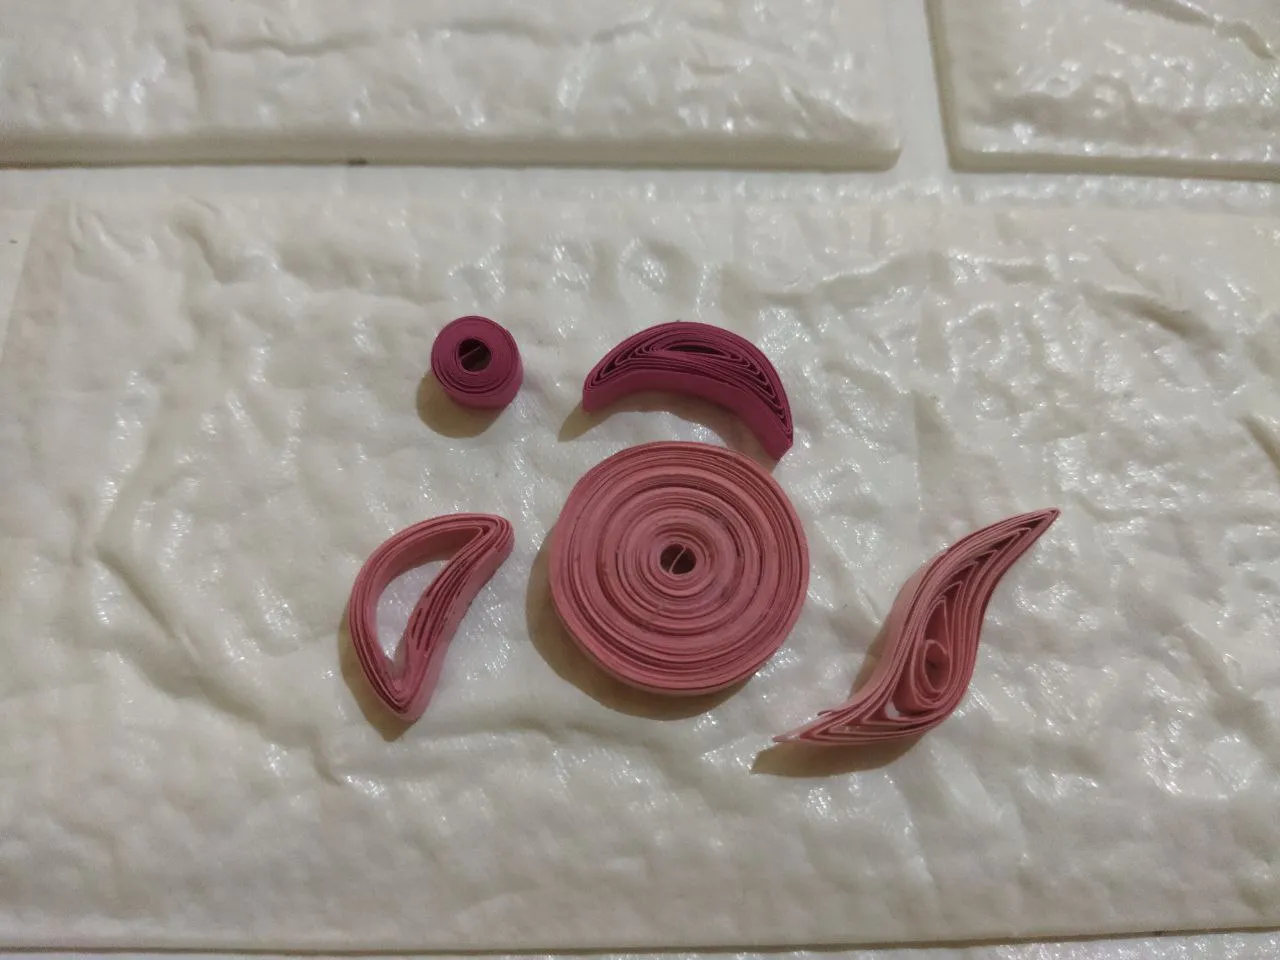
Comenzamos con este nuevo proyecto que les comparto hoy como primera publicación en esta comunidad el cual se trata del tema del mes como son las teteras. En esta ocasión voy a elaborar un colgante o dije tetera y taza ya que pienso que una siempre esta acompañada de la otra. primeramente elaboramos las tiras como es mi casa miden 3 milímetros de ancho por 40 de largo. Primeramente vamos iniciar el proyecto por elaborar la tetera para esta vamos a necesitar 6 tiras en color rosa y 2 en color fucsia. Empezamos haciendo un circulo cerrado enrollando 4 tiras color rosa en forma continua, aplicando pegamento al final de cada una de las tiras. este sera el cuerpo de la tetera
We begin with this new project that I share with you today as the first publication in this community which is about the theme of the month as are the teapots. This time I am going to make a pendant or pendant teapot and cup as I think that one is always accompanied by the other. First we make the strips as is my house measure 3 millimeters wide by 40 long. First we will start the project by making the teapot for this we will need 6 strips in pink and 2 in fuchsia. We start making a closed circle by rolling 4 pink strips continuously, applying glue at the end of each of the strips. This will be the body of the teapot.
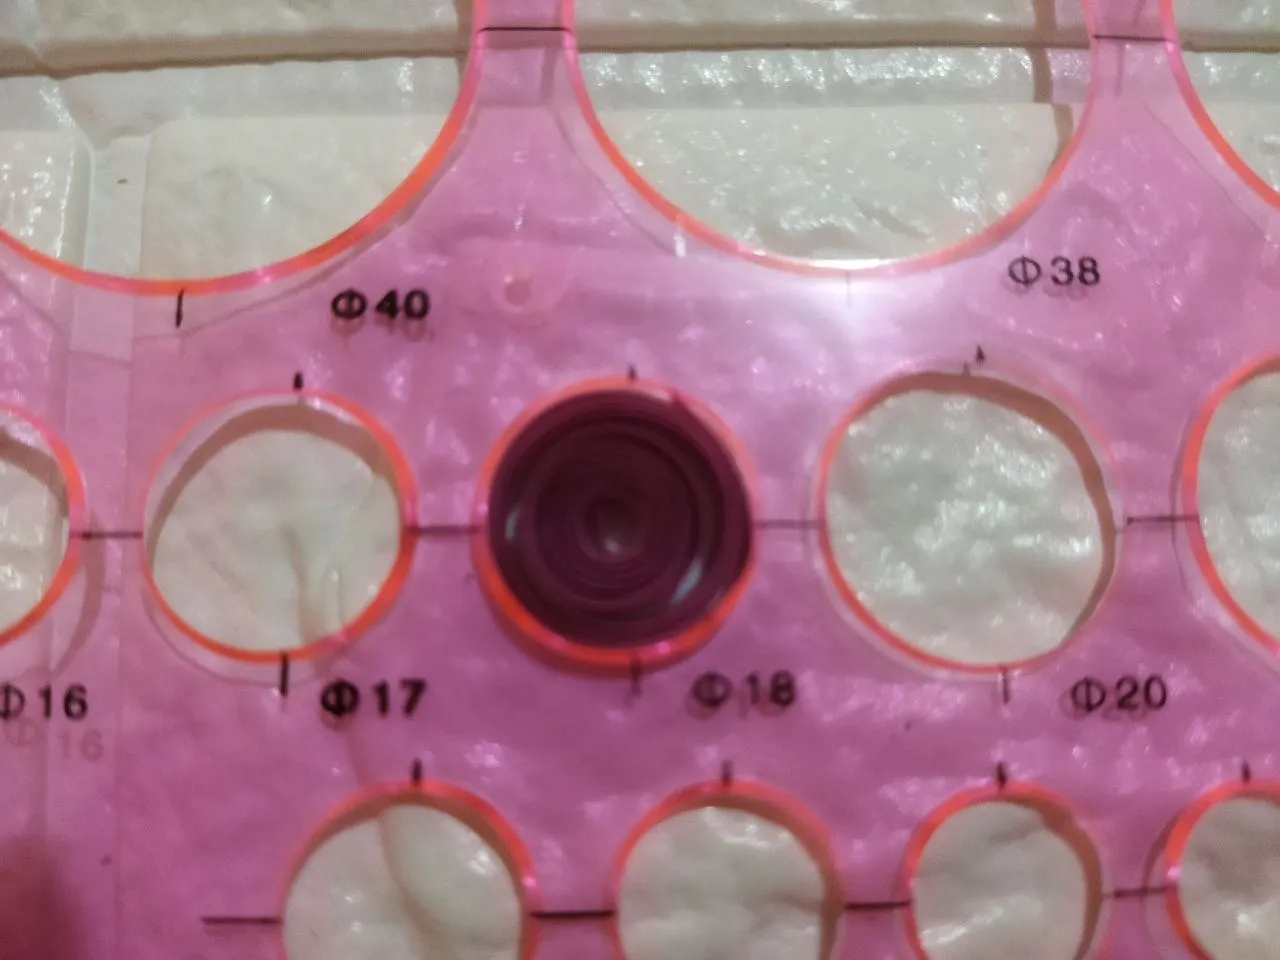
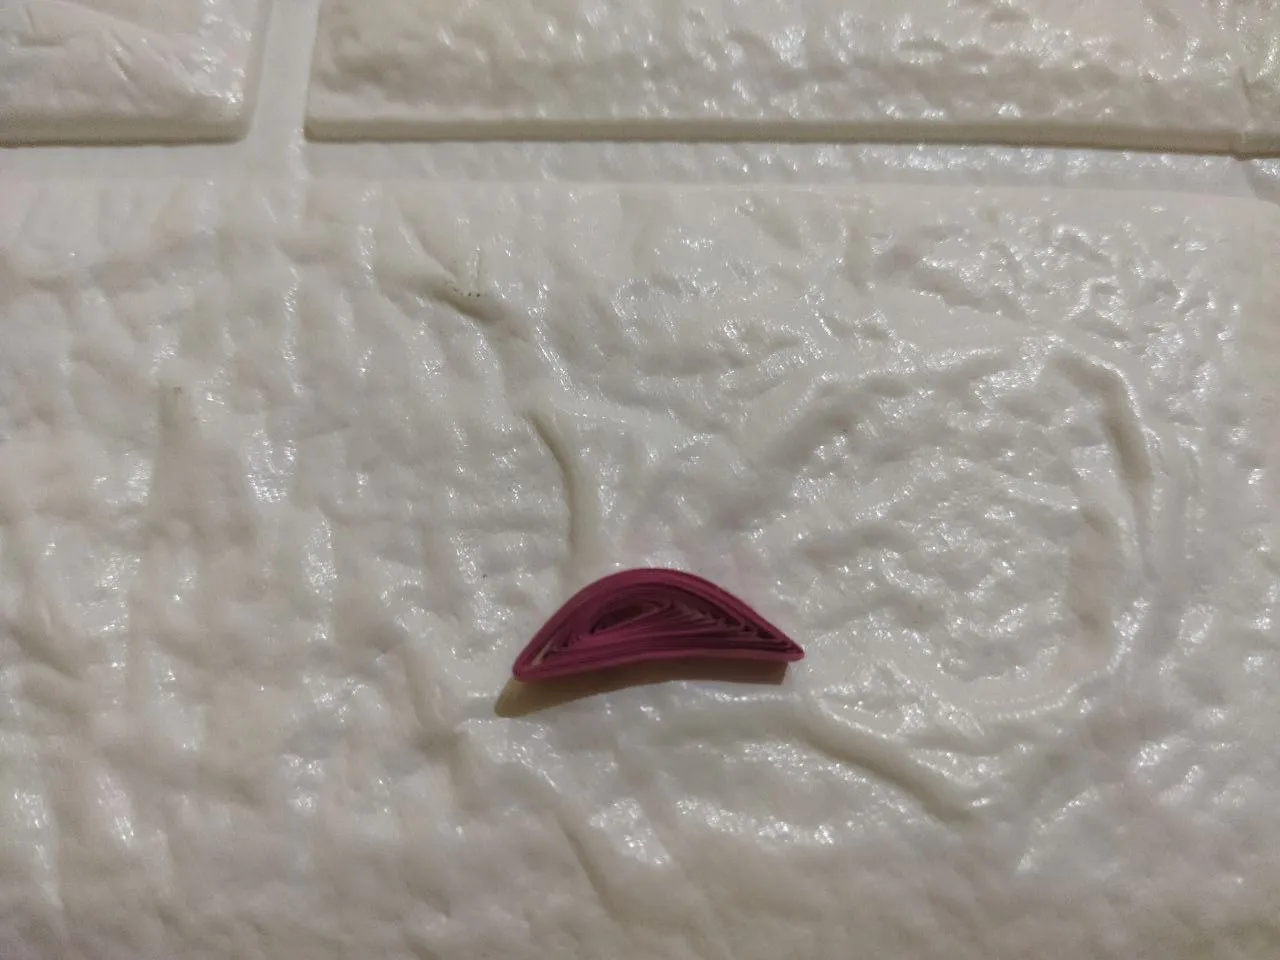
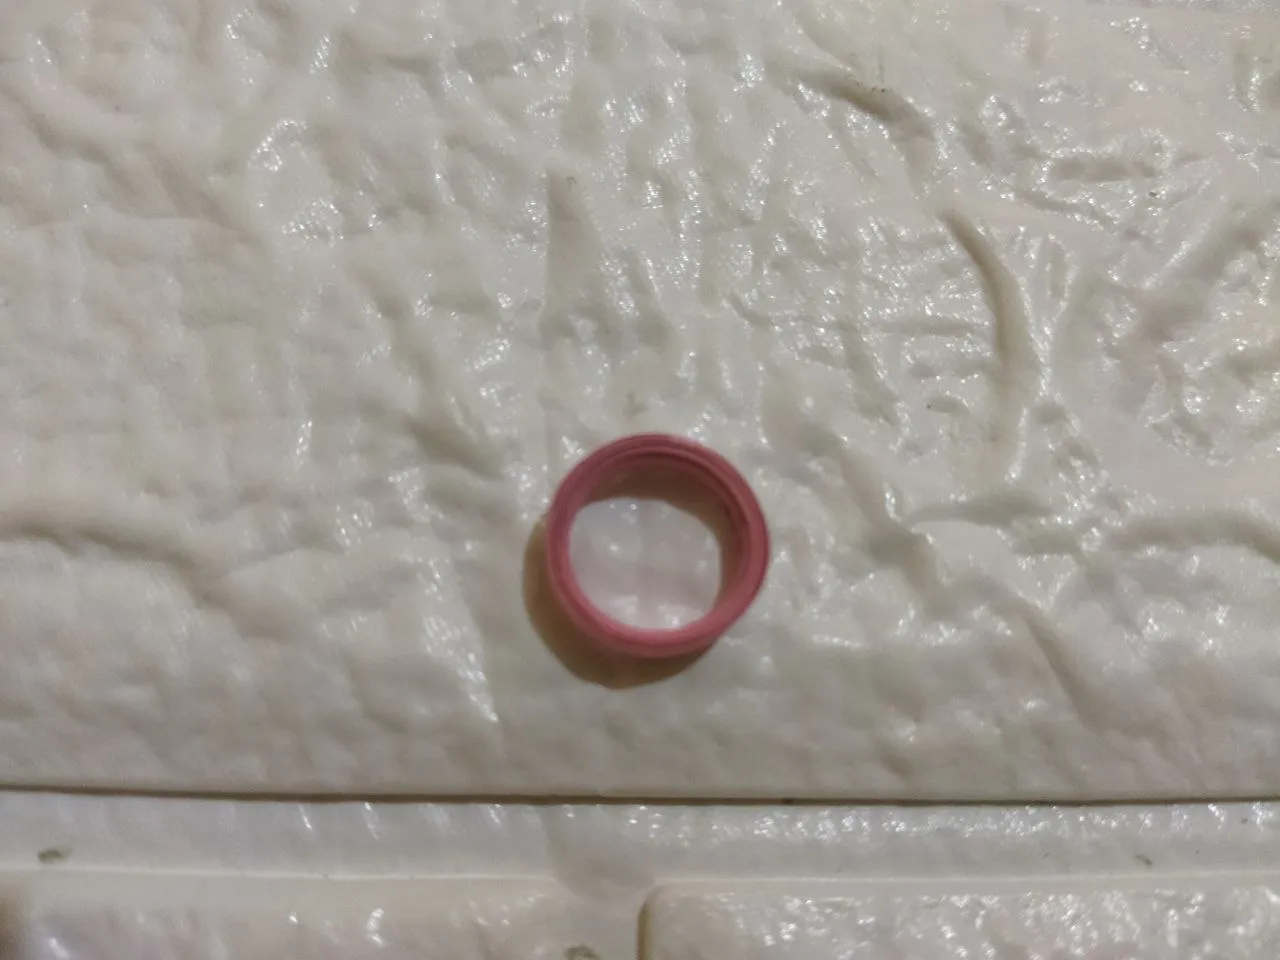
Ahora vamos a elaborar la tapa de la tetera para esto voy a utilizar una tira de color fucsia, hacemos un circulo cerrado pero esta vez lo colocamos en la plantilla de círculos y soltamos, luego lo tomamos y con las manos moldeamos haciendo una figura similar a una media luna
Now we are going to make the lid of the teapot for this I will use a strip of fuchsia color, we make a closed circle but this time we place it in the circle template and release, then we take it and with our hands we mold it making a figure similar to a half moon.
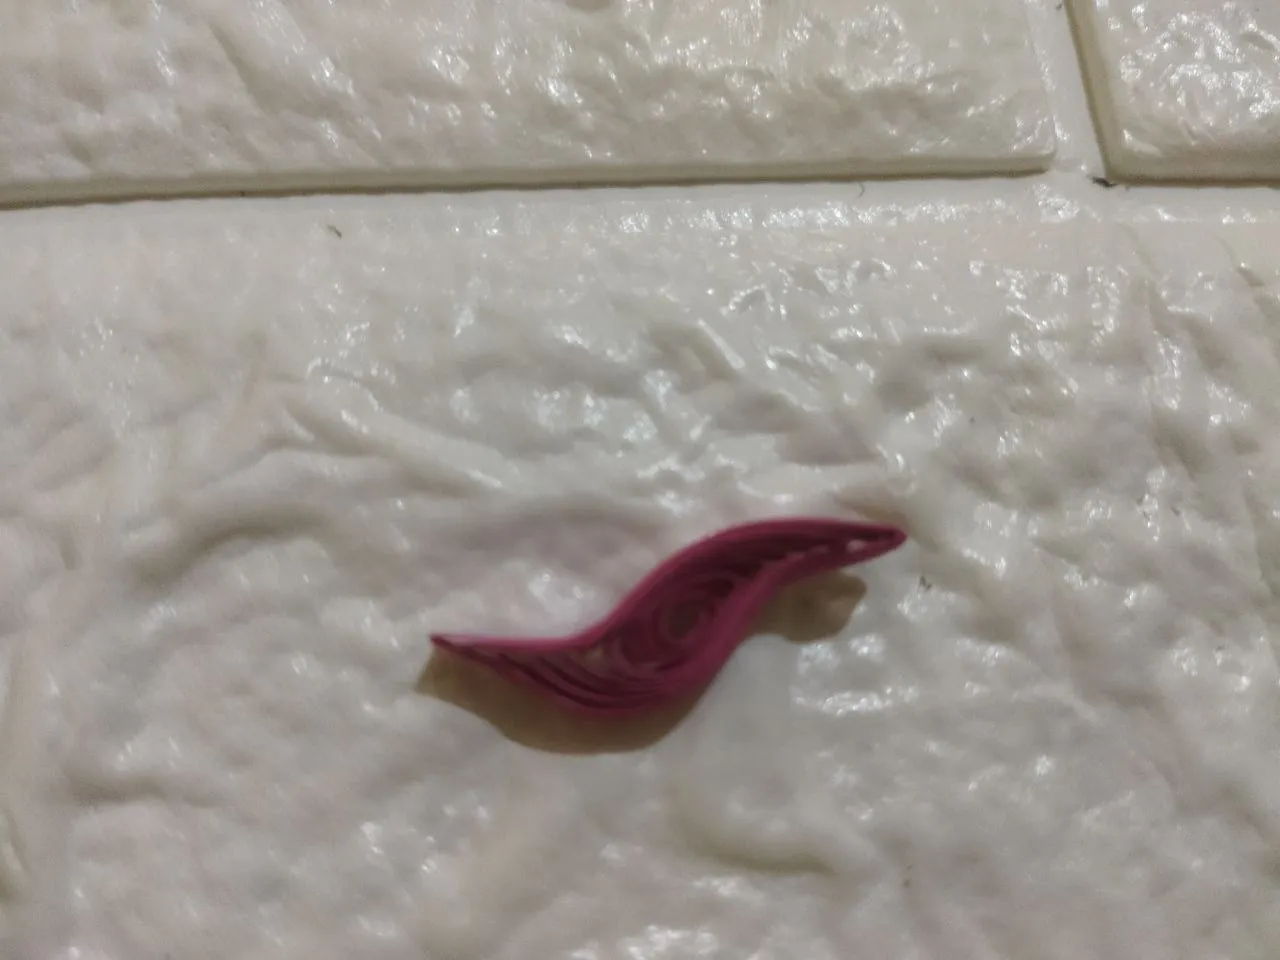
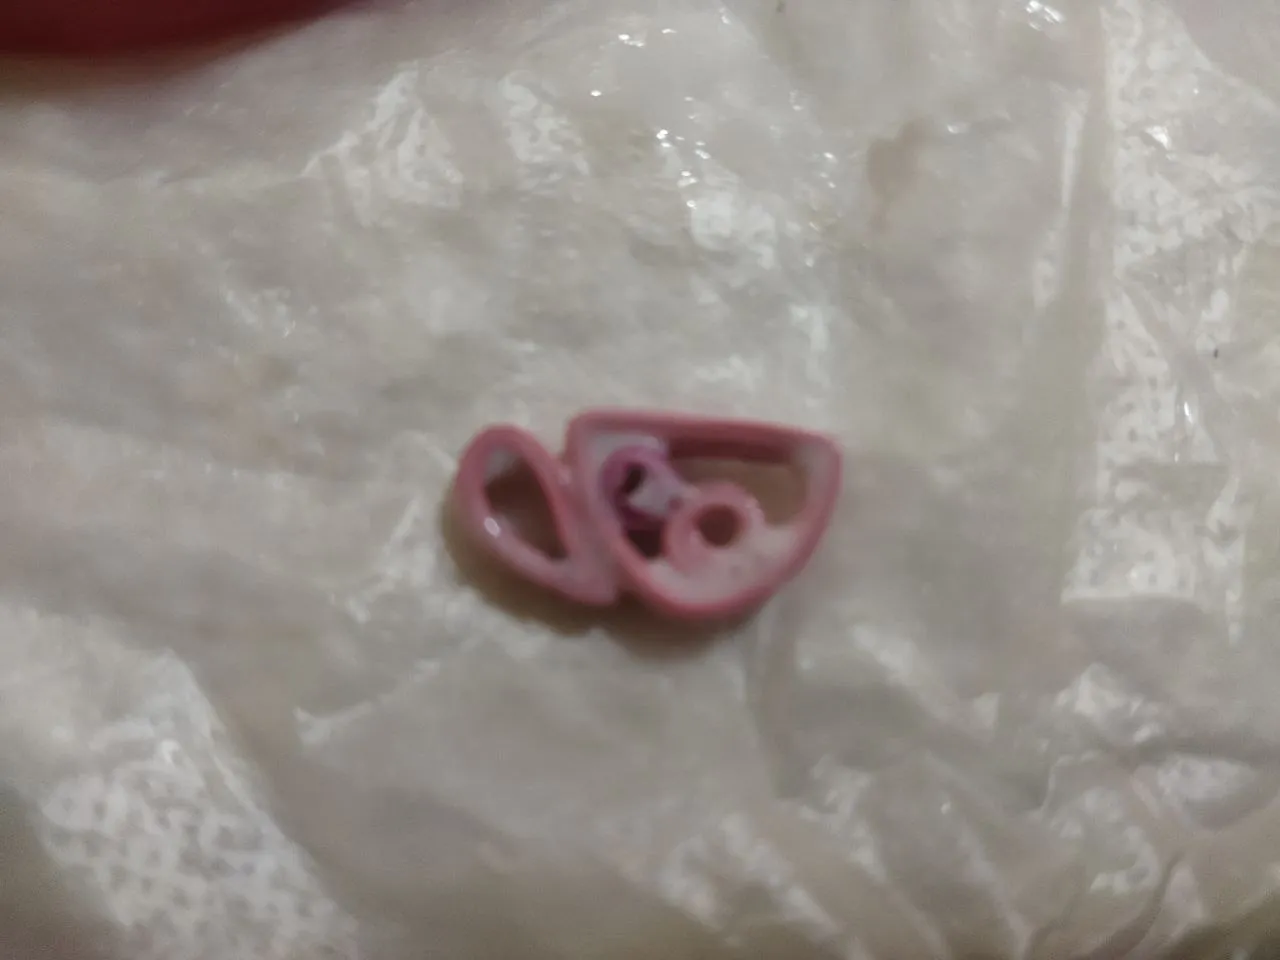
El siguiente paso es elaborar las piezas faltantes para armar la tetera. Para el pico de igual manera vamos hacer un circulo cerrado y lo soltamos en la plantilla para círculos en el numero 24, con el vamos a formar una figura parecida a la letra S. Para el asa de la tetera tome como referencia la tapa de un marcador en donde enrolle la tira de color rosa y de igual manera forme una media luna y para el asa de la tapa, realice un circulo cerrado pero esta vez con media tira es decir 20 centímetros. De esta manera ya tenemos todas las piezas de la tetera
The next step is to make the missing pieces to assemble the teapot. For the spout in the same way we will make a closed circle and release it in the template for circles in the number 24, with it we will form a figure similar to the letter S. For the handle of the teapot take as a reference the lid of a marker where I roll the pink strip and in the same way form a half moon and for the handle of the lid, make a closed circle but this time with half a strip that is 20 centimeters. This way we already have all the pieces of the teapot.
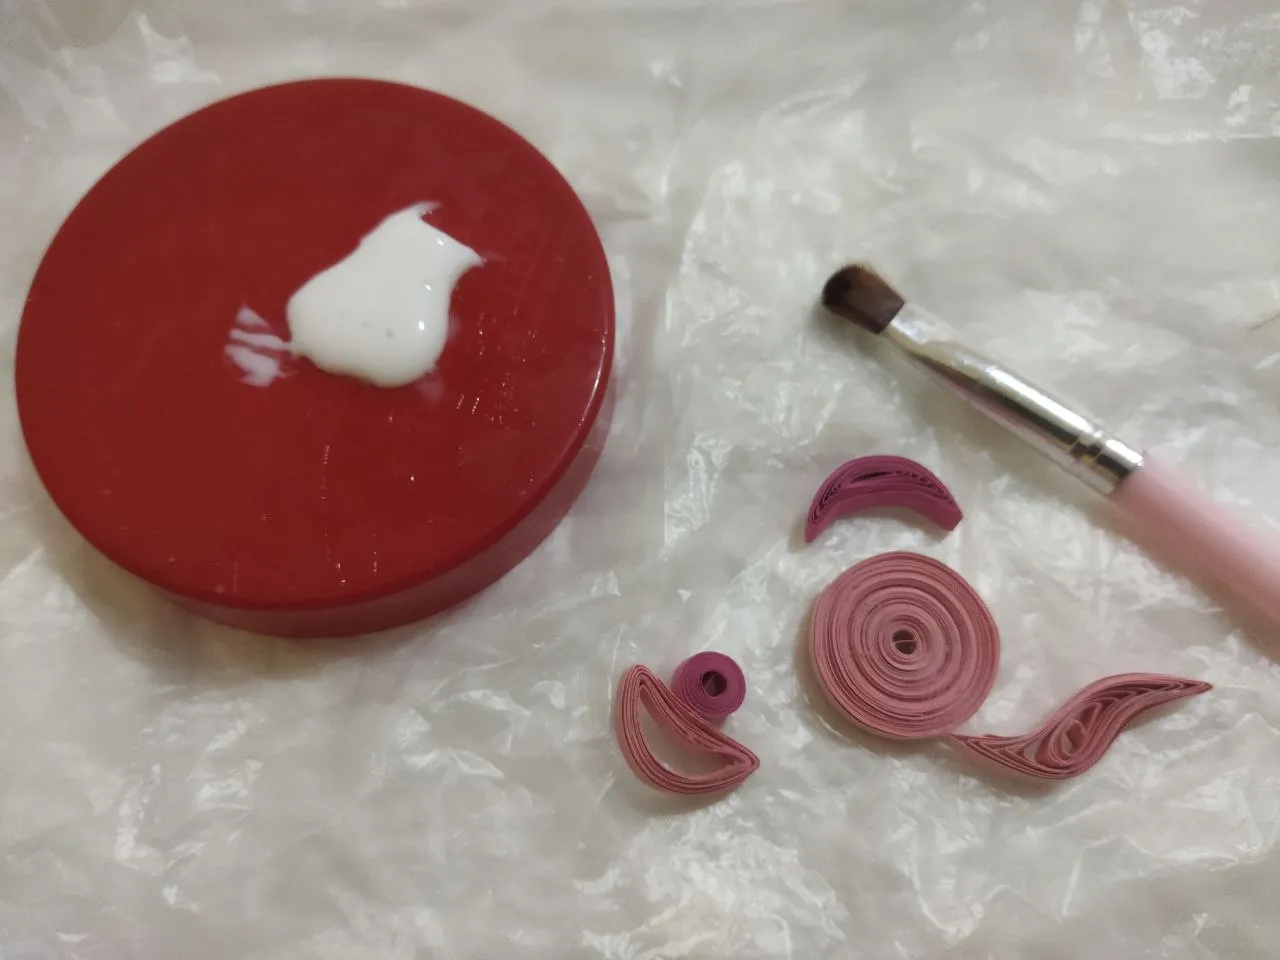
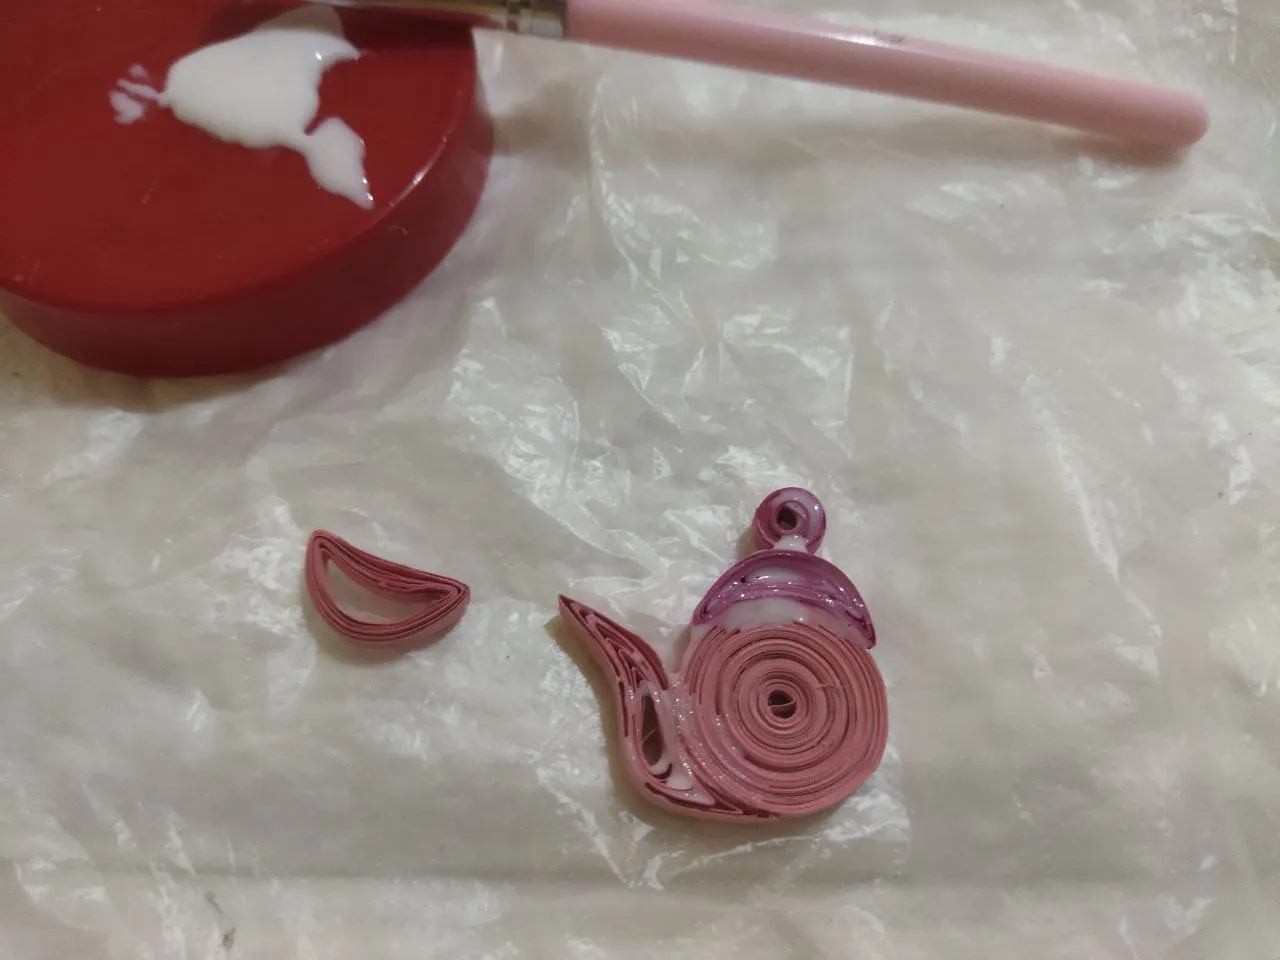
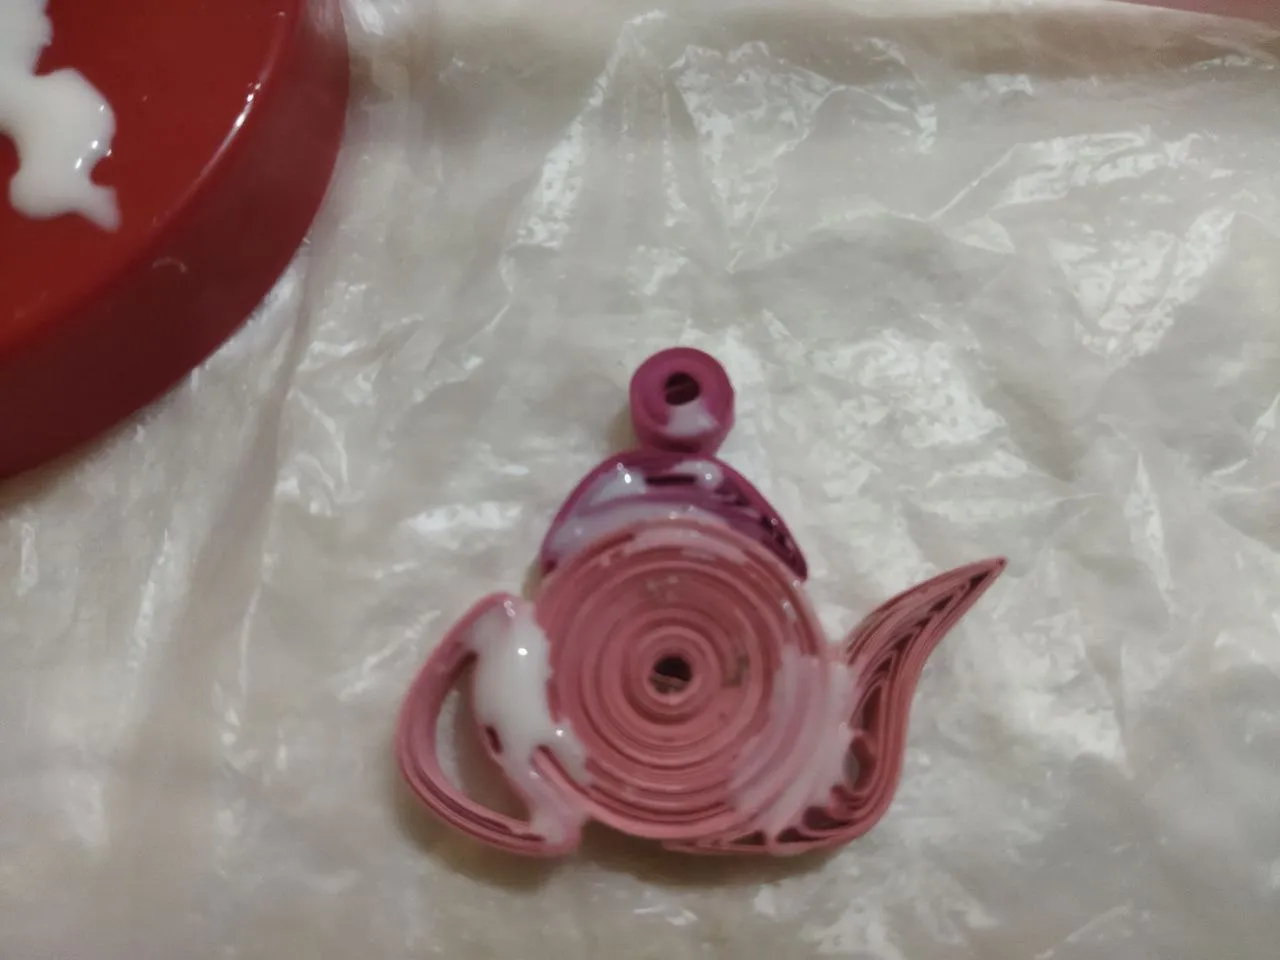
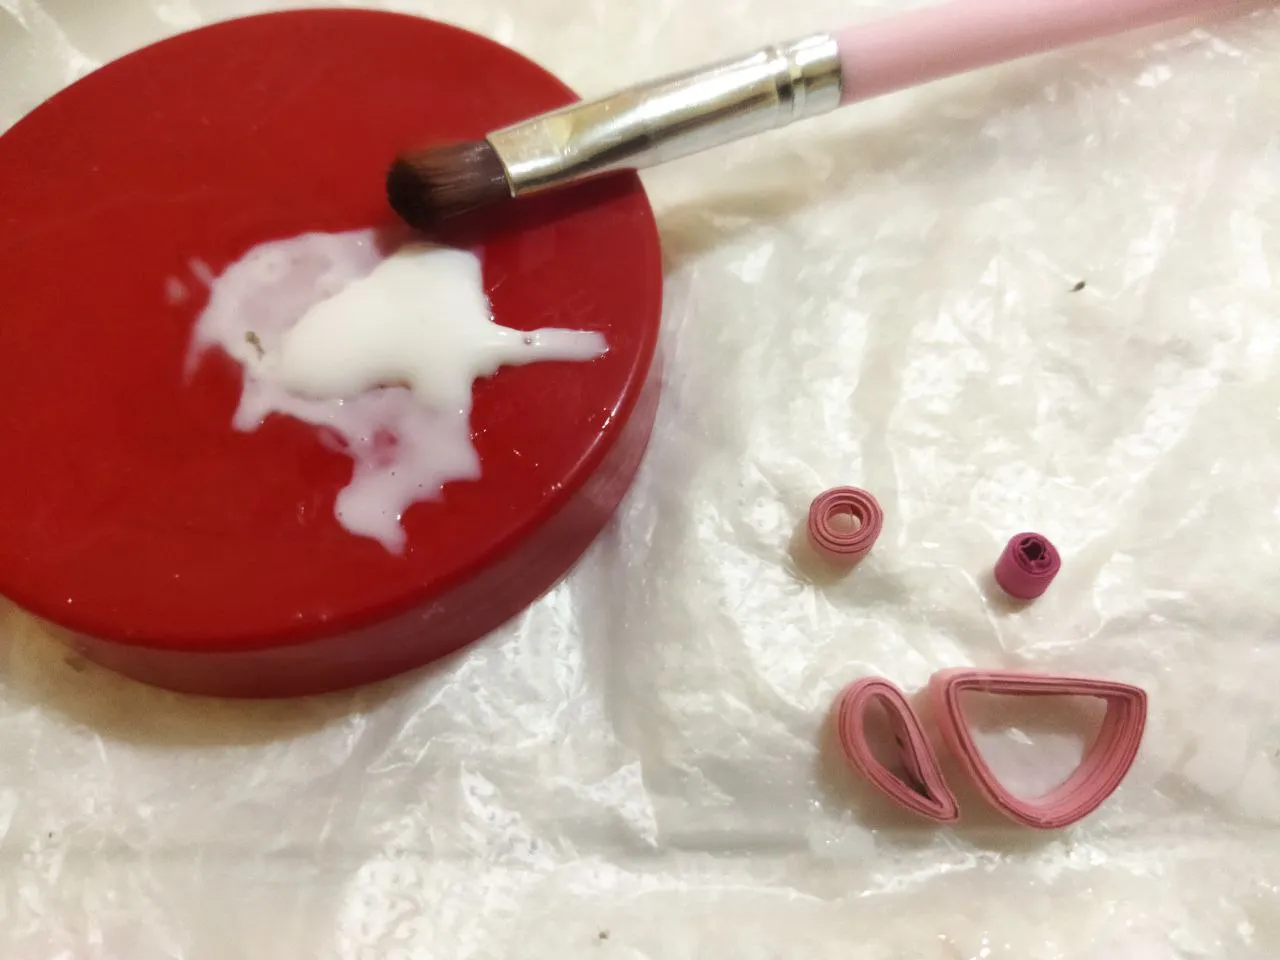
Luego corresponde aplicar cola blanca a cada una de las piezas y colocarlas donde corresponde. Después que seque y las piezas estén pegadas, le colocamos cola blanca a la tetera por ambas caras dejando secar entre un lado y otro como también por los costados o bordes de la figura
Then apply white glue to each of the pieces and place them where they belong. After it dries and the pieces are glued, we apply white glue to the teapot on both sides, letting it dry between one side and the other, as well as on the sides or edges of the figure.
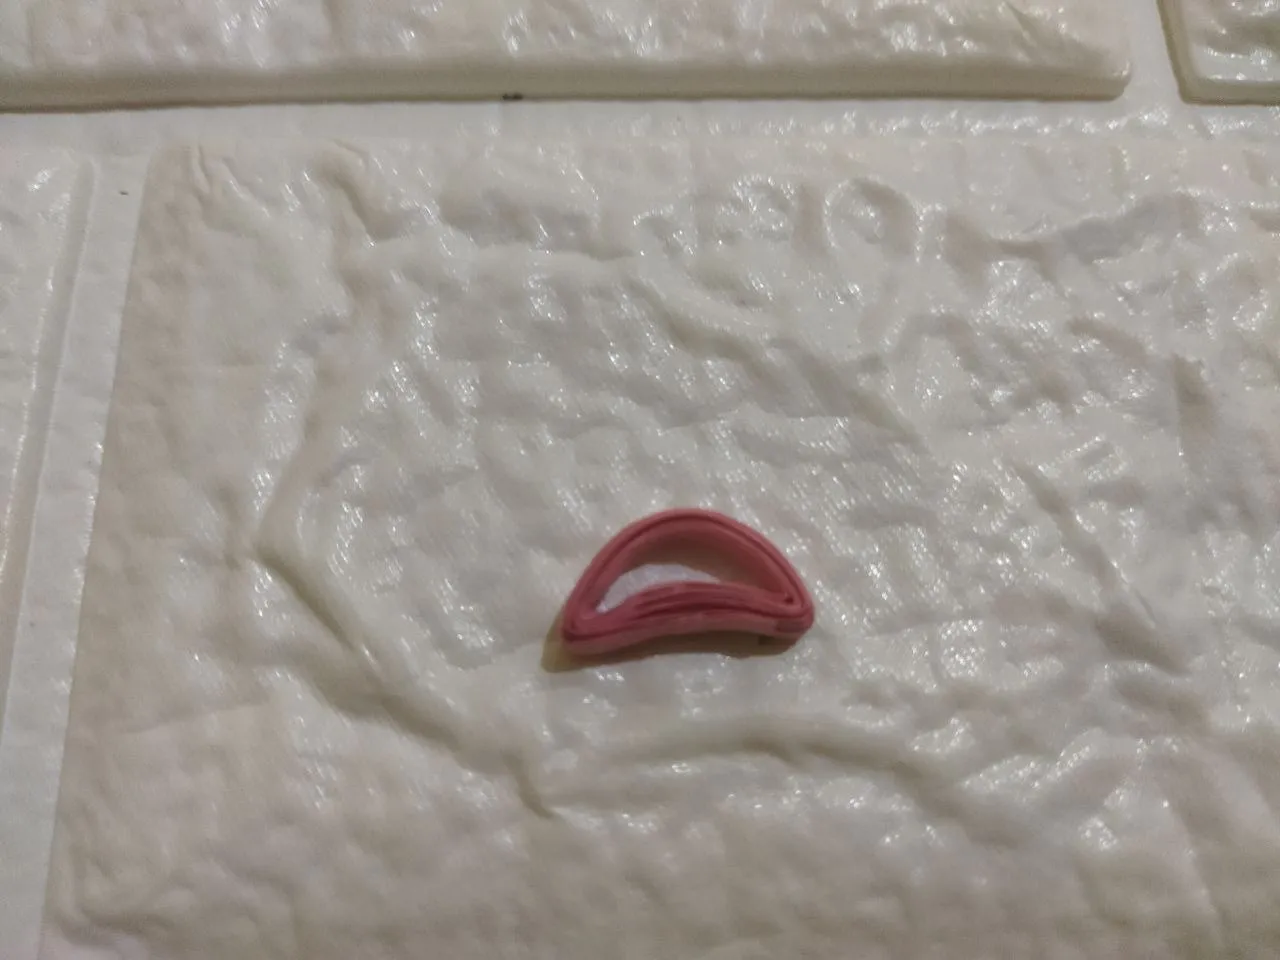
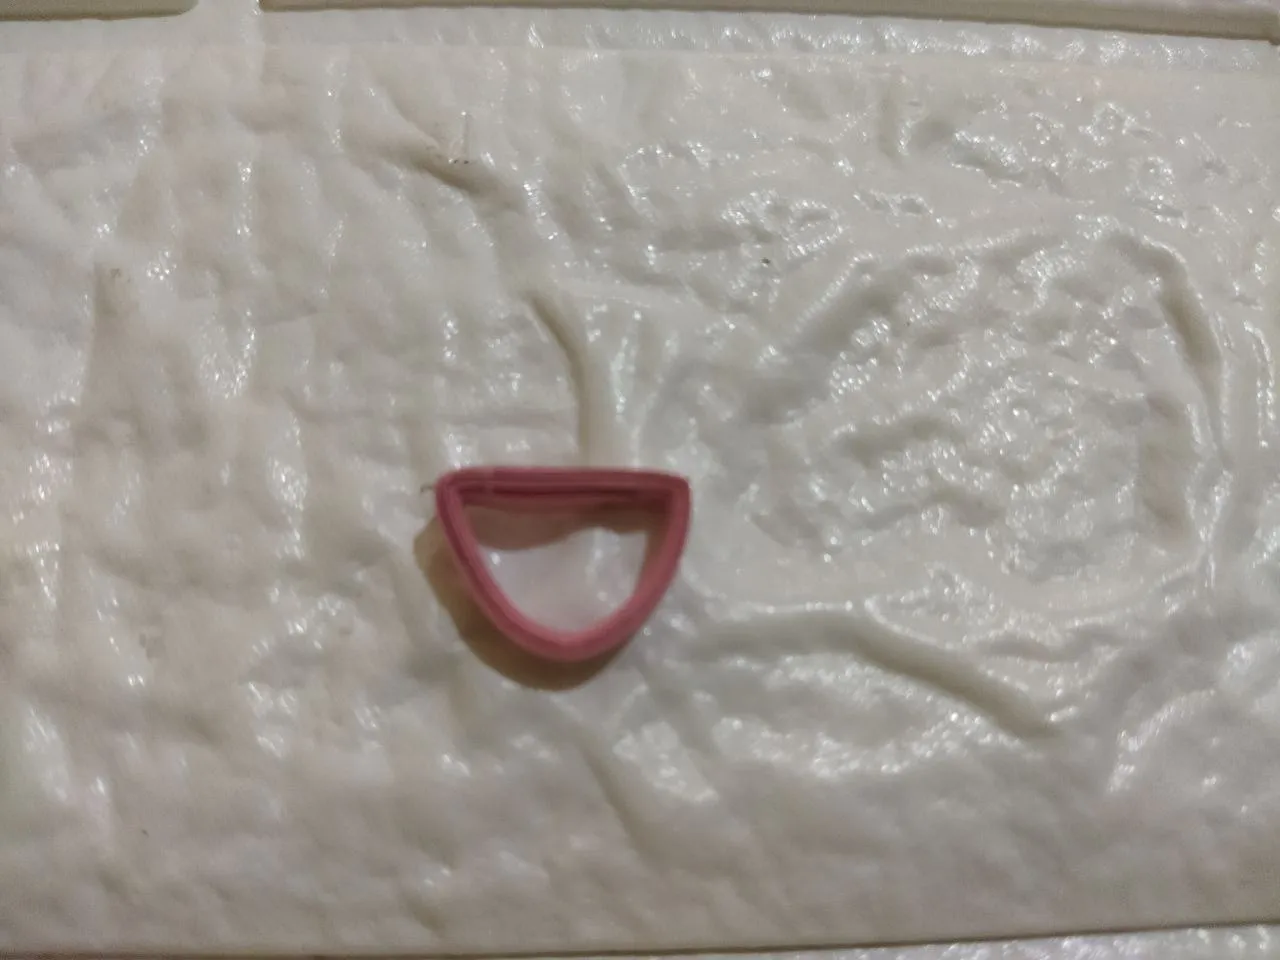
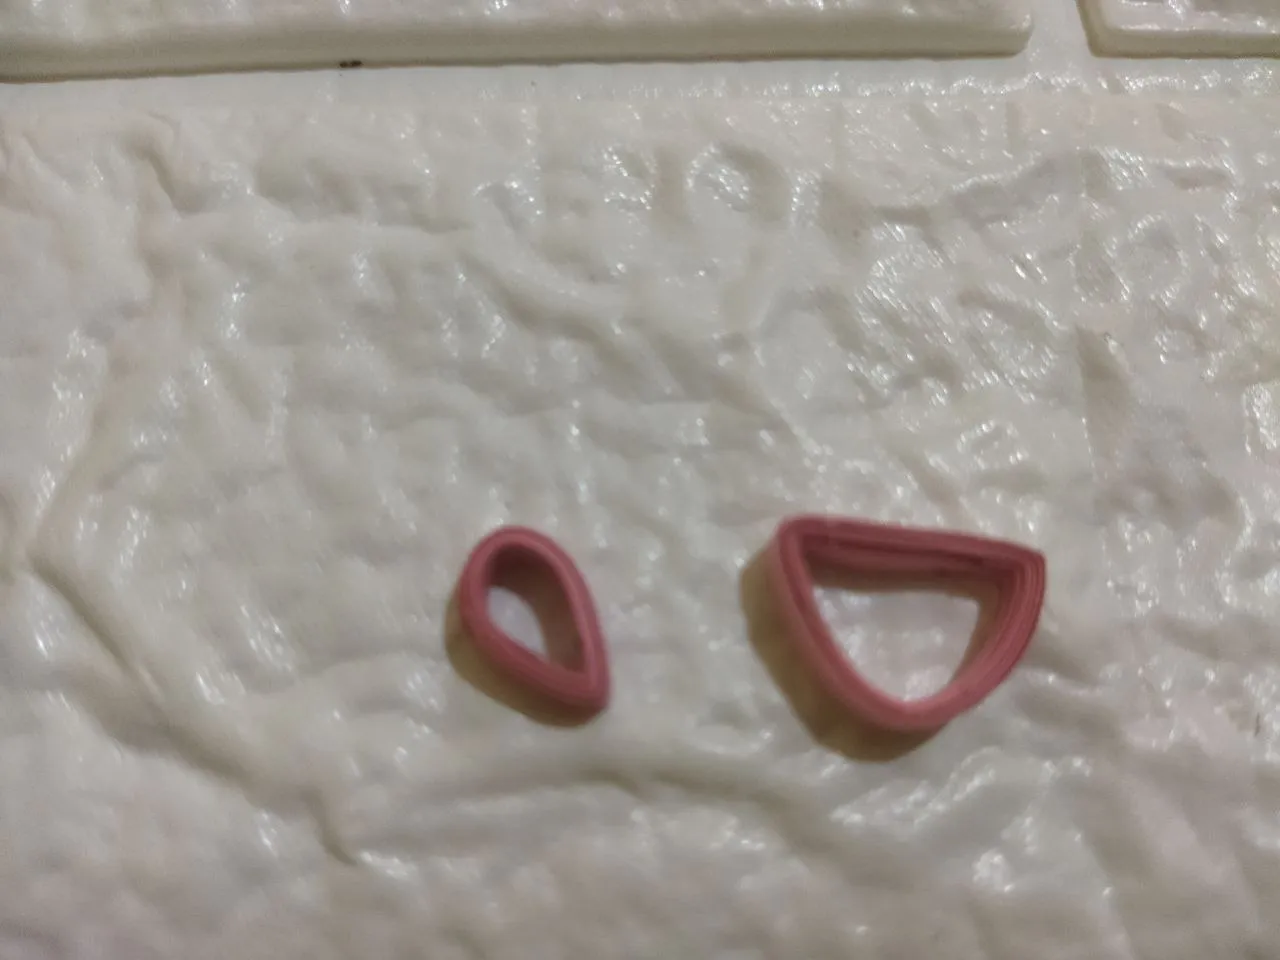
Ahora vamos a diseñar la pequeña taza, para esto vamos a realizar dos círculos abiertos en color rosa. Para uno voy a utilizar como herramienta nuevamente la tapa de un marcador y para el otro un lápiz. con el circulo que hicimos con la tapa del marcador vamos a realizar una figura similar a una U y con el otro circulo que hicimos con el lápiz haremos una gota. De esta manera tenemos las piezas de la taza lista
Now we are going to design the little cup, for this we are going to make two open circles in pink. With the circle we made with the lid of the marker we are going to make a figure similar to a U and with the other circle we made with the pencil we will make a drop. In this way we have the pieces of the cup ready.
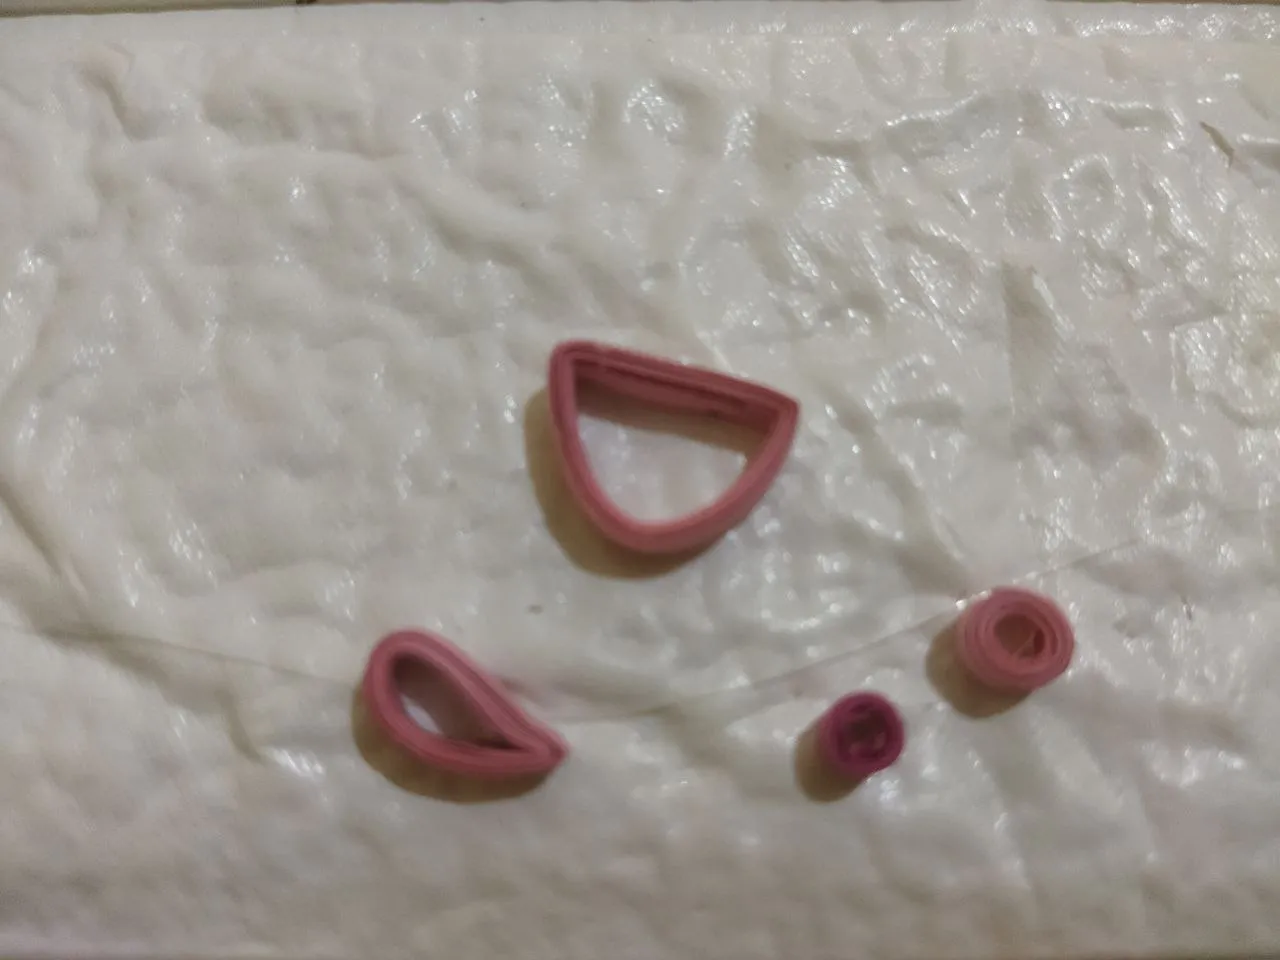
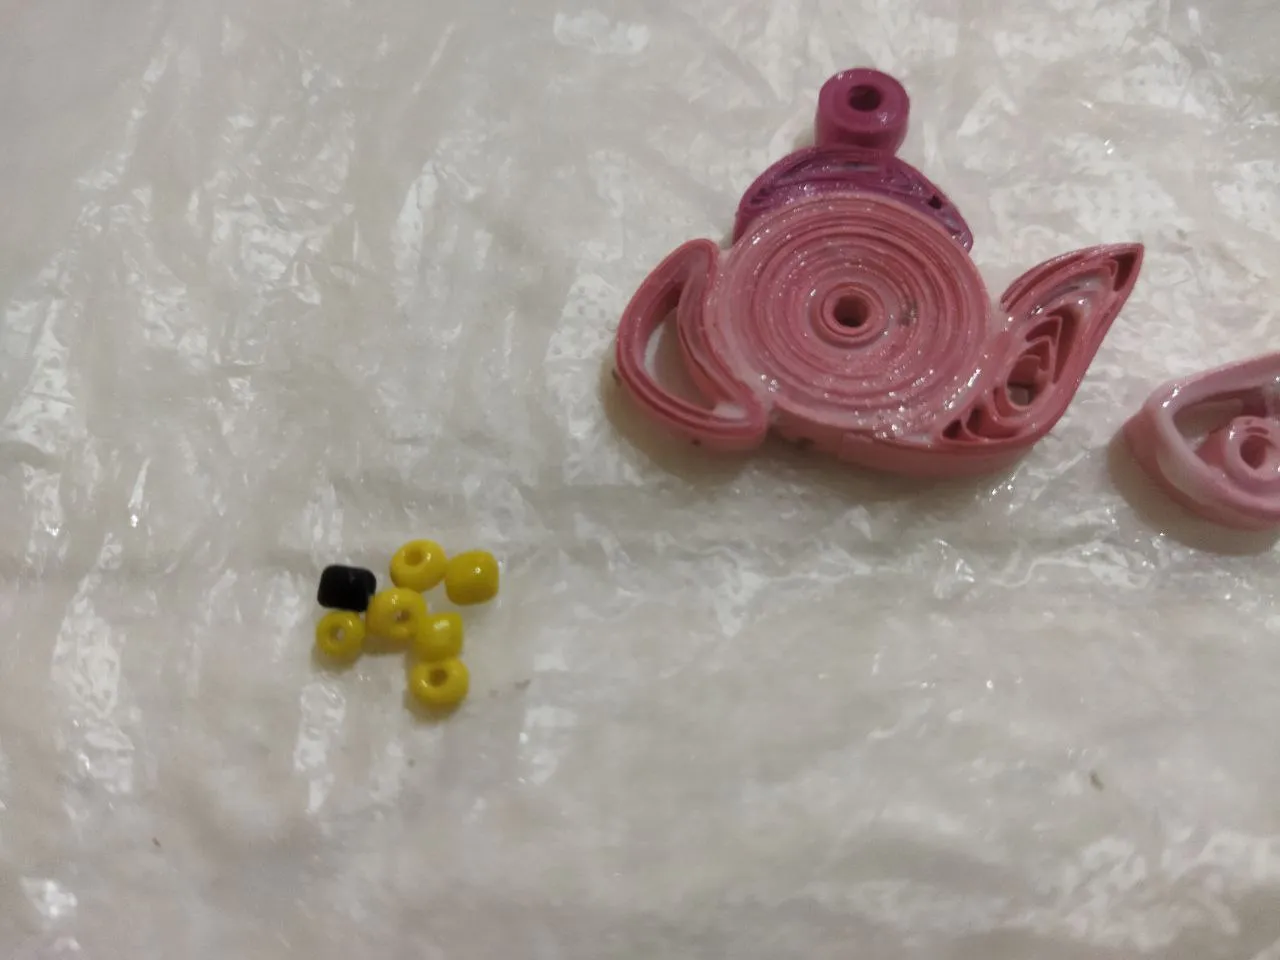
Para darle un poco de fuerza a la pieza y ademas no se vea hueca, vamos a realizar dos círculos cerrados con 10 centímetros de tira una en color rosa y otra en color fucsia y las pegamos dentro de la taza. Unimos el resto de las piezas con cola blanca, dejamos secar y al igual que como hicimos con la tetera le aplicamos cola blanca por ambos lados como también por los bordes. aplicamos cola blanca las veces que sea necesario para fortalecer y proteger la pieza,
To give a little strength to the piece and also not look hollow, we will make two closed circles with 10 centimeters of strip, one in pink and one in fuchsia color and glue them inside the cup. We join the rest of the pieces with white glue, let dry and as we did with the teapot we apply white glue on both sides as well as on the edges. We apply white glue as many times as necessary to strengthen and protect the piece,
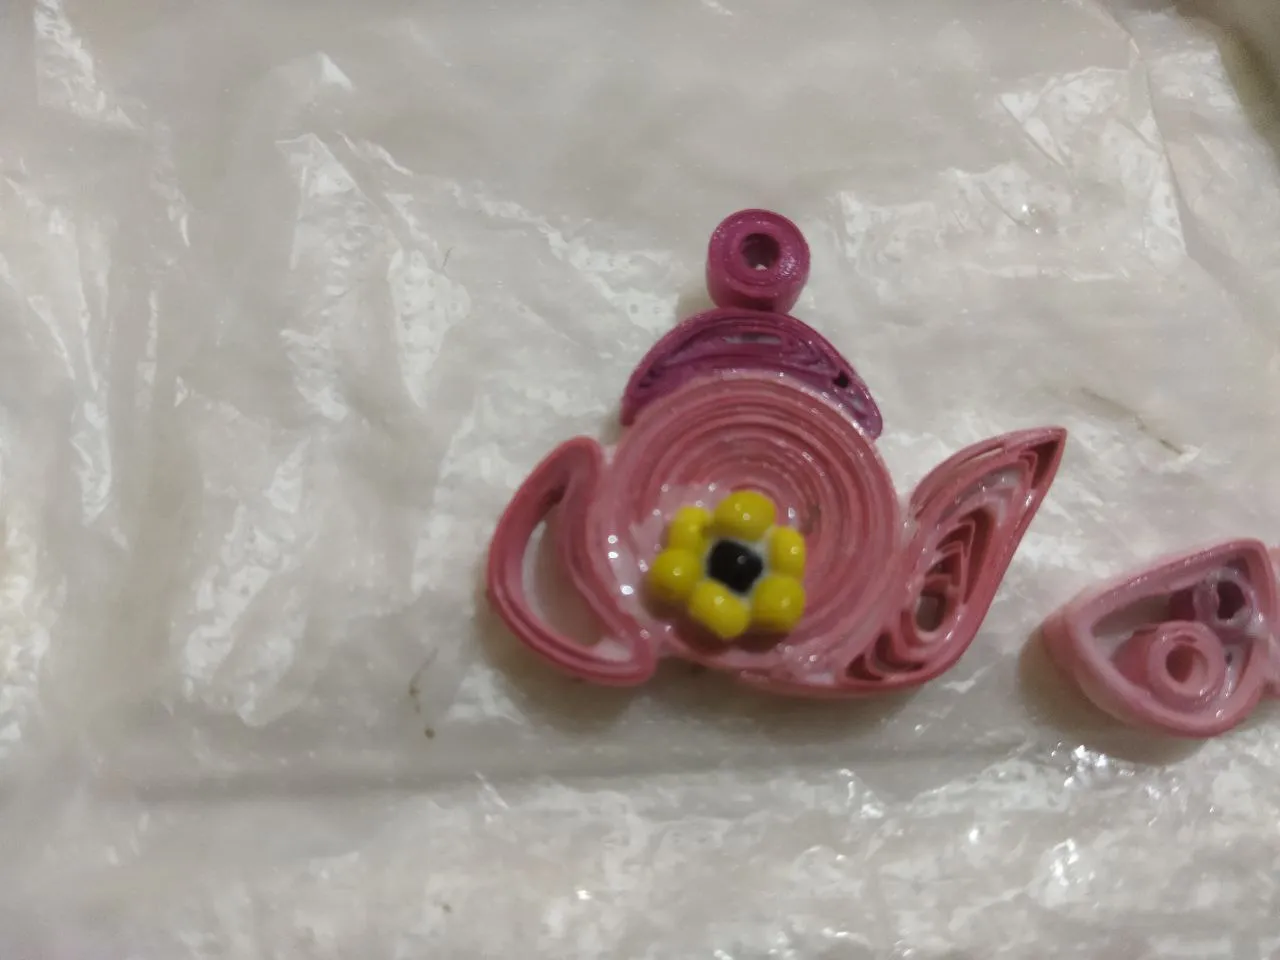
Para terminar en un extremo de la tetera elabore un pequeño girasol con 6 mostacillas amarillas y una negra para el centro de la flor. Agregue cola blanca a la pieza y primeramente coloque la mostacilla negra y alrededor fui colocando cada uno de los pétalos
Finally, at one end of the teapot I made a small sunflower with 6 yellow beads and one black bead for the center of the flower. Add white glue to the piece and first place the black beads and around them I placed each of the petals.
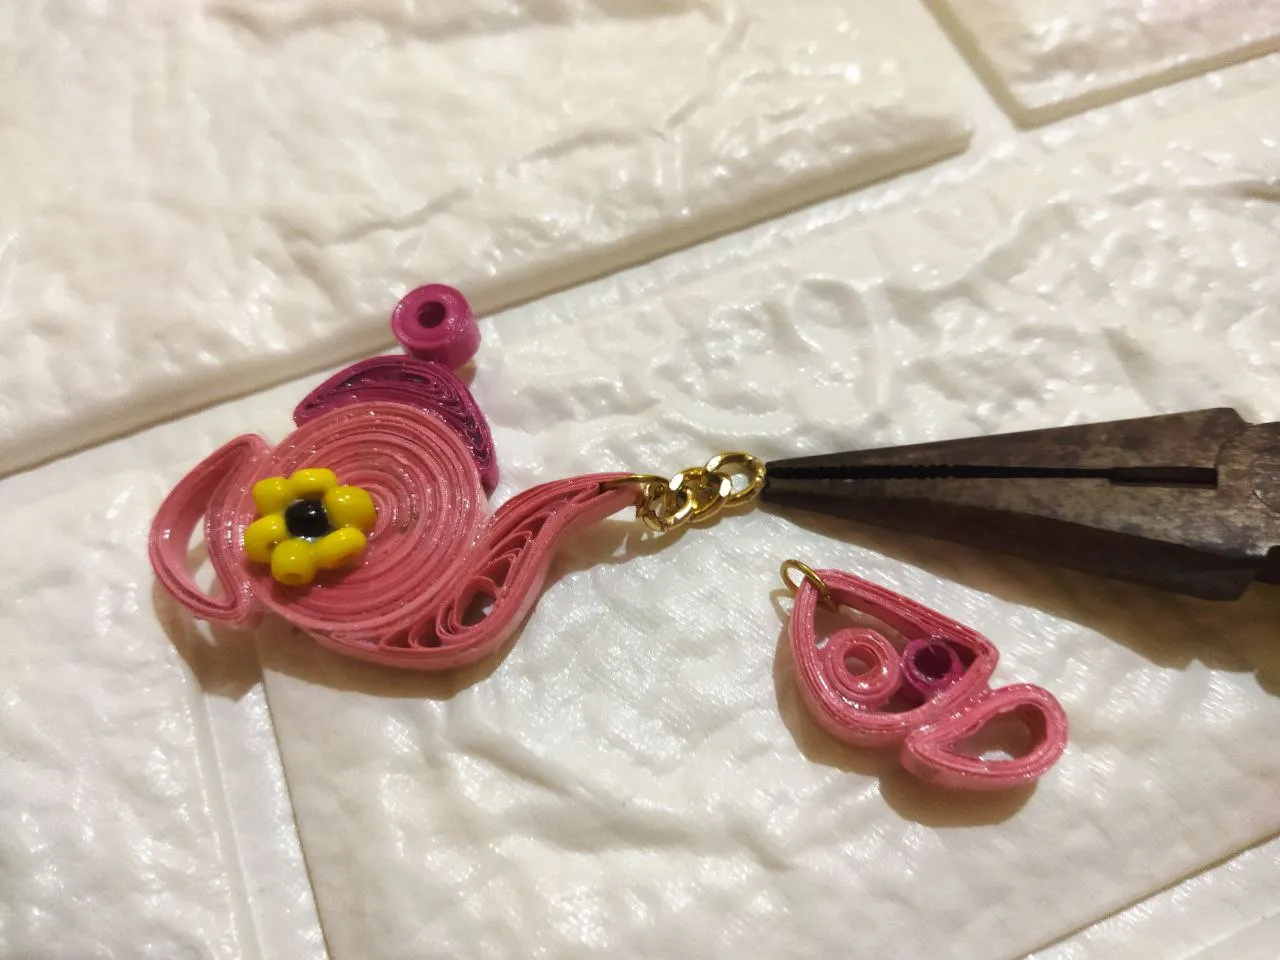
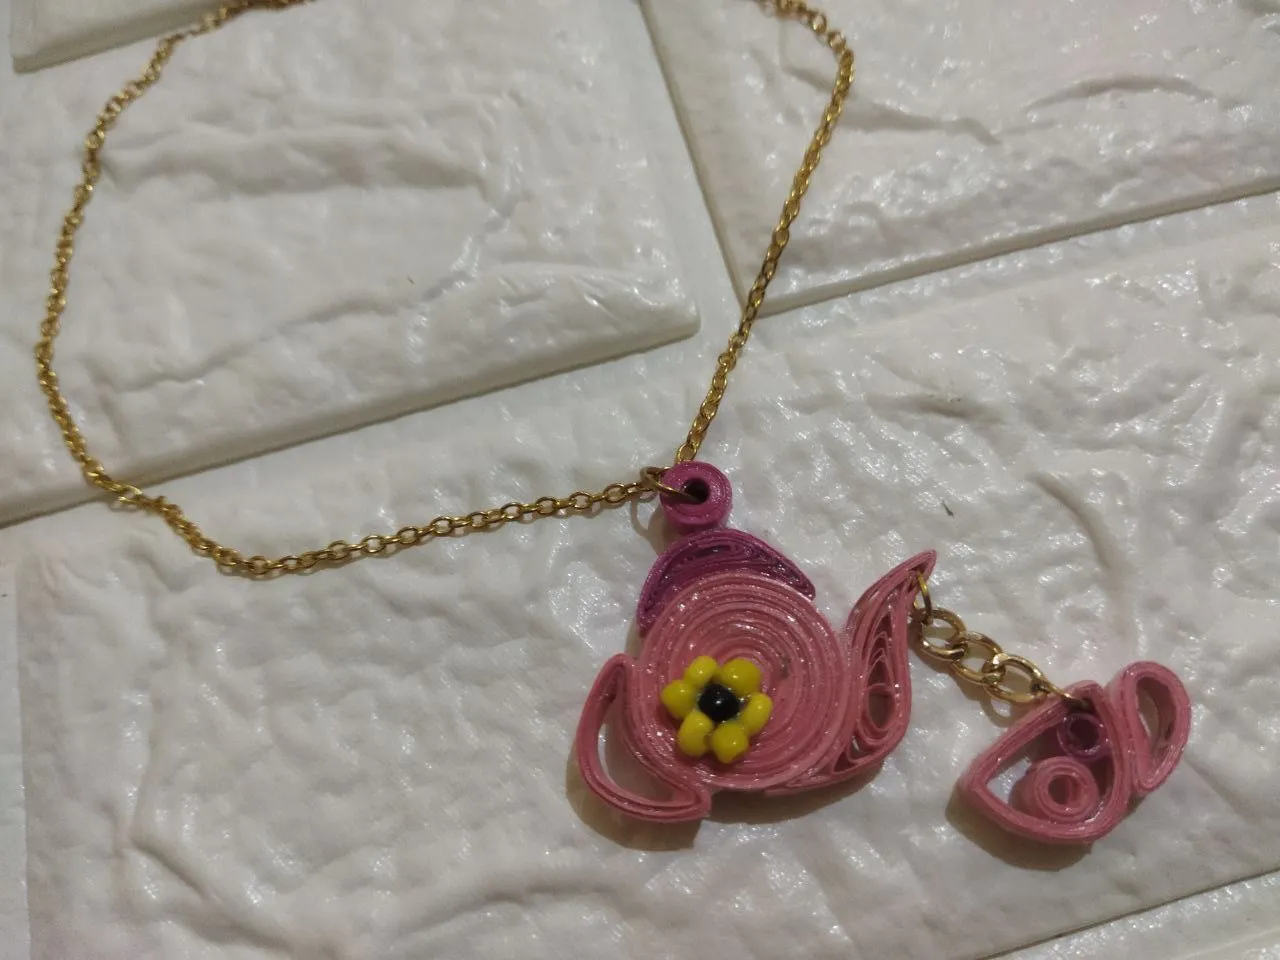
Cuando ambas piezas estaban bien secas y fuertes le coloque un aro delgado al pico de la tetera y otro a la taza y por medio de ellos uní ambas piezas con una cadena delgada de 3 eslabones, que simula el té saliendo de la tetera y cayendo dentro de la taza
When both pieces were dry and strong I attached a thin ring to the spout of the teapot and another to the cup and through them I joined both pieces with a thin 3-link chain, which simulates the tea coming out of the teapot and falling into the cup.
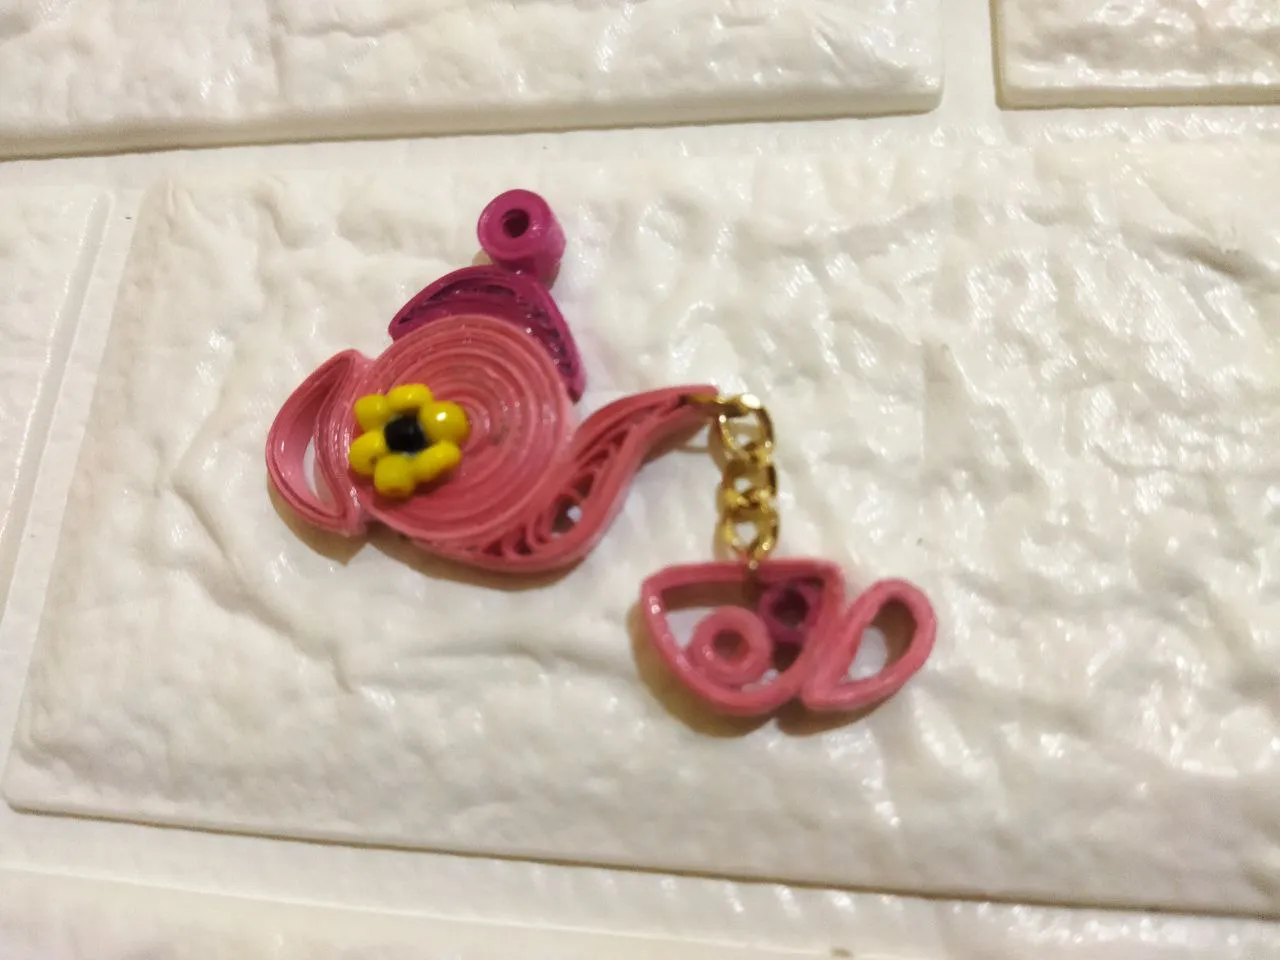
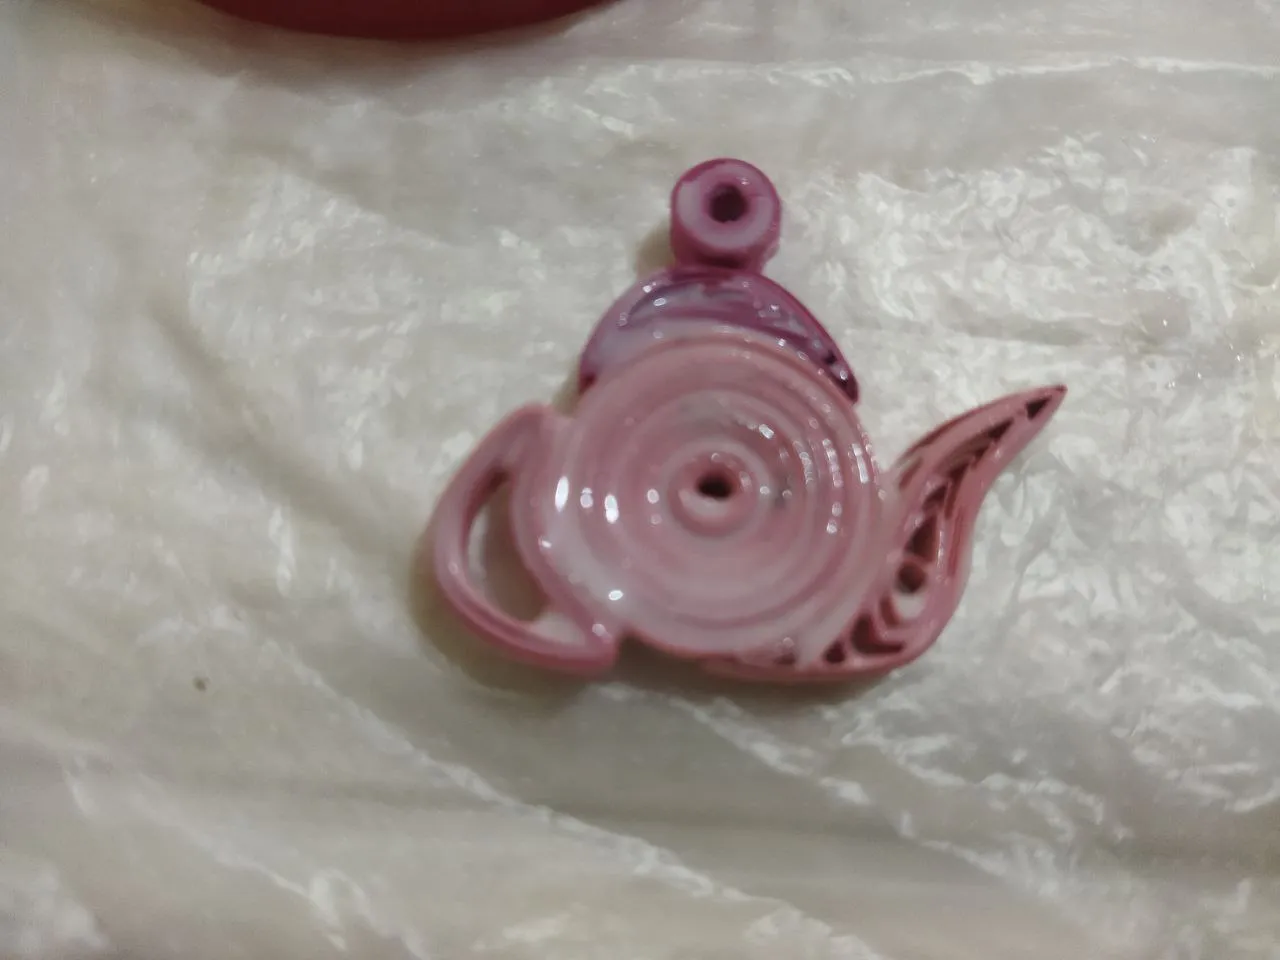
¡Listo! de esta manera terminamos este hermoso proyecto del mes como es un hermoso dije en forma de tetera con una taza, que ademas de encantar me hizo recordar mi niñez, utilizando la técnica filigrana. Espero les guste y animen a realizarlo.
Nos vemos muy pronto para compartir creativas ideas
That's it! this way we finish this beautiful project of the month as it is a beautiful pendant in the shape of a teapot with a cup, which in addition to enchanting made me remember my childhood, using the filigree technique. I hope you like it and encourage you to make it.
See you soon to share creative ideas


| Pueden seguirme en 💙: | You can follow me on 💙: |
|---|---|
| eveyese1312 | |
| Discord | eveyese1312#6211 |
Las fotos y el contenido son de mi autoria tomadas con mi teléfono POCO M3
Imágenes editadas en PowerPoint Canva y PicMonkey
Para la traducción usé el traductor: DeepL
The photos and content are my own.
Images edited in PowerPoint Canva and PicMonkey
For the translation, I used the translator: DeepL