Hello everyone, and to my lovely DIY friends, it's awesome to be back here again with my latest bead project.
This is one of the least complicated beadwork projects I have done. Although it took me around five hours, the steps are not that complicated compared to my previous work.
Last week, a client wanted me to bead a mini square bag for her daughter, which I happily said yes to, hehe. So come with me and let me show you the whole process. As always, I hope that you enjoy it.
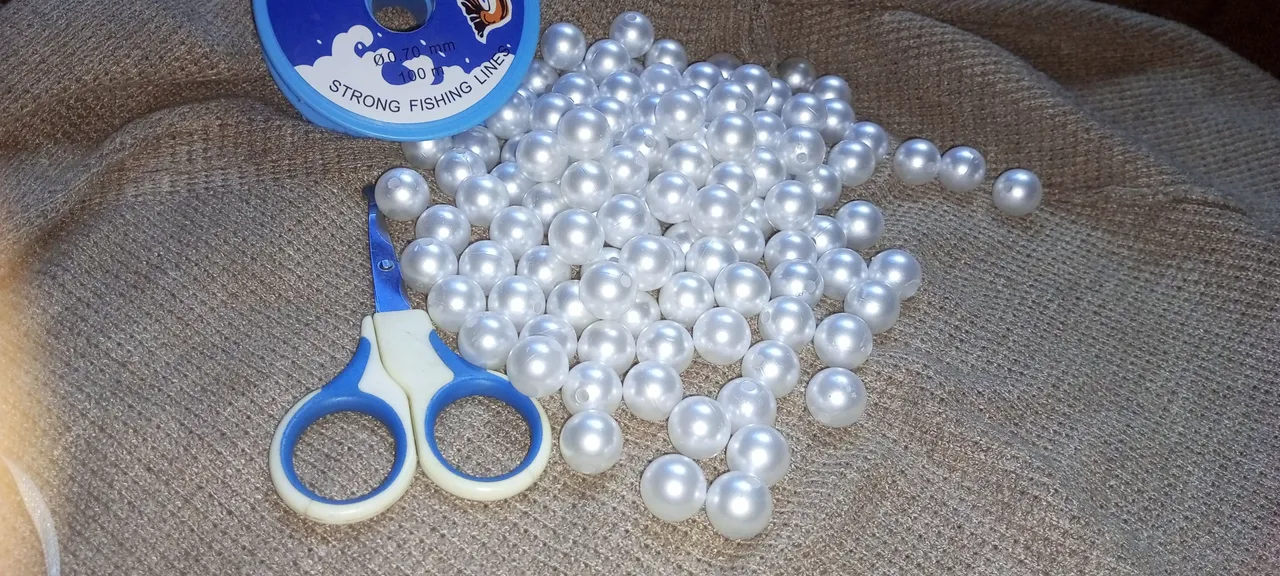
First things first, here are the materials needed for the bag.
A quarter of a size 14 pearl beads pack, 0.7 fishing line, and a pair of scissors.
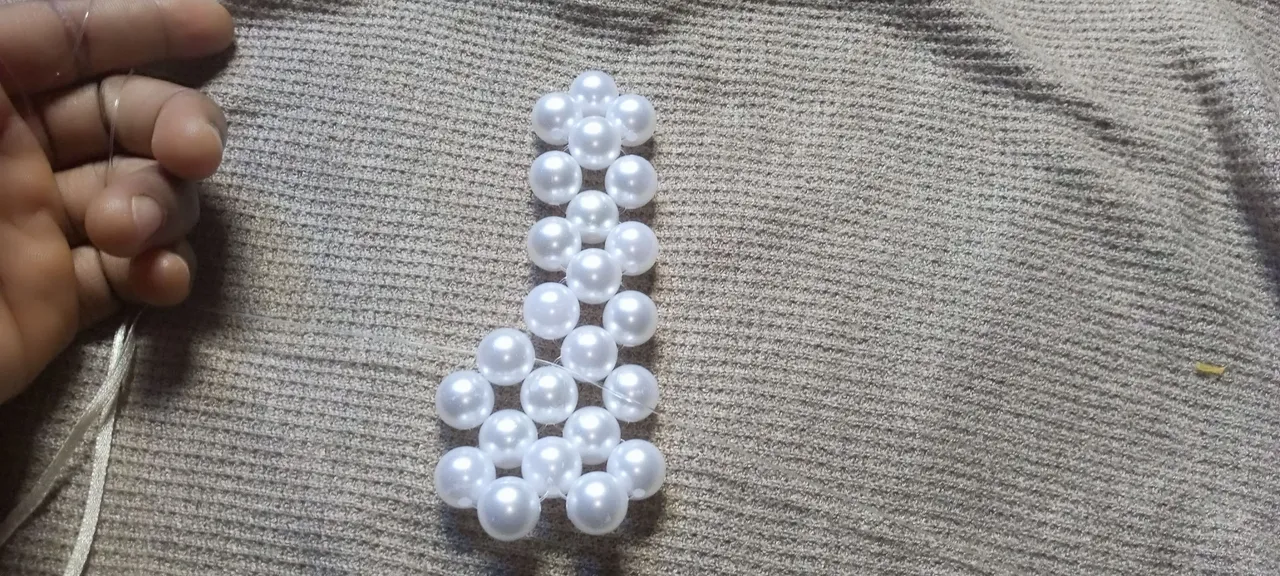
Step 1:
I put four beads on a 200 cm fishing line, then crossed both sides with the fourth bead.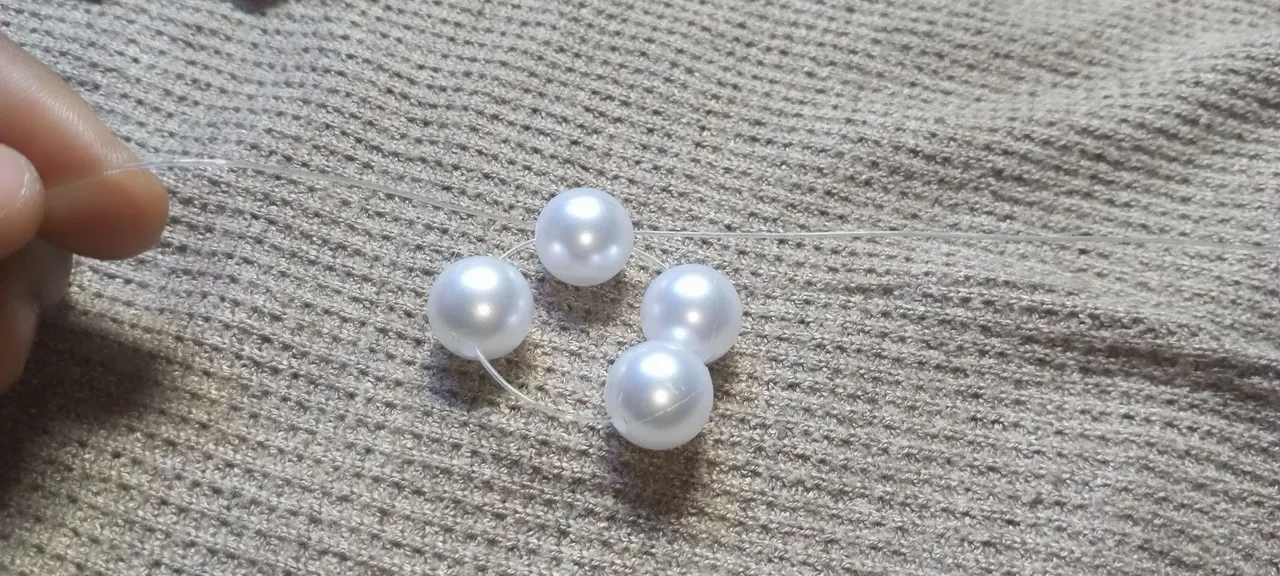
Step 2:
I put one bead on the right side, one bead on the left side, and use one bead to cross both sides.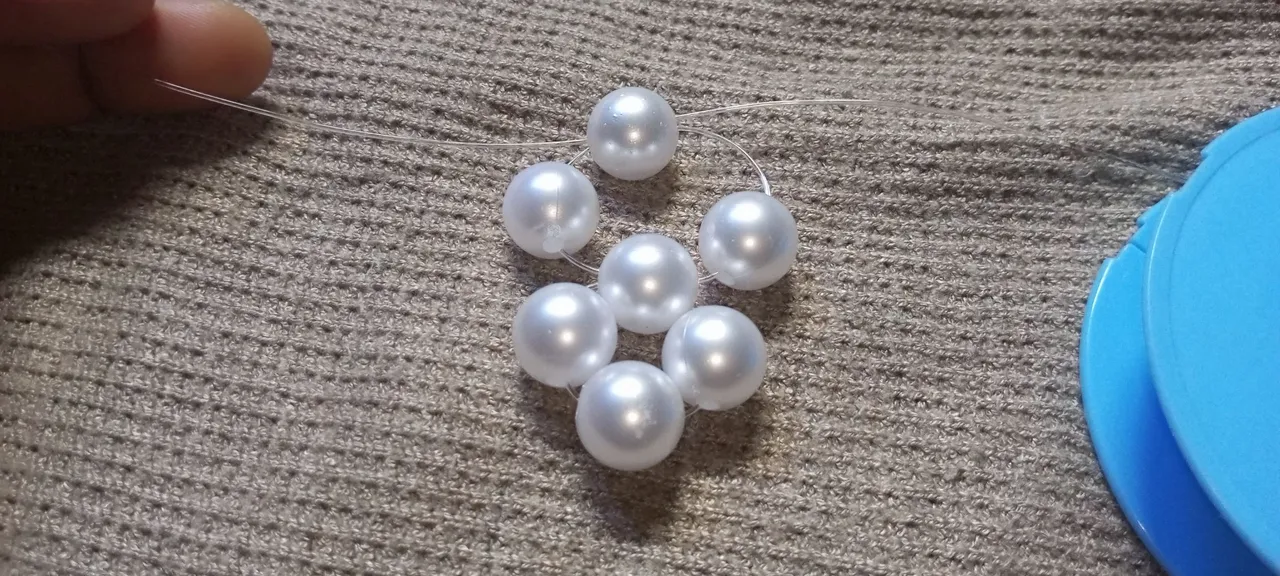
Step 3:
I continue to repeat step 2 above until I have five rings of beads.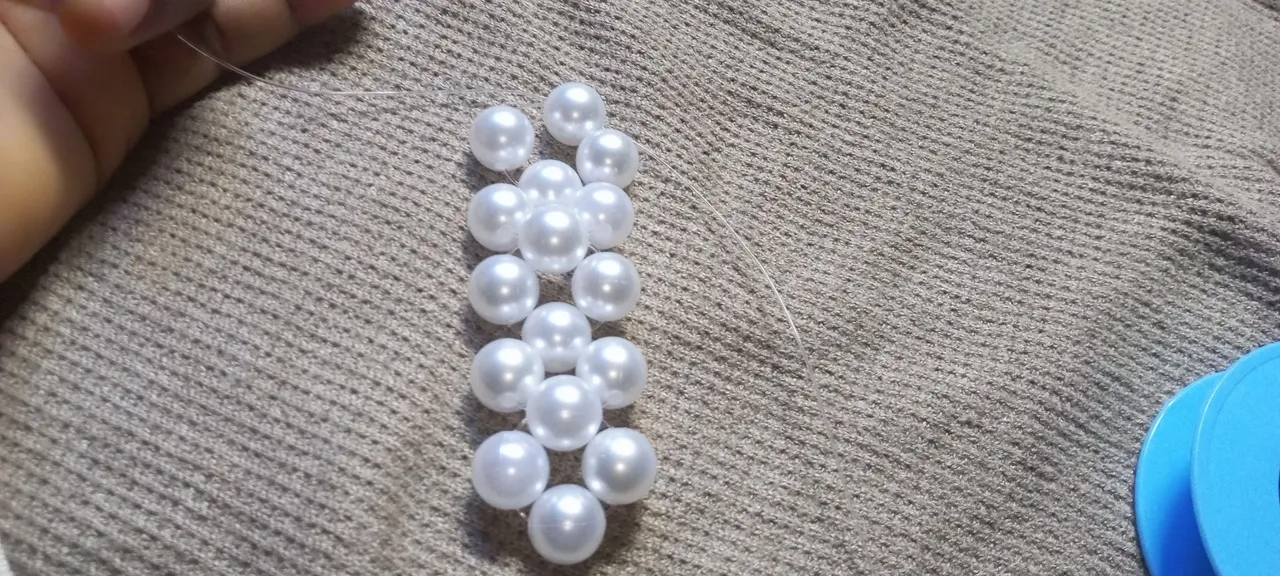
Step 4:
To turn the line, I put two beads on the left side and crossed both sides with the third bead.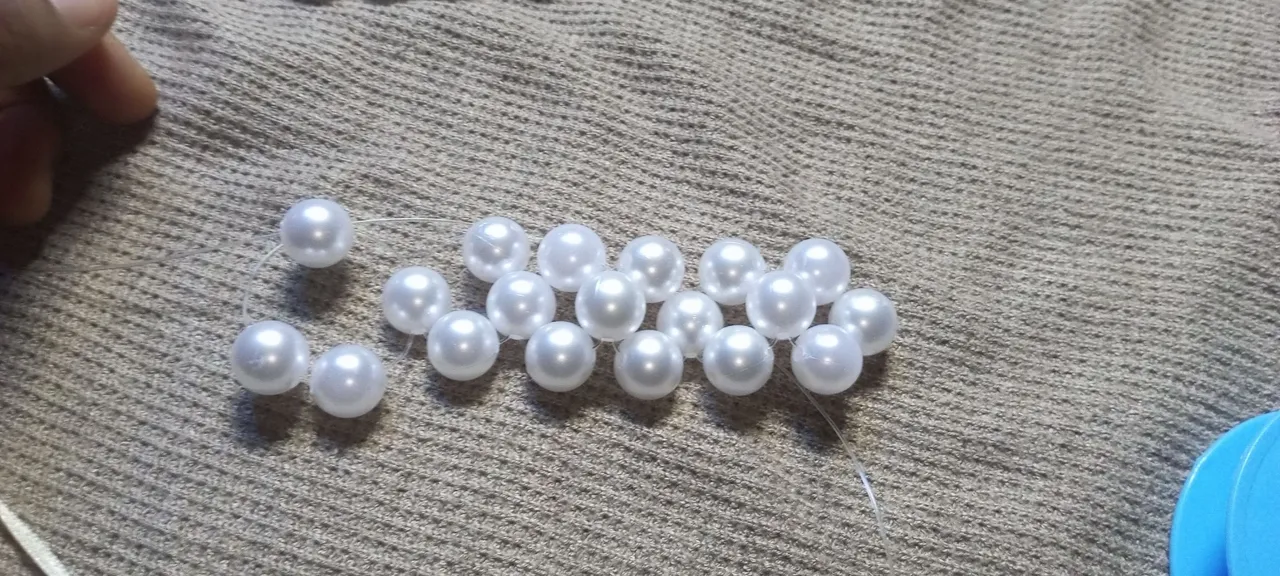
Step 5:
I started a new row by putting three beads on the left fishing line and crossing both sides with the third bead.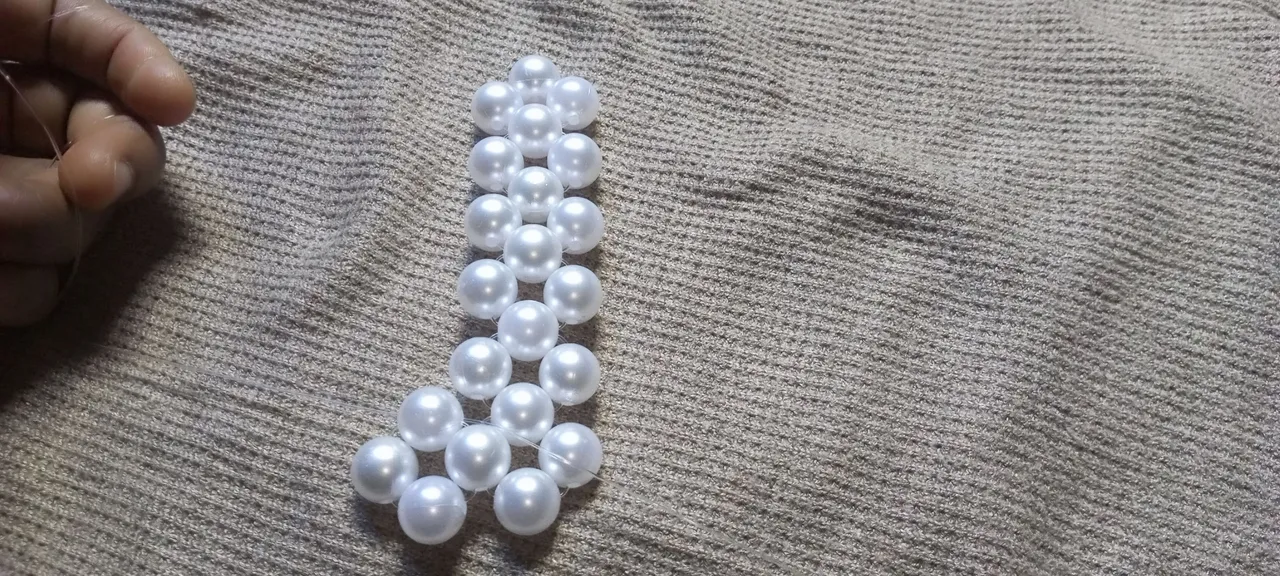
Step 6:
I put two beads on the left fishing line, then crossed both sides with the second bead.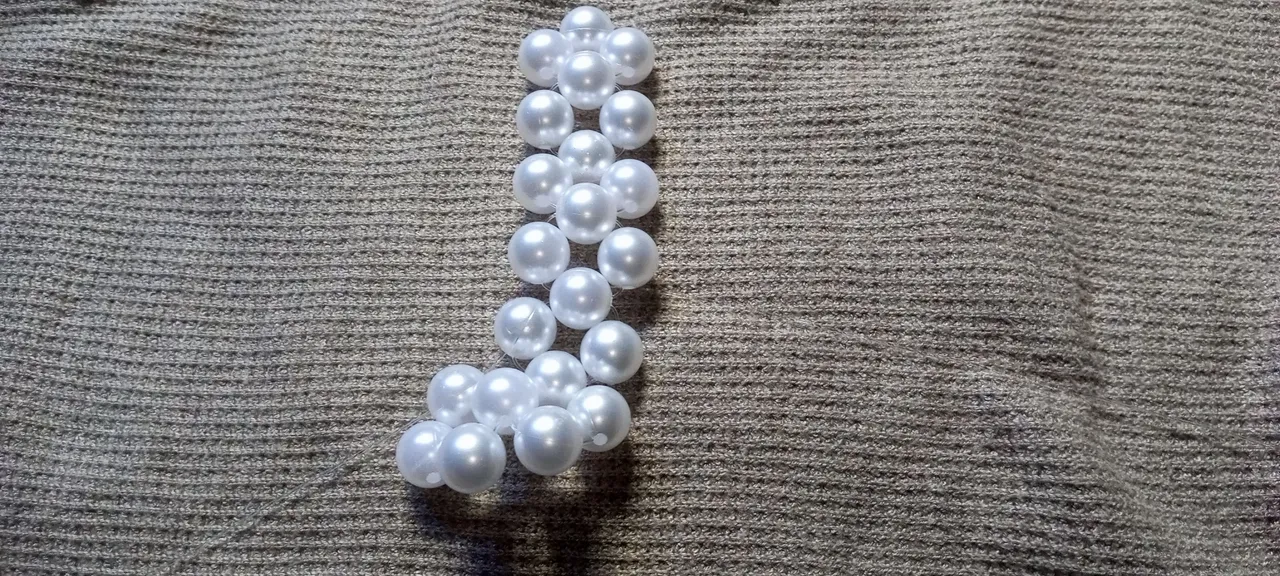
Step 7:
I repeated step 6 above four more times to complete this row. And now I have two rows down out of ten rows.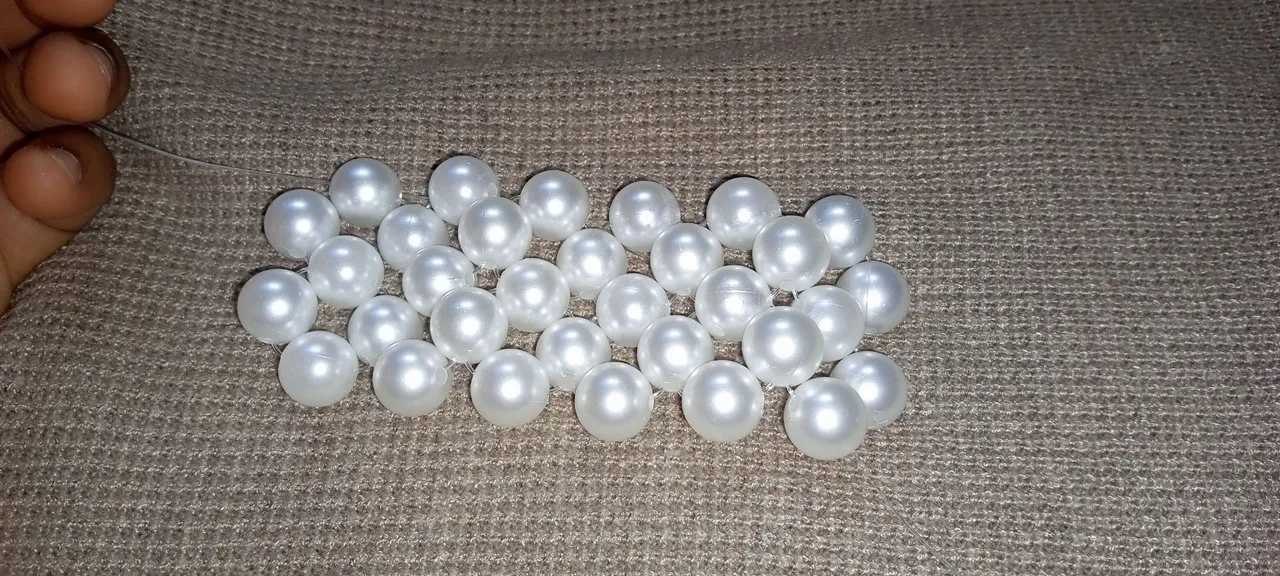
Step 8:
I continue to repeat steps 1 to 7 above until I have ten rows of beads. Completing the ten rows, this is where most of the hours were spent.
Step 9:
I folded the ten rows of beads above into two and then joined the two sides with five beads each. 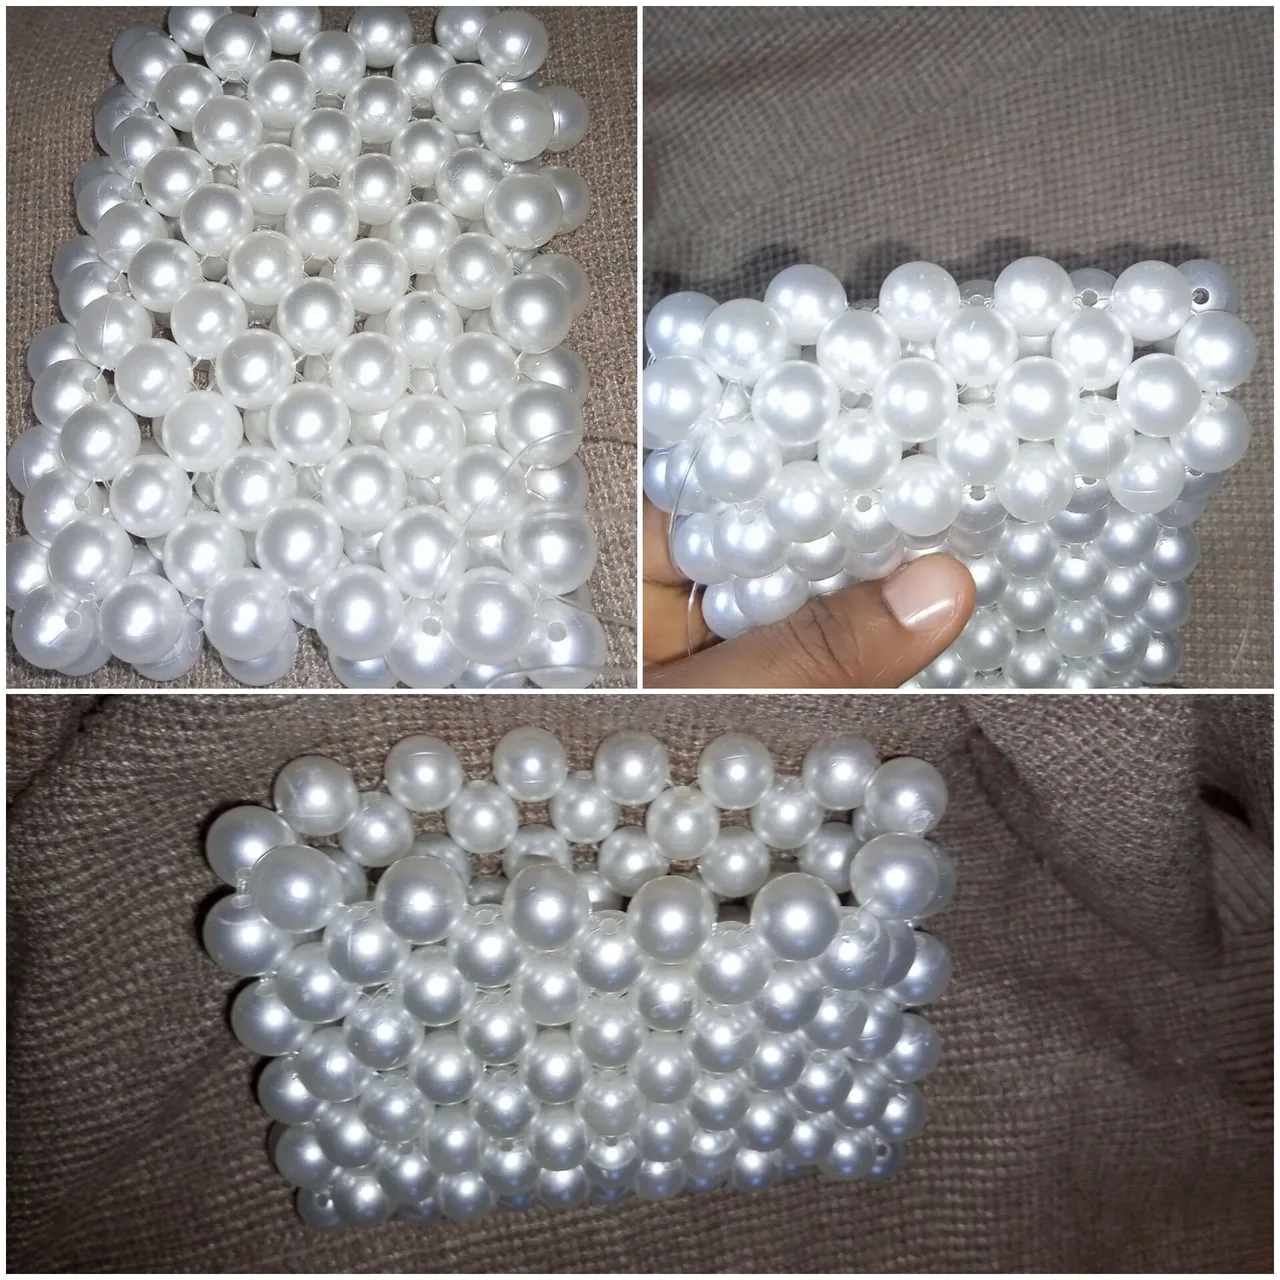
Step 10:
From step 9 above, I tied the knots, passed around the excess fishing lines, and trimmed them off. Then I cut a new fishing line and add 14 beads to form the hand of the bag.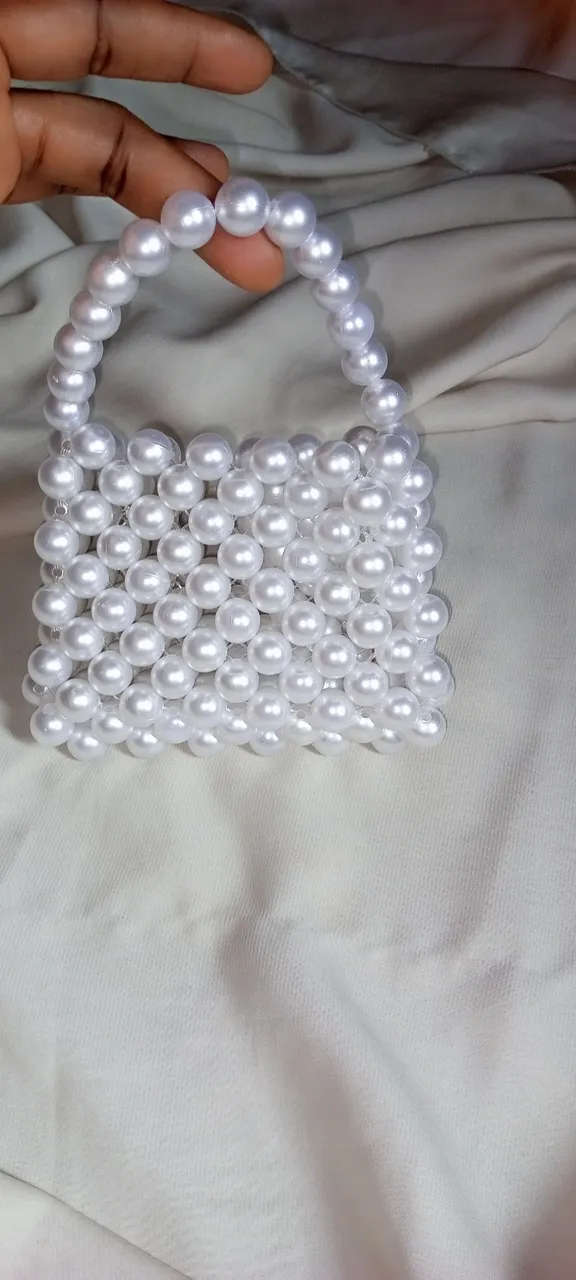
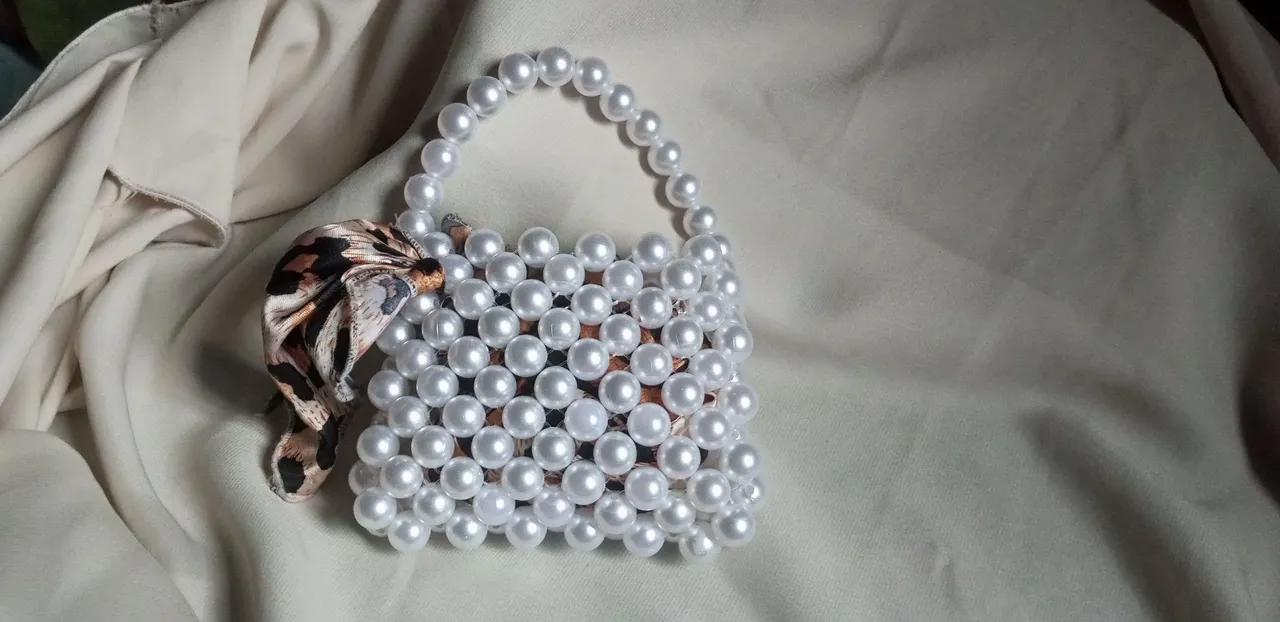
And our mini square pearl bag is ready to be rocked. What do you think? Simple to make, beautiful end result. 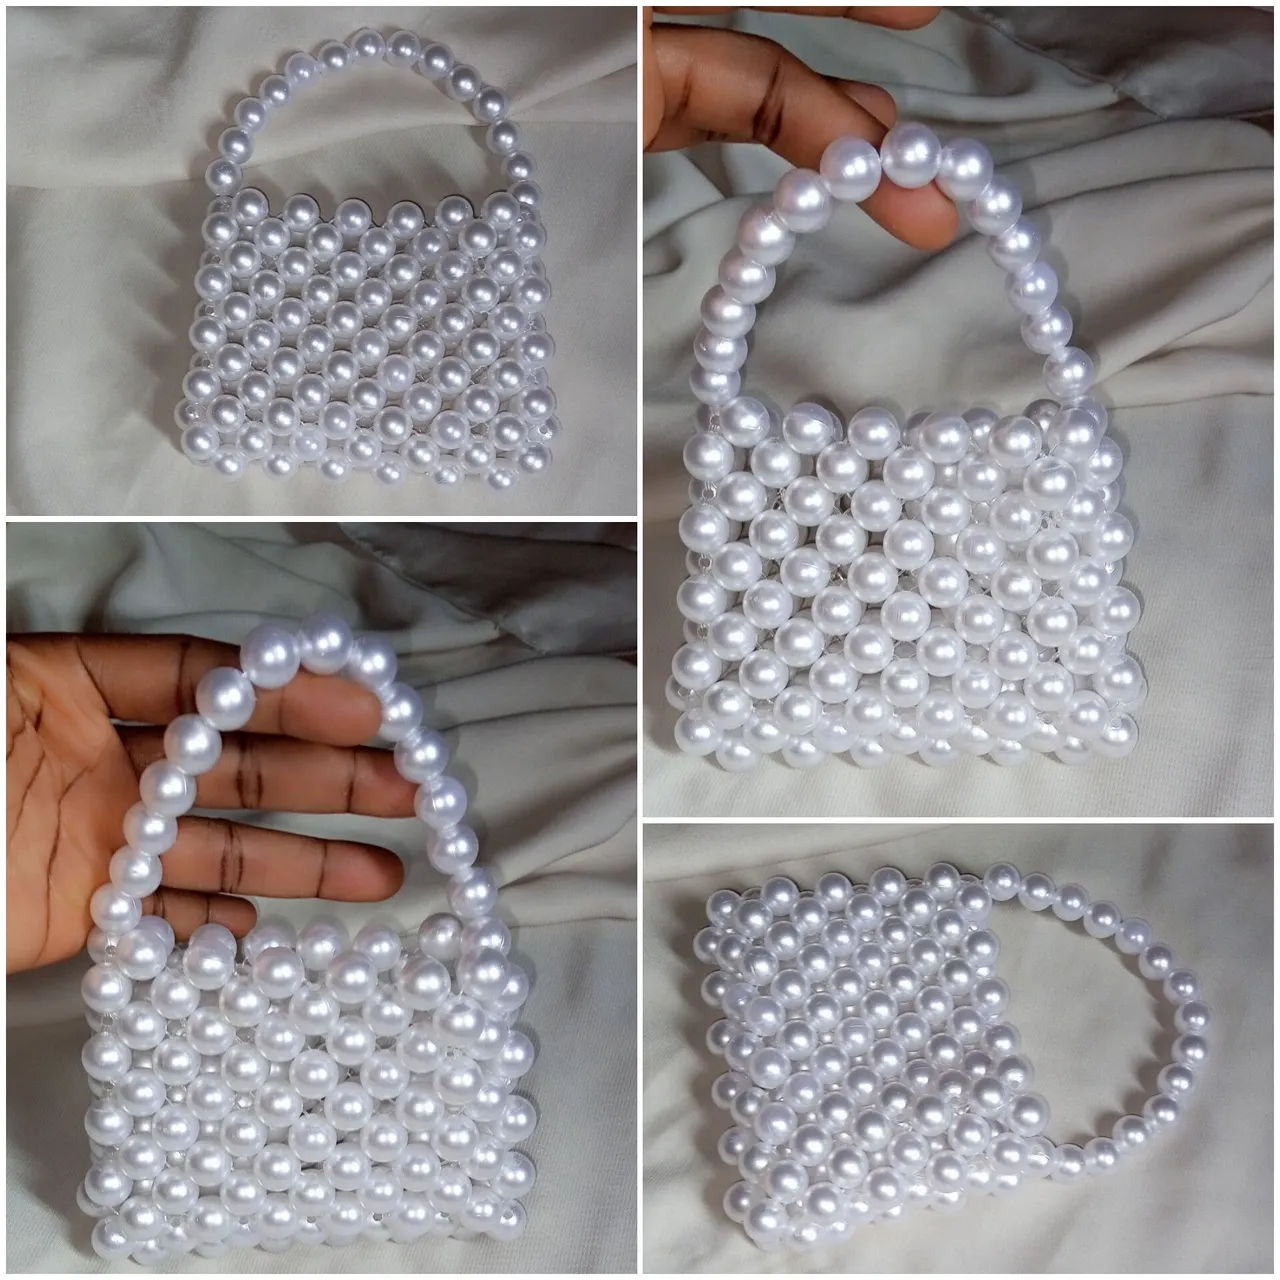
Made with plenty of love ❣️❣️❣️❣️
Thank you so much for your time and support; do have a lovely time on your end.