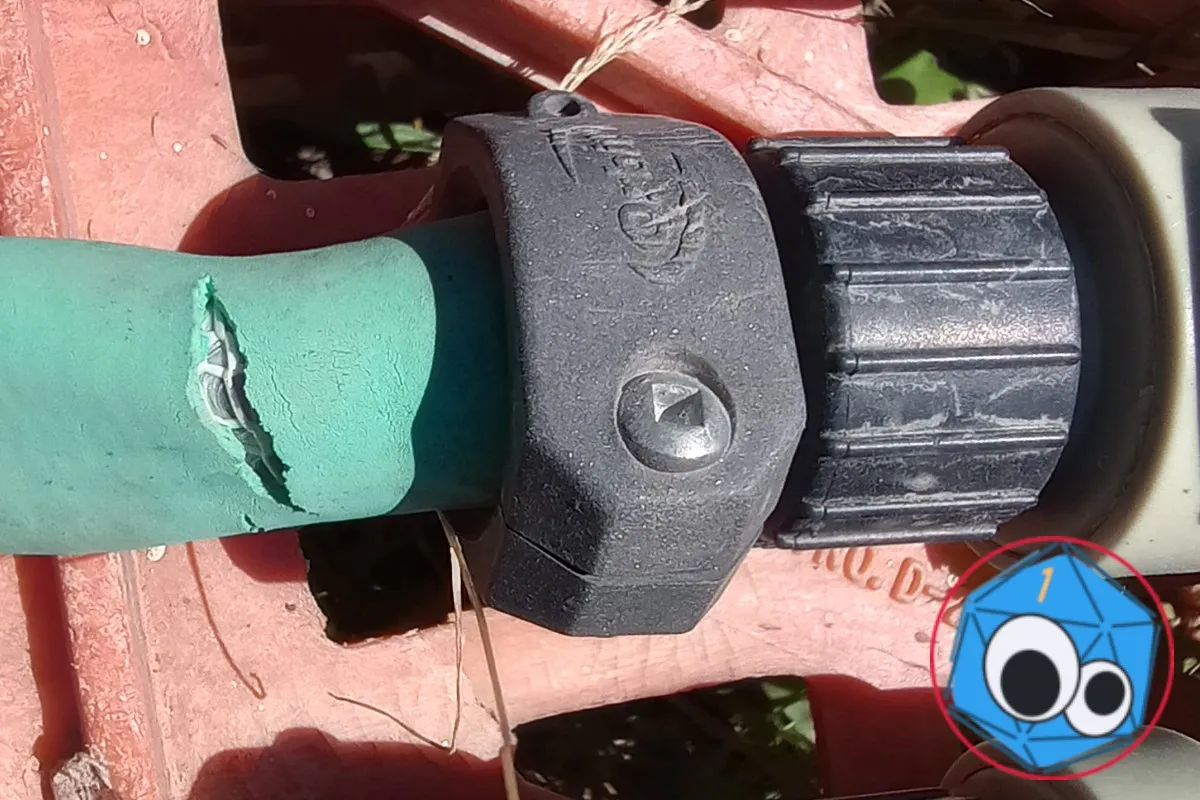
The Mother Thing has a problem: old garden hoses are deteriorating. However, shorter hose lengths work well for parts of her irrigation plan, and there's no reason to go out and buy an entire new length of hose if the damage can be repaired. This particular hose had already been cut down in the past and had a replacement coupling already installed.
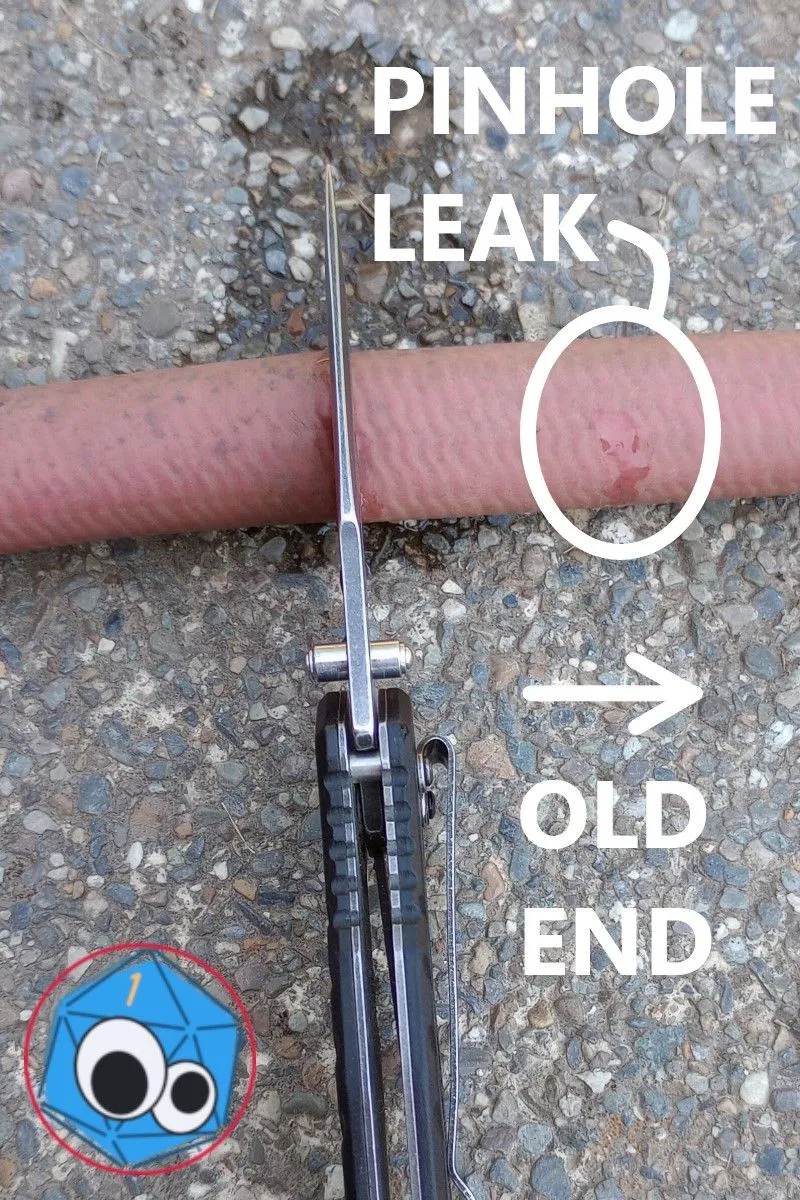
Anyhow, I noticed this old hose sprang another leak. Well, more than one. First, I noticed the hose swell near the fitting, so I turned off the water and trimmed it down. Easy-peasy. But then I noticed another leak, a tiny pinhole, and that's when I got very angry and said some bad words I realized this kind of issue probably affected other people, and maybe even warranted a helpful informative post. Time to fix it again, snap some pictures, and explain the process!
Tools & supplies
- Knife
- Screwdriver (Philips #2 here)
- Pipe wrench or adjustable pliers with wide jaws
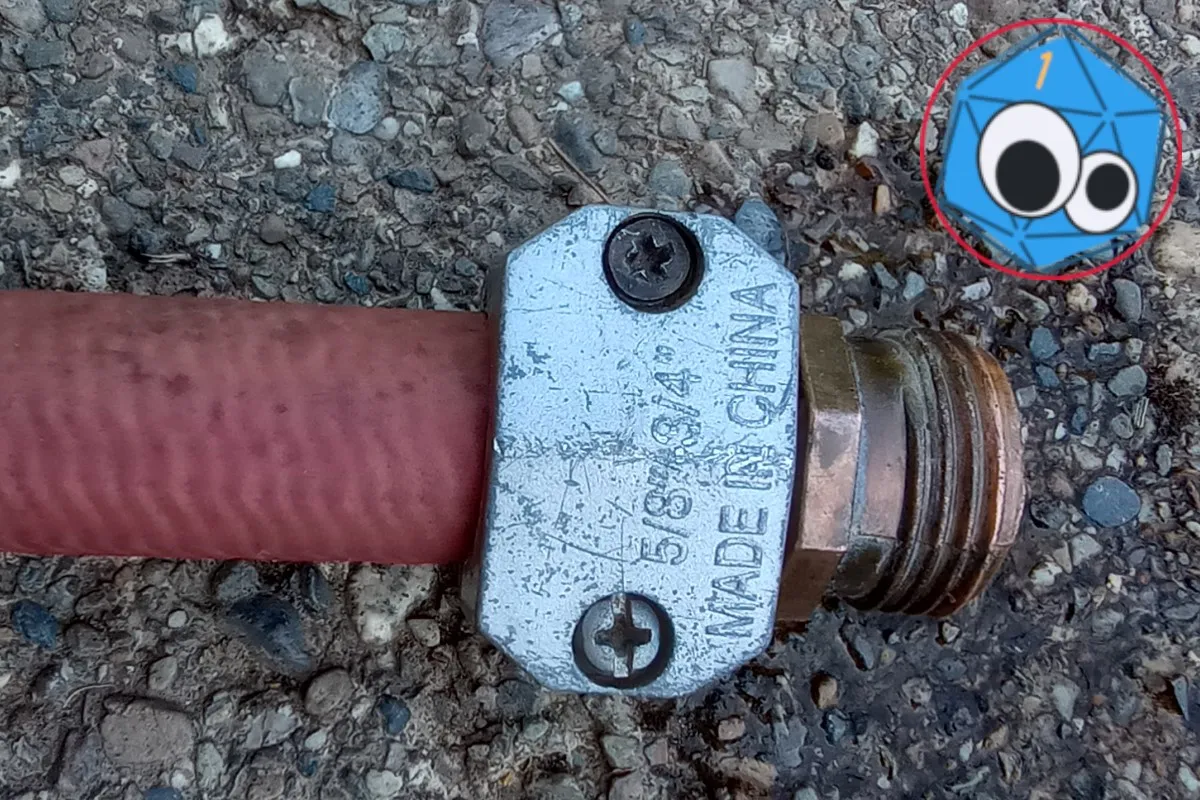
- Replacement hose coupling (Usually sold in a set of male and female fittings)
Hose fittings may come with two clamping halves that screw together, or a basic hose clamp. This is the former. They may be plastic or metal. This is metal, but that isn't necessarily better. Still, it worked well enough before, and I already had the parts to re-use.
Procedure
I used the knife to cut the hose downstream of the leak. This cut needs to be as clean and straight as possible for a good seal with the coupling. I used a cheap pocket knife because I'm a cheapskate and those are the knives I can afford to beat up or lose.

Speaking of the coupling, disregard the mismatched screws. I'm sure this isn't the first time this has been replaced. And no, I don't mean because I already replaced it. I found it this way. If I had to go to the hardware store, I would have bought a new coupling instead of just another screw for this beat-up piece of... well, anyway, here we are.
Inserting the brass piece shouldn't be too difficult. The clamp is what holds everything together.
Speaking of the clamp, this metal one seems designed for a hose with a slightly thinner wall. Oh, well. It wasn't the failure point before. Brute force it is!
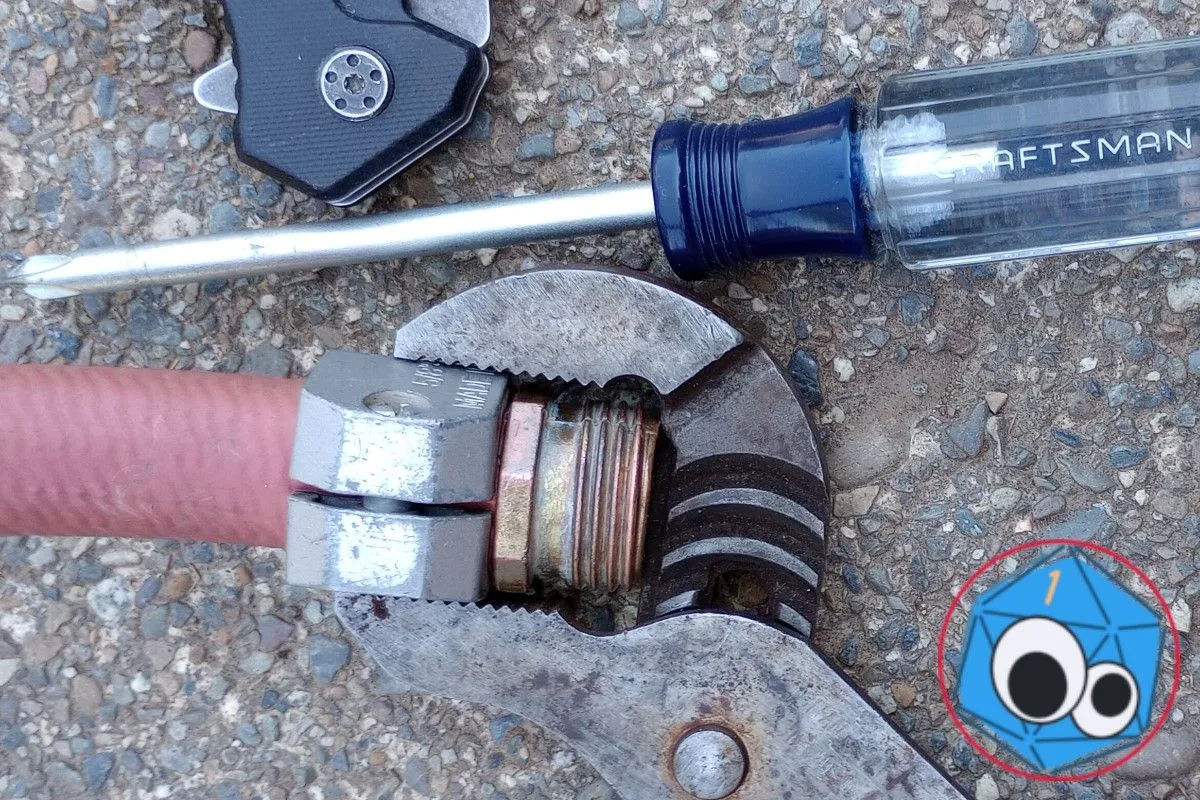
Yeah, this may also be necessary with less-garbage parts. Soaking the end of the hose in hot water may also make it more pliable and help with fit. Besides, I guess these parts can't be too awful considering they keep outlasting the hose. Using pliers or a pipe wrench helps keep the parts aligned as you screw them together even when things fit right, so I'd recommend it anyway.
Everything got put back together and the hose was reinstalled. Everything tested out A-OK.
Then I saw this. I guess it's time to do the job all over again, but this time I need to find a different screwdriver, and more swear words.