¡Bienvenidos a mi blog!
Buenas noches a todos los miembros de esta linda comunidad de #diyhub , espero que se encuentren bien, Dios tome control y dominio de sus vidas.
Hoy ha sido un día lluvioso y sin calor. Aunque no lo crean prefiero la lluvia que el sol. Lo más incómodo es ir a trabajar con lluvia.
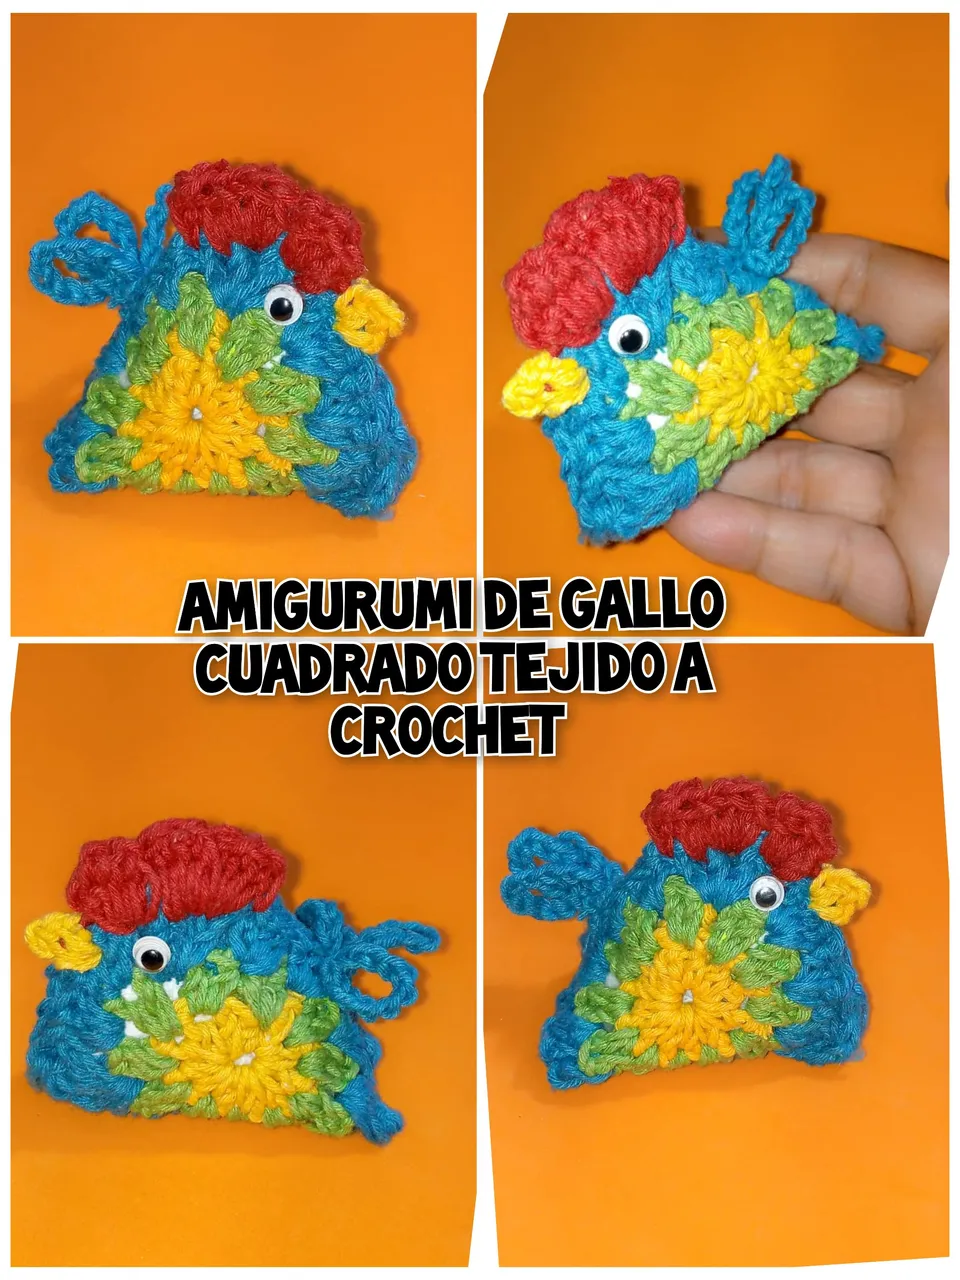
Quiero mostrar a través de un tutorial ,como se hace un Amigurumi de gallo cuadrado, tejido a crochet.
Este Amigurumi sirve para regalar en bautizos, cumpleaños , compartir, a amigos favorito, en fin a quienes deseen es un buen regalo. Pueden utilizarlo como adorno, llavero , para guindar en cartera, bolsos y morrales , entre otros. Así que este un regalo perfecto.
Welcome to my blog!
Good evening to all the members of this nice community of #diyhub , I hope you are well, God take control and mastery of your lives.
Today has been a rainy day with no heat. Believe it or not I prefer the rain than the sun. The most uncomfortable thing is going to work in the rain.
I want to show through a tutorial, how to make a square Amigurumi of a rooster, crocheted.
This Amigurumi can be used as a gift for baptisms, birthdays, to share, to favorite friends, in short, to those who want it is a good gift. You can use it as an ornament, keychain, to hang in wallets, bags and backpacks, among others. So this is a perfect gift.
Hermoso gallo 🐓 tejido a crochet
Beautiful rooster 🐓 crochet knitting
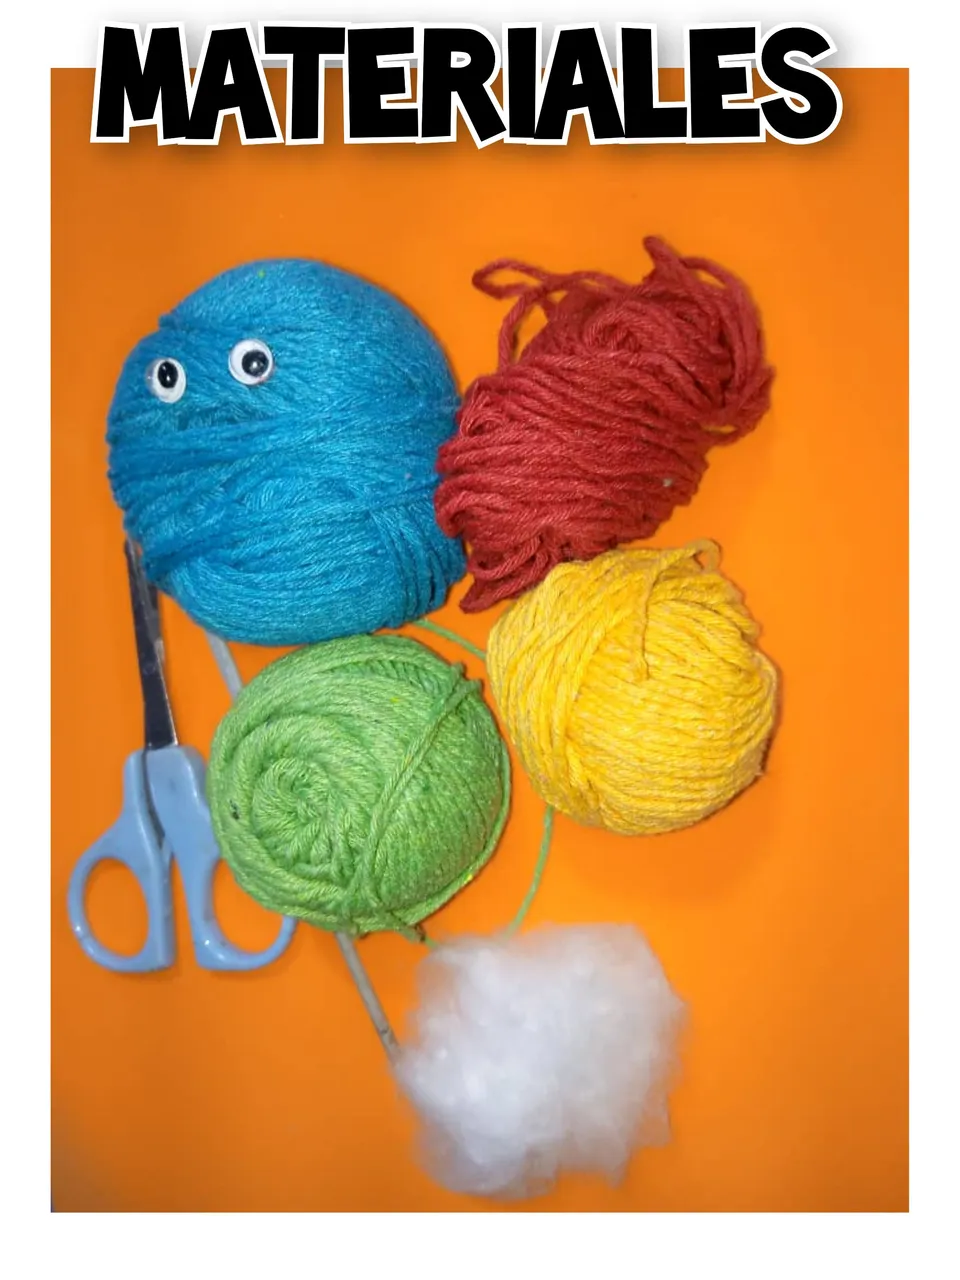
Materiales que se necesitan para la realización del lindo Amigurumi de gallo 🐓 tejido a crochet:
- Hilo de tejer , colores: amarillo, rojo, verde y azul.
- Aguja de tejer ,número 3.
- Silicon líquido.
- Ojos movibles.
- Relleno.
- Tijeras.
Materials needed for the realization of the cute Amigurumi of a crochet-knitted 🐓 rooster:
- Knitting yarn , colors: yellow, red, green and blue.
- Knitting needle, number 3.
- Liquid silicon.
- Movable eyes.
- Stuffing.
- Scissors.
Paso a paso para la realización del Amigurumi de gallo 🐓 :
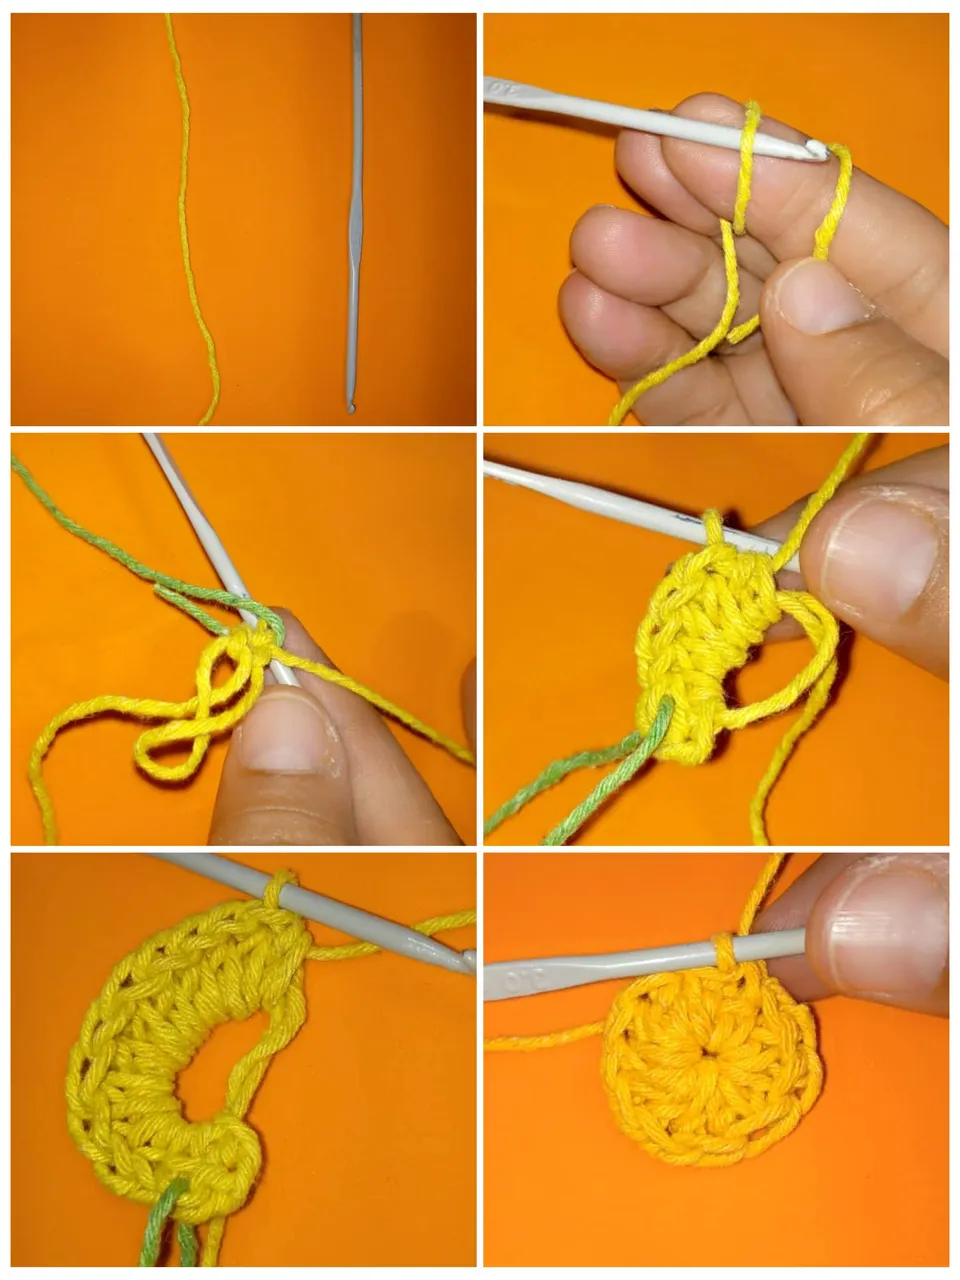
- Tomamos el hilo amarillo con la aguja de tejer, hacer un anillo mágico, levantar dos puntos, luego dentro del anillo meter once puntos medio alto. Para un total de doce puntos medios altos.
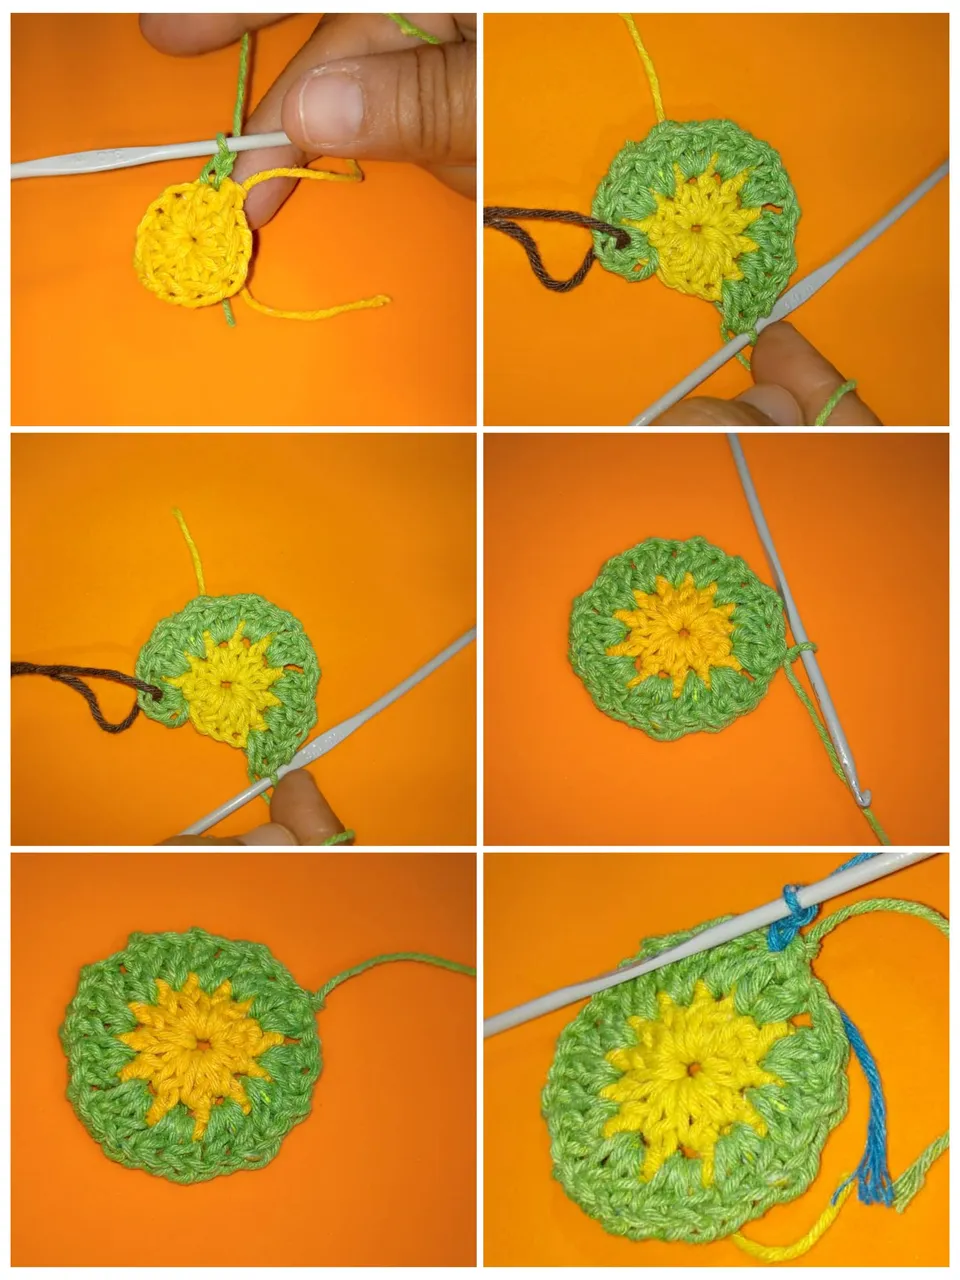
- Cambiar de hilo verde y hacer un aumento de medio punto y una cadena,así va hacer toda la vuelta, aumento y una cadena.
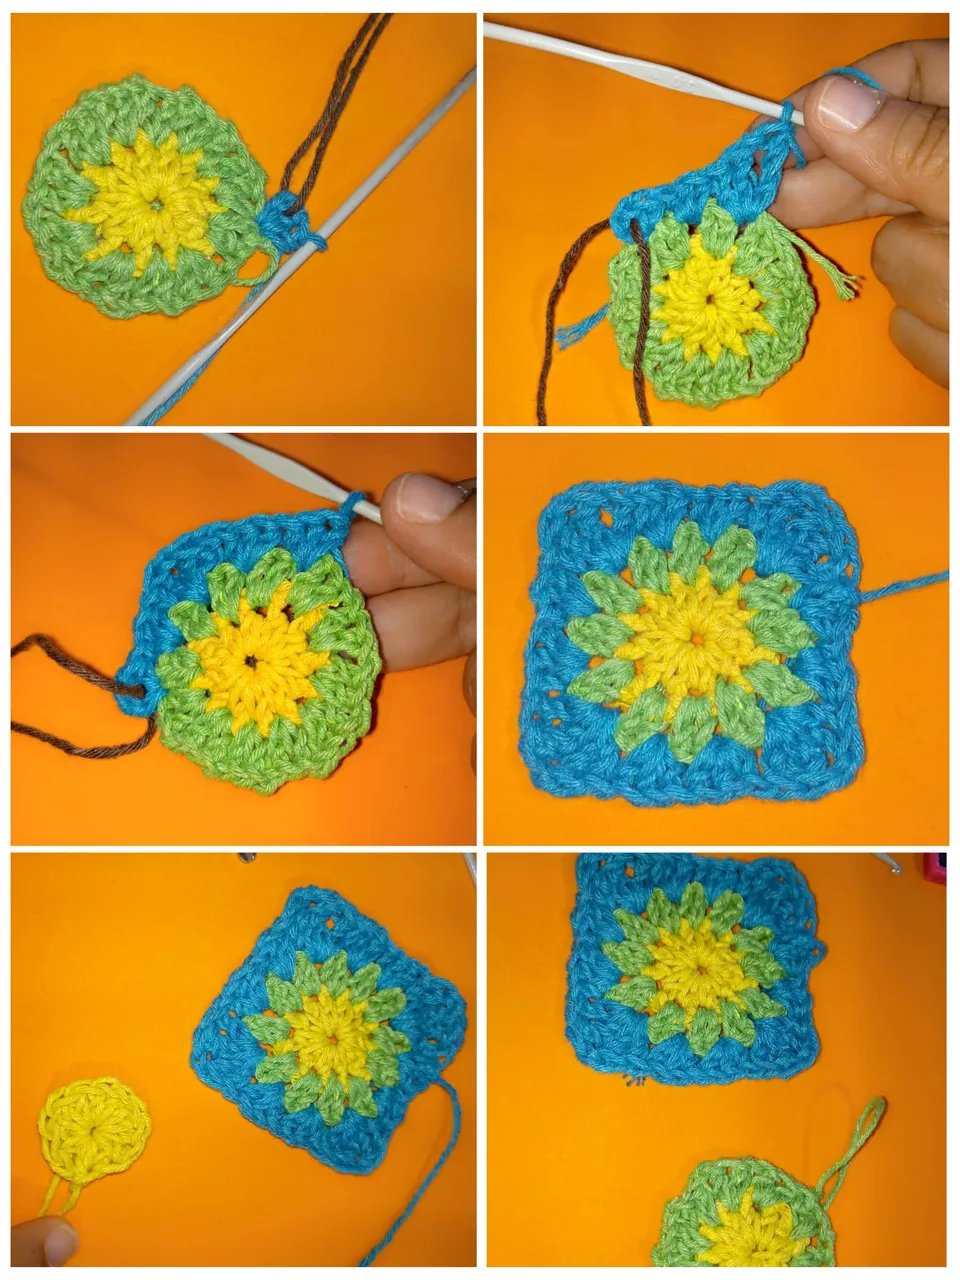
- Cambiar para hilo azul, hacer dos cadenas, luego en el mismo punto meter un punto medio alto. Otro punto medio alto para un total tres puntos medio alto, deja un punto por el medio y en el siguiente punto ,hacen tres puntos medios altos más.
- Luego deja un punto por el medio y en el otro ,hacer un punto alto, en el mismo punto un punto doble, una lazada, un punto doble y un punto alto. Dejando un punto por el medio.Continúa tres puntos medio alto. Otro medio punto alto. Después un punto alto, un punto doble,una lazada un punto doble y uno alto.
- Así van a hacer hasta terminar la vuelta. De esta forma se deben hacer dos.
Step by step for the realization of Amigurumi of rooster 🐓 :
- We take the yellow yarn with the knitting needle, make a magic ring, pick up two stitches, then inside the ring put in eleven half-high stitches. For a total of twelve medium high stitches.
- Change to green yarn and make an increase of half stitch and a chain, so you will make the whole round, increase and a chain.
- Change to blue yarn, make two chains, then in the same stitch enter a half double crochet. Another medium high stitch for a total of three medium high stitches, leave a stitch in the middle and in the next stitch, make three more medium high stitches.
- Then leave a stitch in the middle and in the next stitch, knit a double crochet, a double crochet, a double crochet and a double crochet and a double crochet. Then leave one stitch in the middle and continue with three more half double crochet stitches. Another half double crochet. Then a double crochet, a double crochet, a double crochet, a double crochet and a double crochet.
- This is how you are going to do it until the end of the row. In this way you should make two.
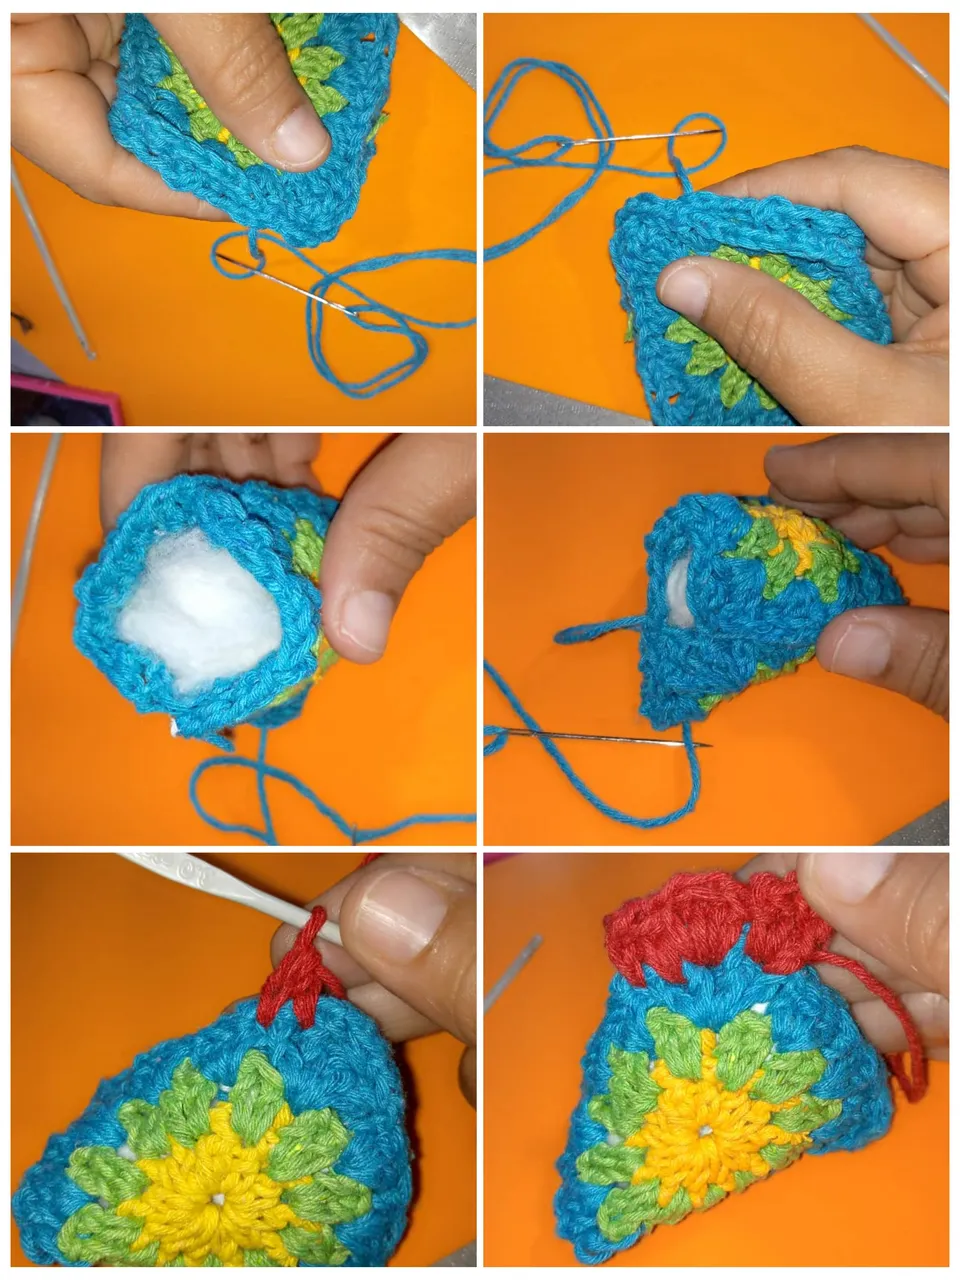
- Teniendo los dos cuadrados ,procedemos a pegar con la aguja lanera ,por lo bordes, dejando un lado que no se debe pegar para meter el relleno. Luego coser el cuadrado completo , pueden ver la imagen para guiarse.
- Ahora colocar la cresta con el color rojo, tomar el hilo rojo y meter por la parte de arriba, hacer un punto alto ,un punto doble, un punto alto,todo estos puntos en un solo punto. Así van a hacer en dos puntos más. Y tenemos la cresta.
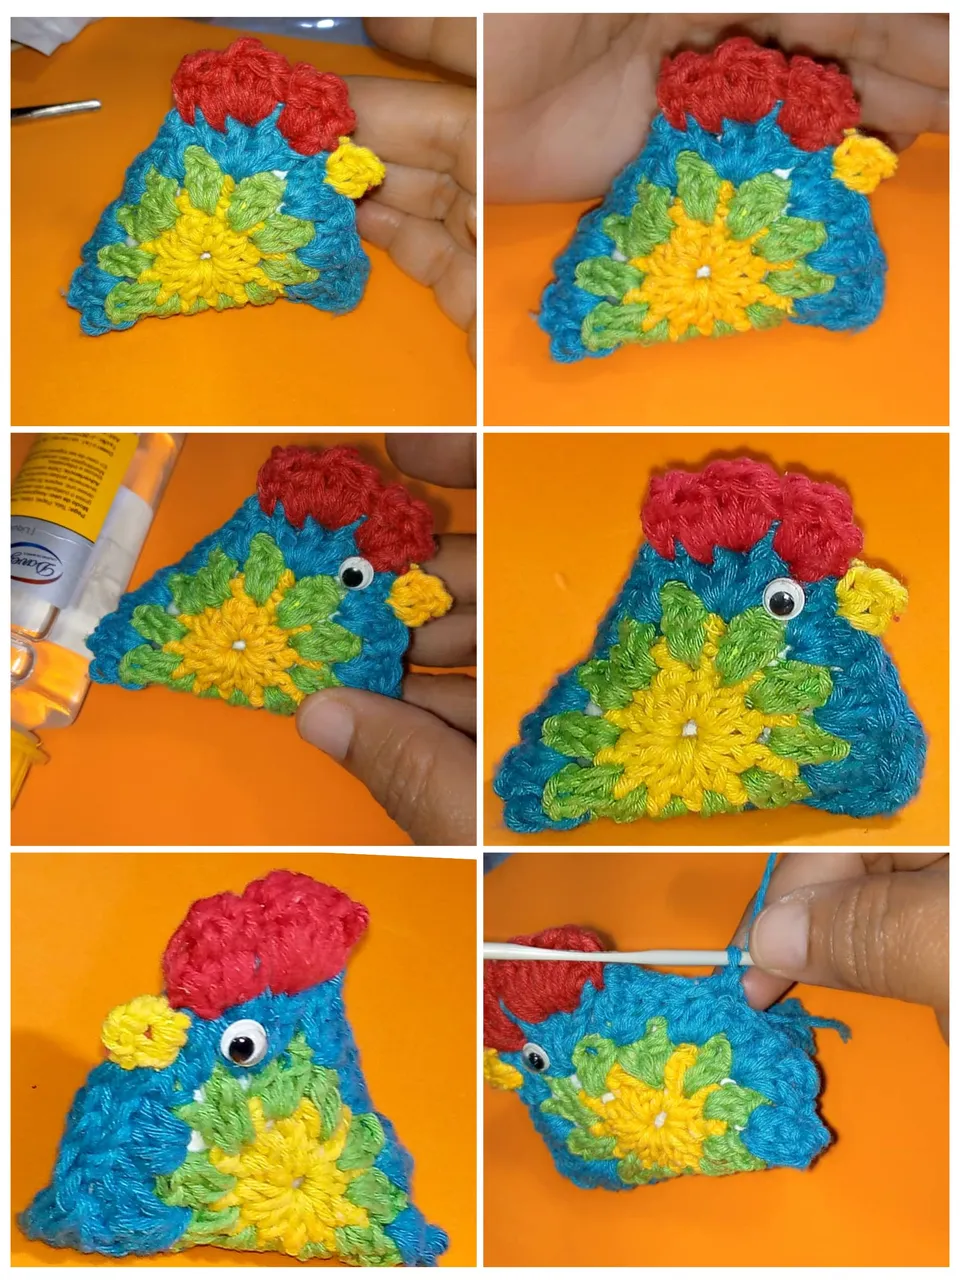
- Ahora el pico, con hilo amarillo, colocar un punto bajo ,una punto alto y un punto bajo en el mismo punto ,ya tenemos el pico.
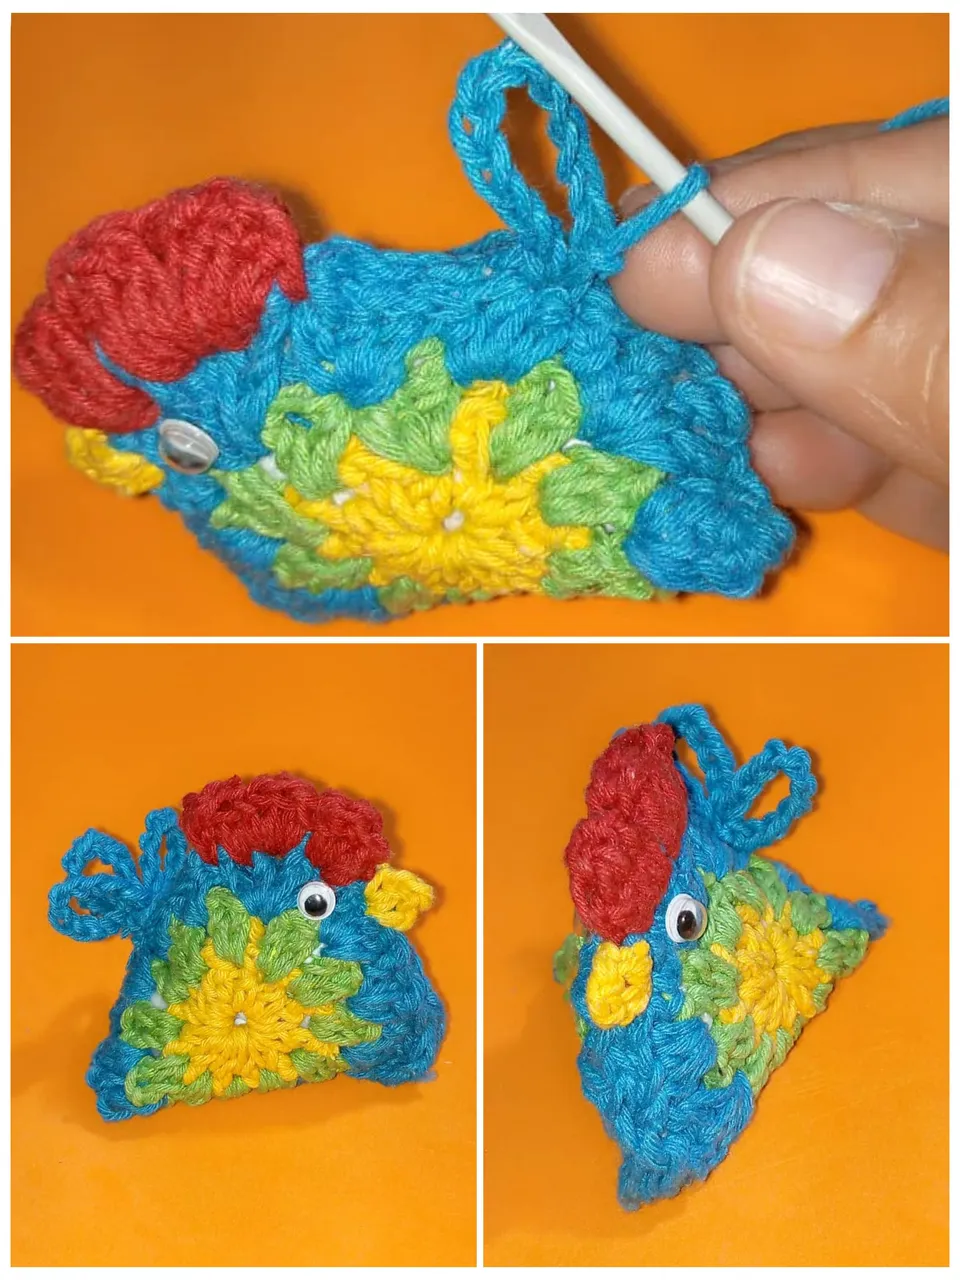
- Y para la cola, el color azul , hacer 10 cadenas y meter en la primera cadena, 10 cadenas más ,volver a meter 10 más ,osea tres cadenas de 10. Y listo , que hermoso quedó el Amigurumi de gallo.
- Por último pegar los ojos con silicona líquido.
- Having the two squares, we proceed to glue with the wool needle, along the edges, leaving a side that should not be glued to put the stuffing. Then sew the whole square, you can see the image to guide you.
- Now place the crest with the red color, take the red thread and put it in the top part, make a double crochet, a double crochet, a double crochet, a single crochet, all these stitches in one stitch. So you are going to do in two more stitches. And we have the ridge.
- Now the beak, with yellow yarn, place a single crochet, a double crochet and a single crochet in the same stitch, we have the beak.
- And for the tail, the blue color, make 10 chains and put in the first chain, 10 more chains, put in 10 more, that is three chains of 10. And ready, how beautiful was the Amigurumi of rooster.
- Finally glue the eyes with liquid silicone.
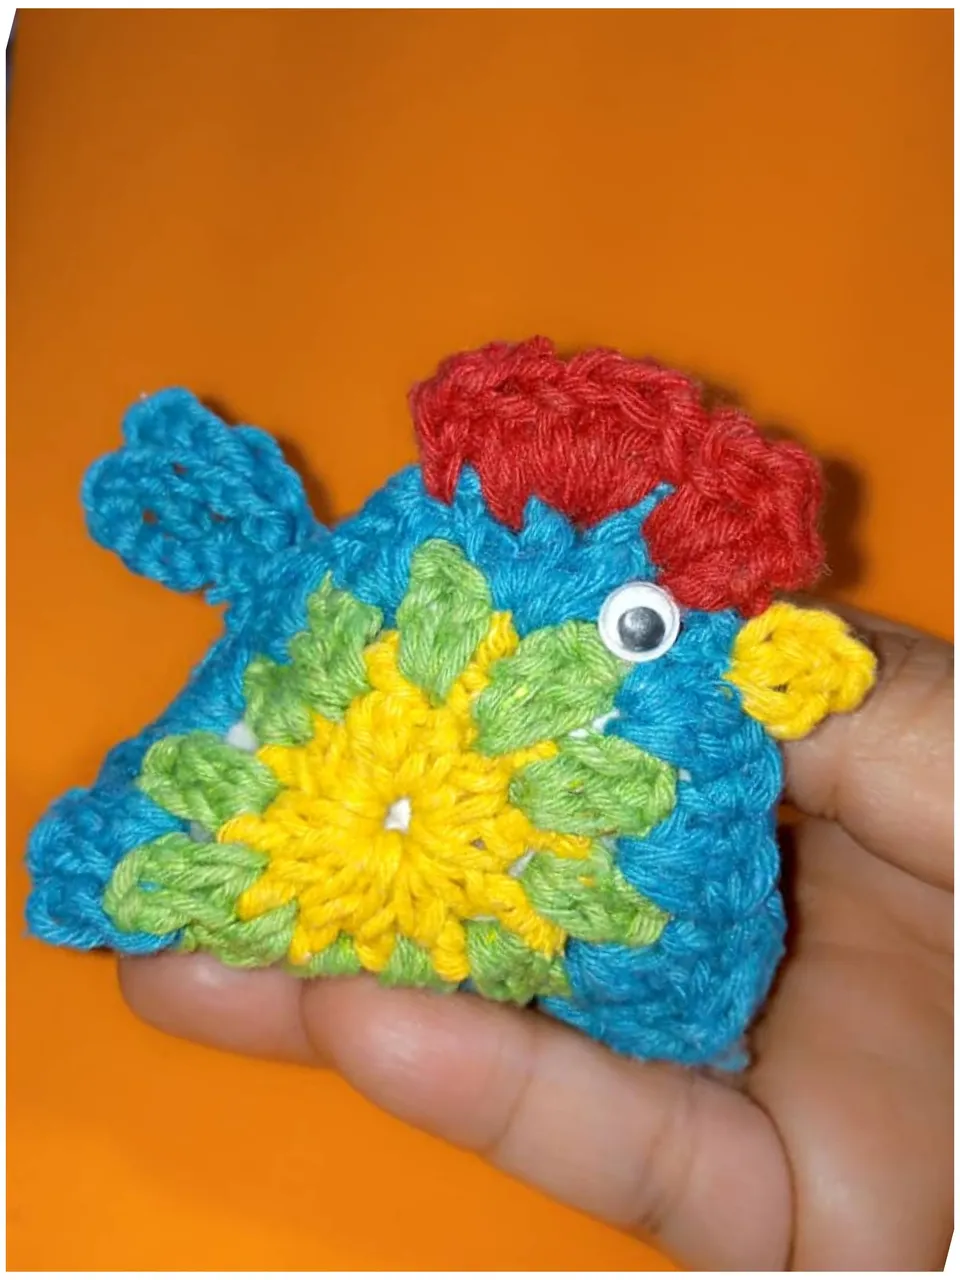
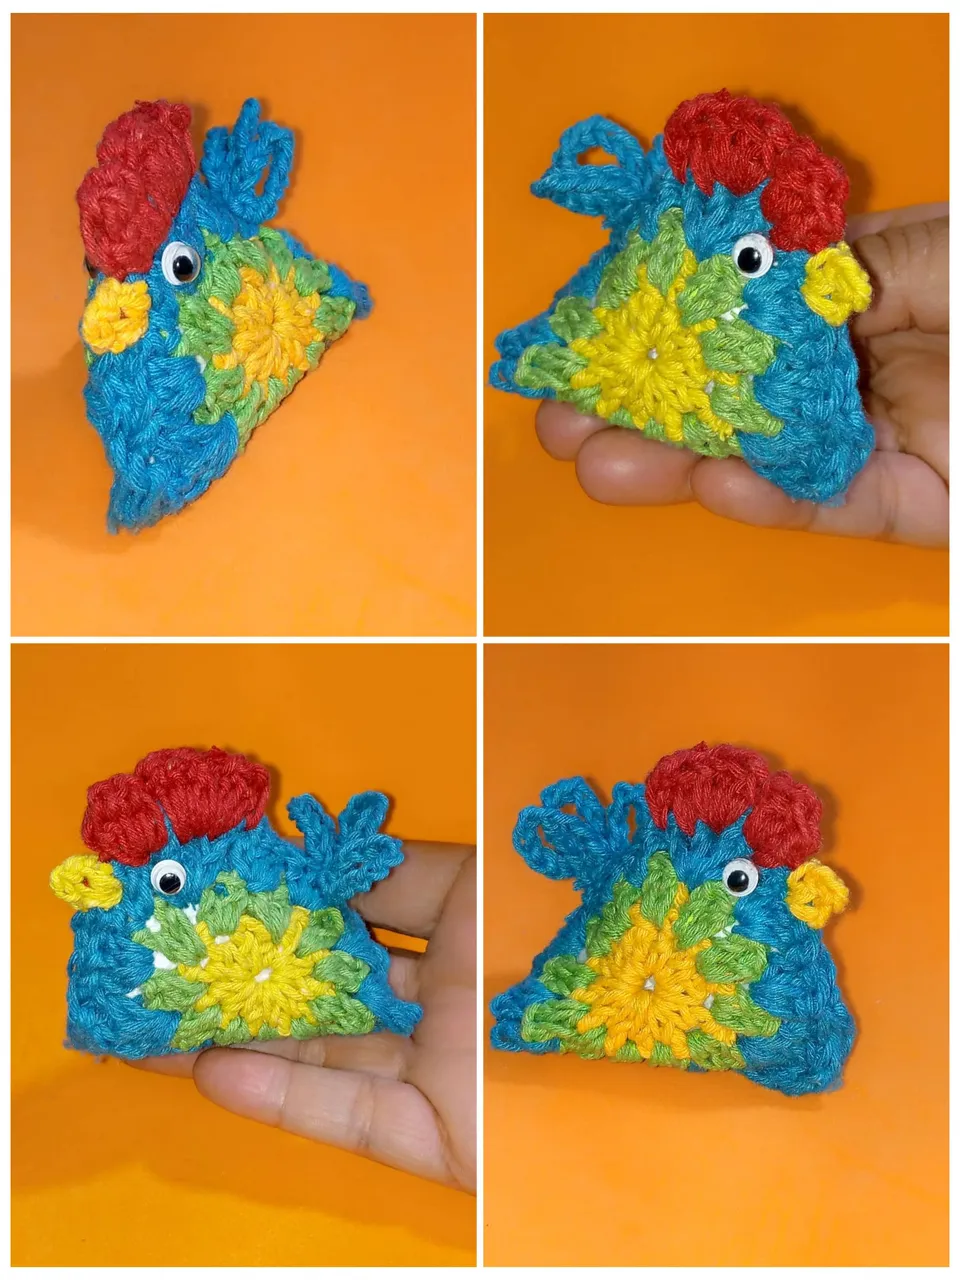
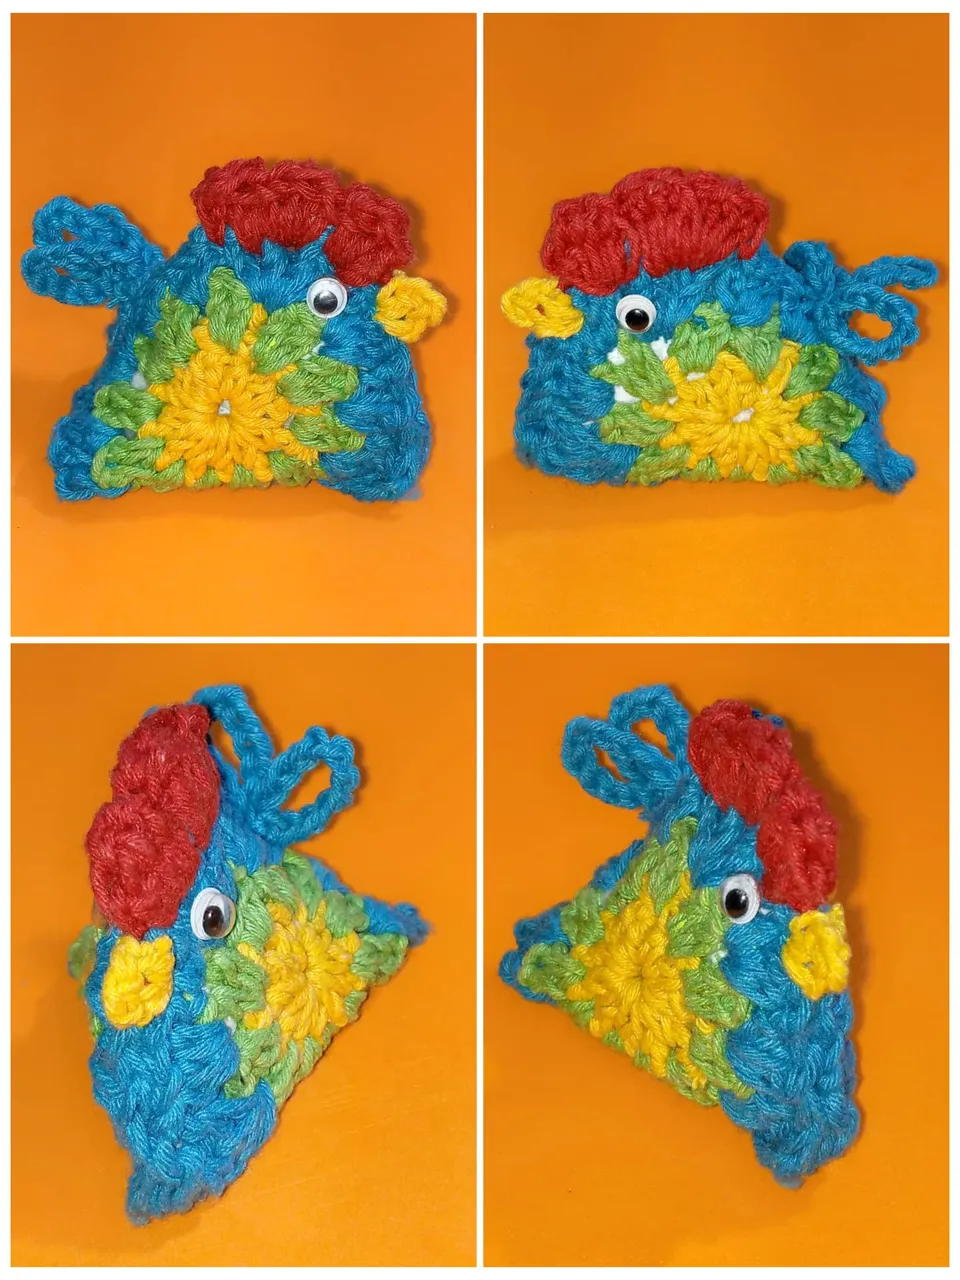
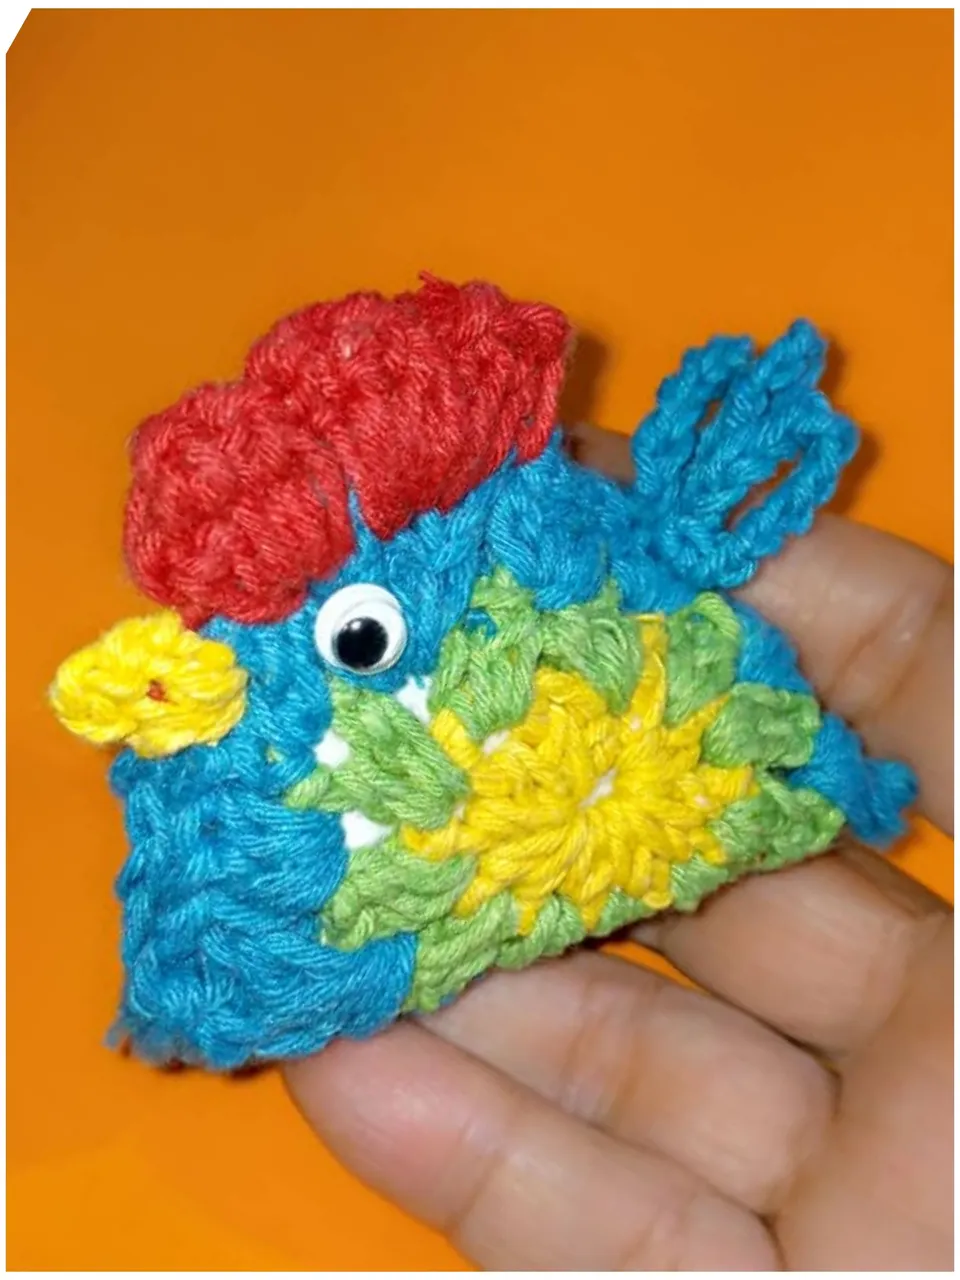
Aquí el resultado final del lindo Amigurumi de gallo tejidos crochet 🐓
Here the final result of the cute Amigurumi of a crocheted rooster 🐓
Gracias por leer y comentar mi post, las fotos son mías, tomadas con teléfono infinix, editadas con incollage y traducidas con Deepl.
Thanks for reading and commenting on my post, the photos are mine, taken with infinix phone, edited with incollage and translated with Deepl.