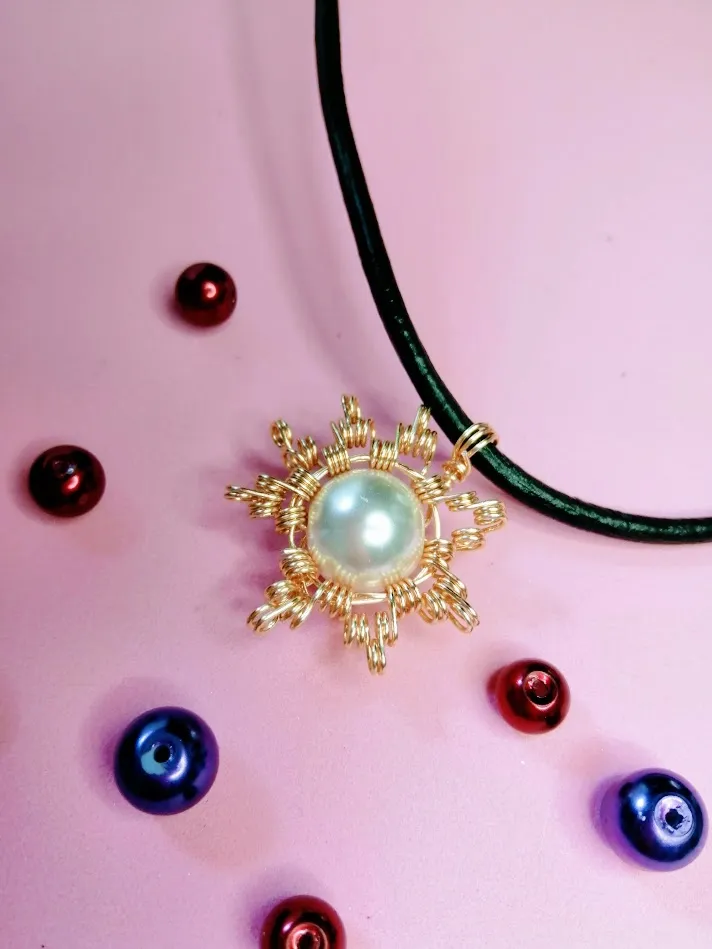
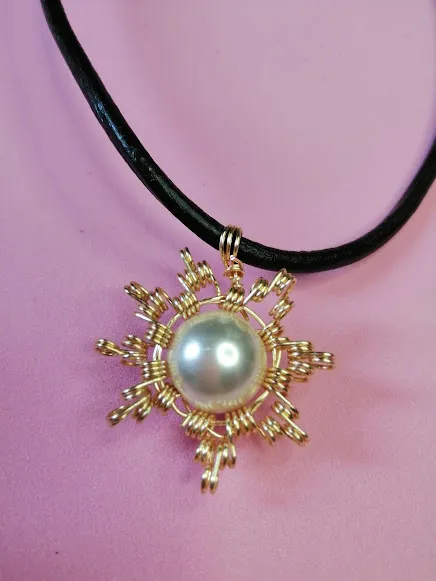
El sol, la principal fuente de energía de nuestro universo, es el motivo principal de la iniciativa semanal de mi querida Comunidad DIYHUB; es por ello, que en ésta oportunidad, quiero presentarles un tutorial para realizar un dije en alambrismo, con materiales muy simples y de fácil acceso; acompáñenme en éste paso a paso.
The sun, the main source of energy in our universe, is the main motif of the weekly initiative of my dear DIYHUB Community; that's why, in this opportunity, I want to present you a tutorial to make a wire wrap charm, with very simple and easily accessible materials; join me in this step by step.
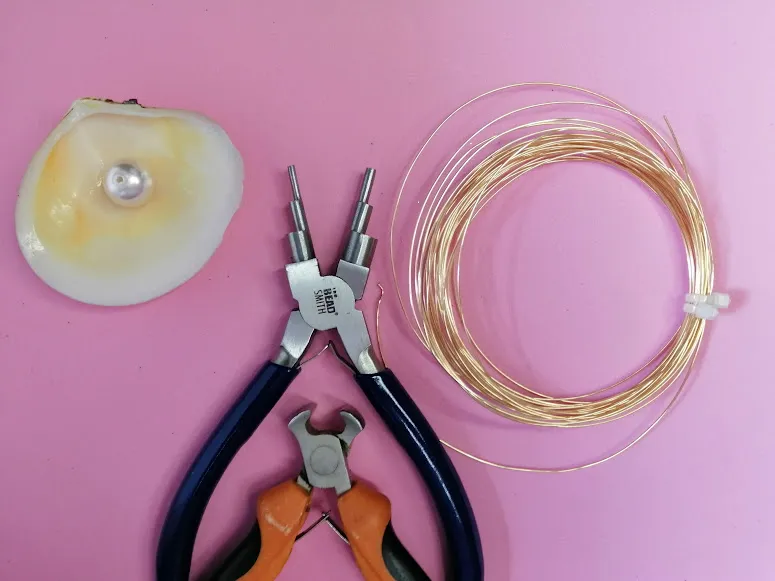
Materiales:
- Hilo de alambrismo Nro 20 (o 22)
- Pinzas de bisutería (mandril multinivel, plana y corte)
- Una perla de Murano 12mm
- Collar
Materials:
- Wiring wire No. 20 (or 22)
- Jewellery pliers (multilevel, flat and cutting chuck)
- One 12mm Murano pearl
- Necklace
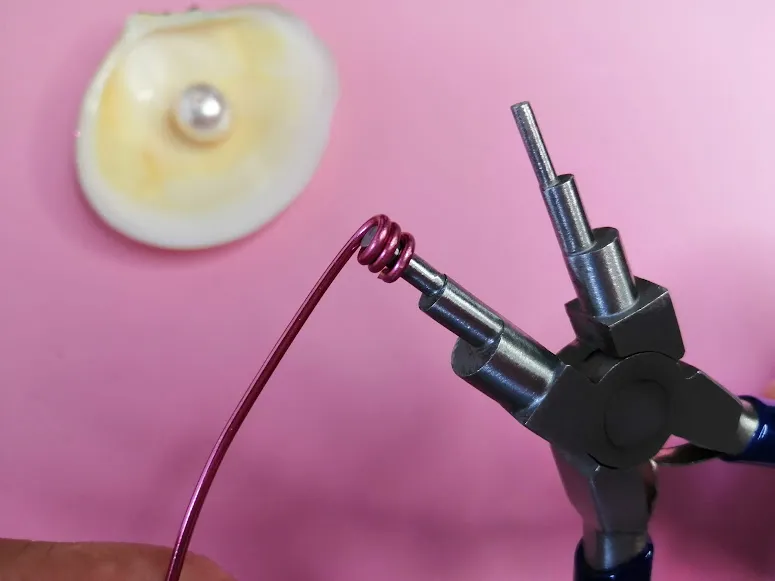
Procedimiento:
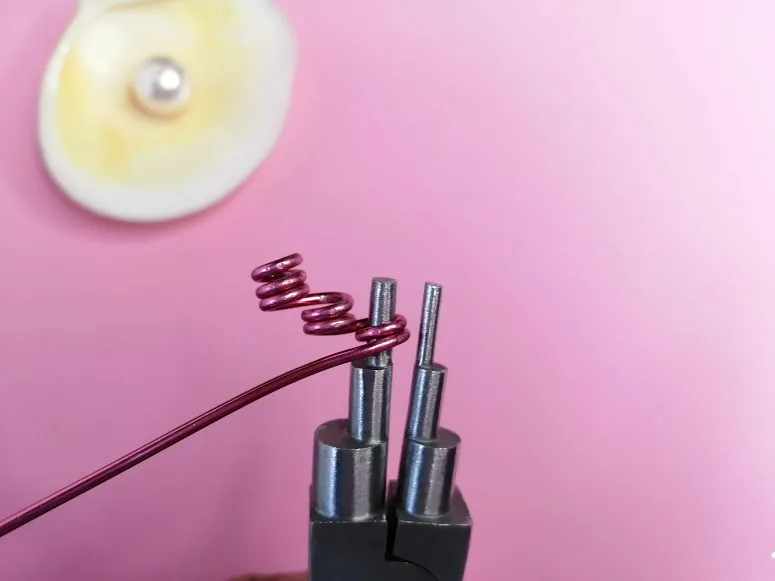
- Lo primero que haremos, es tomar el extremo del hilo de bisutería y darle tres vueltas en el nivel más pequeño del mandril multinivel.
- Una vez realizadas, colocamos la pinza justamente al lado de los aros previos.
Procedure:
- The first thing to do is to take the end of the jewellery thread and make three turns on the smallest level of the multilevel mandrel.
- Once this is done, we place the clamp right next to the previous loops.
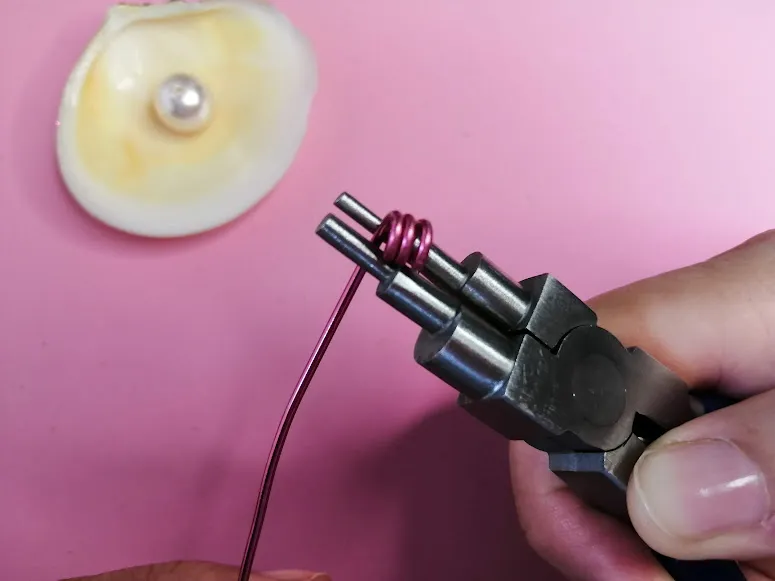

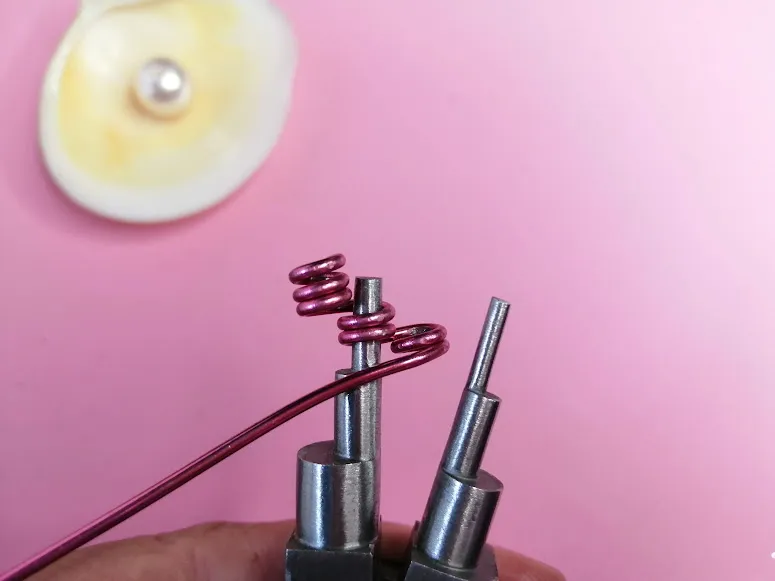
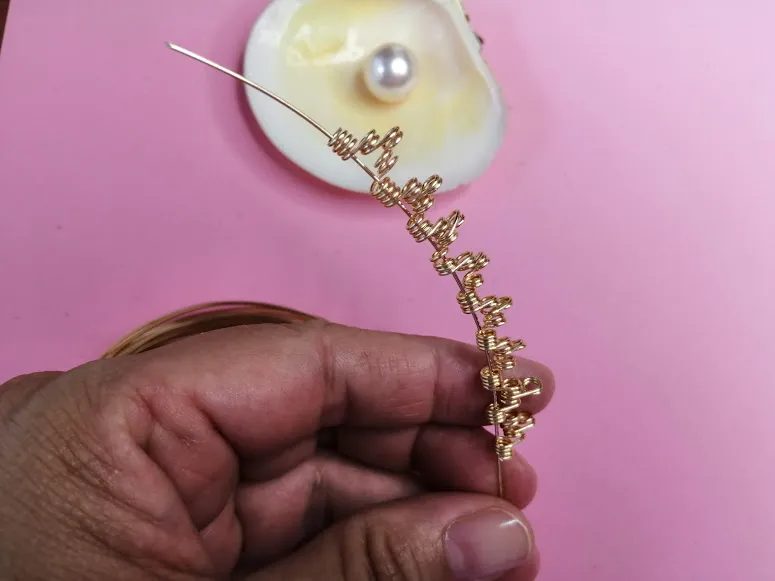
- Repetiremos el paso anterior, formando un tercer grupo de aros que formará el pico del sol.
- Repeat the previous step, forming a third group of rings that will form the peak of the sun.
- Ahora, realizaremos de manera inversa los pasos anteriores, tal como se muestran en las fotografías.
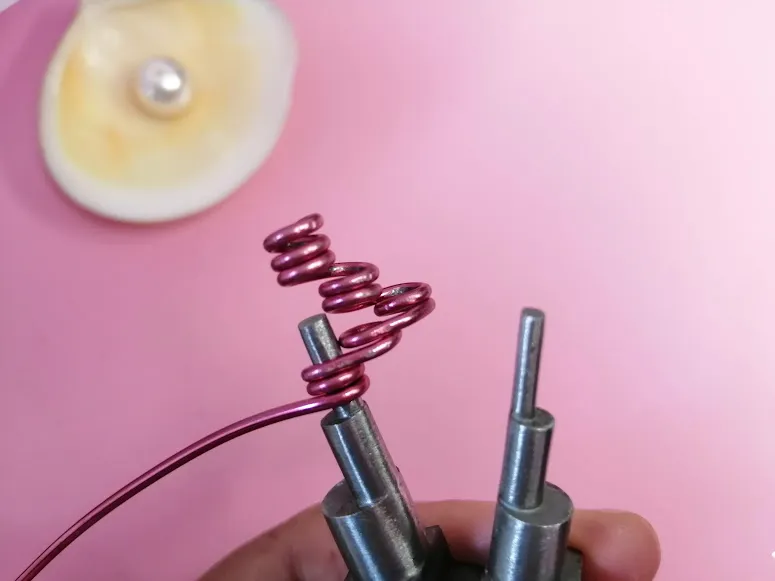
- Now, we will reverse the above steps, as shown in the pictures.
Una vez dominada la técnica, procedemos a realizarla en el alambre de bisutería nro. 20 (o 22), para un cristal de 12mm, realizaremos entre ocho o nueve picos, ayudándonos con la pinza plana para cerrar los espacios que puedan presentarse.
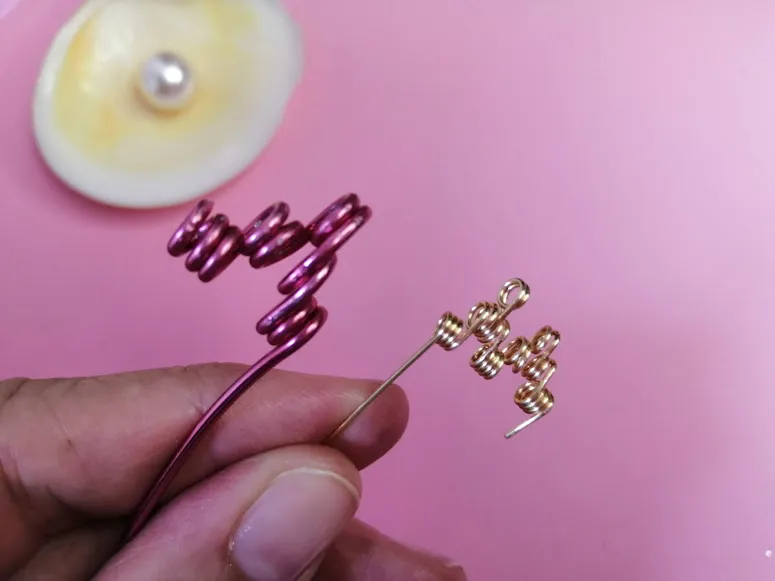

Once we have mastered the technique, we proceed to make it in the costume jewellery wire no. 20 (or 22), for a 12mm crystal, we will make between eight or nine prongs, helping us with the flat pliers to close the spaces that may appear.
A partir de aquí, debemos tener cuidado en la manipulación de los alambres, ya que podemos causar daño a nuestra perla de vidrio. Vamos a introducir el alambre (desde el carrete y sin cortar, para evitar perdida de material), en el motivo que hemos realizado; y con cuidado, vamos a ir envolviendo nuestra perla.
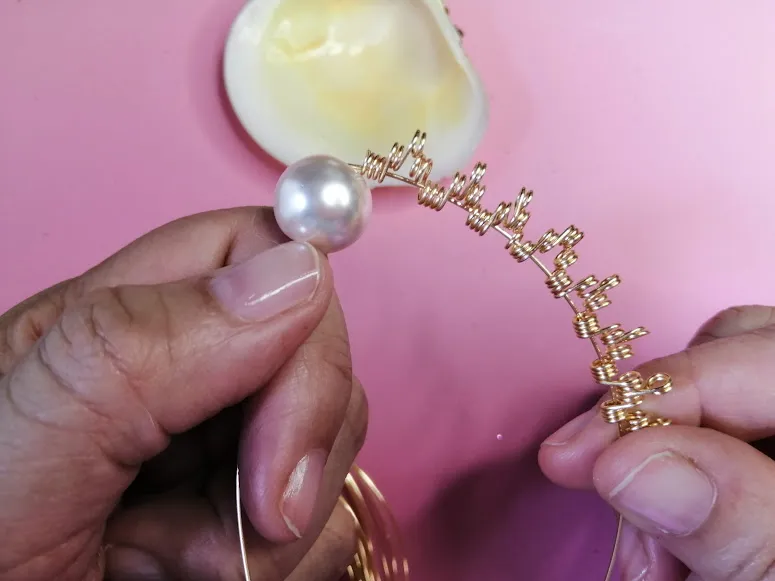
From here on, we must be careful when handling the wires, as we can cause damage to our glass bead. We are going to introduce the wire (from the spool and without cutting, to avoid losing material), in the motif we have made; and carefully, we are going to wrap our bead.
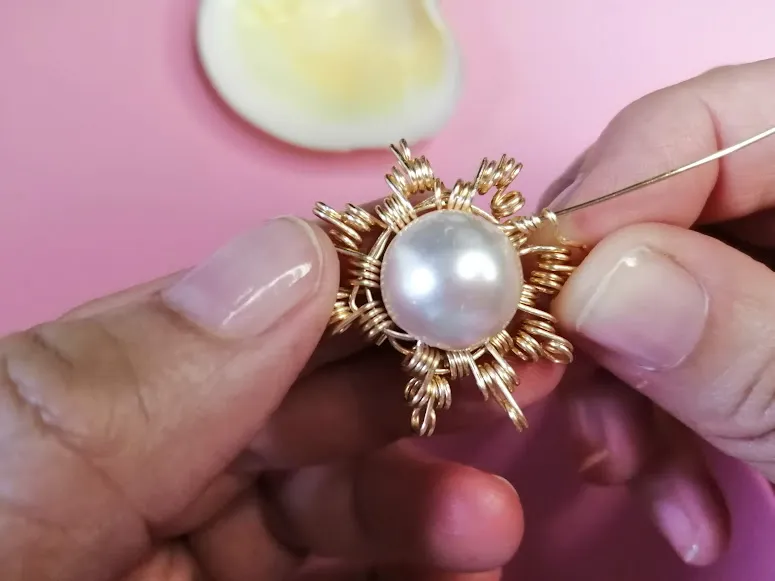
Delicately wrap the pearl, adjusting the tension of the jewellery thread, close with rosary knots, with its respective hanging ring on our chain.
Amigos, espero que les haya gustado este nuevo tutorial, deseo que pueda de ser de gran ayuda, sobre todo para quienes están iniciando en la elaboración de bisutería artesanal.
Recuerda que el trabajo artesanal es único; la elaboración de joyería artesanal, aparte de ser una acción liberadora, es también un acto de amor e ilusión.
¡Nos vemos pronto!
Letty
Friends, I hope you liked this new tutorial, I hope it can be of great help, especially for those who are starting to make handmade jewellery.
Remember that handmade work is unique; making handmade jewellery, apart from being a liberating action, is also an act of love and illusion.
See you soon!
Letty
©️ Jun-2023, @leticiapereira - Original Content
📷 HuaweiY9 - 2019
🇻🇪 🔁 🇺🇸: Deepl
Filters: Google Photos / Liketu
LEP027/2023