Hola y bienvenidos. //Hello and welcome.

Hello to all dear colleagues who are part of this social network. Today I bring you one of my creative activities that I like to do with much affection for you a step by step of a pencil holder in the shape of a car well I tell you a neighbor came to me and told me that if I could make a pencil holder car with cardboard to make it cheaper I told him of course yes and so I took advantage of recycled and I tell you how I did it I liked it because it was nice and can be placed on a table and does not take up much space and helps organize your pencils was very happy here I leave the step by step.
Hola a todos queridos compañeros que hacen parte de esta red social. El día de hoy les traigo una de mis actividades creativas que me gusta hacer con mucho cariño para ustedes un paso a paso de un portalápices en forma de carro bueno les cuento un vecinito me llegó y me dijo que si le podía hacer un portalápices de carro con cartón para que le saliera más económico yo le dije por su puesto que si y así aprovecho recicló y les cuento a ustedes como lo hice me gustó porque quedó bonito y se puede colocar en un a mesa y no ocupa mucho espacio y ayuda a organizar sus lápices quedó muy feliz acá les dejos el paso a paso.

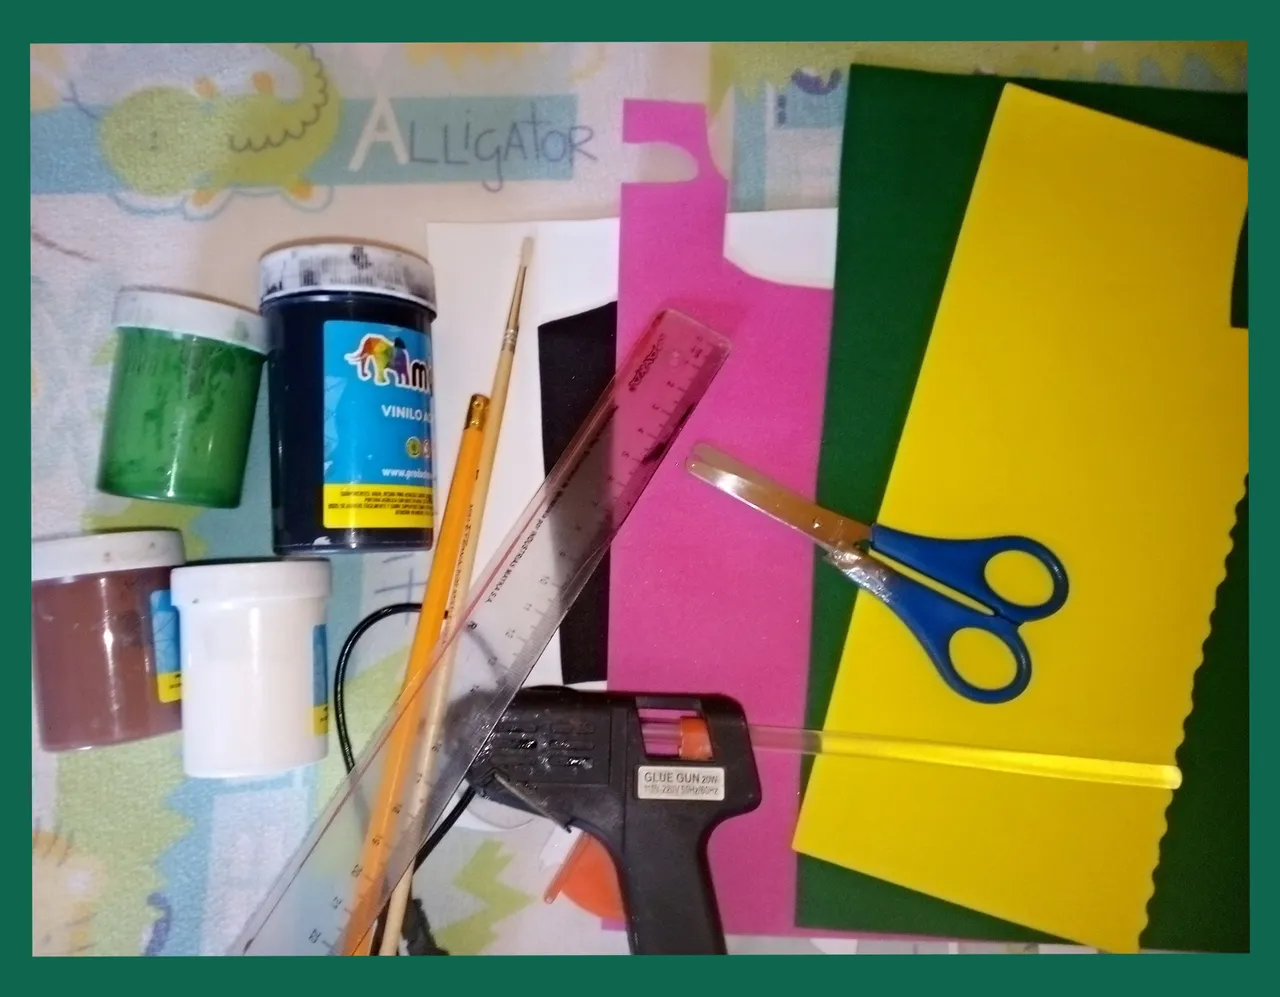
Materials.
Materiales.
- Cardboard
- Green, yellow, black and white eva glue
- Green, brown and black paint
- Paintbrush
- Ruler
- Pencil
- Scissors
- Magic clasp
- Marker pen
- Silicone gun
- Cartón
- Goma Eva verde, amarilla, negra y blanco
- Pintura verde, marrón y negro
- Pincel
- Regla
- Lapiz
- Tijera
- Cierre mágico
- Rotulador
- Pistola de silicón
Step by step.
Paso a paso.
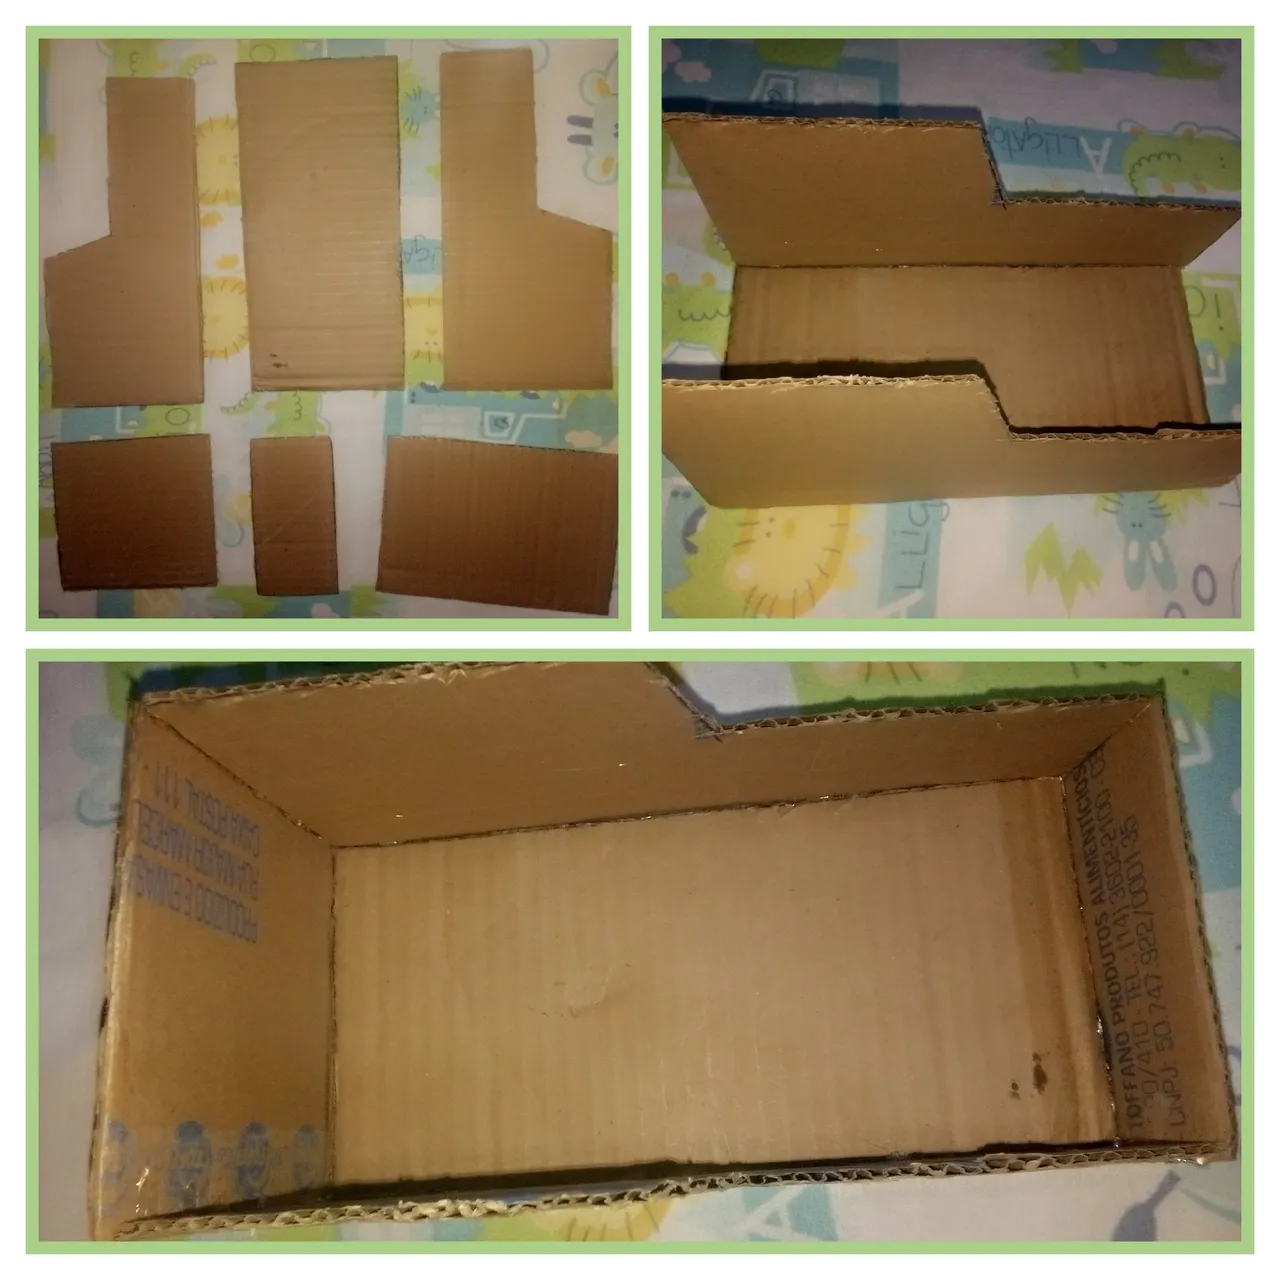
Paso 1. // Step 1.
To make the car pencil holder, draw two car shapes of 12.5 x 26 centimeters on a cardboard and cut these two pieces and the base of 12x 25 centimeters, glue these pieces with silicone, then make a cardboard of 12.5x 7 centimeters and another of 12x13 centimeters and glue the bigger one in the back and the smaller one in the front to the car.
Para hacer el portalápices de carro en un cartón dibuja dos forma de carro de 12.5 x 26 centímetros y corta está dos piezas y la base de 12x 25 centímetros pega con silicón estás piezas después haz un cartón de 12.5x 7 centímetros y otro de 12x13 centímetros y pega la más grande por detrás del carro y la mas pequeña por delante del carro.
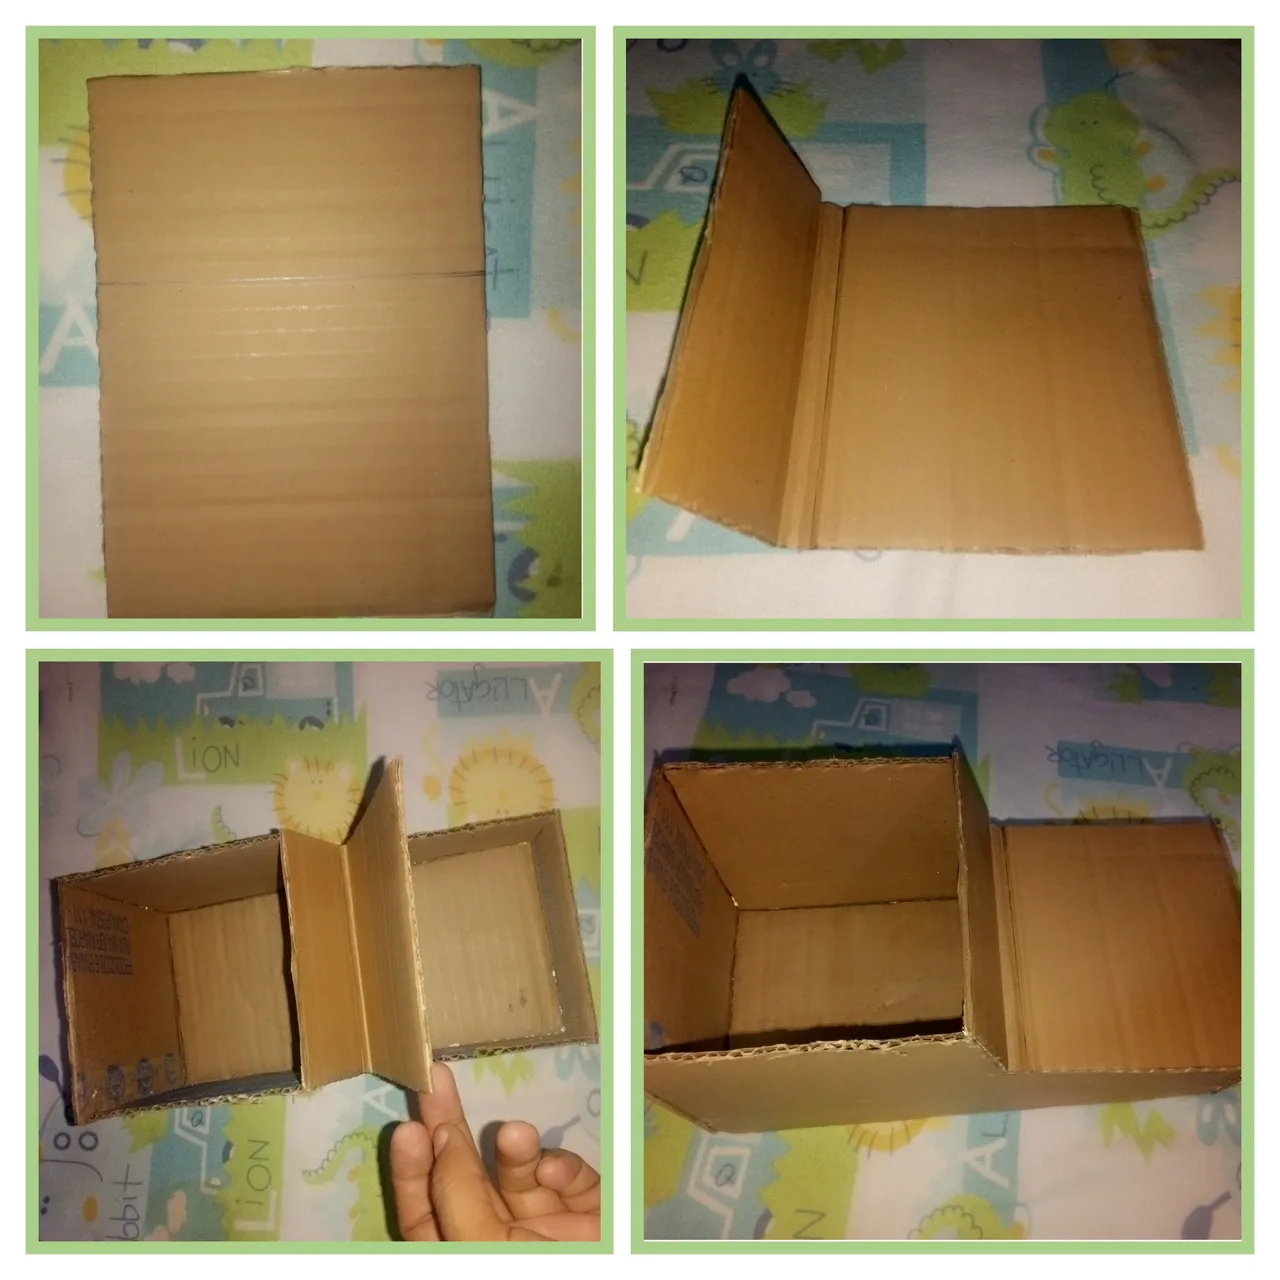
Paso 2. // Step 2
For the top cover cut another 12.5x 19 centimeters cardboard and fold about 5 centimeters for the front car glass glue only the 5 centimeters to be able to lift the cover.
Para la tapa superior corta otra cartulina de 12,5x 19 centímetros y dobla unos 5 centímetros para el cristal delantero del coche pega solo los 5 centímetros para poder levantar la tapa.
Paso 3. // Step 3.
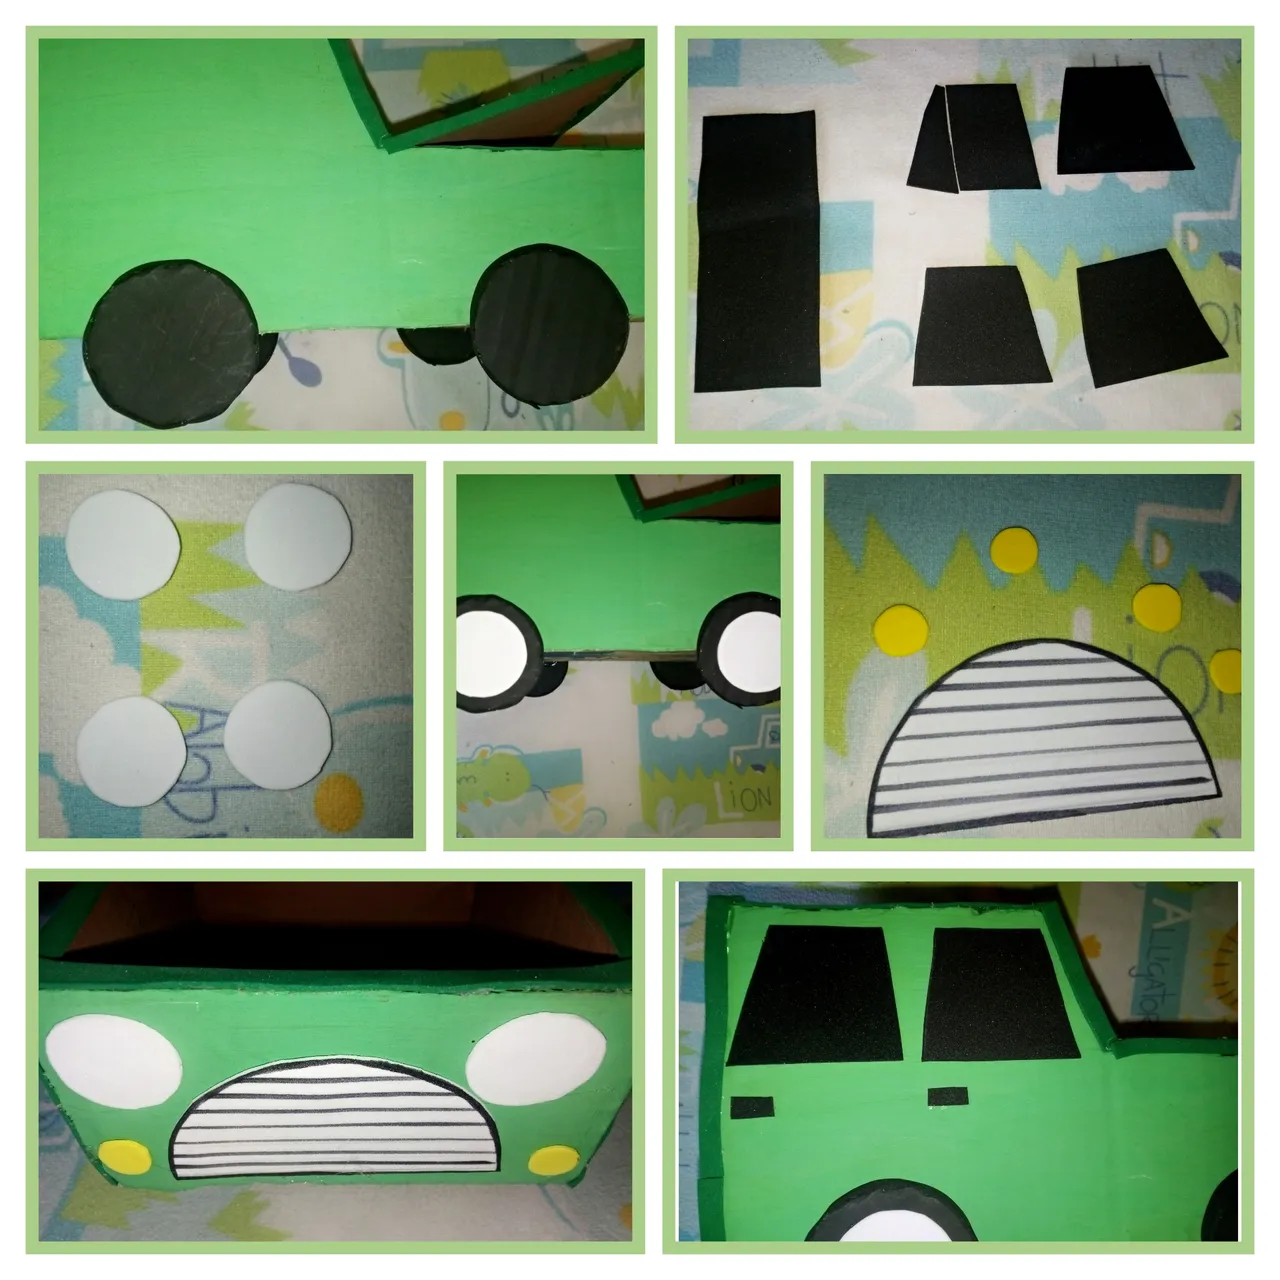
Well, we continue making with cardboard 8 wheels of 5.5 centimeters and double glue and paint black and line around with black Eva rubber and so we have ready the wheels.
Bueno seguimos haciendo con cartón 8 ruedas de 5.5 centímetros y pega doble y pinta de color negro y forra alrededor con goma Eva de color negro y así tenemos lista las ruedas.

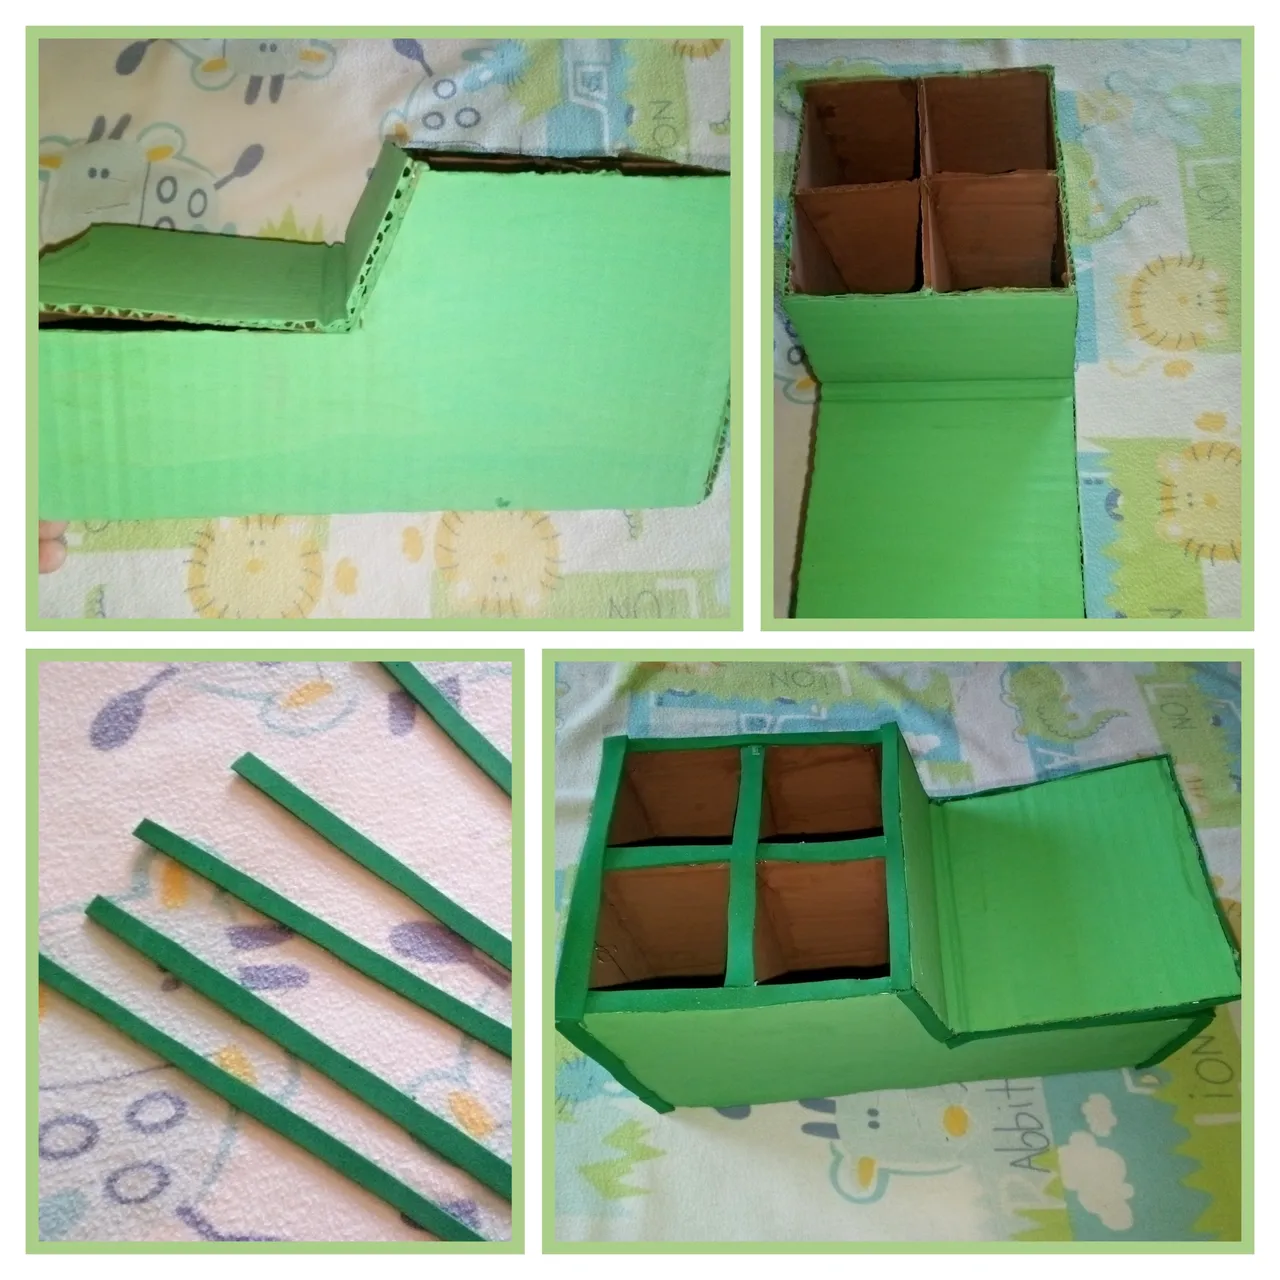
Paso 4. // Step 4.
We continue with the next step for the divisions cut two 11x11 centimeters cardboards and two more of 5x 11 centimeters and glue these separations inside the cart so we will have 4 places. We paint the entire cart inside and outside lined with strips of Eva rubber of the same color as the cart of 0.5 ml.
Seguimos con el paso siguiente para las divisiones corta dos cartones de 11x11 centímetros y dos más de 5x 11 centímetros y pega está separaciónes dentro del carro así tendremos 4 puesto. Pintamos todo el carro por dentro y por fuera forra con tiras de goma Eva del mismo color que el carro de 0.5 ml.
Paso 5. // Step 5.
To finish the pencil holder, glue the 4 wheels with hot silicone and draw the lights, glasses and other details you want to put on the car with Eva rubber.
Ya para darle fin al portalápices pega con silicón caliente las 4 ruedas y con goma Eva dibuja las luces, los vidrios y otros detalles que quieras colocar al carro.
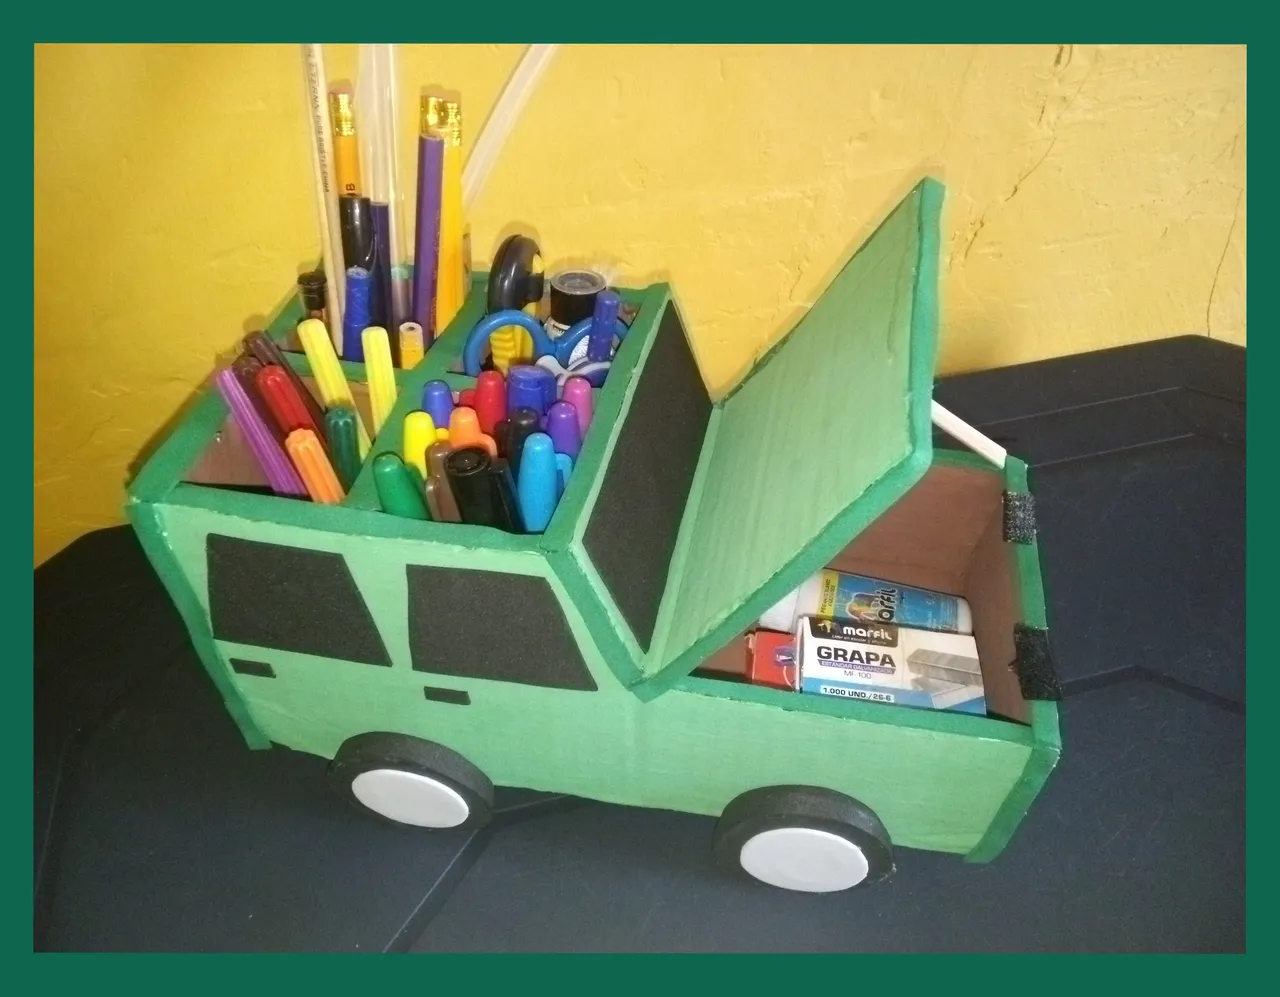
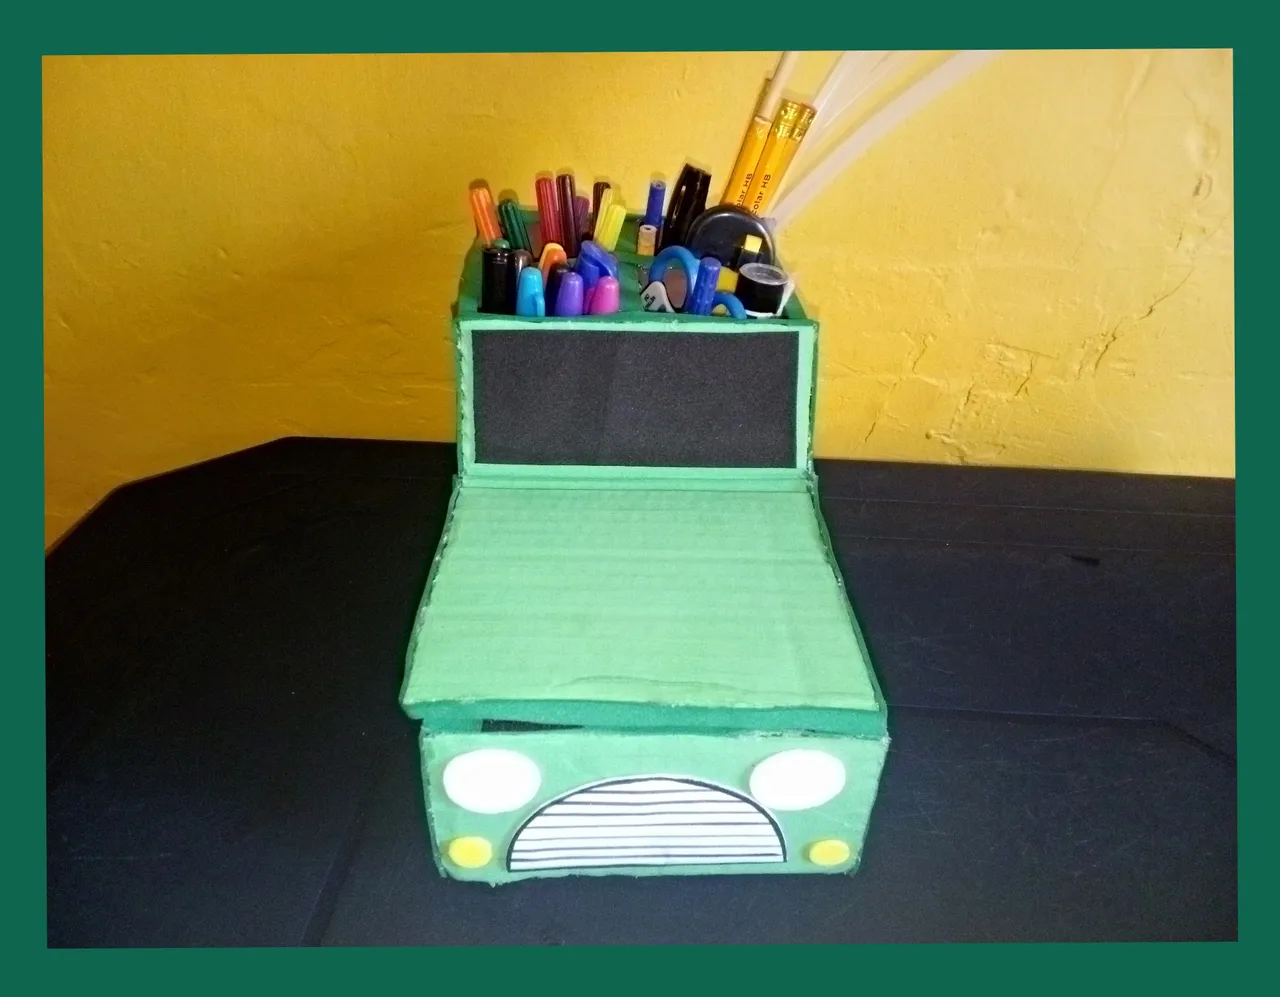
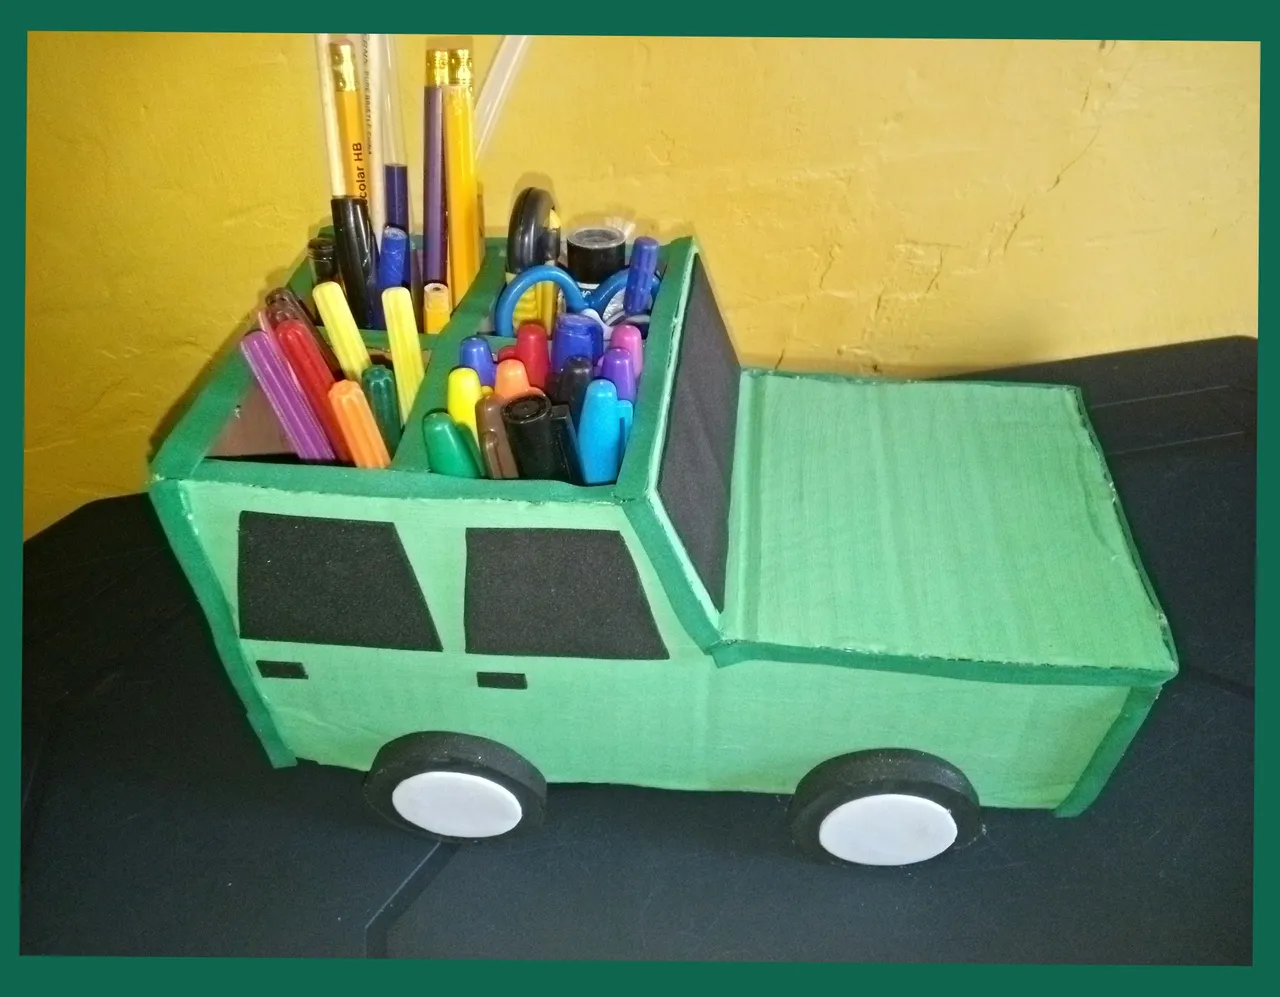
Final result. // Resultado final.
Gracias por visitar.
Todas las fotos y el contenido son originales que hago diariamente para mi blog. Para La traducción uso deepl los marcos y separadores es usado de canva .📷🖼️🤗
Thank you for visiting.
All photos and content are originals that I make daily for my blog. For translation I use deepl the frames and separators are used from canva .📷🖼️🤗