✨Bienvenidos. // Welcome. ✨
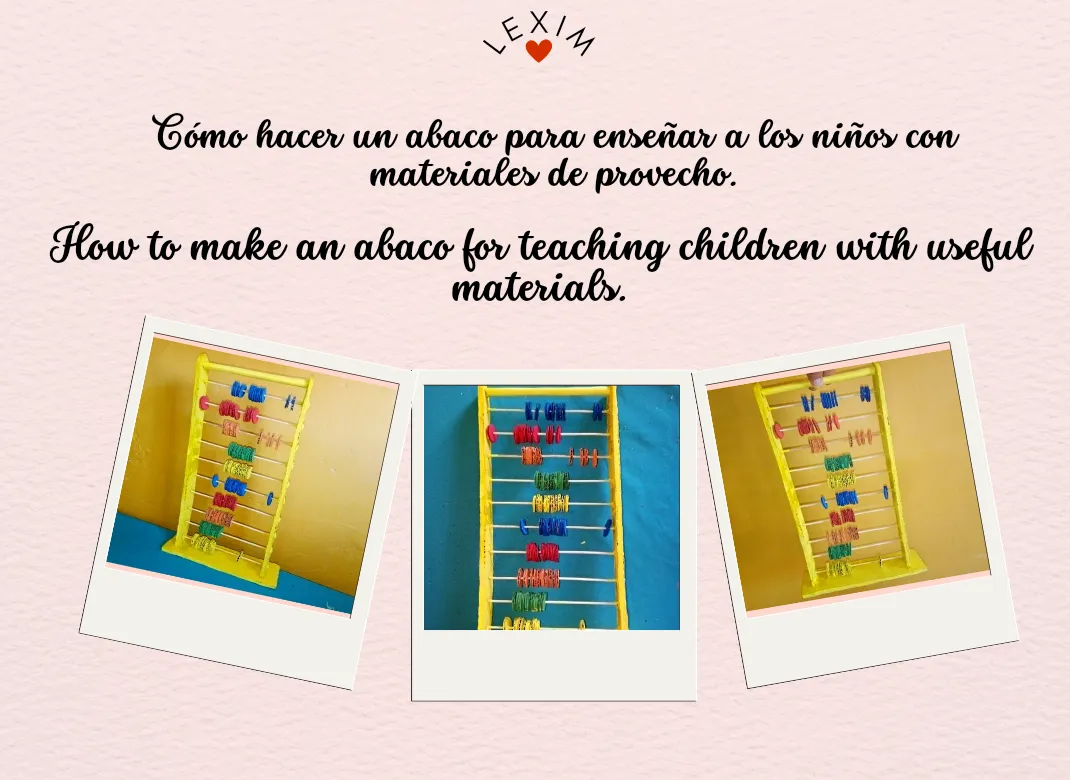
Hello to all dear colleagues a pleasure to greet you. Today I want to share one of my creative activities that I like to do with much affection for you a step by step of an abaco to teach children with useful materials very useful for learning and thus to be able to intellectual simple operations such as addition, subtraction and multiplication in an easier way without having to use your fingers to count I hope it is very helpful for the little ones here I leave its elaboration.
Hola a todos queridos compañeros un gusto en saludarlos. Hoy les quiero compartir una de mis actividades creativas que me gusta hacer con mucho cariño para ustedes un paso a paso de un abaco para enseñar a los niños con materiales de provecho muy útil para el aprendizaje y así poder intelectual operaciones sencilla como la suma, resta y multiplicación de una forma más fácil sin tener que usar sus dedos para contar espero que sea de muchas ayuda para los pequeños acá les dejo su elaboración.

Materials.
Materiales.
- Thick cardboard.
- Chopsticks.
- Yellow Eva rubber.
- Ruler.
- Scissors.
- Pencil.
- Paintbrush.
- Kraft paper.
- Silicone gun.
- Acrylic paint red, yellow, blue, orange, green.
- Cartón grueso.
- Palillos.
- Goma Eva amarilla.
- Regla.
- Tijera.
- Lápiz.
- Pincel.
- Papel kraft.
- Pistola de silicón.
- Pintura acrílica roja, amarilla, azul, anaranjado, verde.
Step by step.
Paso a paso.
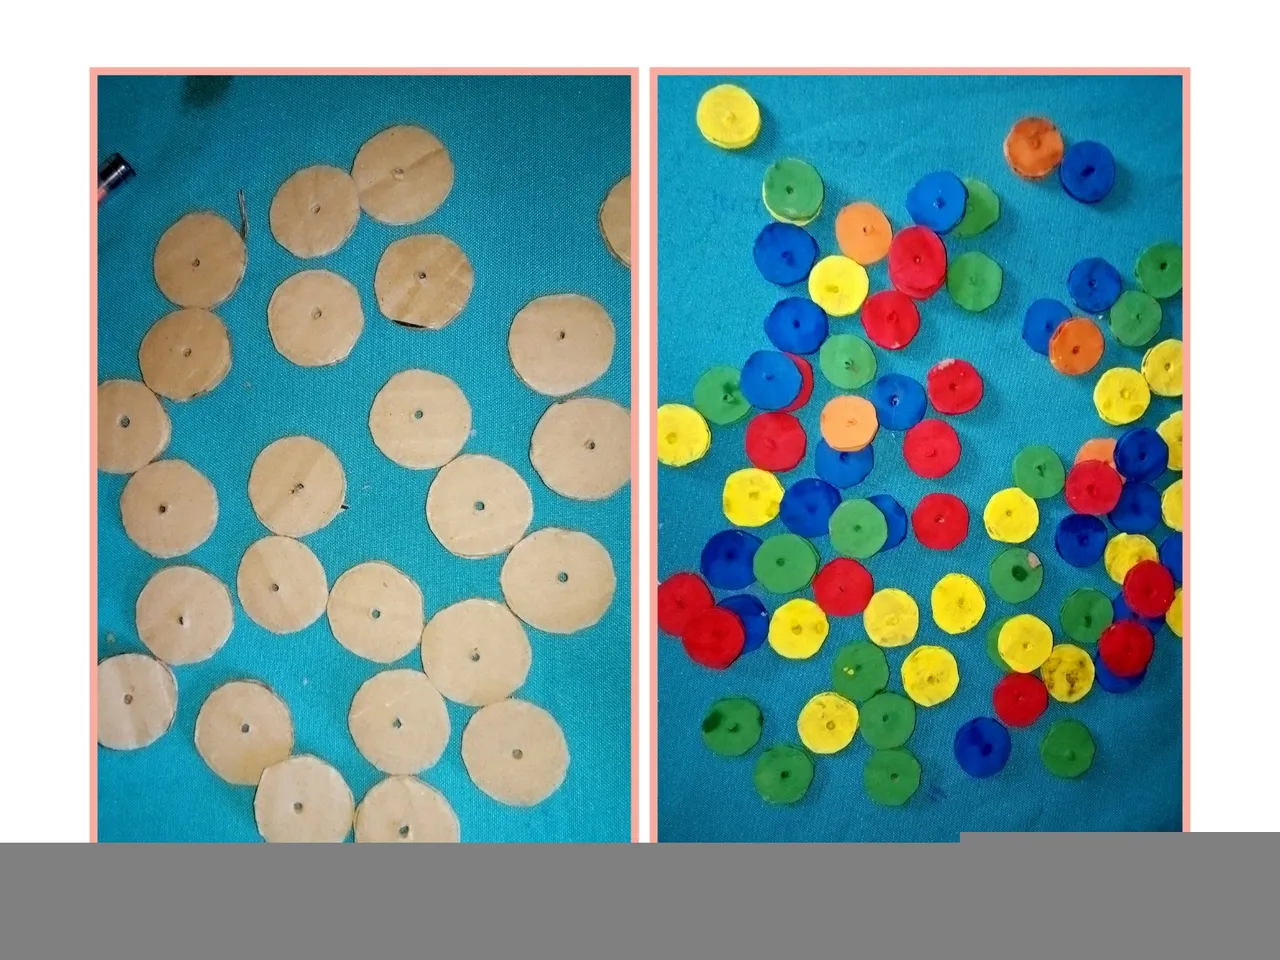
Paso 1. // Step 1.
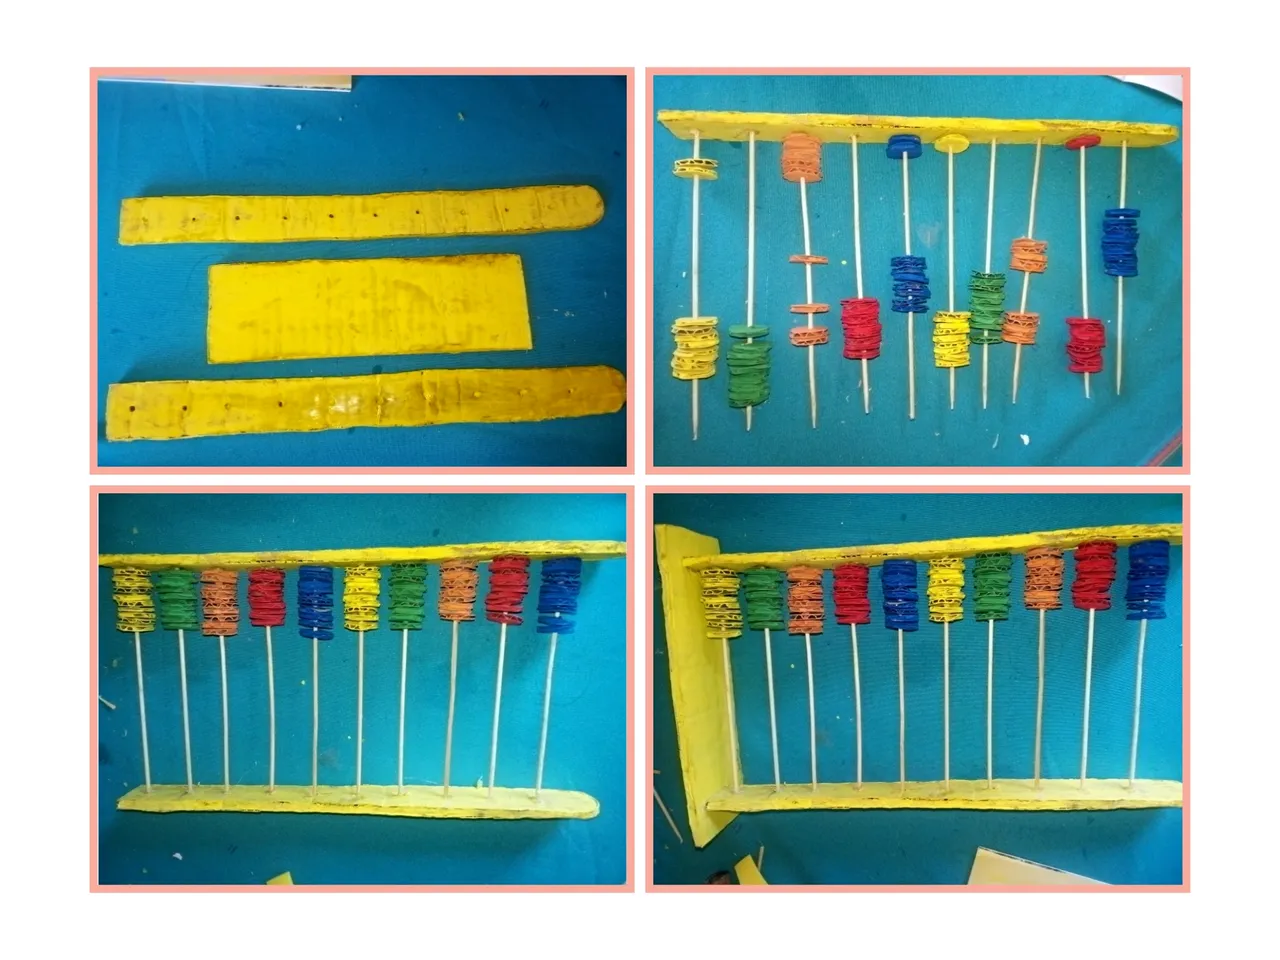
To start this bead make about 100 circles of 3 centimeters and with the help of the tip of the pencil make a hole in the center of each circle. Paint 20 circles in red, yellow, orange, blue and green.
Para comenzar este abaco haz unos 100 circulo de 3 centímetros y con la ayuda de la punta del lápiz hazle un agujero en el centro a cada círculos. Pinta 20 circulo de rojo, amarillo, anaranjado, azul y verde.
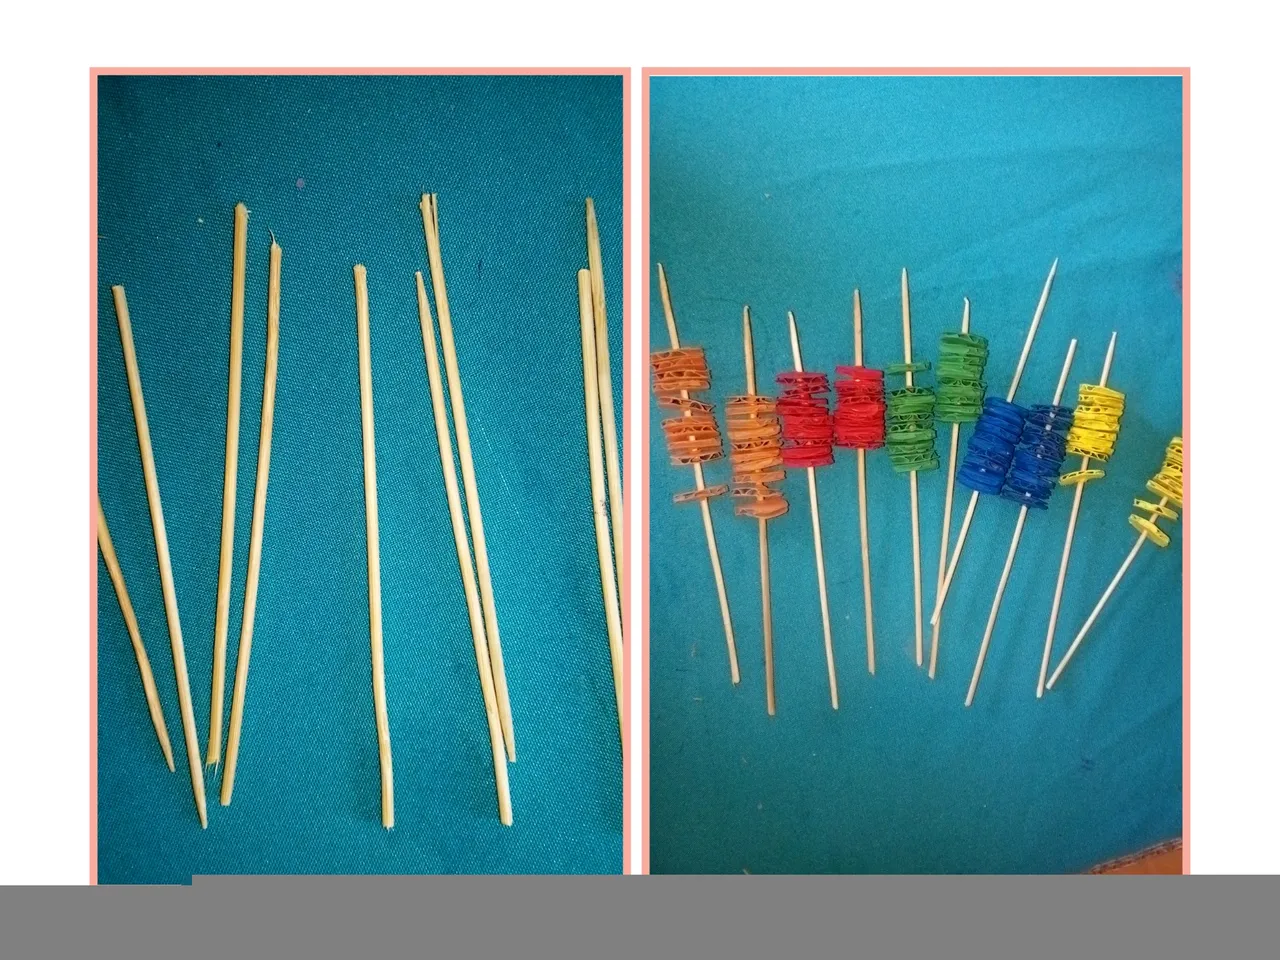
Paso 2. // Step 2
Once the circles are dry, insert 10 circles of about 13 centimeters long into the chopsticks.
Ya seco los círculos introduces 10 círculos a los palillos de unos 13 centímetros de largo.
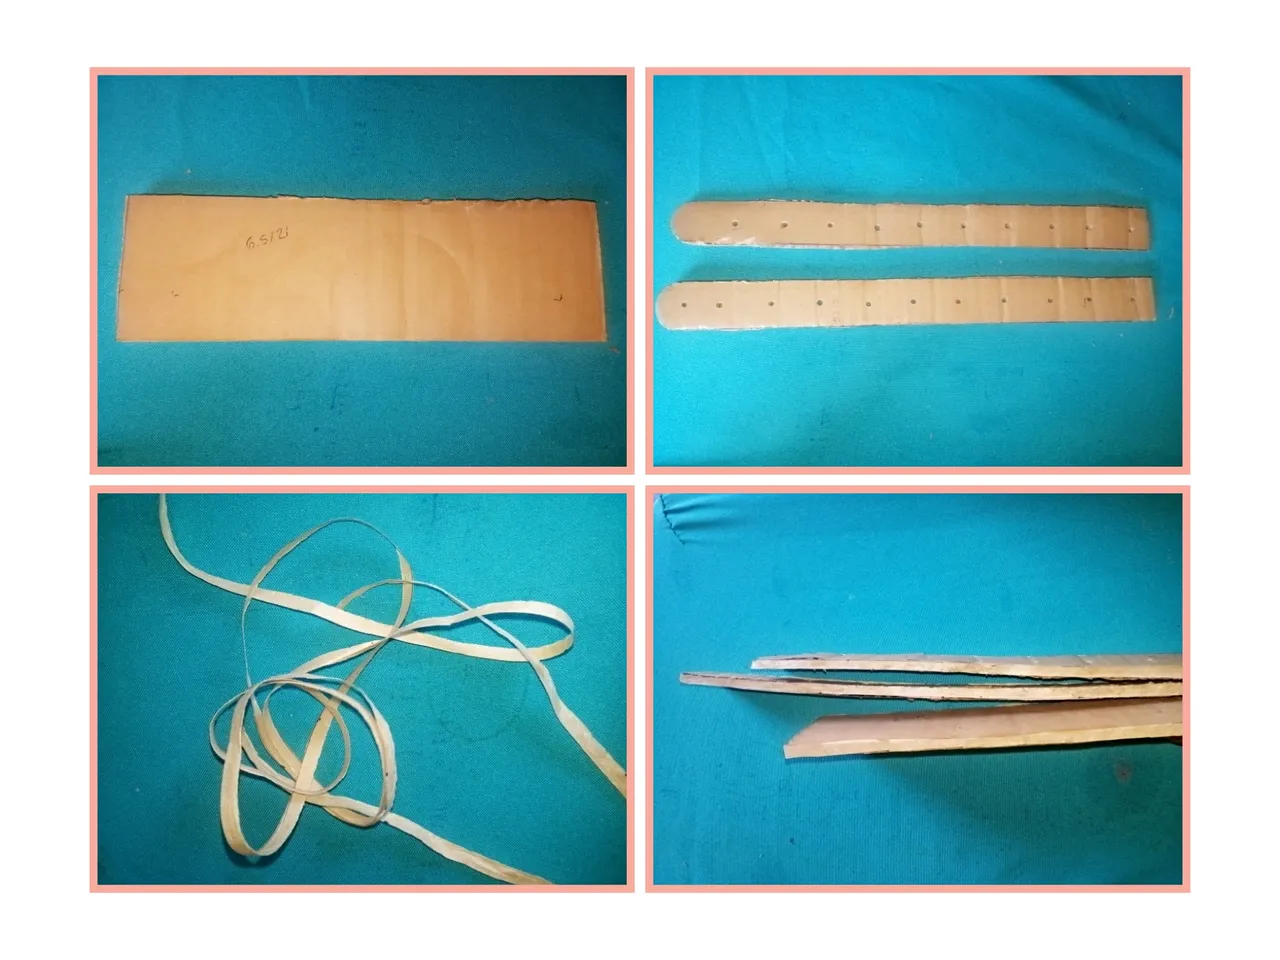
Paso 3. // Step 3.
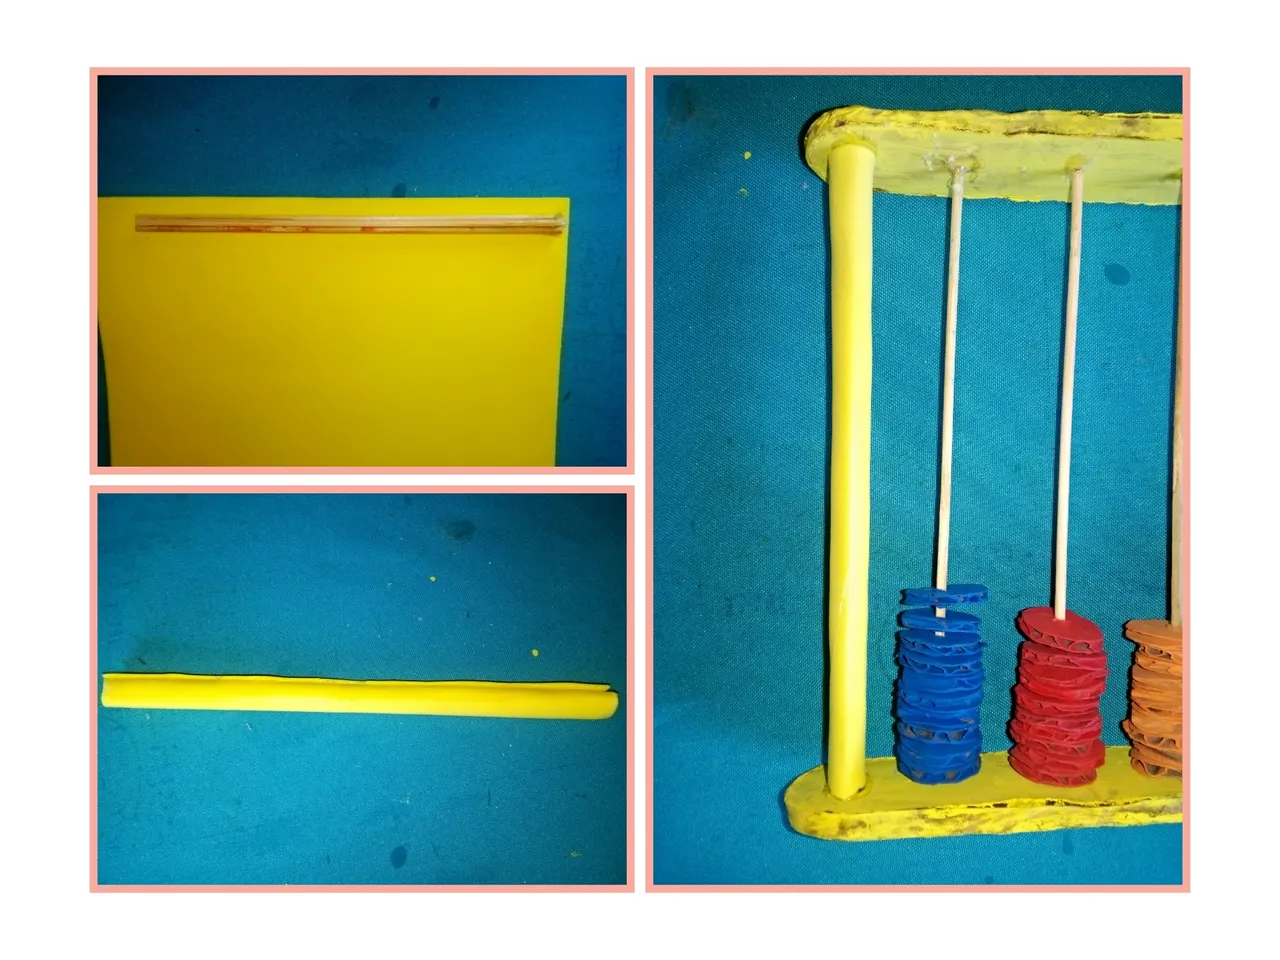
Next step, cut a 6.5 x 21 centimeters cardboard, and two 3x33 centimeters for the sides and making an oval in one of the ends then make 10 holes in the middle to introduce the toothpicks to both cardboards. Cover the holes with kraft paper.
Siguiente paso, corta un cartón de 6.5 x 21 centímetros, y dos de 3x33 centímetros para los laterales y haciendo un ovalo en una de las puntas luego haz 10 agujeros en el medio para introducir los palillos a ambos cartones. Cubre los orificios con papel kraft.
Paso 4. // Step 4.
Paint yellow and take one side and glue with hot silicone the tips of the toothpicks to fix and not to move and then glue the other side and the base.
Pinta de color amarillo y toma un lateral y pega con silicón caliente las puntas de los palillos para fijar y no se mueva y luego pega el otro y la base.
Paso 5. // Step 5.
We are almost finished to reinforce with 3 more sticks glue together and cover with Eva rubber. And glue on the surface of the bead.
Ya casi terminamos para reforzar con 3 palillos más pega juntos y cubre de goma Eva. Y pega en la superficie del abaco.
Paso 6. // Step 6.
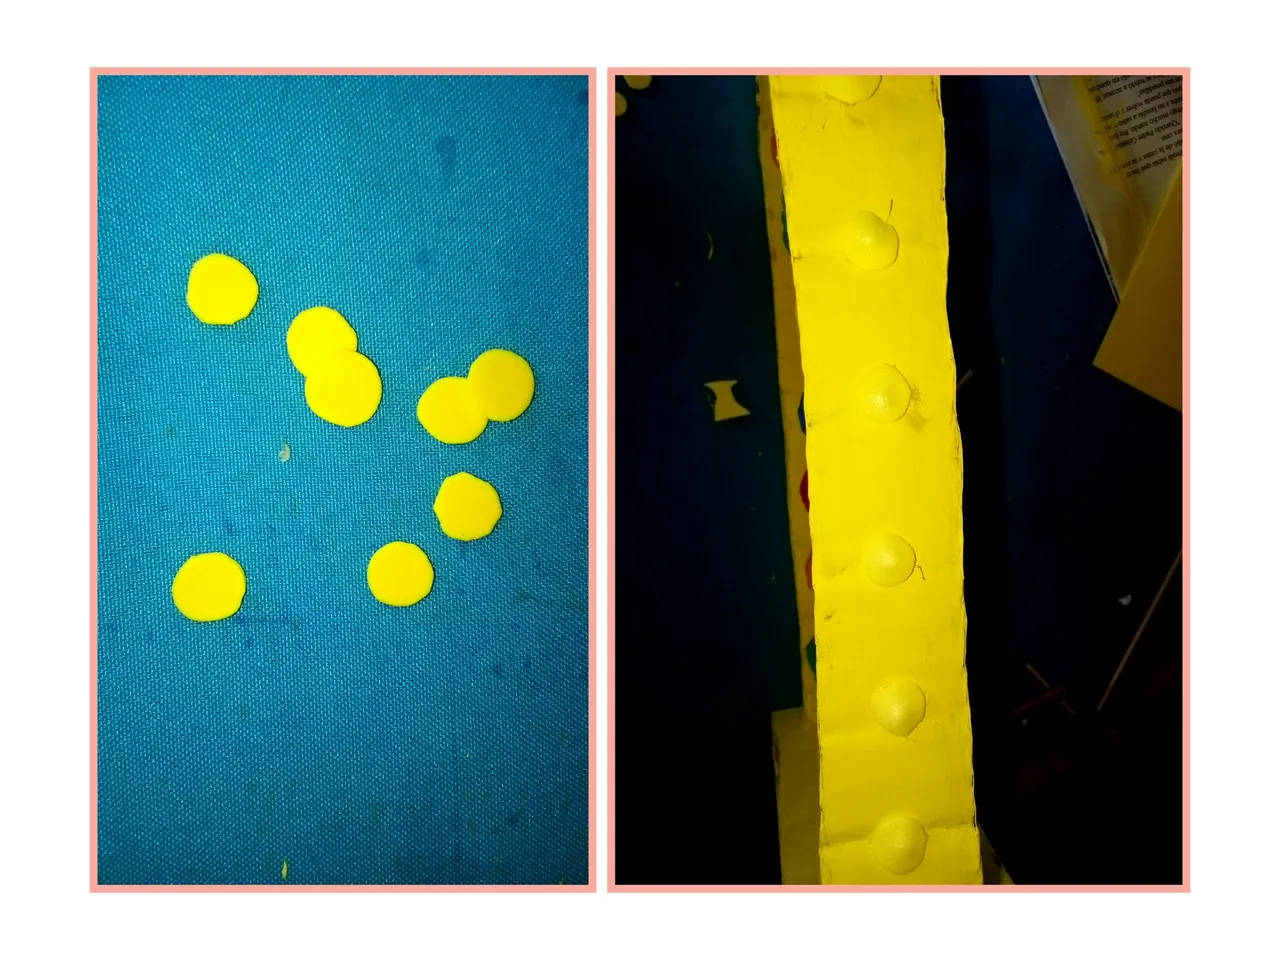
Last step, glue small circles of yellow Eva rubber to cover the holes and thus we finish our bead.
Último paso, pega círculos pequeño de goma Eva amarilla para tapar los agujeros y así culminamos nuestro abaco.
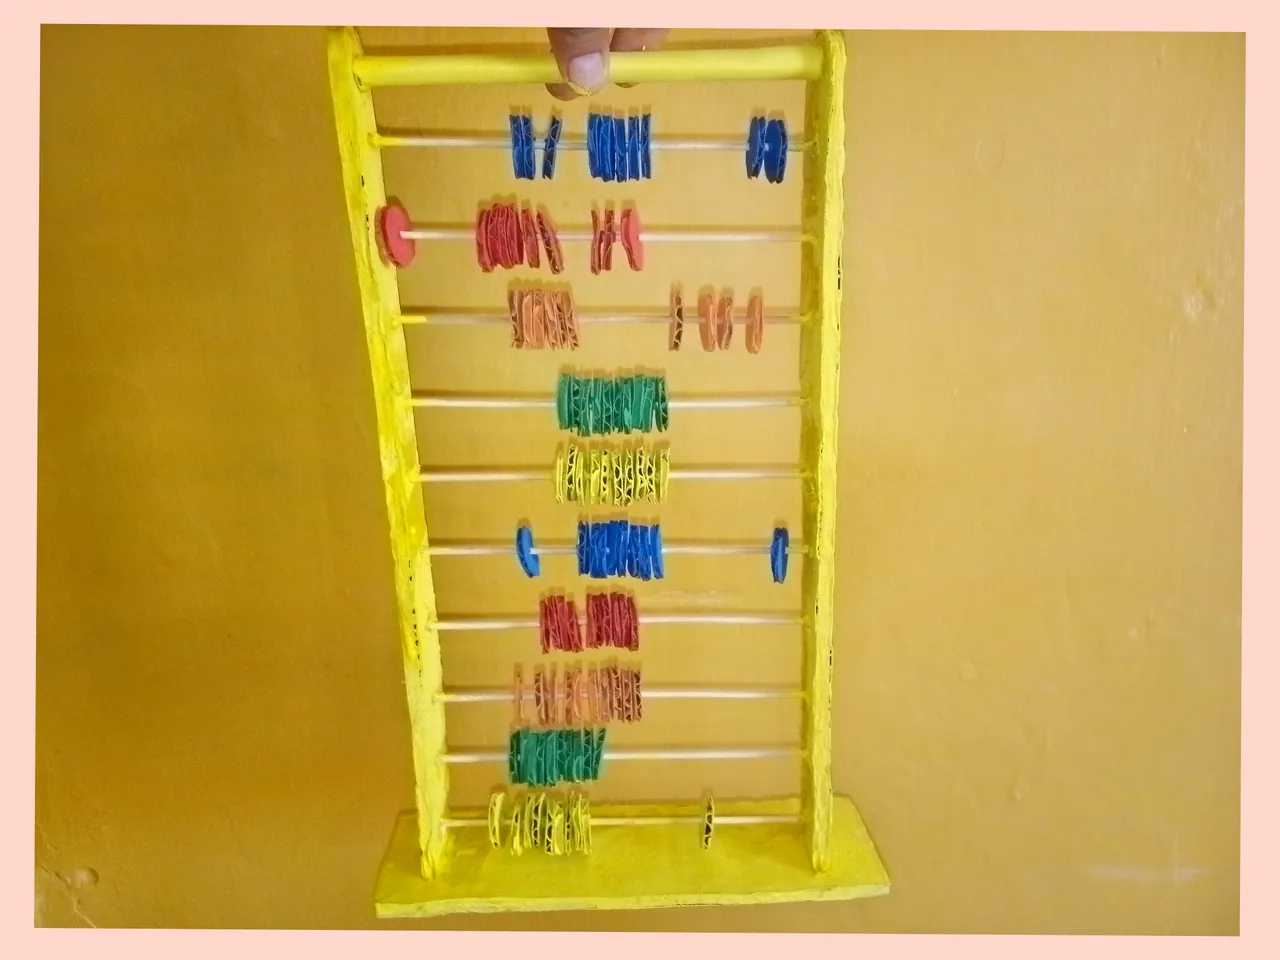
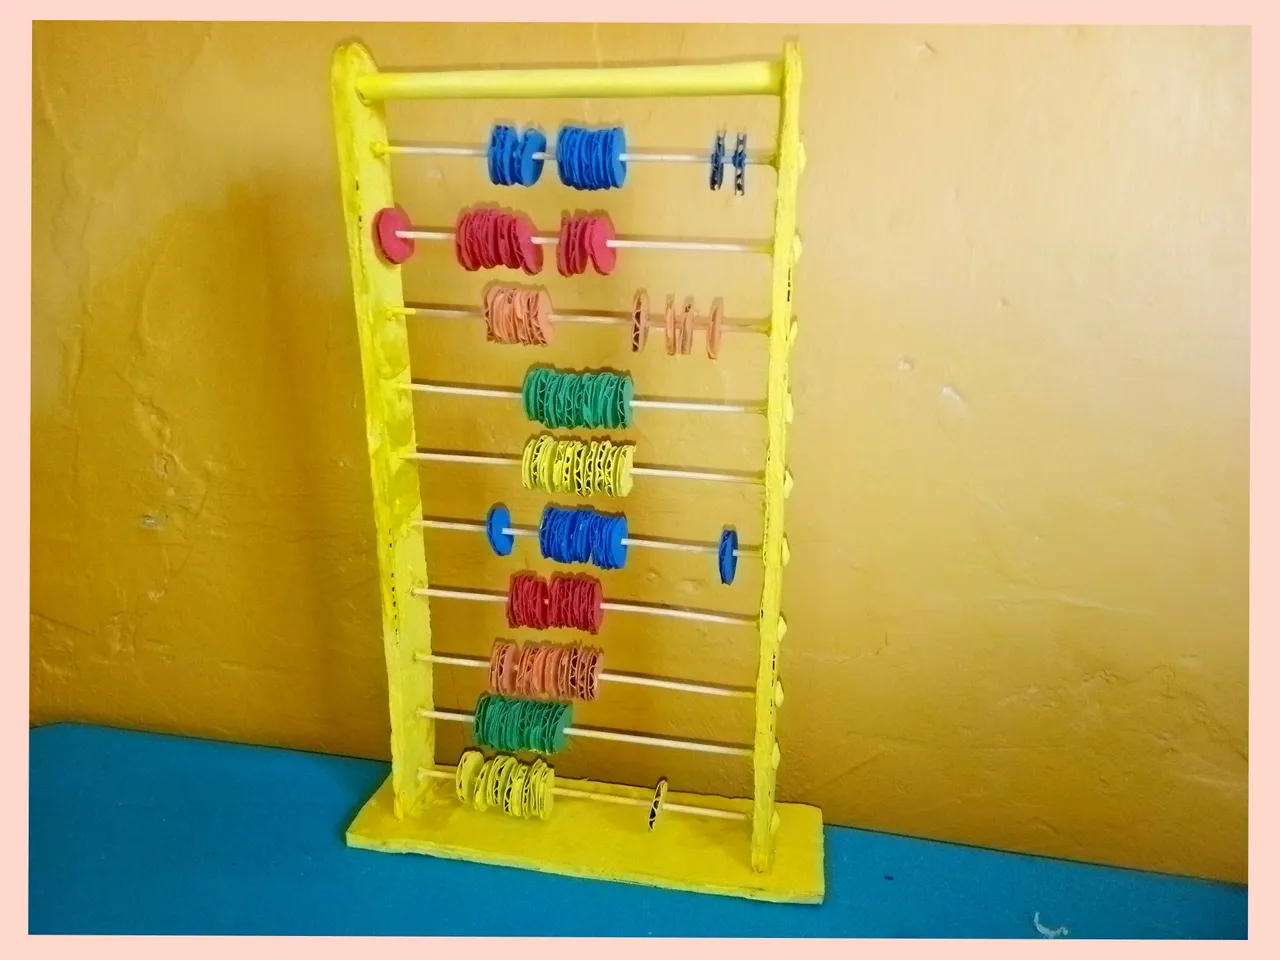
✨Final result. // Resultado final.✨
Gracias por visitar.
Todas las fotos y el contenido son originales que hago diariamente para mi blog. Para La traducción uso deepl los marcos y separadores es usado de canva .📷🖼️🤗
Thank you for visiting.
All photos and content are originals that I make daily for my blog. For translation I use deepl the frames and separators are used from canva .📷🖼️🤗