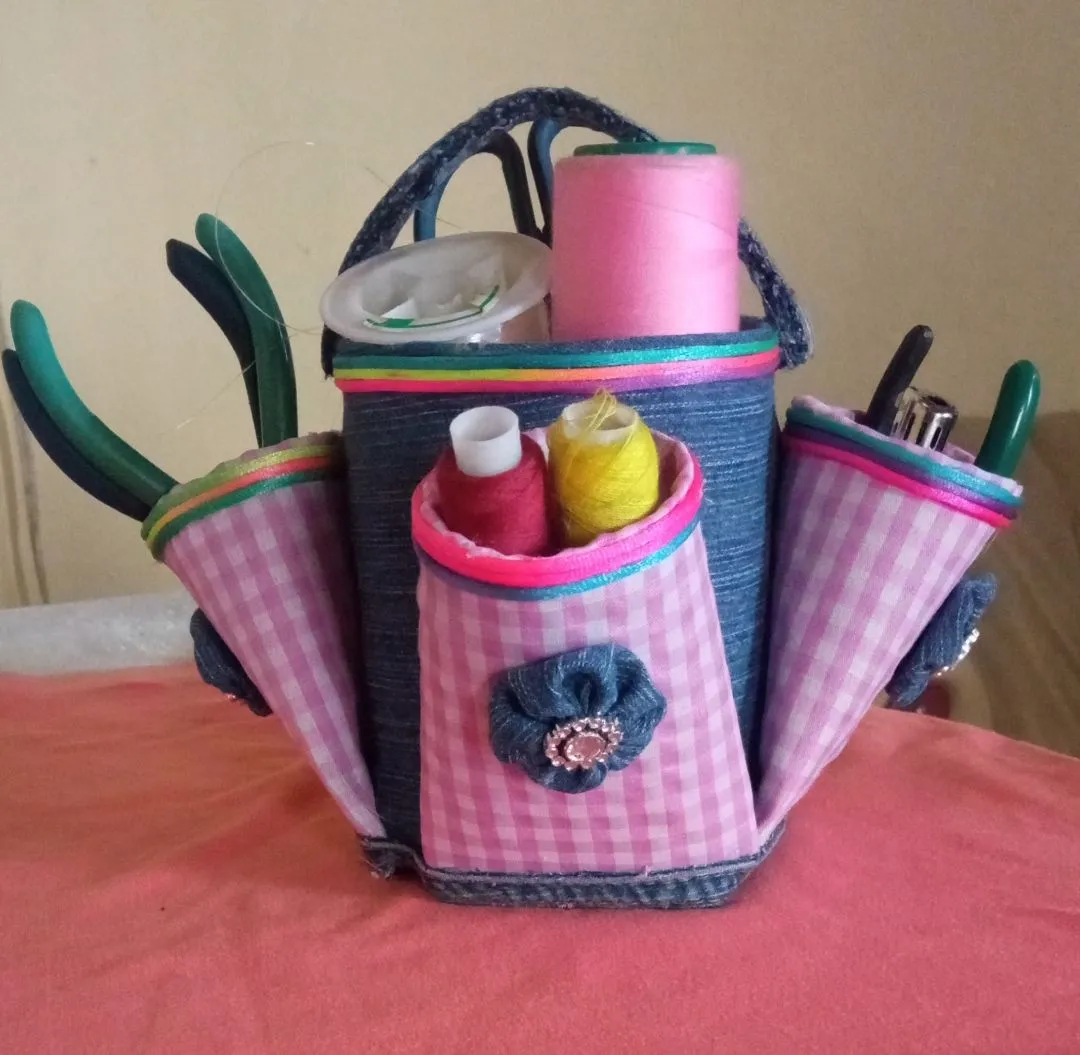
- Hola comunidad #hive y a esta hermosa comunidad #diyhub, deseo se encuentren todos bien con buena salud y esperando que este calor 🥵 tan intenso no les este afectando mucho , nuevamente por acá con ustedes les traigo en esta oportunidad el tutorial para realizar un bonito organizador, hecho con material de reciclaje ♻️. De verdad que me gustó mucho como quedó , espero que se den un paseíto por mi blog y vean lo practico y fácil de hacer este organizador.
Hello #hive community and this beautiful community #diyhub, I hope you are all well with good health and hoping that this heat 🥵 so intense is not affecting you much, again here with you I bring you this time the tutorial to make a nice organizer, made with recycled material ♻️. I really liked how it turned out, I hope you take a walk through my blog and see how practical and easy to make this organizer.
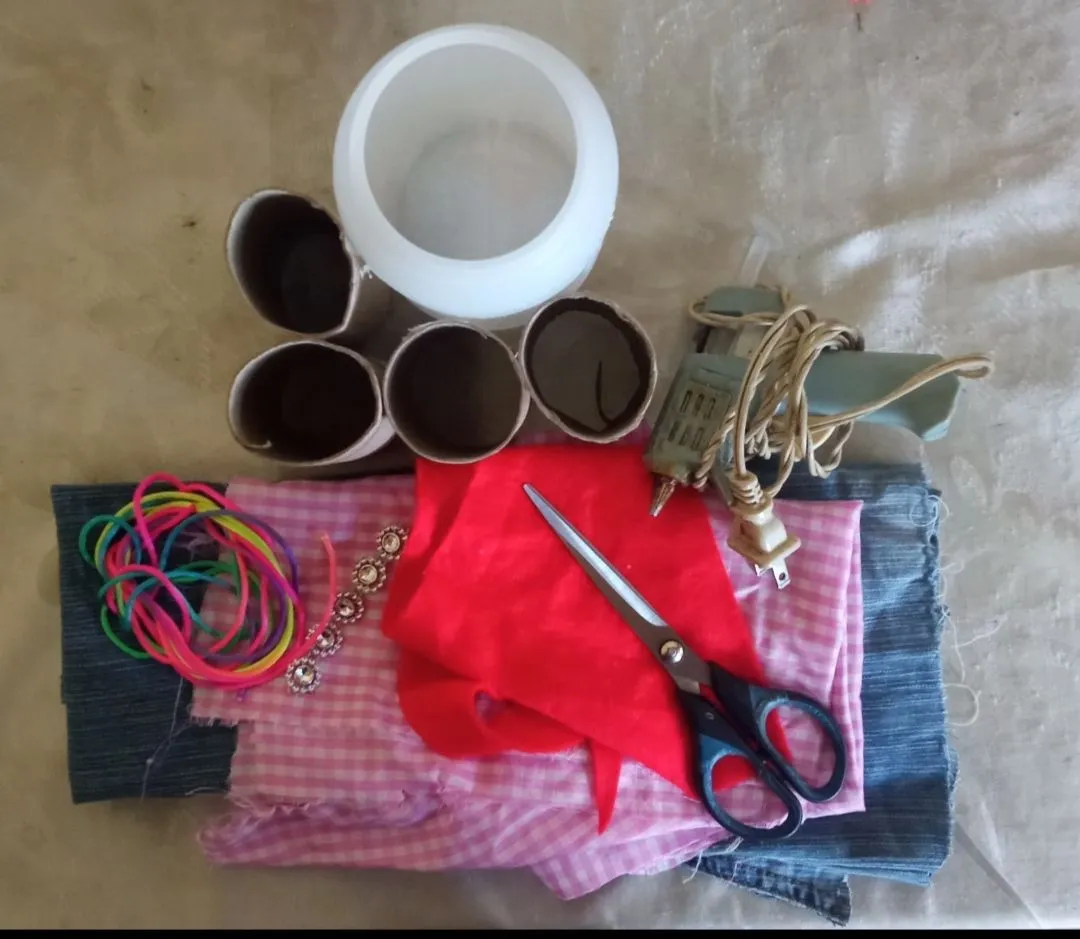
Materiales a utilizar :
♻️ Tela de jean.
♻️ Tela de vichy o cualquier otra tela que sea suave.
♻️ 1 envase plástico o de metal.
♻️ Tijeras.
♻️ 2 Silicón en barra.
♻️ Pistola de Silicón.
♻️ Aguja 🪡.
♻️ Hilo de coser.
♻️ Cola de ratón matizada.
♻️ 4 Cartón de los rollos de papel higiénico.
♻️ Fieltro de cualquier color, yo use rojo.
♻️ Unas flores plateadas para adornar.
Materials to be used :
♻️ Denim fabric.
♻️ Vichy fabric or any other soft fabric.
♻️ 1 plastic or metal container.
♻️ Scissors.
♻️ 2 Silicone stick.
♻️ Silicone gun.
♻️ Needle 🪡.
♻️ Sewing thread.
♻️ Tinted mouse glue.
♻️ 4 Cardboard from toilet paper rolls.
♻️ Felt of any color, I used red.
♻️ A few silver flowers for embellishment.
Procedimiento:
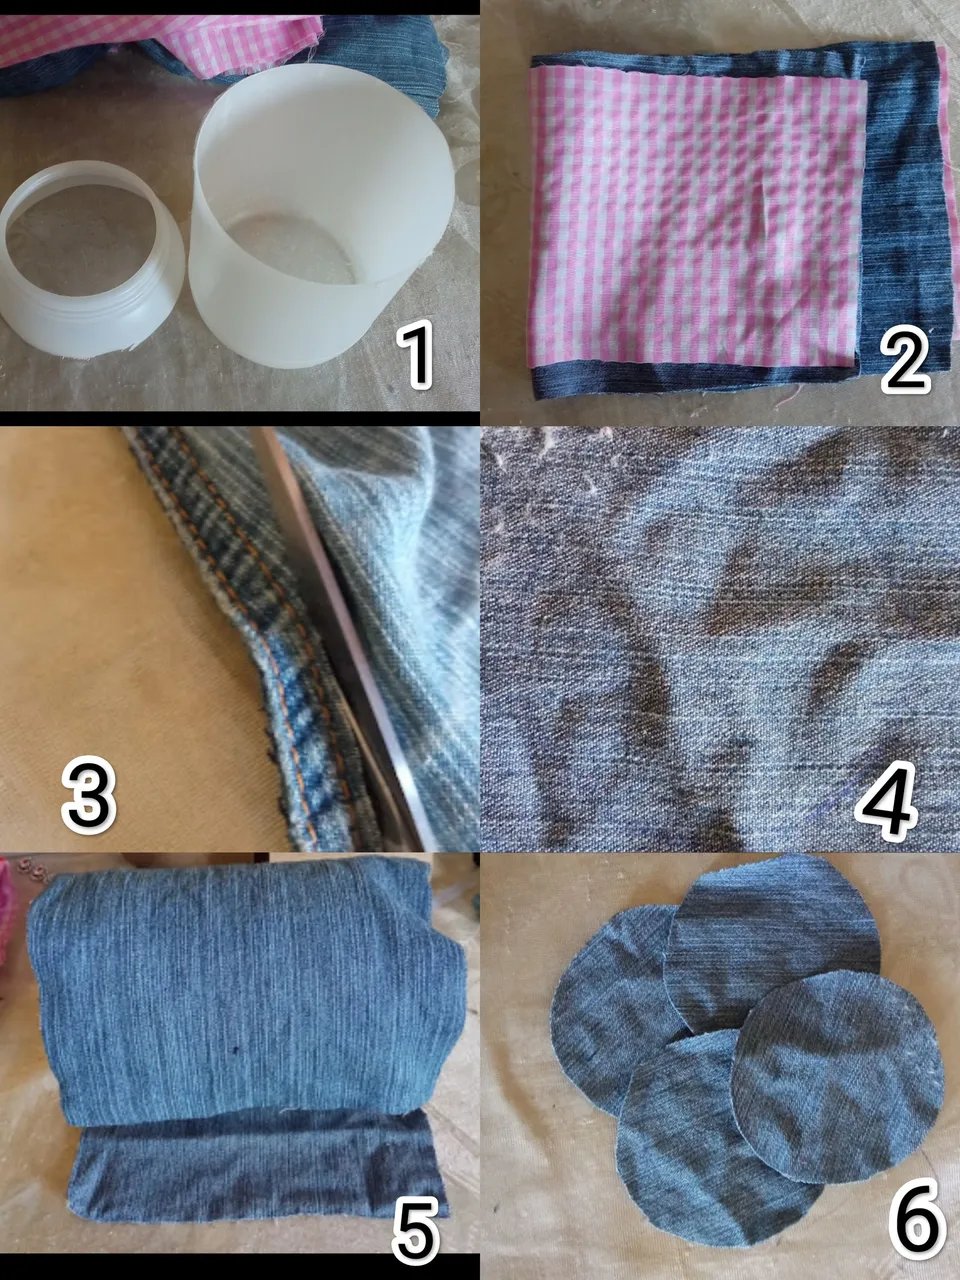
Pasos 1.2.3.4.5.6
Comienzo cortando un poco más abajo de la boca del envase , trato de que me quedé lo más parejo posible, luego corto toda la costura doble del pedazo de jean, ya que esa parte la utilizaré , luego mido la tela de jean al envase corto al igual que corto una pieza del Vichy , marco 4 círculos en el restante de la tela y saco 4 círculos pequeños.
Procedure:
Steps 1.2.3.3.4.5.6.
I start cutting a little below the mouth of the container, I try to make it as even as possible, then I cut the whole double seam of the jean piece, since I will use that part, then I measure the jean fabric to the container and cut the same way I cut a piece of the Vichy, I mark 4 circles on the remaining fabric and take out 4 small circles.
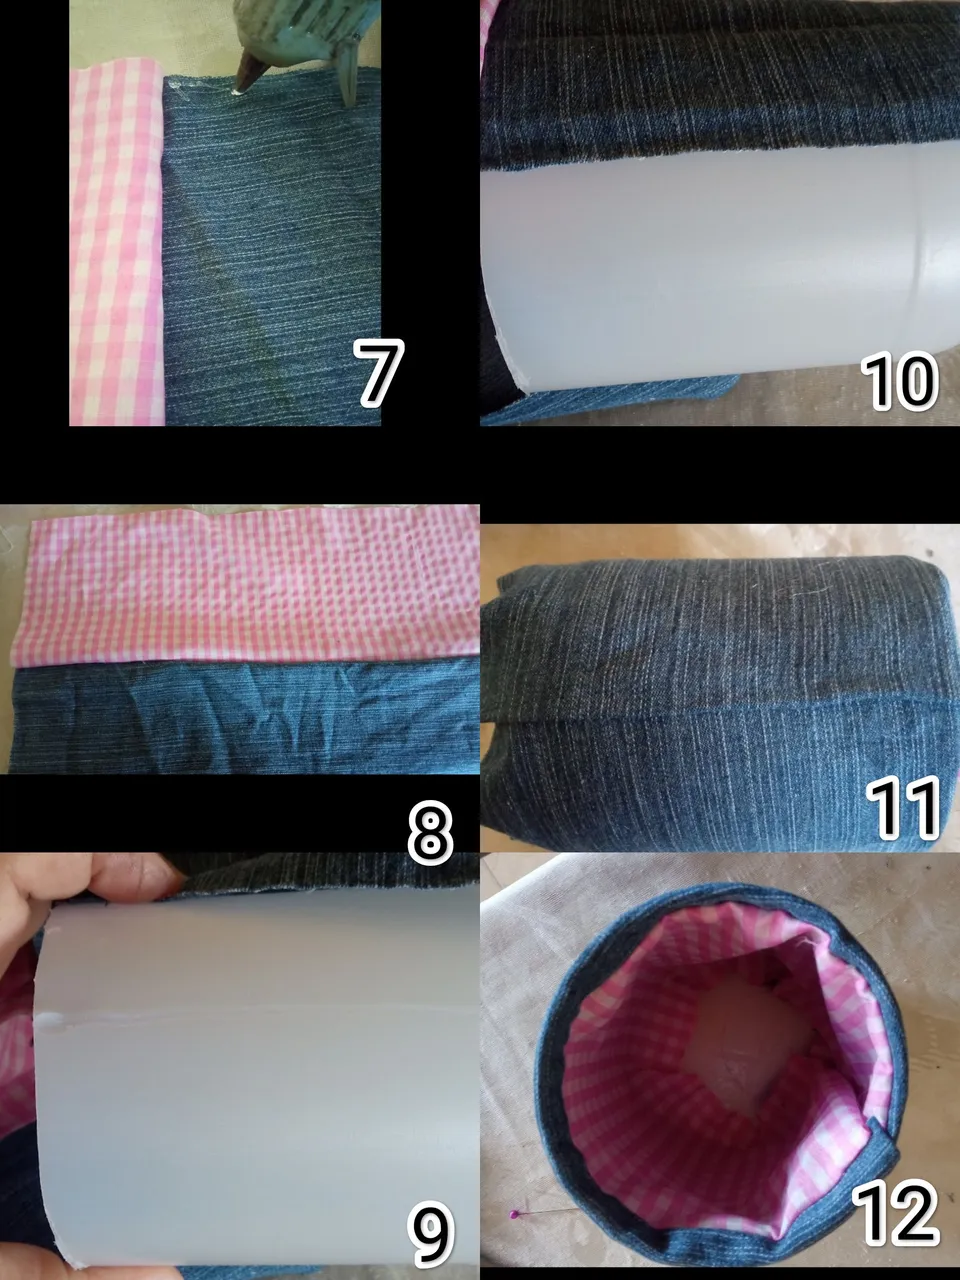
Pasos 7.8.9.10.11.12
Acá coloco la tela de jeans y el vichy de frente y las pego con silicón , luego coloco silicón en el envase y lo forro que quede la tela de jeans en la parte de afuera y el vichy por la parte de adentro , se cuadra bien que quede parte de la tela de jeans hacia adentro.
Steps 7, 8, 9, 10, 11, 12
Here I place the jeans fabric and the vichy on the front and glue them with silicone, then I place silicone on the container and line it so that the jeans fabric is on the outside and the vichy on the inside, it is well squared so that part of the jeans fabric is inside.
Pasos 13.14.15.16.17.18
Corto 2 círculos en fieltro del tamaño del fondo del envase, aplicó Silicón a la tela de jean y coloco un círculo en la parte de abajo y el otro en la parte de adentro del envase , luego mido los tubos de los rollos de papel higiénico en la tela de vichy y procedo a forrarlos.
Steps 13.14.15.16.17.18
I cut 2 circles in felt the size of the bottom of the container, applied Silicone to the jean fabric and place one circle on the bottom and the other on the inside of the container, then I measure the toilet paper roll tubes in the vichy fabric and proceed to line them.

Pasos 19.20.21.22.23.24
Luego de forrados los 4 tubos con la tela de vichy , procedo a realizar las flores con los círculos de la tela de jean y coloco la flor plateada en el centro de la flor, luego aplicó Silicón en uno de las extremos del tubo y pego , repito el proceso en los otros tubos de cartón ,que queden bien pegados.
Steps 19, 20, 21, 22, 23, 24
After lining the 4 tubes with the vichy fabric, I proceed to make the flowers with the jean fabric circles and place the silver flower in the center of the flower, then I apply Silicone on one of the ends of the tube and glue, I repeat the process on the other cardboard tubes, so that they are well glued.

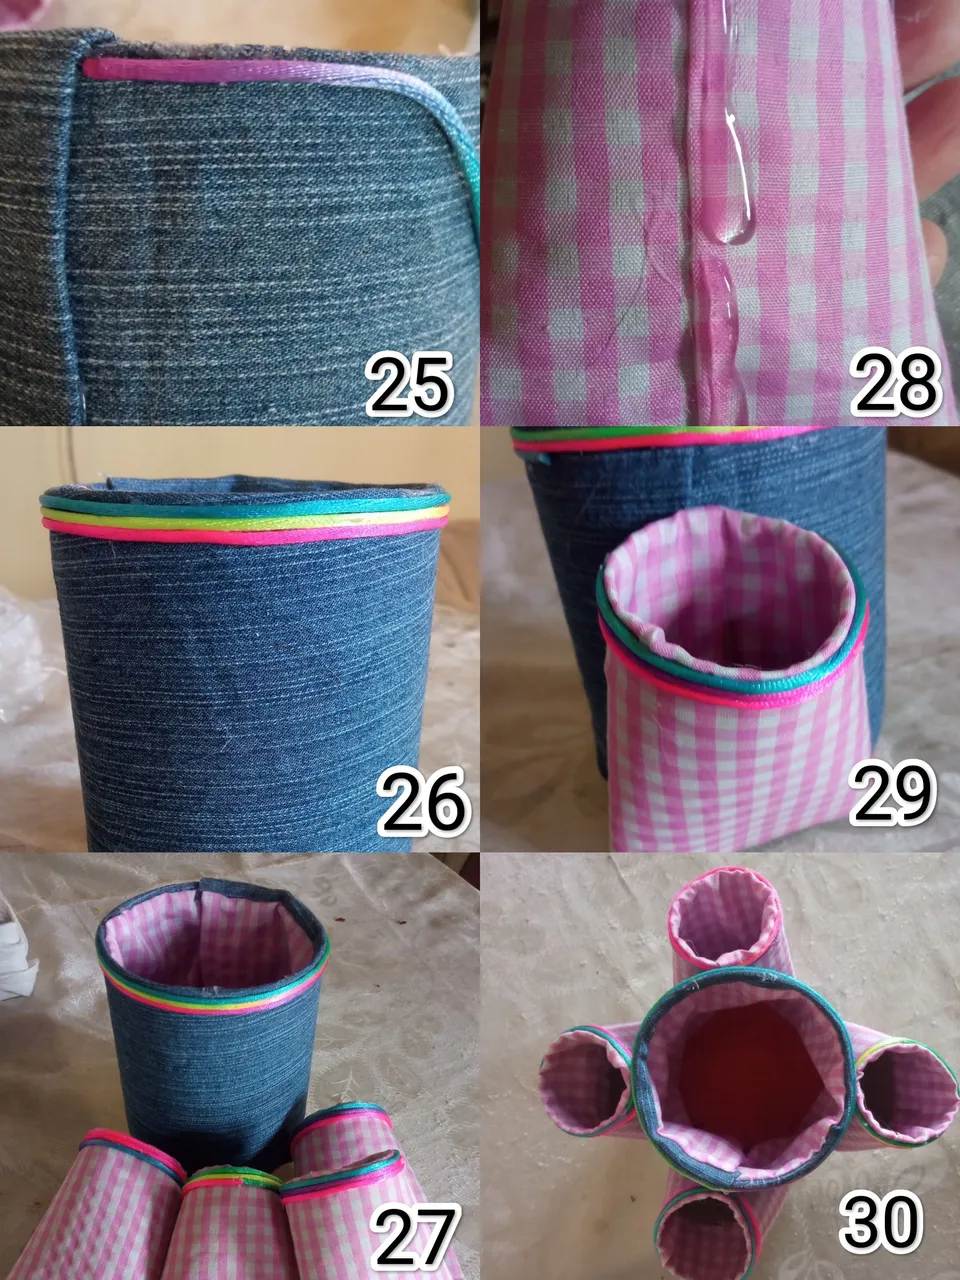
Pasos 25.26.27.28.29.30
Acá procedo a pegar al rededor en la parte de arriba del envase , la cola de ratón matizada y doy 3 vueltas y realizo lo mismo en los tubos de cartón, luego coloco silicón en el extremo de atrás de los tubos y los coloco alrededor del envase más grande y verifico que estén todos bien forrados y pegados .
Steps 25, 26, 27, 28, 29, 30
Here I proceed to glue around the top of the container, the colored mouse glue and I do the same on the cardboard tubes, then I put silicone on the back end of the tubes and place them around the larger container and verify that they are all well lined and glued.
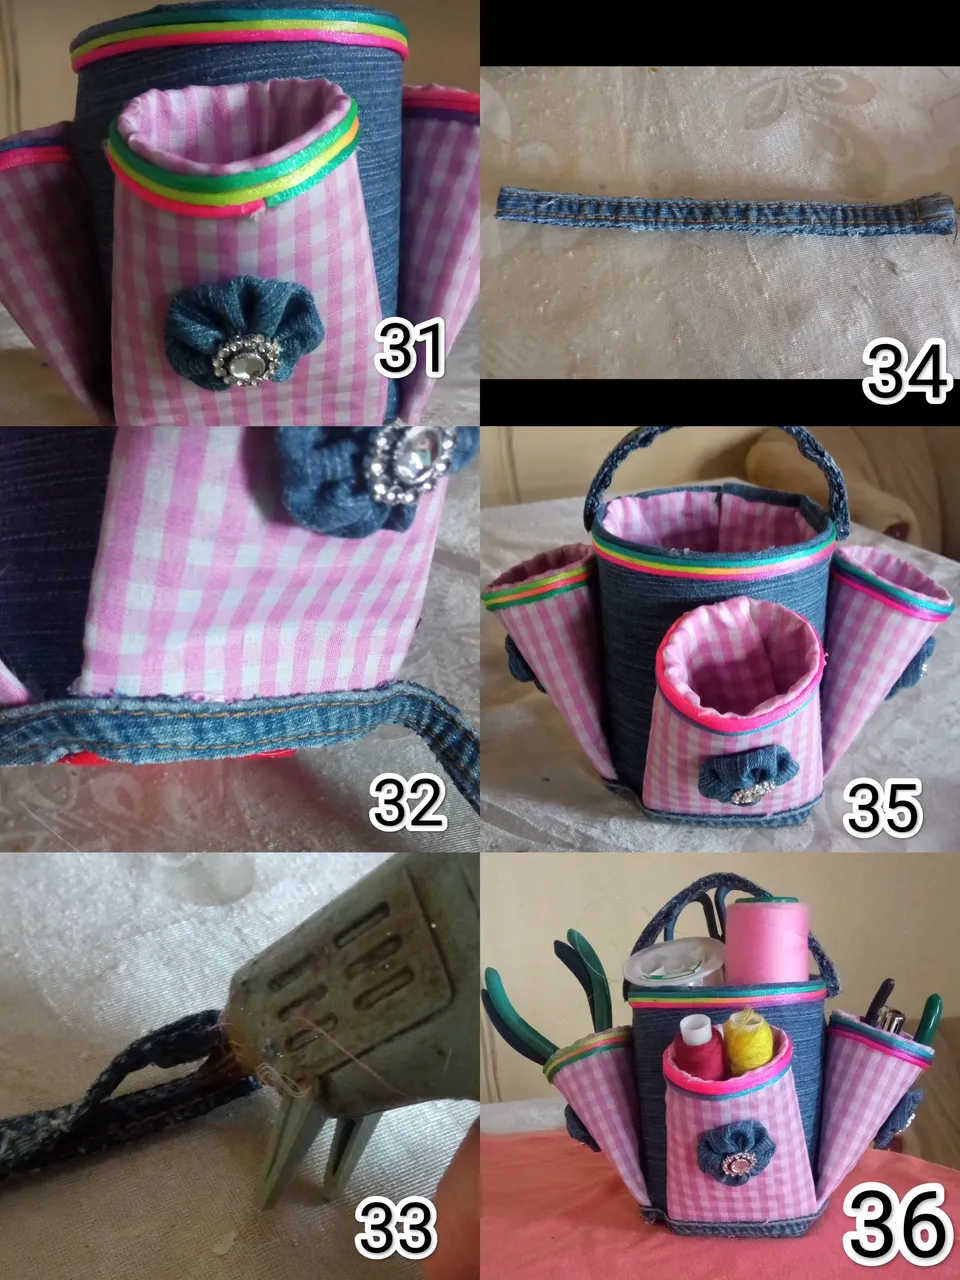
Pasos 31.32.33.34.35.36
Acá coloco una flor a cada tubo de cartón forrado y en la parte de abajo colocó la tira de costura doble, el cual va servir como adorno, reforzar y darle un mejor acabado en la parte de abajo, con el sobrante de la tira, lo doblo coloco Silicón y lo coloco de un extremo a otro del envase , verifico que esté todo en orden y doy por terminado este lindo proyecto
Steps 31.32.33.34.35.36
Here I place a flower on each lined cardboard tube and at the bottom I place the double stitching strip, which will serve as an ornament, reinforce and give a better finish at the bottom, with the excess of the strip, I fold it I place Silicone and place it from one end to the other of the container, I verify that everything is in order and I finish this nice project.
Espero les guste este bello trabajo, todas las fotos son de mi propiedad @lupasbra21 fueron tomadas y editadas de mi teléfono inteligente Redmi note 9, agradecida con su apoyo , será hasta una próxima oportunidad.
I hope you like this beautiful work, all photos are my property @lupasbra21 were taken and edited from my smartphone Redmi note 9, grateful with your support , will be until a next opportunity.
