

Celebrar una graduación entre familiares y amigos en Venezuela siempre será un motivo de alegría para quienes logran su éxito poco a poco, especialmente cuando se trata de nuestros hijos, hermanos, sobrinos o personas allegadas a nuestro círculo familiar. Junto a mi hermano, nos hemos encargado de diseñar una gran variedad de modelos de birretes y paquetes educativos, que en ocasiones comercializamos a través de instituciones educativas o facilitamos la venta al por menor. Básicamente, se trata de buscar un diseño específico y mandar a confeccionar el birrete.
Todo este proceso sigue una serie de pasos que, si te das cuenta, no es tan difícil como parece. Solo debes prestar atención al procedimiento y podrás crear tu hermoso birrete. Cabe destacar que en Venezuela, en esta época del año, nos encontramos en temporada de graduaciones, ya sea de preescolar, primaria o bachillerato. En numerosas ocasiones, recibimos solicitudes de diseños específicos o exclusivos en ciertos establecimientos.
Sin embargo, resulta muy costoso hacer este tipo de pedidos. Si tienes materiales similares a los que vas a observar en la fotografía, con un poco de creatividad y paciencia, puedes obtener un hermoso resultado. Todos los birretes son personalizados y deben llevar medidas específicas, lo que puede hacer que el trabajo sea un poco tedioso, pero no es imposible ni algo que no puedas lograr.
No te imaginas las horas de trabajo y el tiempo que dedicamos a esta actividad, pero la satisfacción de cada uno de nuestros pedidos siempre será lo mejor. Cada día surgen infinidad de modelos y diseños en redes sociales, y las exigencias de las personas se vuelven bastante complejas. Claro, hay que considerar el costo de los materiales y los accesorios adicionales que desean utilizar. Todo depende de cada caso. No puedo hablarte de precios aquí, ya que sería algo inaudito, pero sí puedo facilitarte un procedimiento claro, preciso y con excelentes resultados.

Celebrating a graduation among family and friends in Venezuela will always be a source of joy for those who achieve their success little by little, especially when it is our children, siblings, nieces, nephews or people close to our family circle. Together with my brother, we have been in charge of designing a great variety of cap models and educational packages, which we sometimes market through educational institutions or facilitate retail sales. Basically, it is a matter of finding a specific design and having the cap made.
This whole process follows a series of steps that, if you realize, is not as difficult as it seems. You just have to pay attention to the procedure and you will be able to create your beautiful cap. It is worth mentioning that in Venezuela, at this time of the year, we are in graduation season, whether it is for preschool, elementary or high school. On numerous occasions, we receive requests for specific or exclusive designs in certain establishments.
However, it is very costly to place these types of orders. If you have materials similar to those shown in the picture, with a little creativity and patience, you can obtain a beautiful result. All the birettas are personalized and must have specific measurements, which can make the work a little tedious, but it is not impossible or something you can't achieve.
You can not imagine the hours of work and the time we dedicate to this activity, but the satisfaction of each of our orders will always be the best. Every day an infinite number of models and designs appear in social networks, and people's demands become quite complex. Of course, you have to consider the cost of the materials and the additional accessories you want to use. It all depends on each case. I can't talk about prices here, as it would be unheard of, but I can give you a clear, precise procedure with excellent results.
Materiales:
Cartón doble (lo conocemos como doble en kilo)
Silicón caliente
Tela de tu preferencia para forrar
Pasamanería de preferencia
Nombre personalizado si así lo deseas.
Todo lo que consideres útil para decorar, vale tu creatividad.
Materials:
Double cardboard (we know it as double in kilo)
Hot glue
Fabric of your choice for lining
Trimmings of your choice
Personalized name if you wish.
Anything you consider useful to decorate, your creativity is worth it.
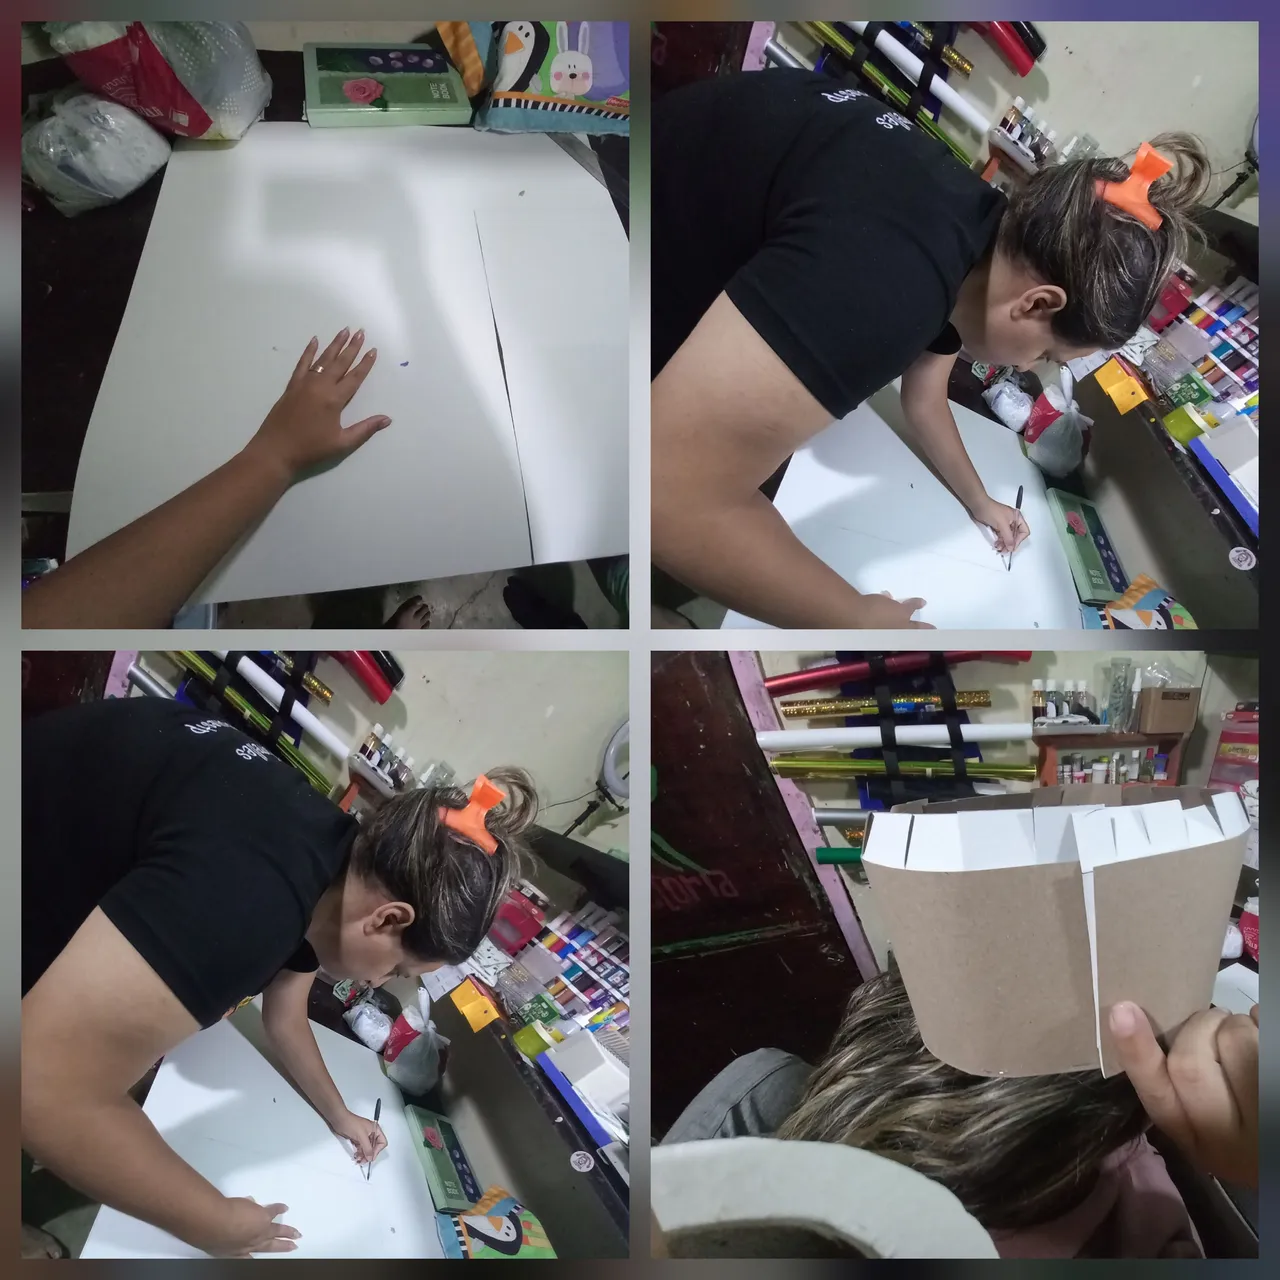
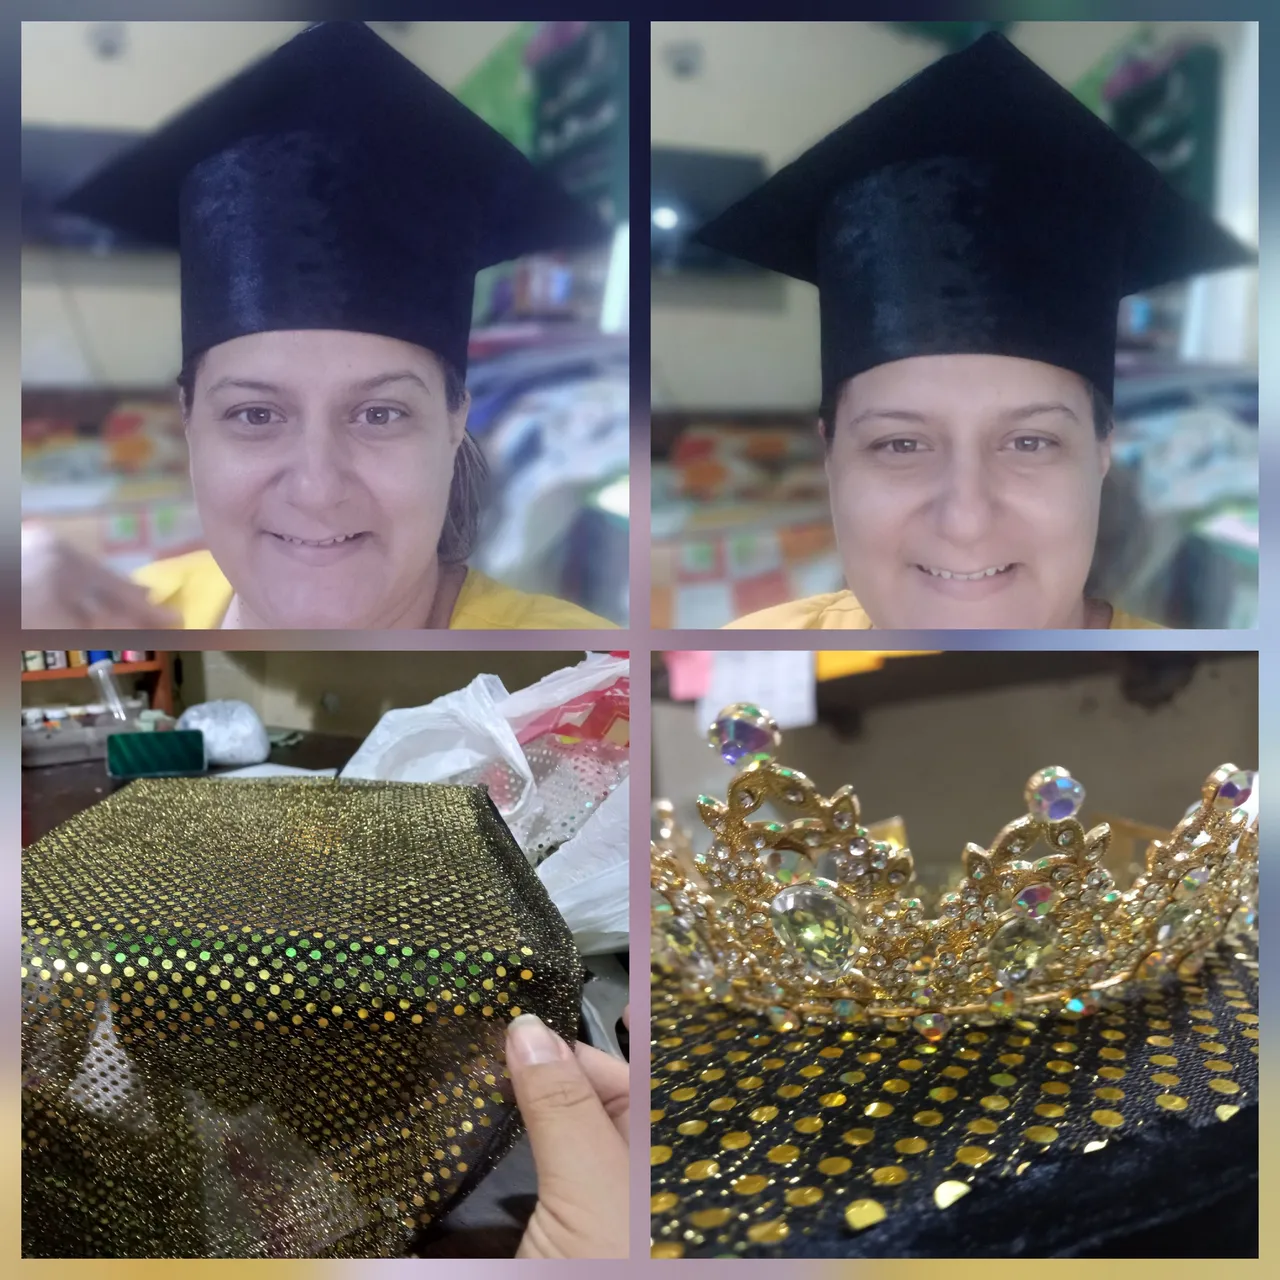
En primer lugar, debemos seleccionar los materiales y saber con qué exactamente vamos a trabajar. Es importante tener las medidas claras para que el birrete no quede grande ni pequeño, sino acorde a la cabeza de la persona que lo usará. En este caso, te muestro una foto con el ejemplo de cómo tomar las medidas para que puedas empezar.
First of all, we must select the materials and know exactly what we are going to work with. It is important to have clear measurements so that the cap is not too big or too small, but according to the head of the person who will wear it. In this case, I show you a picture with an example of how to take the measurements so you can start.

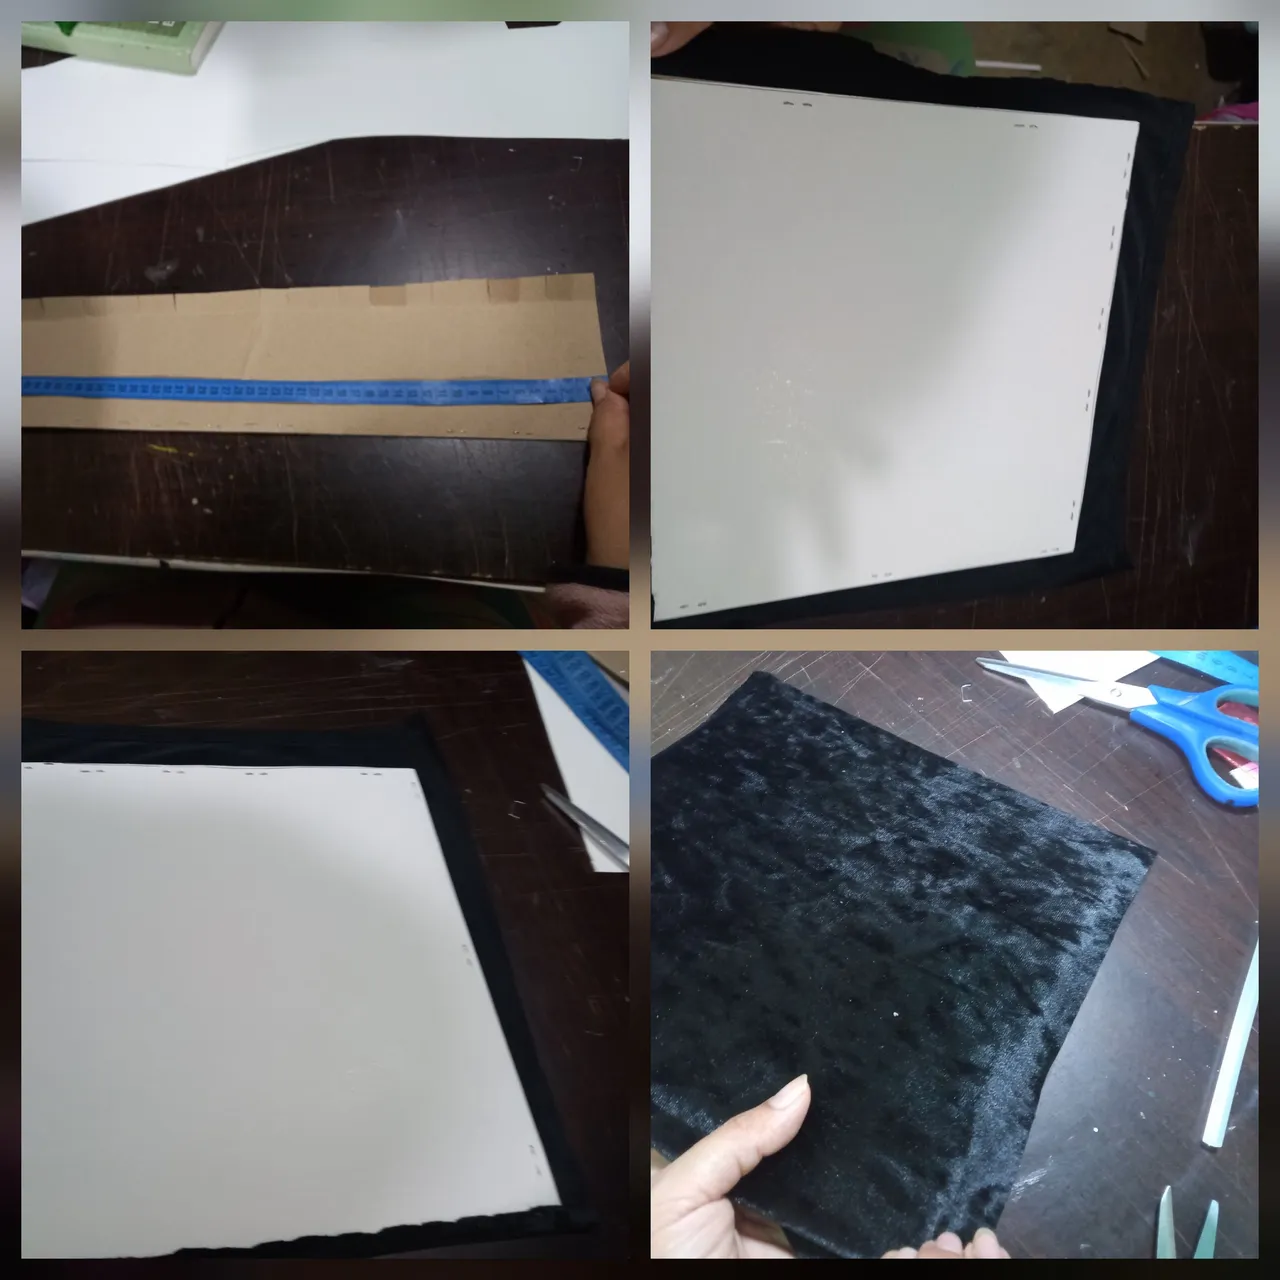
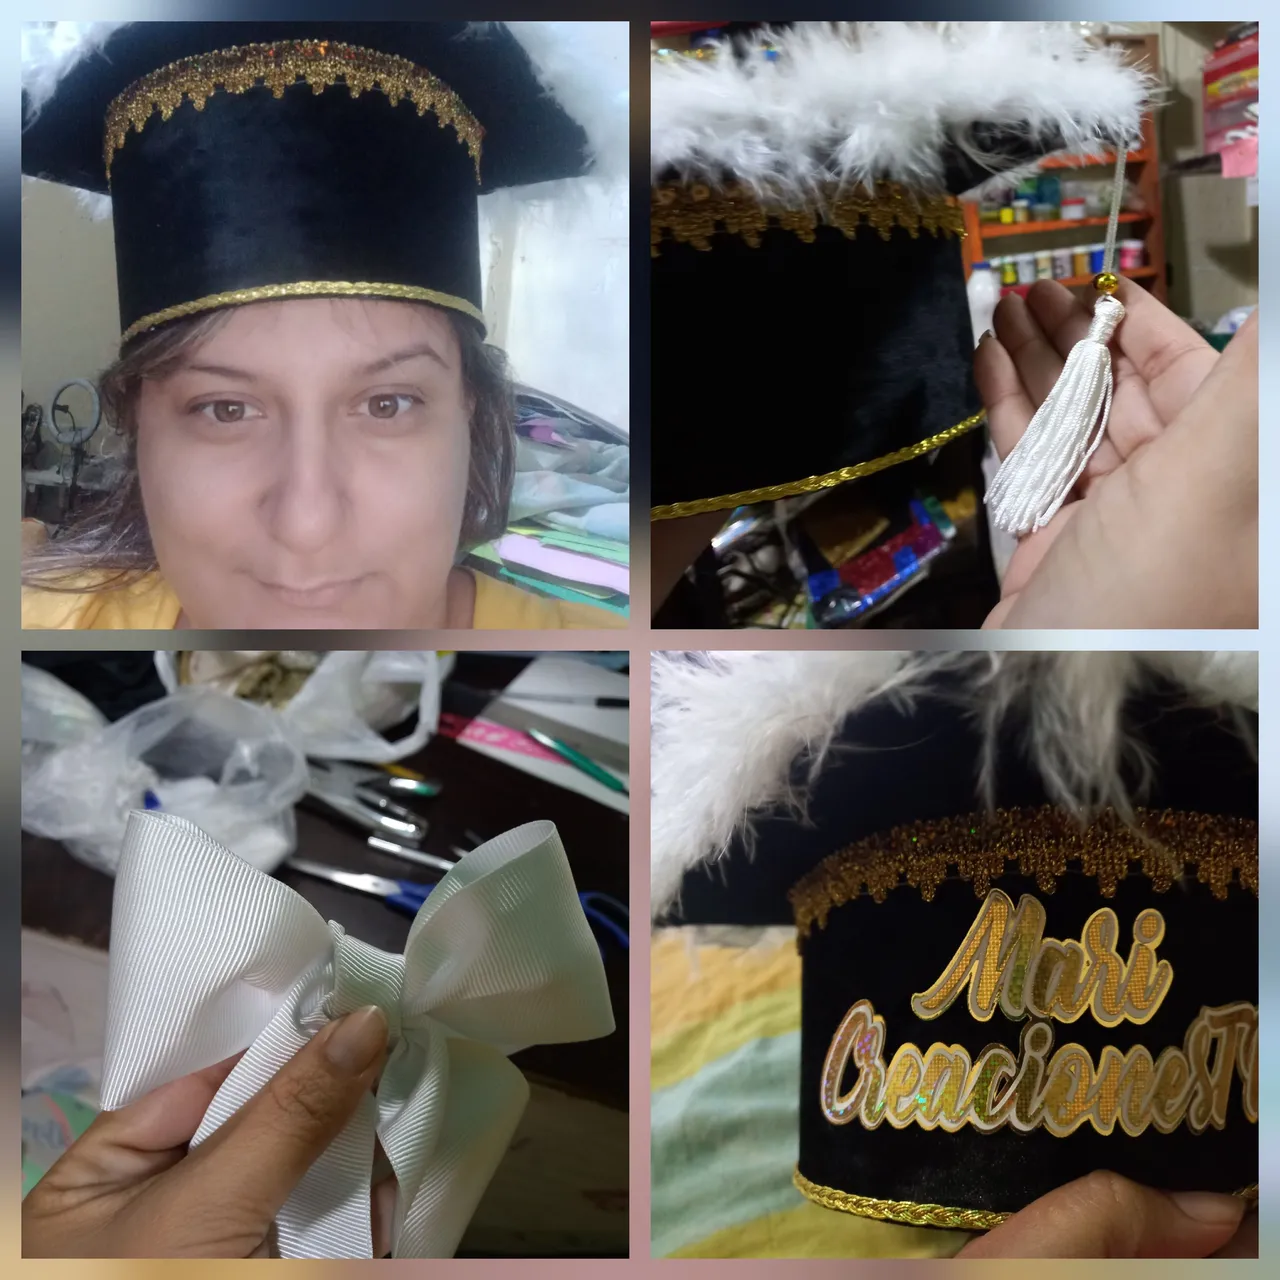
Luego, vamos a realizar dos cortes básicos y elementales. El primero de ellos es el fajón, que es la rueda que va pegada hacia la tapa del birrete. Este debe tener una altura de 10 cm y el largo te lo dará la medida que ya has tomado previamente. Posteriormente, debes recortar la tapa superior, la cual tiene unas medidas de 25 x 25 cm. Una vez listo este procedimiento, continuamos forrando con tela cada parte. Aquí puedes utilizar la tela de tu elección; en este caso, usamos tela de seda en color negro. Es importante forrarlo, ya que esto le da mayor vistosidad y elegancia al birrete.
Next, we are going to make two basic and elementary cuts. The first one is the sash, which is the wheel that is attached to the cap of the biretta. This should have a height of 10 cm and the length will be given by the measurement you have previously taken. Next, you must cut out the top cap, which measures 25 x 25 cm. Once this procedure is ready, we continue by lining each part with fabric. Here you can use the fabric of your choice; in this case, we used black silk fabric. It is important to line it, as this gives more elegance and elegance to the biretta.
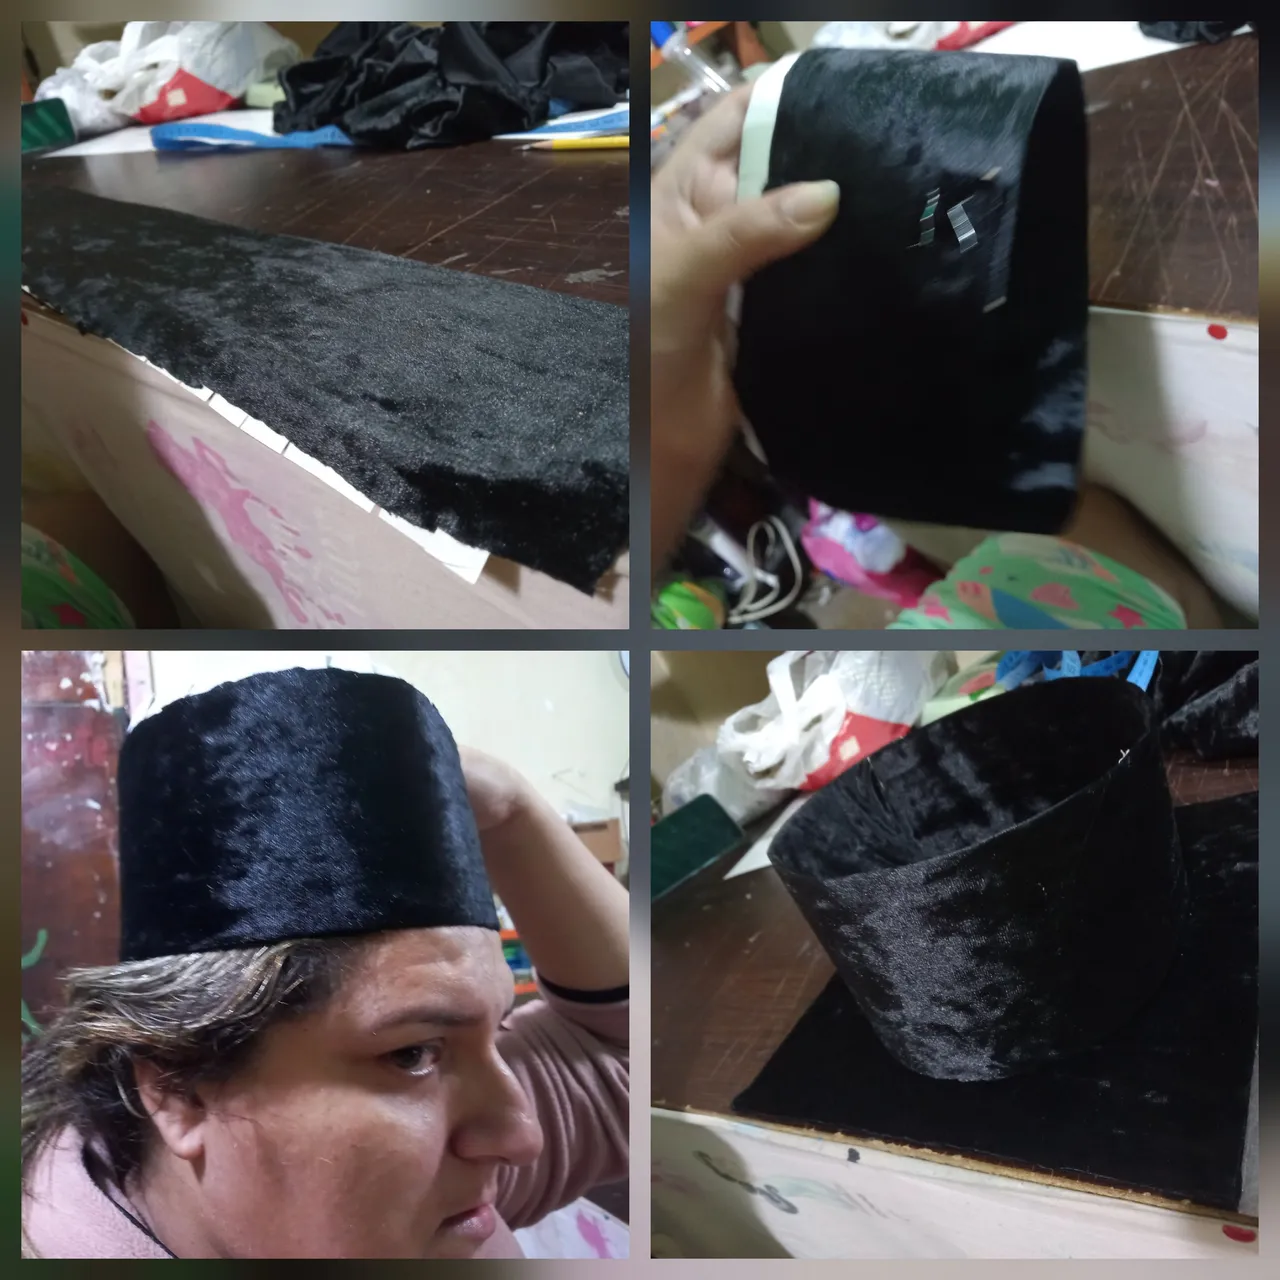
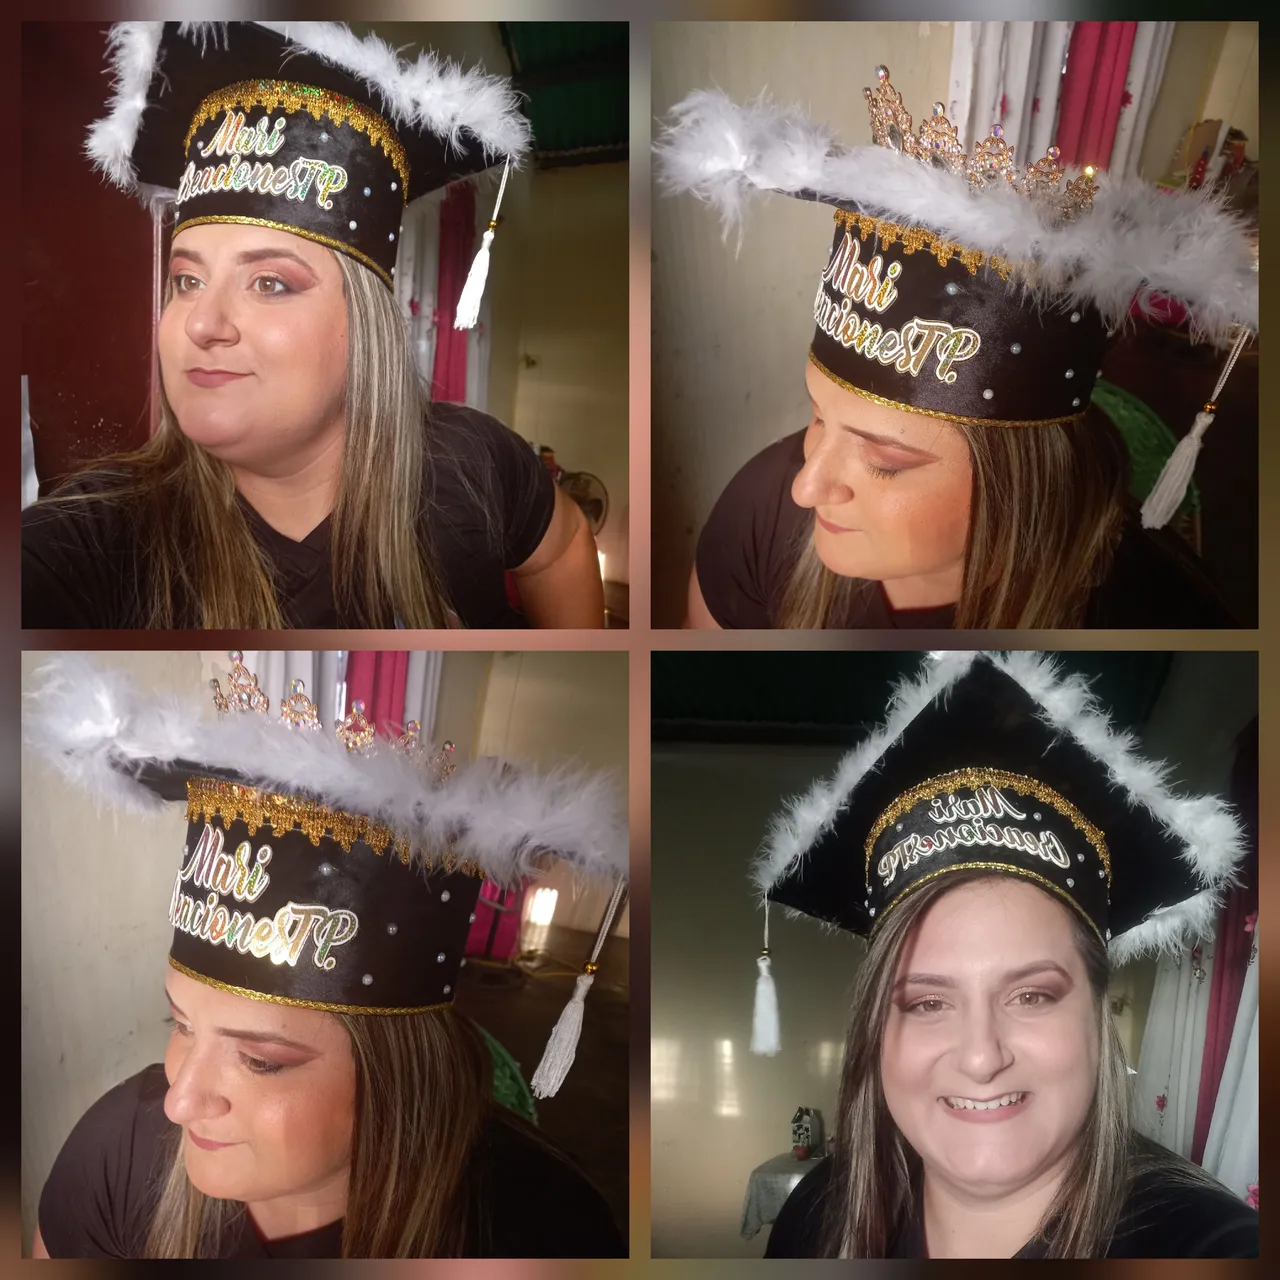
Una vez que estas partes están forradas, se procede a pegarlas en la parte inferior de forma céntrica, es decir, deben quedar bien alineadas para que se vea un equilibrio en el birrete. Es necesario seleccionar los accesorios que le vas a colocar; esto es elección o a gusto de cada persona. Aquí te mostramos cómo se coloca la pasamanería brillante, una serie de accesorios que marcan la diferencia, incluyendo una corona.
Once these parts are lined, proceed to glue them in the lower part in a centric way, that is to say, they must be well aligned so that a balance is seen in the biretta. It is necessary to select the accessories that you are going to place; this is a choice or to each person's taste. Here we show you how to place the shiny trimmings, a series of accessories that make the difference, including a crown.
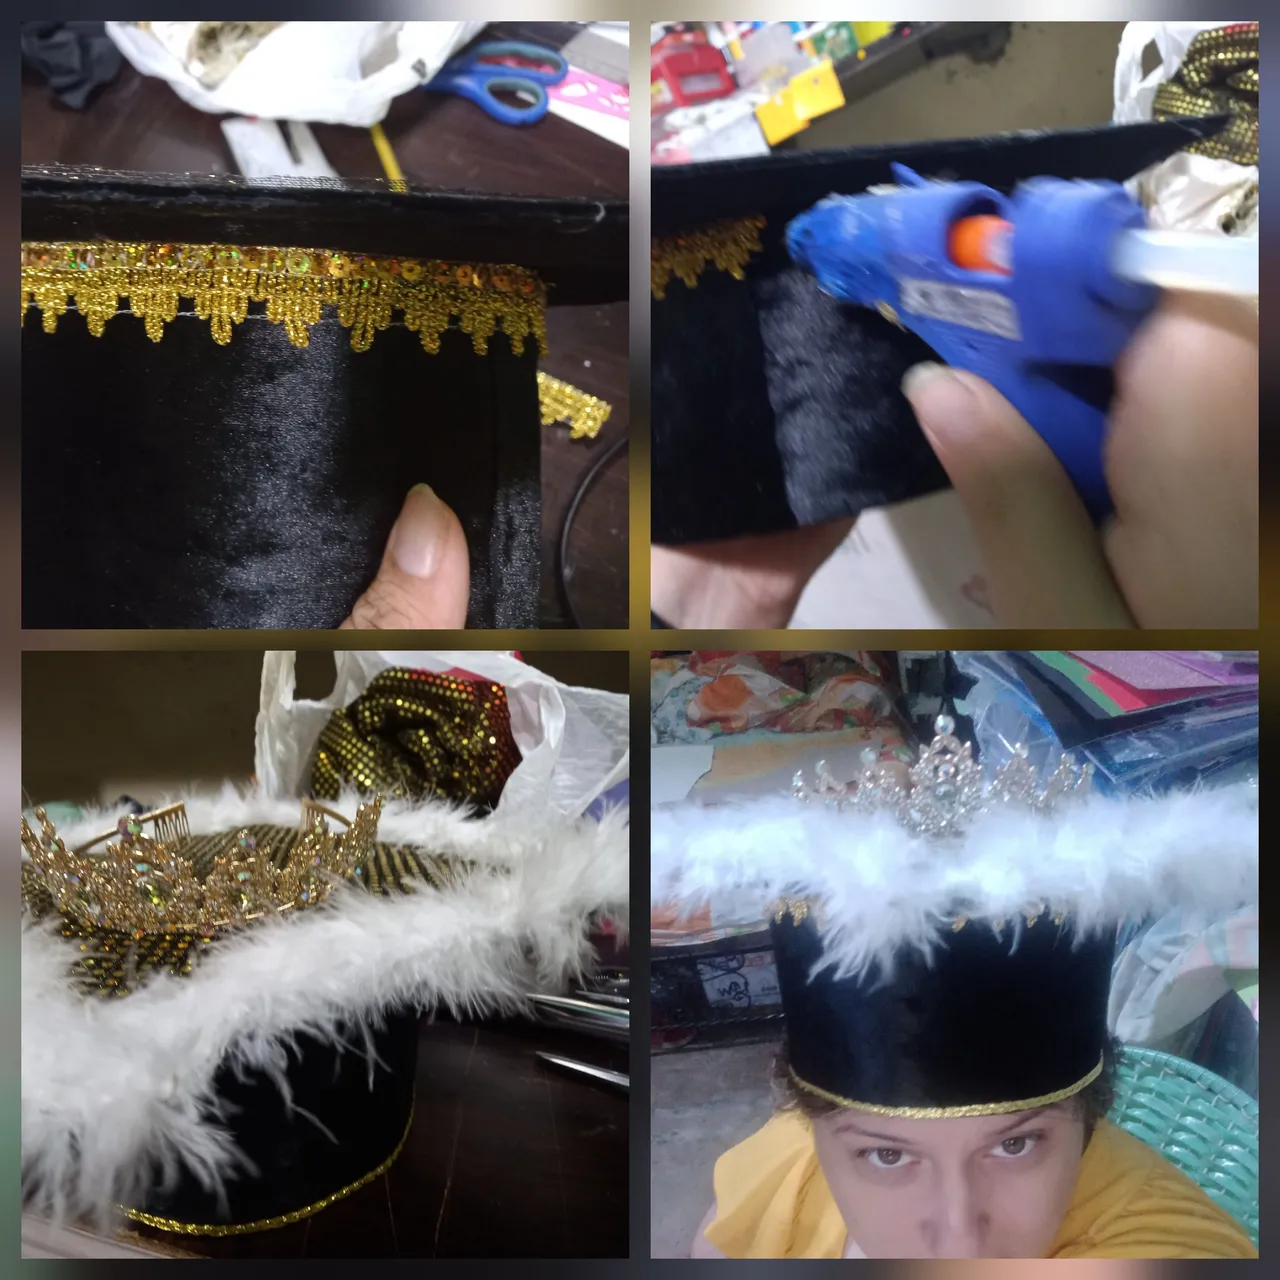
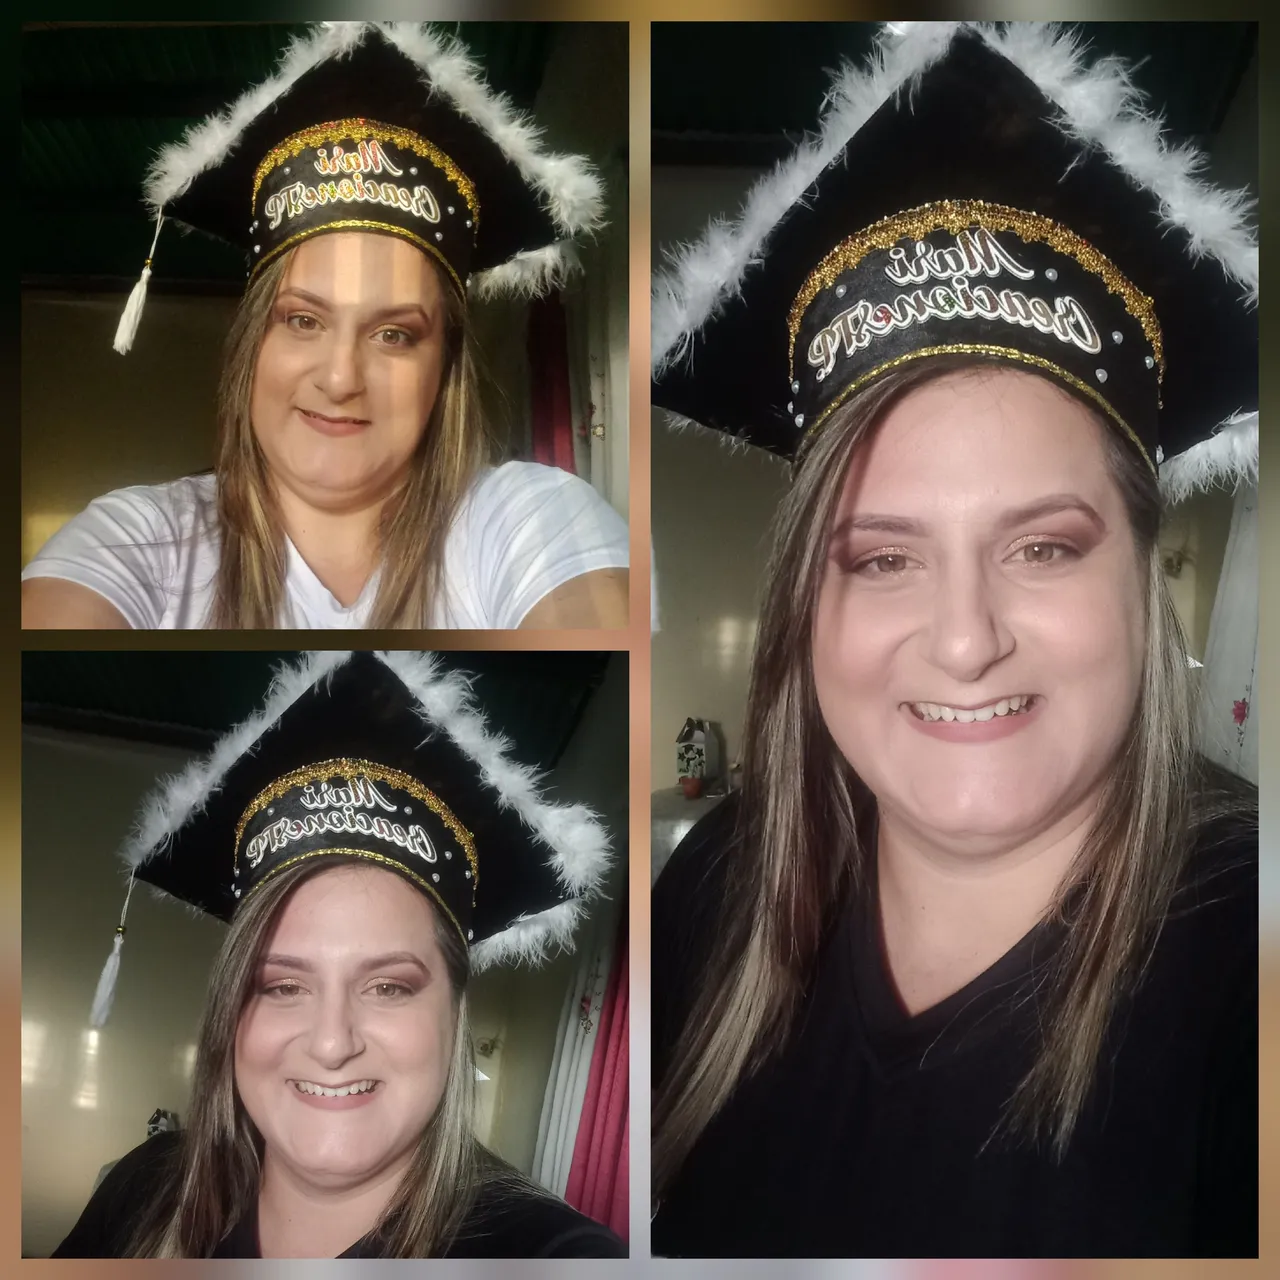
Por último, agrega un toque personalizado con el nombre de tu preferencia. Debes cuidar cada detalle para que el resultado sea pulcro y llamativo. Recuerda limpiar cada borde y quitar el excedente de silicón, pues esto hace que el birrete se vea más estético. Quizás parezca un trabajo bastante complejo, pero en realidad es algo muy sencillo y fácil; solo debes combinar tus materiales y dejar volar tu imaginación.
Finally, add a personalized touch with the name of your choice. You must take care of every detail so that the result is neat and eye-catching. Remember to clean each edge and remove the excess silicone, as this makes the cap look more aesthetic. It may seem quite a complex job, but it is actually very simple and easy; you just have to combine your materials and let your imagination run wild.
Todas las imágenes son de mi propiedad.
Utilicé traductor DeepL versión gratuita
Imágenes, separadores, banner hechos en Canva
Contenido original de @marytp20