🌕🌜🌕🌜🌕🌜🌕🌜🌕🌜🌕🌜🌕🌜🌕🌜

Welcome || Bienvenidos
Feliz día a todos queridos amigos y lectores como siempre es para mi un honor y un placer compartir con cada uno de ustedes semanas tras semanas, en esta ocasión mi contenido gira entorno al concurso de la comunidad @diyhub donde mes a mes nos estarán trayendo una temática distinta, en esta ocasión el tema es LA LUNA una temática bastante hermosa y más porque amo relaizan manualidades, para mí es relajante y a su vez gratificante ya que ver el resultado de la creatividad propia genera sastifaccion, aún así debo confesar que tenía aproximadamente un año que no realizaba ninguna manualidad debido al factor tiempo el cual no es mismo desde que soy mamá, inicialmente considere realizar para complementar la tematica de luna unos adorables osos 🐻 sin embargo no me convencía, así que seguí pensando hasta que a mi mente llegó la idea del Principito ¿quién no ha leído esta historia? Me atrevería a decir que una gran mayoría con solo ver la foto de portada de este post saben que personaje es ante de leer las primeras líneas del presente post, así que sin más comencé a buscar todo lo que iba ser necesario para materializar esta linda idea, así que sin más preámbulos acompañenme a ver el paso a paso, espero que sea de su agrado:
Happy day to all dear friends and readers as always is for me an honor and a pleasure to share with each of you week after week, this time my content revolves around the community contest @diyhub where month after month will be bringing us a different theme, this time the theme is ** THE MOON ** a quite beautiful theme and more because I love crafts relaizan, for me it is relaxing and in turn rewarding because seeing the result of own creativity generates sastifaccion, even so I must confess that I had about a year that I did not make any craft due to the time factor which is not the same since I'm a mom, initially I considered to make to complement the theme of moon some adorable bears 🐻 however I was not convinced, so I kept thinking until my mind came to the idea of the Principito who has not read this story? I would dare to say that a great majority just by seeing the cover photo of this post you know which character is before reading the first lines of this post, so without further ado I began to look for everything that was going to be necessary to materialize this cute idea, so without further ado join me to see the step by step, I hope you like it:
Materials || Materiales
Para la masa flexible: ||
For the flexible dough:
🌕 1 taza de maicena.
🌕 1/2 de paga blanca escolar.
🌕 1 cucharada de aceite comestible.
🌕 1 cucharada de vinagre.
🌕 1 cup cornstarch.
🌕 1/2 of white school pay.
🌕 1 tablespoon of edible oil.
🌕 1 tablespoon vinegar.

Para la lampara.|| For the lamp.
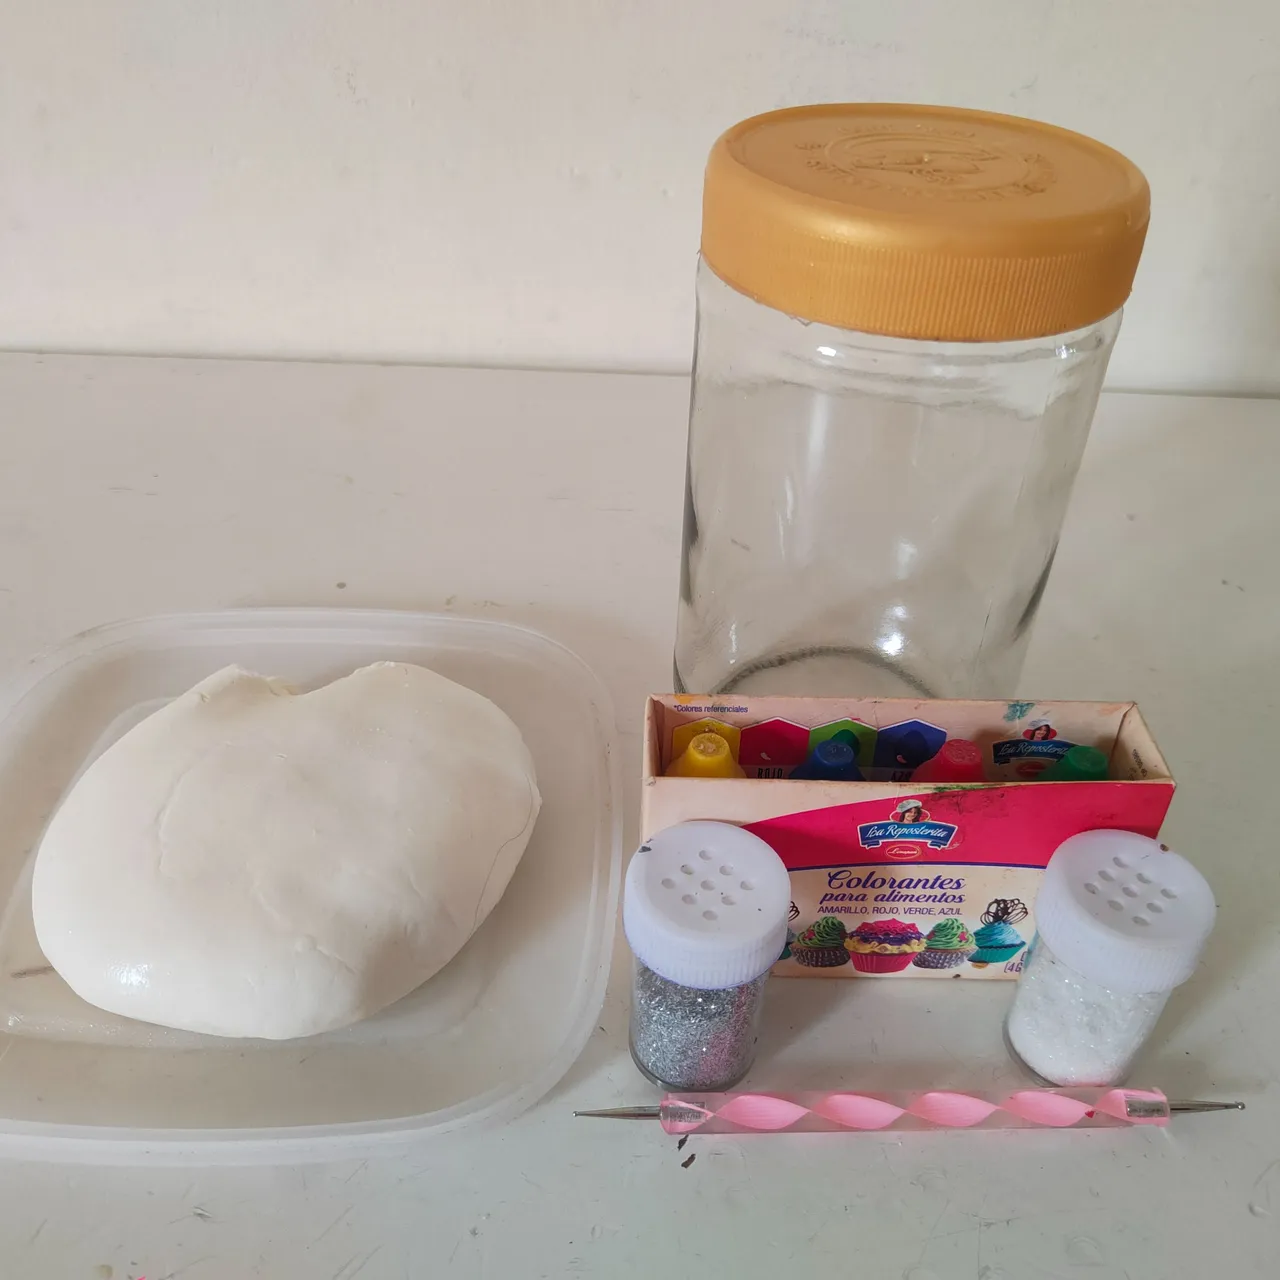
🌕 1 frasco de vidrio.
🌕 Tempera color azul.
🌕 Masa flexible.
🌕 Colorantes.
🌕 Pega blanca escolar.
🌕 Escarcha.
🌕 Luces.
🌕 1 glass jar.
🌕 Blue colored tempera.
🌕 Flexible dough.
🌕 Colorants.
🌕 White school glue.
🌕 Frosting.
🌕 Lights.
steps || pasos
🌕 Paso 1.| Este proyecto lo vamos a realizar desde cero literalmente, así que vamos a comenzar realizando la masa flexible la cual será casera, iniciaremos colocando en un bol nuestra taza de maicena, seguidamente un 1/2 de esa misma taza de pega blanca escolar, por último la cucharada de aceite y la de vinagre, comenzaremos a integrar todos los ingredientes formando nuestra masa flexible casera, es normal al inicio ver cómo la masa es porosa con grumos y que se agriete con facilidad, debemos amasar durante unos minutos hasta que veamos que su consistencia se torne lisa y a su vez que ya no tenga grumos, una vez que esté así guardamos en un bol hermético y llevamos a la nevara por 30 minutos, pasado este tiempo ya está lista para utilizar nuestra masa flexible casera.
🌕 Step 1. | This project we are going to make it from scratch literally, so we will start making the flexible dough which will be homemade, we will start by placing in a bowl our cup of cornstarch, then a 1/2 of that same cup of white school glue, finally the tablespoon of oil and vinegar, we will begin to integrate all the ingredients forming our homemade flexible dough, it is normal at the beginning to see how the dough is porous with lumps and that it cracks easily, we must knead for a few minutes until we see that its consistency becomes smooth and at the same time it no longer has lumps, once it is like this we keep it in an airtight bowl and take it to the refrigerator for 30 minutes, after this time it is ready to use our homemade flexible dough.
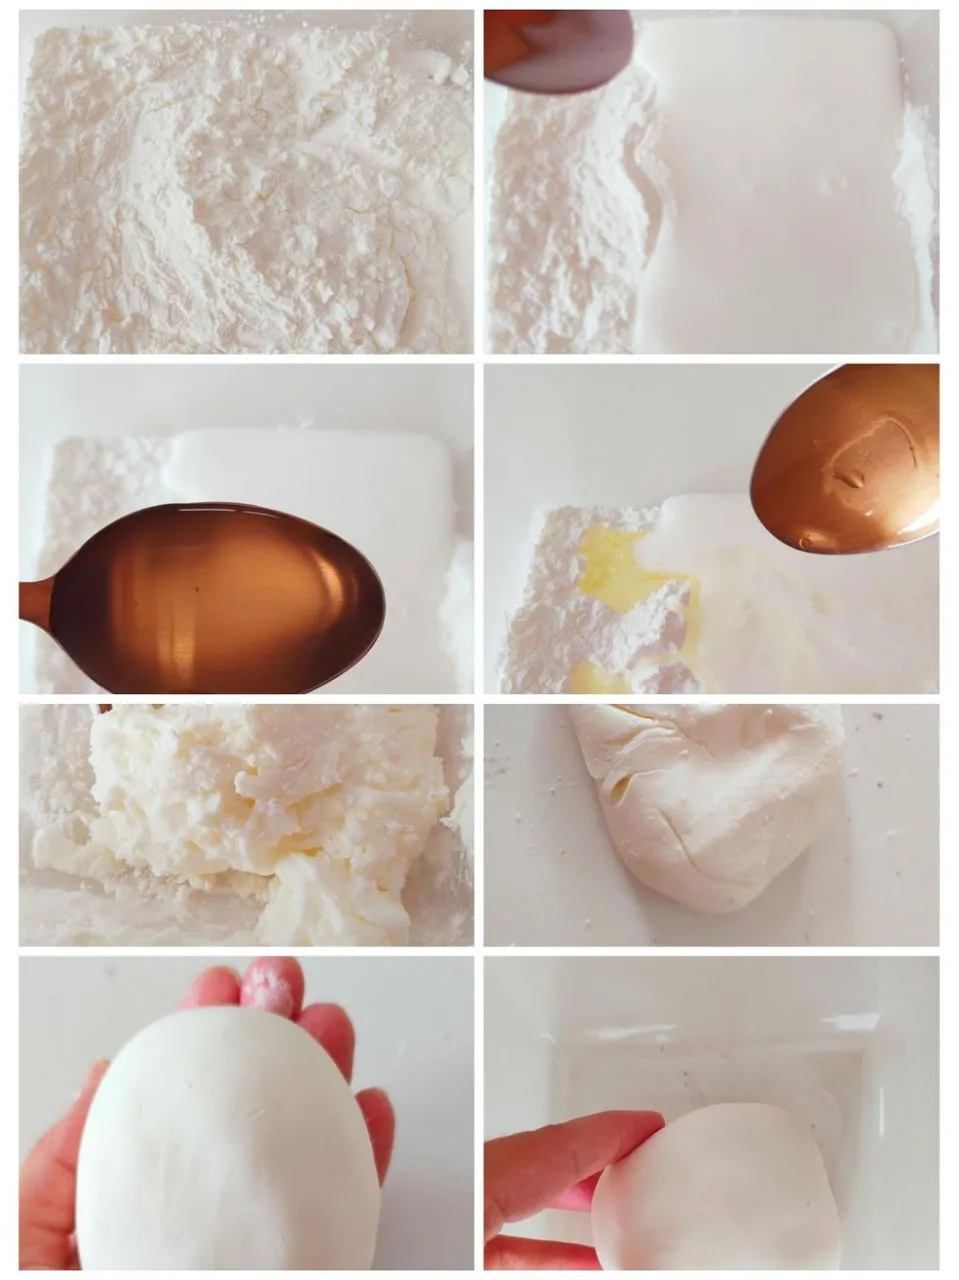
This is how easy it is to make our own homemade flexible dough. || Así de sencillo podemos realizar nuestra propia masa flexible casera.
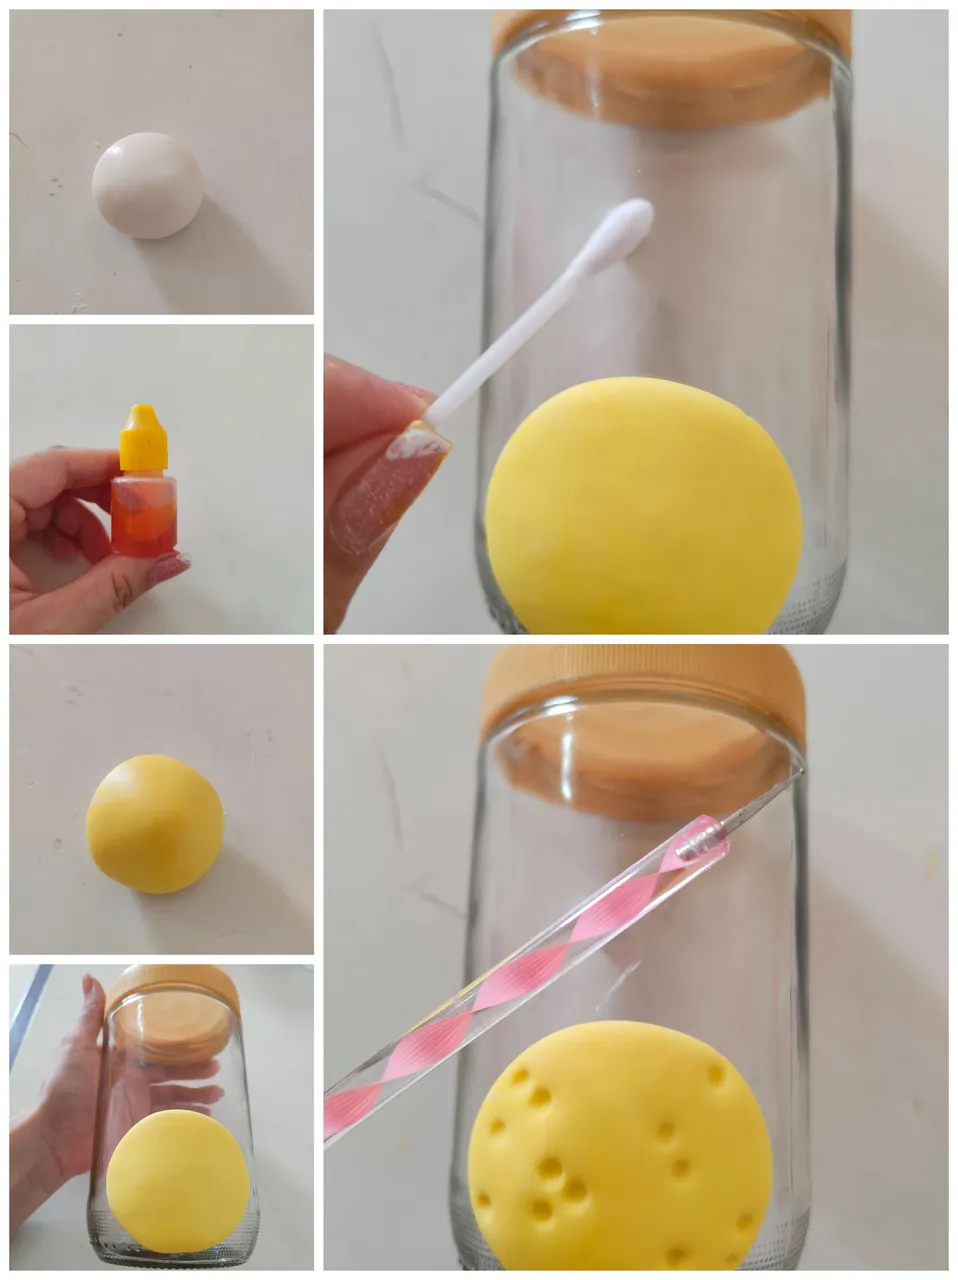
🌕 Paso 2.| Iniciaremos realizando lo que será la luna para ello utilizaremos colorante amarillo para pintar la masa flexible, continuaremos formaremos un circulo y extendiendo de forma uniforme hasta formar un círculo, una vez que ya tenemos nuestra luna vamos a realizar varios cráter en ella con la ayuda de un hisopo realizaremos los más grandes y luego realizaremos los más pequeños con la ayuda de la herramienta de punteo que se suele usar para hacer diseños en las uñas.
🌕 Step 2.| We will begin by making what will be the moon for it we will use yellow dye to paint the flexible dough, we will continue forming a circle and extending evenly until forming a circle, once we already have our moon we will make several craters in it with the help of a swab we will make the biggest ones and then we will make the smaller ones with the help of the dotting tool that is usually used to make designs on the nails.
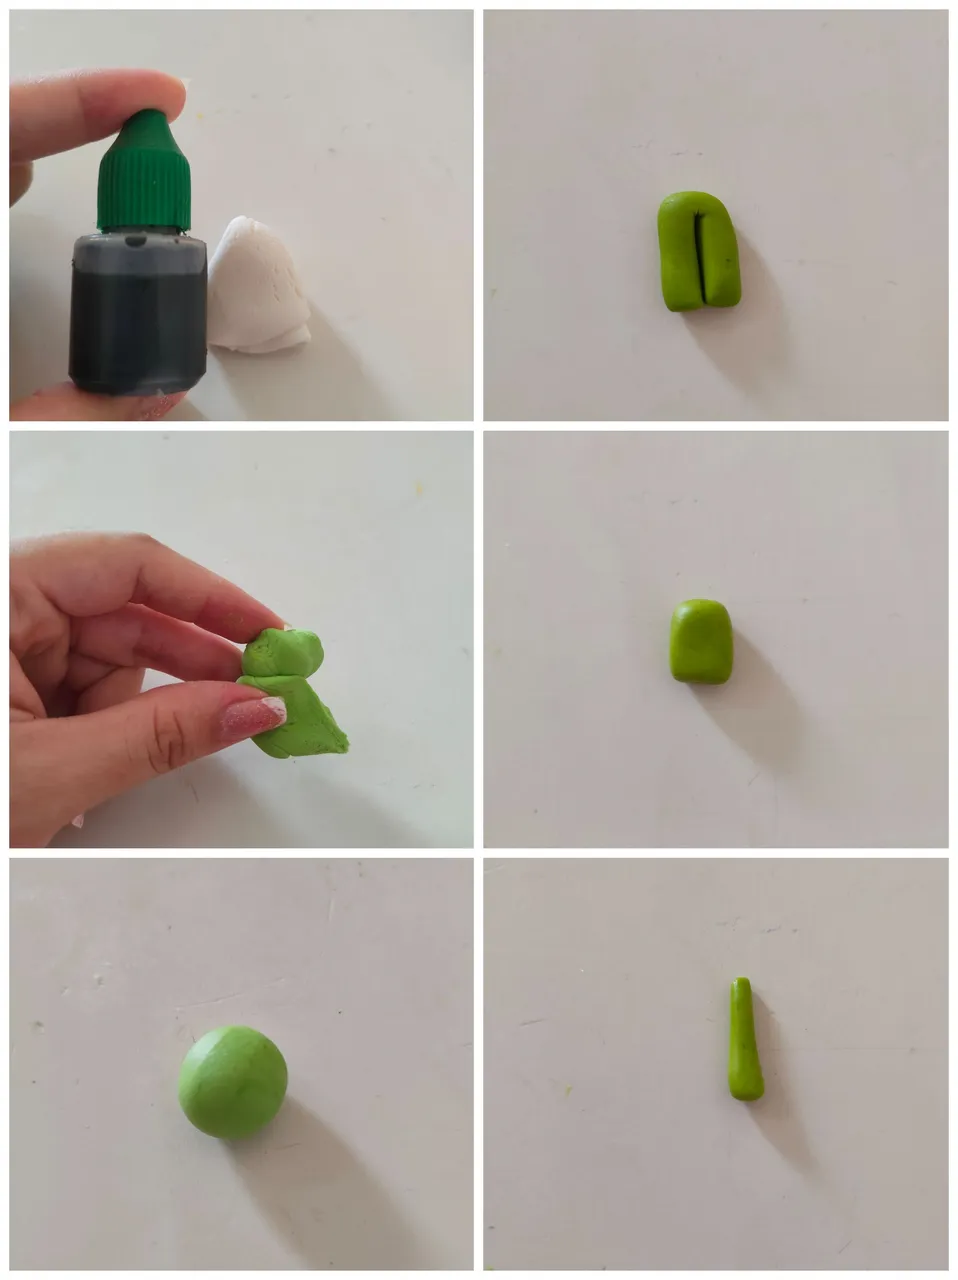
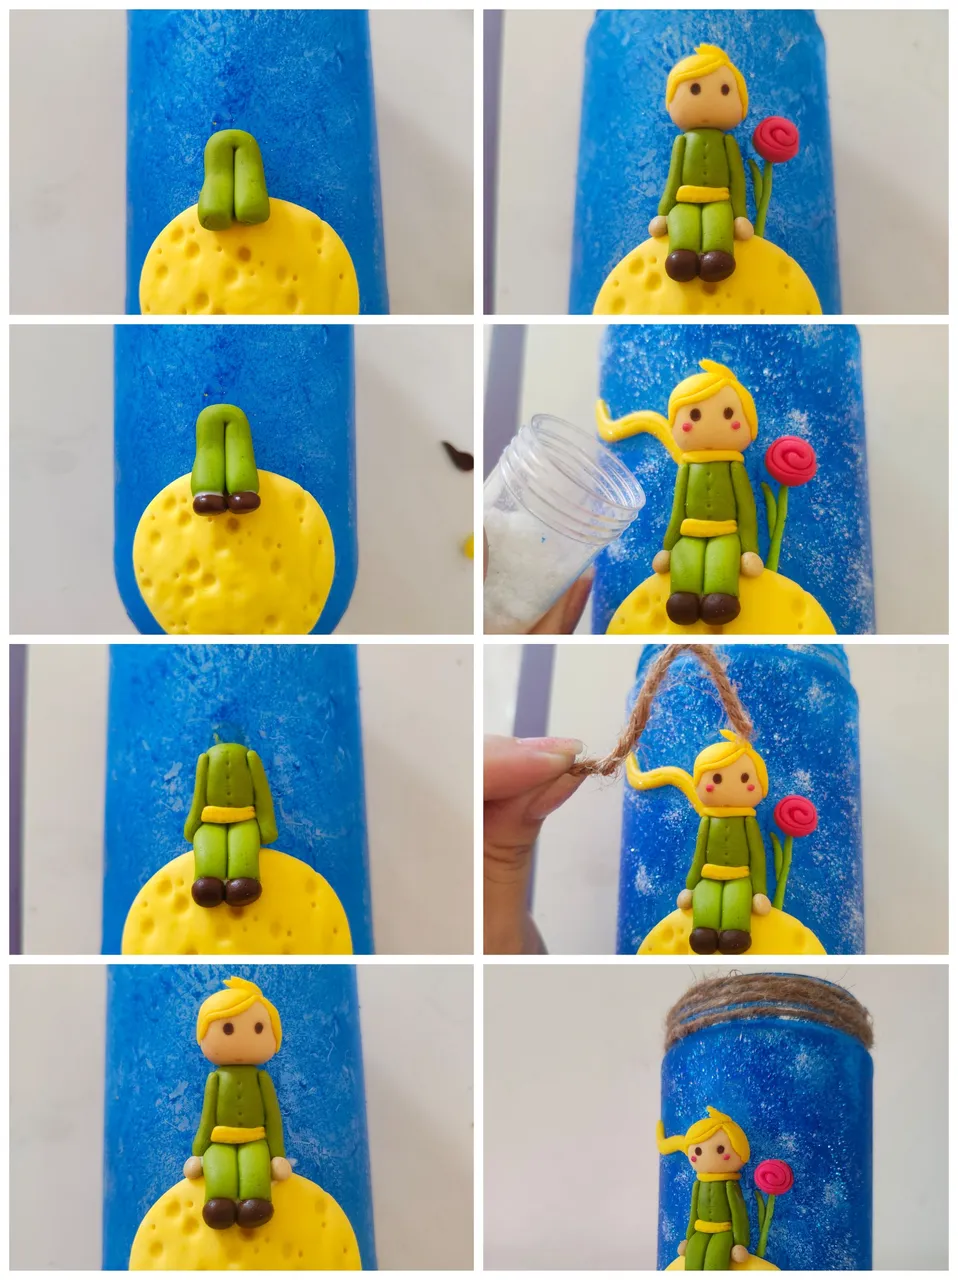
🌕 Paso 3.| Lo siguiente que vamos a realizar el cuerpo de nuestro principe así que tome suficiente masa flexible, aplique unas gotas de colorante verde y comencé a realizar cada parte del cuerpo que correspondía a este color, como eran las piernas, torso y brazos.
🌕 Step 3.| Next we are going to make the body of our prince so I took enough flexible dough, applied a few drops of green dye and began to make each part of the body that corresponded to this color, such as the legs, torso and arms.
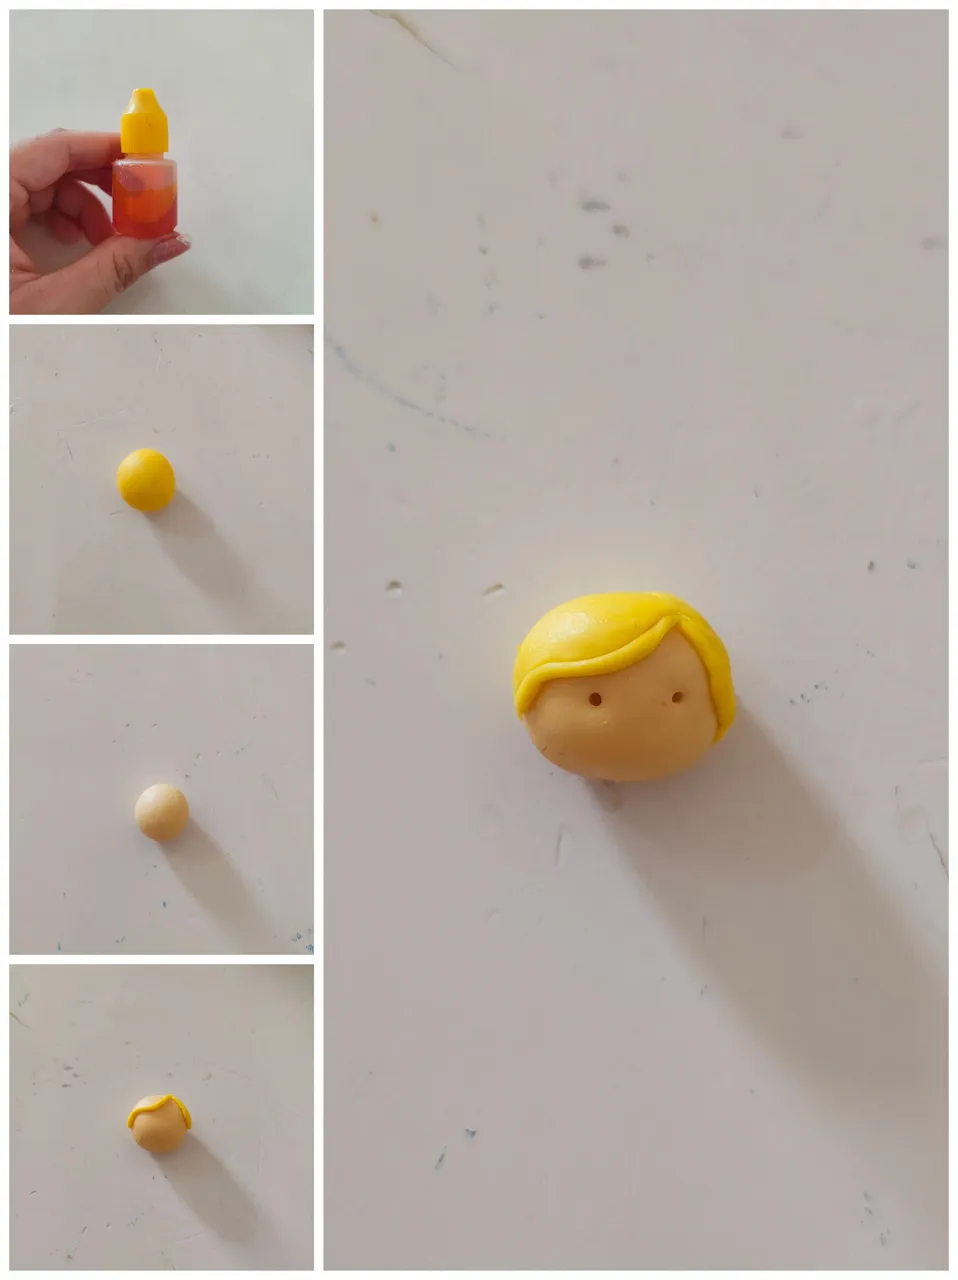
🌕 Paso 4.| seguidamente comencé a realizar lo que sería la cara y cabello para ello tome poca masa flexible la cual dividí en 2 parte y procedí a tinturar en 2 tonos distintos, debido a que el cabello es un tono de amarillo más fuerte y la cara un tono amarillo muy sutil , con la herramienta de punteo realice en la cara lo orificios de los ojos.
🌕 Step 4.| Next I began to make what would be the face and hair for it I took a little flexible mass which I divided into 2 parts and proceeded to dye in 2 different tones, because the hair is a stronger shade of yellow and the face is a very subtle yellow tone, with the stippling tool I made in the face the holes of the eyes.
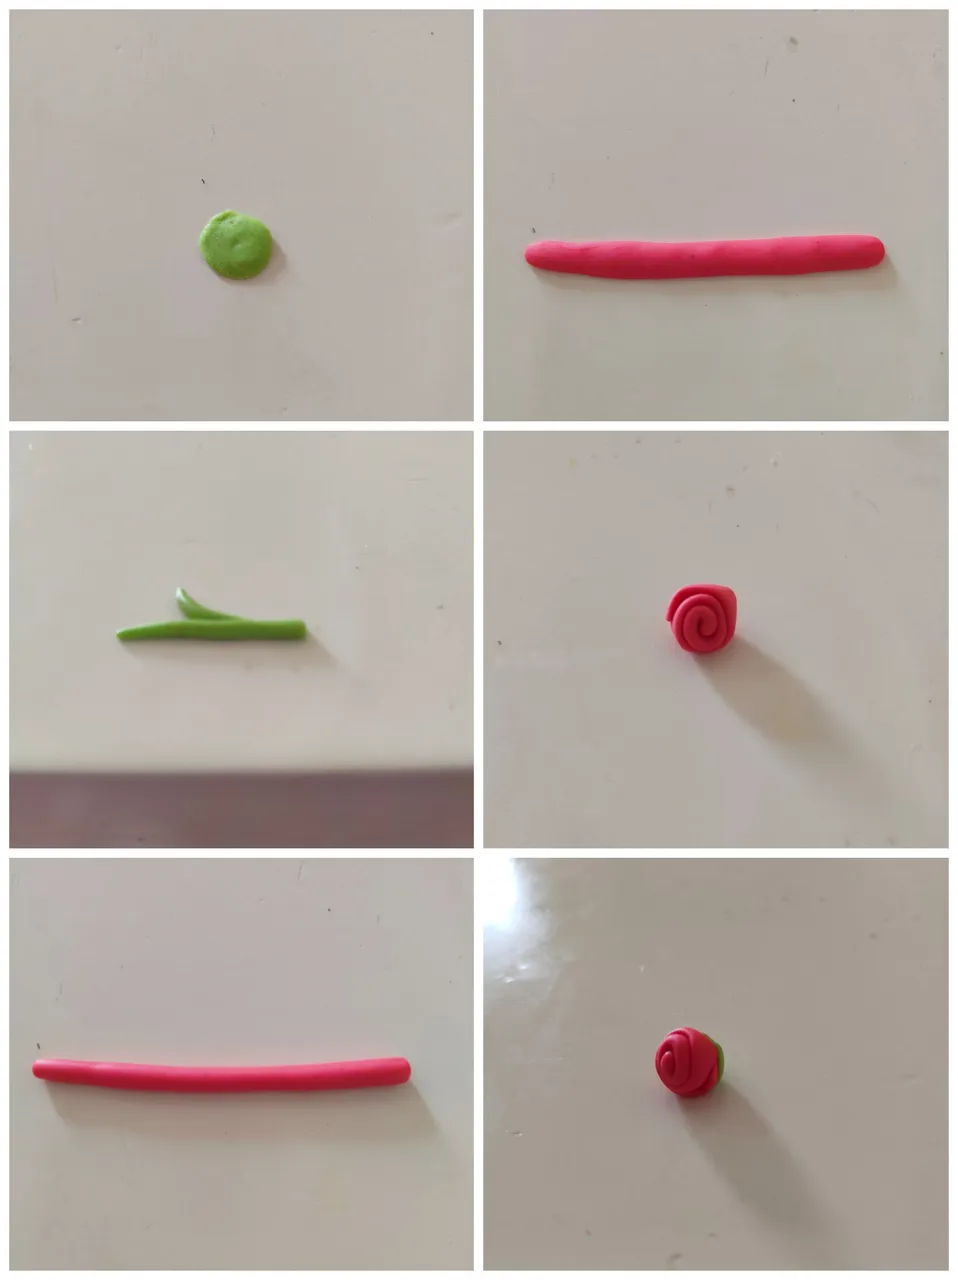
🌕 Paso 5.| No podía faltar la rosa así que sin dilación comencé a realizar este pequeño pero característico detalle de está obra.
🌕 Step 5.| I could not miss the rose so without delay I began to make this small but characteristic detail of this work.
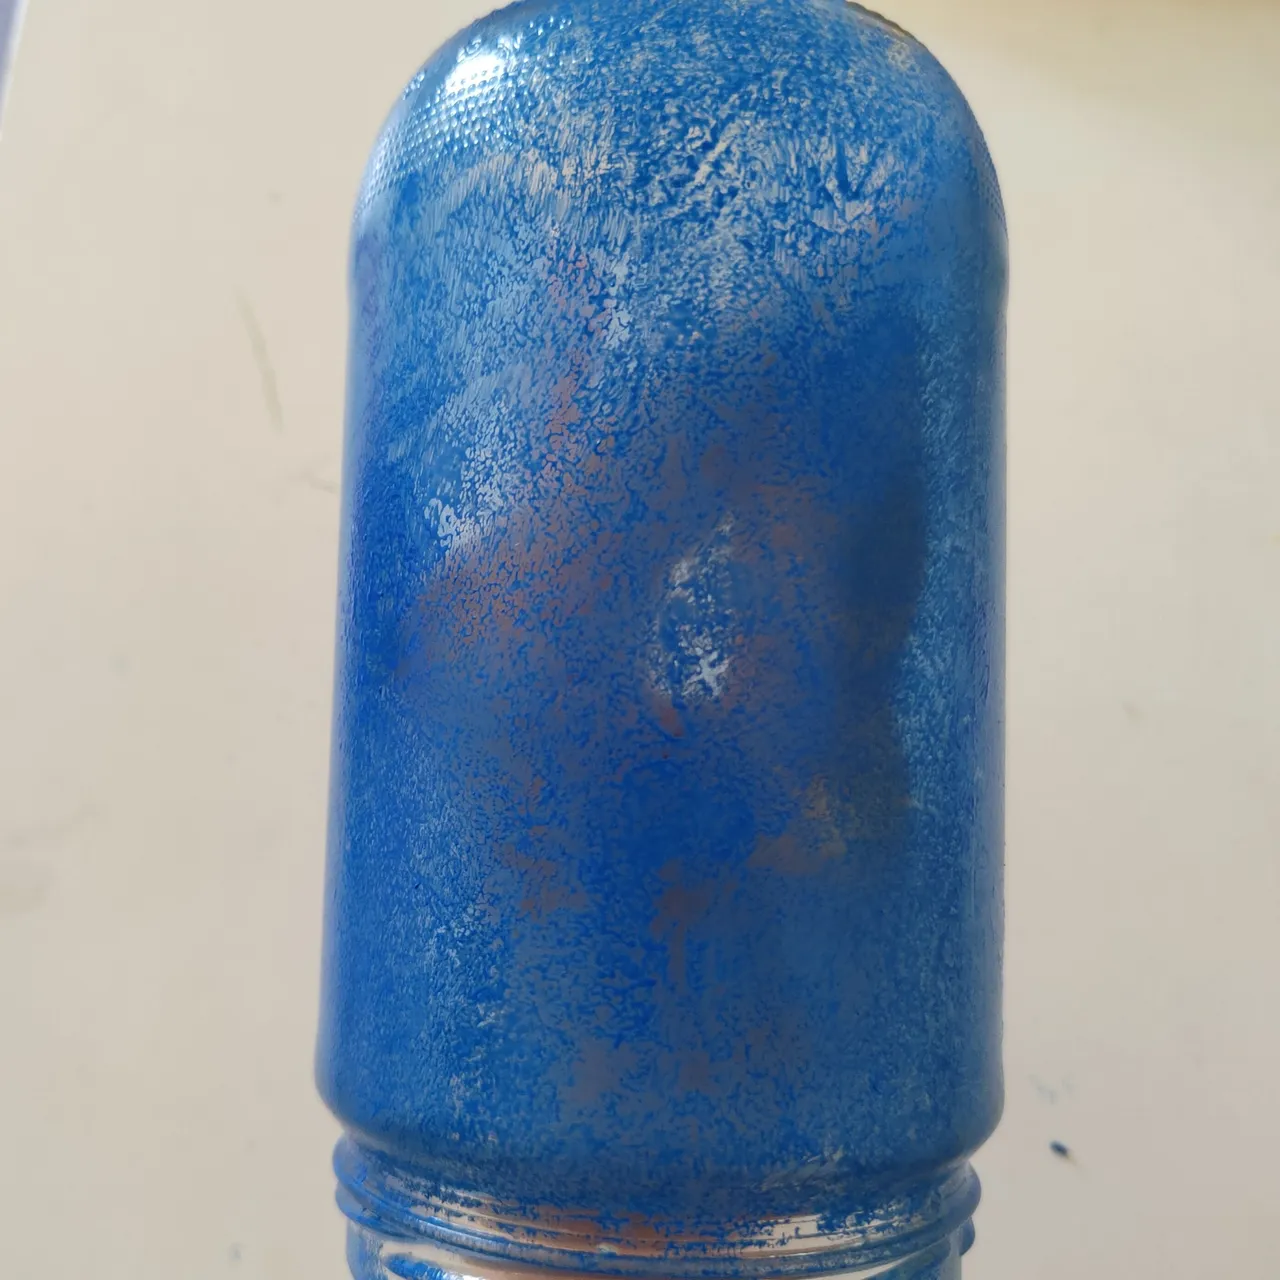
🌕 Paso 6.| Teniendo todas las piezas lista para ensamblar, tome el frasco de vidrio y con tempera de color azul comencé a pintar, ayudándome con una esponjita para darle un acabado que no fuese tan uniforme, deje secar por unos minutos para así poder trabajar sobre él.
🌕 Step 6.| Having all the pieces ready to assemble, I took the glass jar and with blue tempera I began to paint, helping me with a sponge to give it a finish that was not so uniform, let it dry for a few minutes so I could work on it.
🌕 Paso 7.| Ahora sí! Era momento fijar cada pieza elaborada y darle vida a este proyecto, está parte para mí fue una de las que más disfrute, mientra iba fijando las piezas entre sí y al frasco pequeñas piezas como los zapatos, cinturón y bufandas fueron realizados y fijados también, y para darle más detalles a la lámpara aplique una capa fina de pega blanca escolar alrededor de la figura central para así proceder aplicar escarcha y simular las estrellas, por último como detalle final utilice yute para decorar el borde superior de la lámpara.
🌕 Step 7.| Now it's time! It was time to fix each elaborated piece and give life to this project, this part for me was one of the most enjoyable, while I was fixing the pieces to each other and to the bottle small pieces like shoes, belt and scarves were made and fixed too, and to give more details to the lamp I applied a thin layer of white school glue around the central figure to proceed to apply frost and simulate the stars, finally as a final detail I used jute to decorate the top edge of the lamp.
Result || Resultado
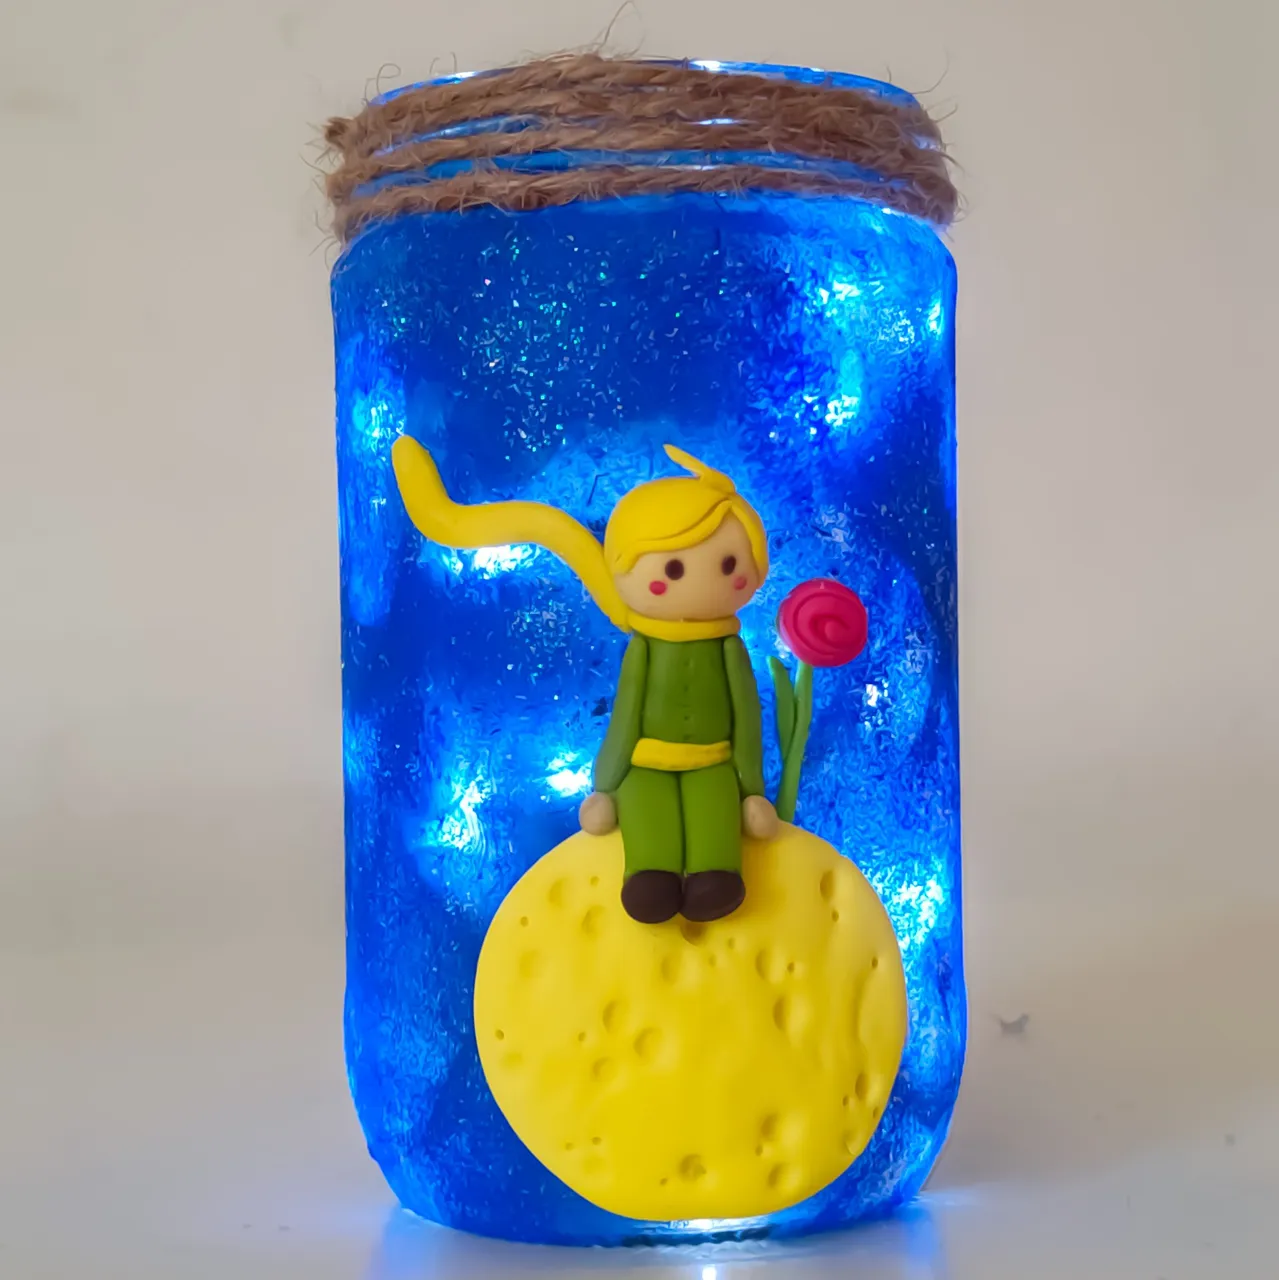
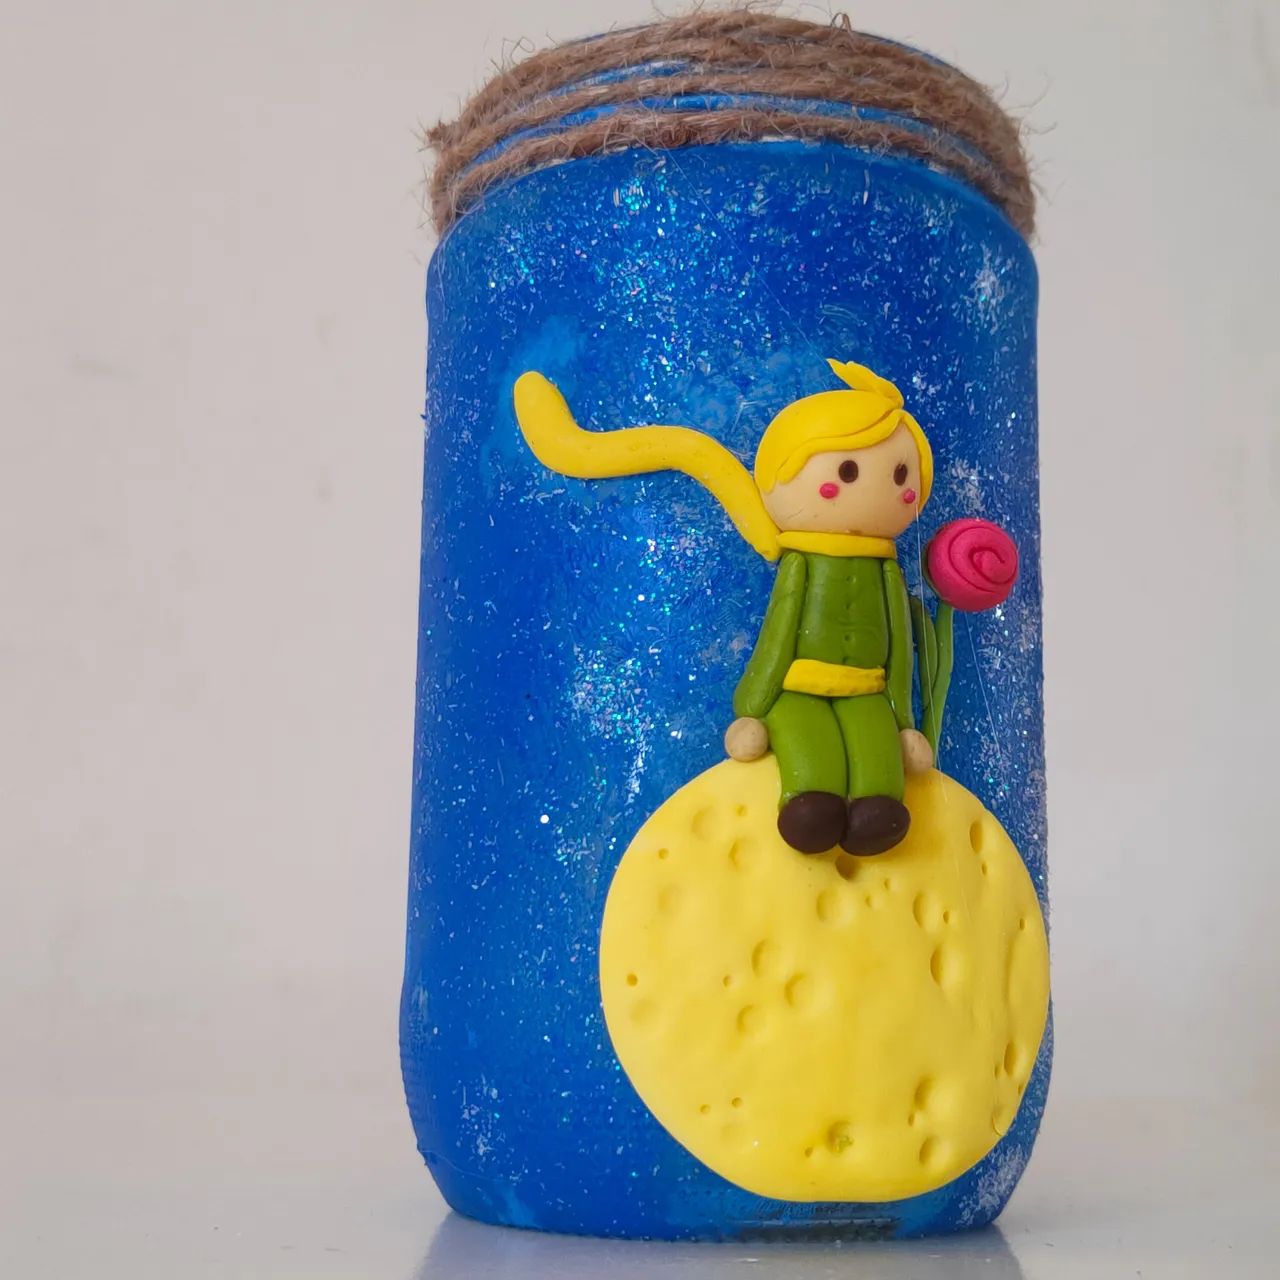
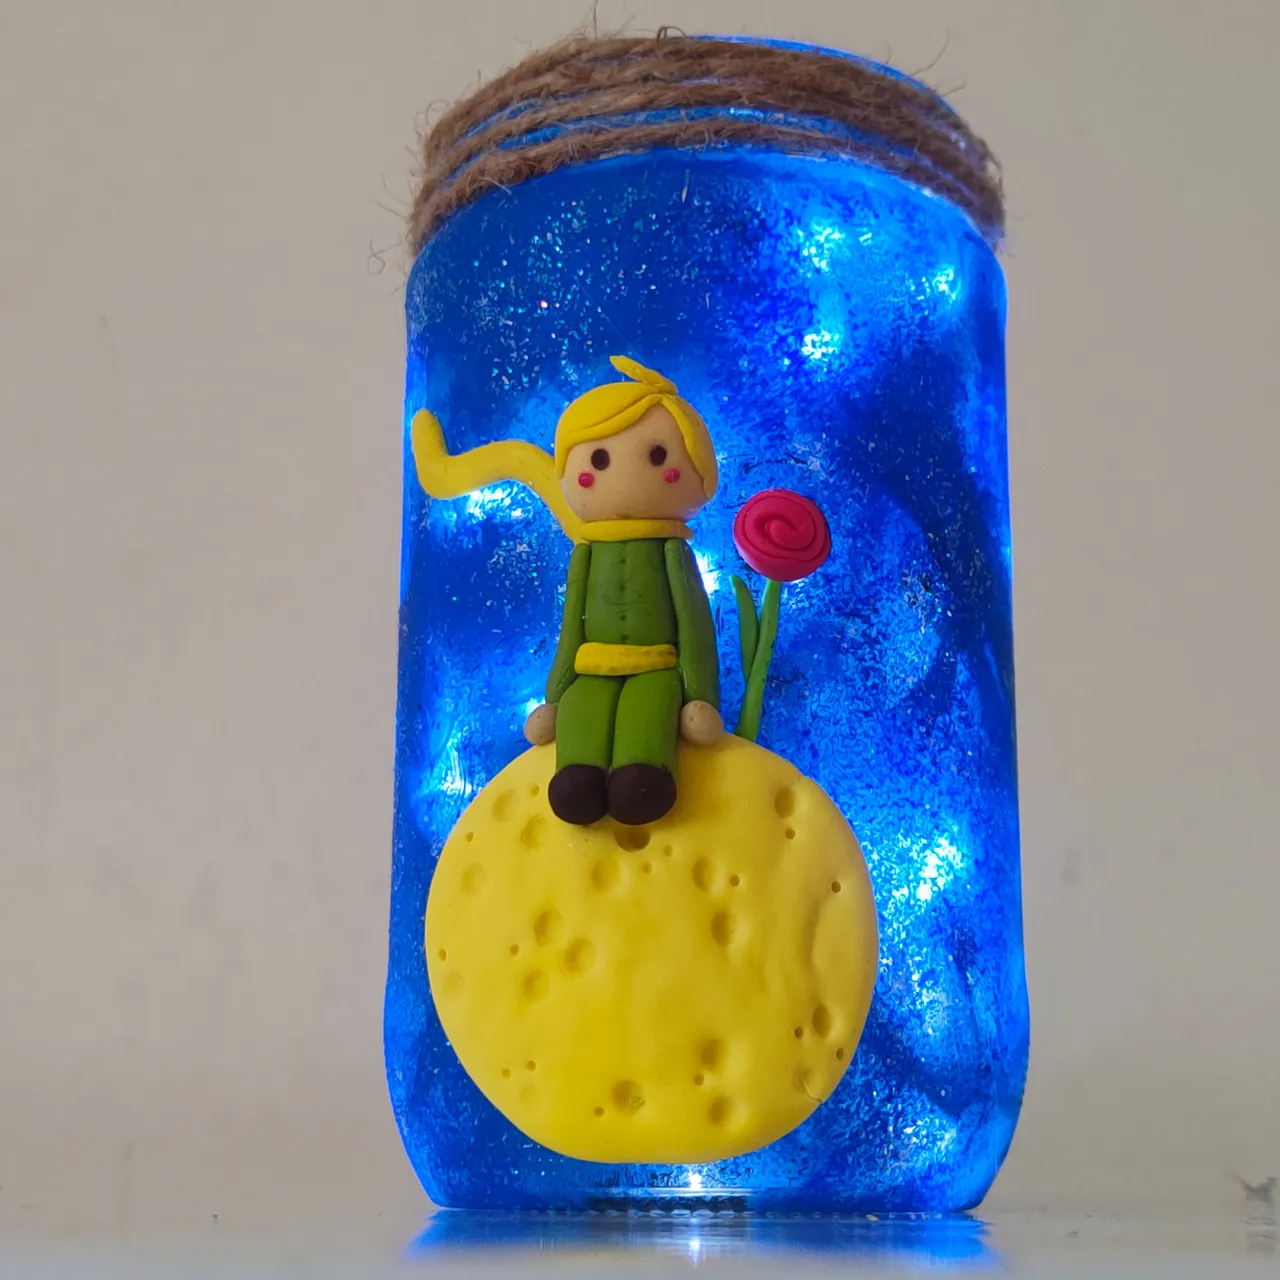
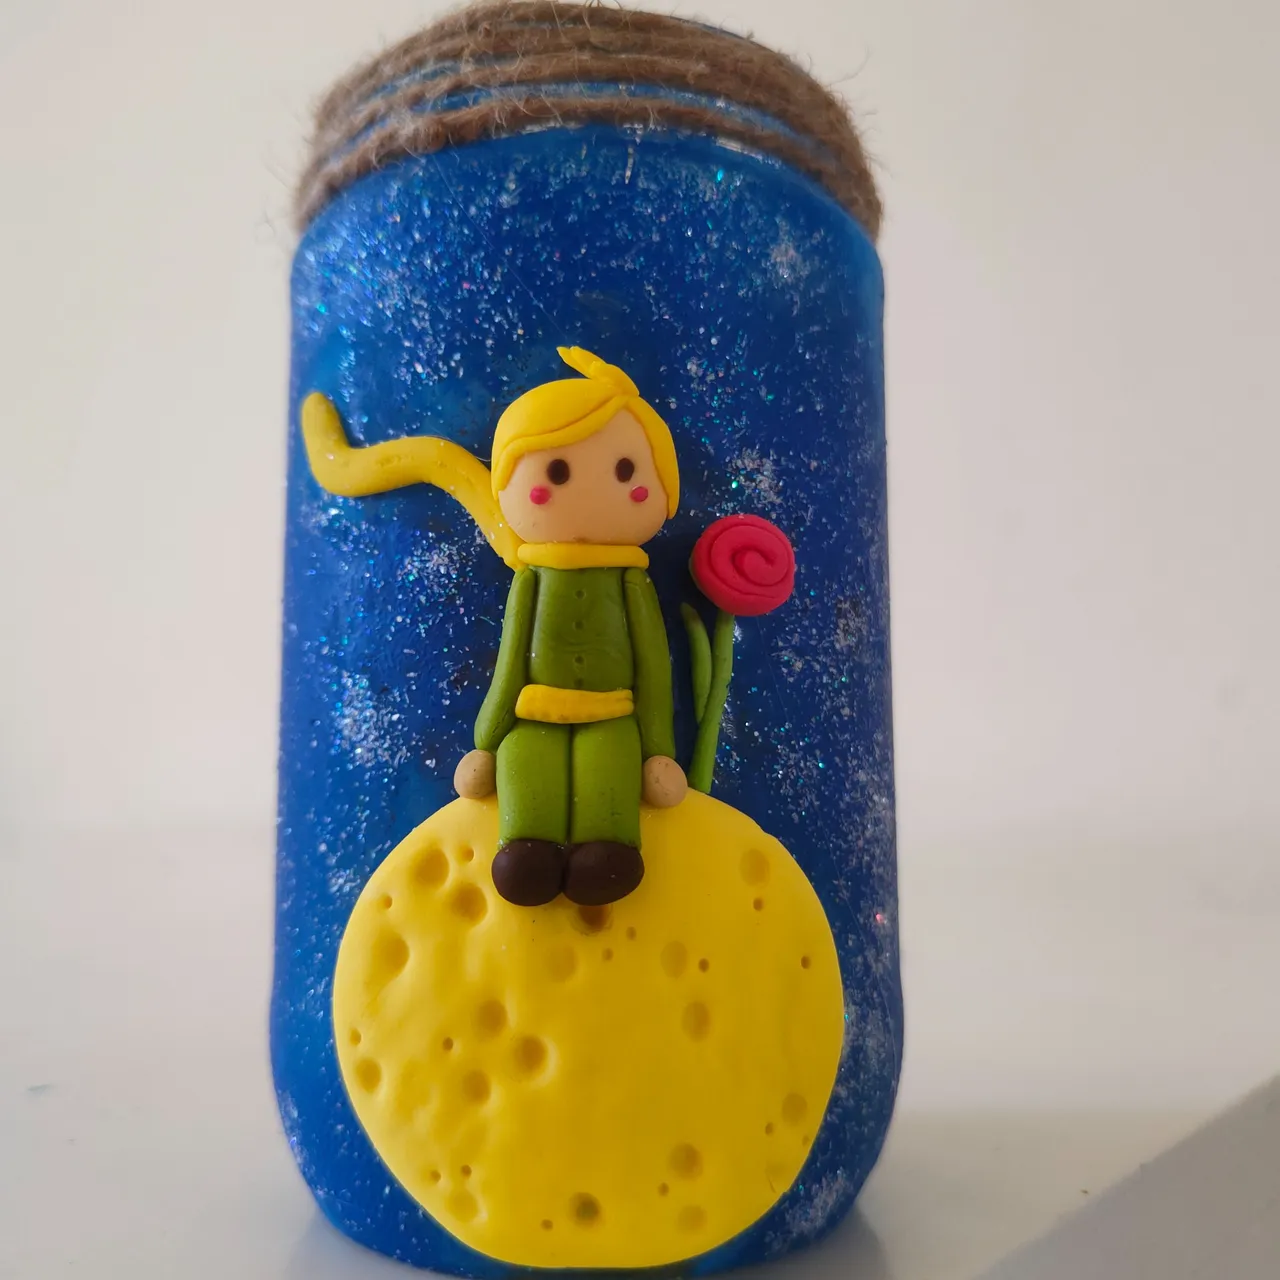
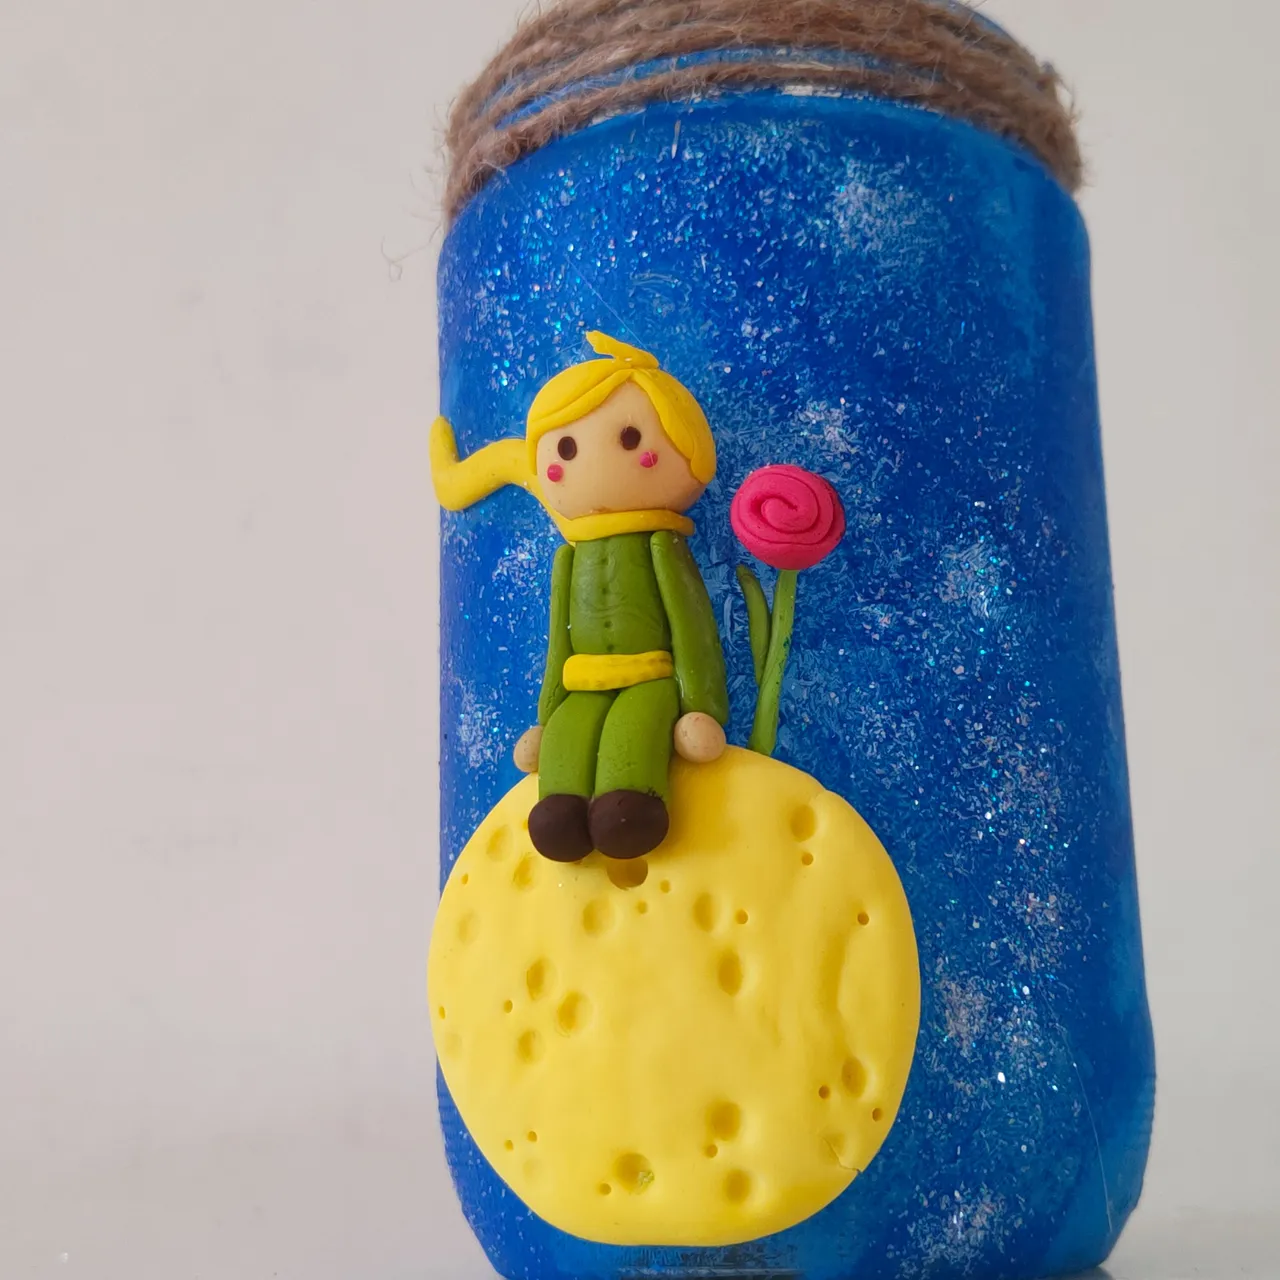
Y así estuvo listo nuestra lámpara, lo único que faltaba era introducir en ella las luces, así que sin duda acomode las luces en su interior, las cuales le dan un toque fenomenal ya que literalmente cuando las enciendes simulan las estrellas, su efecto es realmente encantador.
And so our lamp was ready, the only thing that was missing was to introduce the lights in it, so without a doubt I placed the lights inside, which give it a phenomenal touch because literally when you turn them on they simulate the stars, its effect is really charming.
Agradezco mucho su tiempo, atención, comentarios y apoyos estimados amigos, espero que el proyecto de esta ocasión haya sido de su agrado, yo sin duda quedé feliz con el resultado y la nueva lámpara para el cuarto de mis pequeñas, no quisiera despedirme sin antes invitar a participar a mi estimada @agape5 sin más un fuerte abrazo queridos amigos de Hive, será hasta otra oportunidad.
Thank you very much for your time, attention, comments and support dear friends, I hope that the project this time has been to your liking, I certainly was happy with the result and the new lamp for the room of my little ones, I would not want to say goodbye without first inviting my dear @agape5 to participate, without further ado a big hug dear friends of Hive, will be until another opportunity.
🎥Imágenes y vídeo creados con: |Images and video created with: Youcut video| Giphy | Canva |
🇪🇸 Traducido con DeepL