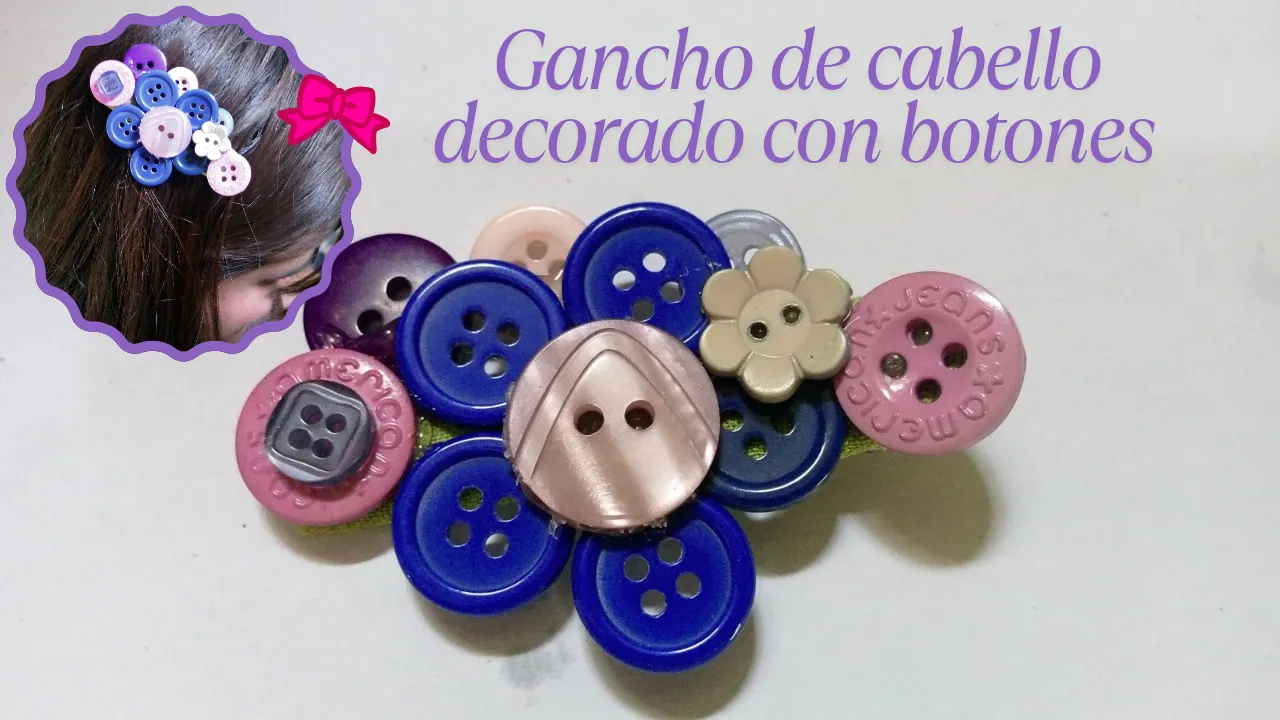
Hello, hello! How are you all, dear friends of DIYHub? Today I'm bringing you a beautiful craft. I'm not sure if it's more about crafts or jewelry accessories, but what I want to show you is how I decorated a hair clip using only buttons. I used buttons in various combinations to create a sort of flower, and I added other additional buttons to make it even prettier. This project isn't something specific, but rather I want to explore the idea of making crafts with a very artisanal style, reusing materials into accessories or decorations. I want to learn how to give a new meaning to crafts by using simple things, like a small button, and combining it with other materials that, at first glance, might not seem like they fit together well. It's not just about wearing buttons on your clothes; each element can have a new purpose. For example, a stone in the ground can become an ornament for your desk, or a zipper can be transformed into a bracelet. The essence of this process is not only to recreate objects, but also to give them an artistic touch.
💜The steps to decorate the hook are so simple that you could make many more without realizing it and, thus, have a collection of hair hooks decorated with buttons.💜
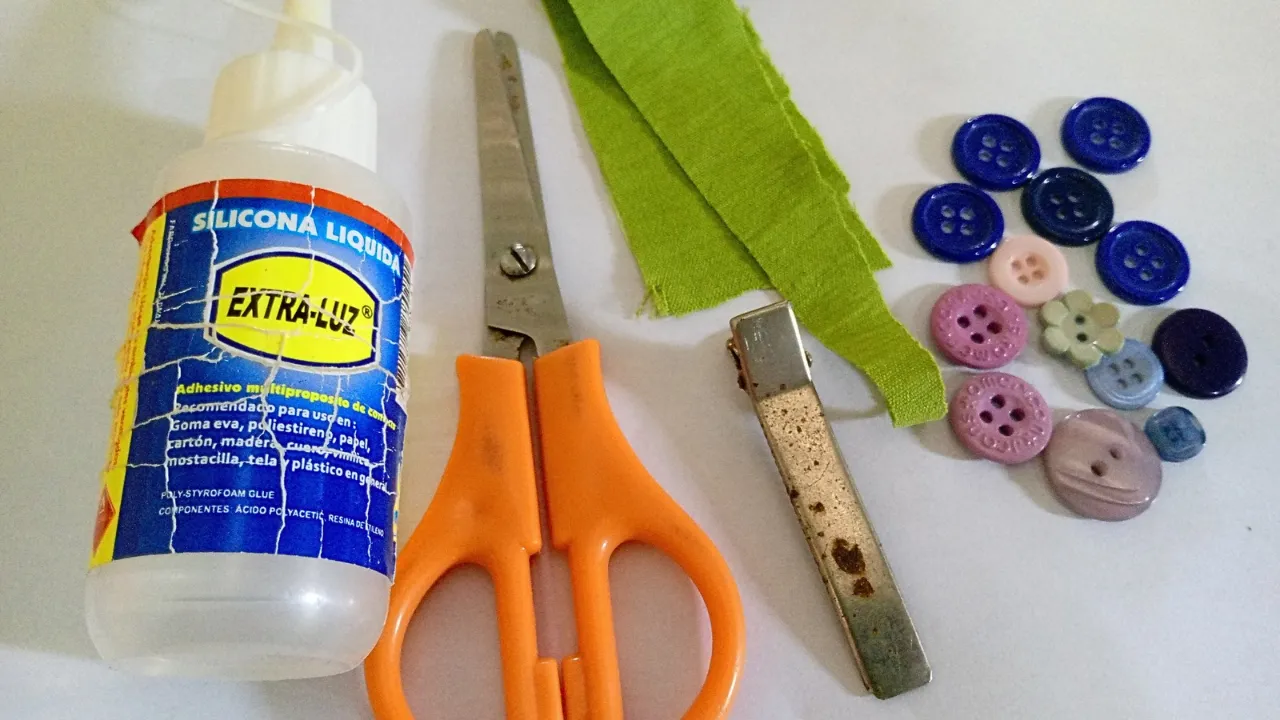
(Materiales a usar:)(Materials to use:)
- Silicón líquido
- Tijeras
- Un pedazo de tela verde (solo para decorar y forrar el gancho, ya que estoy utilizando uno usado que se ve desgastado)
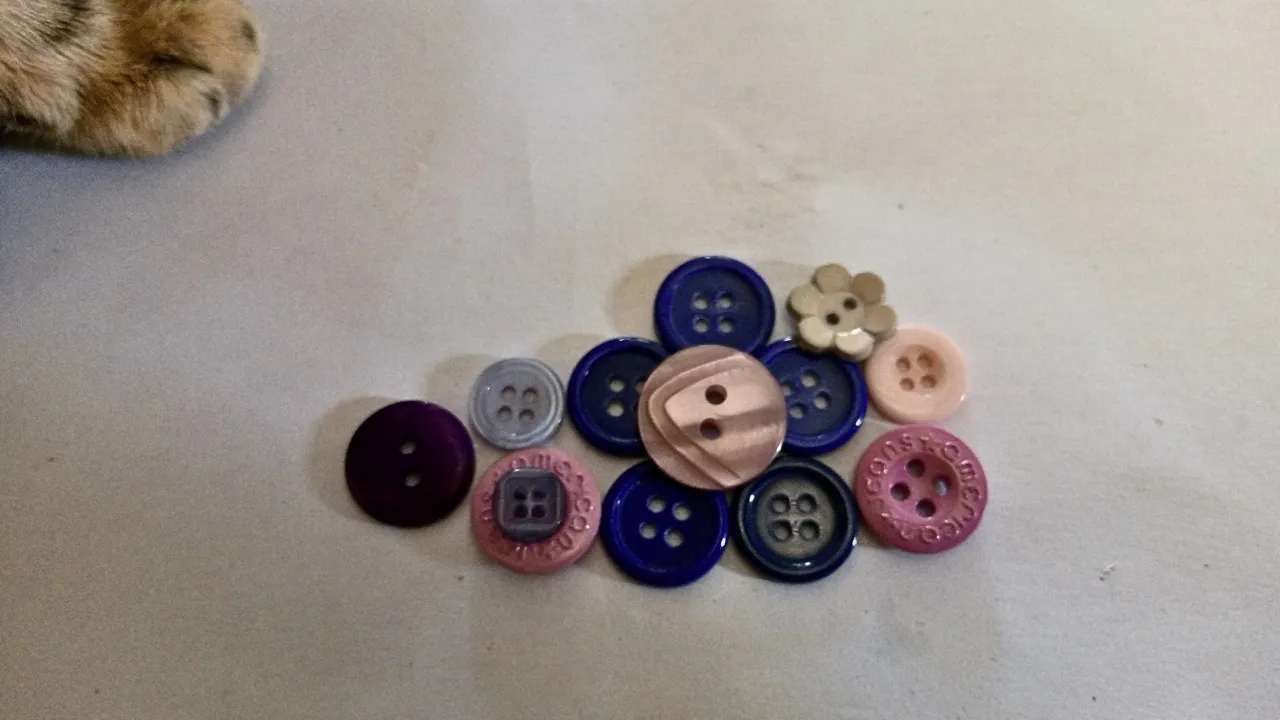
- Botones en los colores que mejor se adapten a tus preferencias. En mi caso, elegí tonos que van desde el azul oscuro hasta el morado y el rosa clarito
- Liquid silicone
- Scissors
- A piece of green fabric (just for decoration and to cover the hook, as I'm using a used one that looks worn)
- Buttons in the colors that best suit your preferences. In my case, I chose shades ranging from dark blue to purple and light pink
(Procedimiento:)(Procedure:)
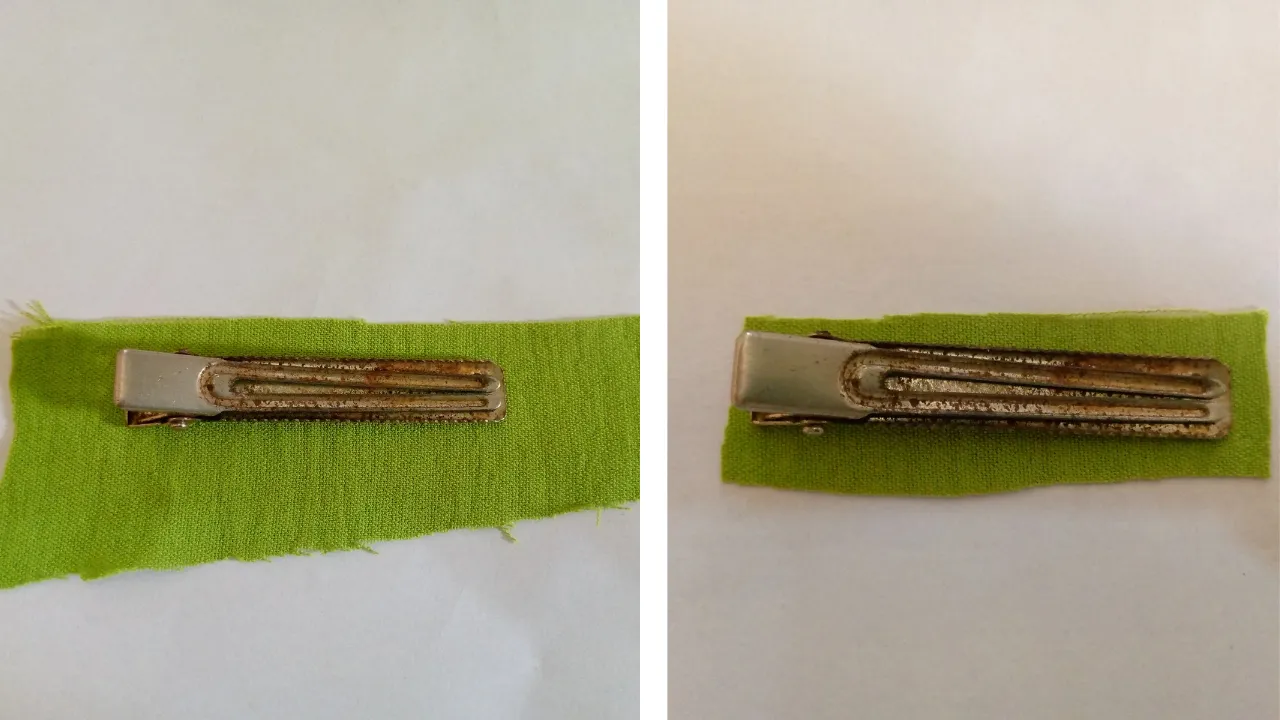
Paso 1
Paso 1
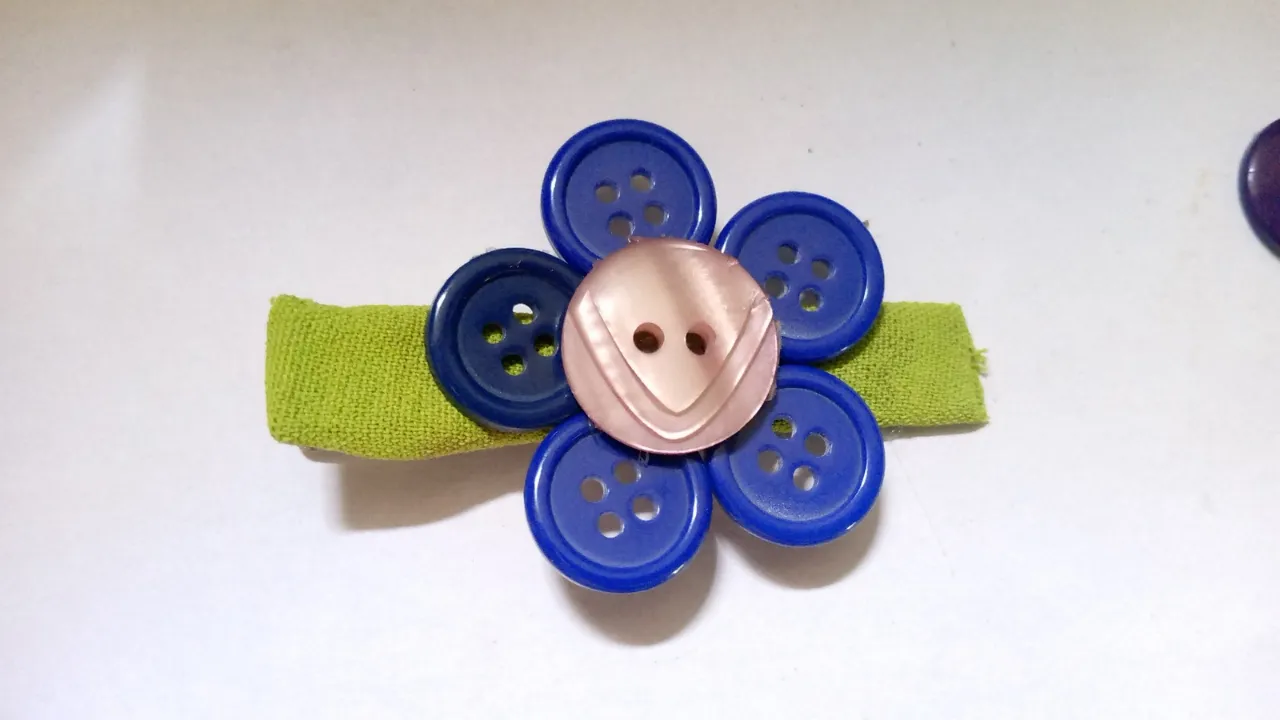
I started by trimming the small piece of green fabric to fit the size of the hook and began gluing it to the inside. I chose green because I thought it was the most appropriate, since I want to make a button flower. I wanted to use this color because it evokes the freshness of plants.
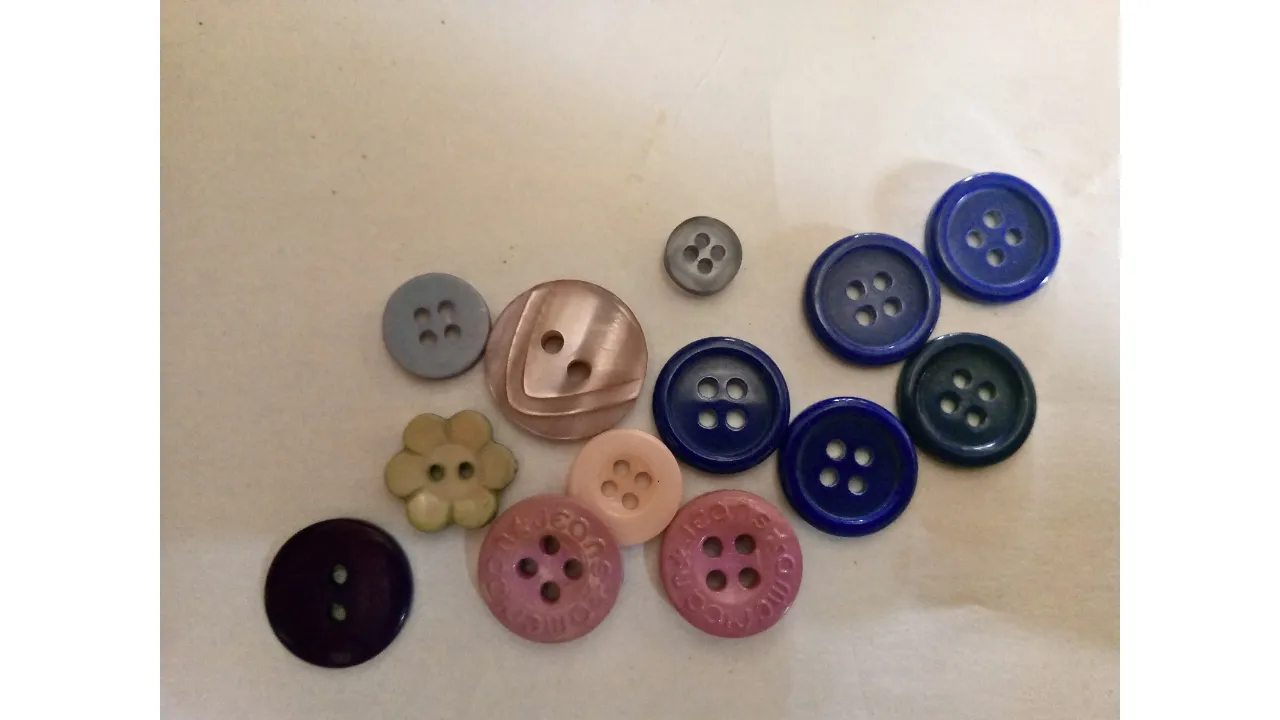
Paso 2
Paso 2
After that, I started testing the buttons to see how each one would look before gluing them, so I could avoid making a mistake I wouldn't like later. For the flower, I chose dark blue buttons, and the center will be light pink. On the sides, I'll place two purple buttons: one green flower-shaped and one dark purple, as well as a light pink button and some lavender blue ones.
Paso 3
Paso 3
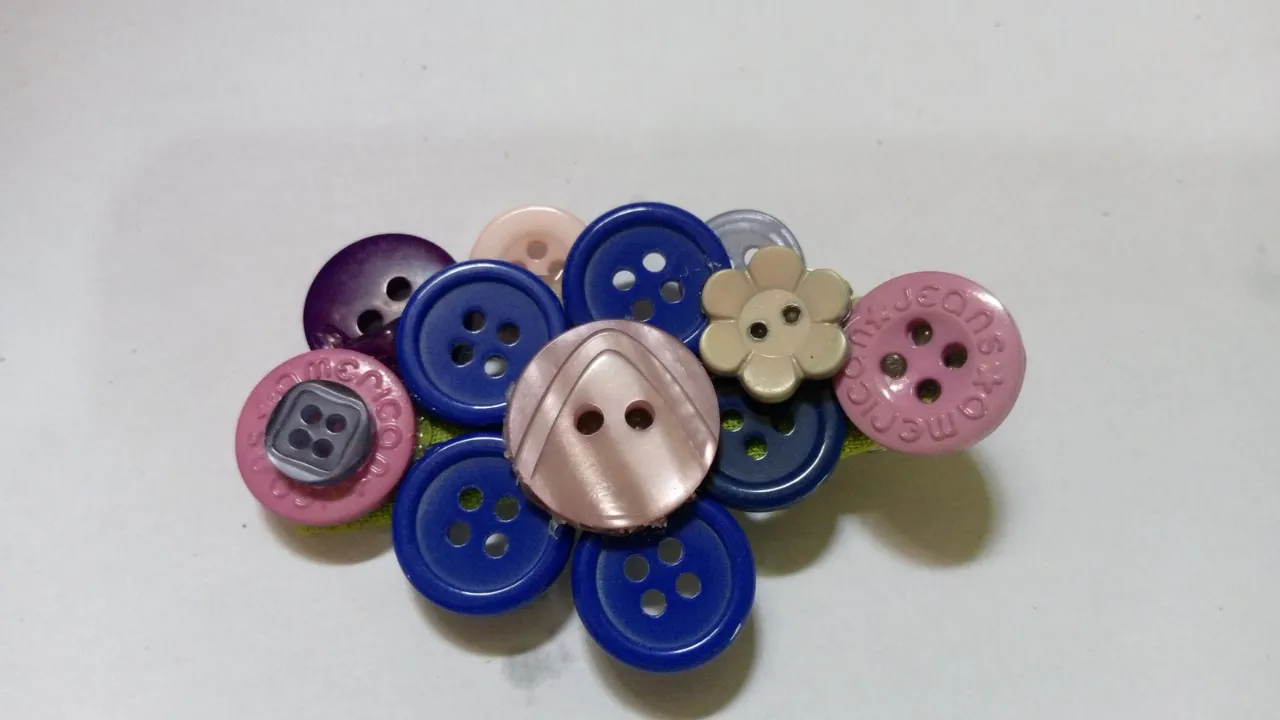
Now I'm going to start arranging and gluing the buttons. First, I'll place the flower in the center and then the buttons on the sides. I confess I had everything organized about where each button would go, but I reset everything and arranged it differently. However, the hook looks pretty anyway. I'm not sure if the flower shows up as much as I wanted, since my original idea was for it to be the main focus. Now that I think about it, I should have left the flower alone, but I didn't want to ruin the look.
(Resultado final:)(Bottom line:)
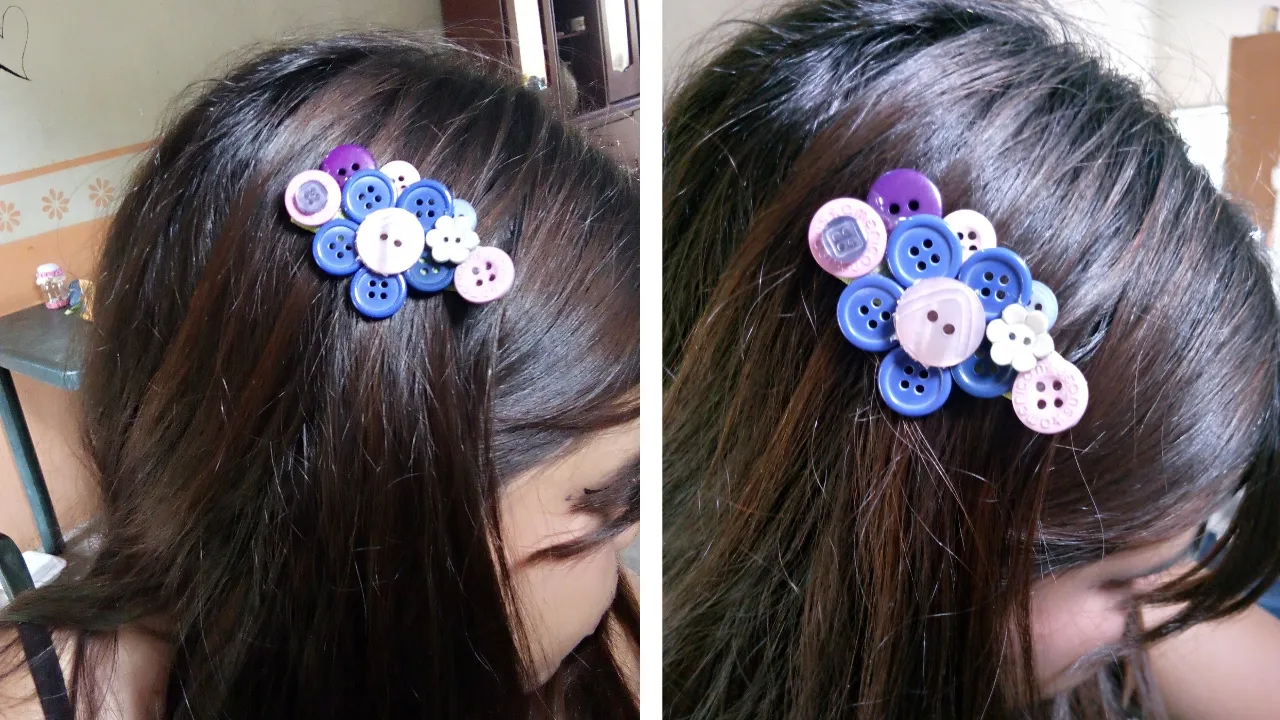
Decorating a hair clip with buttons has been a fun and creative experience. I love how simple materials allow us to create unique and stylish pieces. I hope you'll be inspired to experiment with your own crafts and add a personal touch. Remember, creativity has no limits and every little detail counts. Feel free to create and share your beautiful works! Thank you for joining me this time.

Las fotos de este blog son de mi propiedad|Las imágenes son editadas en canva|Fotografías tomadas en mi celular infinix Smart 7|El contenido está traducido en el traductor de Firefox.