
Saludos mis amigos de @diyhub, hoy culmina el concurso del mes de julio, nos dimos gusto leyendo y disfrutando los trabajos de muchos de los amigos que hacemos vida en esta comunidad, gracias a @SkateHive por ser el socio en esta hermosa propuesta. Hoy no me quise quedar sin participar y traigo para ustedes, una manualidad muy linda, sin dejar de hacer alusión al reciclaje; es algo personal que suelo hacer cuando tengo ocasión, reciclar es una manera de agradecer a la tierra sus bondades.
Últimamente, a través de las redes sociales hemos visto como muchas organizaciones mundiales están haciendo campañas de concientización sobre la importancia que tiene este pequeño ser vivo para la vida en el planeta, hoy es un llamado que va mas allá de la conciencia, es un deber como ciudadano de este mundo cuidarlas.
Greetings my friends from @diyhub, today the contest for the month of July ends, we enjoyed reading and enjoying the work of many of the friends who make life in this community, thanks to @SkateHive for being the partner in this beautiful proposal. Today I did not want to stay without participating and I bring you a very nice craft, without failing to allude to recycling; It's something personal that I usually do when I have the chance. Recycling is a way of thanking the earth for its kindness.
Lately, through social networks we have seen how many world organizations are carrying out awareness campaigns about the importance of this small living being for life on the planet, today it is a call that goes beyond conscience, it is a duty as a citizen of this world to take care of them.
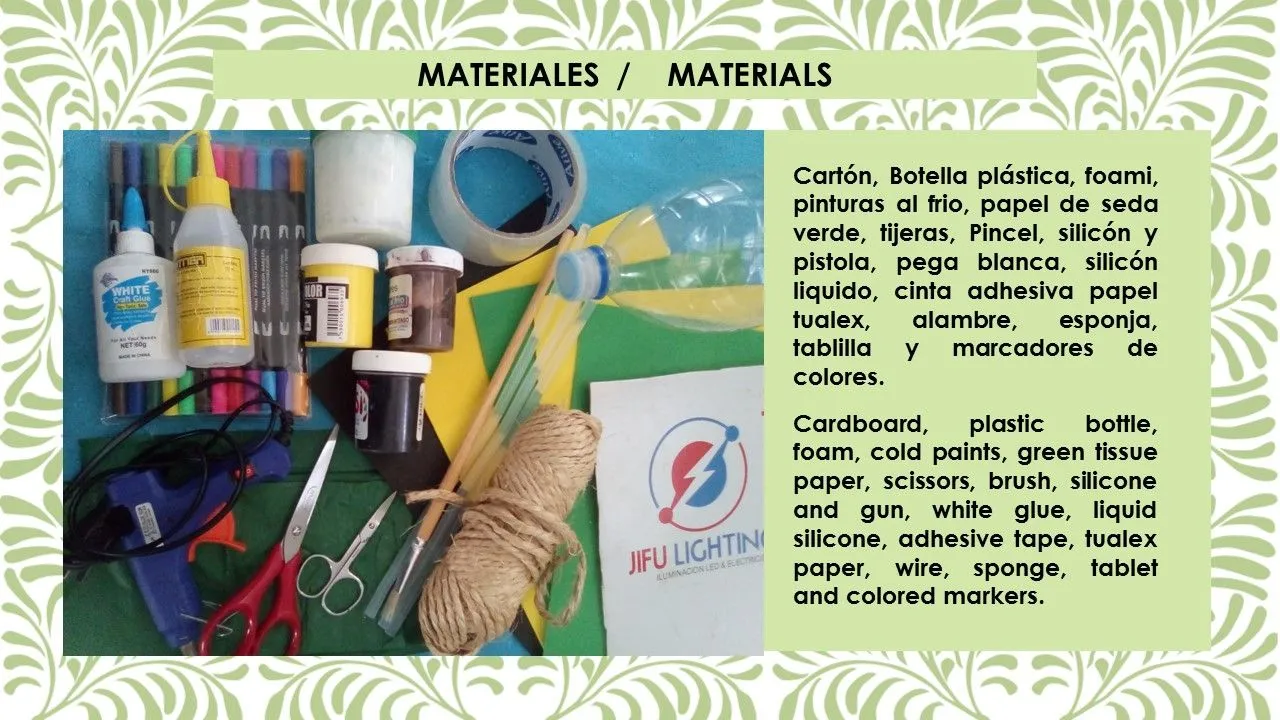
Los materiales con los trabajamos juegan un papel muy importante, en la realización de cualquier manualidad, pero suman mas importancia cuando reciclamos porque le estamos dando
una nueva oportunidad, para convertirlo en cosas mejor. Para este post utilice los siguientes materiales: Botella de plastico, cartón, papel tualex, mecatillo, tablilla, silicon frio y en barra, cola blanca, papel de seda, foami, cinta adhesiva, marcadores, tijeras, pinceles, pintura al frio.
The materials we work with play a very important role, in the realization of any craft, but they add more importance when we recycle because we are giving it a new opportunity, to turn it into better things. For this post use the following materials: Plastic bottle, cardboard, tualex paper, mecatillo, tablet, cold and bar silicone, white glue, tissue paper, foami, adhesive tape, markers, scissors, brushes, cold paint.
🐝🐝 PASO A PASO 🐝🐝 STEP BY STEP

Con las tijeras, cortamos la botella a la mitad, luego quitamos el excedente del centro y dejamos la parte ovalada de arriba con el pico y la tapa. Seguidamente, marcamos en un trozo de cartón el diámetro de la parte inferior para hacerla una tapa. Una vez cortado el disco de cartón, lo pegamos a la botella con cinta adhesiva como se muestra en las imágenes.
With the scissors, we cut the bottle in half, then we remove the excess from the center and leave the oval part on top with the spout and the lid. Next, we mark the diameter of the lower part on a piece of cardboard to make it a lid. Once the cardboard disc is cut, we glue it to the bottle with adhesive tape as shown in the images.
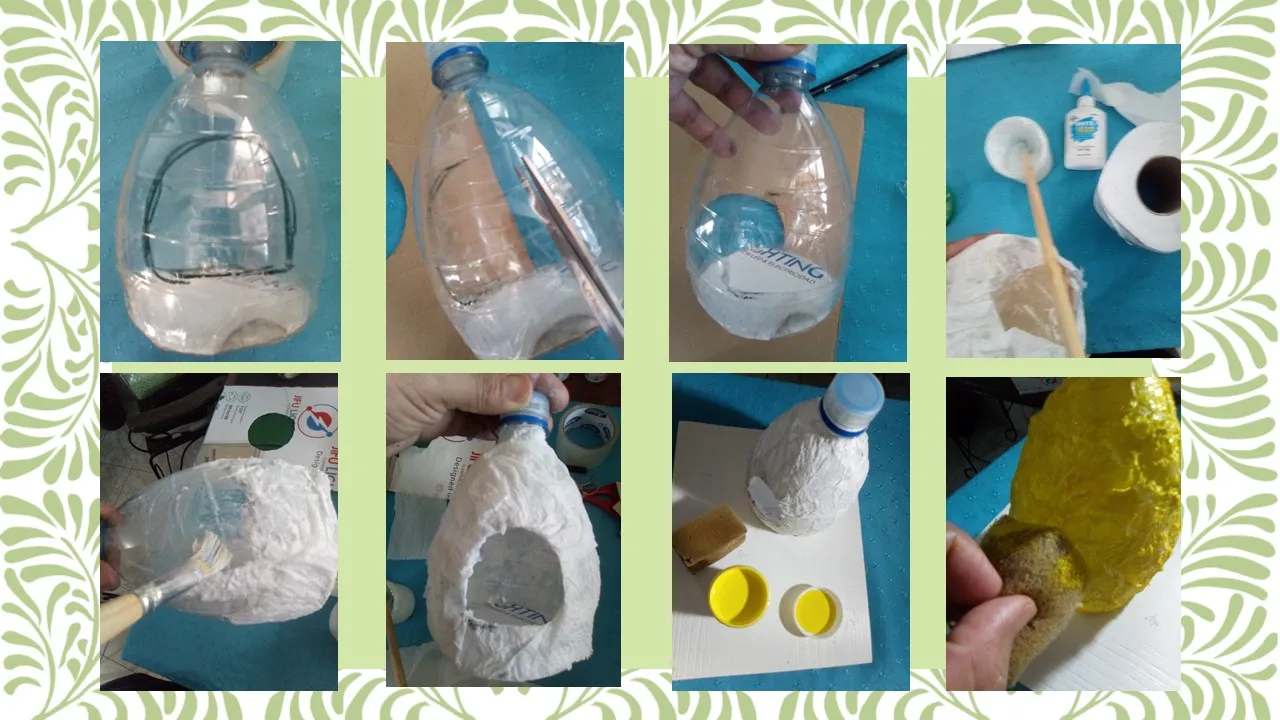
Seguidamente, con un marcador dibujamos la forma de una ventana y cortamos. Con cola blanca y papel tualex, forramos la botella, esperamos a que seque, para luego con una esponja echamos la pintura al frio amarilla.
Next, with a marker we draw the shape of a window and cut. With white glue and tualex paper, we line the bottle, wait for it to dry, and then with a sponge we pour the yellow cold paint.
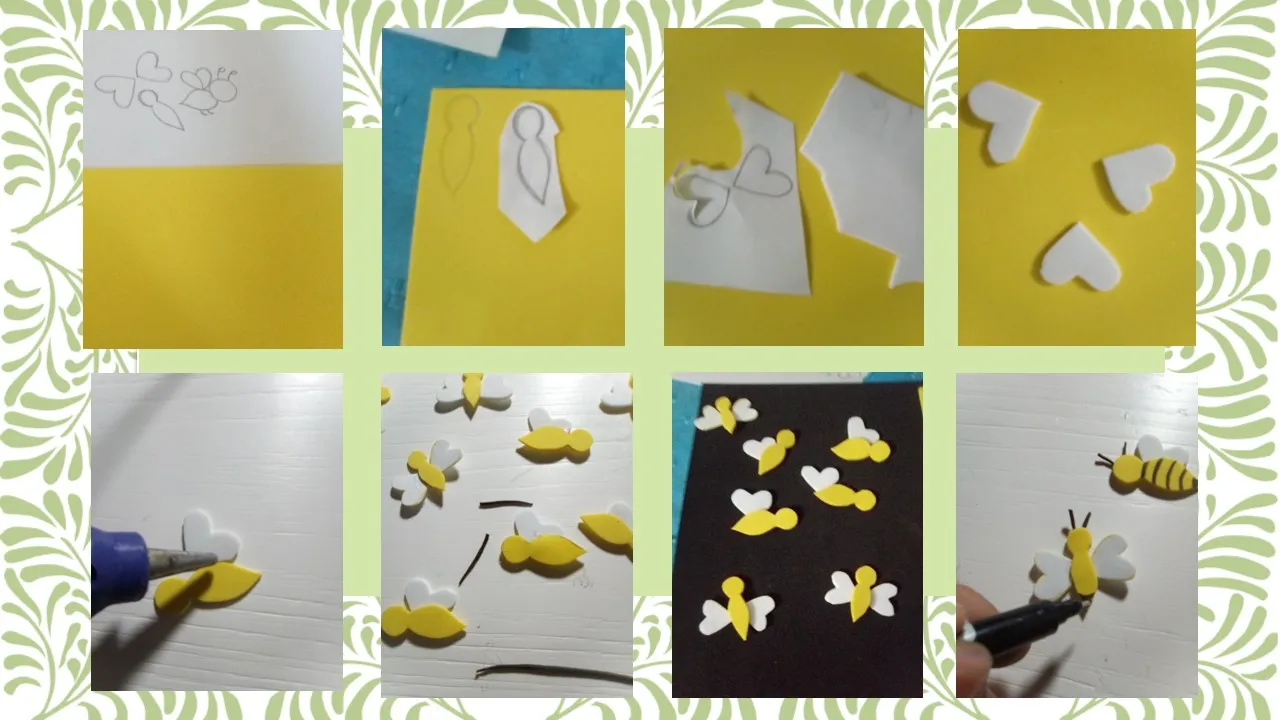
Para la elaboración de las abejitas, dibuje los patrones según mi gusto, y en el foami amarillo fui trazando los cuerpos y en el foami blanco las alitas, corte y las ensamble, luego con el marcador negro dibuje rayas en sus cuerpecitos, de igual manera pinte ojos y bocas con marcador negro.
To make the little bees, I drew the patterns according to my taste, and in the yellow foam I traced the bodies and in the white foam the wings, cut and assembled them, then with the black marker I drew stripes on their little bodies, in the same way paint eyes and mouths with black marker.
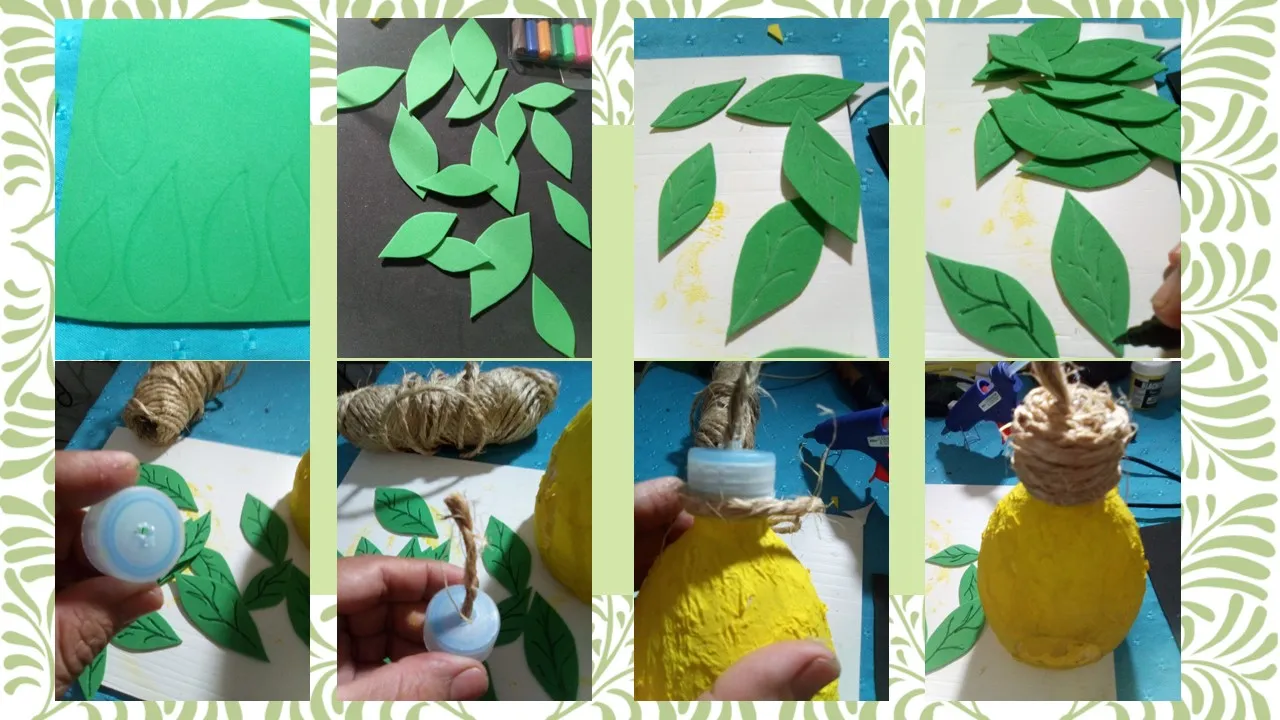
Las hojas son mas fáciles de hacer, solo tienes que trazarlas en el foami, luego las cortas y con algo fino le haces trazos y con el marcador verde afianzas las líneas para darle mas realismo. Para la tapa del panal, abrimos un orificio, por donde introducimos una tira de mecatillo, que servirá para agarrar el panal del árbol. Por ultimo en este paso, forramos la tapa con el mecatillo como se muestra en las imágenes, dejando listo el panal para proceder luego a pegarle las abejitas ya listas.
The leaves are easier to make, you just have to trace them on the foam, then cut them and with something fine you make lines and with the green marker you strengthen the lines to give it more realism. For the honeycomb cover, we open a hole, through which we introduce a strip of string, which will serve to hold the honeycomb from the tree. Lastly, in this step, we lined the lid with the mecatillo as shown in the images, leaving the honeycomb ready to then proceed to glue the ready bees to it.
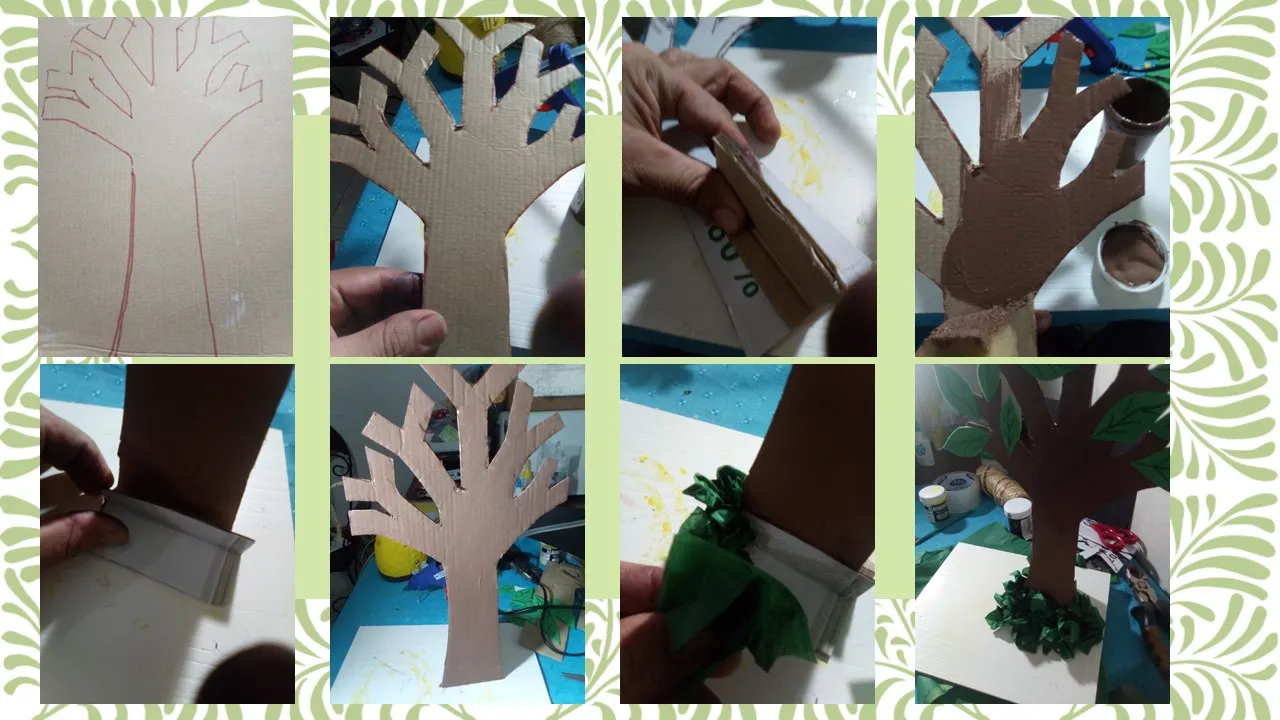
Para elaborar el árbol, se dibujo en el cartón un patrón dos veces, los cuales cortamos y pegamos, para darle mas fuerza y firmeza, seguidamente en la base, se reforzó con dos trozos de cartón que impedirán que se vaya para adelante o para atrás. Luego pintamos el árbol con pintura fría marrón, una vez seco, lo fijamos a la tablilla y con el papel de seca adornamos la base como se muestra en las imágenes.
To make the tree, a pattern was drawn on the cardboard twice, which we cut and glued, to give it more strength and firmness, then at the base, it was reinforced with two pieces of cardboard that will prevent it from going forwards or backwards . Then we paint the tree with cold brown paint, once dry, we fix it to the board and with the drying paper we decorate the base as shown in the images.
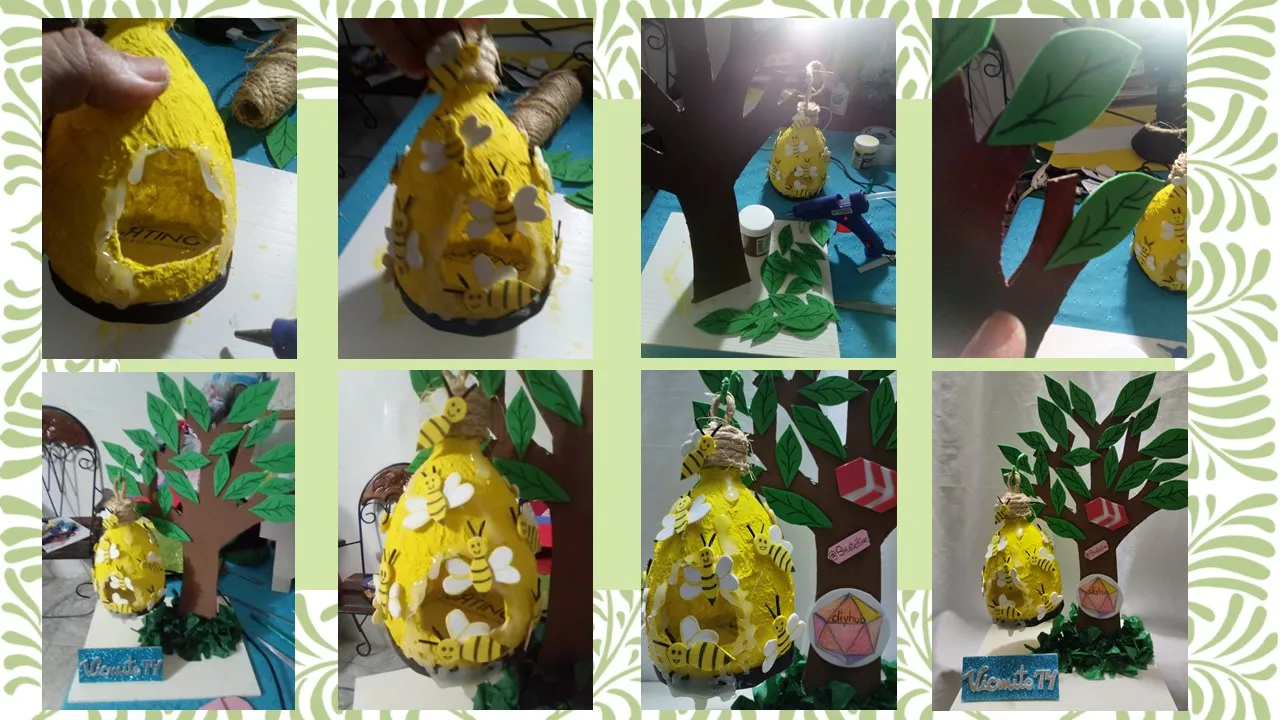
Ya seco y listo el tronco del árbol, procedemos a pegar las hojas, con un trozo de alambre, introducimos un poco en una de las ramas del árbol, para fijar un garfield o gancho para sostener el panal. Para darle mas realismo, con la pistola de silicón, con mucho cuidado, echamos al borde de la puertita, el silicón para que parezca miel, luego pegamos las abejitas al panal y lo fijamos al árbol. Cree los logos de #HIVE y #DiyHub, y los pegue al árbol, también quise colocar el usuario del socio de este hermoso concurso. Espero les haya gustado mi proyecto.
Once the trunk of the tree is dry and ready, we proceed to glue the leaves, with a piece of wire, we introduce a little into one of the branches of the tree, to fix a garfield or hook to hold the honeycomb. To give it more realism, with the silicone gun, very carefully, we pour the silicone on the edge of the door, so that it looks like honey, then we glue the bees to the honeycomb and fix it to the tree. I created the #HIVE and #DiyHub logos, and glued them to the tree, I also wanted to place the username of the partner of this beautiful contest. I hope you liked my project.
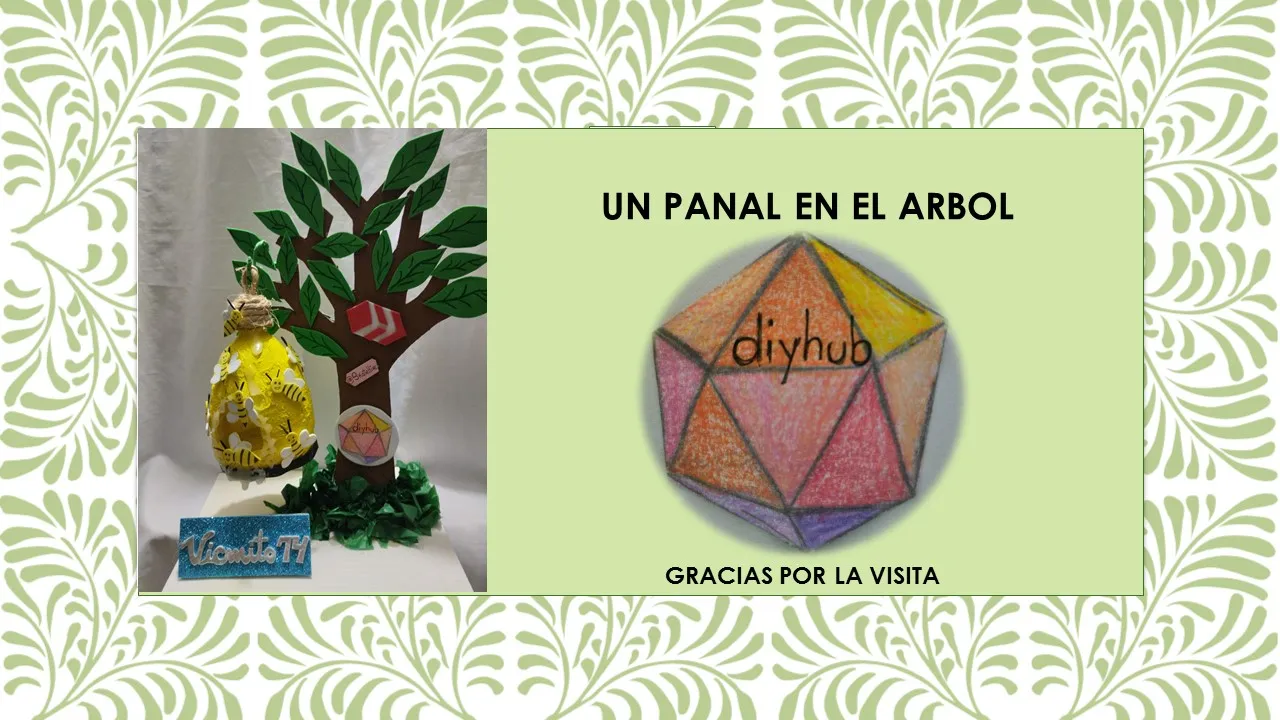
Acá mi panal en el árbol, listo hecho con mucho amor, lo podemos usar como lámpara si le colocamos esas lucecitas que funcionan con pila, debe verse hermoso. Gracia a todos por acompañarme. Las imágenes son de mi autoría editadas en power point, el separador es de pixabay y para la traducción use Deep.
Here my honeycomb on the tree, ready made with a lot of love, we can use it as a lamp if we put those little lights that work with batteries, it must look beautiful. Thank you all for joining me. The images are my own edited in power point, the separator is from pixabay and for the translation I used deepl.