Starting up a meat breeding program at home can be intimidating to many, but the benefits from this far outweigh any downsides associated. Even if you are not raising poultry for the sake of meat, the skillset for dispatching is one that I see every breeder should be required to have. Whether you have a bird that becomes injured/ill or you have one that has some loose screws and continually attacks the rest of your flock (even after multiple attempts at corrective action), the day will inevitably come that you need to dispatch a bird. If that day has not come for you yet, it will eventually come – it’s not a matter of IF, but a matter of WHEN. This process is not something that you should ever take lightly, and should always be done with the utmost respect for the animal being dispatched. While the process will never get “easier” over time, it will certainly become more normalized to you along with helping you gain a better level of respect for the animals that you are raising.
Some people raising gamebirds, or other animals with the intentions of meat usage, choose to use a processor to assist them. Unless you are producing animals on a commercial scale or you are physically unable to meet the demands of the process (e.g. – you raise cows and don’t have the heavy equipment to move the carcasses), I will always advocate for the breeder to do their own processing at home. Among the many reasons that I have for this, I believe the most important reason is that this is the most honorable thing you can do for the animals being reared, along with ensuring proper measures are taken with preparing and storing the meat before transitioning it to the dinner table. Sure, the processor appears to be there for both your and your animal’s best interest while you visit the facility, but can you really say for certain what goes on behind closed doors after you leave?
In this writeup, I will be focusing on the processing of quail; however, this same process can be applied to most other poultry as well (chickens, chukars, ducks, etc). The most important step to keep in mind while prepping for processing, is to ensure that you keep the bird/s as calm as possible in the moments leading up to dispatching. Not only will this make it easier on you, but also make it much easier on the animal that is giving their life so that you can nourish your own. When dispatching multiple animals at once, I like to setup my area so that the animals in the staging area are unable to see the processing table. This prevents them from seeing the process and working themselves up, releasing unnecessary adrenaline in their bodies which can adversely affect taste.
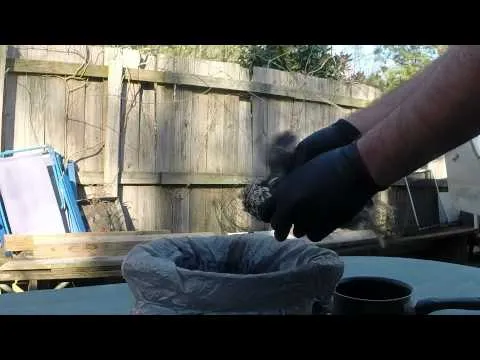
Above is a short video that I did in the past showing the process. I have also included of writeup of the process below.
My typical table setup consists of a trash pot/bag, clean pot, and a sharp set of shears (with emphasis on the sharp part). After selecting the first quail to be processed, I bring them over to the process table and hold them until they are relatively calm and unsuspecting of what’s about to happen. Even the most untamed of birds will eventually settle down while you are holding them.
Once you believe they are in a state of peace, grasp the bird with just one hand and place the shears in your dominant hand. With the shears FULLY opened, place the neck as far into the shears as possible, with the inner ‘V’ area of the shears at the base of the head. Without hesitation and in one swift motion, remove the head and allow the carcass to drain its’ blood into the trash bin that you have. Be sure to ensure that you have a firm grasp upon shearing, as the muscles will flutter for a few seconds – this is perfectly normal, don’t let it alarm you. Upon removing the head, the quail will be dispatched immediately, and all motion that you see afterwards is strictly just muscle reflexes. While going through the remaining parts of processing, you may bump a tendon that causes additional reaction, but they will be much less animated reflexes at that point – so again, don’t be alarmed.
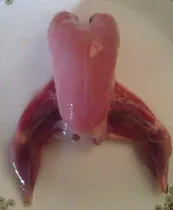
On a small ground bird such as a quail, I choose to remove the wings and dispose of them; however, these can be saved if you wish to do so. Following this step, I skin the bird by ‘pinching’ the skin with both hands on the breast, and pulling back as if you are opening curtains on a window. Once the skin/feathers begin to come off, the rest will follow with extreme ease. If you wish to keep the skin intact for cooking, you can skip that step and pluck the feathers off instead. The next thing I like to do is remove the innards and gizzard. Taking the shears, enter one point between the spine and breast, and the other side on the back side of the spine (offset to one side of the spine). Cut down the full length of the bird and come out by where the tail feathers were, and repeat on the opposite side of the spine. With proper positioning of the bird, pulling the segment that you just cut out will bring all innards with it as well. Take extra caution not to rupture anything when making this cut.

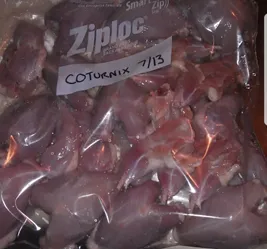
At this point, you have a fully cleaned bird that is now ready for post processing. Now you want to rinse the meat very well, and place it in a pot. I like to soak it in a little bit of salt water for a few hours while refrigerated, but don’t oversoak them at this step. After a few hours, drain the water and place them into a Ziploc bag and remove all of the air and water (or you can go ahead and vacuum seal at this point). I feel this next step is the most important part, especially if you are dealing with an older bird or wild game. You now want to “rest” the meat for a couple days. You want to keep the meat cool, but not frozen for a couple days. This step is not required, but it will help tenderize the meat and bring out the full flavor profiles.
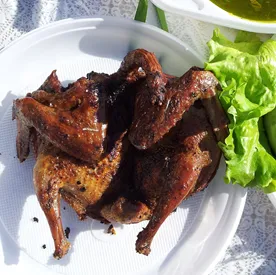
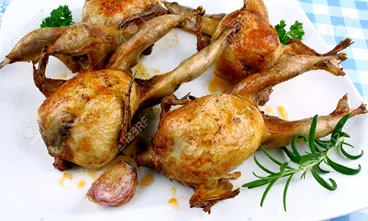
Now you’re down to the best part of the process. Cook and enjoy!
Hopefully this has been both helpful and clear with my wording. If you have any questions, feel free to post them below in the comments. Enjoy!