New to the "Beekeeping for Everyone!" series?
Consider starting with Post #1, search #beekeepingforeveryone, or scroll to the bottom of this post for the complete list.
Let's Make Splits & Queens
First of all let me apologize for taking so long to get this out. I went off to BeeFest and have been busy ever since my return. I procrastinated putting this post together as I knew it was important and would take time to do it right.
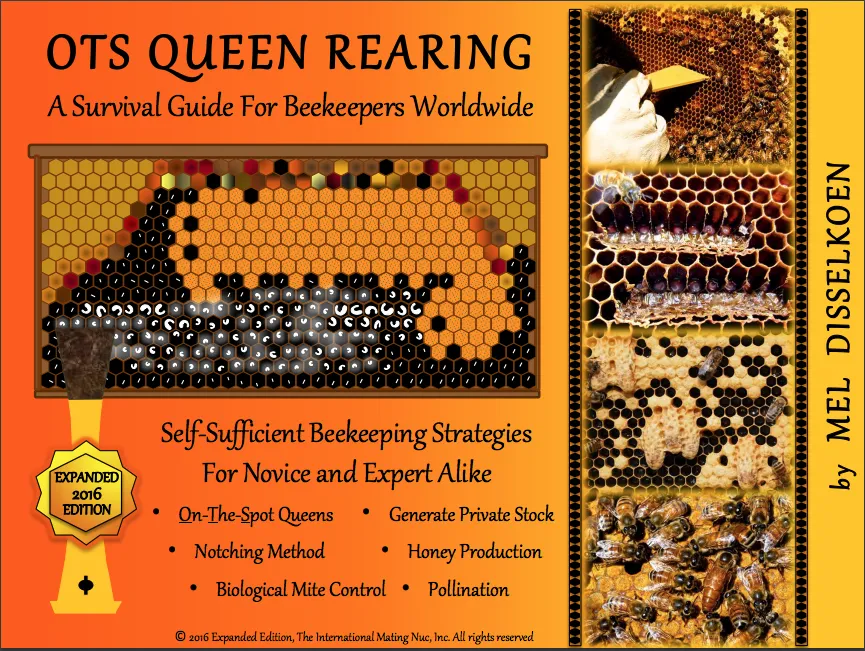
The main aspect of this post will be around a method called On The Spot (OTS) Queen Rearing which is a technic developed by Mel Disselkoen. I am in no way affiliated with Mel, nor do I stand anything to gain by promoting his method. My sole purpose in sharing this method is the fact that I find it the easiest way for novice beekeepers to raise quality queens.
While all the information on OTS can be found on Mel's website and his YouTube videos, I would strongly suggest purchasing Mel's book if you find OTS useful. Mel is a stand up guy and freely shares his knowledge and is the type of person that deserves to be rewarded for their effort.
OTS
What is unique about OTS is that you can take larvae destined to be workers and turn them into quality queens without having to graft. Grafting takes a lot of practice and continual use to remain proficient and therefore not practical for the average novice beekeeper.
The basic principle is to break out the bottom of the worker cells so that the bees can turn a larvae that was destined to be raised horizontally as a worker into being raised vertically as a queen. This is done without having to float the larvae out of the cell on watered down royal jelly first. I discussed the issues with walk away splits in the last post and the emergency queen cells in Honey Bee Queen - part 1.
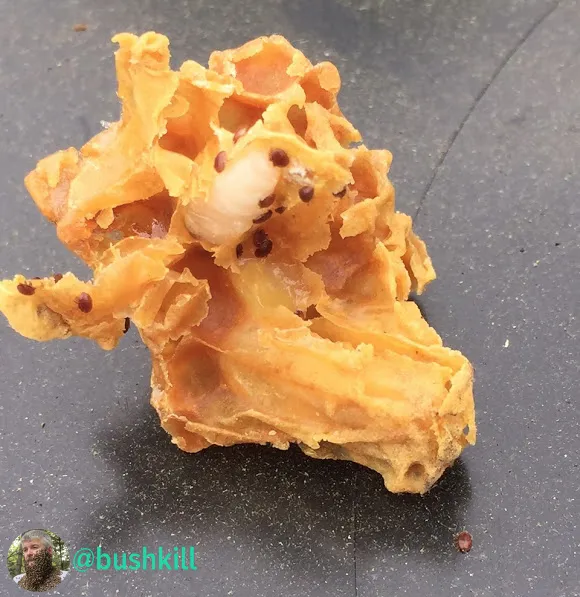
OTS has other benefits as well. When the process is followed correctly, all queen cells are raised in a strong well populated mother colony with all the necessary resources to abundantly feed and care for the queen larvae. It also can be timed to give brood breaks that help with varroa control. With the current state of varroa and viruses, I'm not sure that a single brood break is sufficient, but any reduction in varroa is a positive. With a brood break, all varroa become phoretic (ie. riding or being transported on a bee) as opposed to being in a brood cell mating and reproducing. These phoretic mites ride on the bees looking for 8 day old larvae. The mites go into the cells just before they are capped over to pupate to feed off the larvae and reproduce. When there is a brood break, the mites have to wait until new larvae reaches the 8 day mark. When the first new brood hits day 8, the mites will overload the cells and kill the larvae and die themselves.
Here is a photo of the first larvae after a brood break that has been inundated with hungry varroa. Although the life blood is sucked out of these first larvae, it is a small price to pay to consolidate and starve the varroa mites.
Process
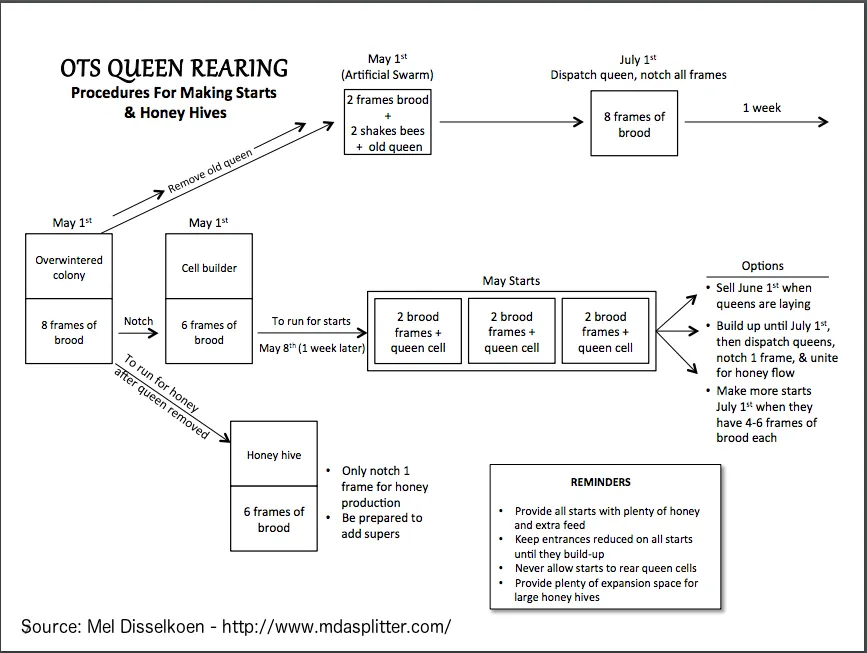
The process starts by identifying the strong mother colony you wish to create new queens from. Timing is obviously dependent on your location and the environmental conditions. Rule of thumb is to start 1 week before your swarming season. Here is the northeast (43rd parallel) that is around May 1st.
The first step is to remove the current queen and two frames of brood to a nuc box and shake another frame or two of nurse bees into the box. Set this nuc box off to the side. What you have just done is created an artificial swarm. Now comes the ingenious part of Mel's process. On each brood frame that you wish to raise a queen (and make a potential split from), find a section of larvae that is younger than 36 hours and break the bottom of the cell walls open with your hive tool. I have found it best to push the hive tool straight into the comb all the way down to the mid-rib and then push the hive tool down in a prying motion to clear a space below for the queen cells to be built. Newer comb is easier, but with a little extra effort older comb can be used as well. Do two to three notches on each frame. I like to mark on the top bare the locations of the notches. You would be amazed at how well the bees can repair the comb if they decide not to raise a queen.
Return to the hive in 1 week and inspect ALL the frames. If there are frames with queen cells that were not notched, destroy these cells as the larvae was floated. On the notched frames destroy all but two of the queen cells. Depending on the size and strength of the mother colony you can take each of the frames with queen cells and make a split from them. Either with resources from this hive, or from another.
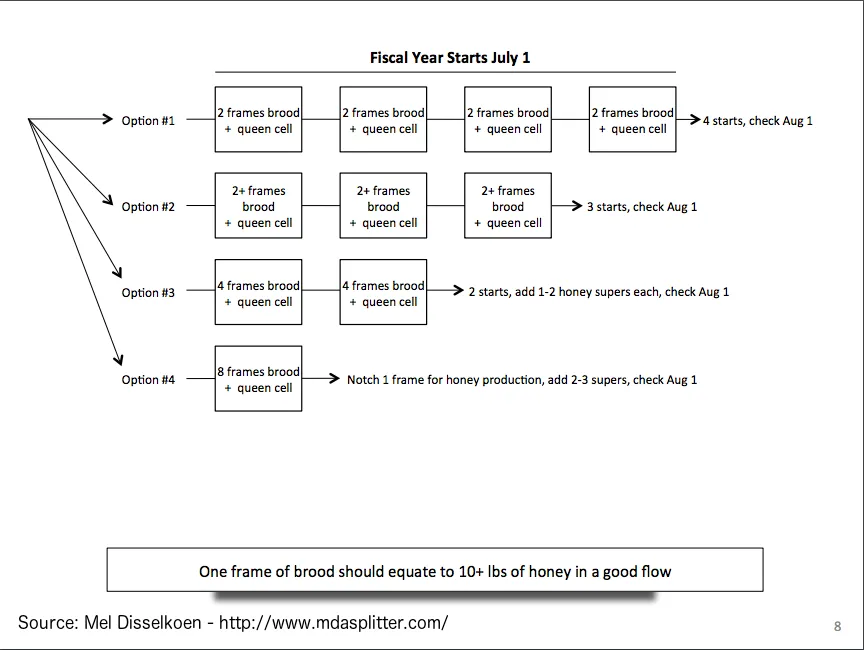
Mel also walks through the options available depending upon what your goals are. It is beyond the scope of this post, but I will include the flow chart that Mel has provided on his website.
Additional Info
Mel Disselkoen's website
Mel's book OTS Queen Rearing: A Survival Guide for Beekeepers Worldwide
Mel's presentation on OTS and varroa control
Mel Disselkoen speaks on OTS Queen Rearing and Miticide-free beekeeping


Beekeeping for Everyone! Series
Follow me (@bushkill) so you don't miss the next post in the Beekeeping for Everyone! series
Check out all the posts in the Beekeeping for Everyone! series
#1 - Introduction
#2 - The Importance of Pollinators
#3 - Honeybee Castes
#4 - Honeybee Queen - part 1
#5 - Honeybee Queen - part 2
#6 - Honeybee Worker
#7 - Honeybee Drone
#8 - There is Nothing Natural About Beekeeping!
#9 - Honeybee Nucs - Buyer Beware
#10 - Package Bees - Understanding What You'll Get
#11 - Let's Talk Splits
Talk Beekeeping

https://discord.gg/RwmvvFH
Keep On Keeping!
@bushkill