Hola amigos de hive ¿Cómo están? hoy quiero compartir un proyecto muy divertido y práctico que realicé con mi impresora 3D! Decidí diseñar y imprimir un soporte personalizado para mi joystick de Xbox. Este proyecto no solo me permitió organizar mejor mi espacio de juego, sino que también fue una excelente oportunidad para mejorar mis habilidades con la impresión 3D. Si eres un entusiasta de los gadgets y la tecnología, ¡este post es para ti!🚀🕹️✨
Hello hive friends, how are you? Today I want to share a very fun and practical project that I did with my 3D printer! I decided to design and print a custom stand for my Xbox joystick. This project not only allowed me to better organize my play space, but it was also a great opportunity to improve my 3D printing skills. If you are a gadget and technology enthusiast, this post is for you!🚀🕹️✨
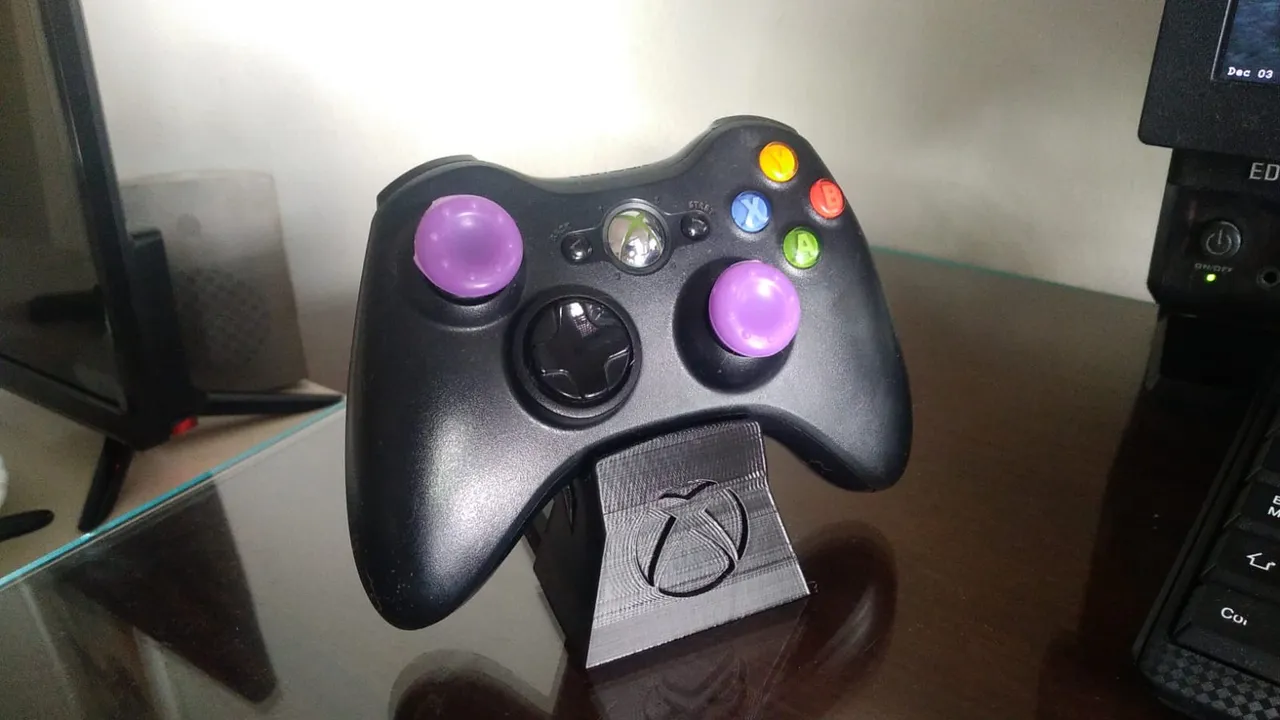
Acá les dejo una foto de mi autoría para que vean el tamaño y como quedo! un saludo para todos amigos.
Here I leave you a photo of my authorship so you can see the size and how it looks! Greetings to all friends.
Pasos para crear tu soporte 📝:
Diseño del soporte 🎨: Empecé creando un diseño en Tinkercad. Hice una base sencilla para que el mando se mantuviera estable. Asegúrate de medir bien tu joystick para que encaje perfecto. 📐✏️
Preparación para la impresión 🖨️: Una vez que el diseño estuvo listo, lo exporté como archivo STL. Lo cargué en Cura (el software que uso para preparar la impresión) y ajusté parámetros como la altura de capa (0.2mm) y el relleno (20%) para que fuera fuerte, pero rápido. ⚙️🕒
¡Impresión en marcha! 🚀: Comencé a imprimir. 🖨️ El proceso duró unas 2 horas. Usé filamento PLA, que es fácil de manejar y crea un soporte bastante resistente. 💪
Post-procesado ✂️: Después de imprimirlo, lo saqué con cuidado de la cama de impresión y lo lijé un poco para quitar las imperfecciones. ¡Quedó súper suave al tacto! 🙌
¡Listo para usar! 🎉: Colocando el joystick en su soporte, todo se ve increíble. ¡Ahora tengo un lugar organizado para mi mando cuando no lo estoy usando! 🏅🎮
Steps to create your support 📝:
Support design 🎨: I started by creating a design in Tinkercad. I made a simple base for the controller to stay stable. Make sure you measure your joystick correctly so that it fits perfectly. 📐✏️
Preparing for printing 🖨️: Once the design was ready, I exported it as an STL file. I loaded it into Cura (the software I use to prepare the print) and adjusted parameters like layer height (0.2mm) and padding (20%) to make it strong, but fast. ⚙️🕒
Printing underway! 🚀: I started printing. 🖨️ The process lasted about 2 hours. I used PLA filament, which is easy to handle and creates a fairly sturdy support. 💪
Post-processing ✂️: After printing it, I carefully removed it from the print bed and sanded it a little to remove any imperfections. It was super soft to the touch! 🙌
Ready to use! 🎉: Placing the joystick on its support, everything looks amazing. I now have an organized place for my controller when I'm not using it! 🏅🎮