Welcome to week 2 in our Fall Lifebook Challenge. If you missed week 1, you can check that out here.
In this week's email, we're going to start building section 2 of our Lifebook - the Life Timeline. I'm also going to share some insights I had while working through Week 1.
I hope you'll share your thoughts and experiences about this project in the comments.
Week 2 - The Life Timeline
In Week 2, we're going to start building a life timeline. This is a project you won't likely finish in a week. The goal for this week is to determine how you're going to document the important moments in your life.
I've written previously about the life timeline. You can read the article at that link or, I've adapted a version that I'm including here.
My life timeline is something I started, I think, in about 2010. I add to it regularly. When I am at my best — so maybe three or four months out of the year — I update the life timeline once a month as a part of my monthly review. I try not to go more than a couple of months without opening the file. I'm also constantly adding to it as I find photos, documents, and records.
What is a life timeline?
A life timeline is simply that — a timeline of the events and milestones you consider important in your life. You can keep your life timeline analog if you want, but I do mine in digital.
Why do I need a life timeline?
What year did we…?
Did we stop in Yellowstone when we went to … ?
Have you ever had these types of conversations? If so, then a life timeline is for you.
I also find my life timeline to be my “full” resume. I customize resumes for different jobs but keep all the details on my life timeline. This is one of the reasons I’ve moved to digital as it is easier to store old job descriptions and other job artifacts to reference — all of which I can now easily link to from my life timeline.
Document, Spreadsheet, or Database — Which is best?
Analog friends: A notebook and pen will work fine if you like analog. I would probably dedicate one year per page/spread and then add events to their respective pages. The Jibun Techo Life Book (available on jetpens.com if you can’t find it on amazon) is a pretty, pre-formatted life timeline. I love it but it’s too small for my aging eyes. Bullet Journalers (or BuJo’ers for those in the know), your monthly log could also serve this purpose — simply highlight items that you feel reach the level of Life Timeline and migrate them to a collection.
Digital Options: A simple document is a good starting point. Whether it’s word, google docs, or even a text file, start with the current year, begin adding months and add a new line by date. So, for instance:
2022
January —
3 — adopted a puppy (Barney) from the local humane society
6 — kids started back to school following the holiday break
If I’m recording things monthly I might go into this level of detail. At the end of the year I might add more things or take out things I don’t really think I’ll need to know in five years — like the day the kids started back to school following the holiday break. There is no right or wrong way to do this. You make your own rules.
Google Sheets Version
Since I do love the analog Jibun Techo so much, I created a version of it in Google Sheets. I love how this looks and I might still keep some version of it but in the end the Notion version did win out for me. Feel free to try out the google sheets version. Just choose File > Make a Copy and save it to your own Google Drive.
Notion Version
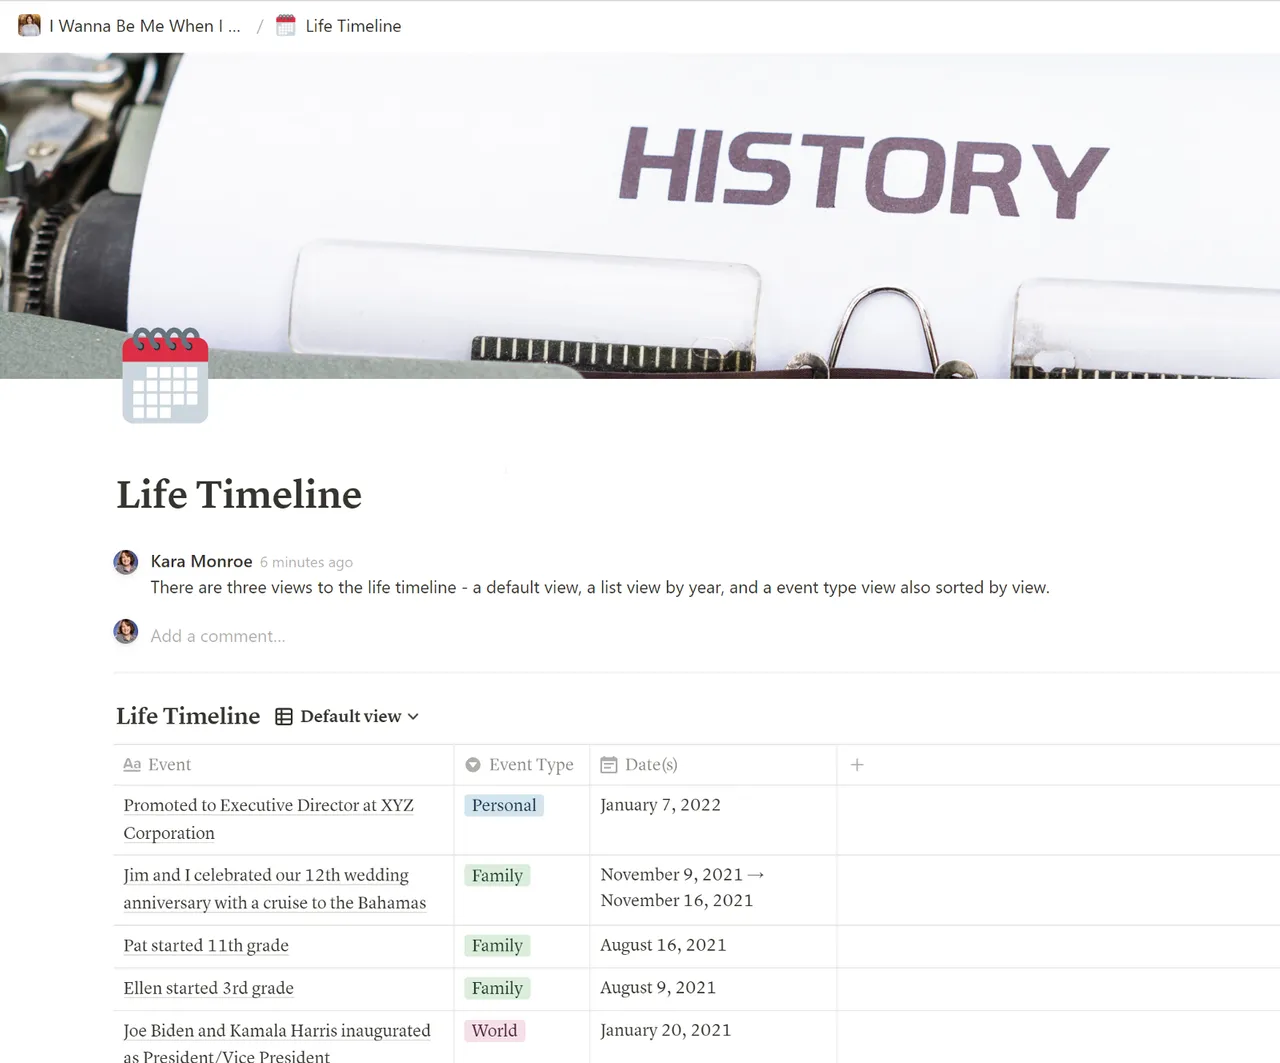
In the end, I think Notion will probably be the final stop on my journey with my life timeline. I created a simple template that you can duplicate to your own Notion database if you’d like to give it a try.
There are three views in this database:
- Default table view sorted in descending order by date
- A grouped list view my month
- A card view that shows by event type
How do you keep track of all the history in your life? What do you use it for?
So that's it for week 2. Start building out your life timeline. Let's talk about how things went in Week 1.
Recapping Week 1
I made really great progress in week 1. My notebook is now packed with copies of my driver's license, passport, birth certificate, and social security card. I also added copies of these documents to 1Password.
Storing Documents in 1Password
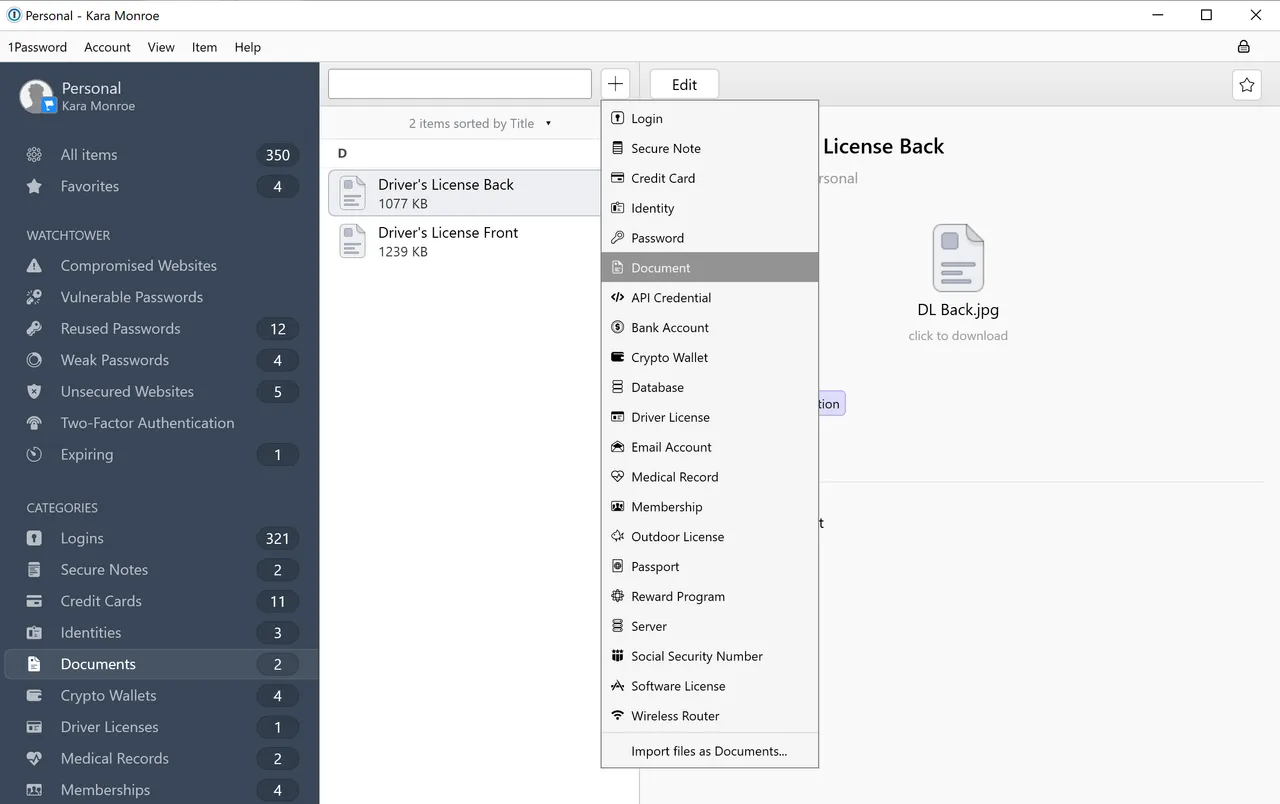
1Password has so many options for storing information. As I've been exploring it in planning for this project, I realized that you can also use it to start documents. I would NOT want to use it for a lot of document storage, but as a secure way to store images of a few sensitive documents, it worked nicely.
Step 1: Open 1Password on your computer or 1password.com on the web.
Step 2: Click the "+" button. In the image below, it's at the top of the screen. On the web, it's at the bottom of the screen. So, you may need to look around. Select document.
Step 3. Give your document a name. Drag the document into the 1Password window or click the "click here" link to open a file dialog so you can select the document.
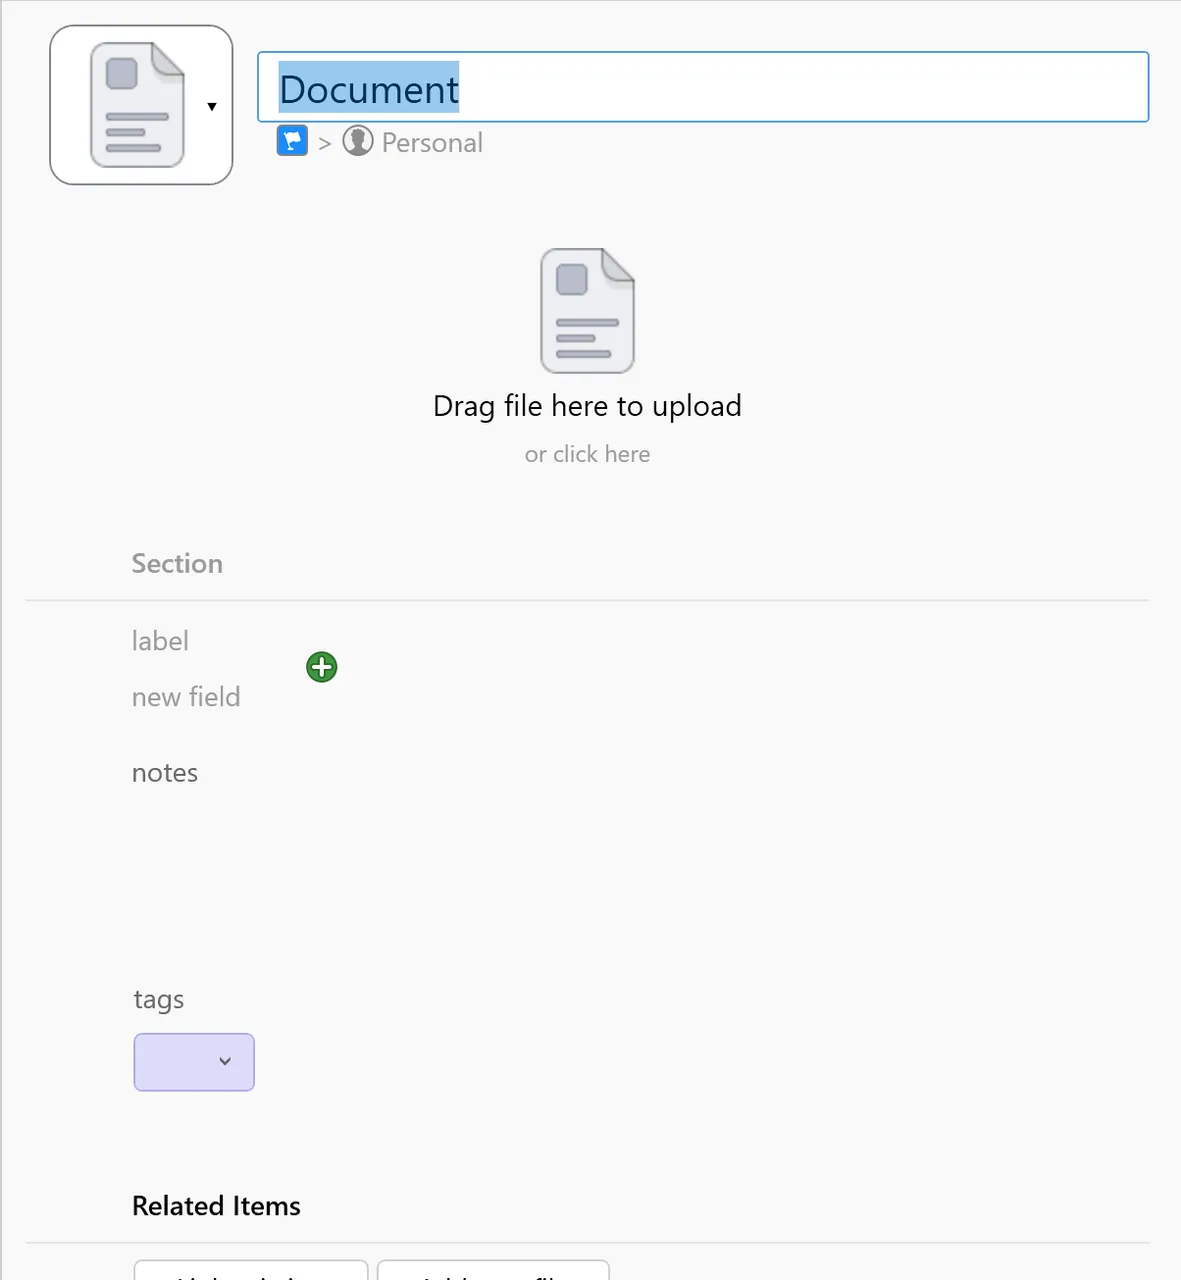
Step 4: Enter any other properties you want about the document and then, most importantly, click Save.
What I learned about the project this week
As I noted in the original post, this project is very personal so what works for me might not work for you. What works for you might not work for me.
Building my "emergency" plan
Every family/household should have an emergency plan. Ready.gov is an outstanding resource for building your emergency plan. This is their dedicated page to information on building a plan for your family. The overall Ready.gov site also has a load of information that may be of value for your family.
I already had an emergency plan which includes an emergency first aid/evacuation bag so I just went through that and replaced anything that was expired or faulty.
Pet Information
I mentioned collecting information for each person in your family in the first section of your Lifebook. I can't believe that I forgot pets.
Meet Kona! He's my main squeeze.
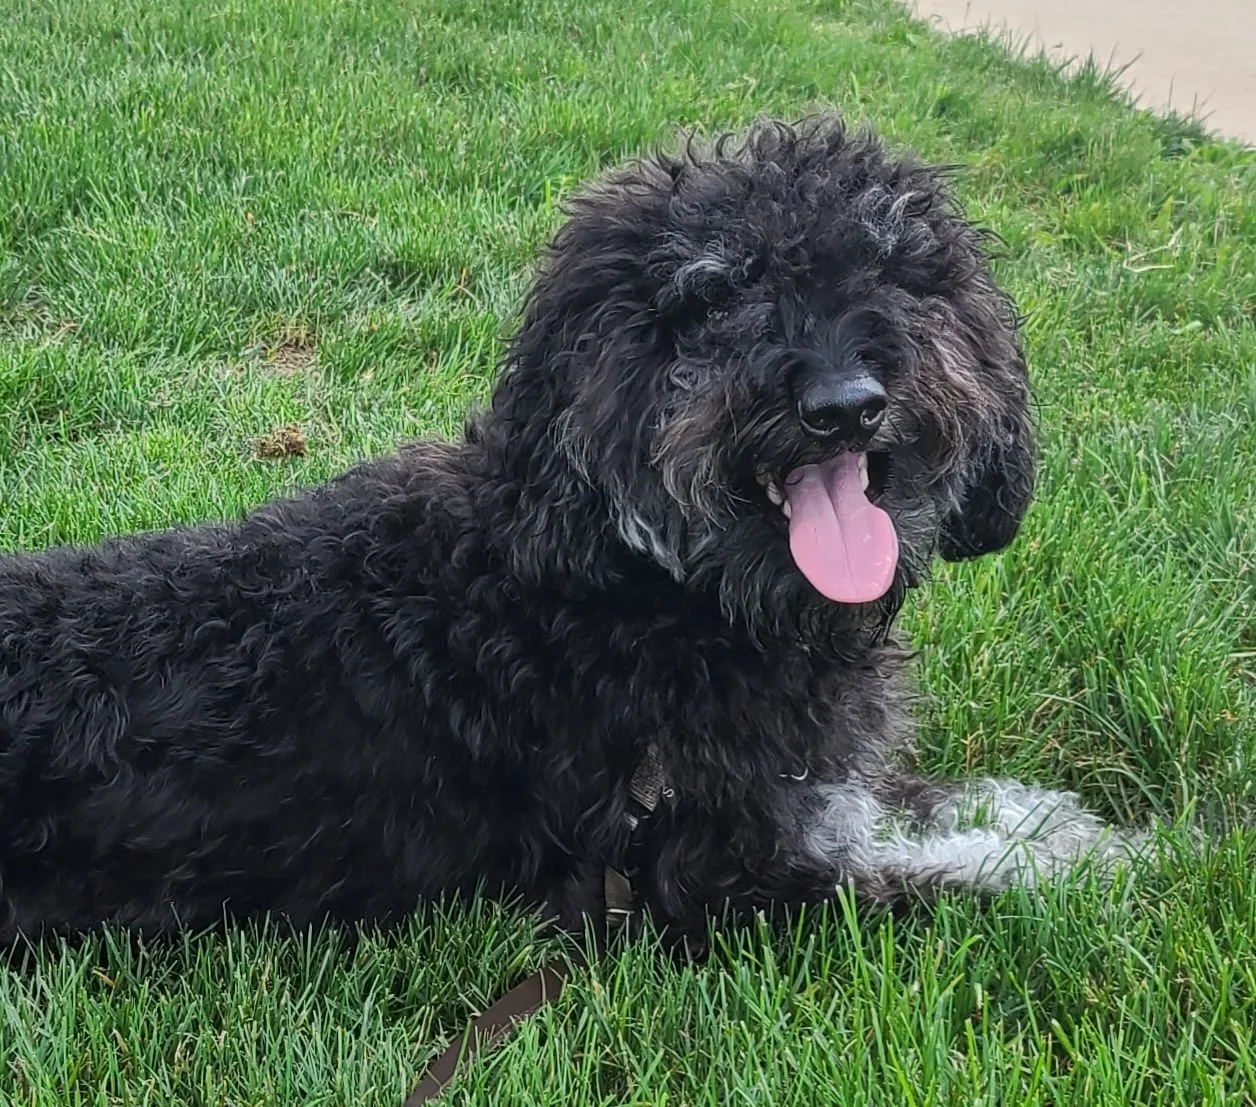
Kona has his own notebook but I did include a copy of his detailed care guide in my Lifebook since it's the document I am building for my family to access in case of an emergency where they need to step into my life.
Email, Calendar, and Phone Access
Speaking of information people will need in case they have to step into my life, in addition to addresses and numbers, I also included information on how to access my most important digital files as well as my email, calendar, and cell phone.
I also printed a copy of my 1Password Recovery Kit as well as my Hive Blockchain access keys.
How did Week 1 go for you?