If you are looking to use your IPhone/IOS device to livestream on DLive please follow the guide below using Live Air Solo. (FREE APP) For anyone looking to start doing IRL(In Real Life) Streams, I suggest you use this and let me know if your having any issues. I have tested on WIFI & LTE for great connections without any drops. Be sure to always check your current connection and make sure to be in a good area with good signal if using LTE.
If you are looking to #livestream using an Android, be sure to continue reading down below, on how to use Android and livestream to @Dlive.
If you are looking for more information on @Dlive be sure to check us out on https://dlive.io/ & https://help.dlive.io/en/

DLIVE - IOS LIVESTREAMING GUIDE

Step 1 - DLive Stream URL + Key
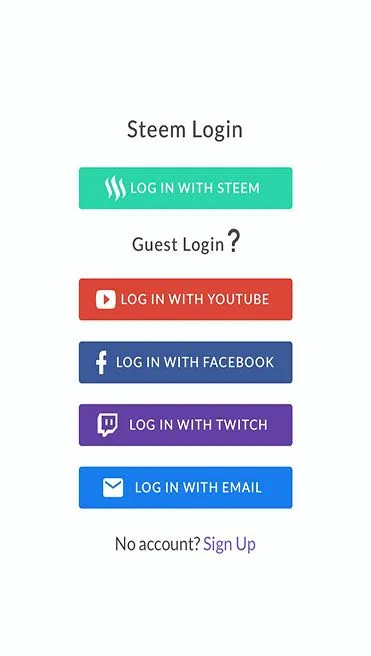
Log into your DLive account with STEEM account and press Go Live at the top right of the screen on Dlive.io
Under Encoder authentication select DLive transcoder (not Wowza)
Under Encoder authentication section copy your full stream URL & Stream Key (Select All and Copy)
Step 2 - Download Live Air Solo
Download Live Air Solo application and install it on your IOS/APPLE device.
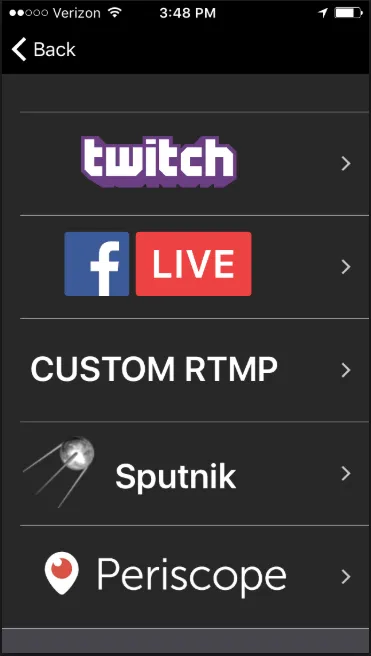
Open the Live Air Solo app and swipe down to get settings in the top left screen press the Broadcasting Destinations. Click on Manage Destingations and Add a New Destination. Scroll Down till you see CUSTOM RTMP
Enter your streaming URL from the DLive Go Live screen. Make sure you are using Dlive Servers and click on Regernate Server URL:
rtmp://stream.dlive.io/live?key=< KEY >/< STREAMKEY > Input this into the URL under Custom RMTP.Under the "Stream" tab within Live Air Solo under URL you will see "Stream" enter in your STREAM NAME/KEY that is provided on the Dlive Go live page under the generated URL.
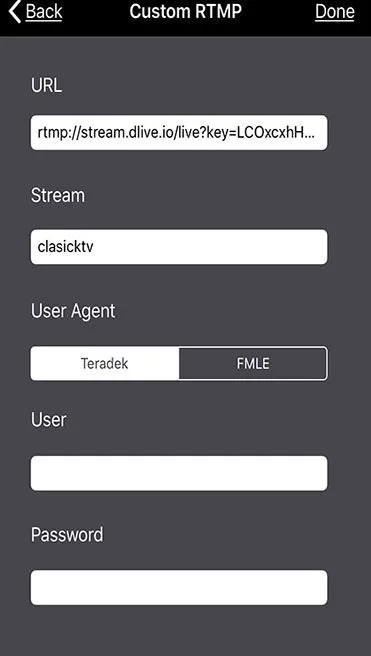
- Press Done
Step 3 - Encoder Setup
Swipe down to get settings in the top left screen press the Encoder Settings. There is a list of default settings that show 1080P - 240P & Also a Manual setting, I have found the 720P Setting the best, be sure to make sure Key Frame Interval is set to 2s.
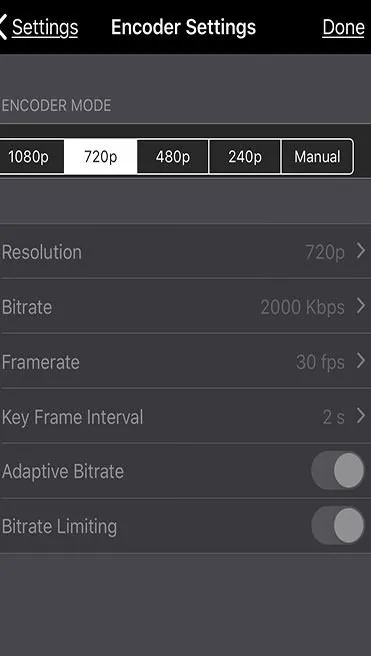
- Hit Done.
Depending on your connection (WiFi / 4g) enter the settings into the Encoder Setup.
For low speed connection choose a low bitrate and resolution.
For high speed connection choose a bitrate that does not exceed 3000kbps and keep the resolution at a maximum of 720p
Step 4 - Going Live
Press the GO Live in the top right corner after configuring above settings from Step 1-3.
Swipe right for Sources
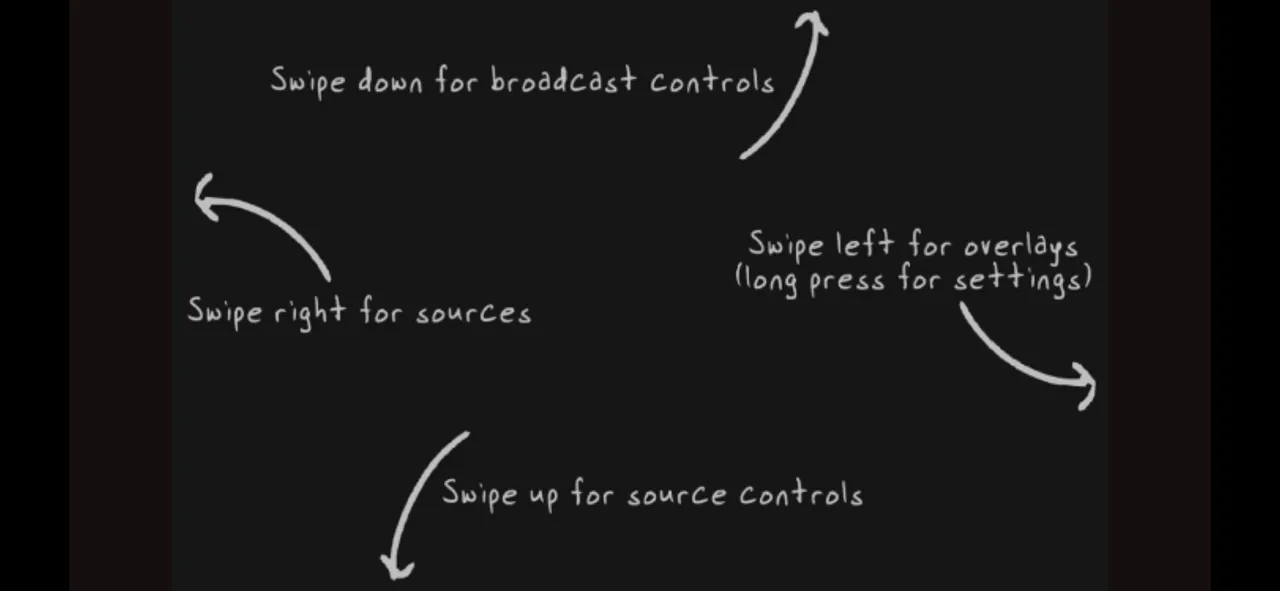
The Camera is the defaulted in as the main source, you can add video files as well. I see that there is a TeraDek Device option and also Core Device option but those seem to be propriety to Live Air Solo.
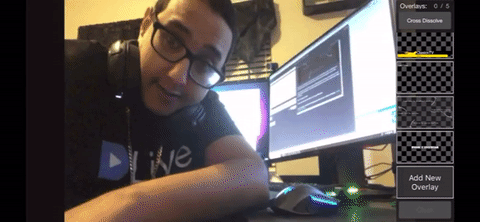
Camera through Front Facing & Main Camera is allowed through Live Air Solo. It also allows you to add overlays from your IOS device, or from default templates that you can also edit for a quick overlay within Live Air Solo.
*Note - Be sure to make sure your volume is all the way down in your device if not using headphones for live audio monitoring. You will need to uncheck the mute button in order for people to hear you, and make sure to lower your volume all the way down for no echo feedback in the IOS device, not Live Air Solo.
Step 5 - Stopping your Stream
To end your livestream press CLOSE on your Custom RTMP stream
If you are looking for an Android Livestreaming guide to Dlive, be sure to check out, Bitstream. Android Live Streaming Guide
Bitstream allows you to use either of your cameras (if your using an android device and has front or back cameras) and also your screen.
