Intro
Photography has a history of its own but the basic principles used can actually be found in classic paintings. However, photography has evolved to be an art on its own. Like every type of art, everything is permitted, but for beginners it is very helpful to have a guideline. Then they can build and experiment from there.
Composition
Some photos look better that others, even if it has the same subject. Maybe you have noticed this but did not know why. Maybe you've seen your friends post photos from their vacation and they did not feel right. It has to have some kind of composition, a balance. I hope this tutorial will help steemians who just write and want to illustrate with their own work and add value to their post.
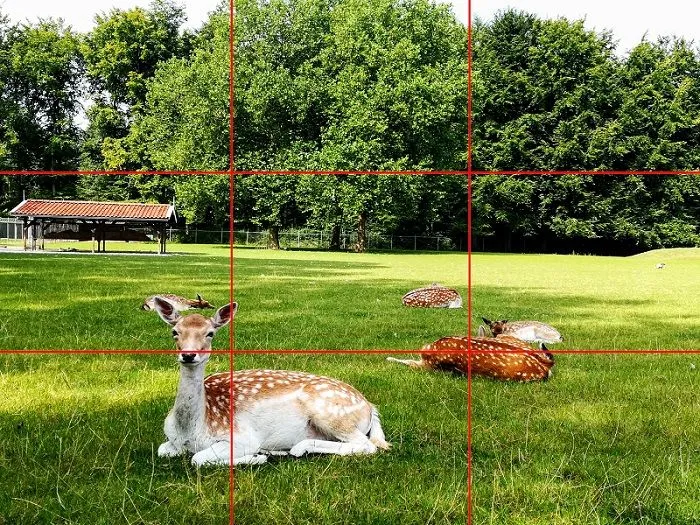
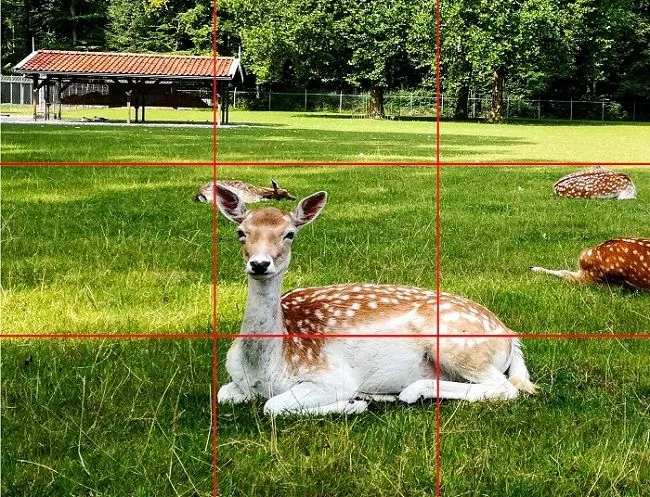
Rule of thirds
Divide your image in nine equal segments by drawing two horizontal and two vertical lines onto the photo, at the same distance. At first it can be difficult to imagine where those lines would go. Many phones, if not all, do that automatically. You may find them in the menu under grid or guide lines. Be sure to capture your subject along these lines or at their intersection.
In example one, I've photographed the deer on the left. It draws your eyes to it, but also it lets your eyes to wonder on the photo and to explore it a little bit.
In the other example, I've cropped the image just for demonstration. In the center you can see the deer, but not much else.
The horizon
When we see a beautiful landscape we immediately want to click a photo. Sometimes we are in a hurry or we don't pay attention to the composition. Tell me, which one do you like the most of the two below?
It's the second one, right? It looks better when the horizon is a straight line. Using the grid makes it easy to have a straight photo. If it is not straight, do not worry! Smartphones have a build-in editing app where you can adjust your shot. Or if it doesn't, you can download an app and use it.


Position
When you're photographing a subject that walks, runs or looks in a direction, take your time to think where you will position your subject in the picture. Leaving room for its action feels more natural, permitting the subject to continue its running or action. This applies to portraits too, let the subject breathe a little.
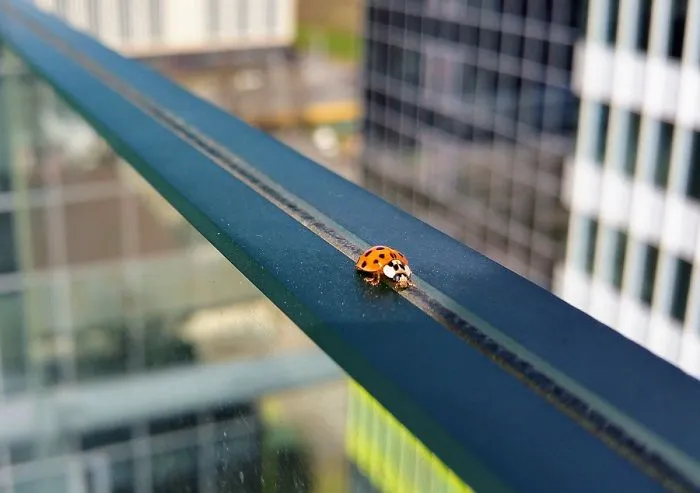
Lines
When you're exploring a place, a good way to find something to photograph is to search for lines. They can be of any kind: straight, curvy, zig-zag. A line gives a direction and it captures the attention, guiding the eyes. With the ladybug I experimented a little, took different shots until I got the effect I liked.
Focus
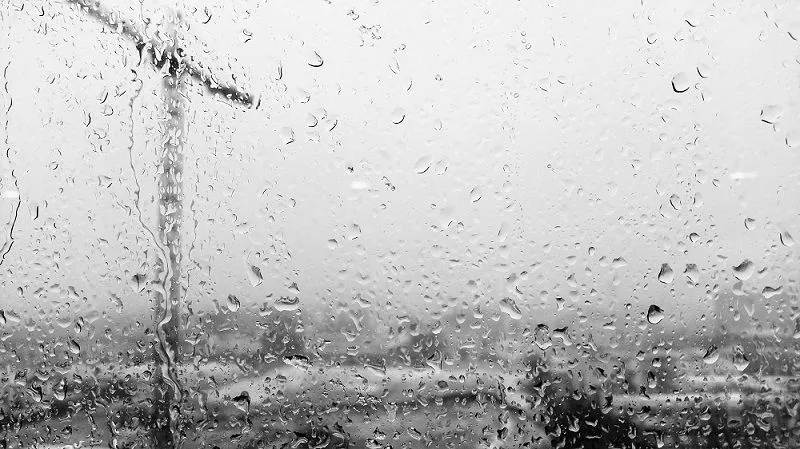
Photos look professional when using focus. It is that effect that blurs the background and the main subject is clear and detailed. Some smartphones have an automatic focus when detecting a face. Mainly, all phones have the possibility of focusing on something. Just holding your finger on the subject, the camera will choose to focus on that and blur the rest. This function will make your subject pop and give the photo a sense of depth. Experiment a little and you will see a difference.
The photo shown here is focused on the rain drops. By clicking on the screen, I also had the option to focus on the buildings, but that would not have been as interesting.
Conclusion
There are many more tricks to making nice photos. You just have to experiment and discover new techniques. There's no need to have a professional camera like DSLR or SLR if you just what better pictures but you're not that into it. Or it may be a starting point to learn a few things and discover if you're passionate in this field. It is said that a photo values more than a thousand words. Sometimes it does, other times it adds to what you want to convey. I am not a professional photograph, I just use my knowledge from an adjacent domain. I enjoy taking photos that mean something to me or I find something interesting.
Take photos and enjoy yourself! I would love to see some of your work and hope this post helped!