I was thinking for a while what was the method I had most "fun" with, however I couldn't remember anything nearly as painful as @sco and @alexs1320 have been through.
Since I was nominated, I decided to describe my amazing experience with improvised apparatus for agarose gel electrophoresis that I had during my "I-want-to-volunteer-and-learn-lab-techniques-before-I-graduate" nerdy phase of life.
So what is Agarose Gel Electrophoresis?
Agarose gel electrophoresis is actually a great method which allows researchers to separate DNA fragments of sizes ranging from 100 bp (base pairs) to 25 kb (25 000 bp).
Agarose is a carbohydrate isolated from seaweed, and consists of repeated agarobiose (L- and D-galactose) subunits. During the process of polymerization (making of gel), agarose polymers form a network of bundles whose pore sizes depend on percentage of input agarose. This means that higher agarose percentage gels will have smaller pores and therefore will be used to separate smaller size DNA fragments. On contrary, lower percentage gels are used for separation of larger DNA fragments.
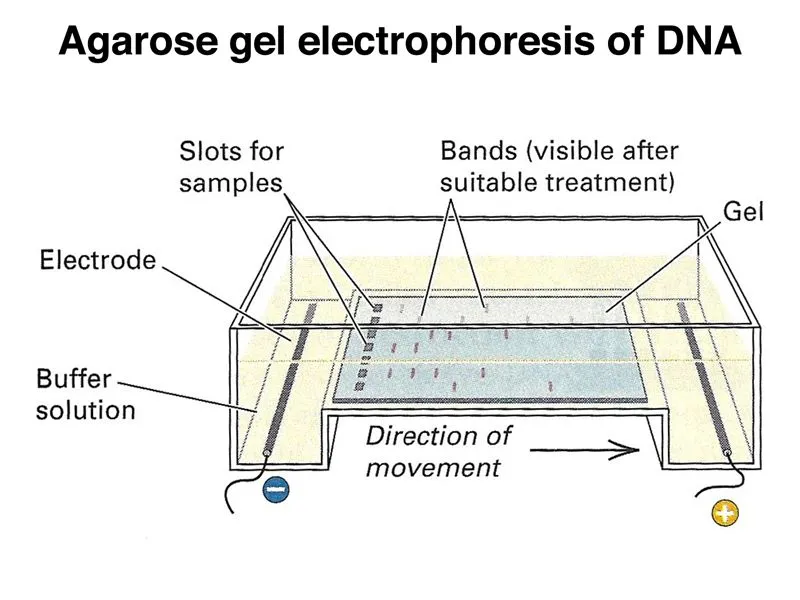
Polymerized agarose gel is placed into special electrophoresis chambers that contain cathode (negatively charged electrode) and anode (positively charged electrode) and submerged into buffer solution which serves as a conductor of electricity. After the gel is placed in buffer, the DNA is loaded into pre-cast wells in the gel, and a current is applied. Since the DNA (and RNA) molecule is negatively charged, it will migrate to the positively charged anode in the electric field. DNA is loaded into gel together with a dye which serves to drag DNA samples on the bottom of wells and also as a signal that samples have traveled far enough through the gel and that the current should be off (this is because the dye travels faster than DNA through the gel and therefore is always few centimeters in front of the samples). Because DNA has a uniform mass/charge ratio, DNA molecules are separated exclusively by size as they migrate through agarose gel, which means that shorter fragments of DNA will travel further through the gel compared to longer ones during the same time of electrophoresis.
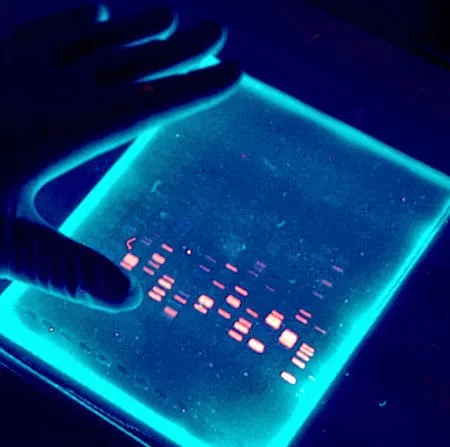
To be able to visualize our DNA samples once the electrophoresis is over, during the process of agarose gel preparation ethidium bromide is added. Ethidium bromide is an intercalating agent that intercalates between DNA base pairs and emits fluorescence under the UV light.
This is how that looks like:
My trouble with agarose gel electrophoresis
Since I was living and studying in Serbia, it was not rare that researchers in our institutes had to come up with various improvisations in order to complete their experiments, because most often there were no money, not even for a basic equipment, such as electrophoresis kit :)
So, this is how regular gel casting tray should look like:
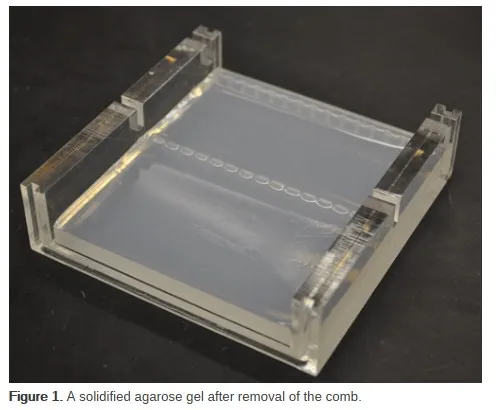
As you can see, it needs to have 2 vertical sides which should contain channels for fitting combs, which will make holes in forming gel - wells for samples.
Gel casting tray I worked with looked something like this:
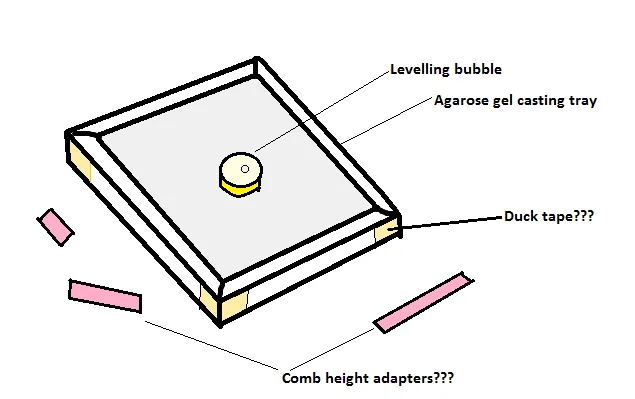
First, it had 4 sides instead of two, that were held together in place by a duck tape. Next, before gel preparation, I had to make sure that the tray is in the perfect horizontal position by using labeling bubble, which I would place in different spots on the bottom of the tray.
Of course, the tray was NEVER in perfect horizontal position! :)
Now, you may wonder what are those cute little pink things lying around?
They are the best part of my story! Since my gel tray didn't have channels where I could place combs (because this plastic dish certainly wasn't planned to be used for agarose gels!), and the height of the side walls of the tray was completely improper for the size of the combs we used, I actually had to put those plastic pieces on top of side walls, and then to put combs on top of them!
If you don't understand, no worries, here's the drawing:
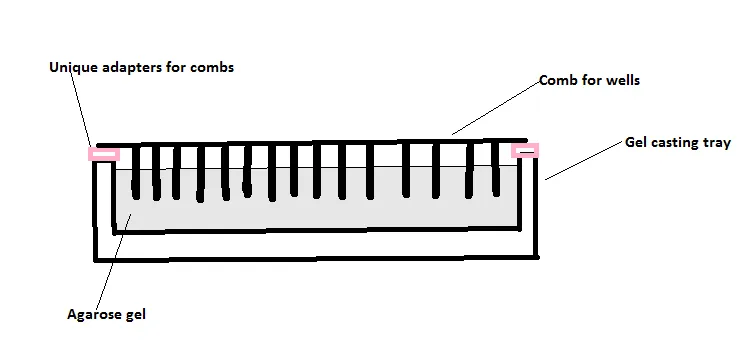
Of course, you can imagine how unstable such construction was, with "adapters" falling down when I place combs on top of them, and I had to be very careful when pouring hot, boiling gel into the tray, because if the comb falls while gel is being poured... Just don't ask! :)
Another very nice thing that I had to do is to make sure that gel doesn't contain any bubbles (which would disturb DNA migration), which always appear after pouring gel in tray. The bubbles were removed by amazing technique - I would take a pipette tip, lean over the evaporating gel and remove any potential bubbles while the gel is still liquid (not polymerized):
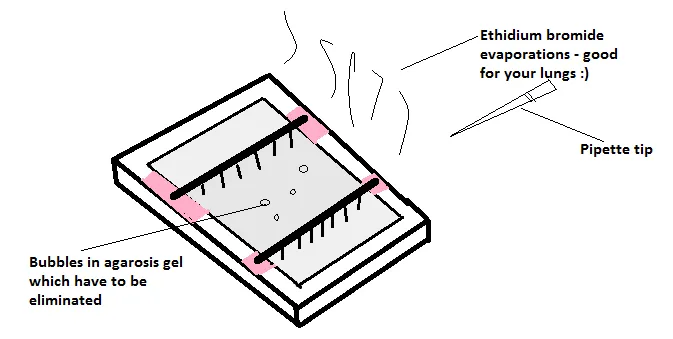
Wait, the gel contains ethidium bromide, right? Which is an intercalating agent, very cancerous?
And I was inhaling the evaporation? :)
I hope you had at least a little fun reading this, and looking at my very own (terrible!) drawings made in Paint.
For the next post, I nominate lovely @suesa - since she is a biology student, I'm sure she will have something interesting to share with us :)
Until next post, relax and keep steemSTEM! ;)
Literature
Agarose Gel Electrophoresis for the Separation of DNA Fragments
For more scientific-related content check steemSTEM. Follow me if you like my posts and want to read some more ;) If you have any thoughts/suggestions fell free to leave a comment!