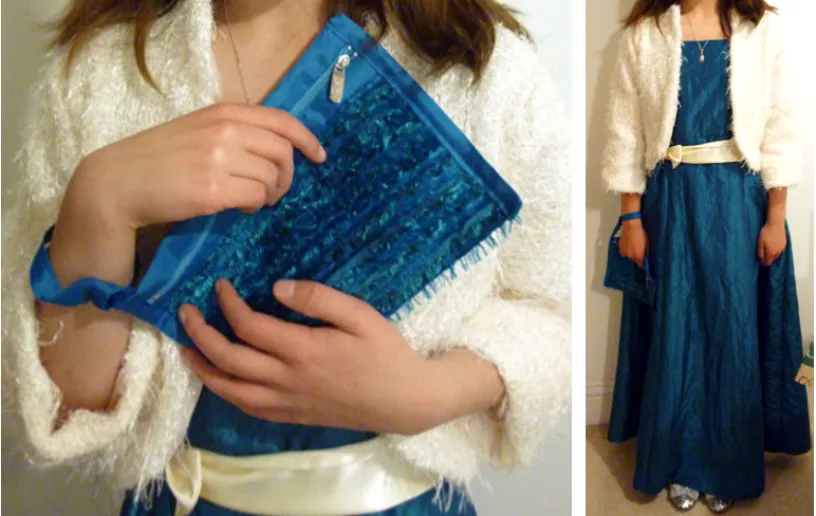
I’ve been getting rid of clutter at home : finding paper to recycle and old clothes to give away or upcycle. Some I’ll keep for personal reasons. Consider the outfit below for instance. It’s perhaps not as sophisticated as a shop bought one, but this was for a young lady going to her first end of year party at secondary school. I felt that at 11 she needed to look her age. I am personally glad I achieved that.
For the dress I actually followed a pattern - which I couldn’t find for the purposes of this post so I may put an update later. The fabric was fancy for my usual choice. I think it's called crush taffeta and it's got that 'natural creased look' - which is great from my point of view.
I made the pattern for the bolero and the bag, but I didn’t keep them due to time pressures at the time.
It is the fabric of that little bag I wanted to tell you about today.
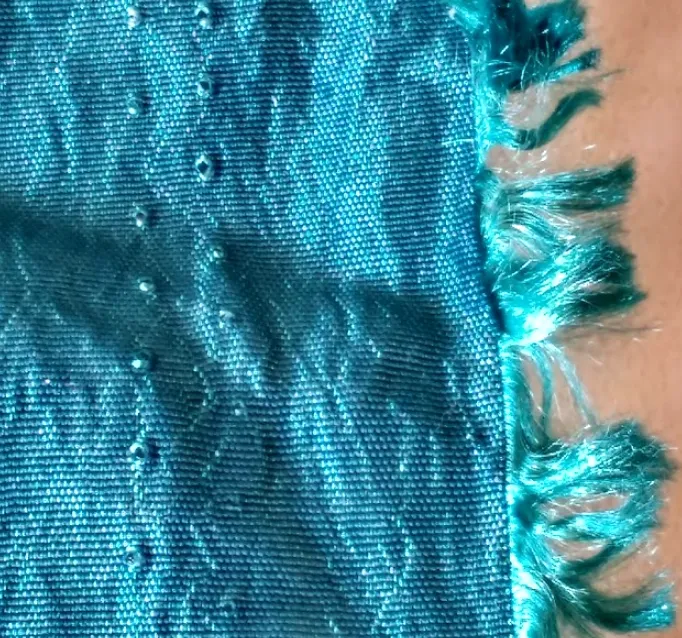
While cutting so much of that lovely blue/jade fabric, I noticed I was having to cut off (and waste !) quite a bit of the selvedge / selvage. That is the edge of the fabric. You can see what it looked like below because I kept the remnants:
This video from Made to Sew explains clearly about selvedges. I needed to avoid the holes so you can see I needed to get rid of a long strip of fabric. This happened for the main fabric and for the lining too (!).
Incidentally, in case you’re wondering :
These holes are caused by the pins holding the fabric when it’s created in the textile factories. If you look at the holes and the holes appear neat and smooth, that’s the right side...
Source:
In addition, I have to clarify that the fraying fringe above actually does not fray at all.
At the time I was a bit sad about the wastage and somehow came up with a cunning plan to upcycle / recycle that waste. Below is my method :
How to use 'fringed' selvedge to make fabric :
I laid strips of the fabrics with the ‘fraying edge’ showing on top of a rectangle piece of the lining. The photo below is a reconstruction of how I made this :

Number (1) is the lining base I cut in lining fabric, and number (2) is the strip cut right after the holes.
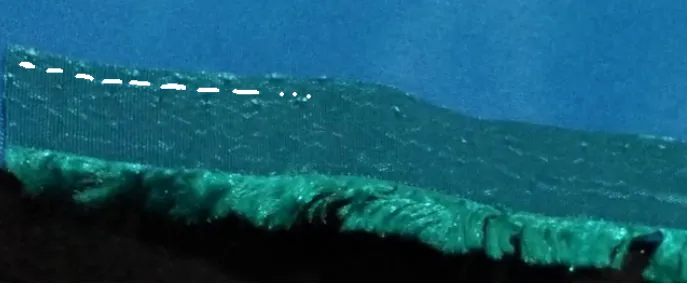
The dashes above show you where I sewed the strips using my sewing machine and matching thread. I made sure I overlapped the sewn line of the previous strip so I hid it.
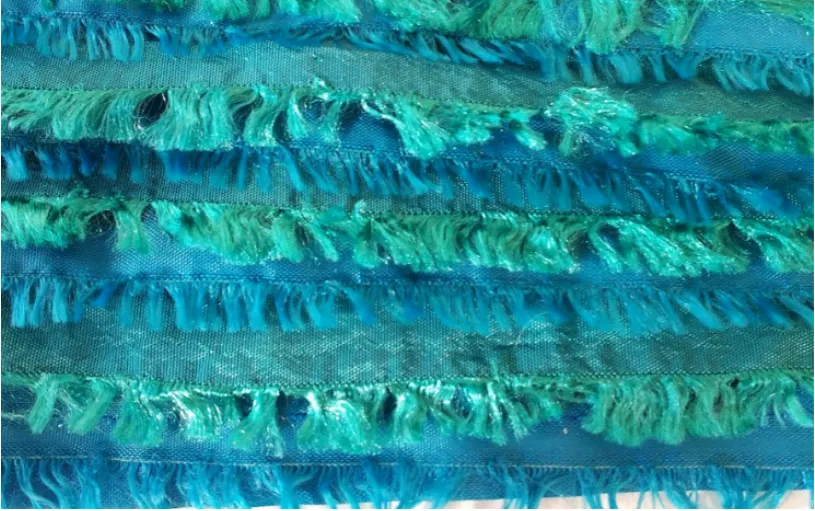
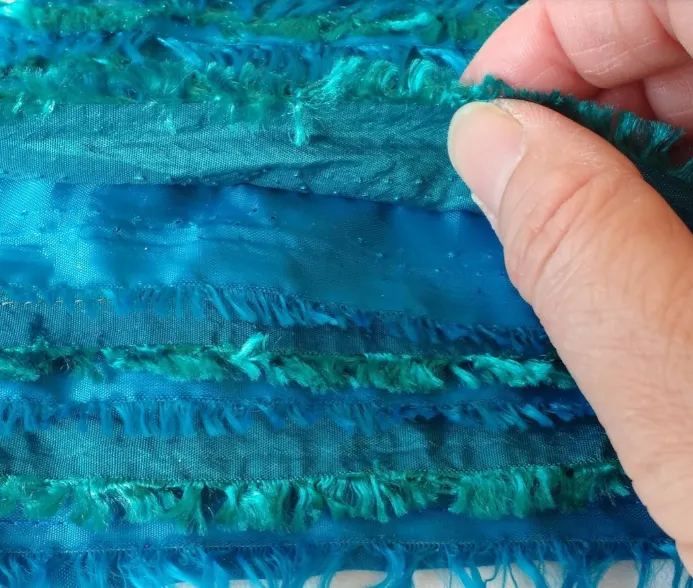
So I kept laying strips and sewing them onto the base until I reached the right size of my rectangle base. The photo below shows a close up of the fabric made:
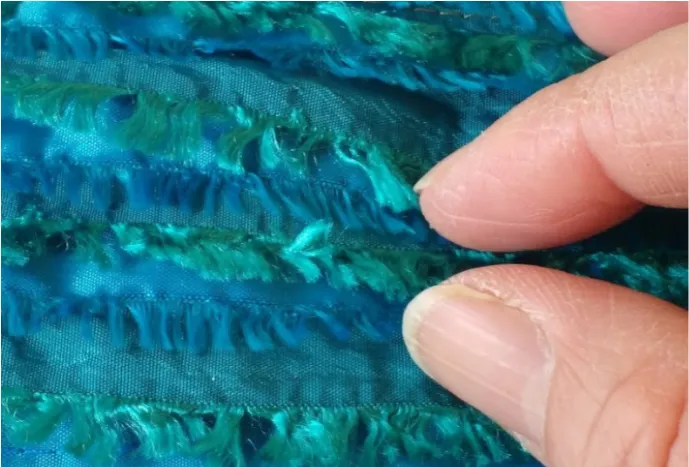
I have to confess I enjoyed the making process of this fabric more than the dress making itself. The photo below shows you what it looks like when you lift the strips :
It doesn’t look that ‘neat’ perhaps but that was the plan. At this point I started to run out of time badly so I didn’t have enough time to ‘plan’ what sort of bag to make to match the dress.
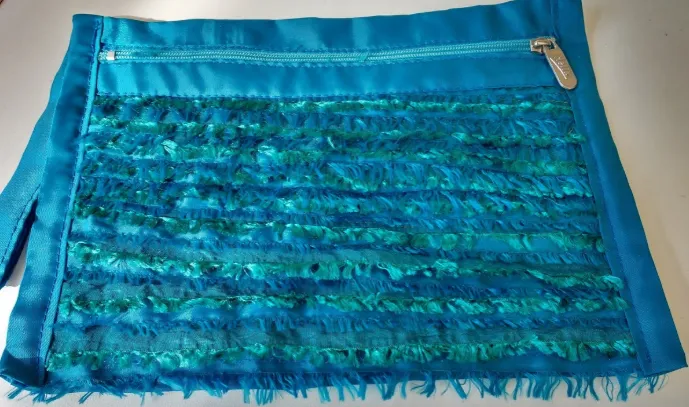
I came up with a sort of pocket :
I have searched on pinterest to see whether anyone else uses ‘selvedges’ for this sort of thing, in order to link to a better tutorial and so on. I only came up with people who use selvedges that have printing. In fact someone made an actual dress some years ago. I couldn’t find a tutorial on the process but from what I see the selvedge is really neat and without the ‘natural fringe’ so the resulting fabric looks colourfully stripey.
Here's a list of projects using the selvedge if you are interested :D
If you would like to read further about selvedges and the type of legal (and safety) information they carry including using that fabric to sell items, please read here. I had actually never thought about possible restrictions on using a piece of fabric !
Apologies for the long post.
all work by @cryptocariad

Thank you everyone for reading this far, to @crosheille for starting this community and to the awesome helpers that keep it going.