This is a tutorial for creating a Ethereum wallet on the free webservice MyEtherWallet. This will be relevant for all interested investors of the ONSTELLAR ICO on March 29th. Please follow the guide very thoroughly to avoid any potential losses.

This is Tutorial 5 out of 9 for the ONSTELLAR ICO. (overview)

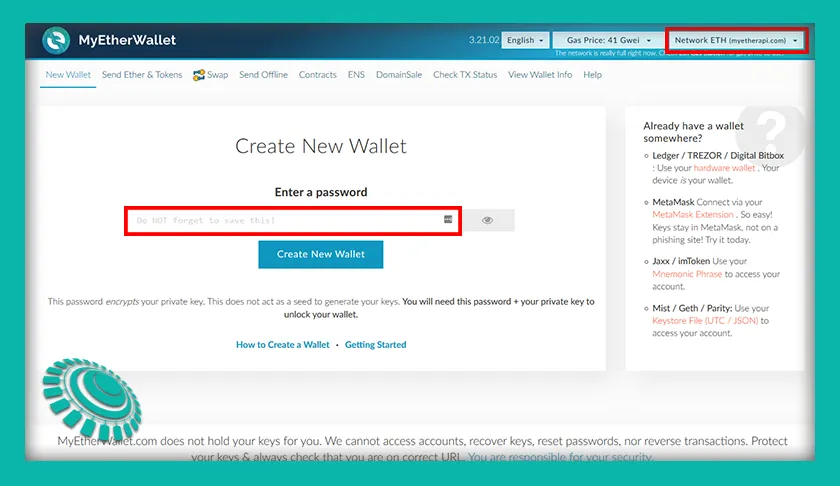
Step 1:
Open the website https://www.myetherwallet.com/ in your web browser.
Make sure to navigate there directly and don't click any links on a website or in a search engine. There are so-called phishing websites out there that resemble original websites which may try to steal your money.
Double check if you are on the an official ETH network in the top right corner. ETH (myetherapi.com) should be the default option.
If that is the case enter a secure password for your wallet in the big password field in the center and finally click Create Wallet. Make sure to remember this password and maybe create a paper copy of it which you store in a secure location.
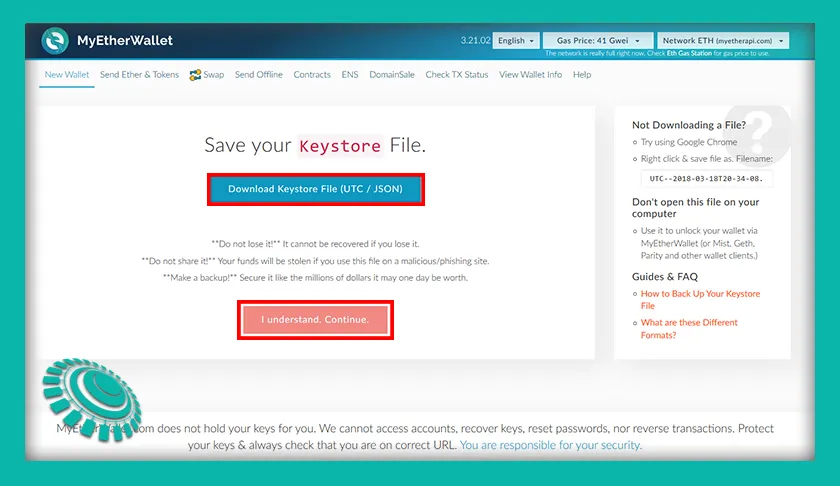
Step 2:
Download the keystore file and safe it on an external flash drive which you keep in a secure location. This file will allow you to recover your wallet as a backup plan. Never share this file with anybody!
After you are done with that click on I understand. Continue.
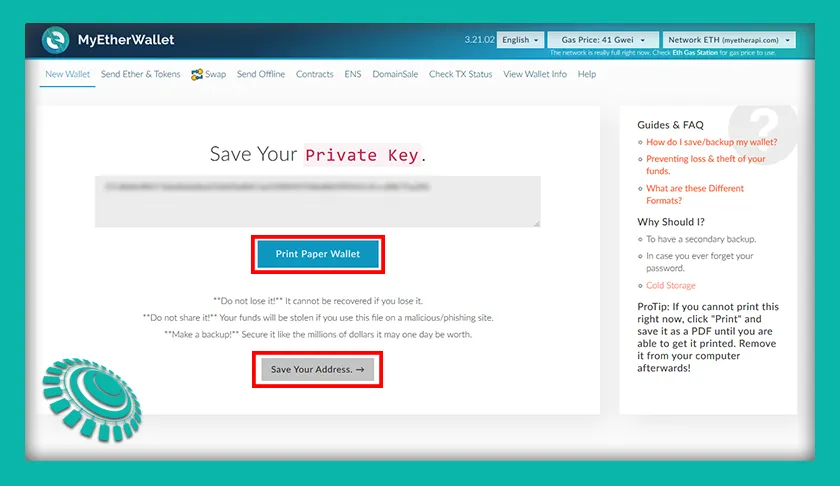
Step 3:
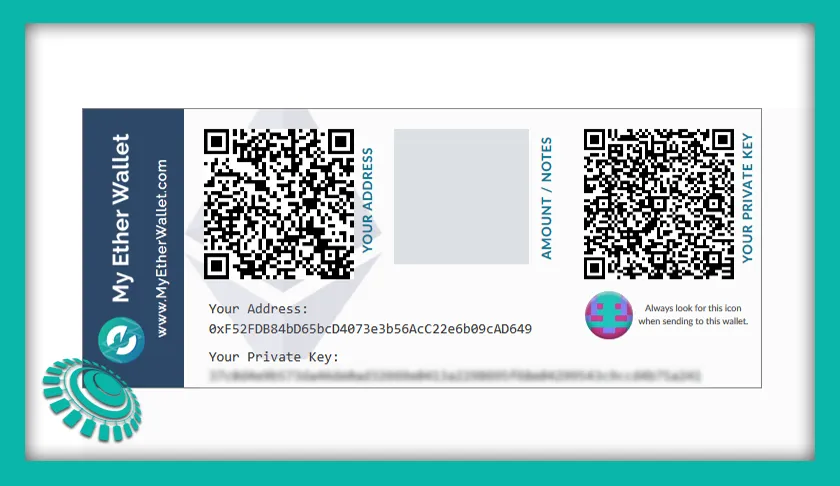
You can now print your unencrypted Paper Wallet. This is an optional step but highly recommended as an extra backup for you. Make sure to keep this in a secure location and not at the same place as your keystore file to avoid loss in case of fire, water or something like that.
Do not safe your private key on any cloud service or online storage as that might get compromised!
After you are done with that click on Safe Your Address.
This is how the Paper Wallet will look like:
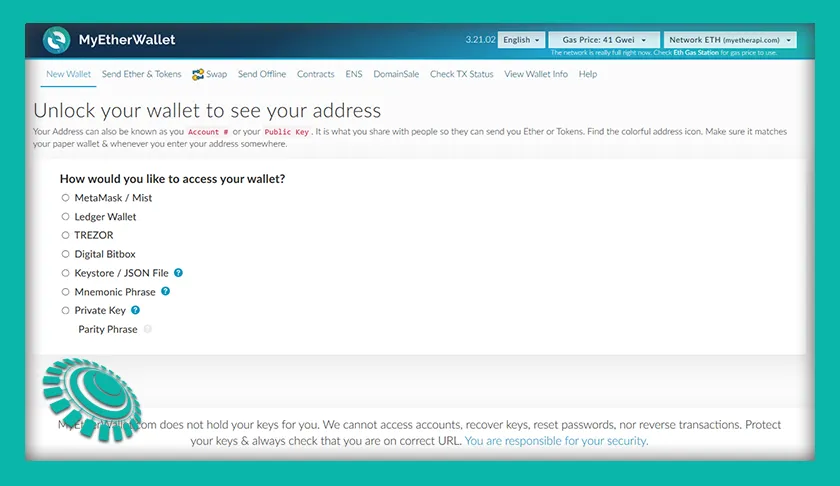
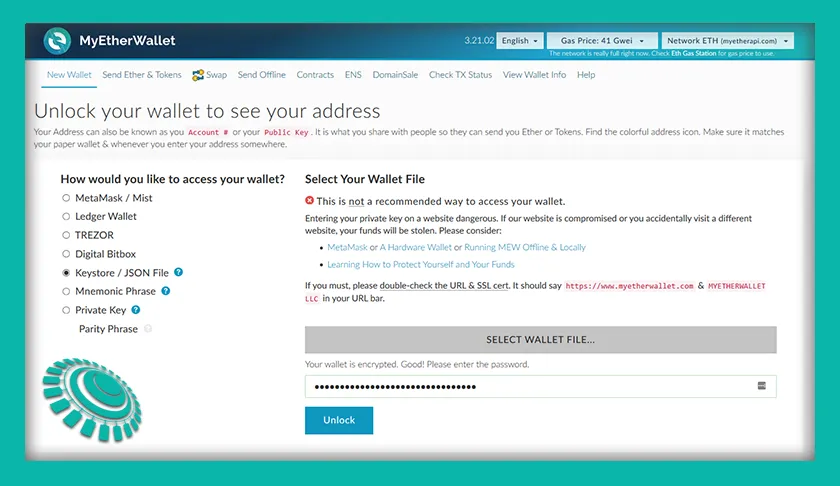
Step 4:
You can now unlock your wallet. Try to use your new keystore file for that to see if that works. You will be asked for your wallet password that you generated in Step 1.
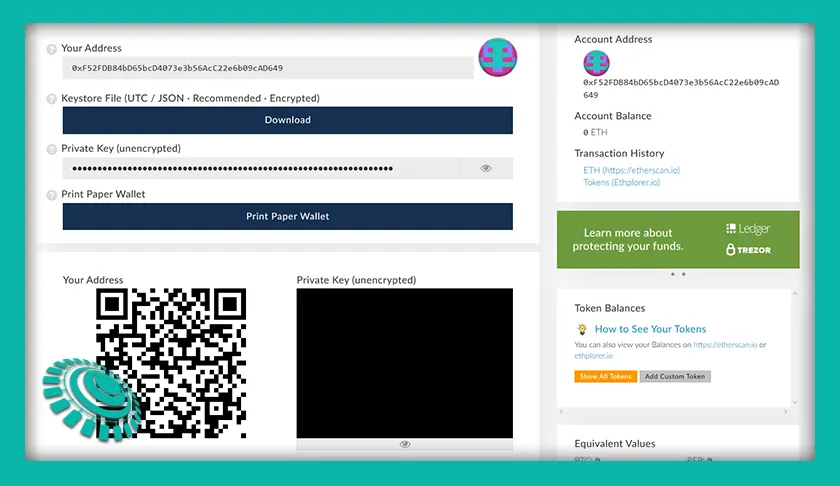
After entering for the first time you will see wallet details where you can access the private key, a QR code address, download the keystore file again and print the paper wallet again.
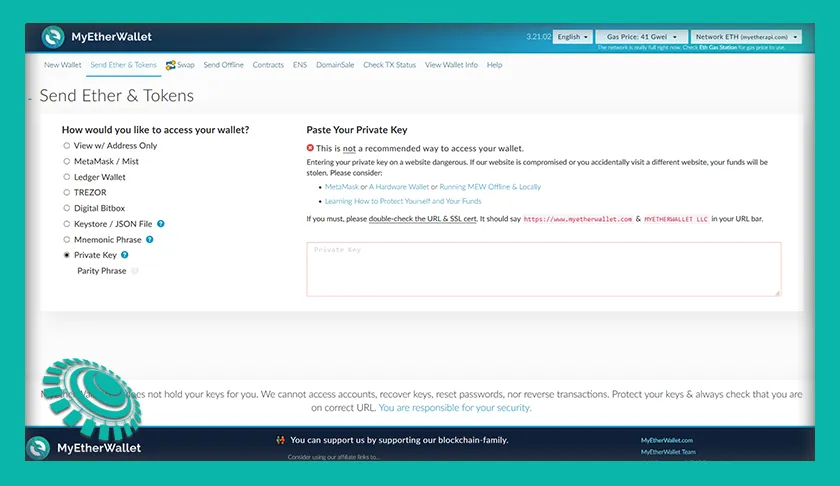
Step 5:
You have a now a fully functional Ethereum wallet. If you want to send funds from there to another wallet you can login by clickin gin the main navigation on Send Ether & Tokens. That will bring you to the access page where you can select Private Key. Every time you do that you should double check the URL and the SSL certificate of the website to avoid entering your key on a phishing website.
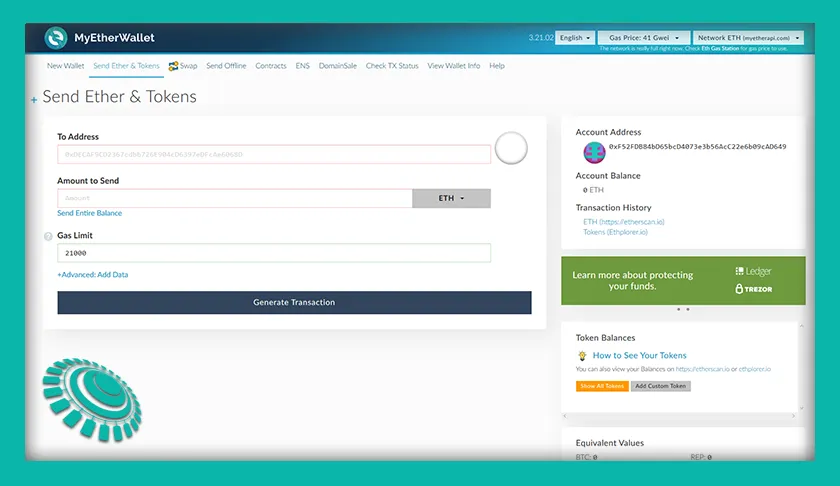
You will land in your wallet from where you can now send funds to other wallets. We will provide a tutorial just for that soon.
Finished!
That's it! You have successfully created an Ethereum wallet compatible with the ONSTELLAR ICO.
Check out the ONSTELLAR whitepaper and social media links to learn more about our Smart Media Token project for esoteric topics.

Website | Telegram chat | Twitter | Instagram | Facebook