[ENGLISH] - Język polski poniżej CTRL + F [POLSKI]
Hi!
This time we will go with a more twisted topic, especially for people who have not done this yet. At least I hope that others do it too and not just me doing such messed up things xD
What will we be doing today? Silly question, the title gave it away - we will be setting up an nginx server on a Linux subsystem, which will be visible on Windows through a browser as localhost and additionally will use a Windows directory to store files/pages.
In the end, we will have a fully Linux server accessible on Windows.
0. WSL...
0.0 Let's get started then! I assume you already have WSL installed if you have come to this thread, but if you haven't, I won't make it difficult for you and here's a handy link to MS Store:
https://apps.microsoft.com/store/detail/windows-subsystem-for-linux/9P9TQF7MRM4R
1. Installing Ubuntu using PowerShell.
1.1 We run PowerShell as an admin
1.2 We enter a simple command
wsl --install Ubuntu
1.3 Depending on the internet connection, it may take some time.
1.4 We choose a username.
1.5 Next, we enter a password (the characters typed are not visible, don't panic, everything is working).
... password again
The system is installed and ready, you can now see your Linux.
#fasttutorial Here's a video of how it should look like:

2. Installing the nginx server.
2.1 We will be operating as an administrator for the rest of the session, so we enter the following command and confirm it with a password.
sudo -i
2.2 We make sure that everything is up-to-date.
apt update && apt upgrade -y`
2.3 We download nginx.
apt install nginx -y
2.4 We open the configuration file using the nano editor.
nano /etc/nginx/sites-available/default
2.5 In the server block, we find the line:
root /var/www/html;
And we change it to:
root /mnt/c/www;
This corresponds to the www directory on the C drive of Windows. Similarly, you can change it to any location that is convenient for you.
2.6 To avoid having to go back to the file again, we configure PHP, which we will install in the next step. So we continue a few lines down and between index and index.html we add index.php, which in my case looks like this:
index index.php index.html index.htm index.nginx-debian.html;
2.7 Go to block
        #location ~ \.php$ {
        #        include snippets/fastcgi-php.conf;
        #
        #       # With php-fpm (or other unix sockets):
        #        fastcgi_pass unix:/run/php/php7.4-fpm.sock;
        #       # With php-cgi (or other tcp sockets):
        #       fastcgi_pass 127.0.0.1:9000;
        #}
and remove comment signs
        location ~ \.php$ {
                include snippets/fastcgi-php.conf;
        #
        #       # With php-fpm (or other unix sockets):
                fastcgi_pass unix:/run/php/php7.4-fpm.sock;
        #       # With php-cgi (or other tcp sockets):
        #       fastcgi_pass 127.0.0.1:9000;
        }
Here, if needed, adjust the PHP path to the version you will install as the process will be similar for other PHP versions.
2.8 Apply the following sequentially: CTRL + X and then Y, Enter to exit and save the changes.
2.9 We test our configuration with the command:
nginx -t
result should look like this:

2.10 Startujemy serwer uruchamiając usługę
service nginx start
2.TIPS
Stop service by calling:
service nginx stop
Service restart (e.g. after modifying the configuration file):
service nginx reload
3. Visibility of the server on the Windows side.
In fact, the server is already visible under Windows, specifically under the IP address assigned to the WSL service. However, this is not a particularly convenient solution, so let's change it!
3.1 Remaining on Ubuntu, we type the command and copy the displayed IP address.
hostname -I | awk '{print $1}'

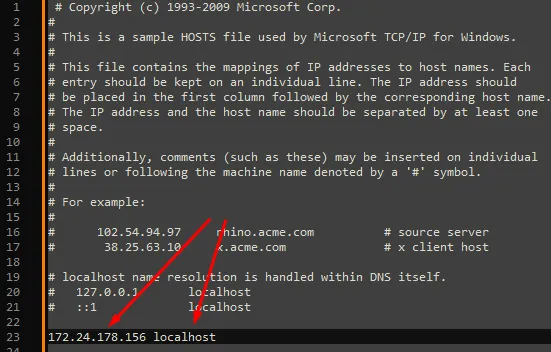
3.2 Edit the Windows hosts file as an administrator, located at:
C:\Windows\System32\drivers\etc
3.3 Add the following line at the end of the file and save the changes.:
COPIED_IP_ADDRESS localhost
w przypadku mojego IP wygląda to tak
3.4 Launch the browser and enter the address http://localhost. If you have done everything correctly, you should see this beautiful image:
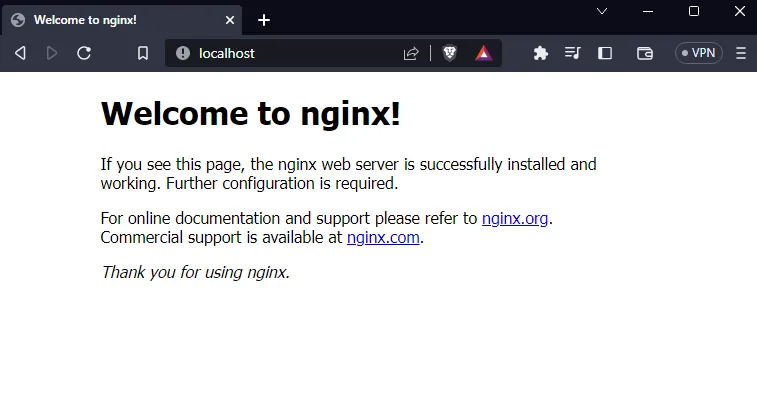
To proceed further, we need to install PHP and MySQL, so let's continue!
4. Instalacja PHP
4.1 Install additional repositories.
apt -y install software-properties-common
add-apt-repository ppa:ondrej/php
Confirm ENTER
apt update
4.2 PHP Installation
apt install php7.4-fpm -y
4.3 Start the service.
service php7.4-fpm start
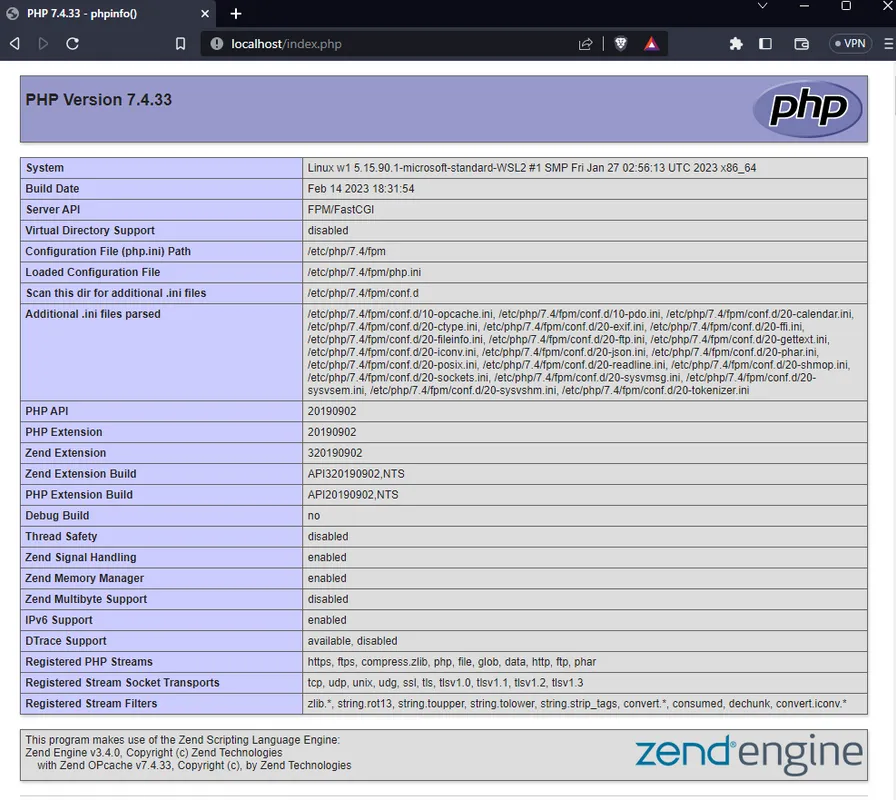
and after going to the address http://localhost/index.php we should see an image like this:
index.php file:
<?php phpinfo(); ?>
4.TIPS
Here, it works analogously to nginx, i.e. start/stop/reload.
5. MySQL Database
The last but not least, because without it, few applications will make sense. We are only two simple steps away from installing MySQL.
5.1 Installation
apt install mysql-server
5.2 Start the service.
service mysql start
Summary
It's possible that someone may find this configuration useful or that it may at least introduce someone to a system other than Windows. If there is a need to expand on this topic or implement other complex configurations, feel free to write about it in the comments.
Enjoy!
[POLSKI]
Siema!
Tym razem polecimy z tematem bardziej pokręconym, a zwłaszcza dla osób, które jeszcze tego nie robiły. Przynajmniej mam nadzieję, że inni tak robią i nie tylko ja robię takie popieprzone rzeczy xD.
Co będziemy dzisiaj robić? Głupie pytanie, zdradził mnie tytuł zgodnie z którym postawimy serwer nginx na substemie linux, który będzie widoczny na windowsie przez przeglądarkę jako localhost a dodatkowo będzie korzystał z katalogu windowsego do przechowywania plików/stron.
Finalnie uzyskamy w pełni linuxowy serwer dostępny na windowsie.
0. WSL...
0.0 No to lecimy!. Zakładam, że macie już zainstalowany WSL jeśli przygiągnął was ten wątek, jeśli jednak nie macie to nie będę robił wam pod górę i przynoszę oto poczciwy link do MS Store:
https://apps.microsoft.com/store/detail/windows-subsystem-for-linux/9P9TQF7MRM4R
1. Instalacja Ubuntu przy uzyciu PowerShell
1.1 Uruchamiamy PowerShell jako admin
1.2 Wklepujemy banalną komendę
wsl --install Ubuntu
1.3 W zależności od łącza potrwa to jakąś chwilę
1.4 Wybieramy nazwę użytkownika
1.5 Następnie wpisujemy hasło (wpisywane znaki nie są widoczne, nie panikuj, wszystko działa)
... jeszcze raz hasło
System zainstalowany i gotowy, właśnie widzisz swojego linuxa.
#fasttutorial wideo jak to powinno wyglądać:
2. Instalacja serwera NGINX
2.1 Do końca sesji będziemy działać jako administrator, więc wklepujemy poniższą komendę i potwierdzamy to hasłem.
sudo -i
2.2 Upewniamy się, żę wszystko jest aktualne
apt update && apt upgrade -y
2.3 Pobieramy nginxa
apt install nginx -y
2.4 Przy uzyciu edytora nano otwieramy plik konfiguracyjny
nano /etc/nginx/sites-available/default
2.5 W drzewie server odnajdujemy linię
root /var/www/html;
i zmieniamy na
root /mnt/c/www;
Co odpowiada katalogowi www na dysku C windowsa. Analogicznie można zmienić to na inną dogodną dla Ciebie lokalizację.
2.6 By nie powracać do pliku ponownie, konfigurujemy php, które będziemy instalować w kolejnym kroku, a więc za ciosem idziemy parę linijek dalej i między index a index.html dodajemy index.php co w moim przypadku wygląda tak:
index index.php index.html index.htm index.nginx-debian.html;
2.7 Przejdź do bloku
        #location ~ \.php$ {
        #        include snippets/fastcgi-php.conf;
        #
        #       # With php-fpm (or other unix sockets):
        #        fastcgi_pass unix:/run/php/php7.4-fpm.sock;
        #       # With php-cgi (or other tcp sockets):
        #       fastcgi_pass 127.0.0.1:9000;
        #}
I usuń komentarze
        location ~ \.php$ {
                include snippets/fastcgi-php.conf;
        #
        #       # With php-fpm (or other unix sockets):
                fastcgi_pass unix:/run/php/php7.4-fpm.sock;
        #       # With php-cgi (or other tcp sockets):
        #       fastcgi_pass 127.0.0.1:9000;
        }
Tutaj w razie potrzeby dostosuj ścieżkę PHP do wersji, którą zainstalujesz gdyż proces będzie analogiczny do innych wersji PHP.
2.8 Zastosuj kolejno: CTRL + X a następnie Y, Enter by wyjść i zapisać zmiany
2.9 Testujemy naszą konfiguracją komendą:
nginx -t
wynik powinien wyglądać następująco:
2.10 Startujemy serwer uruchamiając usługę
service nginx start
2.TIPS
Gdy chcemy zatrzymać usługę wywołujemy:
service nginx stop
Restart usługi (np. po zmianie konfigurjacji w pliku)
service nginx reload
3. Widoczność serwera po stronie windowsa
W rzczywistości serwer jest już widoczny pod windowsem a konkretniej pod adresem IP przypisanym do usługi WSL. Jednak nie jest to szczególnie wygodne rozwiązanie, a za tem zmieńmy to!
3.1 Pozostając na Ubuntu wklepujemy komnendę i kopiujemy wyplute IP
hostname -I | awk '{print $1}'
3.2 W Windowsie odpal dowolny edytor tekstu jako administrator, po czym edytuj nim plik hosts, który znajduje się w następującej lokalizacji
C:\Windows\System32\drivers\etc
3.3 Na końcu pliku dodaj linijkę poniższą linijkę i zapisz zmiany:
SKOPIOWANY_ADRES_IP localhost
w przypadku mojego IP wygląda to tak
3.4 Uruchom przeglądarkę i wpisz adres http://localhost , jeśli wszystko zrobiłeś poprawnie Twoim oczom powinien ukazać się ten piękny obraz:
Do pełni szczęście brakuje nam teraz tylko PHP i MySQL, a więc lecimy dalej!
4. Instalacja PHP
4.1 Doinstalowujemy repozytoria
apt -y install software-properties-common
add-apt-repository ppa:ondrej/php
Potwierdzamy ENTER
apt update
4.2 Instalujemy PHP
apt install php7.4-fpm -y
4.3 Uruchamiamy usługę
service php7.4-fpm start
i po przejściu pod adres http://localhost/index.php powinniśmy widzieć taki o to obrazek:
index.php file:
<?php phpinfo(); ?>
4.TIPS
Tutaj działa to analogicznie do nginxa tj. start/stop/reload
5. Baza danych MySQL
Ostatnia ale nie mniej ważna, bo bez niej mało która aplikacja będzie miała sens. Od mysql'a dzielą nas tylko dwa proste kroki
5.1 Instalacja
apt install mysql-server
5.2 Start usługi
service mysql start
Podsumowanie
Możliwe, że komuś taka konfiguracja się przyda lub otworzy kogoś choć w podstawowym stopniu na system inny niż Windows. Jeśli będzie potrzeba rozwinąć temat lub zrealizować inne zakręcone konfiguracje piszcie w komentarzach
Enjoy!