Greetings to all who are part of my beautiful community as it is Hive Diy and one of my favorite spaces in Hive, I really enjoy sharing with you each of the works that I have published made with love and creativity, I was delighted every time I enter the community and I can see and learn from each of you.
Today I want to share a very creative and simple tutorial that many will like, so join me to make a Mini Piñata decorated with flowers, this will be a detail for someone special.
Let's start by reminding them of the materials we are going to use.

Materials
💙 Cartón reciclado,cartulina.
💙 Pega,Silicon líquido
💙 Tijera
💙 Regla.
💙 Lápiz
💙 Cinta plástica
💙 Papel crepe( de acuerdo al gusto)
💙 Taza o compás para hacer la
circunferencia
💙 Recycled cardboard,cardboard.
💙 Glue,liquid silicon.
💙 Scissors
💙 Ruler.
💙 Pencil
💙 Plastic tape
💙 Crepe paper( according to taste).
💙 Cup or compass to make the
circumference

Step by step
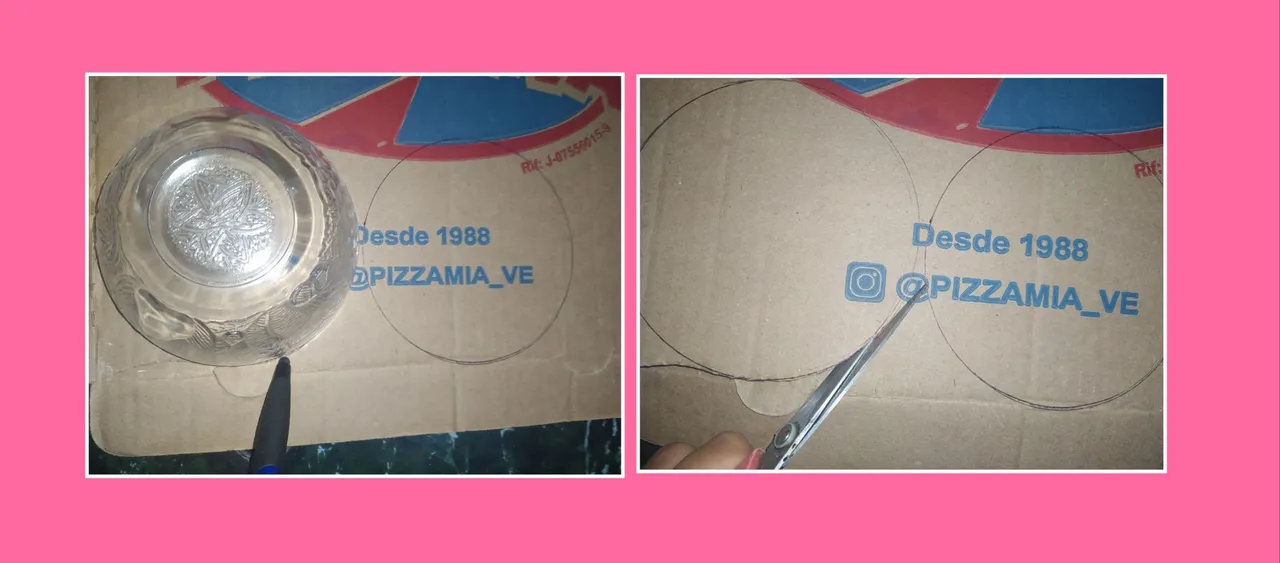
The first thing we do is to mark on the cardboard the circumference of the desired size for the mini piñata, we will do it 2 times, using a cup, a round plate or a compass.
After this we cut a long strip of cardboard much thinner than the circumferences, this can be double fax cardboard, the measures are 4cm wide and the length goes according to the size of your circumference. In my case it measures approximately 40cm long.
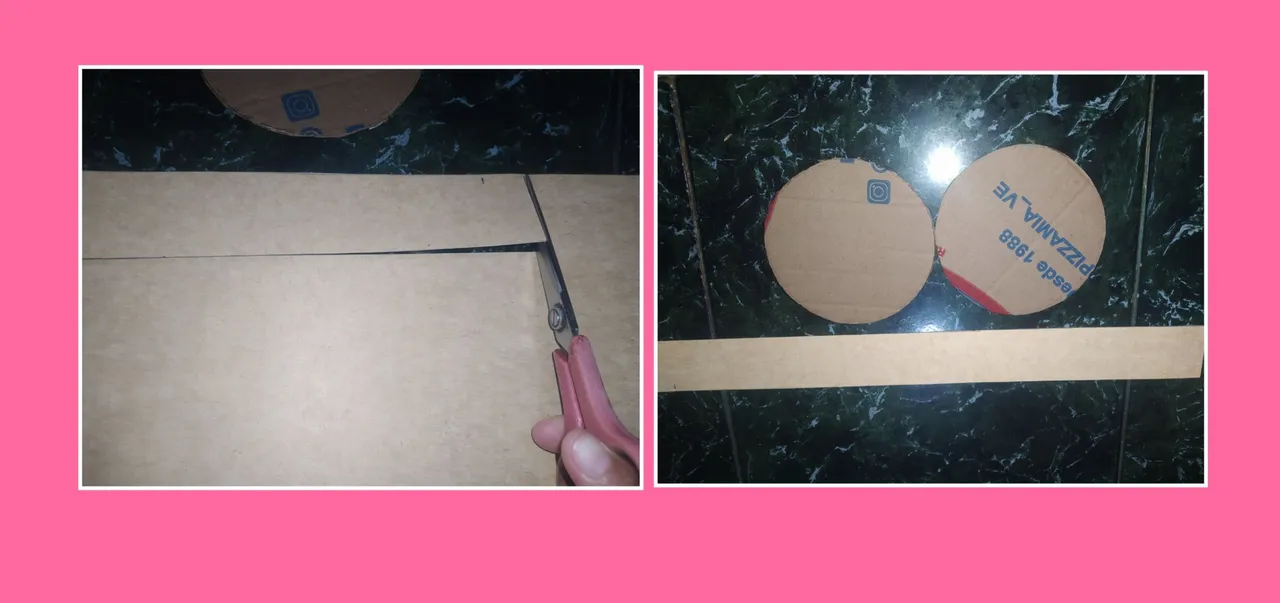
Once we have our two circles and the strip cut, we proceed to glue with Silicon the circles to the strip at both ends with patience and care, remember to leave one end of the strip without gluing it to the circles so that we have the hole where we will place the candy or whatever you want to give and so it will be shaped as a piñata, once they are glued we reinforce by placing plastic tape.

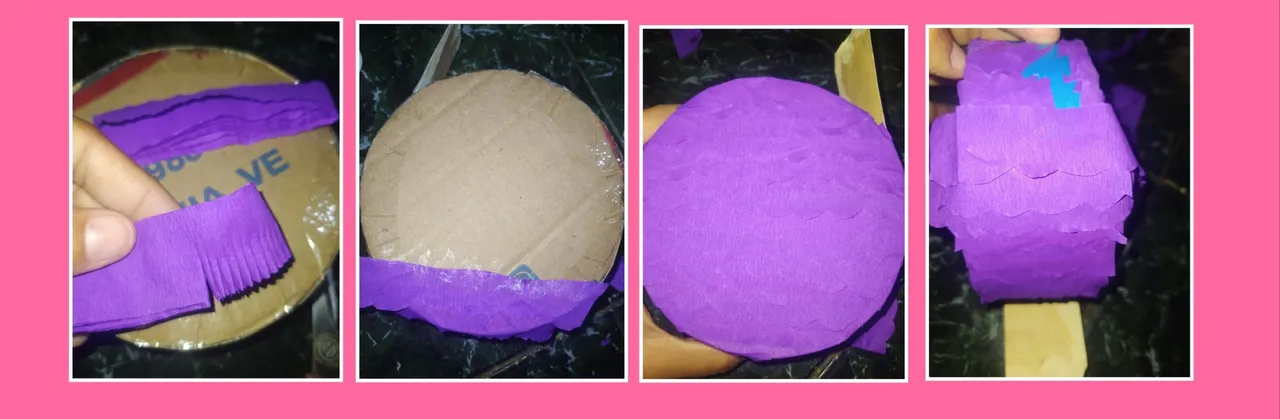
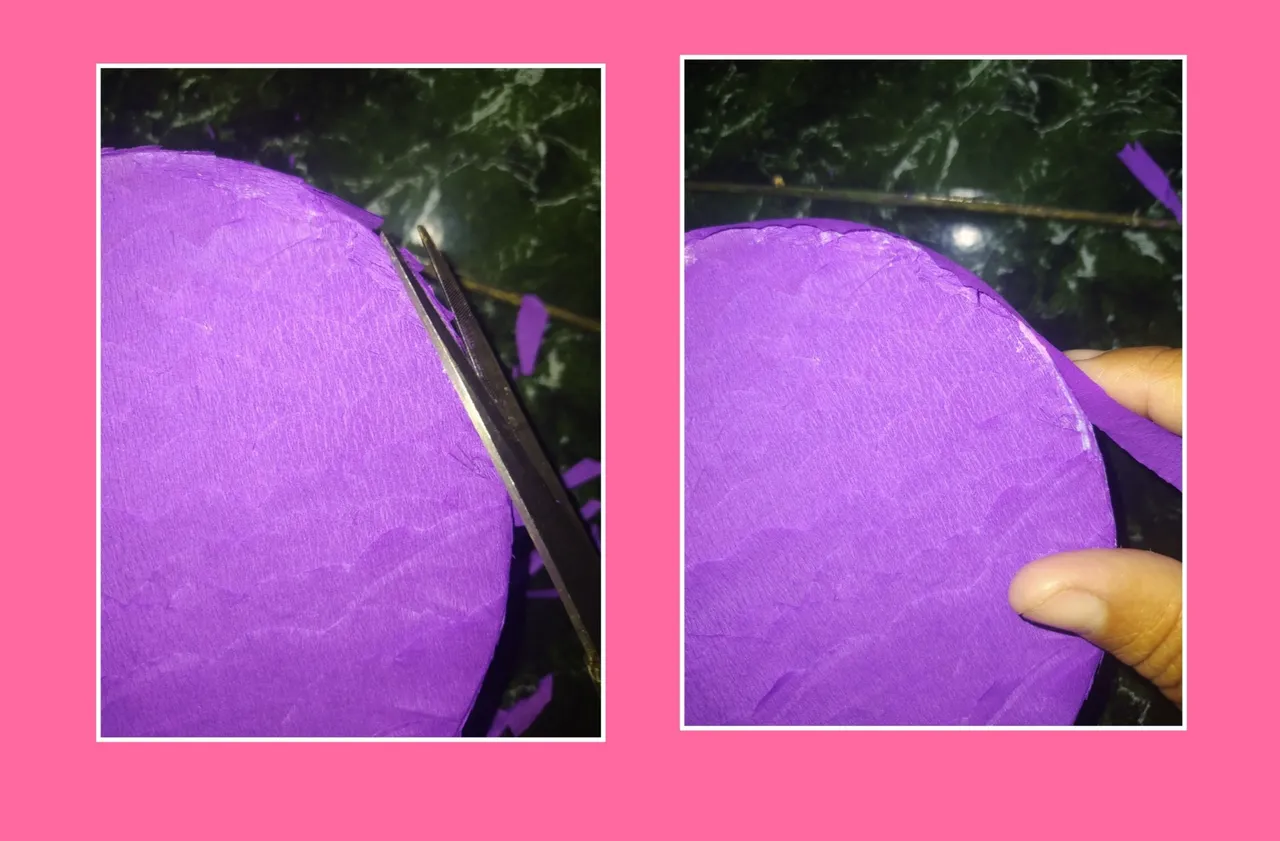
now if we touch the most creative part decorate, for this we use crepe paper the color you like, I used purple, take the crepe paper without unfolding cut strips of about 3cm, traditionally the piñatas have always been decorated with a fringe cut, I wanted to use a wavy cut so that it looks more beautiful and looks better creatively, with these Cortes begin to decorate our mini piñata, we start gluing the paper from bottom to top so that each strip does not cover the detail of the wavy so until I finish my first circle and repeat the same with the other, then glue the paper on the strip that forms my piñata, ready this ended by cutting strips of paper 1cm folded in half and I'm gluing the entire edge to cover the details and that is a good job.
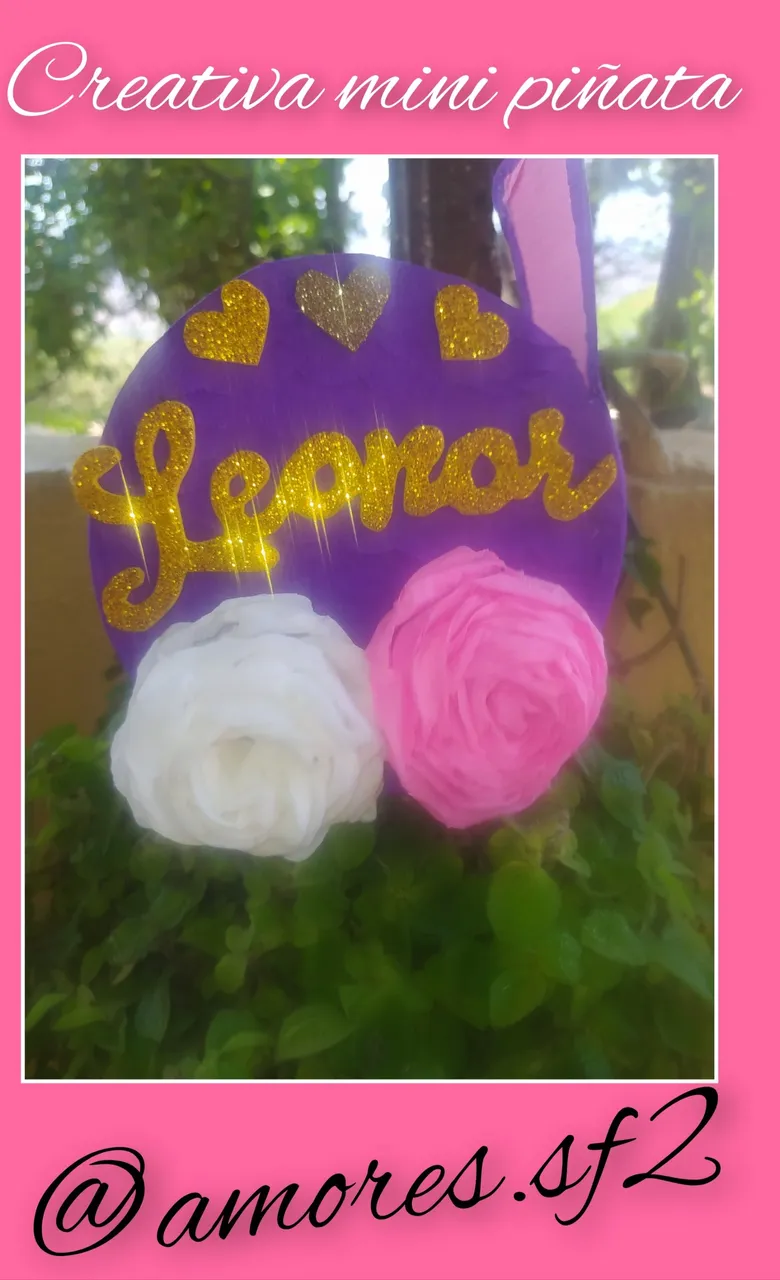
Now we have our mini piñata, now we just need to put the details, at first I said it was to give to a special person and I decided to make in gold frosted foami her name plus three small hearts and some beautiful flowers with crepe paper, if you want to know how to make it I invite you to visit my blog there you have the details of how to do it.
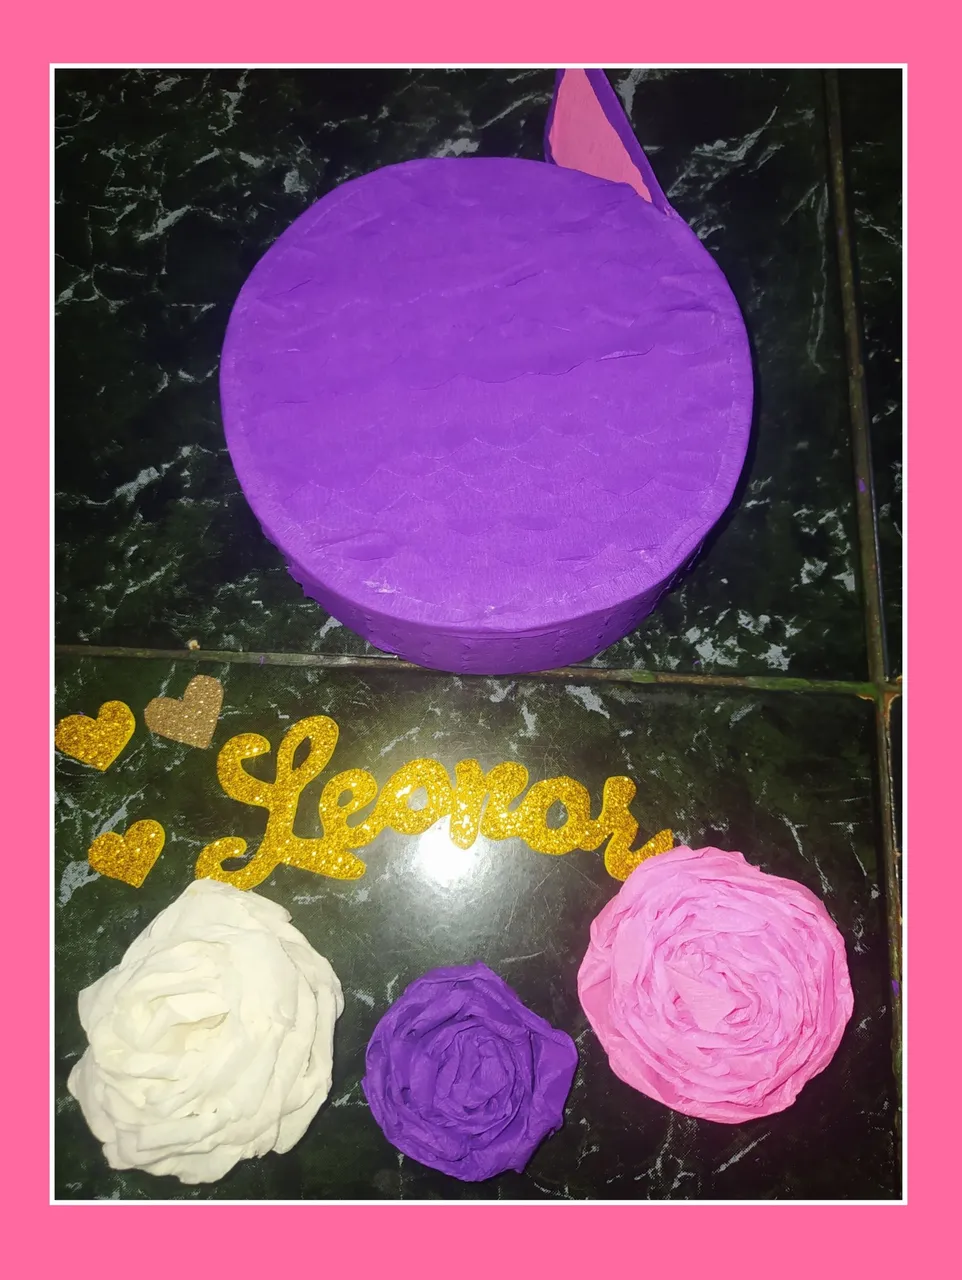
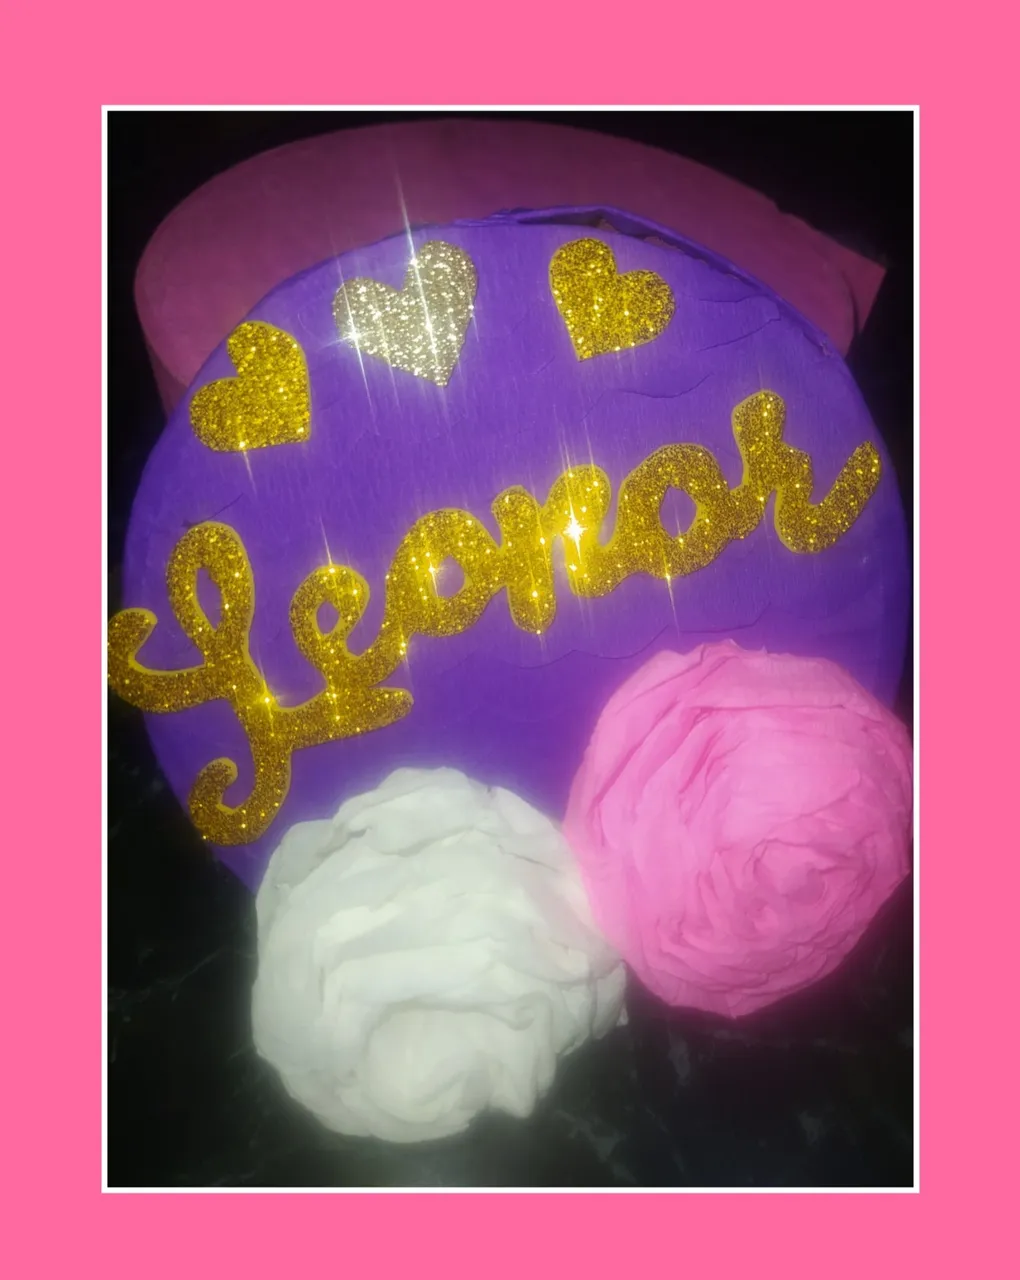
Finally we place the details in the piñata and glue with Silicon the hearts, the name and the two flowers as shown in the photo, you can see that with easy and recycled materials we can build beautiful details, now we just have to place inside the candy or whatever you want to give away.
I hope you like this tutorial and I encourage you to make your mini piñata that can also serve. For party favors, souvenirs, among others.
Who wrote for you @amores.sf2.
Todas las fotos publicadas son personales tomadas con mi teléfono Redmi note 8 y editadas en la aplicación Incollaje, mi texto es tradición por Deepl Translate..
All published photos are personal photos taken with my Redmi note 8 phone and edited in the Incollaje application, my text is tradition by Deepl Translate.
Mil gracias y Bendiciones para todo nos vemos en una próxima ocasión.💙💙
A thousand thanks and Blessings for everything see you next time.💙💙