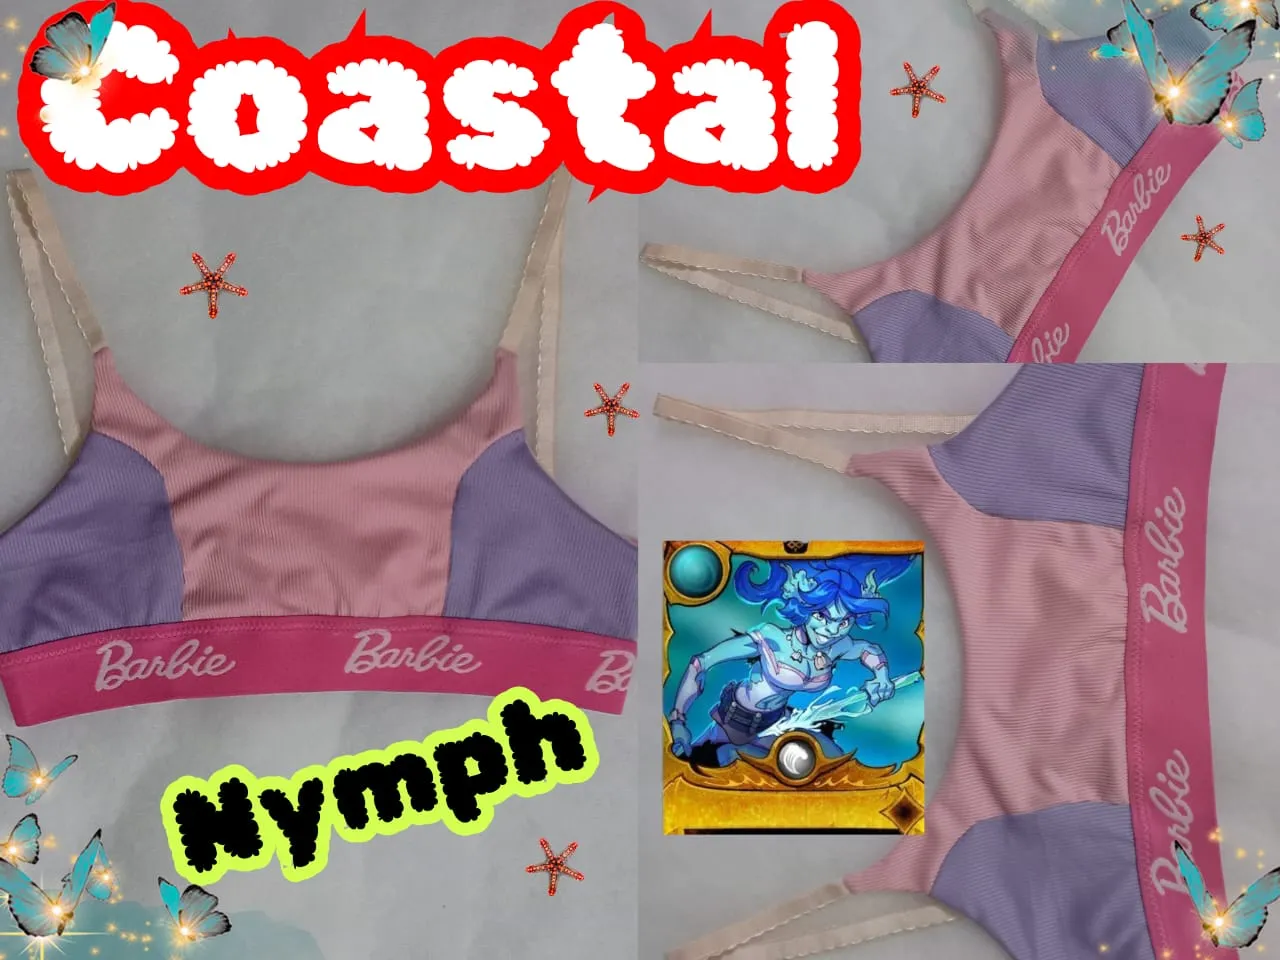

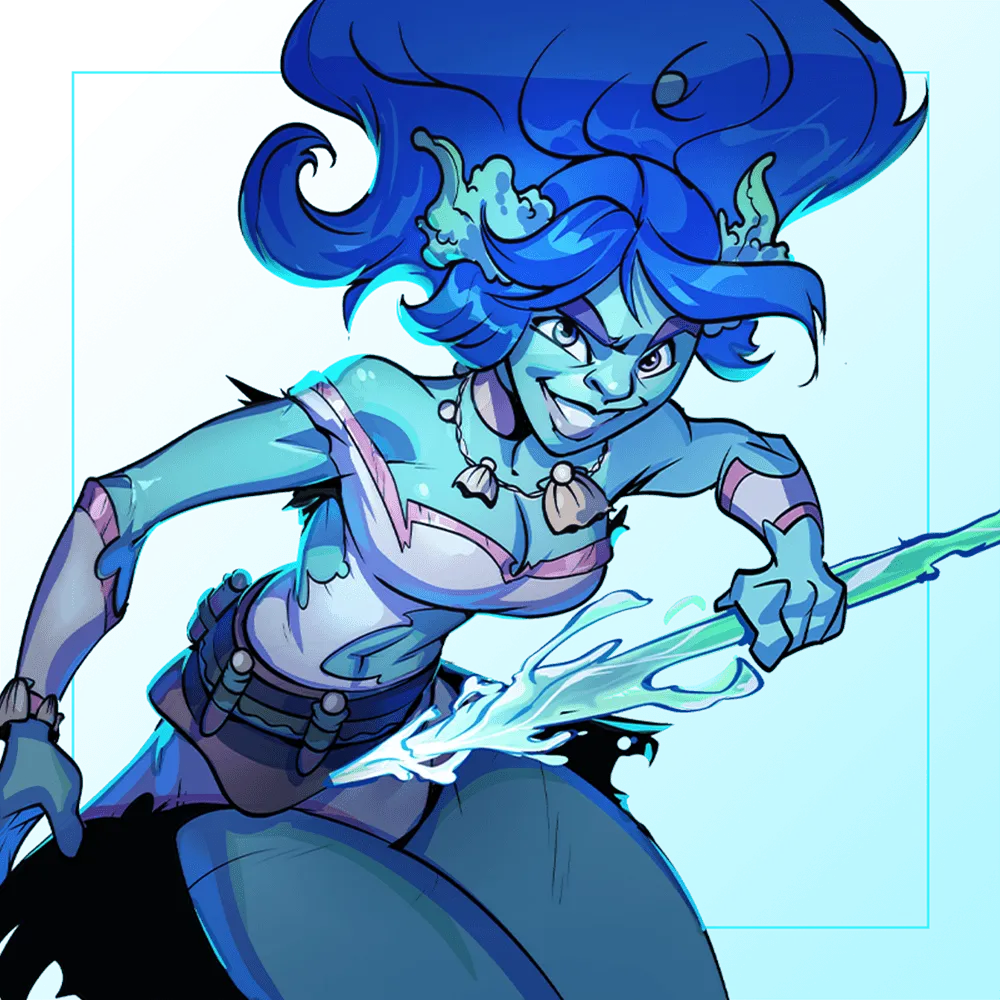
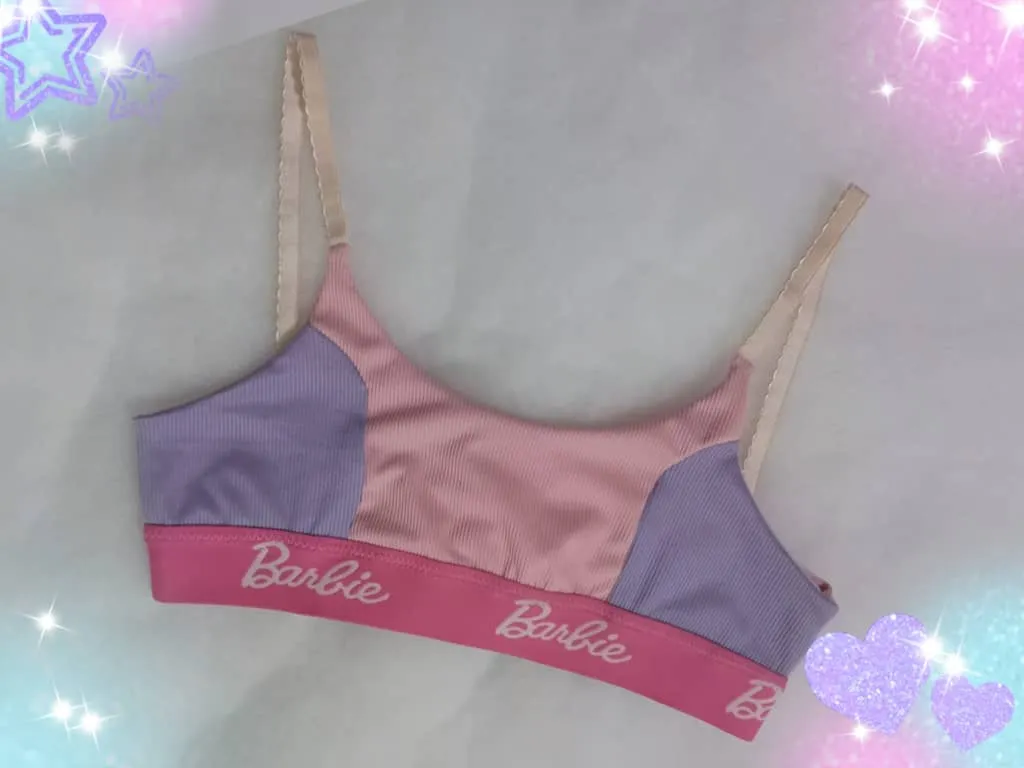
Greetings creative friends and the @diyhub community, I hope you have a great day and that God's blessings abound in your homes. It's incredible how quickly the days go by. We're almost at the first half of August. I've been taking advantage of my son's school vacation to finish several sewing projects. This time, I'm sharing the creation of a two-tone top inspired by the Coastal Nymph, a Splinterlands character who wears various shades of pink, purple, and other colors in her outfit. I used these as a reference to make the top.
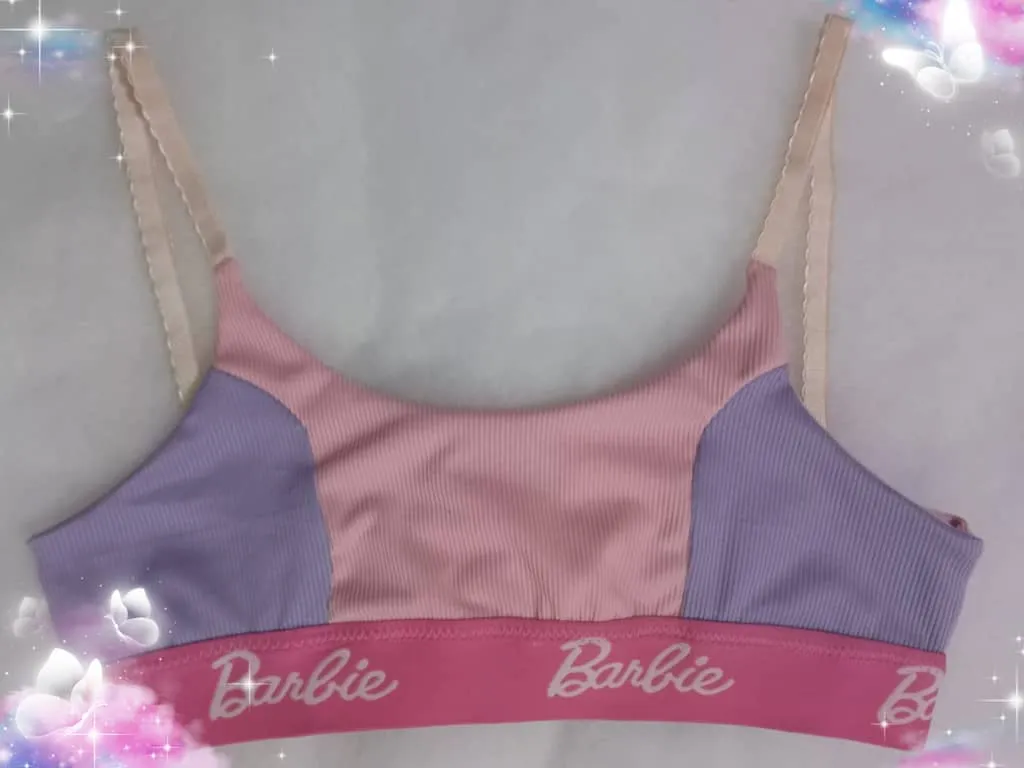
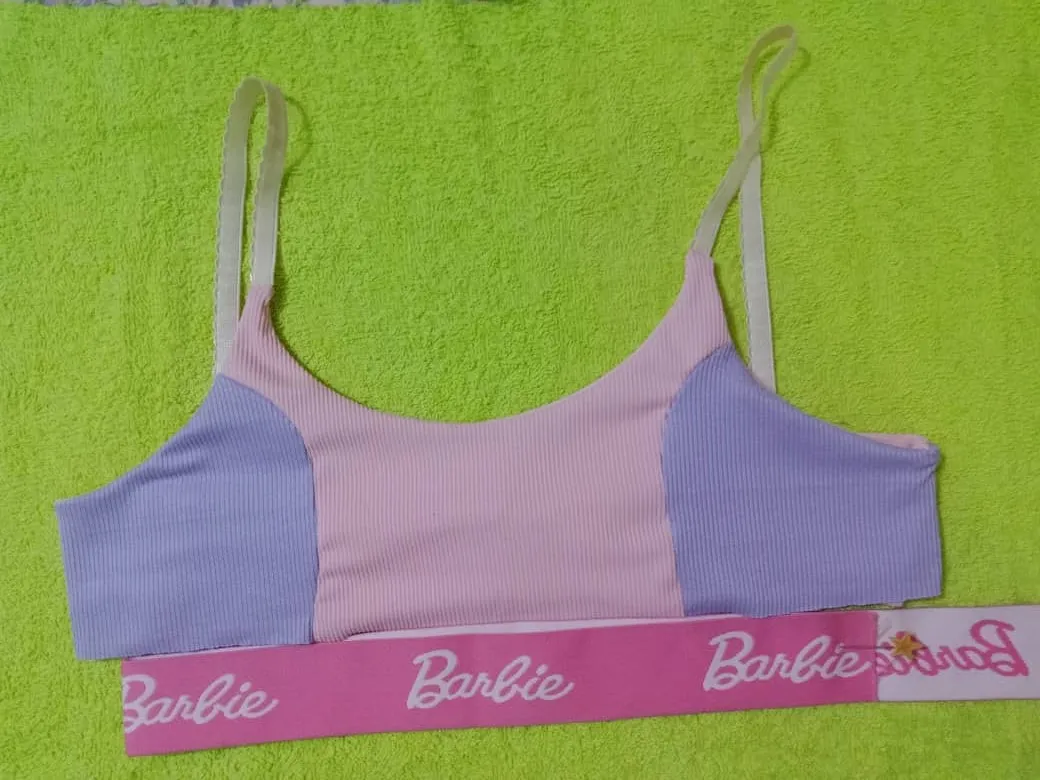
The front of the top is pink, and the cup is purple. Under the bust, I placed a pink elastic band with a Barbie design, which is four (4) centimeters wide, ideal for this type of garment because it provides a better fit to the cups.

Saludos amigos creativos y comunidad @diyhub, deseo que tengan un excelente día y que la bendición de Dios abunde en sus hogares, es increíble lo rápido que avanzan los días, ya estamos muy cerca de primera quincena del mes de de agosto, he estado aprovechando las vacaciones escolares de mi hijo para terminar varios proyectos de costura, en esta ocasión les comparto la elaboración de un top bicolor inspirado en la Coastal Nymph, un personaje de Splinterlands que lleva en su atuendo varios tonos de color rosa, morado, entre otros, estos los tomé como referencia para elaborar el top.
La parte delantera del top es de color rosa y la copa de color morado, en el bajo de busto, coloqué un eslástico rosa con diseño de Barbie, que tiene cuatro (4) centímetros de ancho, ideal para este tipo de prendas porque brinda mejor ajuste a las copas.

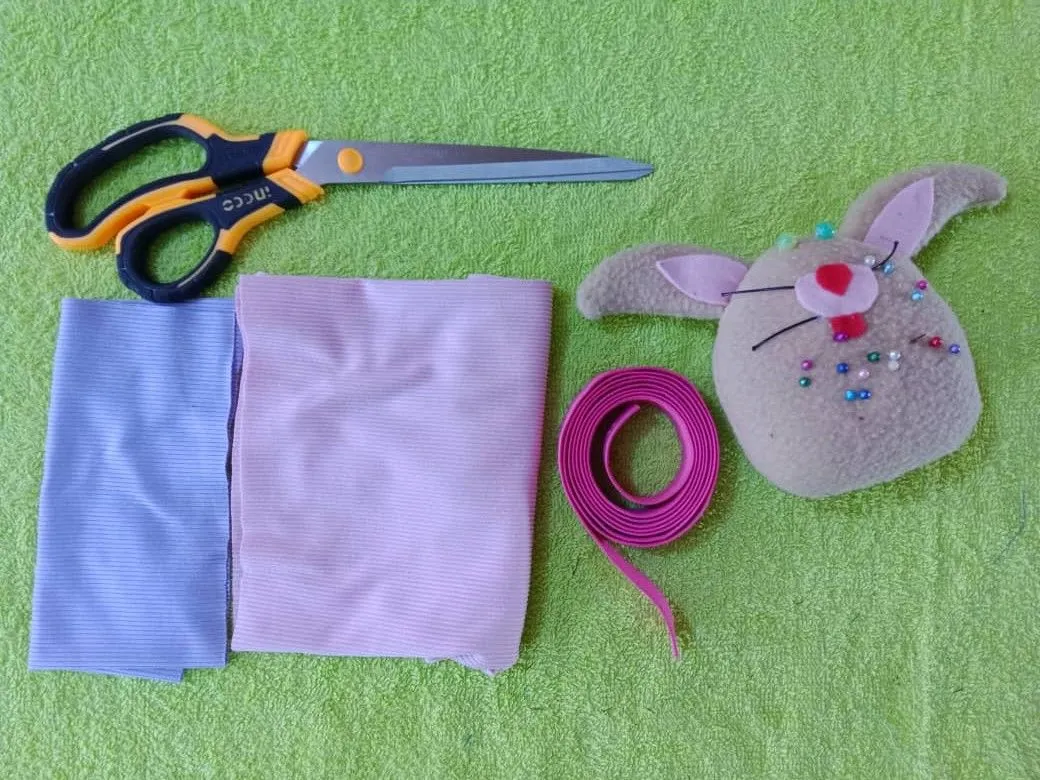
The materials used were:
Ribbed fabric (pink and purple)
Patterns
Scissors
Chalk
Pins
Bias tape
Elastic
Sewing machine
Los materiales usados fueron:
Tela rib (rosa y morada)
Moldes
Tijera
Tiza
Alfileres
Sesgo
Elástico
Máquina de coser
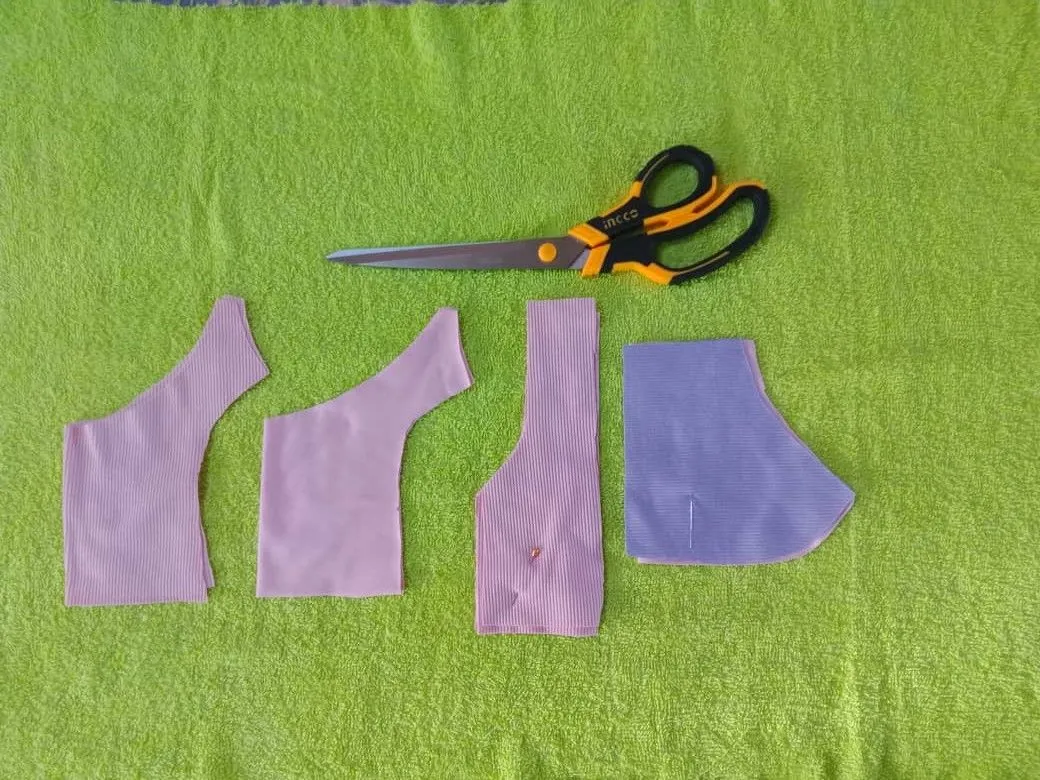
Elaboration
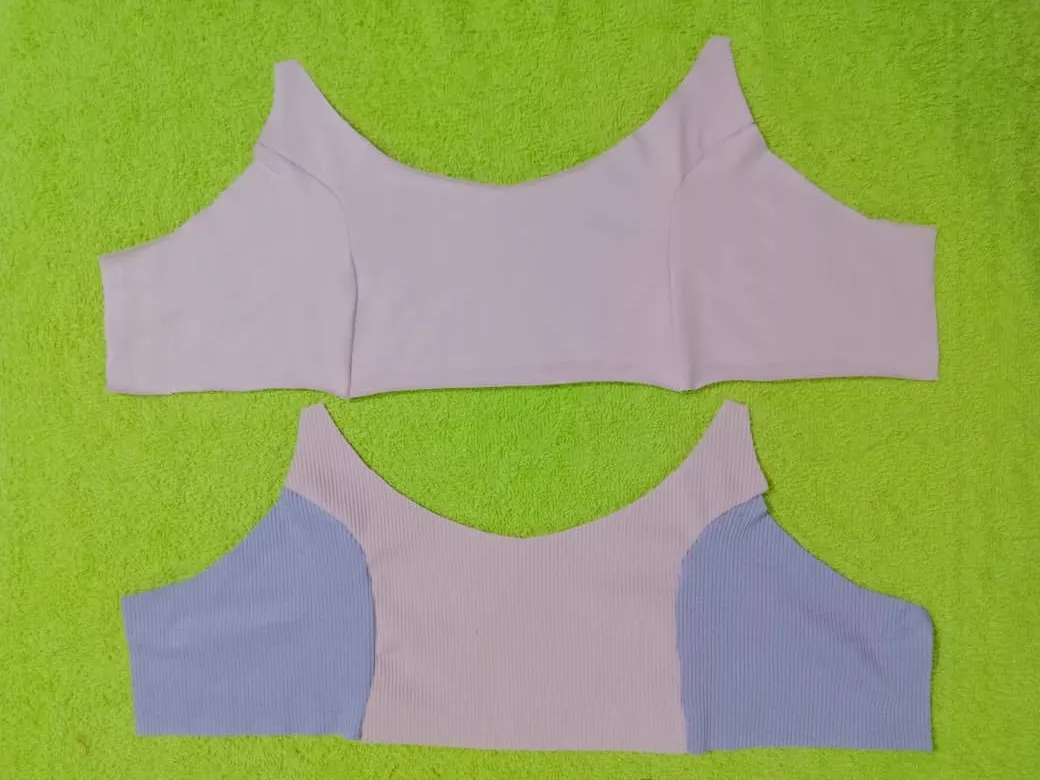
I started by marking the top pieces: front and back (I cut two of each because they'll fit together). To use up some fabric scraps left over from a previous project, I marked the cups on the smallest purple fabric, and the other pieces on pink fabric.
Elaboración
Inicié marcando las piezas del top; delantero, trasero (de estos corté dos de cada una porque irán embonadas), para aprovechar unos retazos de tela que quedaron de un proyecto anterior, marqué las copas en la tela morada que es la más pequeña, las otras piezas en tela rosa.
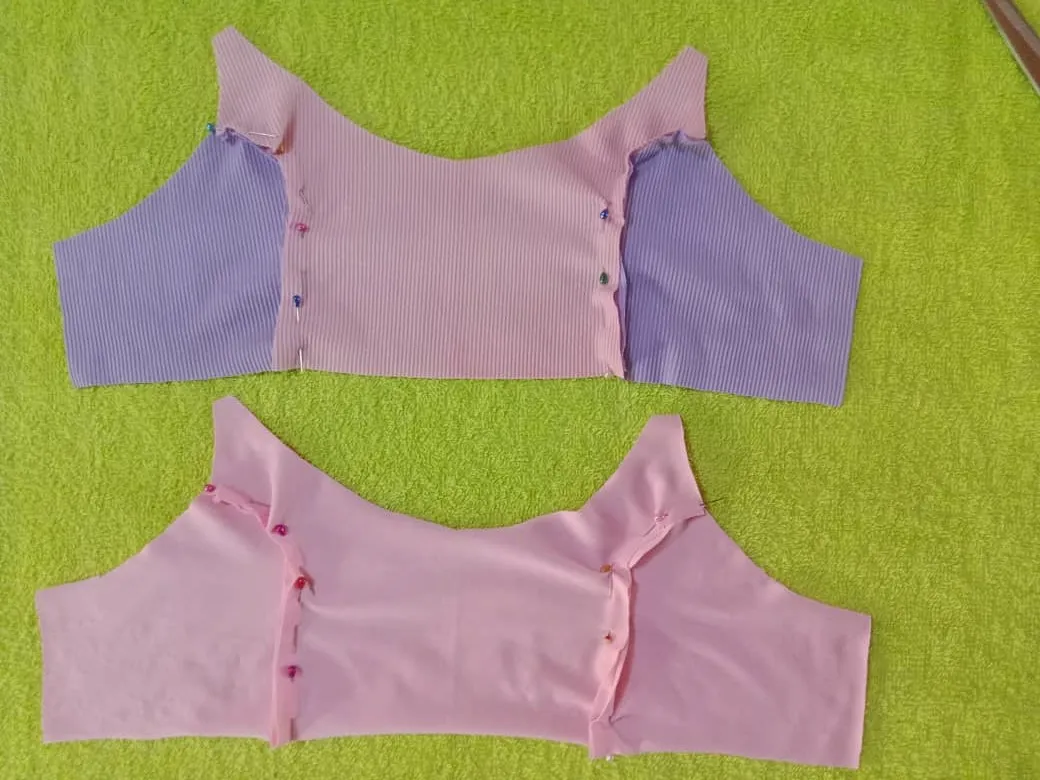
Then I assembled the front piece facing the center piece and cups, I pinned it and sewed with a straight stitch. The back piece, according to the pattern, is cut with a fold, but due to the amount of fabric, I cut four pieces, faced them right sides together and joined them with a double seam, using a straight stitch just like on the front.
Luego ensamblé el delantero enfrentando la pieza central y copas, sujeté con alfileres y cosí con puntada recta, la pieza trasera según el patrón se corta con doblez, pero por la cantidad de tela, corté cuatro piezas, las enfrenté por el derecho y uní con doble costura, usando puntada recta al igual que en el delantero.
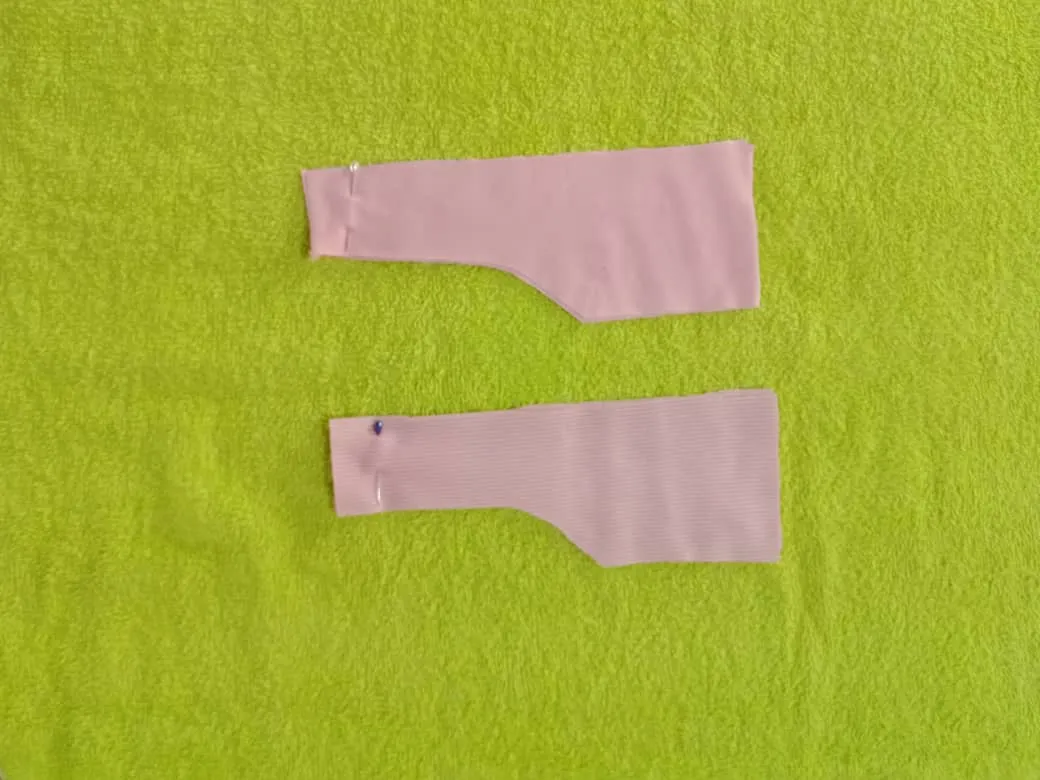
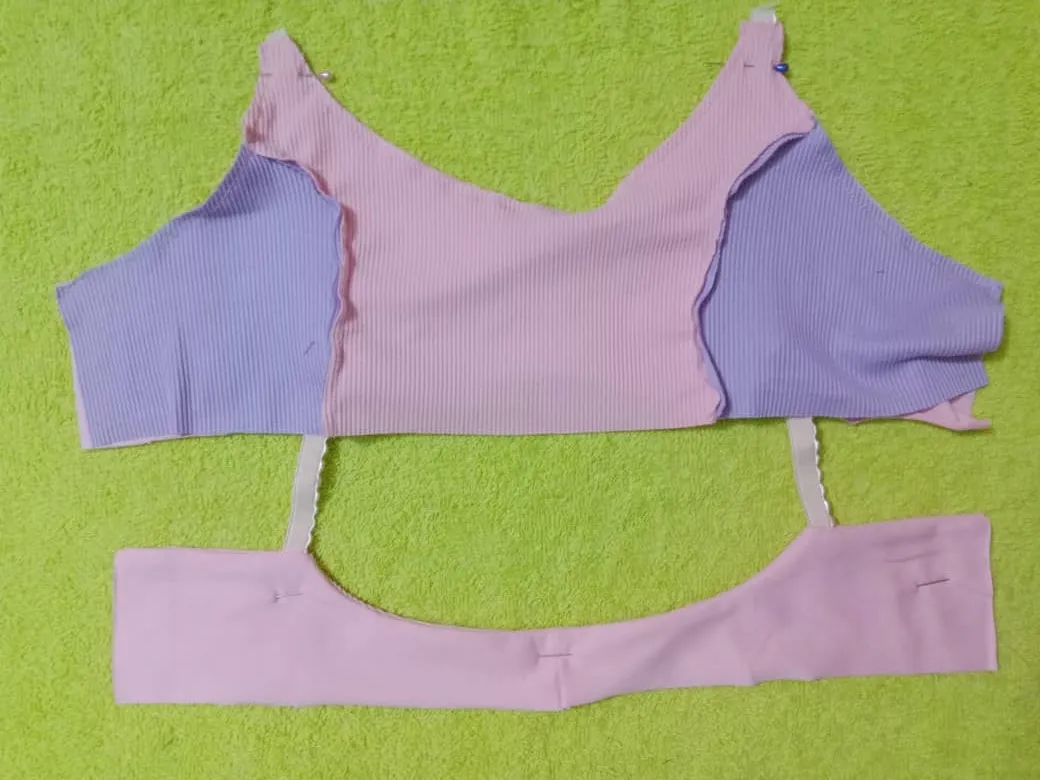
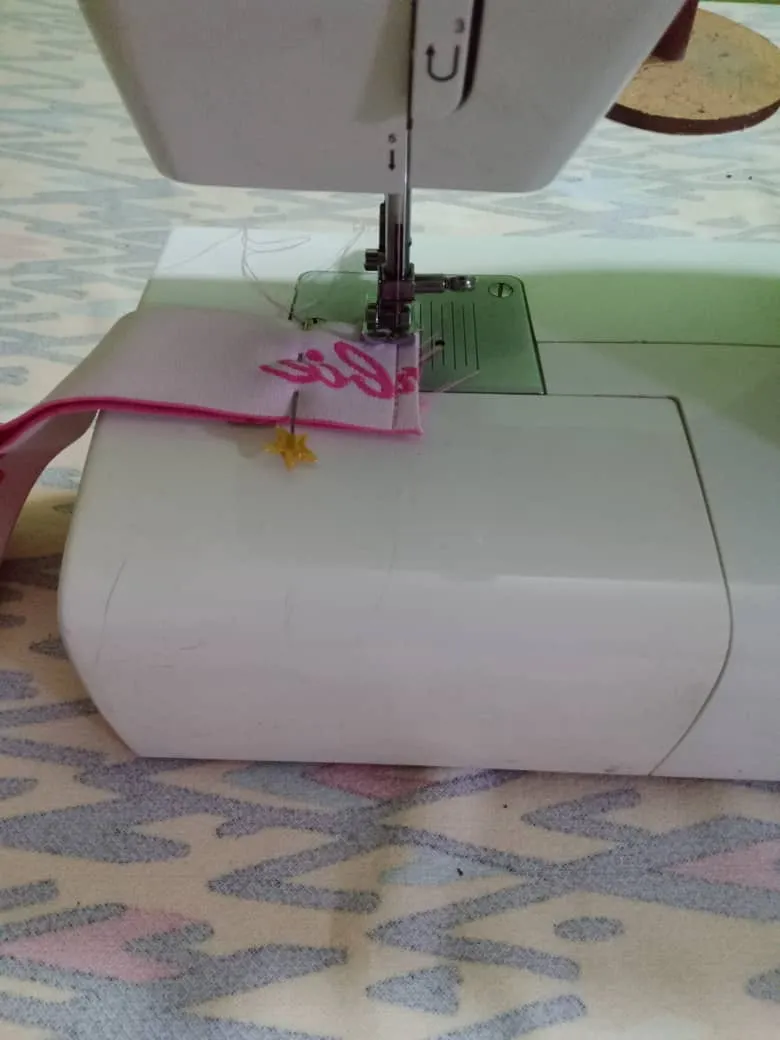
The next step was to sew the bias on the back, facing the right sides and placing the strips on the triangular finish at a distance of eleven (11) centimeters from the center, leaving the sides and bottom unstitched.
El siguiente paso fue coser los tiros (sesgo) en el posterior, enfrentando los derechos y colocando las tiras en la terminación triangular a una distancia de once (11) centímetros del centro, dejando los laterales y bajo sin costura.
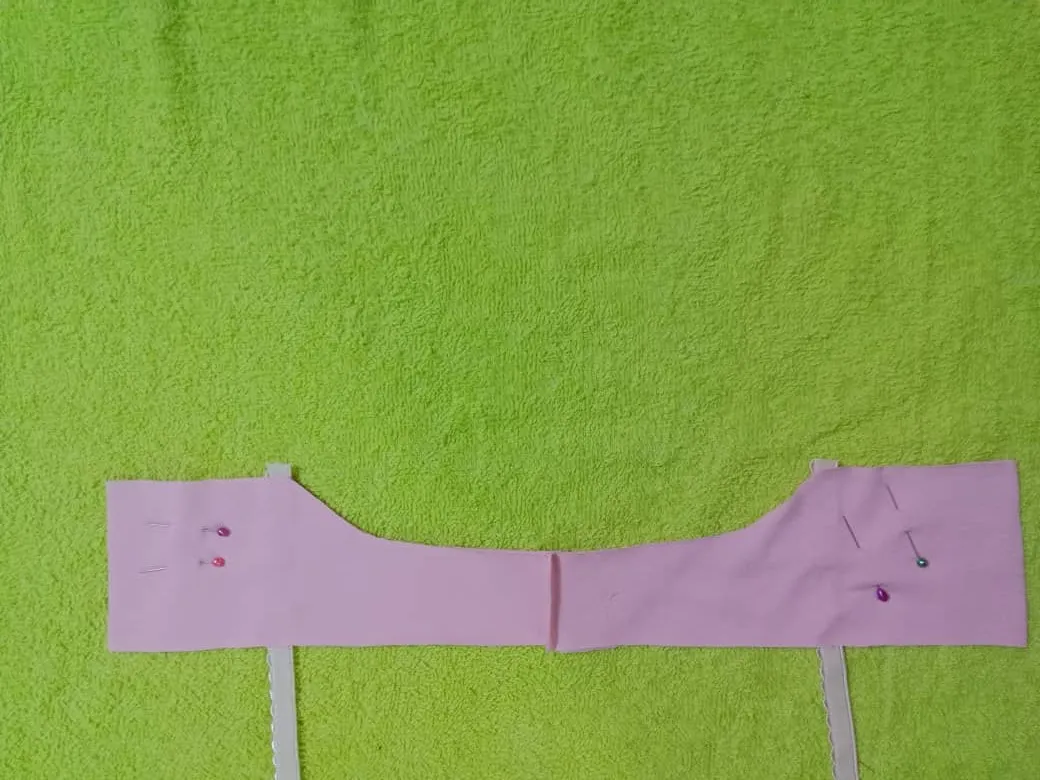
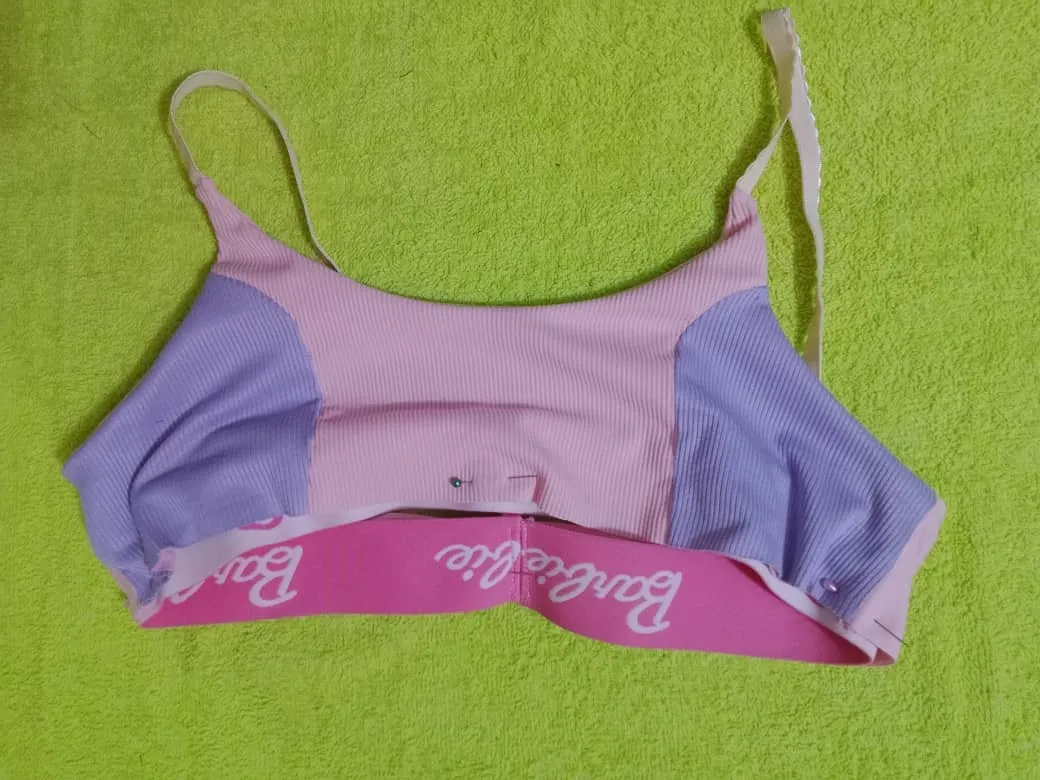
Once the strips were glued to the back, I placed the front pieces face to face, secured them with pins, and sewed the armhole and neckline with a straight stitch, leaving the sides, bottom, and shoulders open where the strips will be joined.
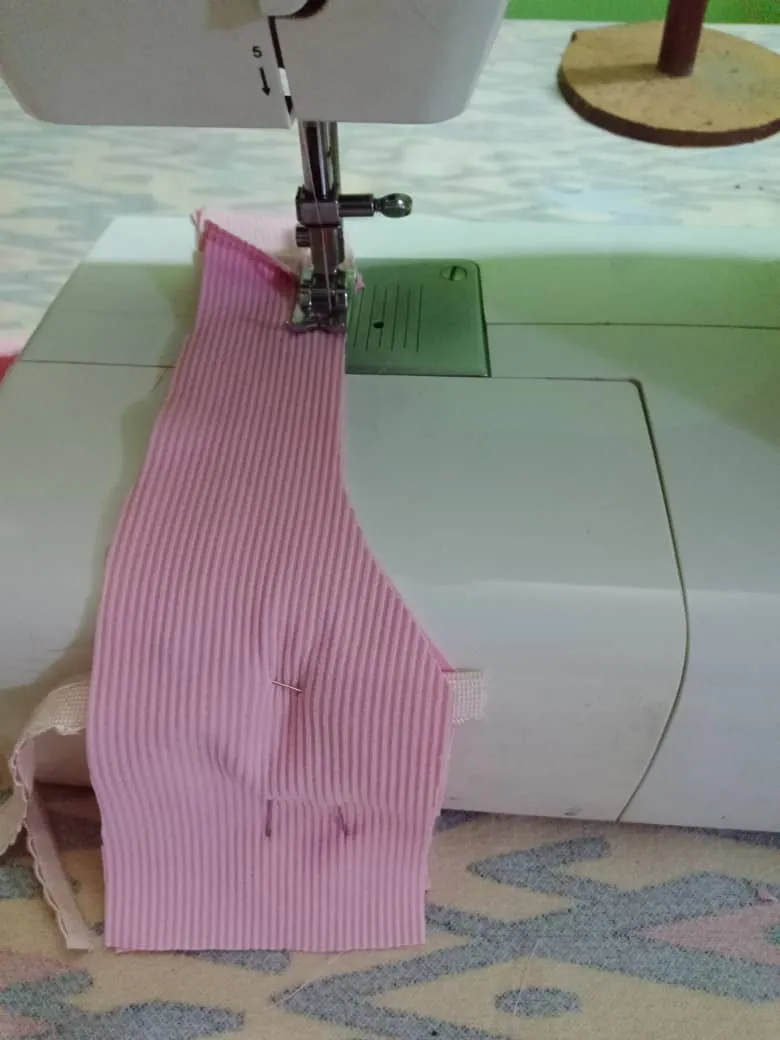
Once the front and back were assembled, I joined the two pieces together, right sides together, and threaded the strips through the shoulder opening. I pinned them together, sewed them, then turned the piece over so all the seams matched up.
Pegadas las tiras al posterior, enfrenté las piezas delanteras, fijé con alfileres, cosí con puntada recta la sisa y el cuello, dejando abiertos los costados, bajo y hombros por los cuales se unirán las tiras.
Ensamblado el delantero y trasero uní ambas partes, enfrentando por el derecho y pasando las tiras por la abertura de los hombros, sujeté con alfileres, cosí, luego volteé la pieza y así quedan todas las costuras embonadas.

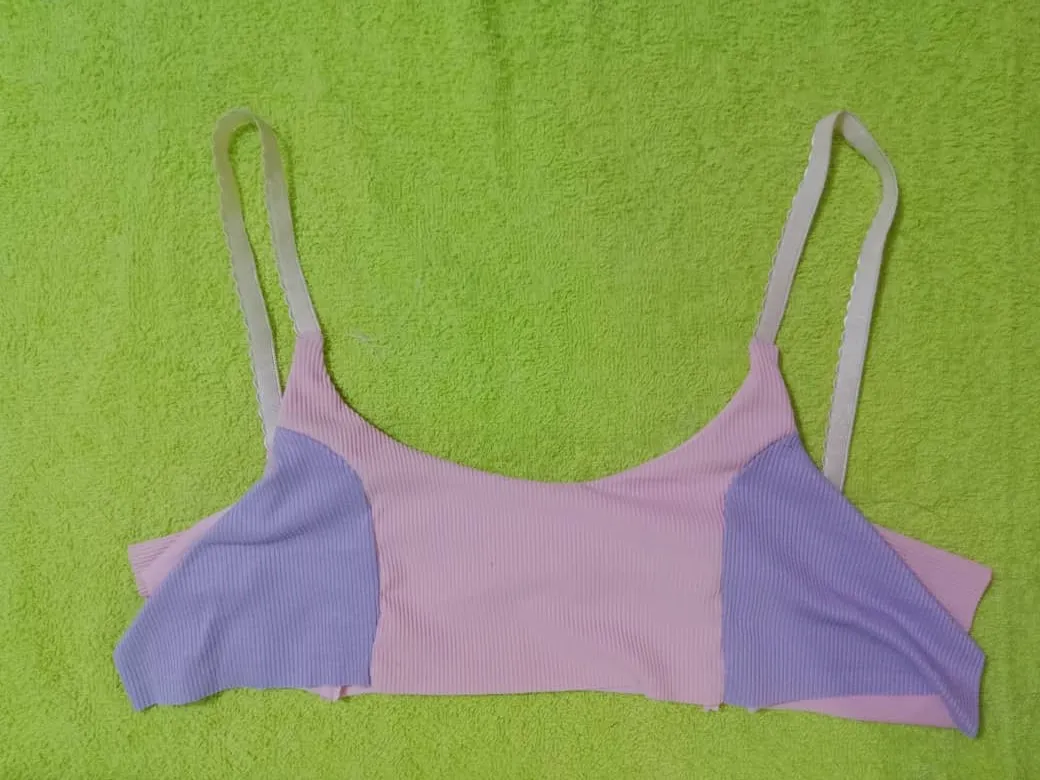
To close the sides, I faced the front and back seams so that the armholes met, pinned them, sewed with a straight stitch, and turned them out.
Then I measured the contour of the top and subtracted ten (10) centimeters (80 -10 = 70), to obtain the measurement of the elastic and cut.
Para cerrar los laterales enfrenté las costuras del delantero y posterior, de tal forma que coincidan las uniones de las sisas, sujeté con alfileres, cosí con puntada recta y volteé.
Luego medí el contorno del top y le resté diez (10) centímetros (80 -10 = 70), para obetener la medida del elástico y corté.

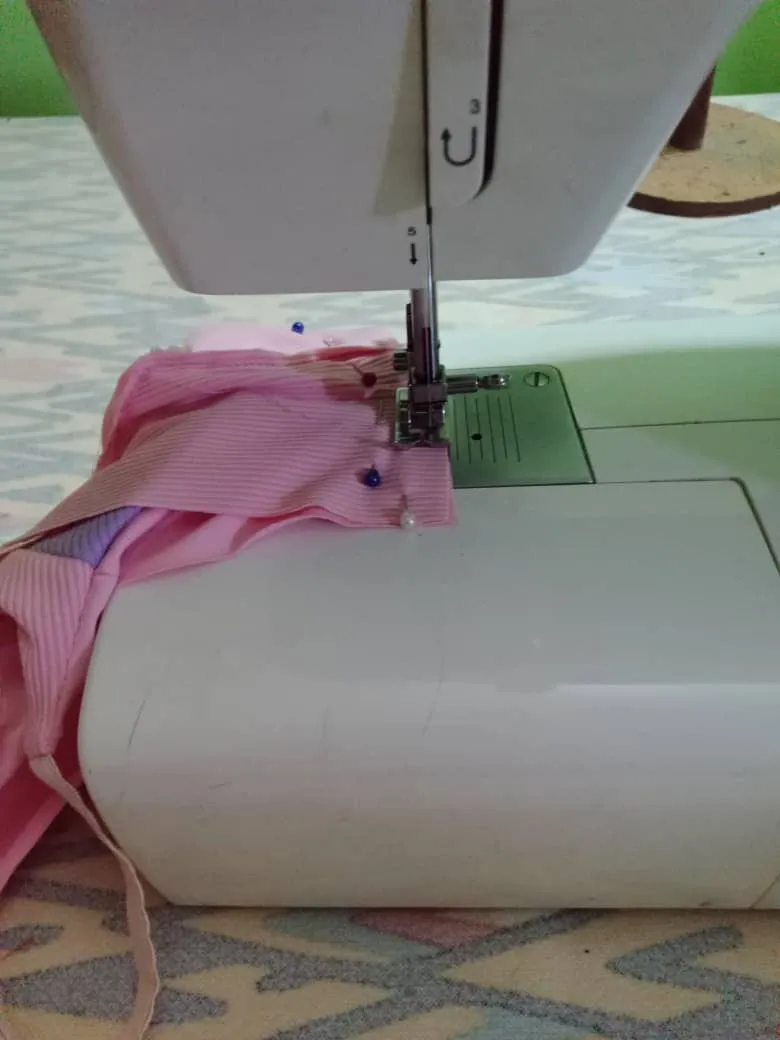
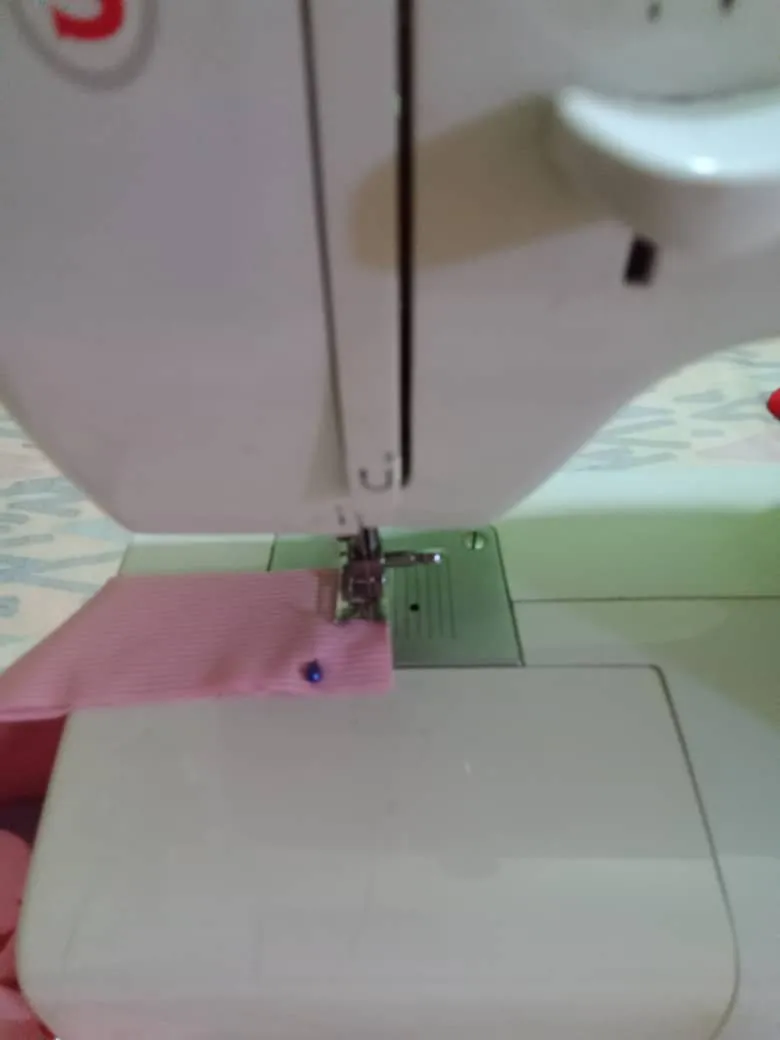
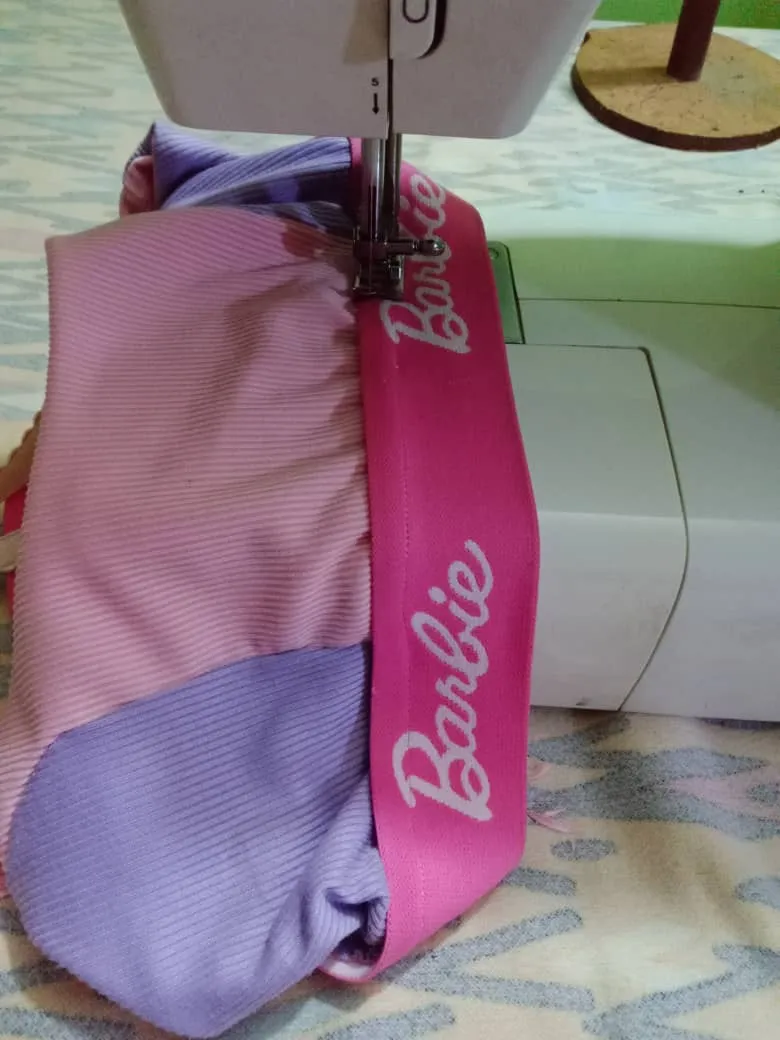
To finish, I sewed the elastic to the ends facing each other and double-stitched it for reinforcement. Then, I divided it into four sections and pinned it to the bottom of the top.
I glued the elastic facing the wrong side of the fabric. I sewed with a straight stitch, stretching it one (1) by five (5) centimeters. Then, I turned the elastic right side out and sewed it with a zigzag stitch. With these simple steps, a beautiful Coastal Nymp-inspired top is finished.
Para finalizar cosí el elástico enfrentado los extremos y pasé doble costura para reforzar, luego lo dividí en cuatro partes y con alfileres fijé en el bajo del top.
El elástico lo pegué enfrentando con el revés de la tela, cosí con puntada recta, estirando uno (1) por cinco (5) centímetros, seguidamente voltée el elástico por el drecho y cosí con puntada de zigzag, con estos sencillos pasos está terminado un lindo top inspirado en la Coastal Nymp.
The initial idea to make the top was to put a thinner fuchsia elastic on it, but when I measured it I decided to change it because Barbie's looked better since it is wider and also provides support to the cups and bust, the elastic I was initially going to use has a nice flower design, but Barbie's looks better on the top and combines very well with the purple and pink colors, this combination is one of my favorites, it also looks tender and elegant; I hope this tutorial is useful to you and you are encouraged to make it, in addition to the rib fabric you can use micro peach, micro peach heavy and spandex fabrics that have elongation on both sides, the color combination depends on each person's taste.
La idea inicial para hacer el top era colocarle un elástico de color fucsia más delgado, pero al medirlo decidí cambiarlo porque el de Barbie se veía mejor, ya que es más ancho y también le brinda soporte a las copas y al busto, el elástico que iba a usar inicialmente tiene un lindo diseño de flores, pero el de Barbie queda mejor en el top y combina muy bien con los colores morado y rosa, esta combinación es una de mis favoritas, también se ve tierna y elegante; espero que este tutorial les sea de utilidad y se animen a realizarlo, además de la tela rib se puede usar micro durazno, micro durazno heavi y telas licradas que tengan elongación para ambos lados, la combinación de colores depende del gusto de cada persona.
Blessings!
Bendiciones!
Hasta luego!
Translated with https://www.deepl.com/translator
              All images are my own.

   Todas las imágenes son de mi autoría.