Hello everyone... 🎄
Hello my dear Hiver and the dear community of artists #DiyHub, I am very excited to be here for the first time with you to present a work made with love and affection. I wish all the success in the world to your project, community and I hope that together we build a big family, so that we can support each other and grow together. I take this opportunity to give you a special thanks for your support. Success and blessings...
For those who know my work know that I have been working especially in the technique of quilling art, but mostly I have directed this technique to the part of costume jewelry as I have loved it and I have seen little in other people, but I always emphasize that this technique is very broad, versatile and can be adapted to the need we have, to make not only charms, if not all kinds of decorative accessories, we can decorate or embellish the unimaginable.
For today I bring you a small Christmas, card with some Christmas flowers consisting of 6 petals plus other nice details, (already in another post I had made the flowers), but I want you to see the other use that we can give and also add other simple decorations to give beauty to this card that I will present. We started this beautiful season and it is the right time to carry out the details for that special person.
Let's start:😃

Hola a todos... 🎄
Hola a mis queridos Hiver y a la querida comunidad de artistas #DiyHub, estoy muy emocionada es estar por acá por primera vez con ustedes para presentarles un trabajo hecho con mucho amor y cariño. Les deseo todo el éxito del mundo a su proyecto, comunidad y deseo que juntos construyamos una gran familia, para que nos apoyemos y crezcamos todos juntos. Aprovecho de darles un agradecimiento especial por el apoyo brindado. Éxitos y bendiciones…
Para los que conocen mi trabajo saben que llevo tiempo trabajando especialmente en la técnica de quilling art, pero más que todo he dirigido esta técnica a la parte de bisutería ya que me ha encantado y poco lo he visto en otras personas, pero siempre les recalco que esta técnica es muy amplia, versátil y se puede adaptar a la necesidad que tengamos, para hacer no solo dijes, si no todo tipo de accesorios decorativos, podemos decorar o embellecer lo inimaginable.
Para el día de hoy les traigo una pequeña tarjeta navideña, con unas flores navideñas que constan de 6 pétalos más otros lindos detalles, (ya en otro post había realizado las flores), pero deseo que vean el otro uso que le podemos dar y así mismo agregar otro tipo de decoraciones sencillas para darle belleza a esta tarjeta que les presentare. Ya iniciamos esta hermosa temporada y es el momento preciso para llevar a cabo los detalles para esa persona especial.
Comencemos:😃

• Cartulina blanca.
• Cintas de quilling de 3mm de ancho rojas, verdes, y de 3mm y 6mm de ancho doradas.
• Aguja para quilling.
• Pega blanca extra fuerte (de carpintería).
• Tijera.
• Regla con diversas medidas de circunferencia.
• Perlas doradas (o del color de tu preferencia).
• Gel escarchado.
• Cristales pequeños.
• Pinza punta fina.
• Pincel.
- White cardboard.
- Quilling ribbons of 3mm wide red, green, and 3mm and 6mm wide gold.
- Quilling needle.
- Extra strong white glue (carpentry glue).
- Scissors.
- Ruler with different circumference measures.
- Golden beads (or the color of your choice).
- Frosted gel.
- Small crystals.
- Fine tip tweezers.
- Paintbrush.

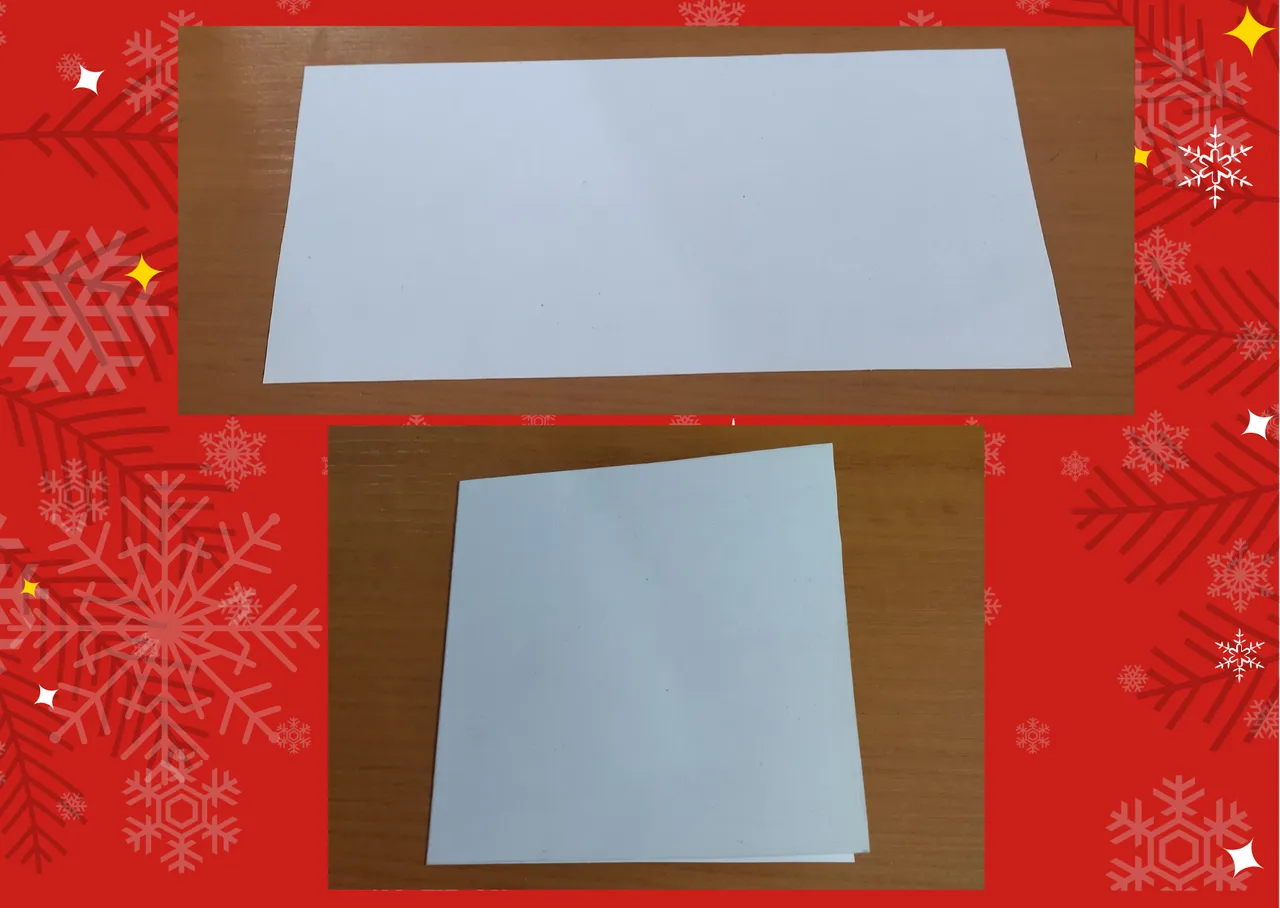
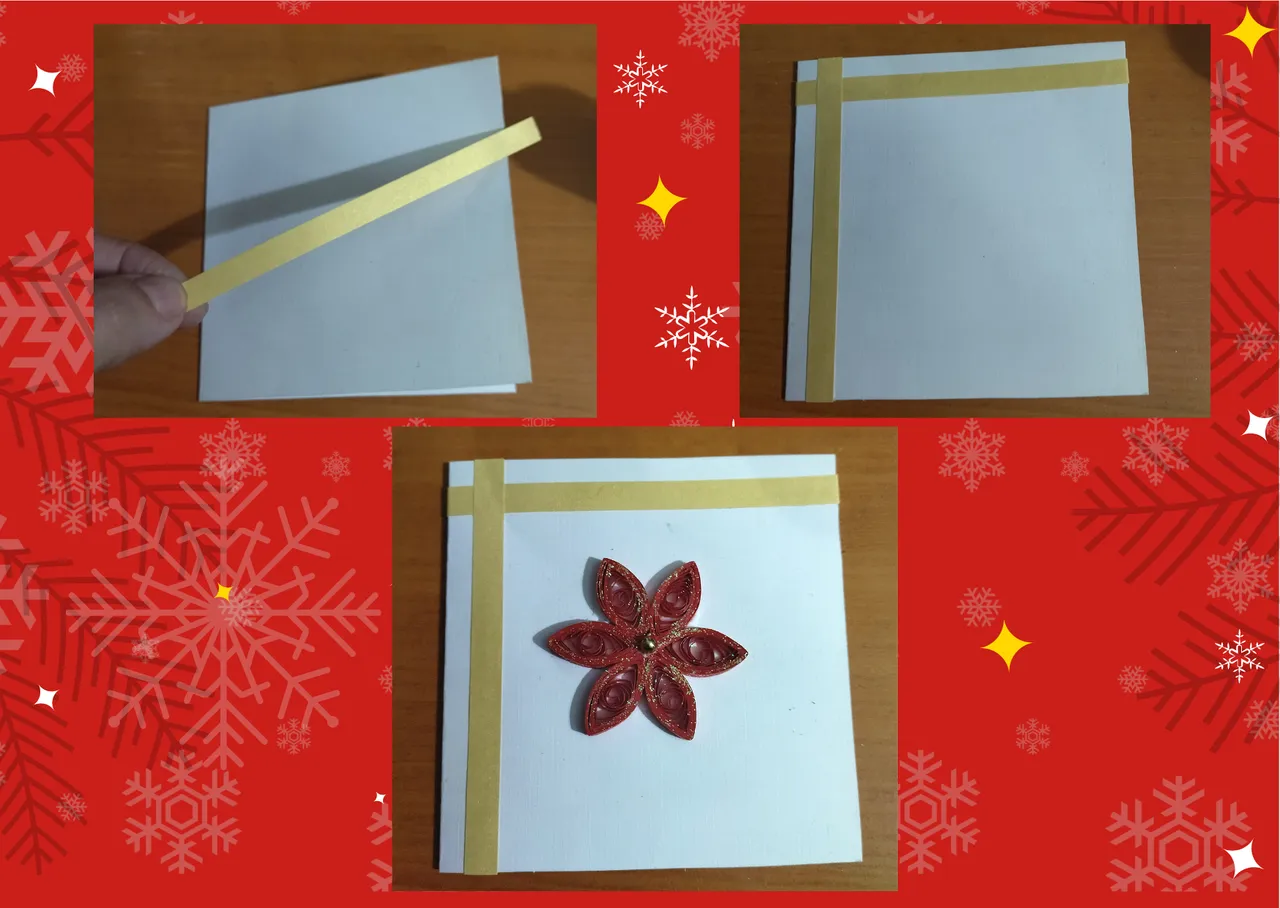
- Let's start by taking a piece of white cardboard, which we will cut to the size of our preference according to the size we want our card to be, in my case I made it 9cms wide x 18cms long, cut so that we can fold it in half and it is 9cms x 9cms. so that inside you can add the dedication of your preference, and decorate the outside. I have always been inclined towards small things, I feel them quite delicate, that's why I decided not to make such a big card.
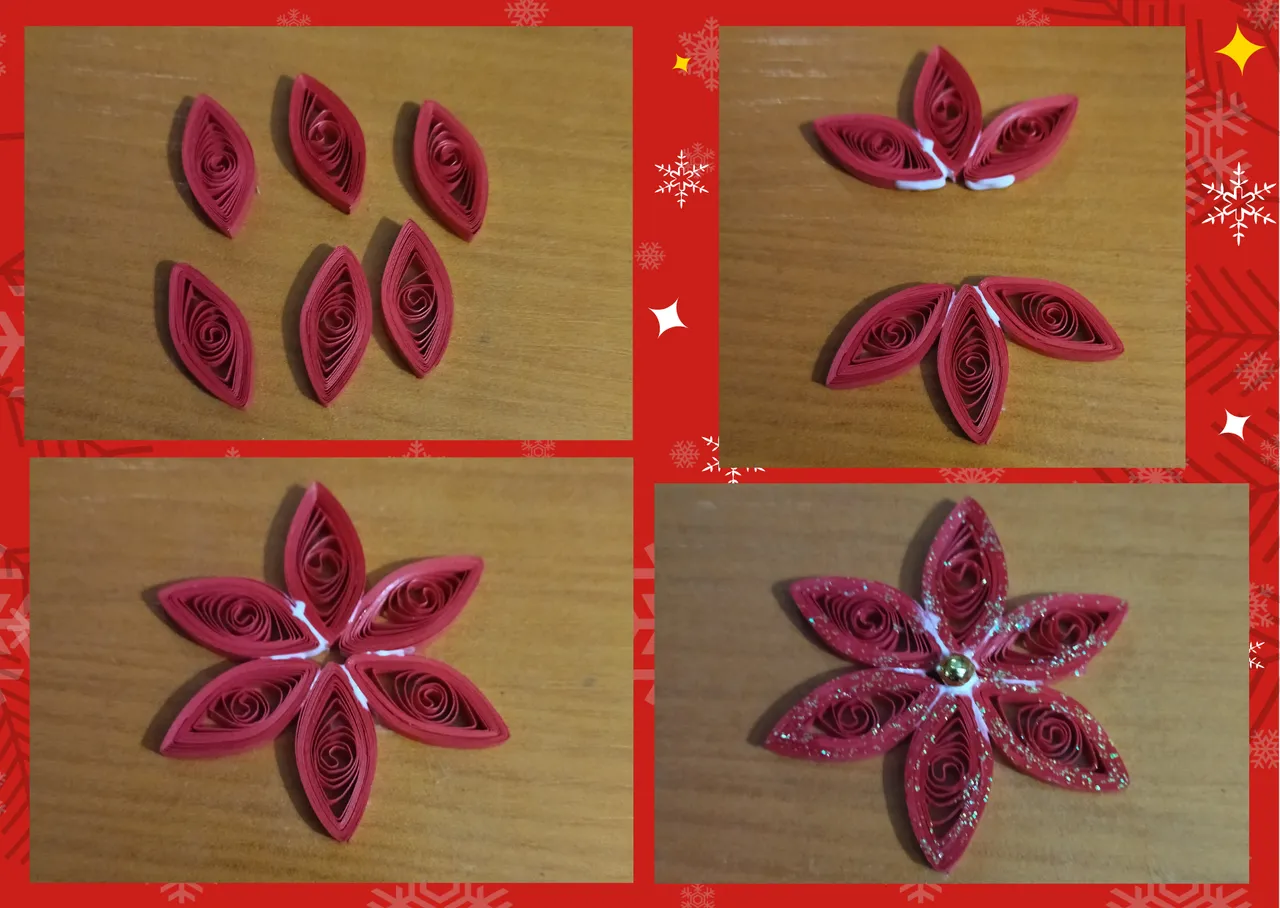
- Let's start with the ornaments, the fundamental basis of this card will be a Christmas flower that I previously made, the only thing I modified was the size, and decorate with a golden pearl, I have always stressed that each of the things we do we can make them in the color, size and decoration of our preference.
If you want to see the detailed procedure of the elaboration of the flower you can do it by clicking on the following Link flores de navidad.

• Vamos a comenzar tomando un trozo de cartón blanco, el cual cortaremos de la medida de nuestra preferencia según el tamaño que deseamos que quede nuestra tarjeta, en mi caso lo hice de 9cms de ancho x 18cms de largo, corte de manera que podamos doblar a la mitad y quede de 9cms x 9cms. para que por dentro puedan añadir la dedicatoria de su preferencia, y adornare por la parte de afuera. Yo siempre me he inclinado hacia cosas pequeñas las siento bastante delicadas, es por ello que decidí no hacer una tarjeta tan grande.
• Comencemos con los adornos, la base fundamental de esta tarjeta va a ser una flor de navidad que previamente hice, lo único que modifique fue el tamaño, y adorne con una perla dorada, siempre he recalcado que cada una de las cosas que hagamos podemos realizarlas del color, tamaño y decoración de nuestra preferencia.
Si desean ver el procedimiento detallado de la elaboración de la flor pueden hacerlo marcando el siguiente Link flores de navidad.
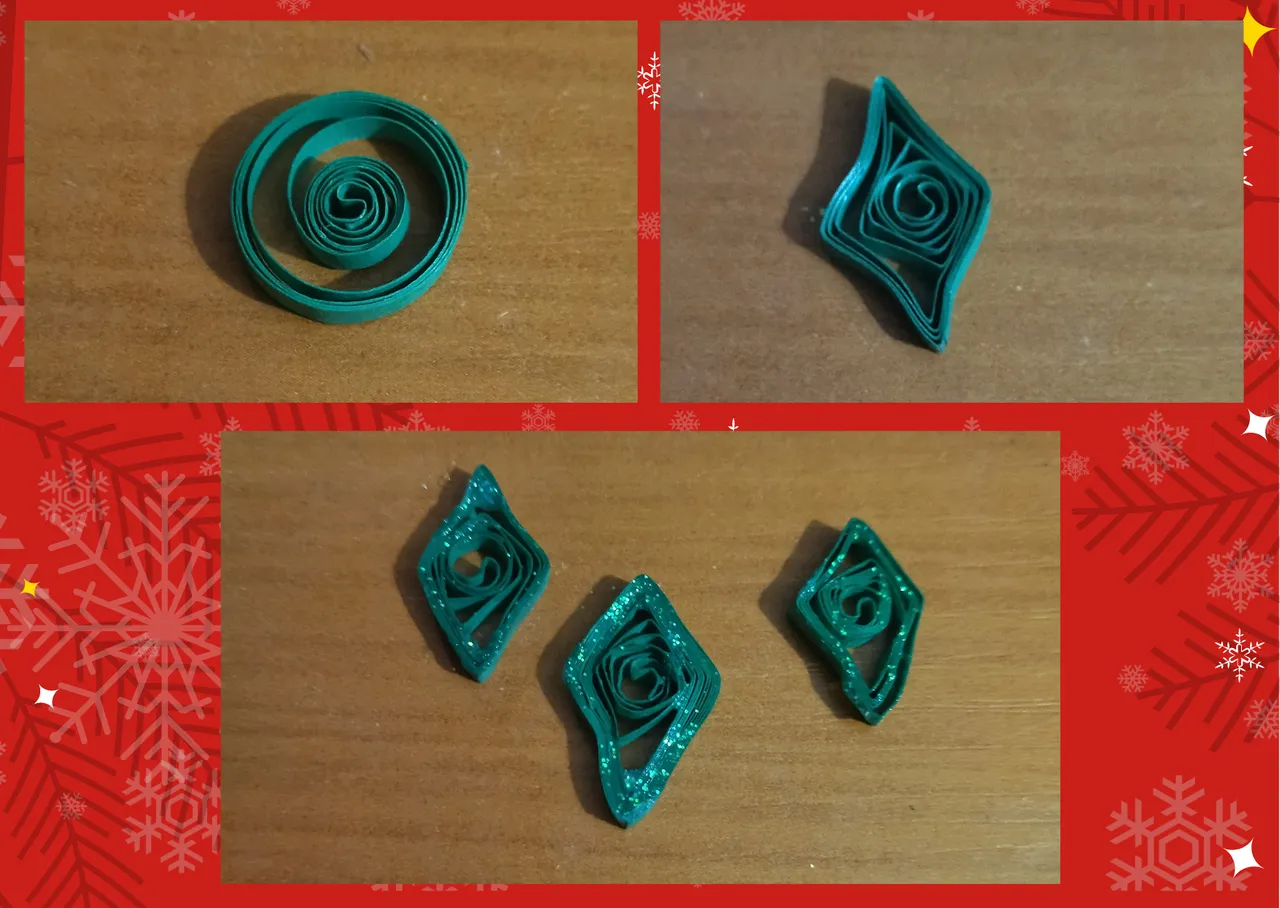
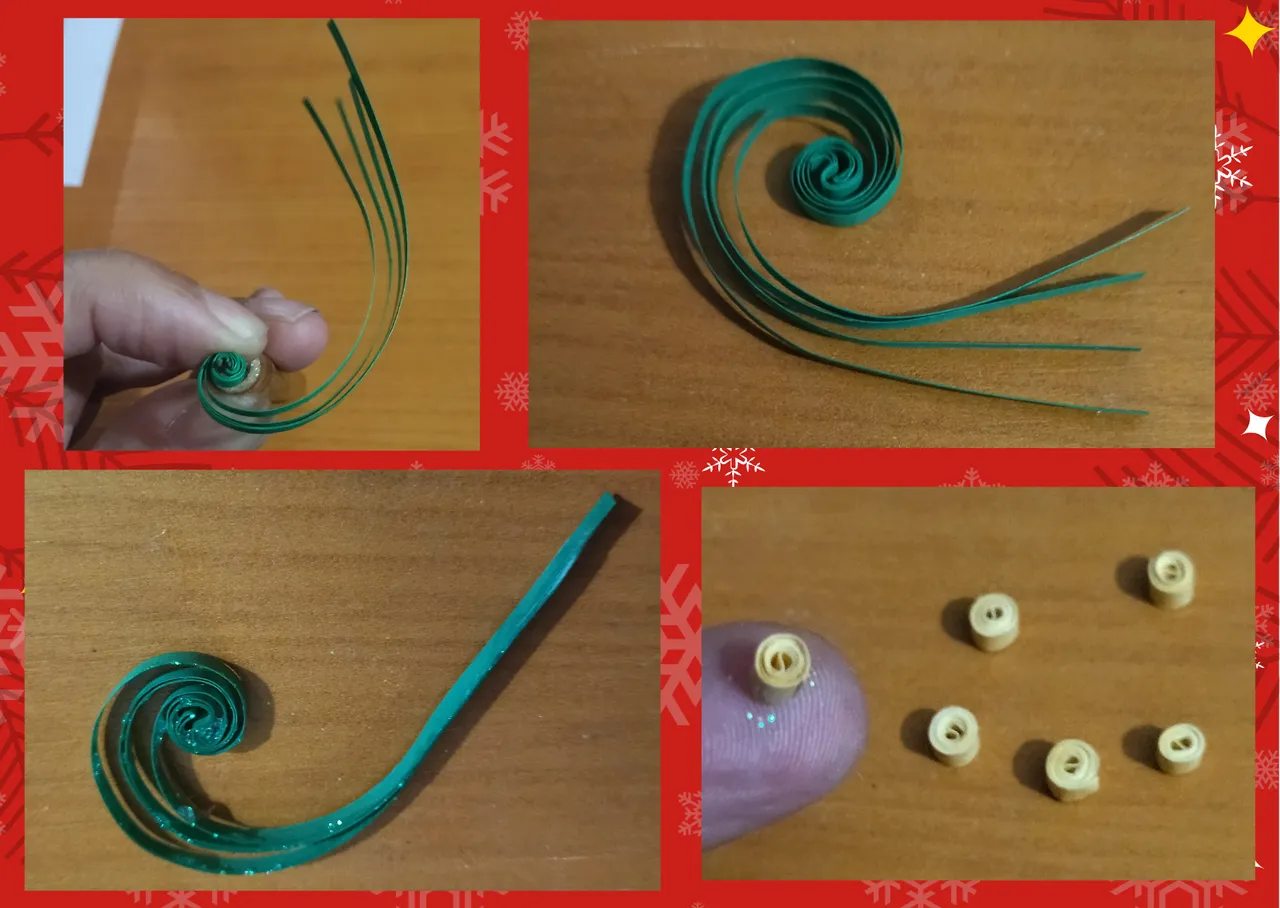
- We have our Christmas flower ready. We are going to make some leaves to decorate, we take a green quilling ribbon, with the quilling needle we will make an open circle and once sealed, we will mold it in the shape of a Christmas leaf pinching with our fingers in different parts of the circle, then we add some frosting gel. We will make the amount we want to decorate.
Here I am going to leave a link for you to see in more detail the procedure of the basic quilling figures, this will be useful for the small details that I will make to decorate.
- Now I decided to take several 3mm wide green ribbons and with the help of the quilling needle, I made a spiral at the tip, added some frosted gel and set aside to decorate the card.
- We are going to take several pieces of gold ribbon and we will make with the quilling needle several small closed circles of the sizes you want, you can also make red and green or the color of your choice.
• Tenemos lista nuestra flor navideña. Vamos a realizar unas hojas para decorar, tomamos una cinta para quilling color verde, con la aguja para quilling realizaremos un circulo abierto y una vez sellado, moldearemos en forma de hoja navideña pellizcando con los dedos en diversas partes del círculo, luego añadimos un poco de gel escarchado. Haremos la cantidad que queramos para decorar.
Por acá les voy a dejar un link para que vean más detalladamente el procedimiento de las figuras básicas de quilling, este le servirá para los pequeños detalles que hare para adornar.
• Ahora decidí tomar varias cintas verdes de 3mm de ancho y con la ayuda de la aguja para quilling, realicé un espiral en la punta, añadimos un poco de gel escarchado y reservamos para decorar la tarjeta.
• Vamos a tomar varios trozos de cinta dorada y haremos con la aguja para quilling varios pequeños círculos cerrados de los tamaños que deseen, también pueden hacer de color rojo y verde o del color de su preferencia.
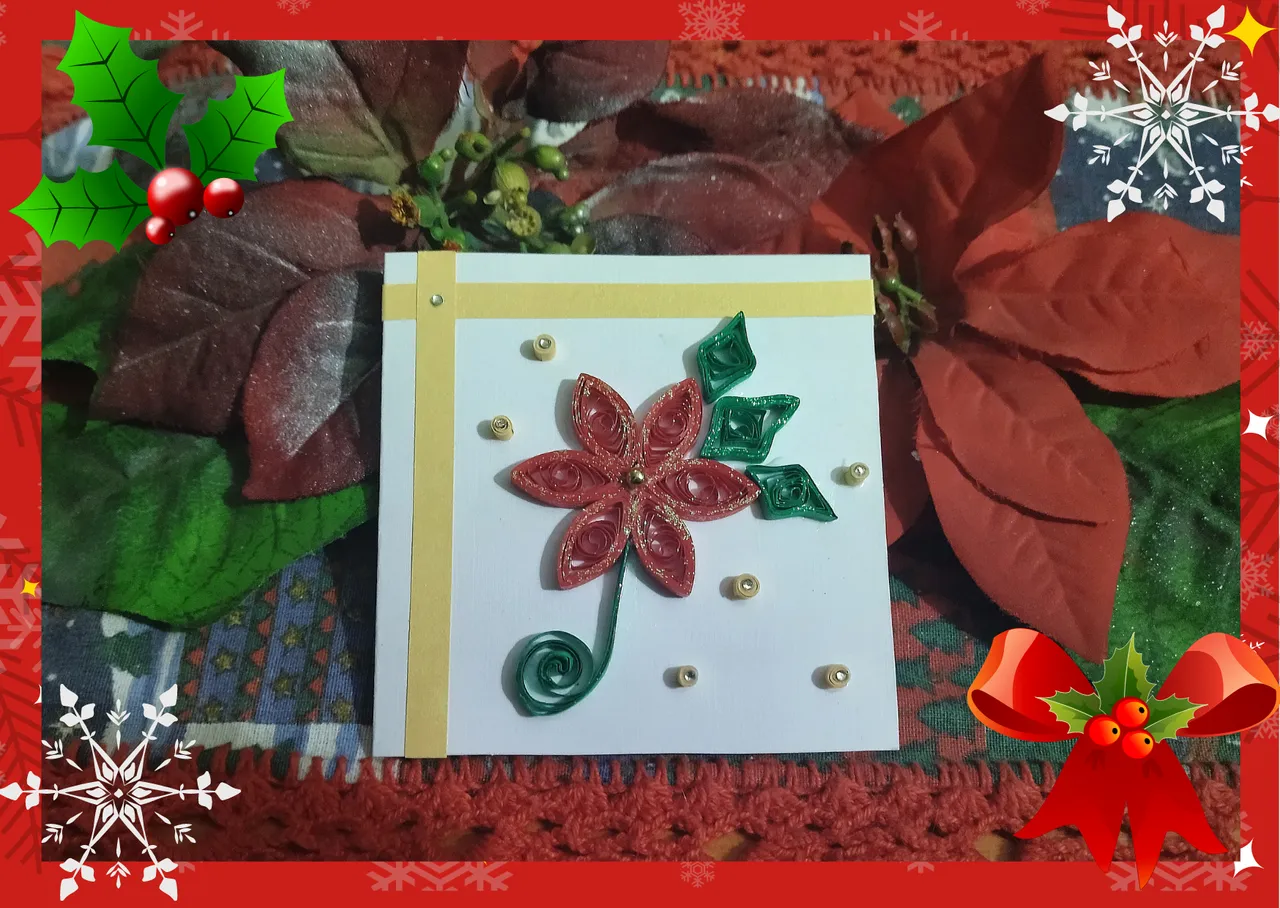
- At this point we are going to decorate our card. We take 6mm wide gold colored ribbon and we are going to glue a piece with extra strong white glue, on the top of the card and another piece on one of its sides.
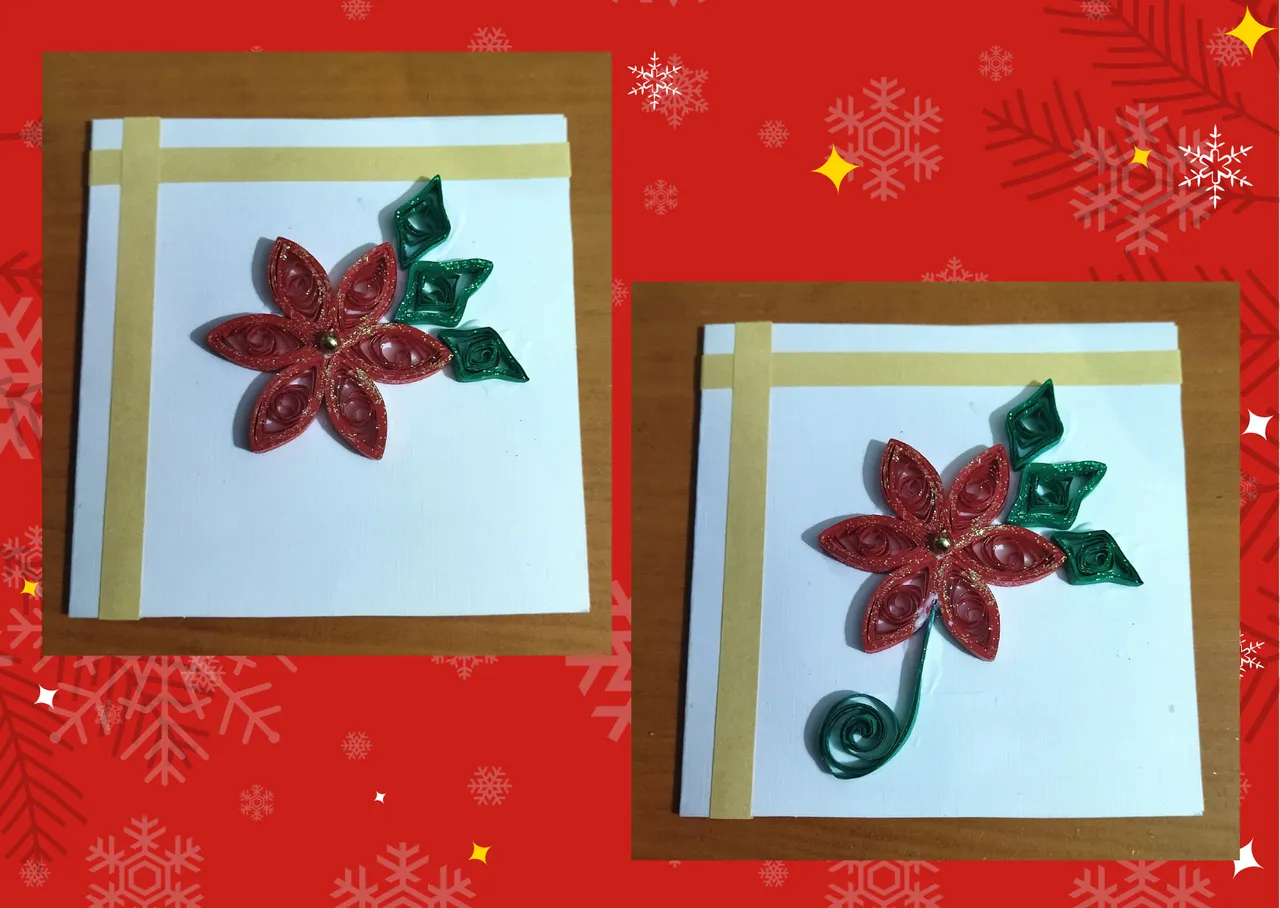
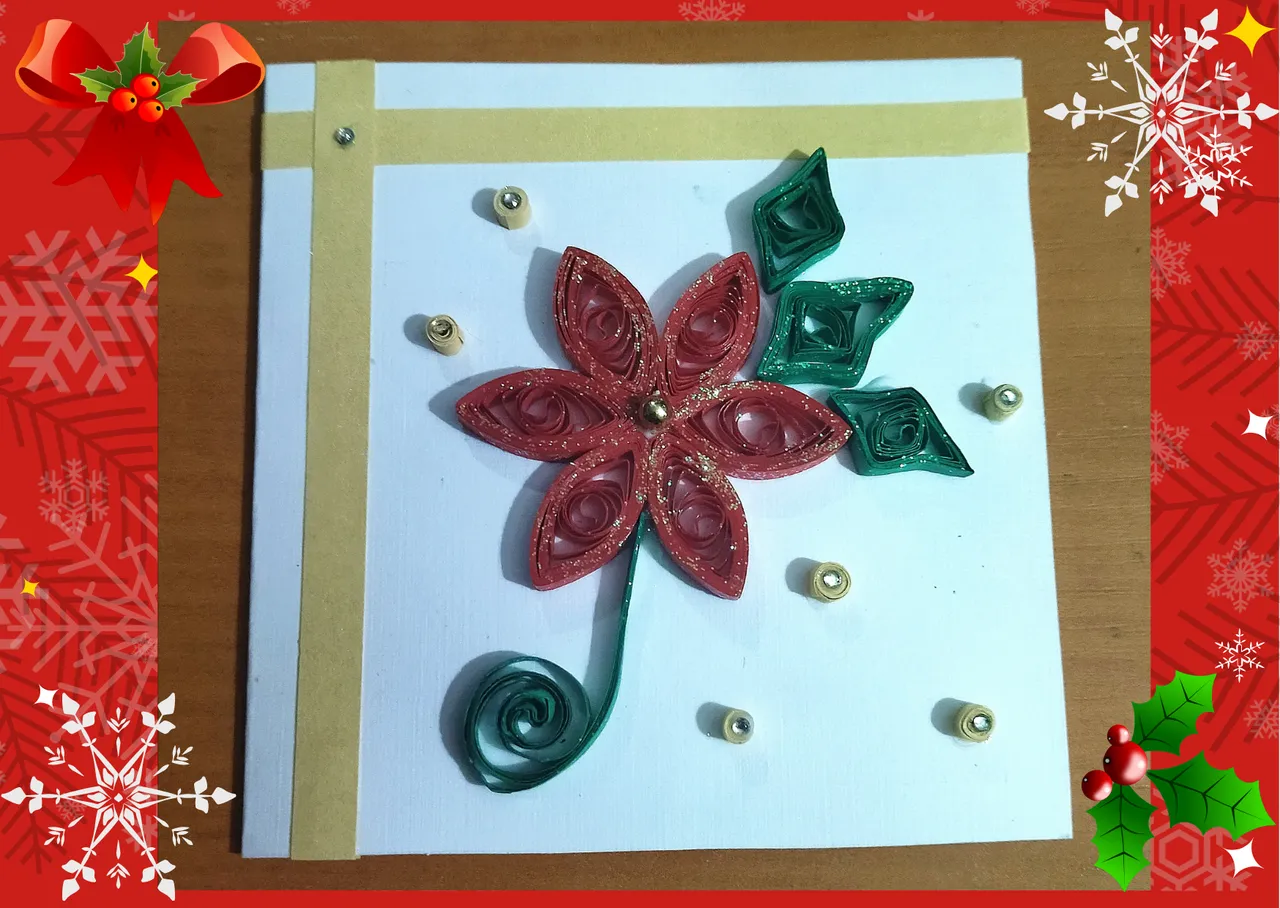
- Finally we will place the other decorations as we like, the flower, leaves, spiral and the small circles which we will decorate with some small crystals to make it more colorful.
In this way we have our beautiful 3D Christmas card ready to be given to that special person...🎄💕
• Llegado a este punto vamos a decorar nuestra tarjeta. Tomamos cinta color dorado de 6mm de ancho y vamos a pegar un trozo con pega blanca extra fuerte, en la parte de arriba de la tarjeta y otro trozo en uno de sus lados.
• Por ultimo colocaremos las demás decoraciones como más nos guste, la flor, hojas, espiral y los pequeños círculos a los cuales adorne con unos cristales pequeños para darle mayor vistosidad.
De esta manera tenemos nuestra bonita tarjeta navideña en 3D lista para ser obsequiada a esa persona especial… 🎄💕

What did you think, did you like it?
I hope you did, I hope you liked my explanation, procedure and photos, I made them with love for you.
"Let out that muse that inspires you, and let your imagination fly".
Thank you all, see you next time. 🐾🐱💕
¿Que les pareció, les gustó?
Espero que sí, que les haya gustado mi explicación, procedimiento y fotos, los hice con mucho cariño por y para ustedes.
"Deja salir esa musa que te inspira, y deja volar tu imaginación".
Gracias a todos, nos vemos en la próxima. 🐾🐱💕
Los invito que apoyen a "La Colmena", dale tu voto ✨
 Vote la-colmena for witness By @ylich
Todas las fotos usadas en este post son de mi autoría y han sido sacadas en mi celular personal un Redmi 9T y editadas Canva Banner y separador hecho por mí en Canva Traducido con la ayuda de DeepL
