Hey lovelies ❤️
It's your favorite girl @debbie-ese 😍
Welcome to my blog 🤗
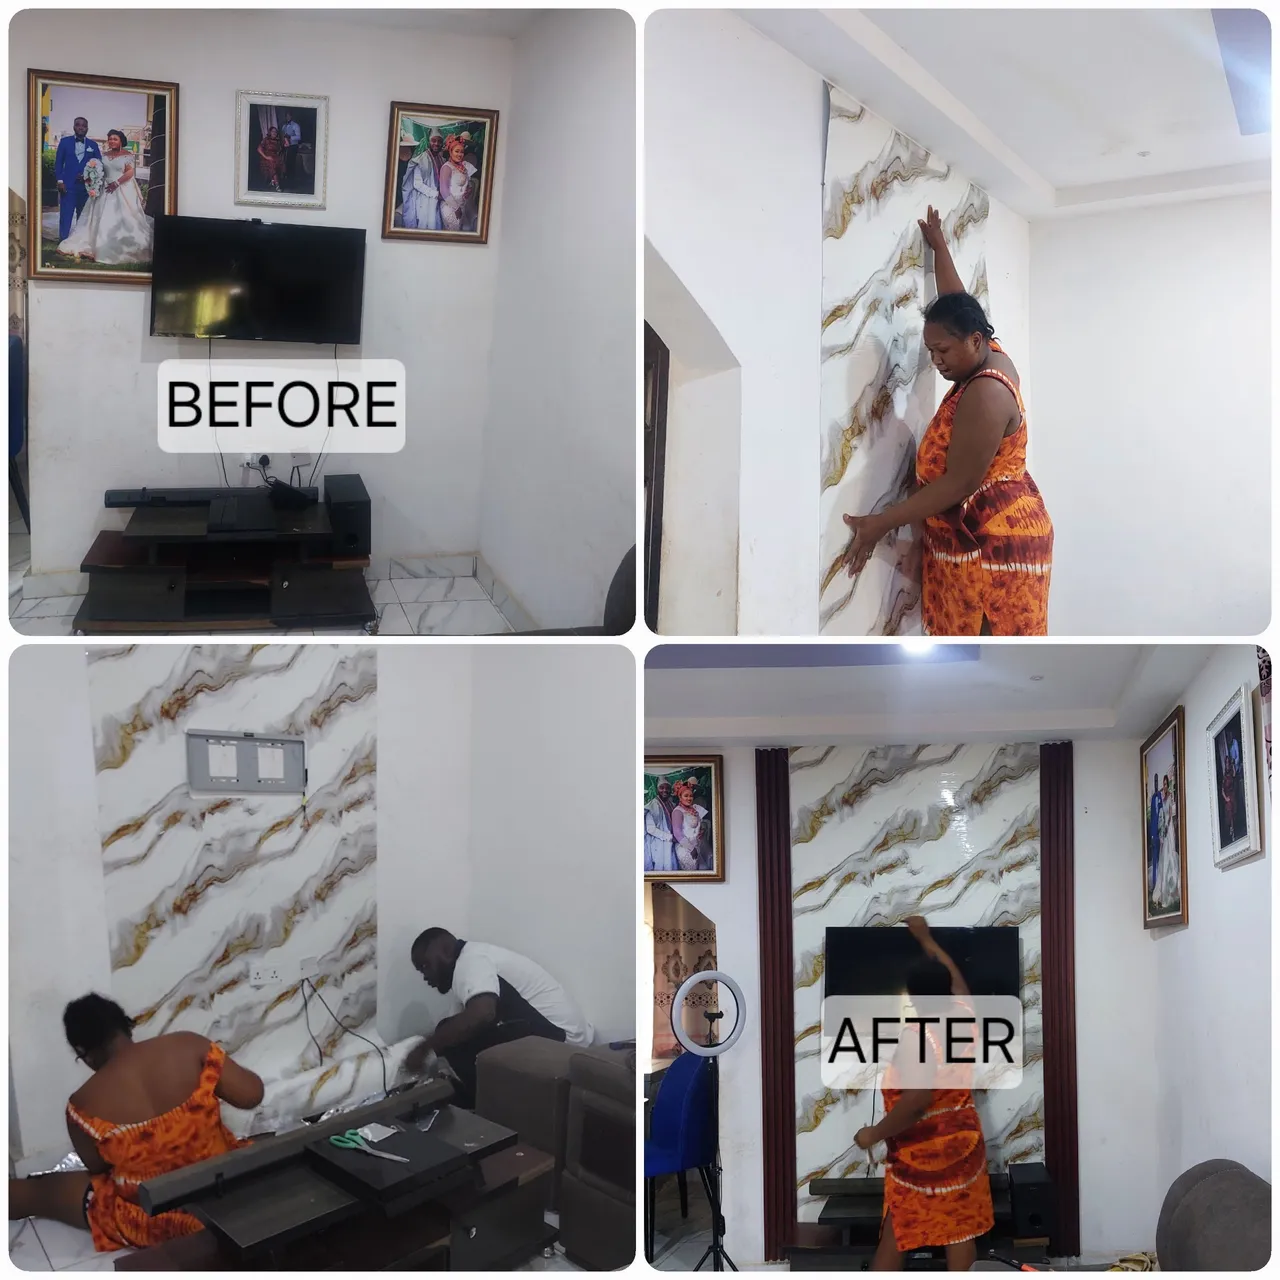
For so many years, my sitting room had the same look - same color, same arrangement of picture frames and so on. Though it isn't looking bad but I needed a new look, something that looks more modern. In short, i just needed to have a new refreshing feel when I sit in my sitting room.
So, I came up with the idea to change the look of my TV area, since it is the major highlight of any sitting room. After several hours of checking the internet for ideas I had the option of choosing from two ideas. These ideas are: installing a TV console or using a wallpaper and a fluted panel to create a trendy and elegant background.
A TV console may have been the preferred option but it is quite expensive for me at the moment. I would have to seek the service of a furniture maker, buy the required materials, pay for labor and installation. That is going to cost quite a lot. So, I had to settle for the more budget-friendly option - a PVC wallpaper sticker and a fluted panel. This is a more preferred option because I could install it myself. Myself and my husband did the installation without hiring anyone pro.
The installation process was a fun one even though it took quite some hours to get it completed. Well, this may be as a result of the fact that I'm an amateur in the field.
Step by Step
The first thing we did is to take everything off the wall. That is, the TV, and picture frames.
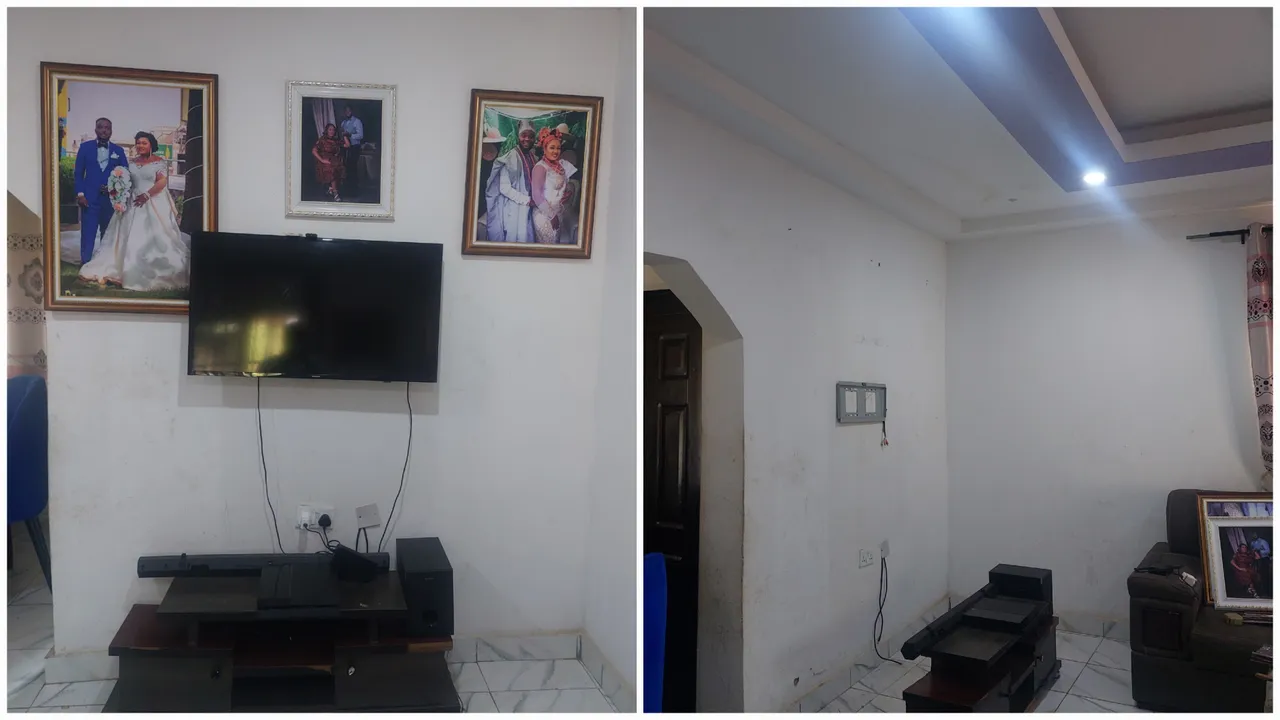
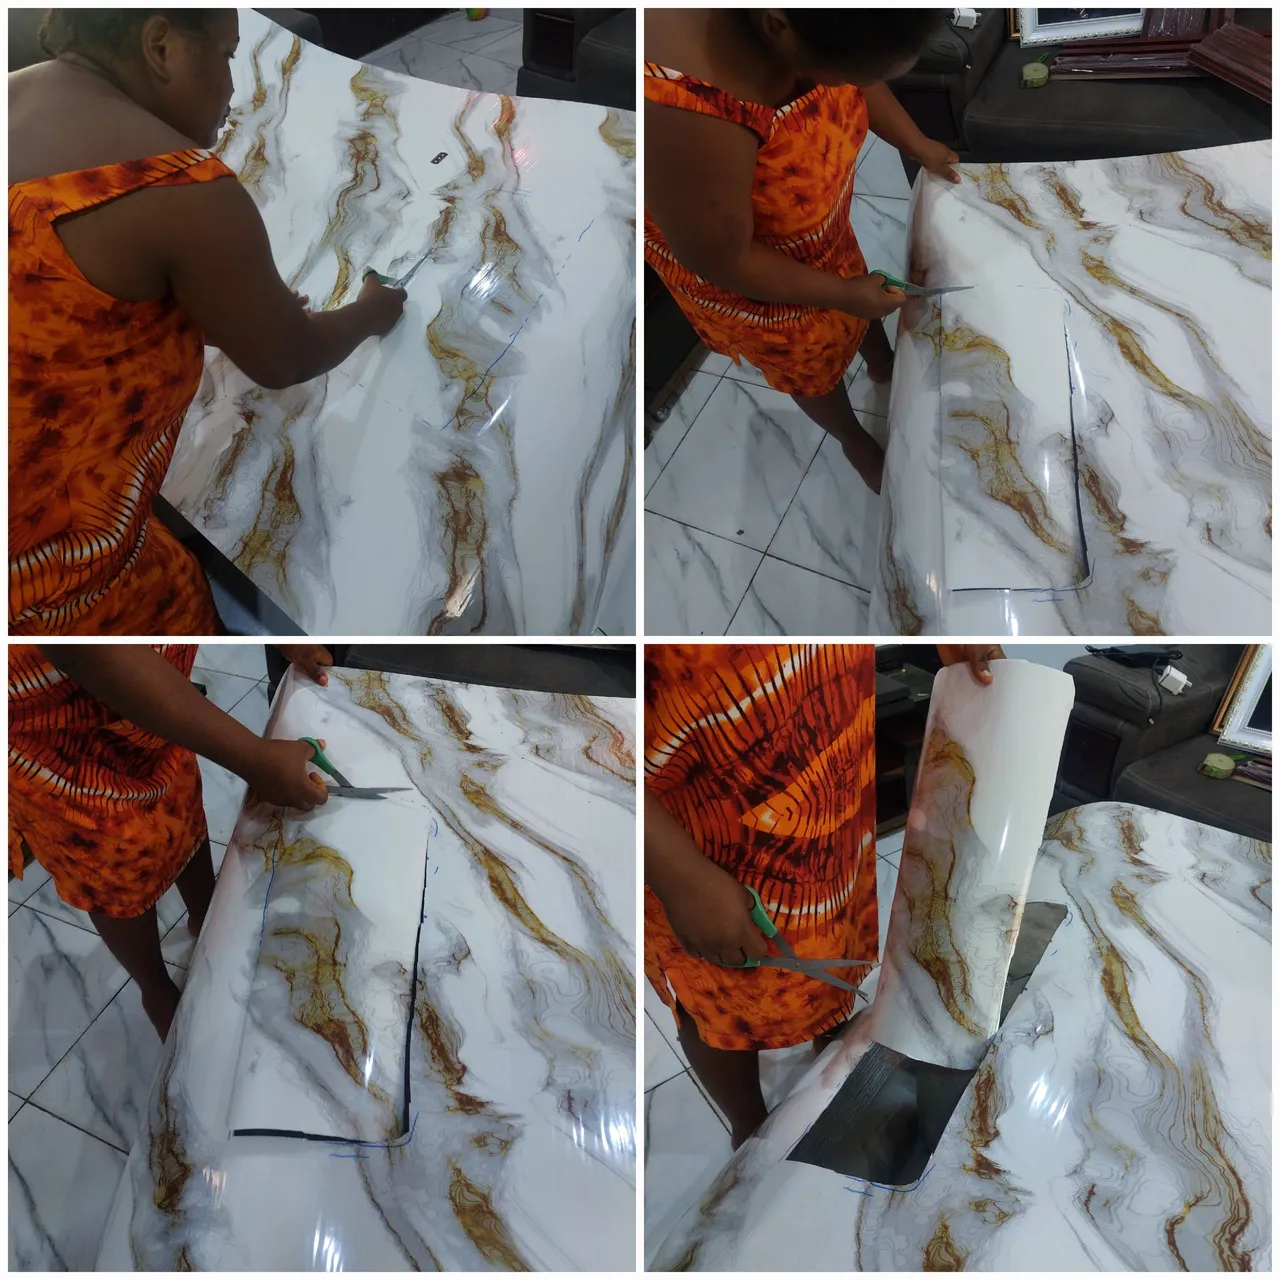
Next, in order to ascertain the exact area of the wall the wallpaper will be covering we held the wallpaper to the wall and mark the area. Also, we also marked the TV hanger position so that we can carefully cut it out.
Then I use a pair of scissors to cut out the marked area on the wallpaper where the TV hanger would be positioned.
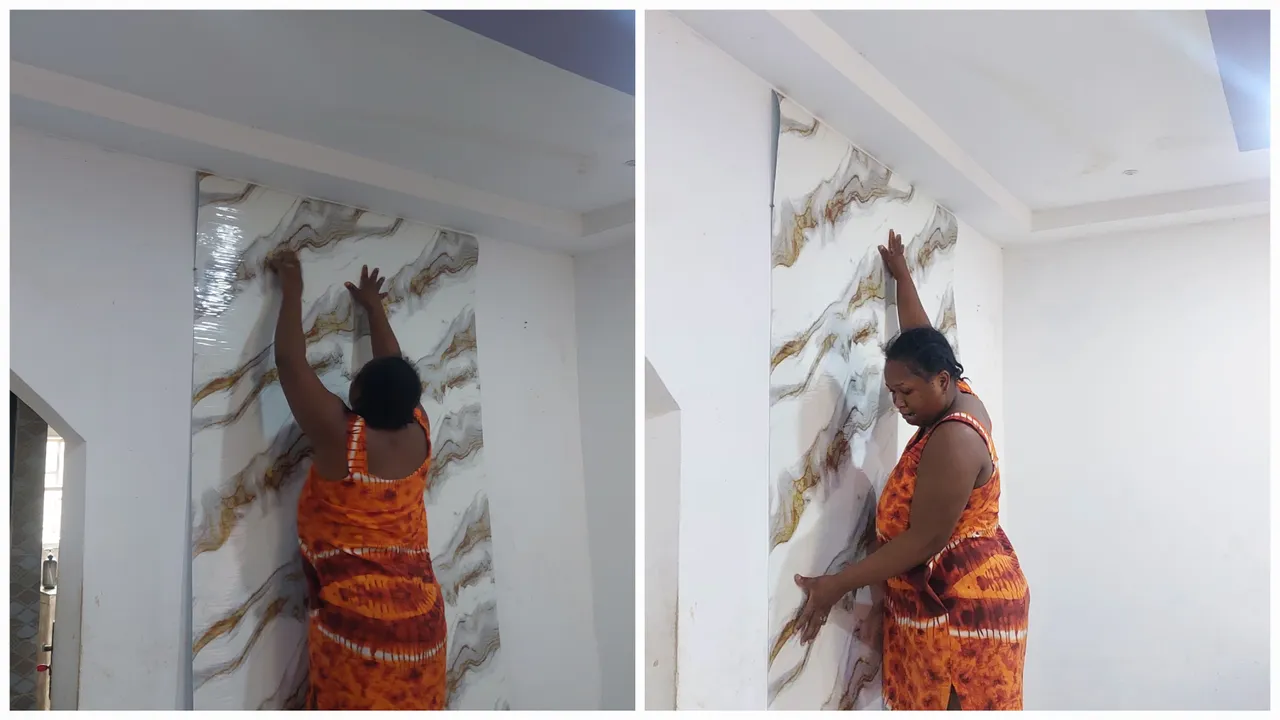
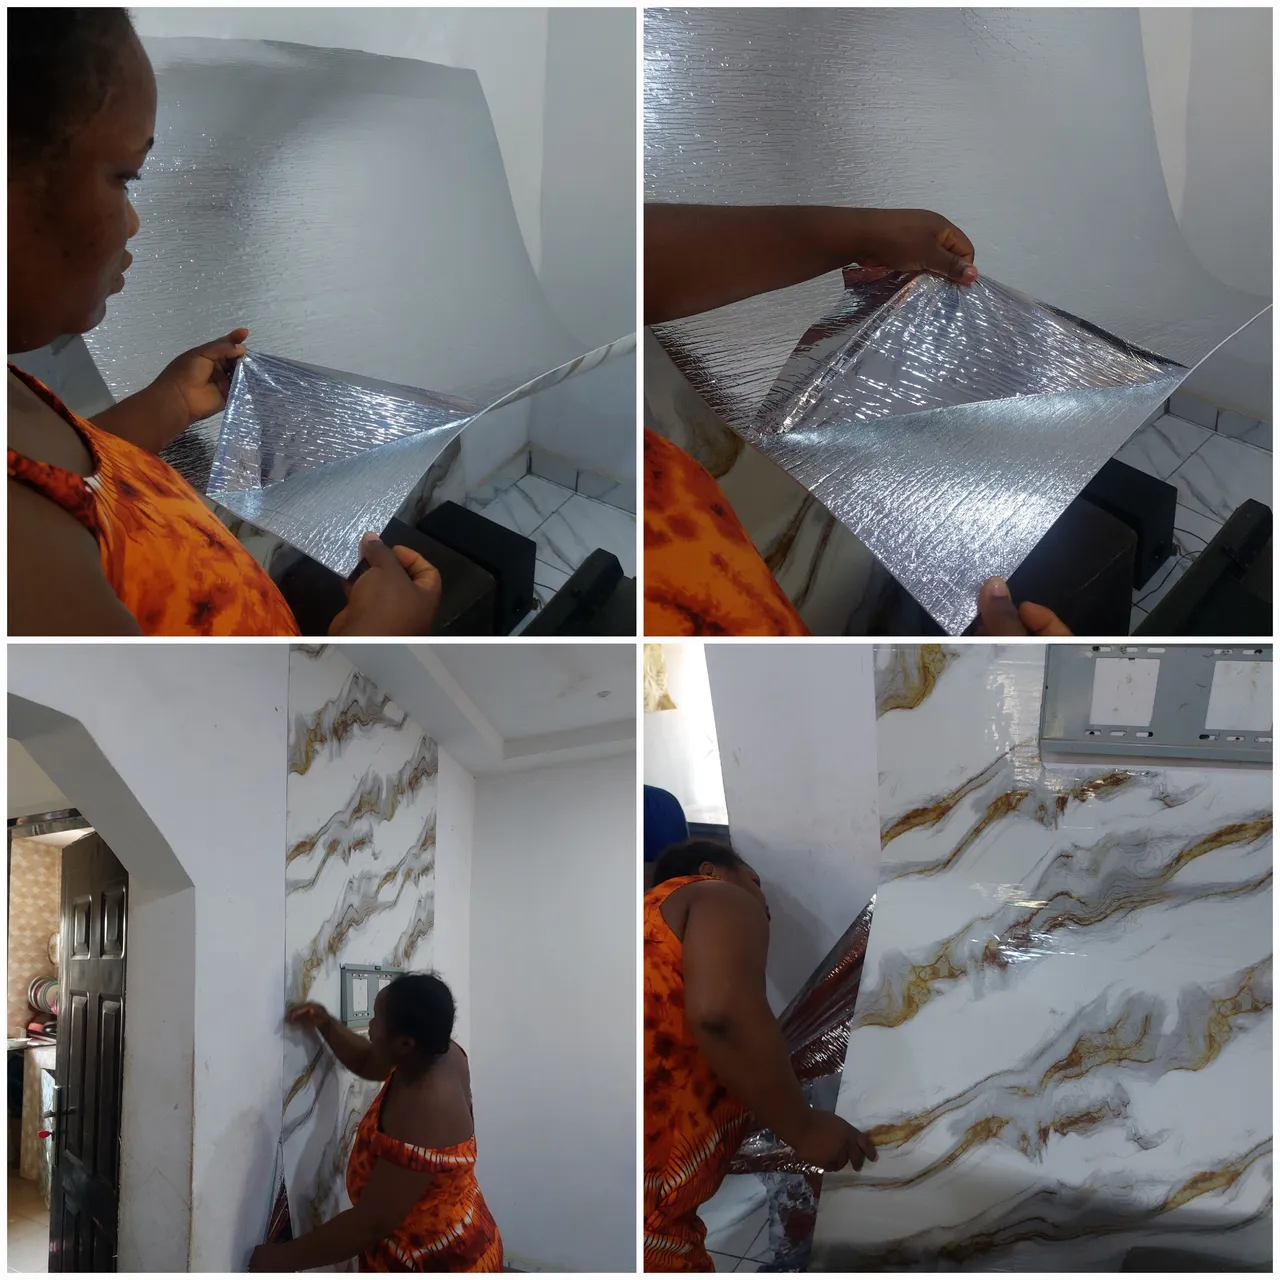
Then it is time to stick the wallpaper to the wall. I peeled off the protective foil at the back of the wallpaper gently and began pasting it on the wall from top to bottom.
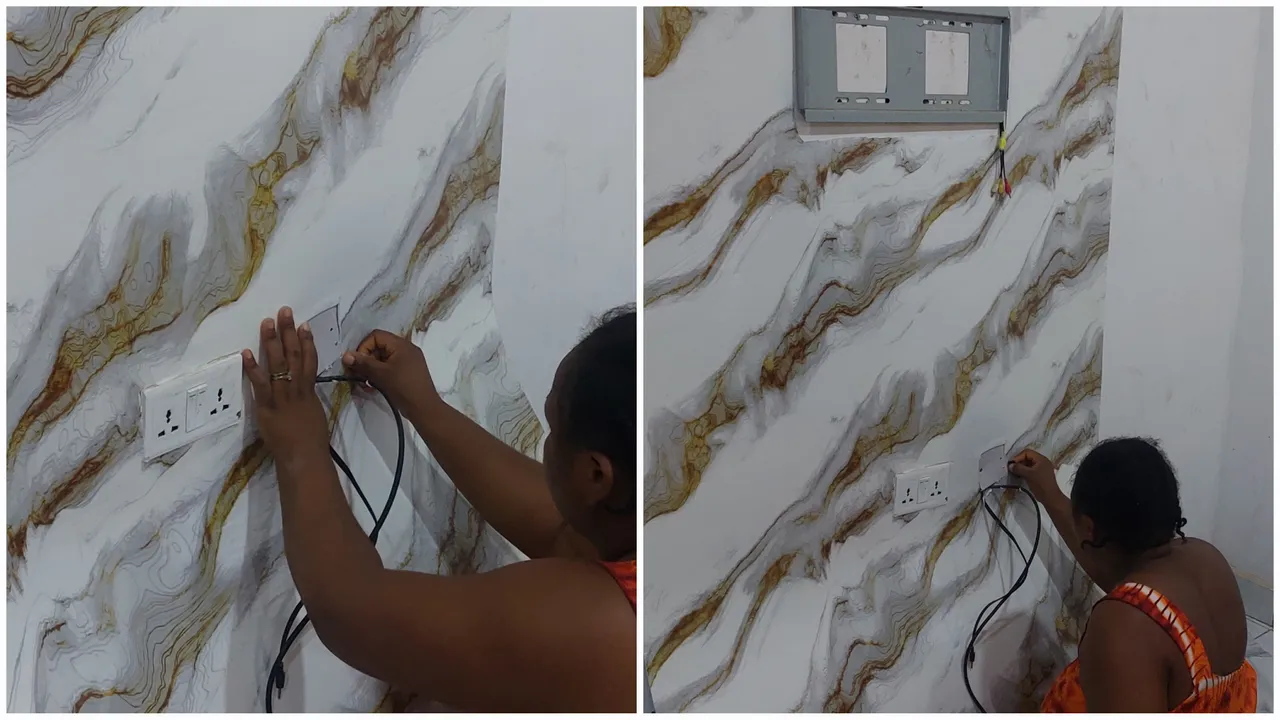
Then when I got the socket area, I carefully used a razor to cut out the socket. Then I smoothen the wallpaper to be sure that there is no folds. And that is it, the wallpaper installation is complete.
Now to the installation of the fluted panel. I placed the panels on the wall to check how it will look before applying glue to it.
Once I was satisfied with the fitting I applied gum to about five different spots on the back of the panel before pressing it firmly on the wall.
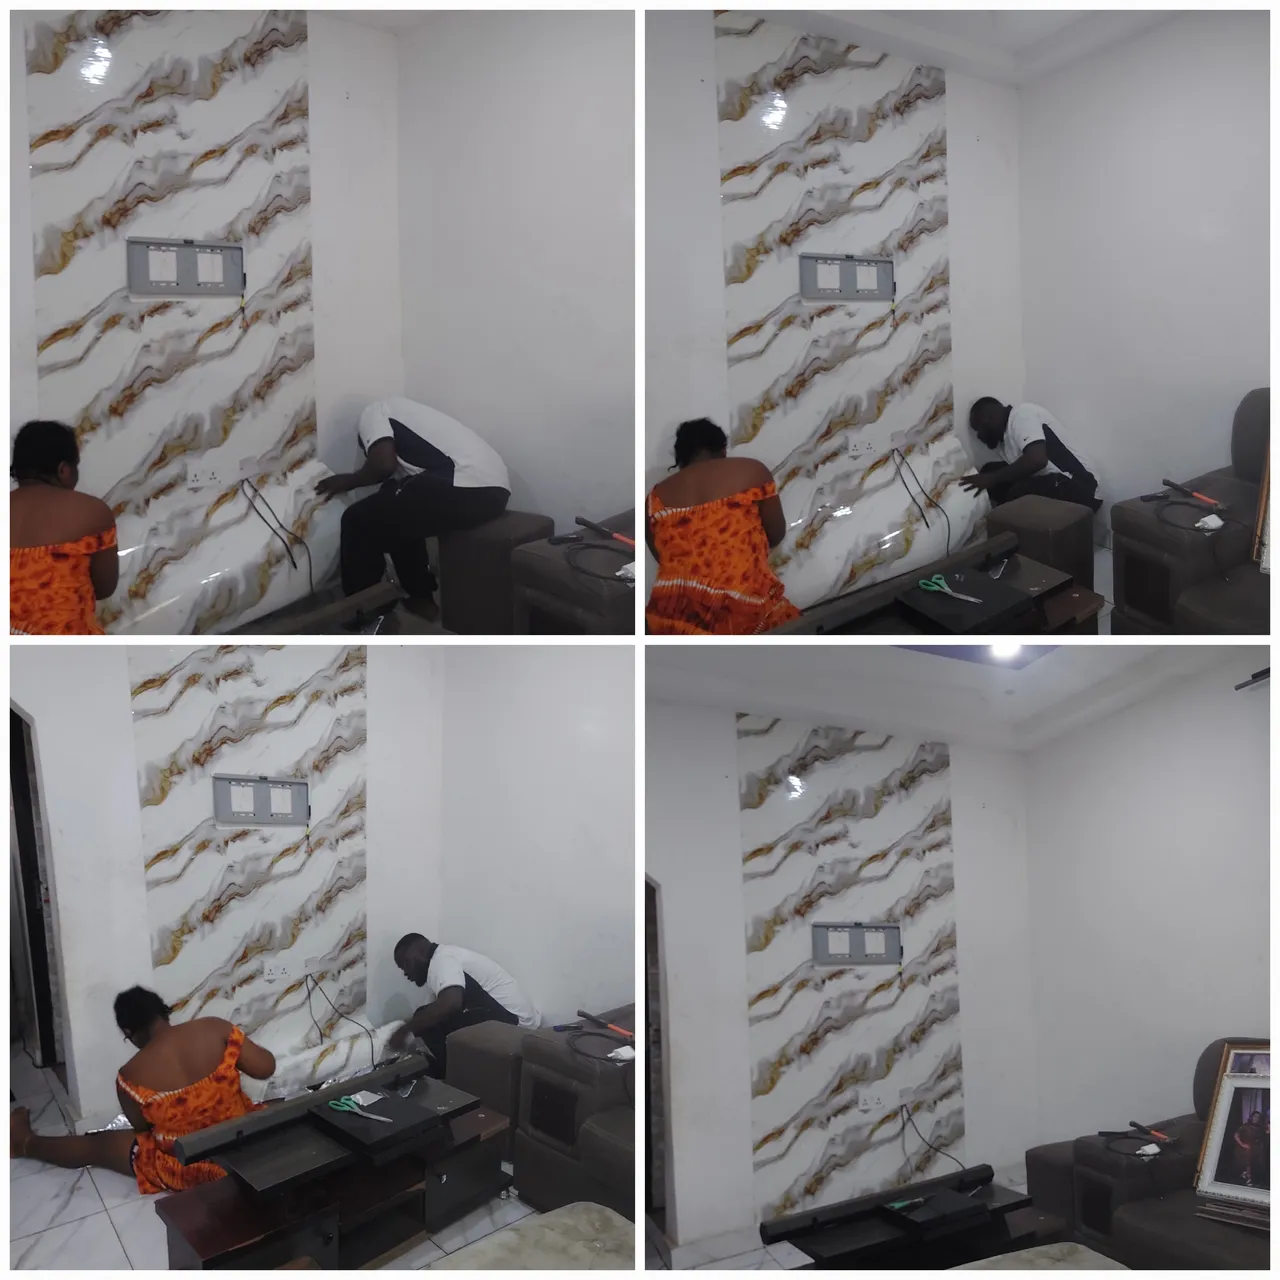
I held it firm for about 3 minutes on the wall to ensure it is well glued. That's all about installation of the fluted panel.

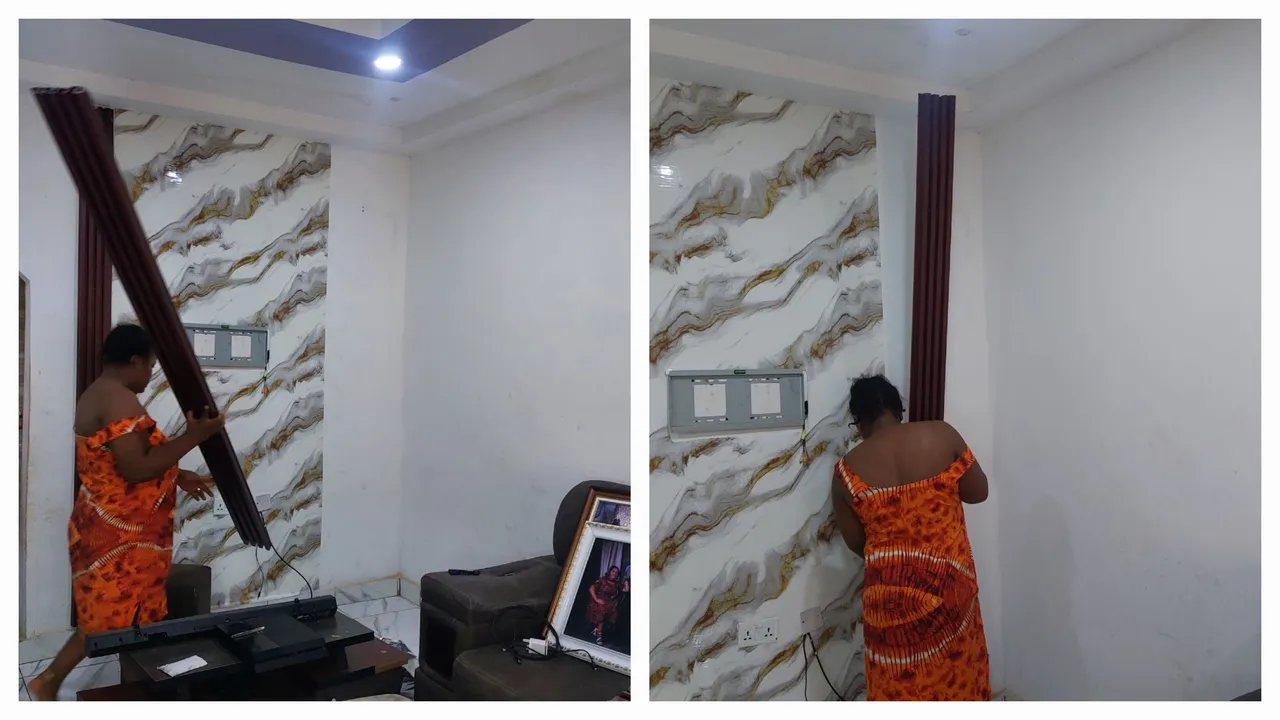
- Now that the wallpaper and fluted panel have been well installed, we re-mounted the Television and hung the picture frames. Though the picture frames had to take up new positions.
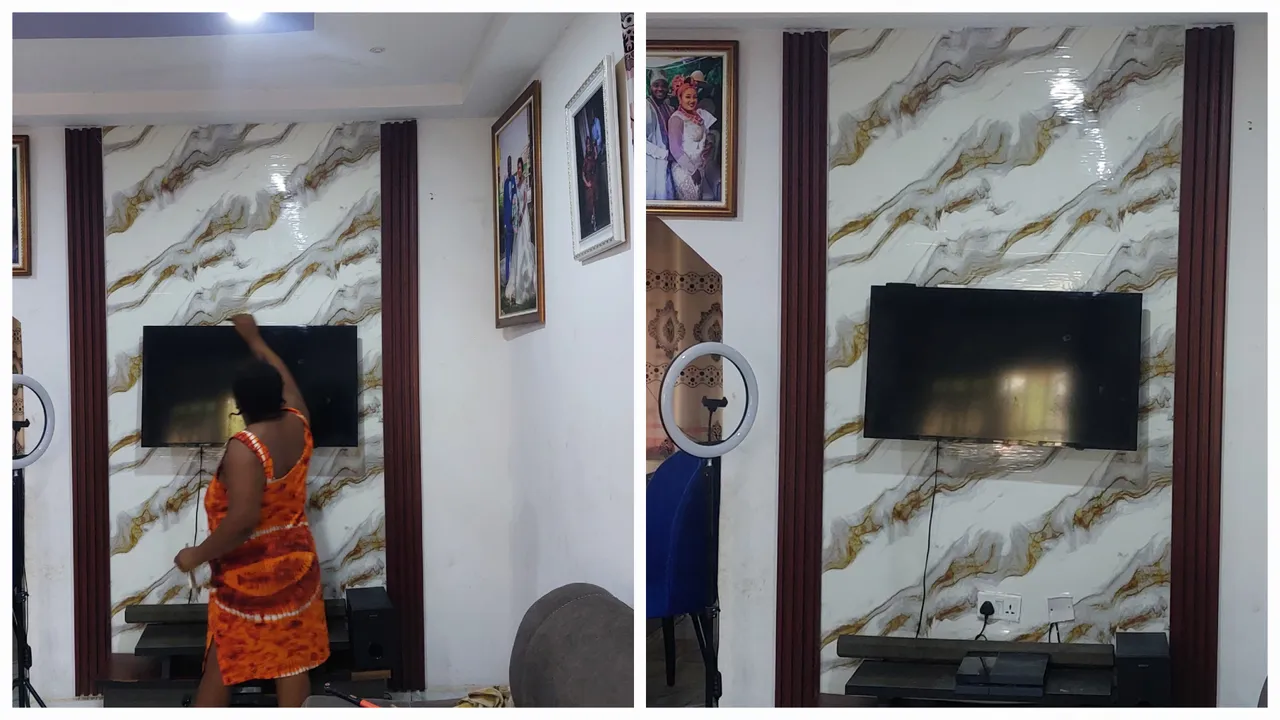
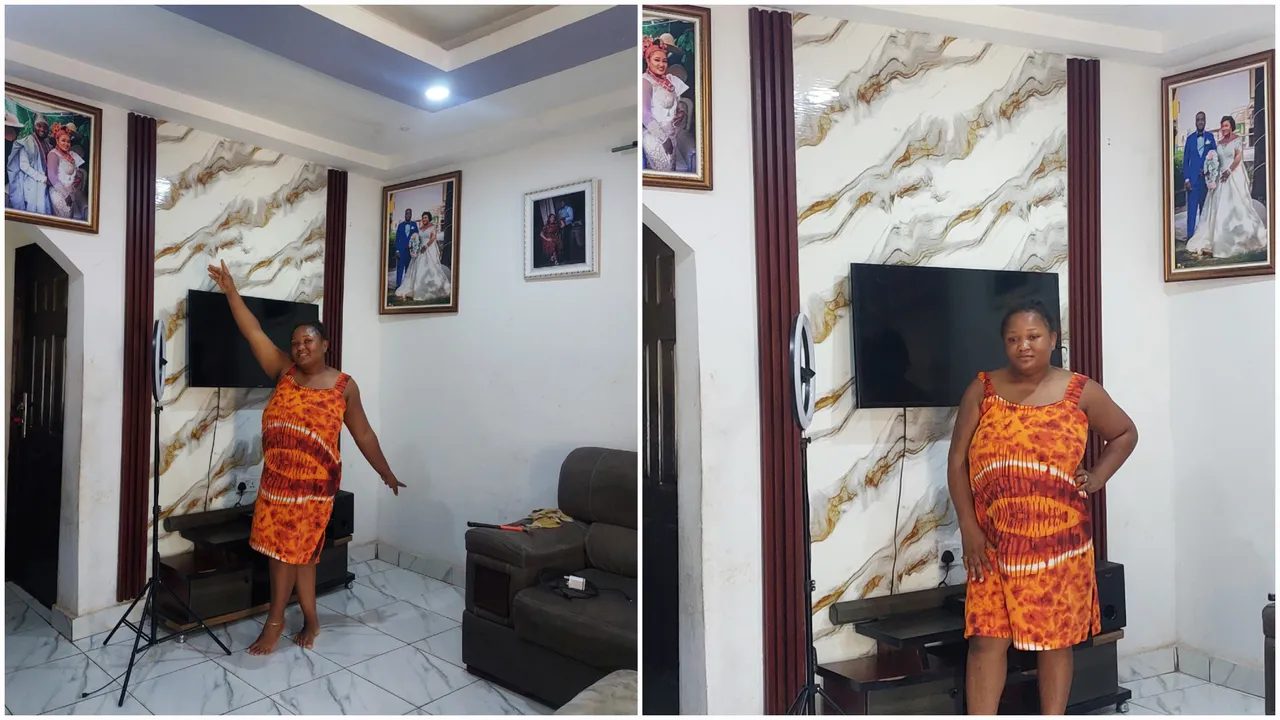
The finished result was absolutely amazing and I'm glad that we were able to do it ourselves.
Thanks for reading and see you in my next one.
ABOUT ME

Just a quick reminder:
The text and photos on this blog was created by me, unless I state otherwise.
The cover images are designed using Canva with strict adherence to elements that are licenced for use under their terms.
Photographs are taken with my Samsung Galaxy A52 - 64MP Camera and other amazing features that absolutely capture the moment in high quality.
Lastly, do not use any of my content either text or image without asking me for authorisation. In other words, unauthorised used of my content is highly prohibited.