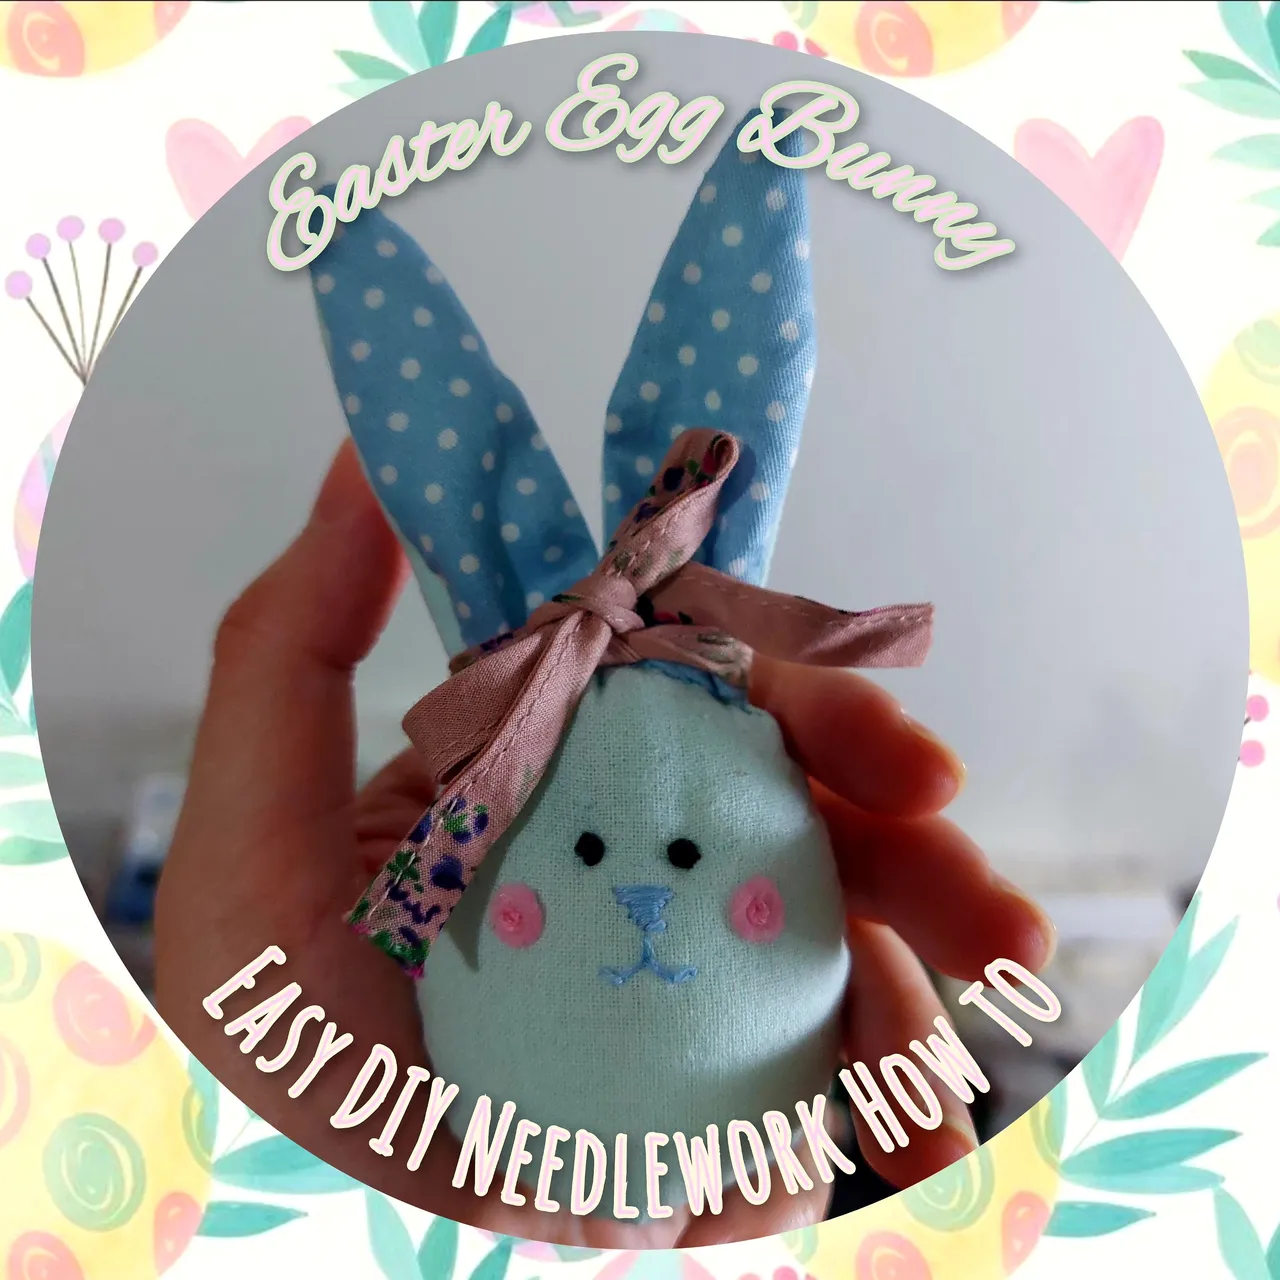
Hello, friends especially needleworkers!
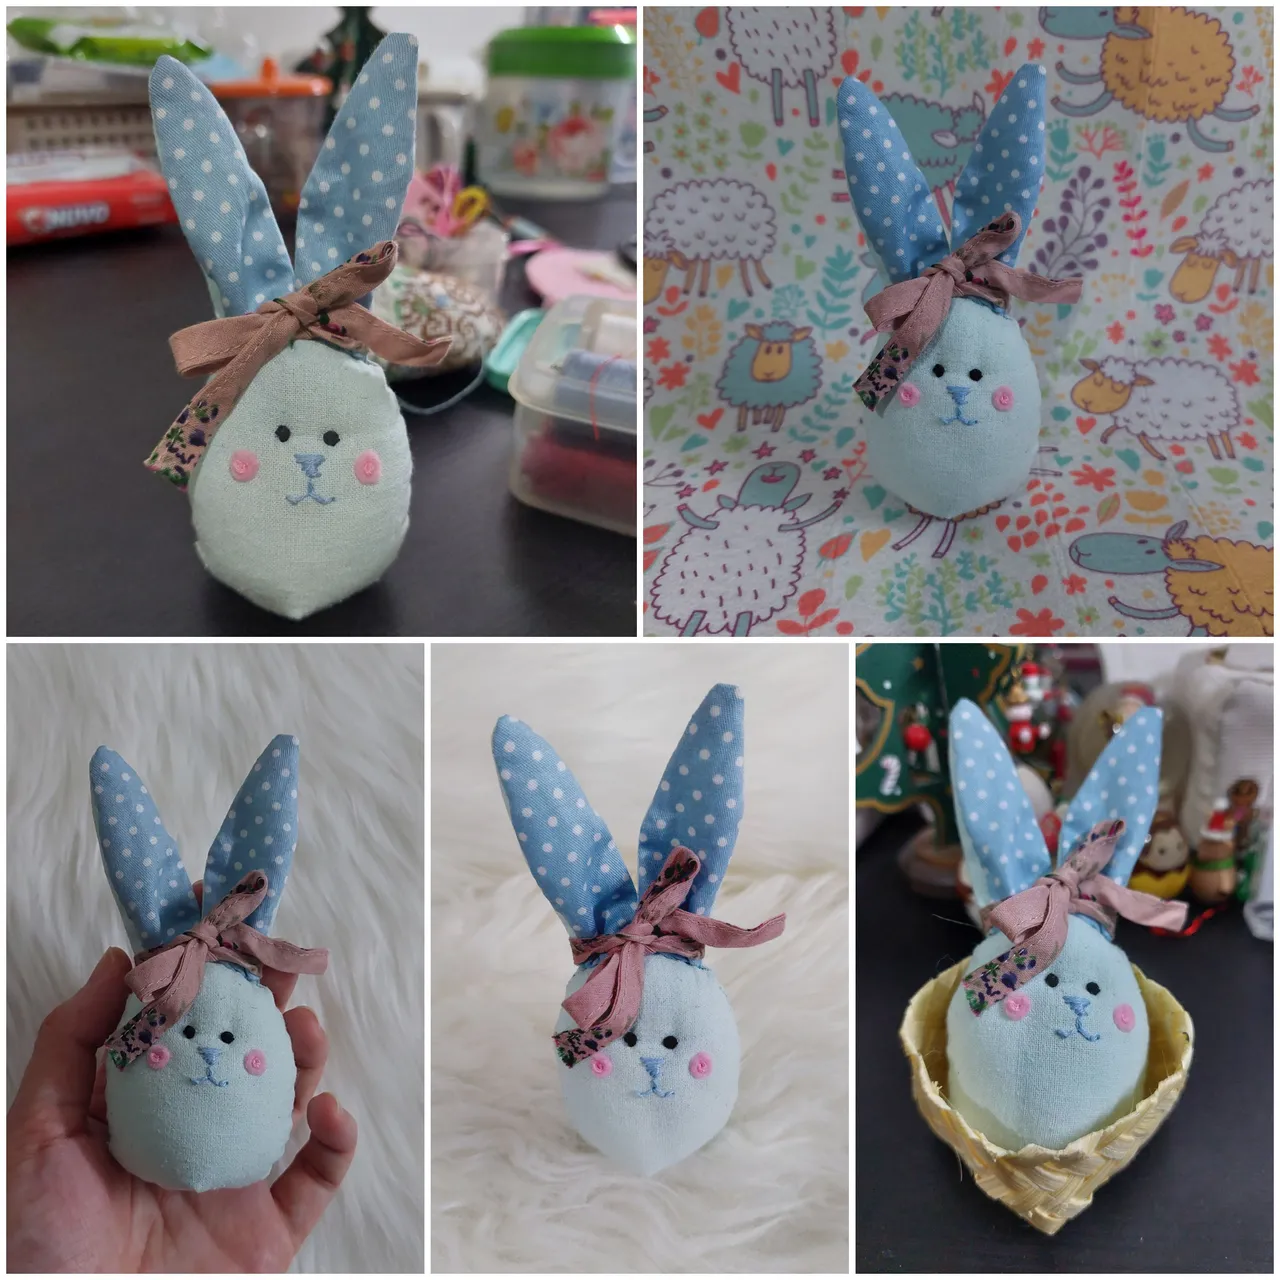
Today i would like to share the project i made up recently, it took a bit more time than my other projects. This was a bit difficult to make for me because the size was only as the size of the real egg, and how to make it was quite not simple. This was my first project to embroider not only on fabric but also with the filling inside. Although difficult to make i think the result was satisfying me :), i finally have my very own easter egg bunny. You could also make one for yourselves too!
Project Time: approximately 7 hours
Difficulty: Quite hard for me
Skills Needed:
- running stitch
- back stitch
- french knot
- invisible ladder stitch
Materials & things needed:
- unused thin cardboard
- marker
- scissors
- soft blue fabric
- sewing needle
- soft blue thread
- pinset
- dacron/micro fiber filling
- baby blue embroidery thread
- blue polkadots fabric
- black embroidery thread
- soft pink felt fabric
- soft pink embroidery thread
- straight pins
- soft cotton ribbon (optional)
How to make it:
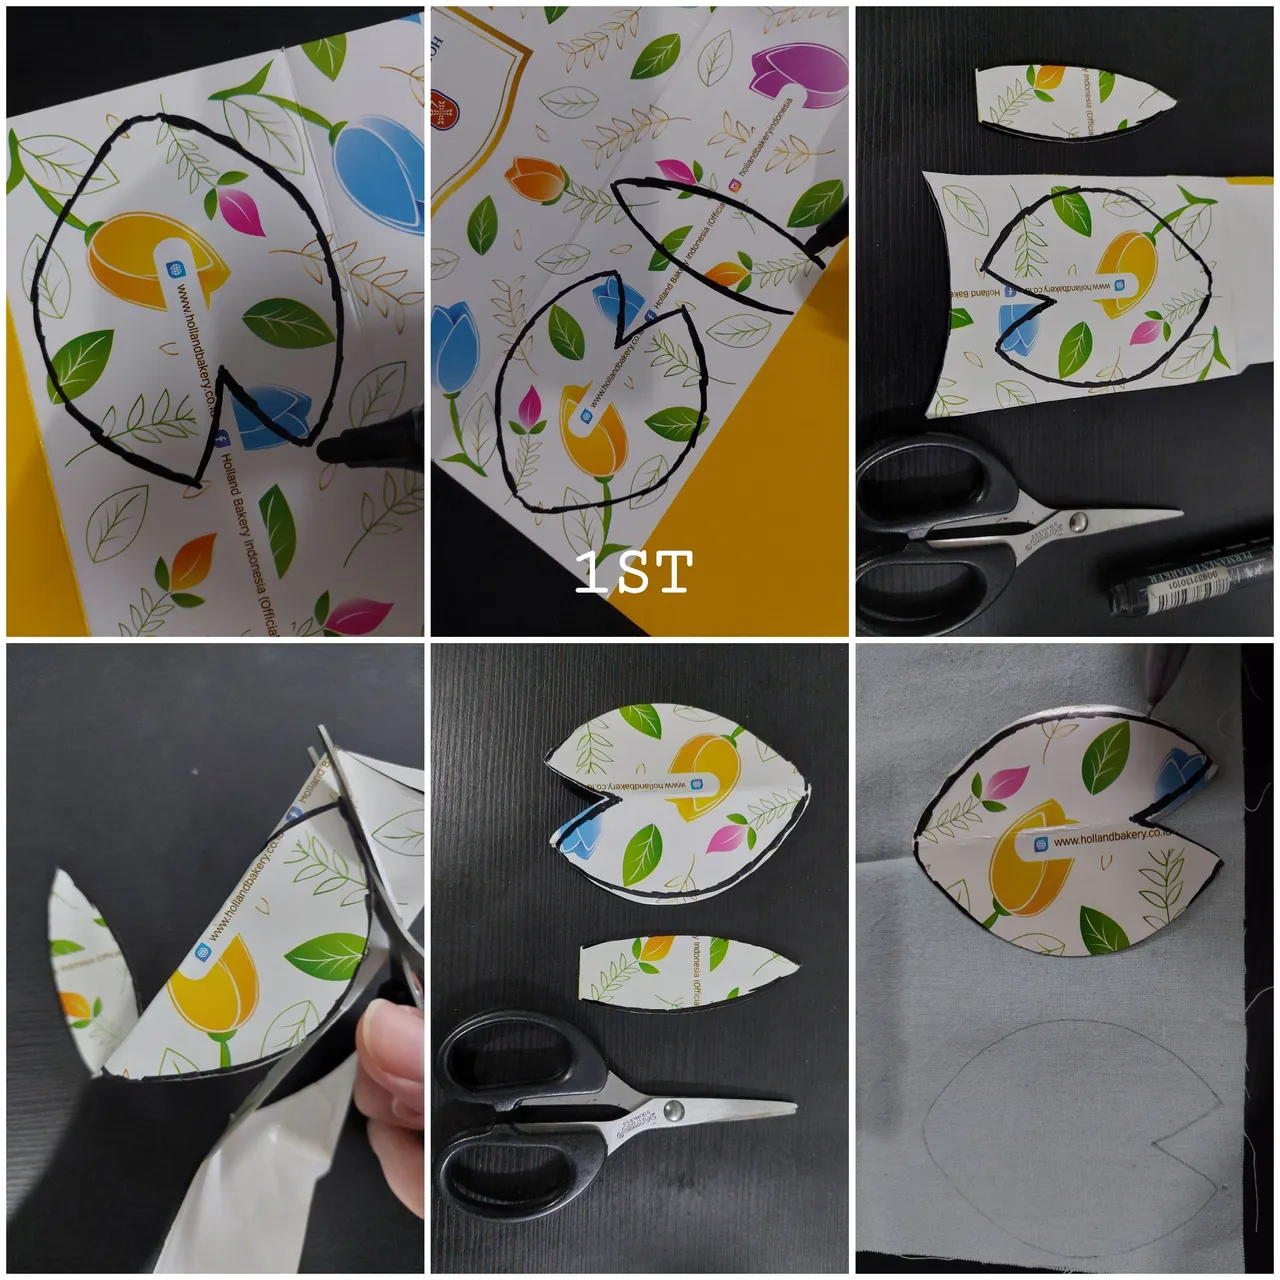
1ST
I drew the egg pattern on the unused cardboard, also i drew the long ear. Then i cut them off. To make sure that the egg would be symmetric, i folded the cardboard in the middle first. I also transferred the pattern of the egg unto the soft blue color fabric. I made two of it.
2ND
Next, i folded my fabric. So the egg would meet the other egg pattern. For the pattern if you pay attention, there's a triangle looked like hollow on its' bottom, it would made the egg looked 3D. Then, i did the running stitch around.
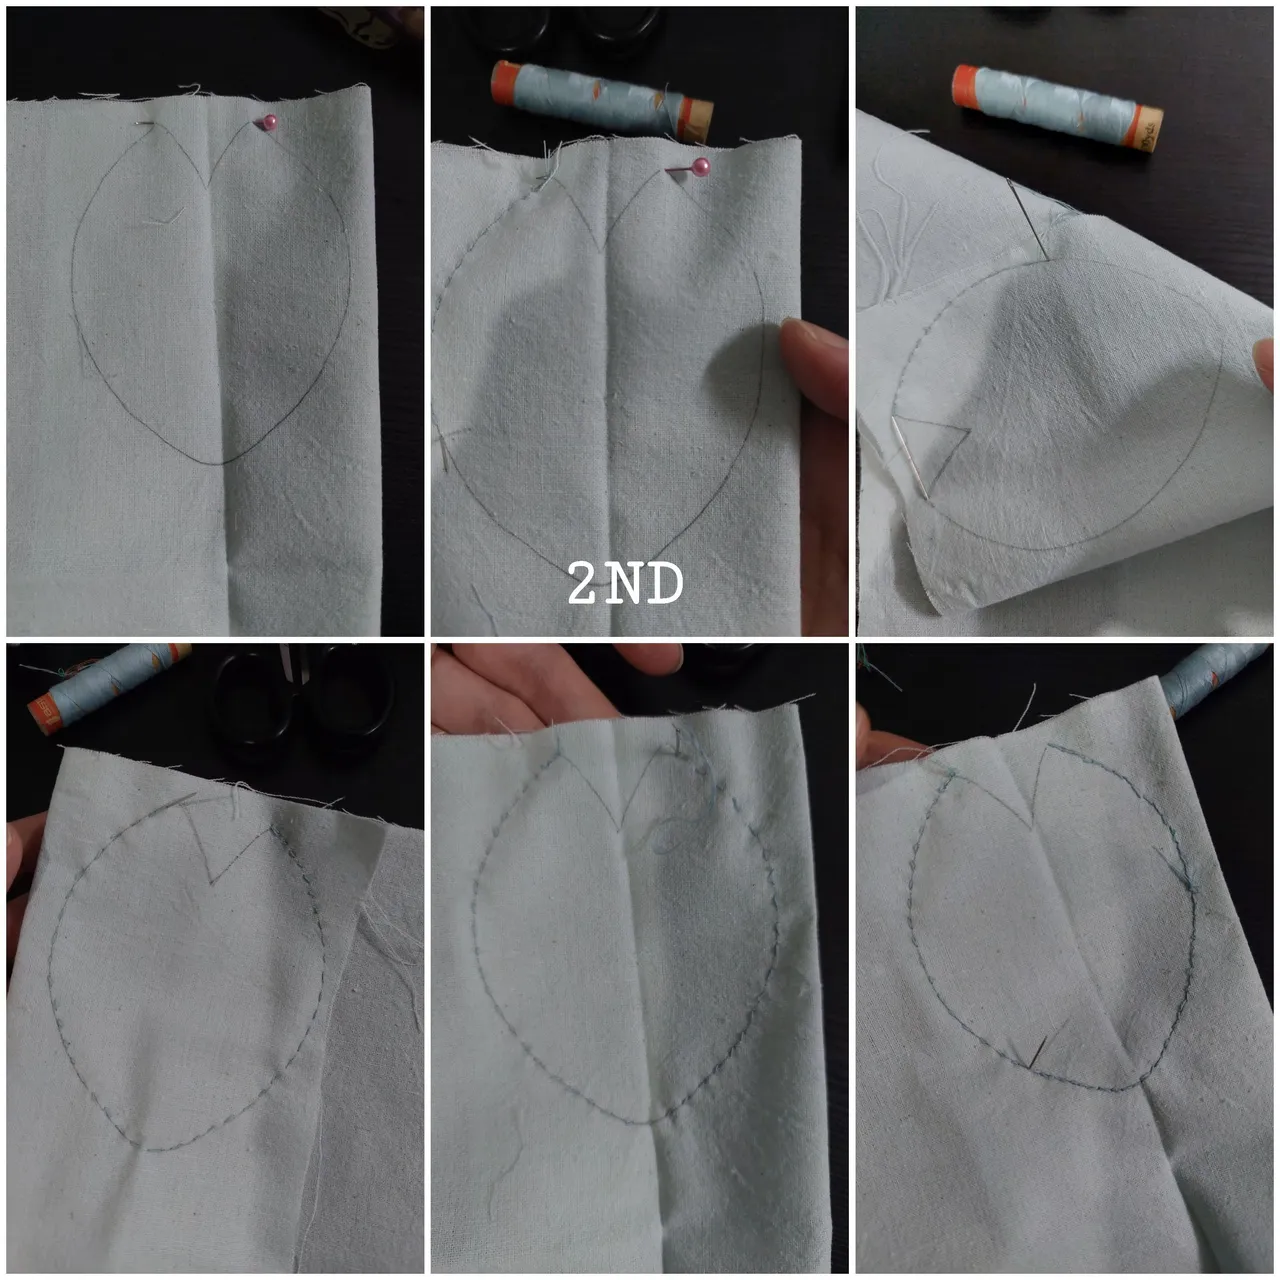
3RD
I did the running stitch one more to close the gap between each stitch. Then i cut the egg off the fabric. I also sew the triangle but i left a bit in the middle to fill the dacron.

4TH
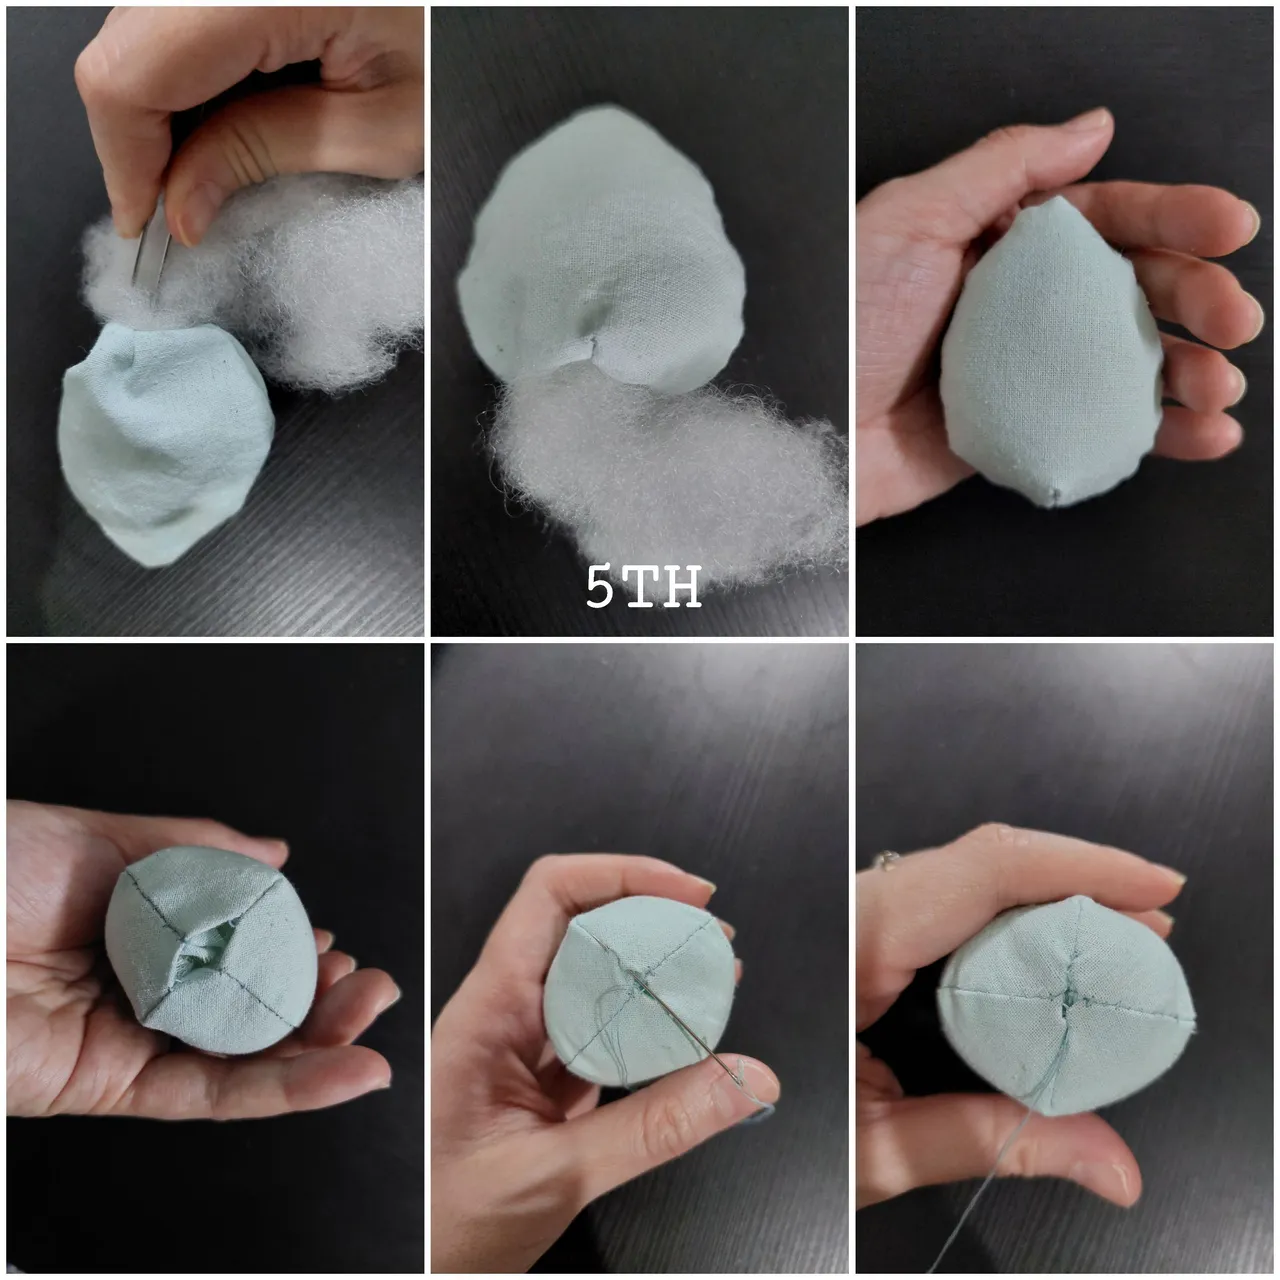
I finished the stitch then i turn outside in. And looked the egg already made up.
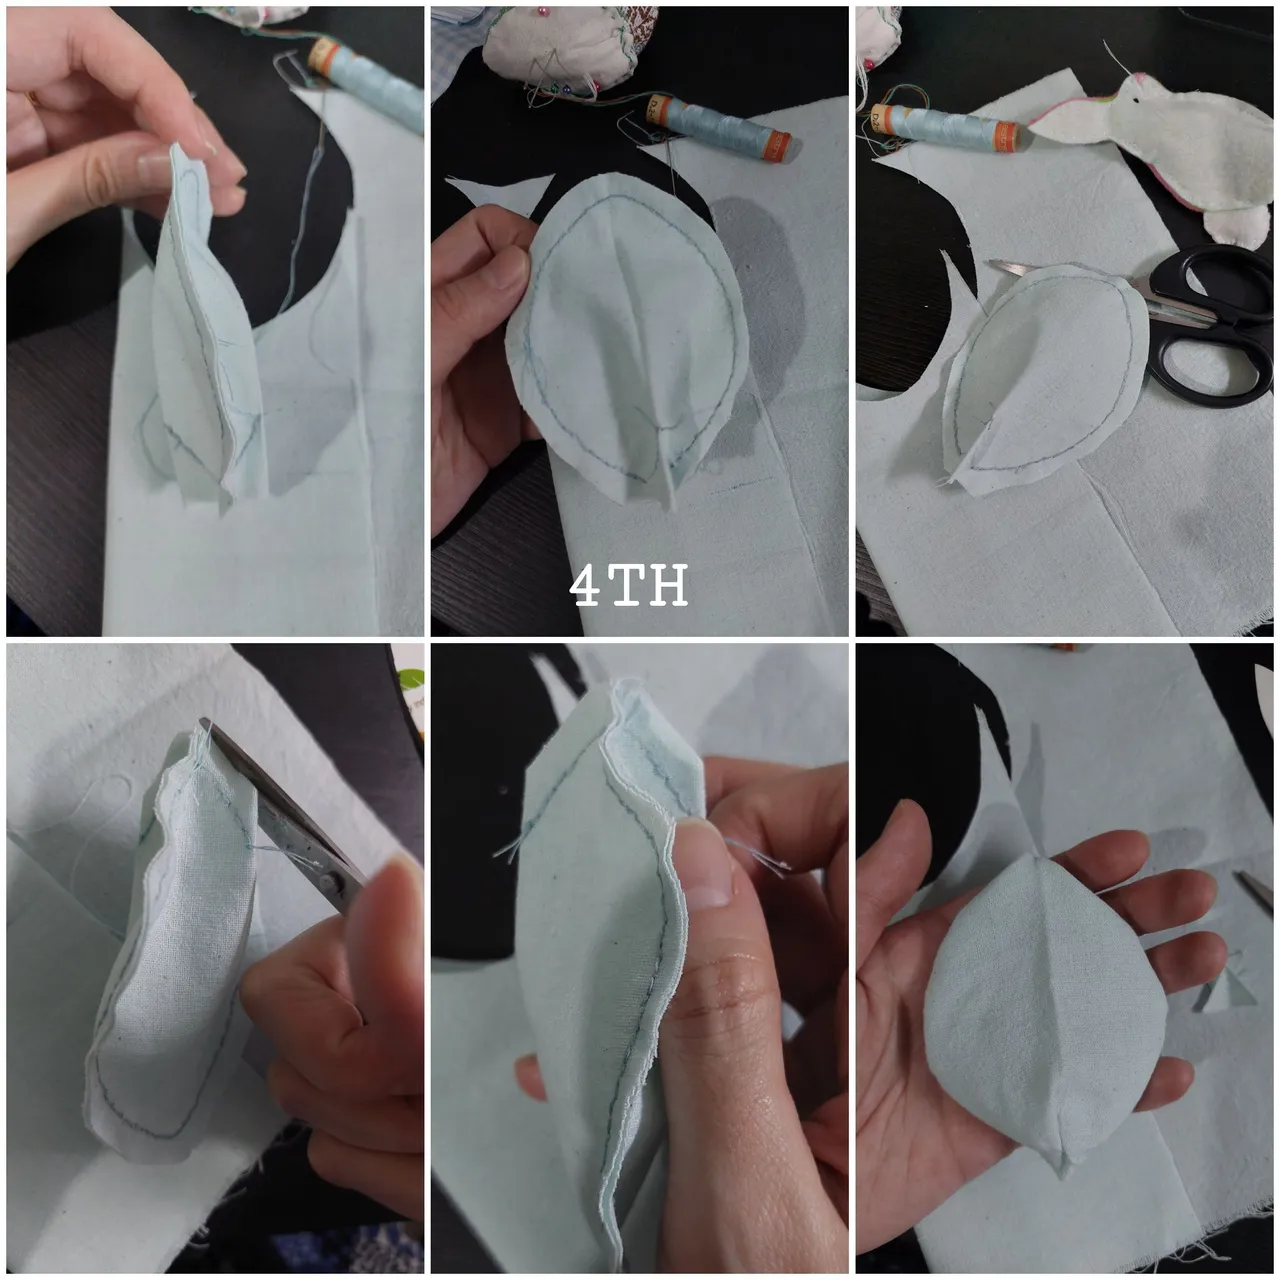
5TH
With the pinset help i put the filling inside the egg. Then i closed the hole with the ladder stitch, after that is finished.
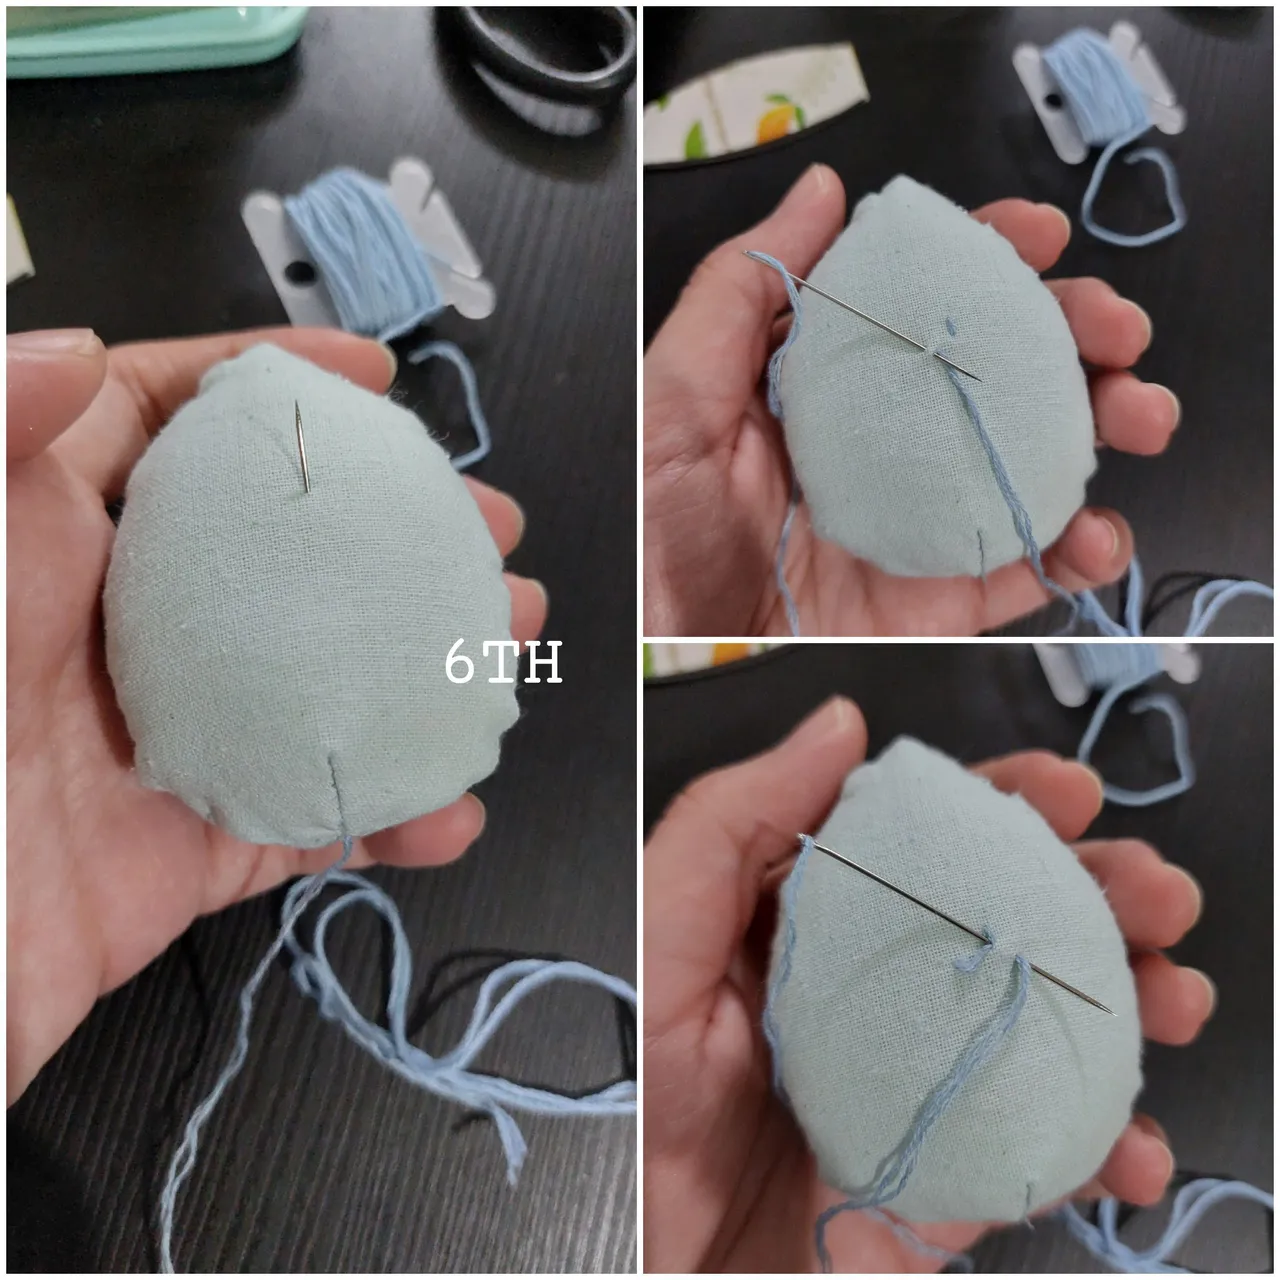
6TH
Then i did the embroidery for the mouth with 4 strands of the baby blue embroidery floss. I did the back stitch for this. The most important thing was i insert the needle from the bottom.
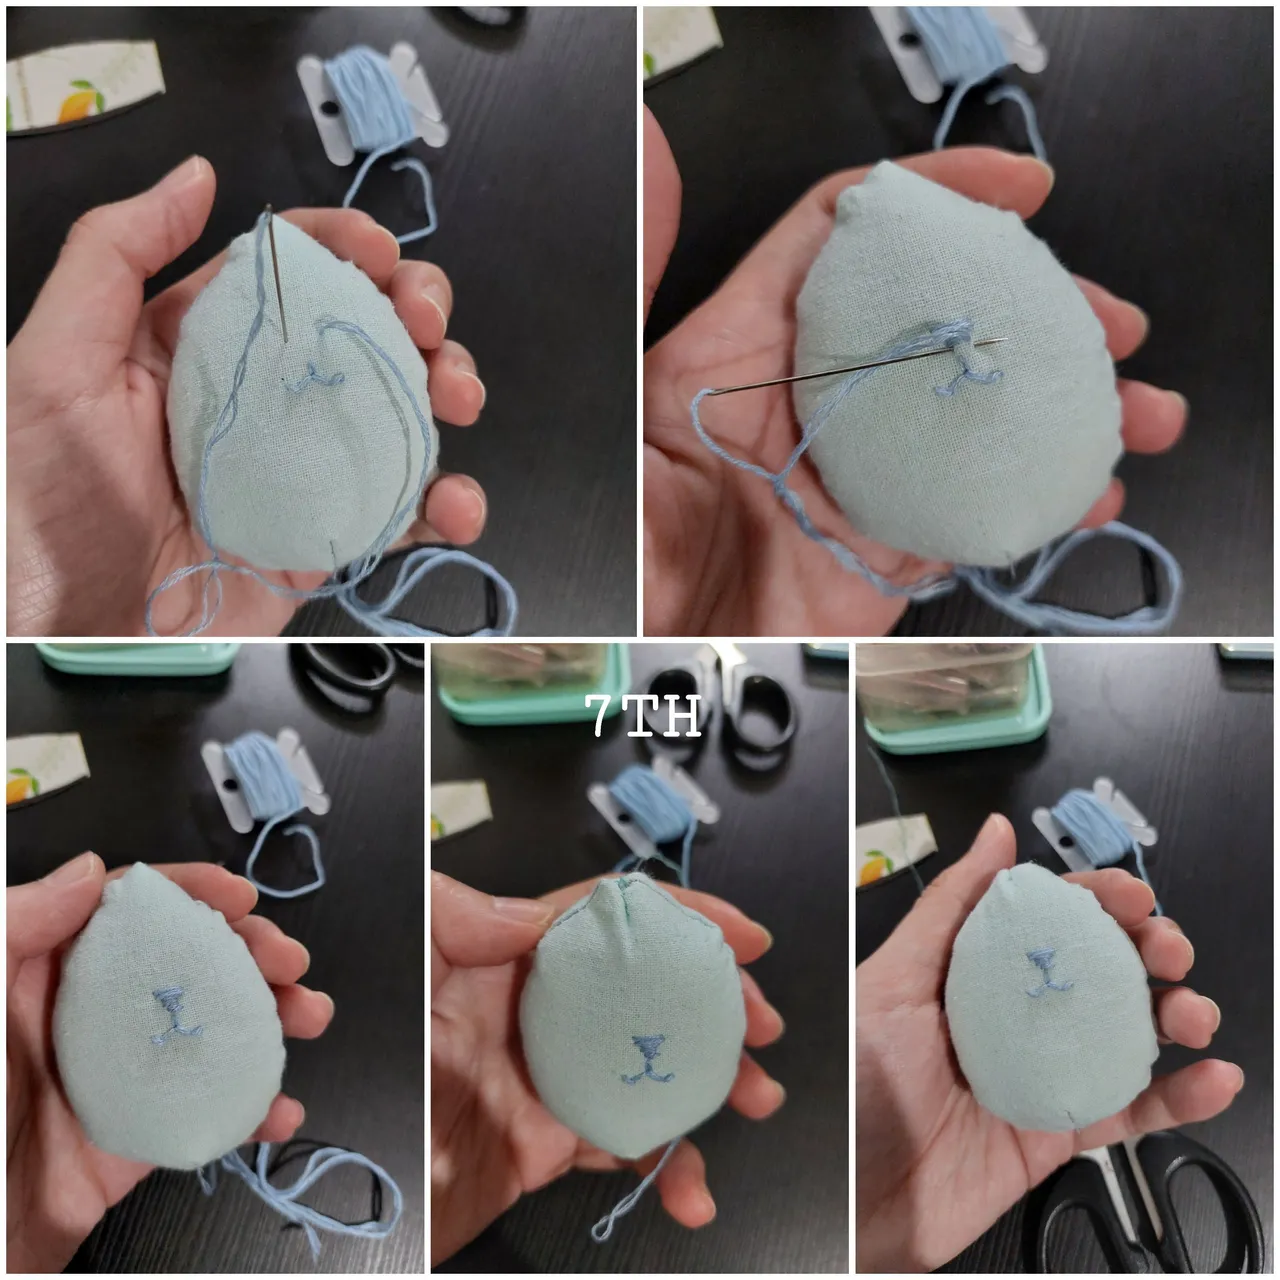
7TH
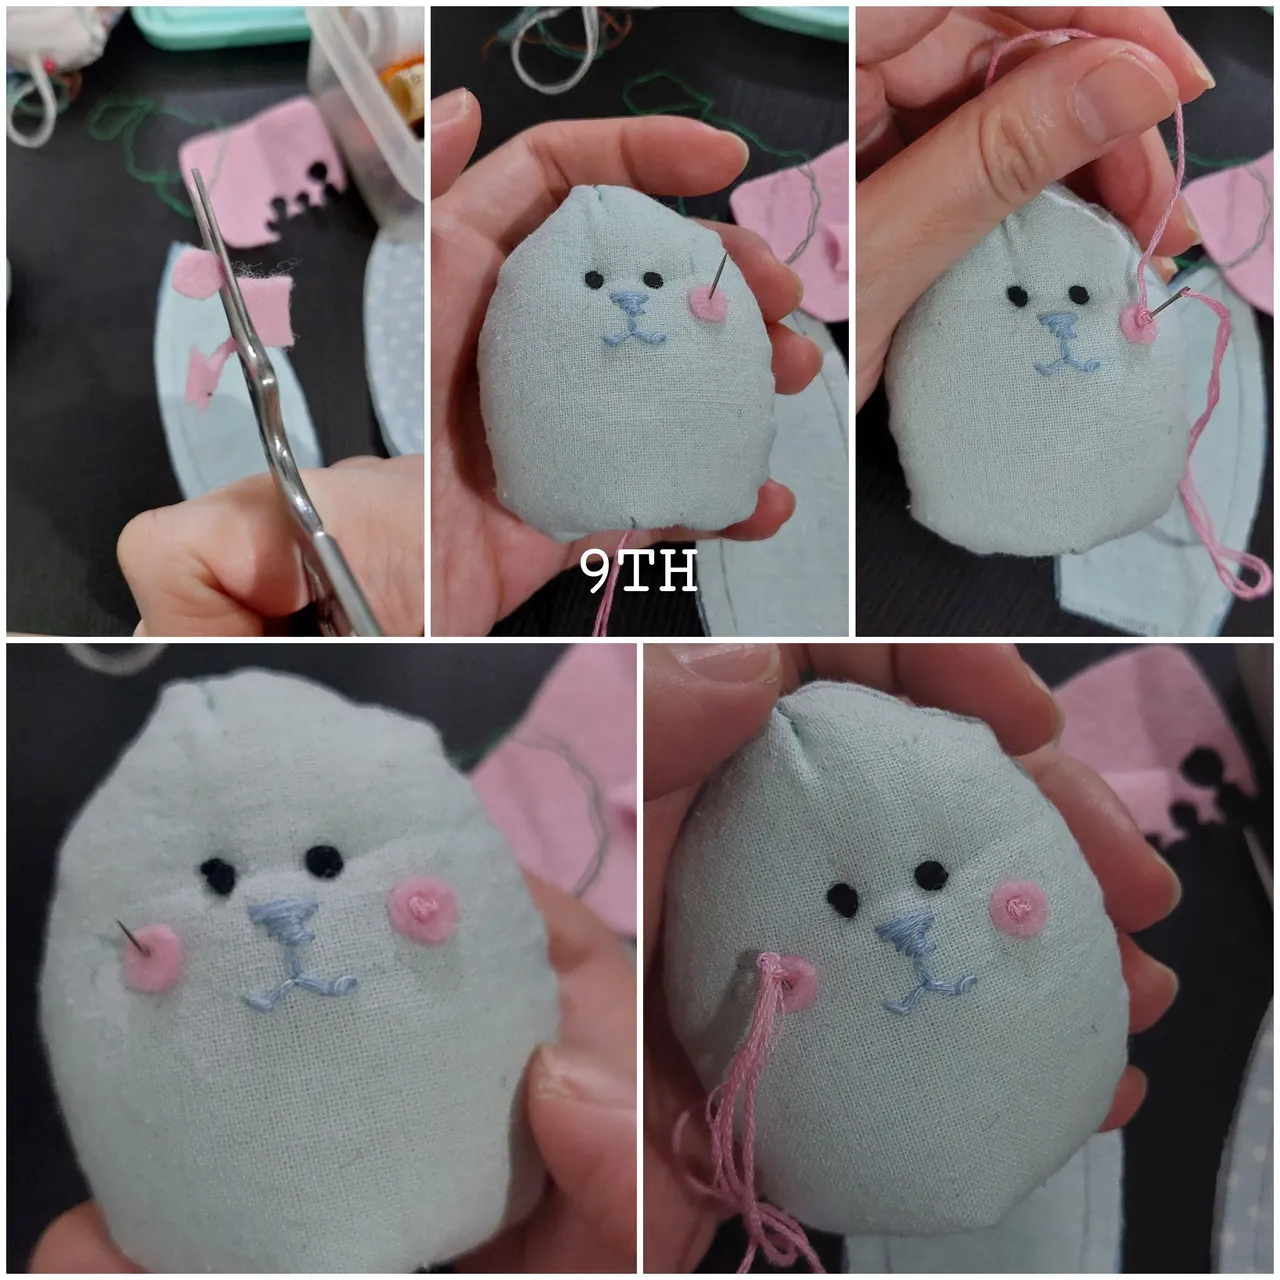
Then i made the nose by doing the left right left right stitch until the triangle nose shaped up.
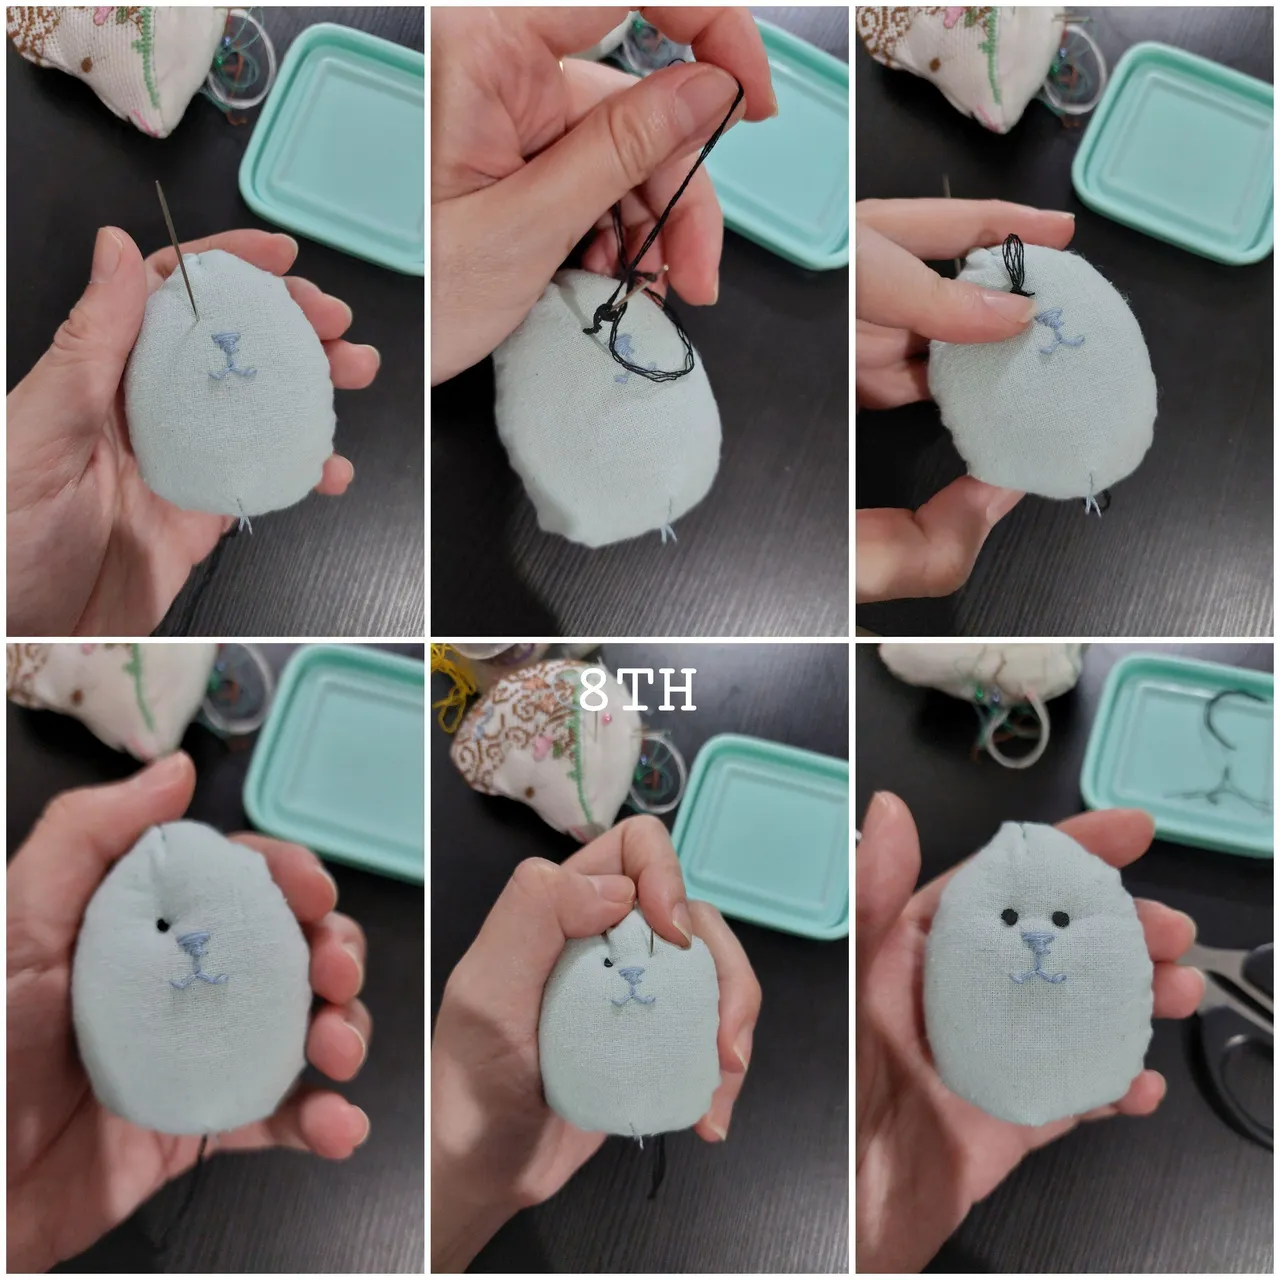
8TH
For the two eyes i used four strands of black embroidery floss, i did the french knots for these eyes. I also started from the bottom for this and also finished it in the bottom.
9TH
For the cheeks i cut the two small circles from the pink felt fabric. I then pasted them on the face with the french knots.
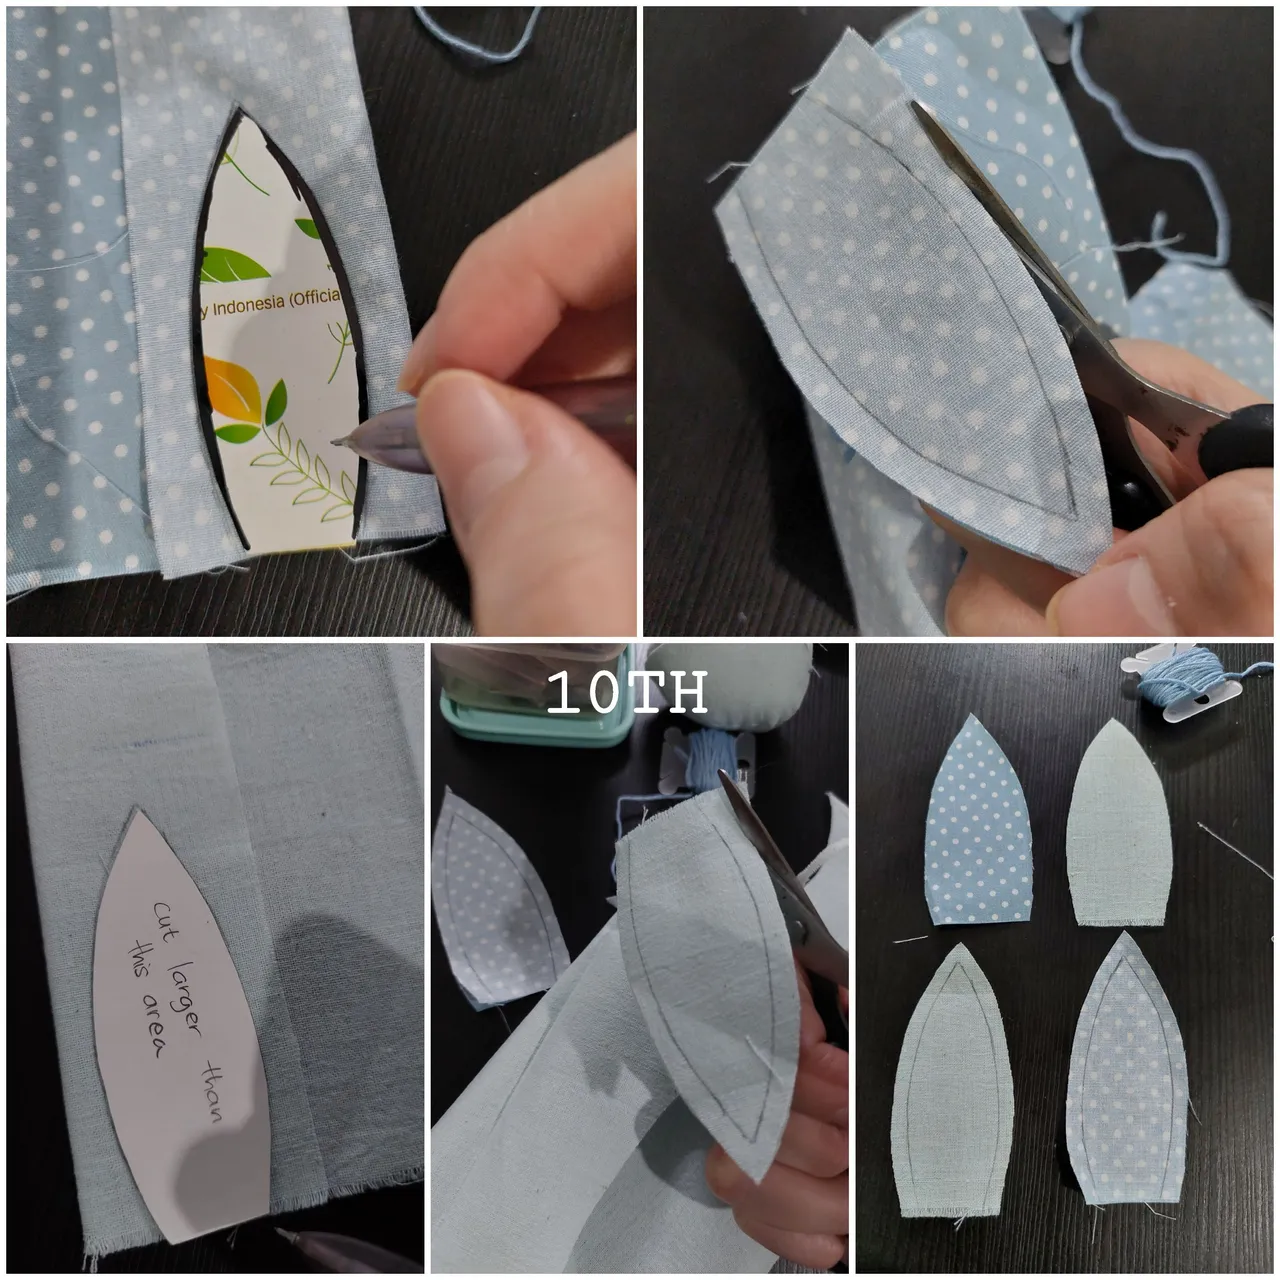
10TH
For the ears, I copied the long ear pattern i made before on the polkadot and soft blue fabric. Also i cut them off, 2 for each fabric. So i had 4 long ears now.
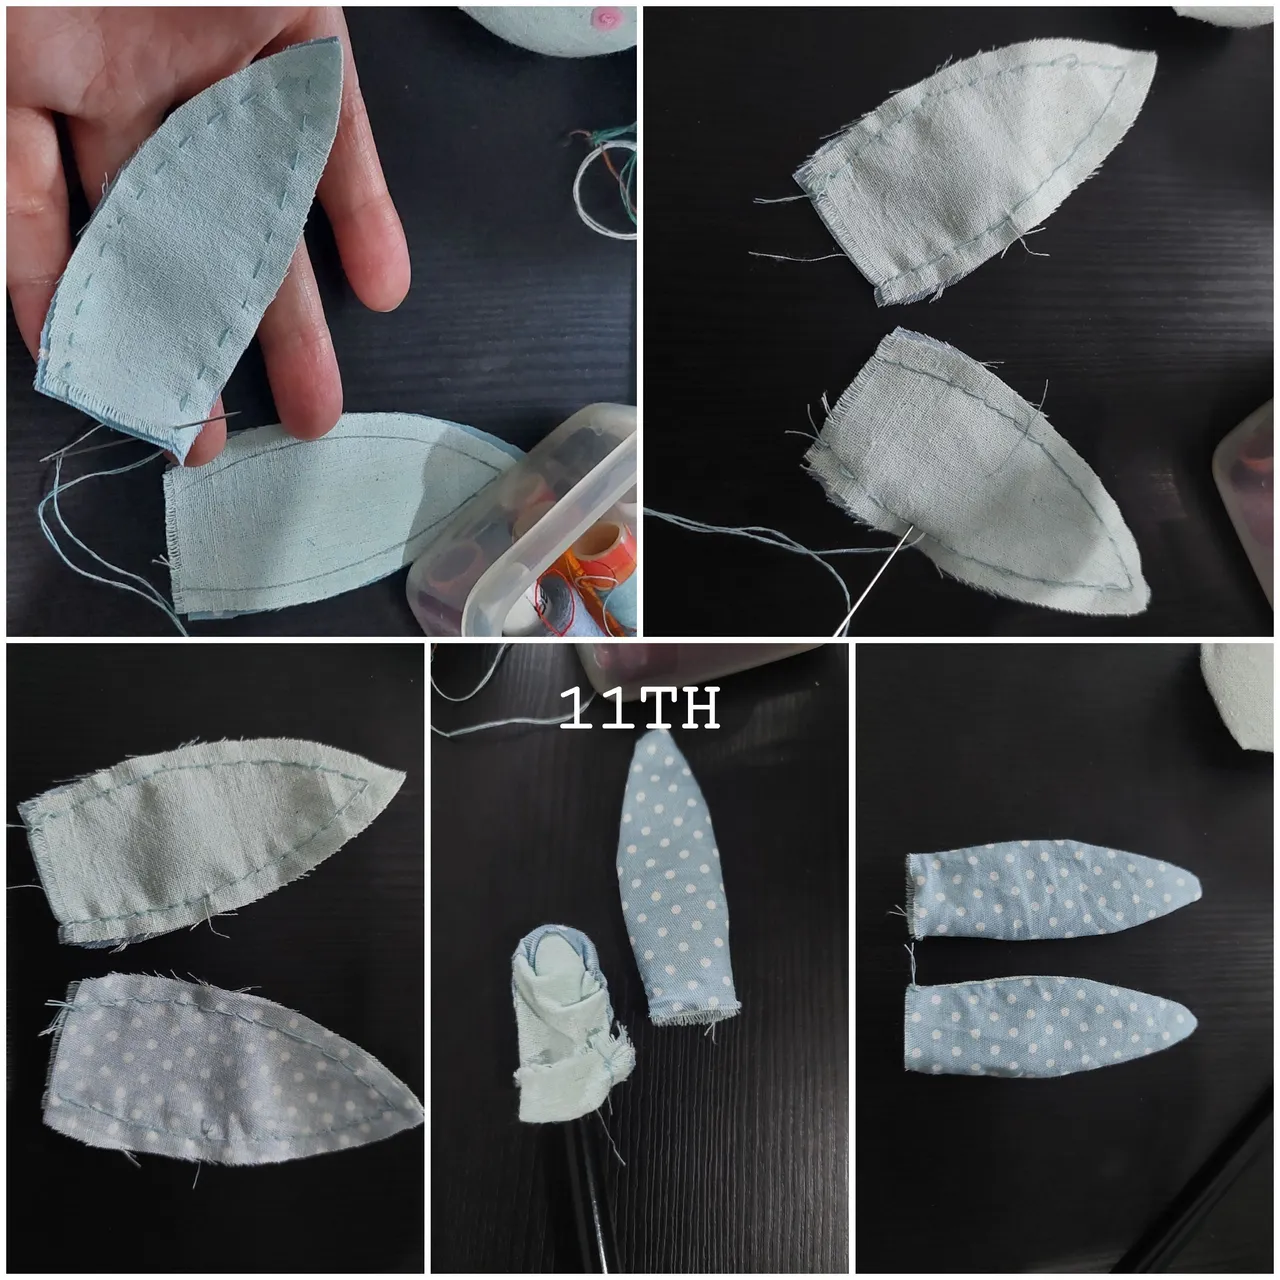
11TH
I then did the running stitch inside, also i did once more to close the gaps between the stitches. I then turned the ears outside in.
12TH
Next i also pinned the two long ears on the egg i made up before. After that, i did the ladder stitches to join them with the egg.
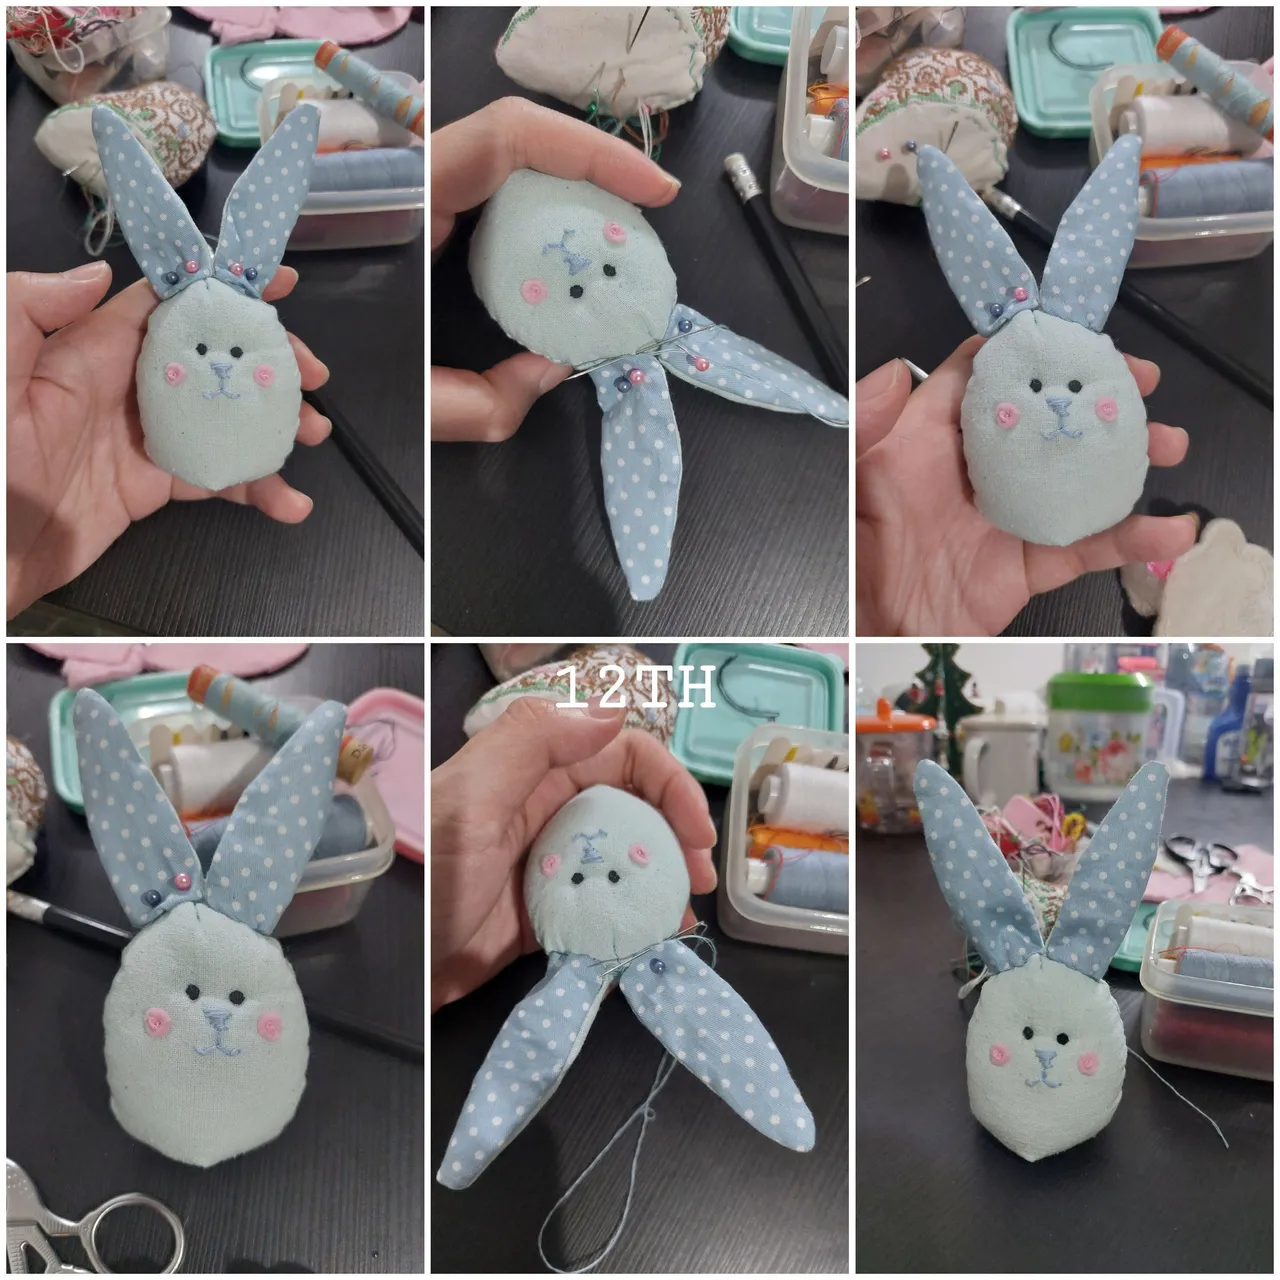
I then made the bow with the pink fabric ribbon i had and voila, my cute easter egg bunny is finished. Now it also i could use as the pin cushion. You could also make one for you too.
Anyway, HAPPY EASTER to all of my hive friends!
Thanks for reading my article, hope you enjoy it and stay tune for more CRAFT things from me!
A bit about the author
She works in a bank but she interests in CRAFT (CRaft, Art, Food and Travel). To pursue her art passion she does the cross stitch, embroidery, handsewing, crafts, crochet and also draws. Find hers in https://www.redbubble.com/people/de-creartique/shop?asc=u and https://decreartique.threadless.com/designs . Also find her cute collectibles pixel cat pictures here https://opensea.io/collection/pixelcryptocat .