
Hola amigos, sean todos bienvenidos a mi publicación.
Me complace estar aquí con ustedes en esta nueva comunidad y poder compartir mi primera publicación de manualidades.
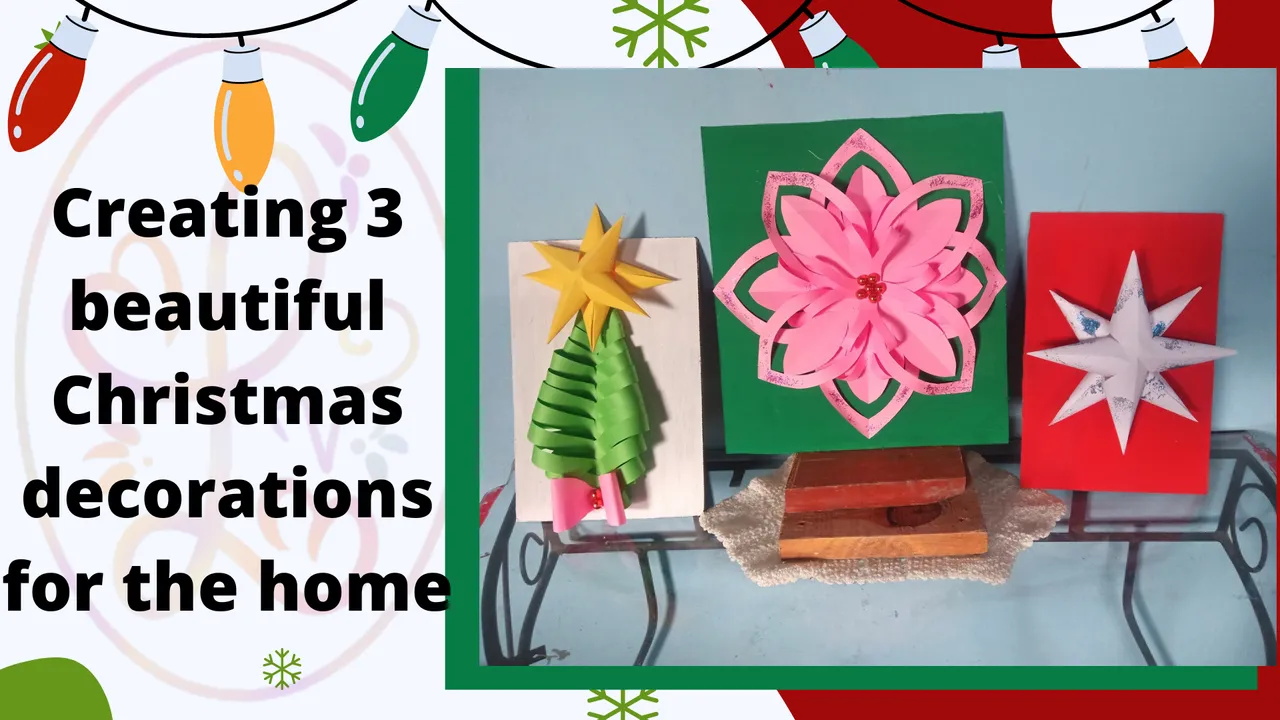
Hoy te presentó mi participación al concurso que se está llevando a cabo en estos momentos, mi entrada será una simple pero hermosa decoración para nuestros hogares, más aún cuando estamos en estas épocas del año, podremos realizarlas con pocos materiales, es fácil de hacer y que lo podremos colocar en cualquier parte de nuestro hogar.
Pero no solo te he traído una sola manualidad, sino 3, las cuales están hechas de diferentes formas y que le dará un hermoso brillo a tu hogar.
Las fotografías que verán a continuación, fueron tomadas con mi teléfono modelo Alcatel_5044R.

Hello friends, welcome everyone to my publication.
I am pleased to be here with you in this new community and to be able to share my first craft post in this community.
Today I present you my participation to the contest that is taking place right now, my entry will be a simple but beautiful decoration for our homes, even more when we are in these times of the year, we can make them with few materials, it is easy to do and we can place it anywhere in our home.
But I have not only brought you a single craft, but 3, which are made in different ways and that will give a beautiful glow to your home.
The pictures you will see below, were taken with my phone model Alcatel_5044R.

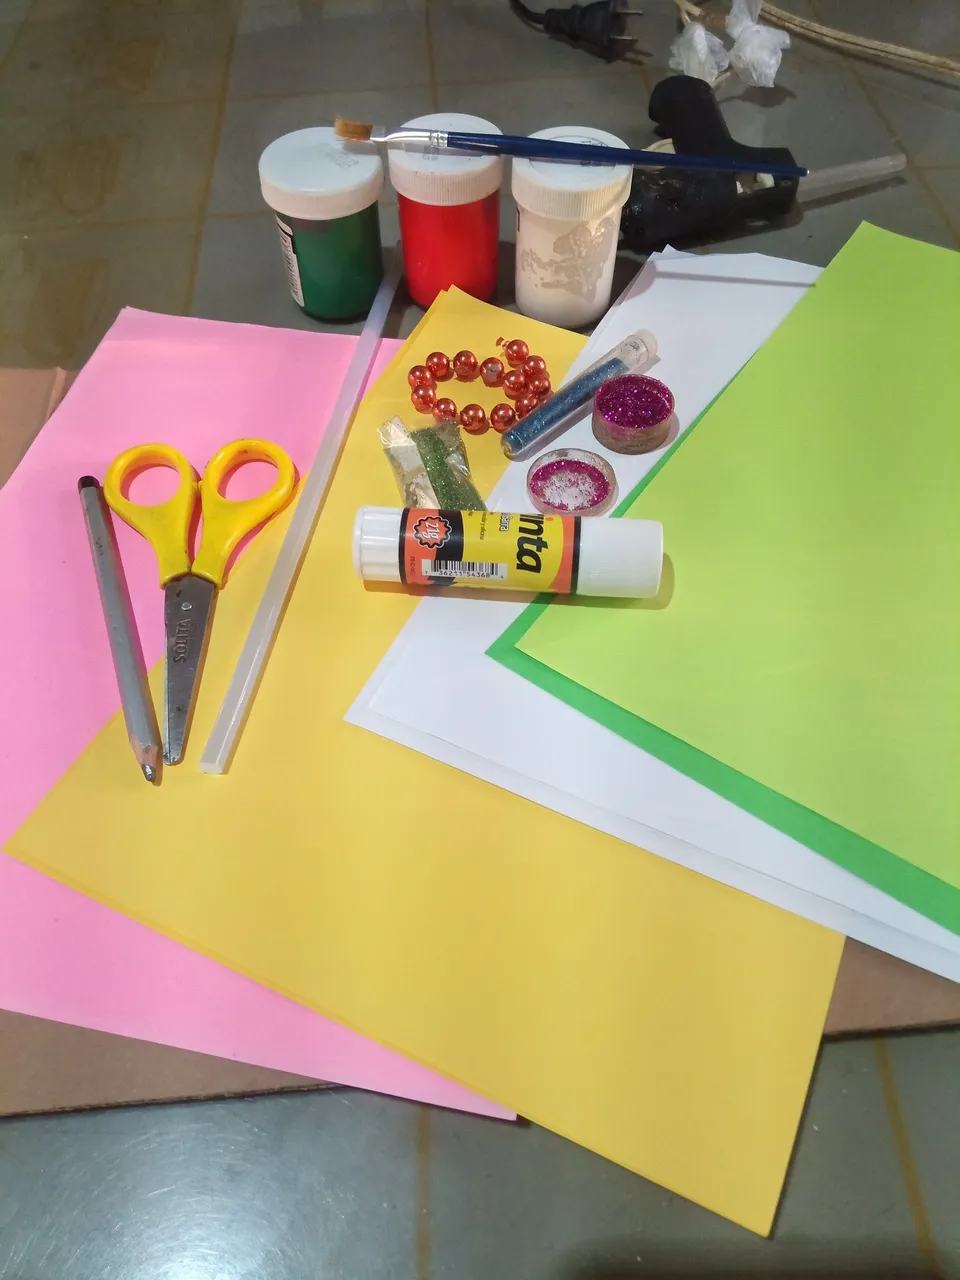
Los materiales son los siguientes:
Carton.
Hojas de colores como: Verde manzana, verde oscuro, amarillo, blanco y rosado.
Lapiz para marcar zonas donde debamos recortar.
Tijera.
Barra de silicona.
Pistola de silicona.
Perlas de plastico de color cobre.
Escarcha.
Pinturas al frio como: Rojo, verde oscuro y blanco.
Pegamento de barra.
Cutter.
Pinceles.
The materials are as follows:
Sheets of colors such as: apple green, dark green, yellow, white and pink.
Pencil to mark areas to be cut out.
Scissors.
Silicone stick.
Silicone gun.
Copper-colored plastic beads.
Frost.
Cold paints such as: red, dark green and white.
Glue stick.
Cutter.
Brushes.
 |  |  |
|---|---|---|
| Paso /Step 1 | Paso/Step 2 | Paso/Step 3 |
Como punto de partida, decidí crear el soporte donde irán adheridas cada una de las formas navideñas que are más adelante.
Quise hacer esto de primero porque tendría que dejarlos secar, mientras pasa ese proceso de secado pudiera hacer el resto de las decoraciones que mencionaré.
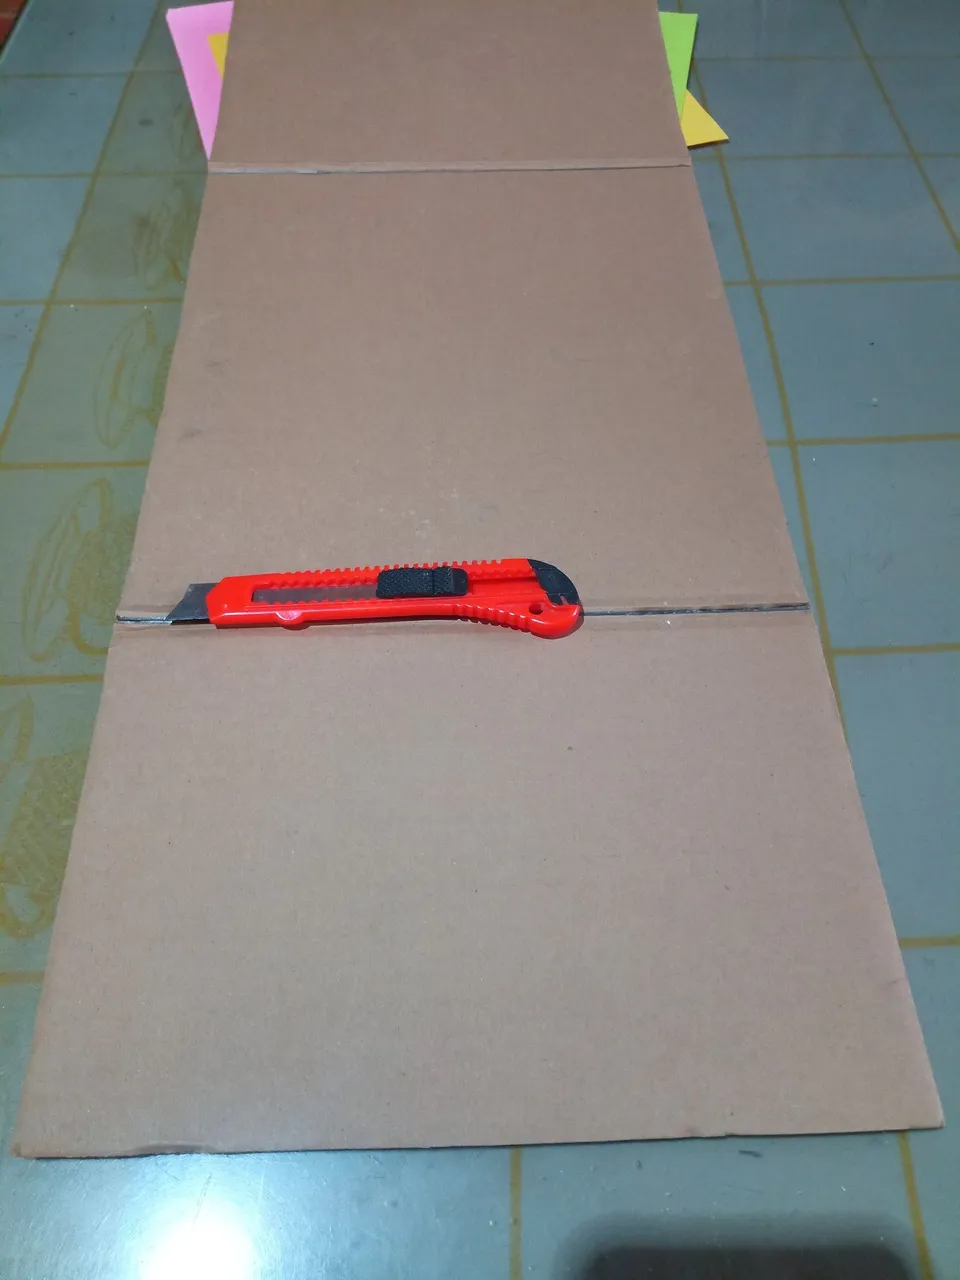
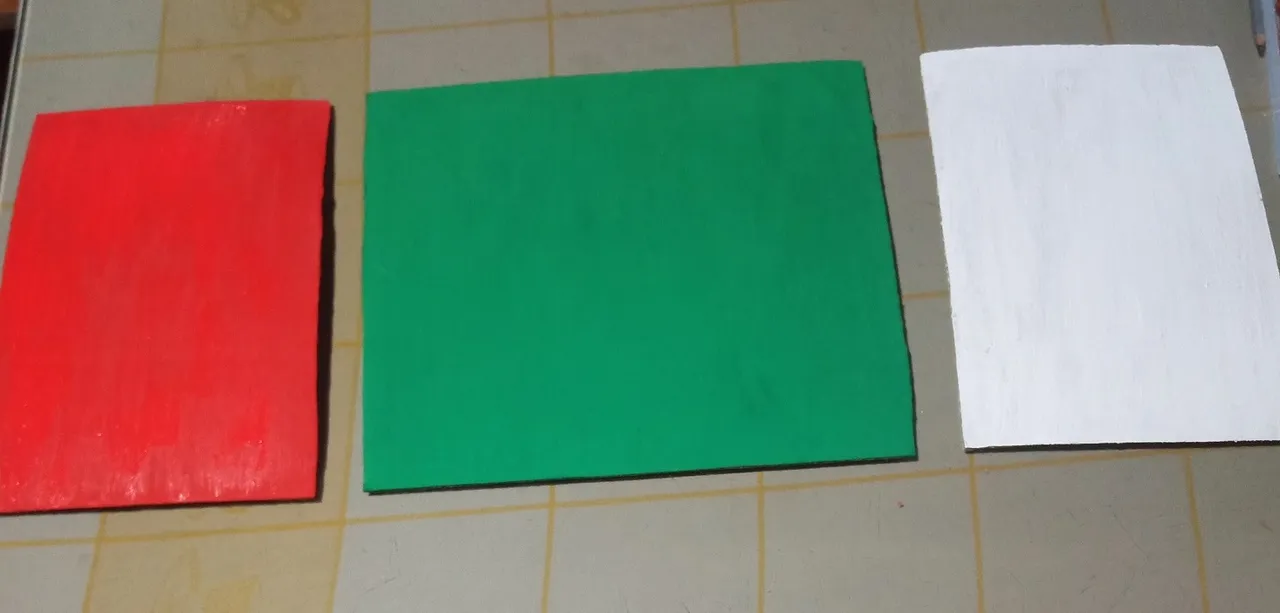
Con la ayuda de un Cutter, tome un largo pedazo de cartón de una vieja caja que tenía almacenada en mi estante de manualidades, dicha caja comencé a recortarla en tres partes, dos de 18 centímetros de ancho con 32 centímetros de largo, después de haber picado estas dos partes me sobro una de 28 centímetros de ancho por la misma altura anteriormente mencionado.
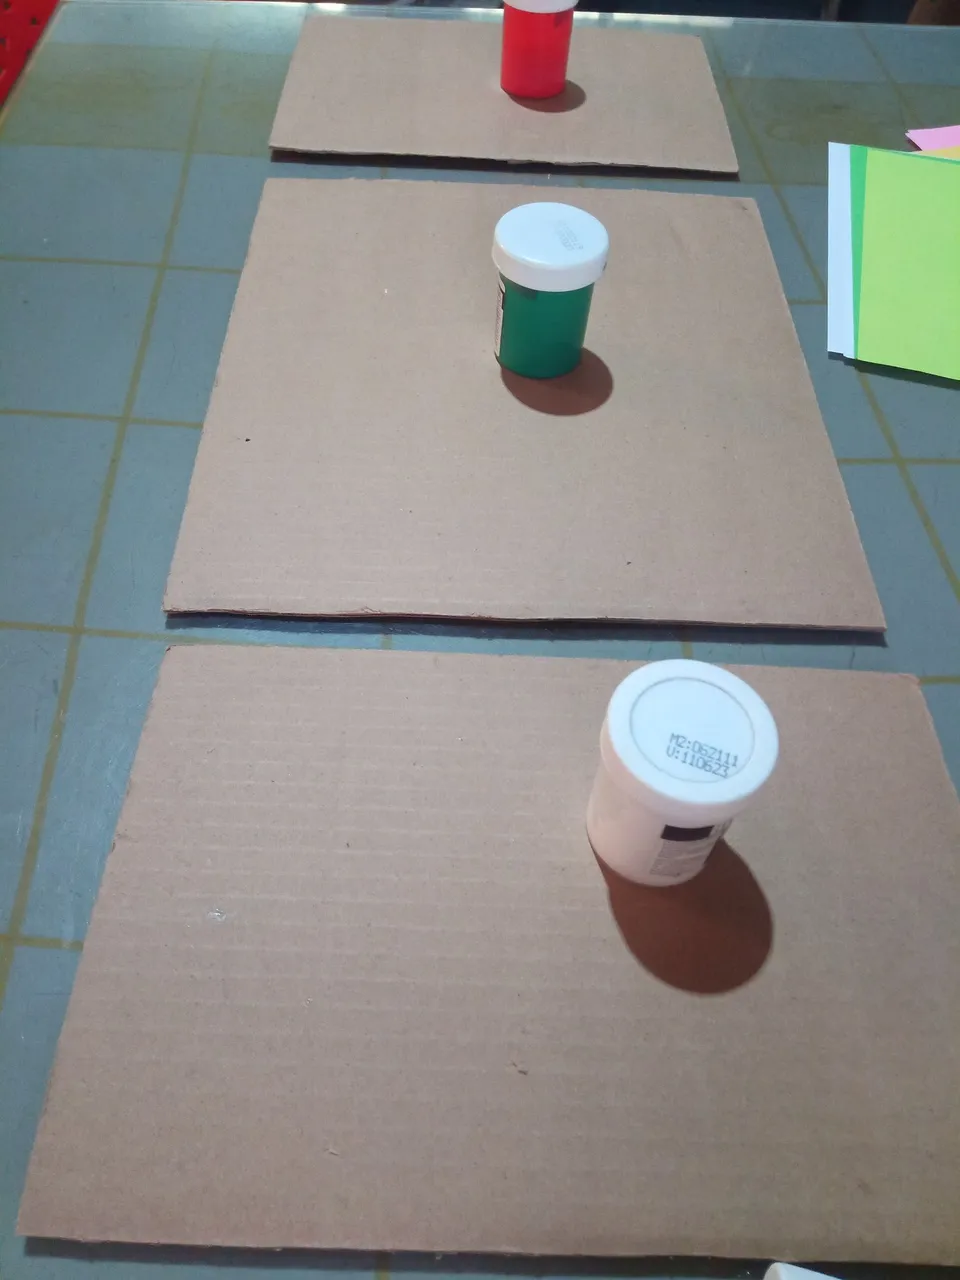
Luego, con la ayuda de las pinturas al frío, comencé a pintar cada una de ellas con los colores rojo, verde y blanco.
As a starting point, I decided to create the support where each of the Christmas shapes that I will be making later on will be adhered.
I wanted to do this first because I would have to let them dry, so while that drying process was going on I could do the rest of the decorations I will mention.
With the help of a cutter, I took a long piece of cardboard from an old box that I had stored in my craft shelf, I started to cut it in three parts, two of 18 centimeters wide and 32 centimeters long, after cutting these two parts I had left one of 28 centimeters wide by the same height previously mentioned.
Then, with the help of cold paints, I began to paint each one of them with the colors red, green and white.
 |  |  |
|---|---|---|
| Paso /Step 1 | Paso/Step 2 | Paso/Step 3 |
 |  |  |
|---|---|---|
| Paso /Step 4 | Paso/Step 5 | Paso/Step 6 |
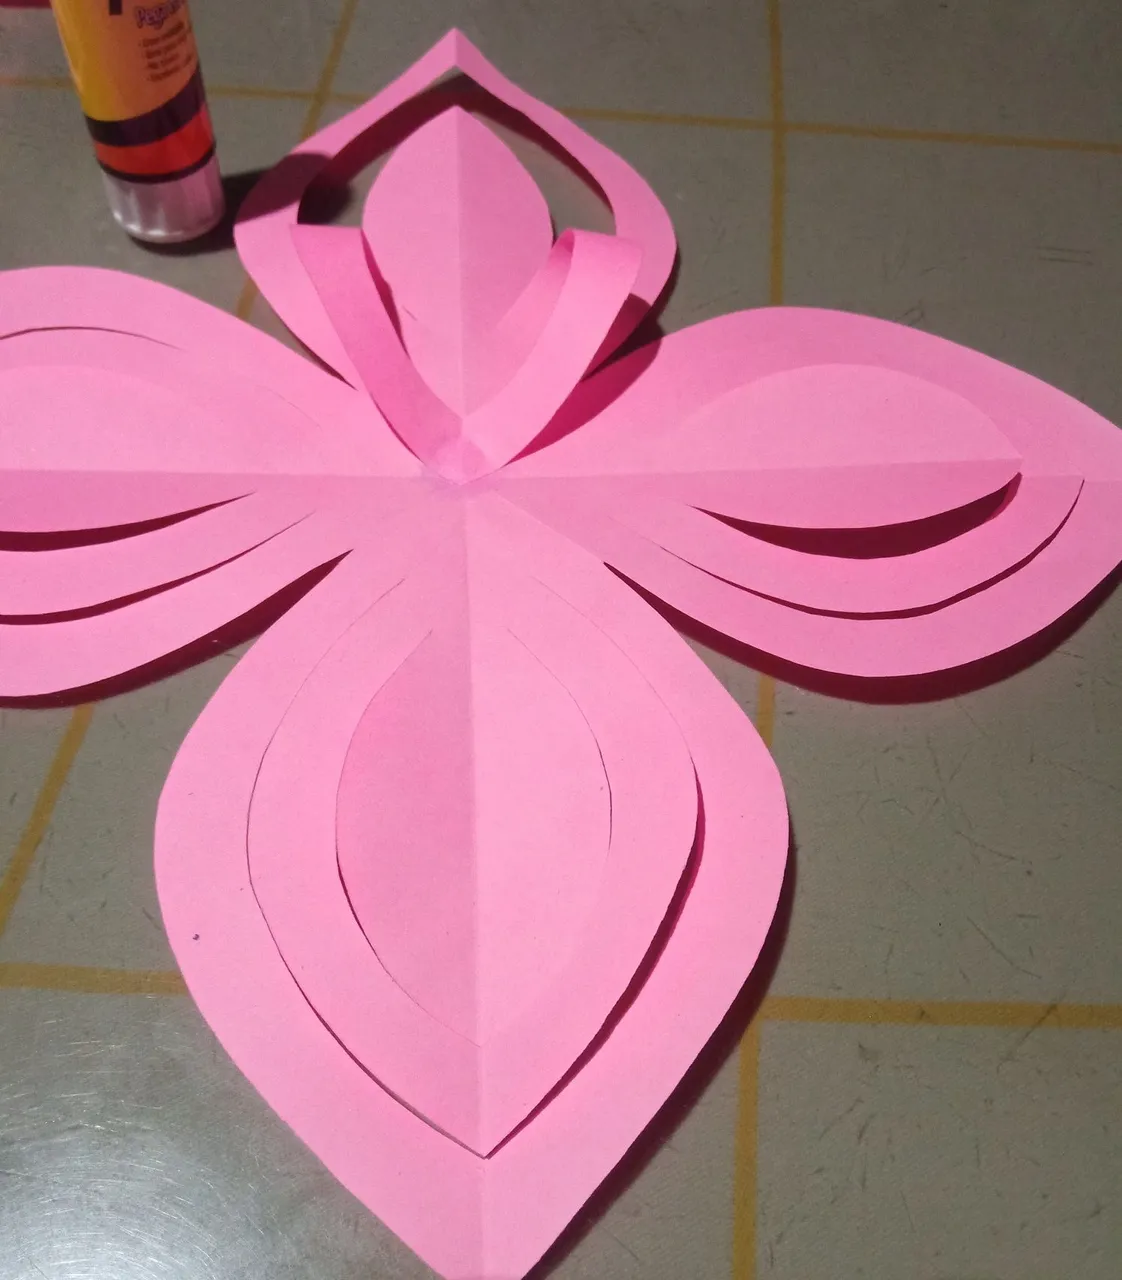
Una vez terminado de pintar las bases de las decoraciones, las deje secar, en el proceso comenzaré a realizar una flor navideña con una hoja de color rosado.
Este proceso lo hice un poco delicado, se debe a que un solo error pudiera recortar mal una parte de esta flor o se me arrugaría la hoja.
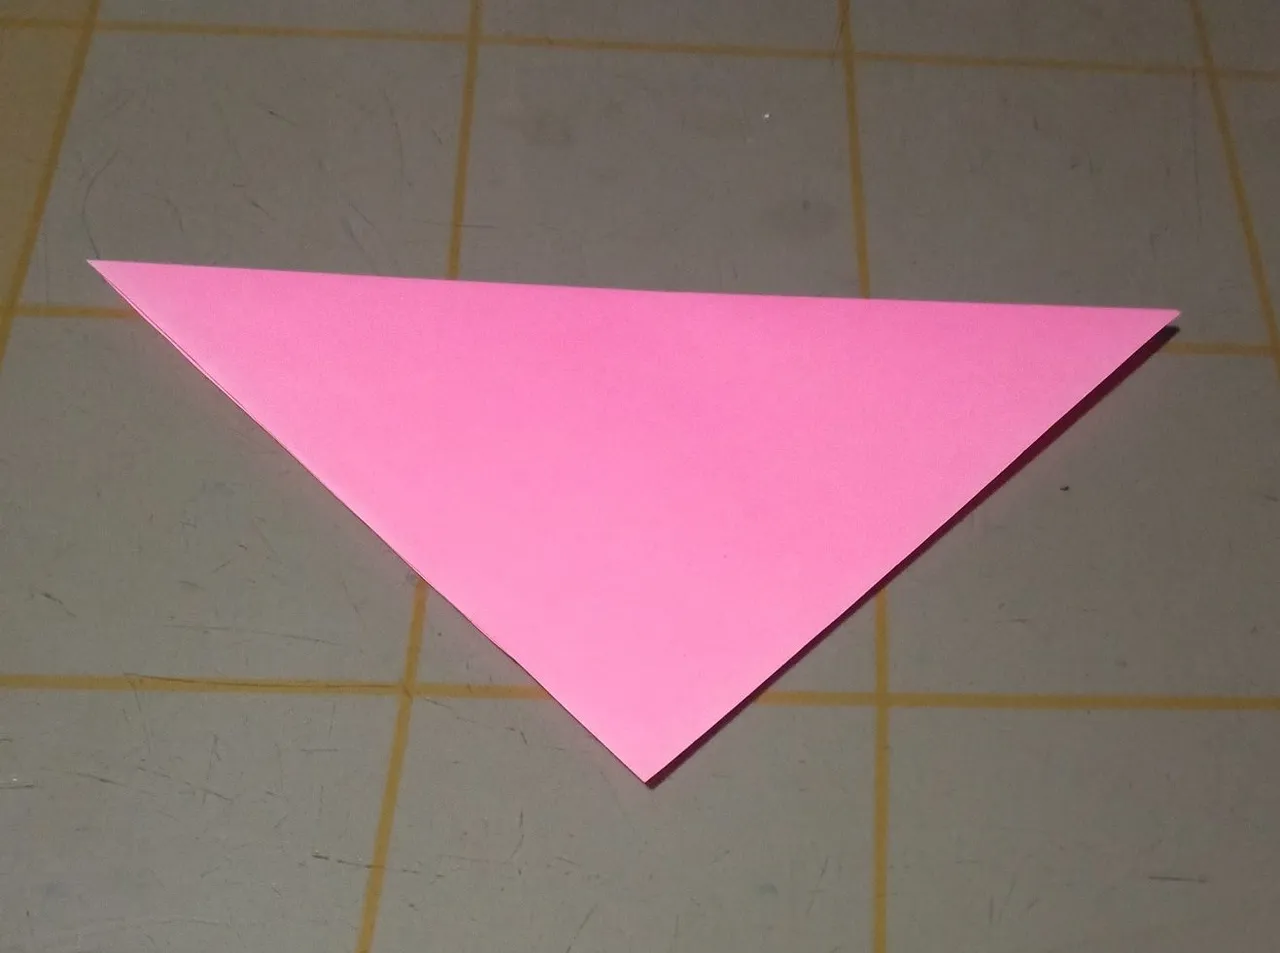
Tome la hoja y la doble haciendo una figura geométrica, en este caso es el triángulo, después volví a doblarlo nuevamente.
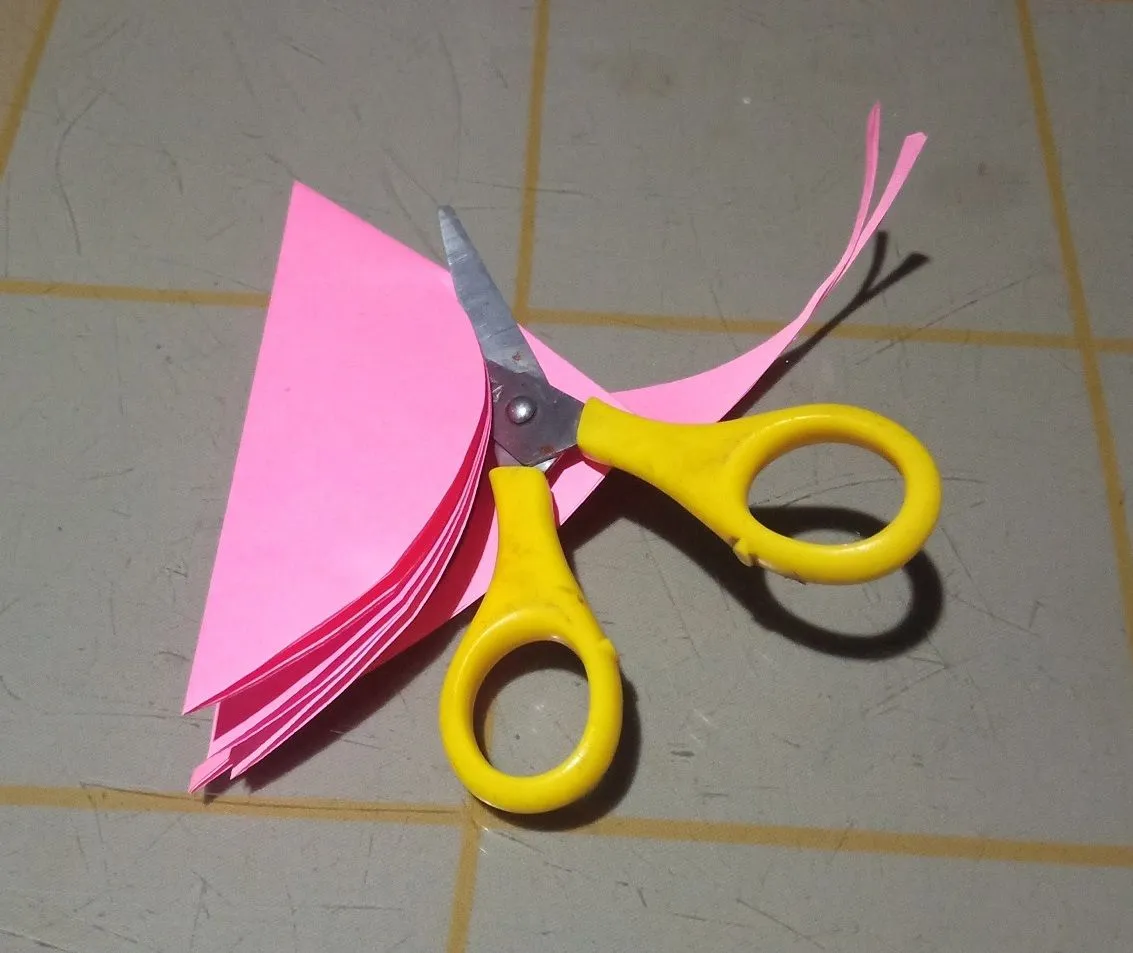
Al tenerlo todo doblado usé una tijera para recortar la punta del triángulo, dándole la forma de media luna.
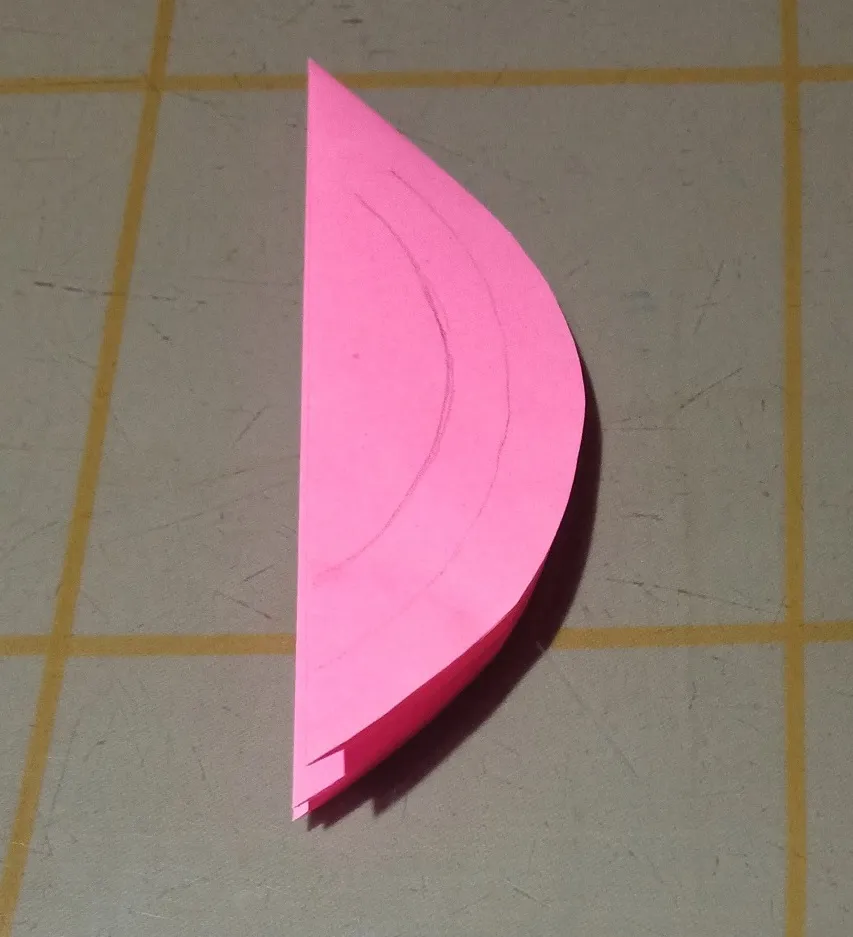
Luego repetí el mismo procedo en la parte central de la hoja, solo que esta vez el recorte no será hasta el final del mismo, sino que deje una pequeña parte sin recortar y procedí hacer otra línea de corte un poco más abajo.
Al abrirlo podremos notar que tiene la forma de una flor, así que hice otra realizando los mismos pasos anteriormente mencionados.
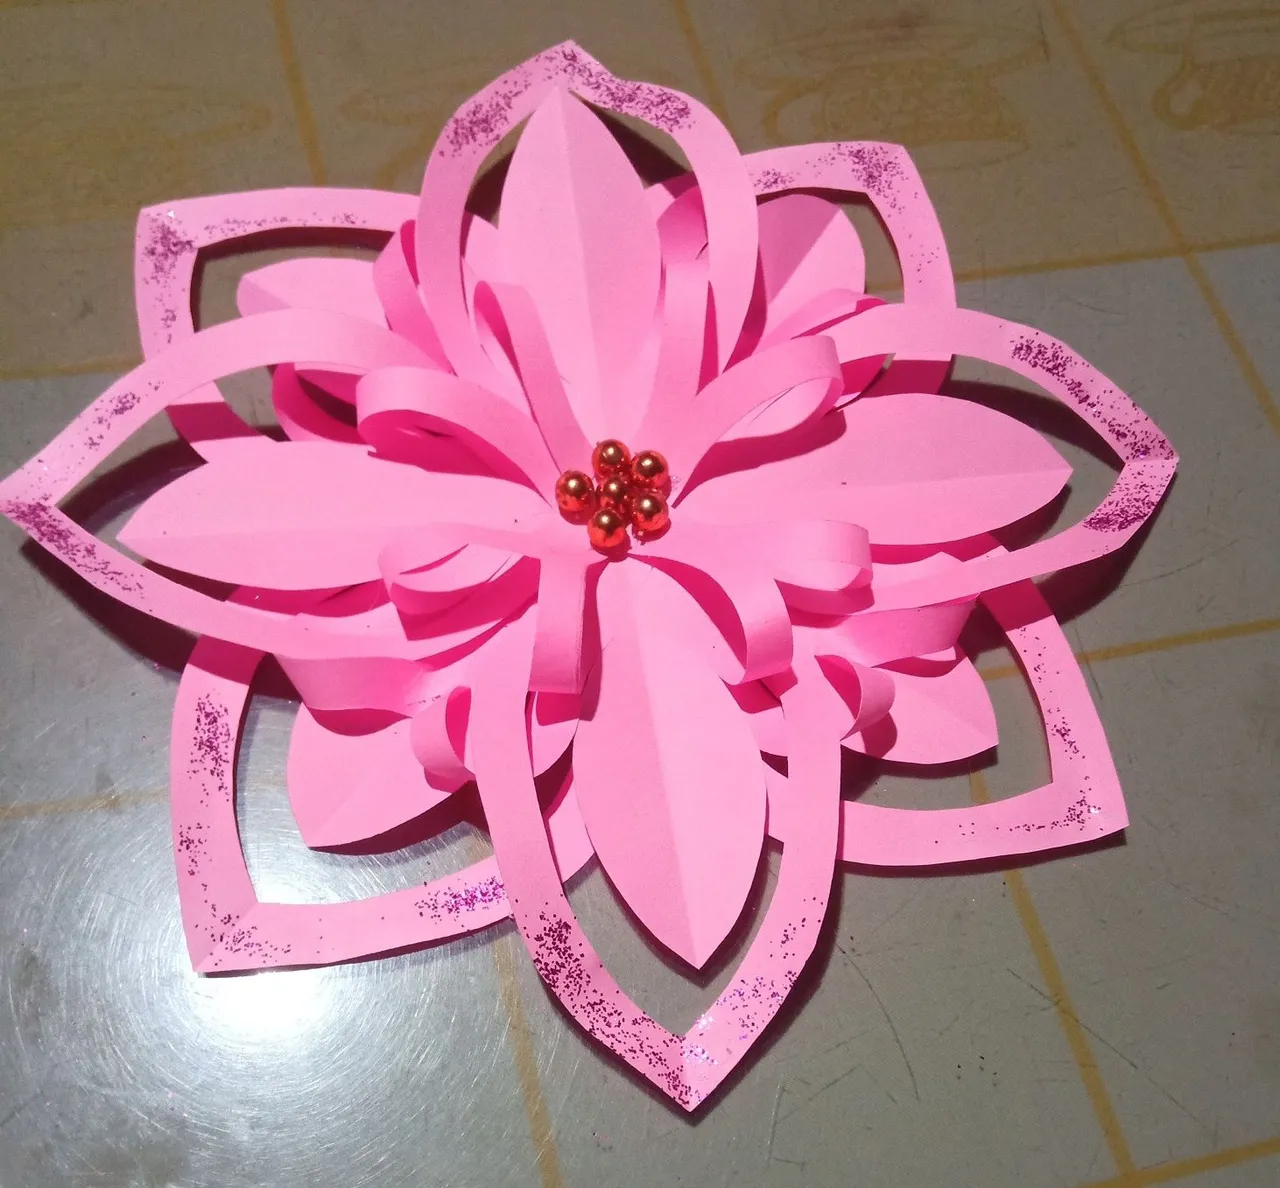
Más adelante, con la ayuda de la pega de barra, comencé agregarle pega en las puntas de las líneas que recorte anteriormente.
Por último, con la ayuda de la silicona caliente, pegue una flor sobre la otra, una en forma que equis (X) y otra en forma de cruz. Seguidamente, en el centro de esta hermosa flor de papel, le agregué también silicona caliente para pegar las perlas de plástico de color cobre.
En las puntas de cada uno de los pétalos le agregué escarcha para que brillara con las luces encendidas.
Once I finished painting the bases of the decorations, I let them dry, in the process I will begin to make a Christmas flower with a pink leaf.
I made this process a little delicate, because a single mistake could cut a part of this flower wrong or I would wrinkle the leaf.
I took the leaf and folded it making a geometric figure, in this case a triangle, then I folded it again.
When I had it all folded I used a scissors to cut the tip of the triangle, giving it the shape of a half moon.
Then I repeated the same procedure in the central part of the leaf, only this time the cut will not be until the end of it, but I left a small part untrimmed and proceeded to make another line of cut a little further down.
When we open it we can notice that it has the shape of a flower, so I made another one doing the same steps previously mentioned.
Later, with the help of the glue stick, I started to add glue to the ends of the lines I cut out before.
Finally, with the help of hot silicone, I glued one flower on top of the other, one in the shape of an X and the other in the shape of a cross. Then, in the center of this beautiful paper flower, I also added hot silicone to glue the copper-colored plastic beads.
At the tips of each of the petals I added frosting to make it shine with the lights on.
 |  |  |
|---|---|---|
| Paso /Step 1 | Paso/Step 2 | Paso/Step 3 |
 |  |
|---|---|
| Paso /Step 4 | Paso/Step 5 |
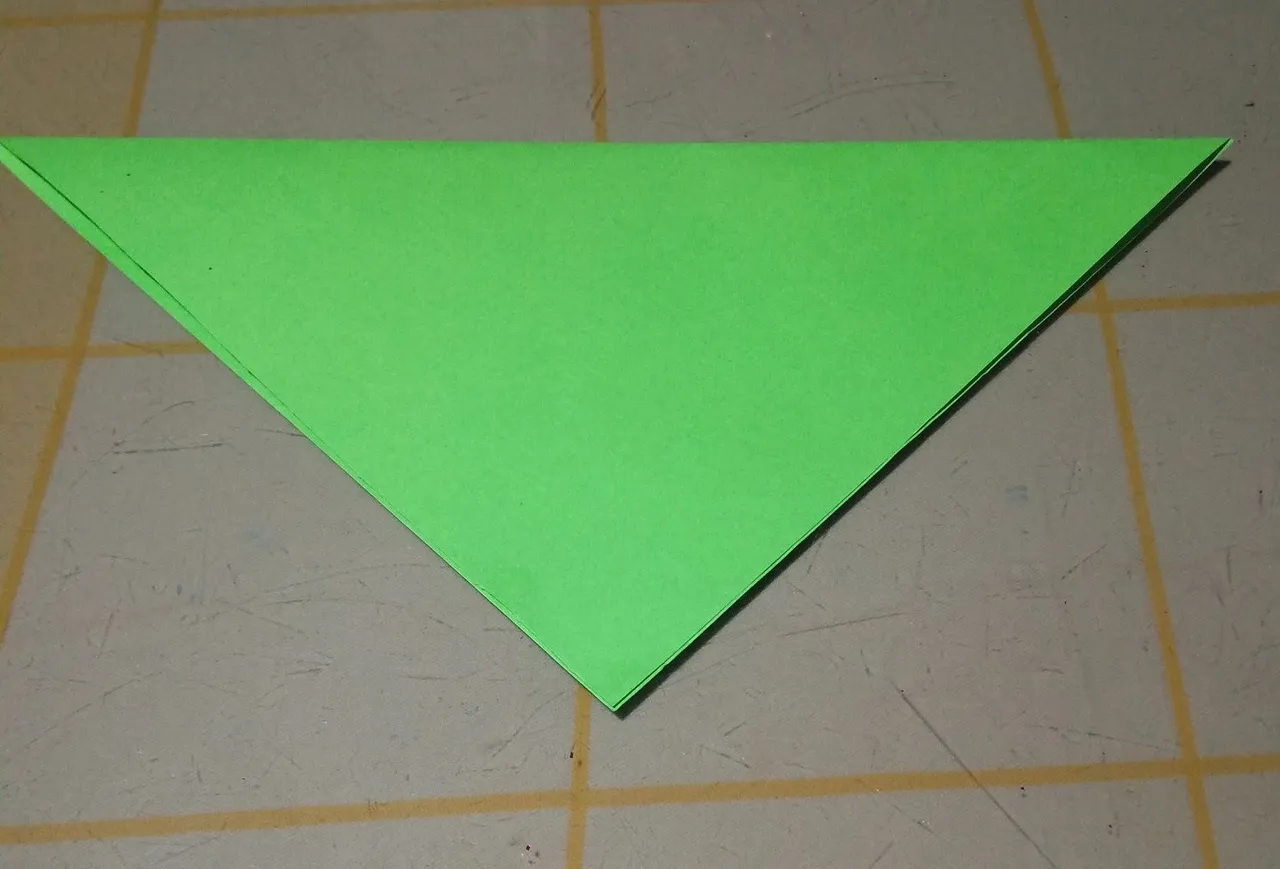
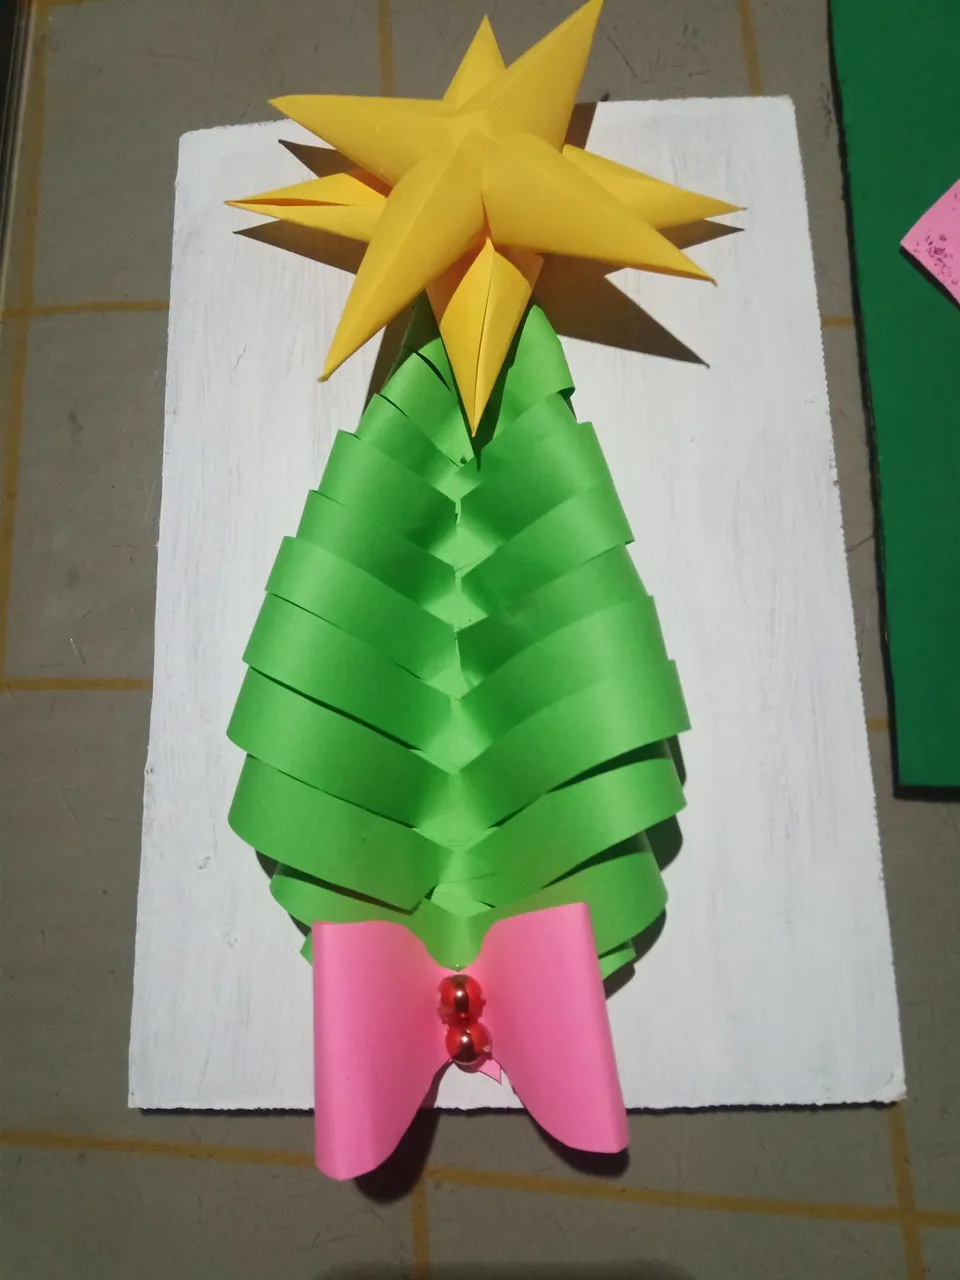
Al terminar con la flor navideña, la siguiente decoración será un árbol de navidad.
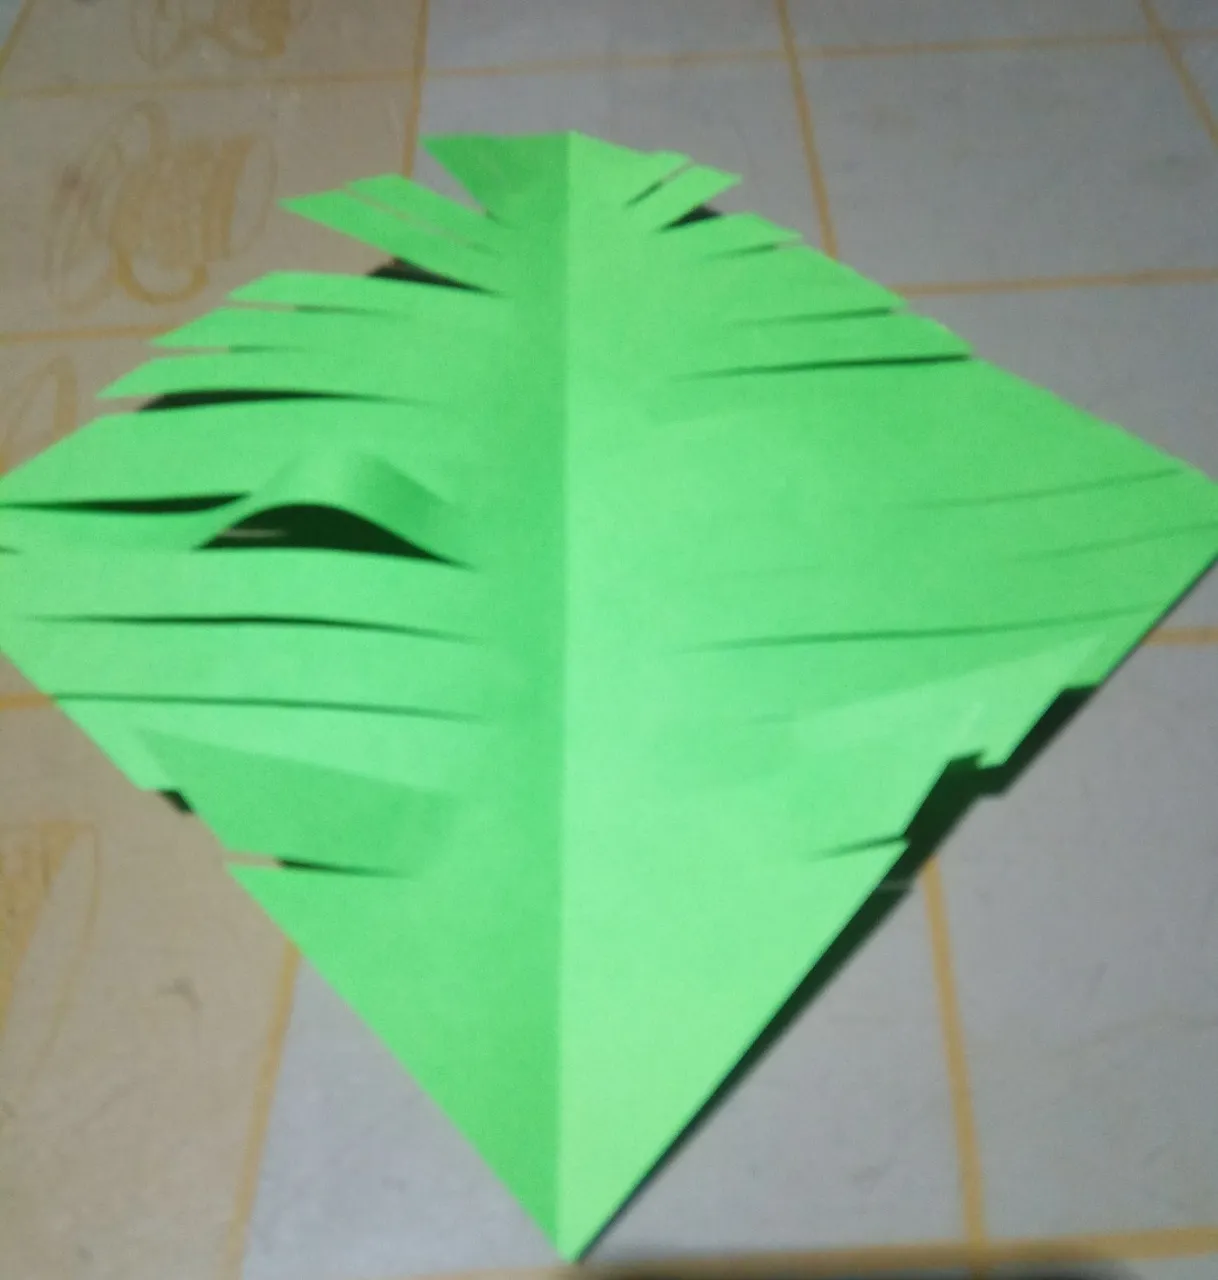
Primero tomé una hoja de color verde, después la doble en forma de triángulo.
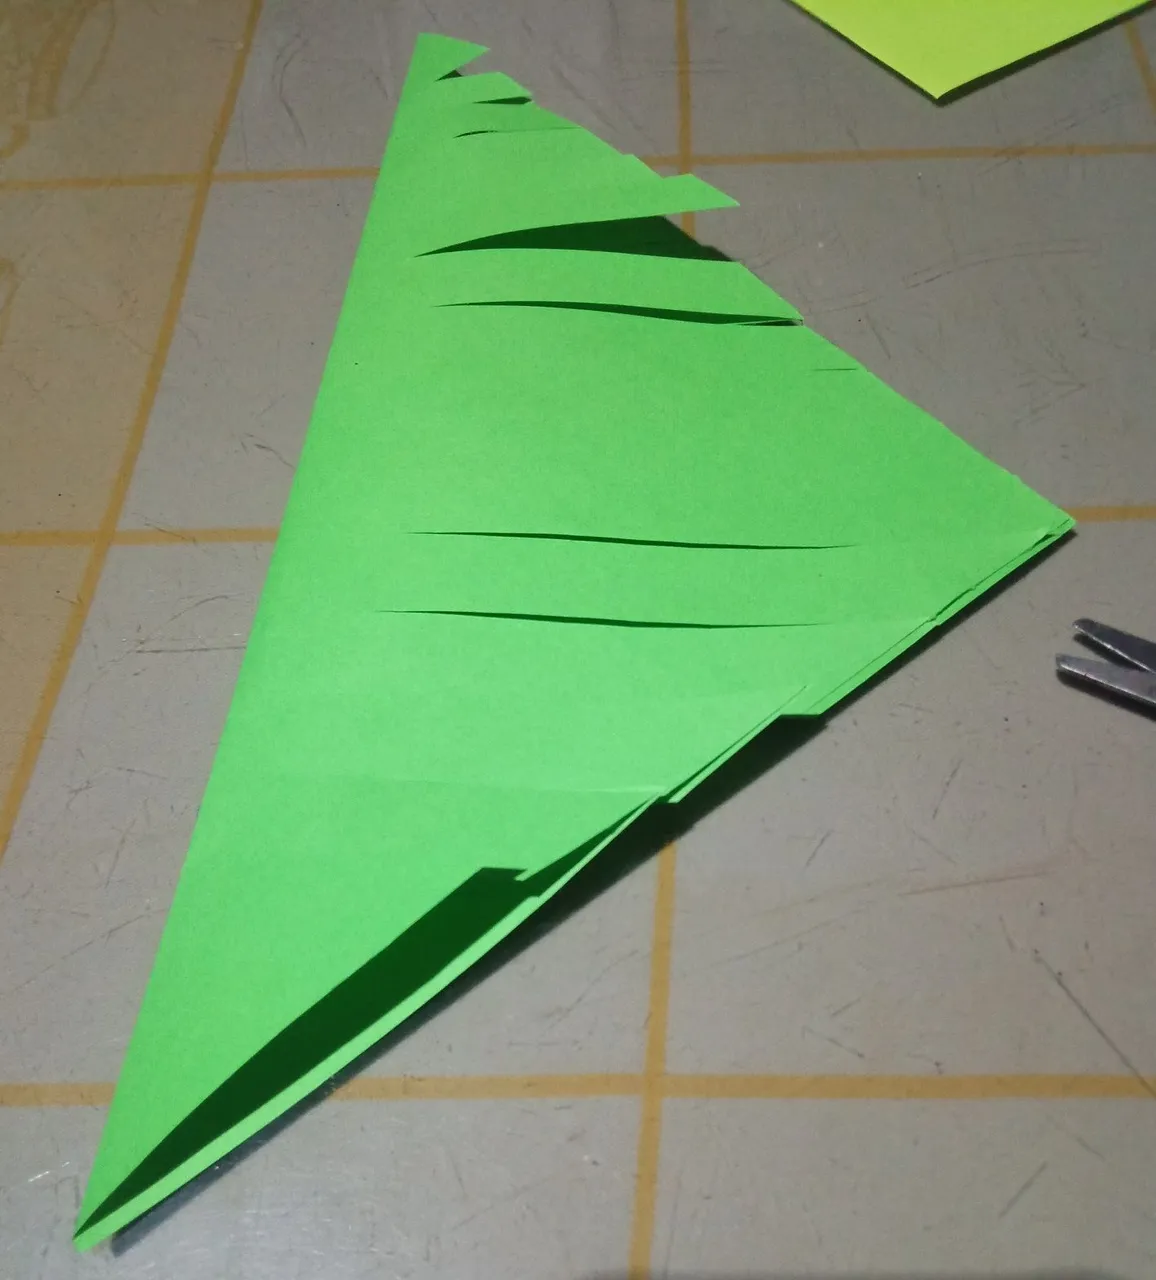
Luego con una tijera procedí hacer algunas líneas de corte en ambas partes del triángulo sin llegar a recortar toda la hoja, dejando también ambas de las puntas sin recortar, estas tienen una más larga que la otra, la separación de cada línea es de preferencias. Esto es debido a que una será el tronco del árbol y el otro será la base de la estrella.
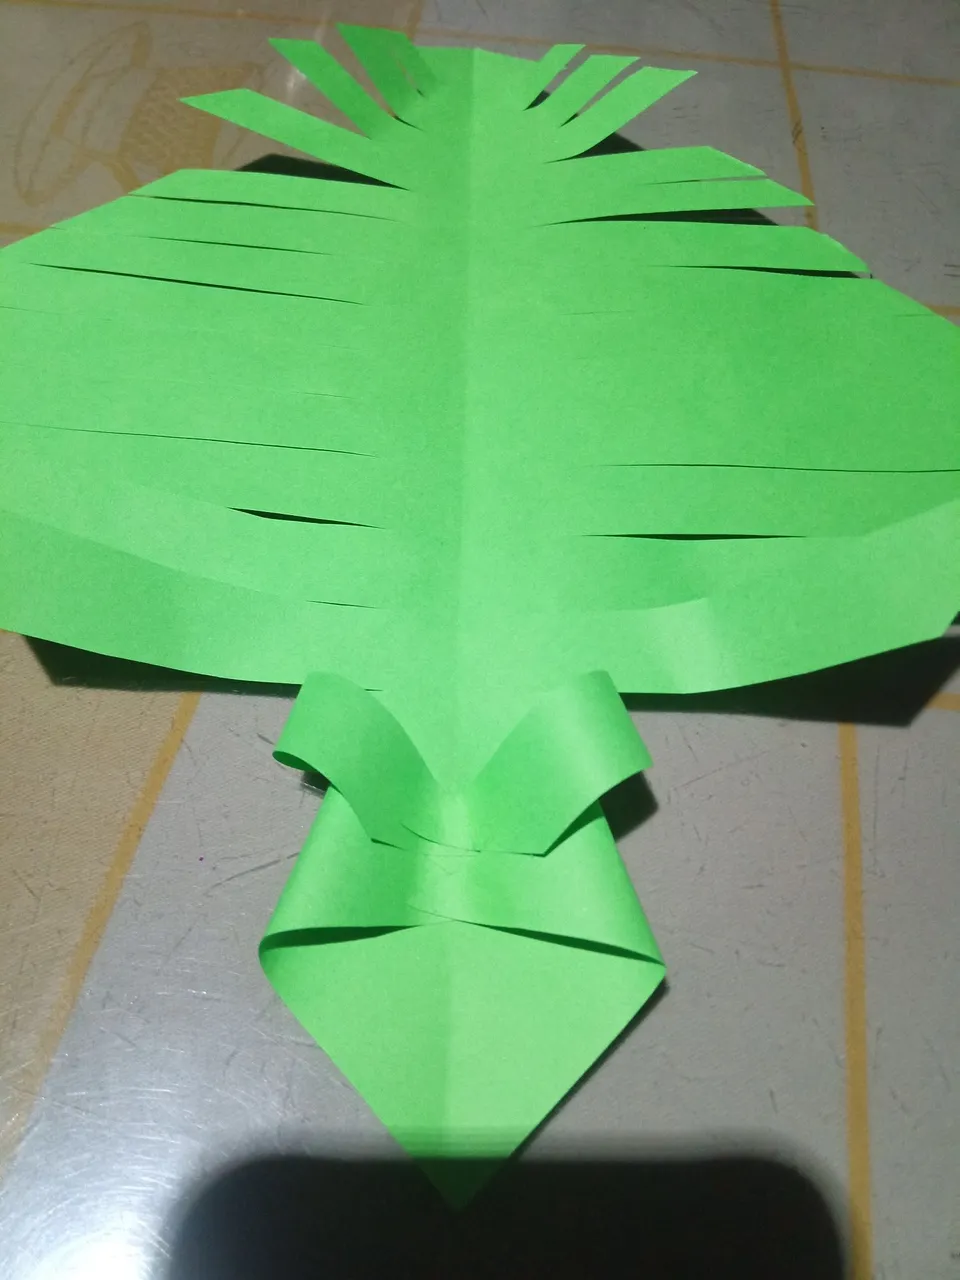
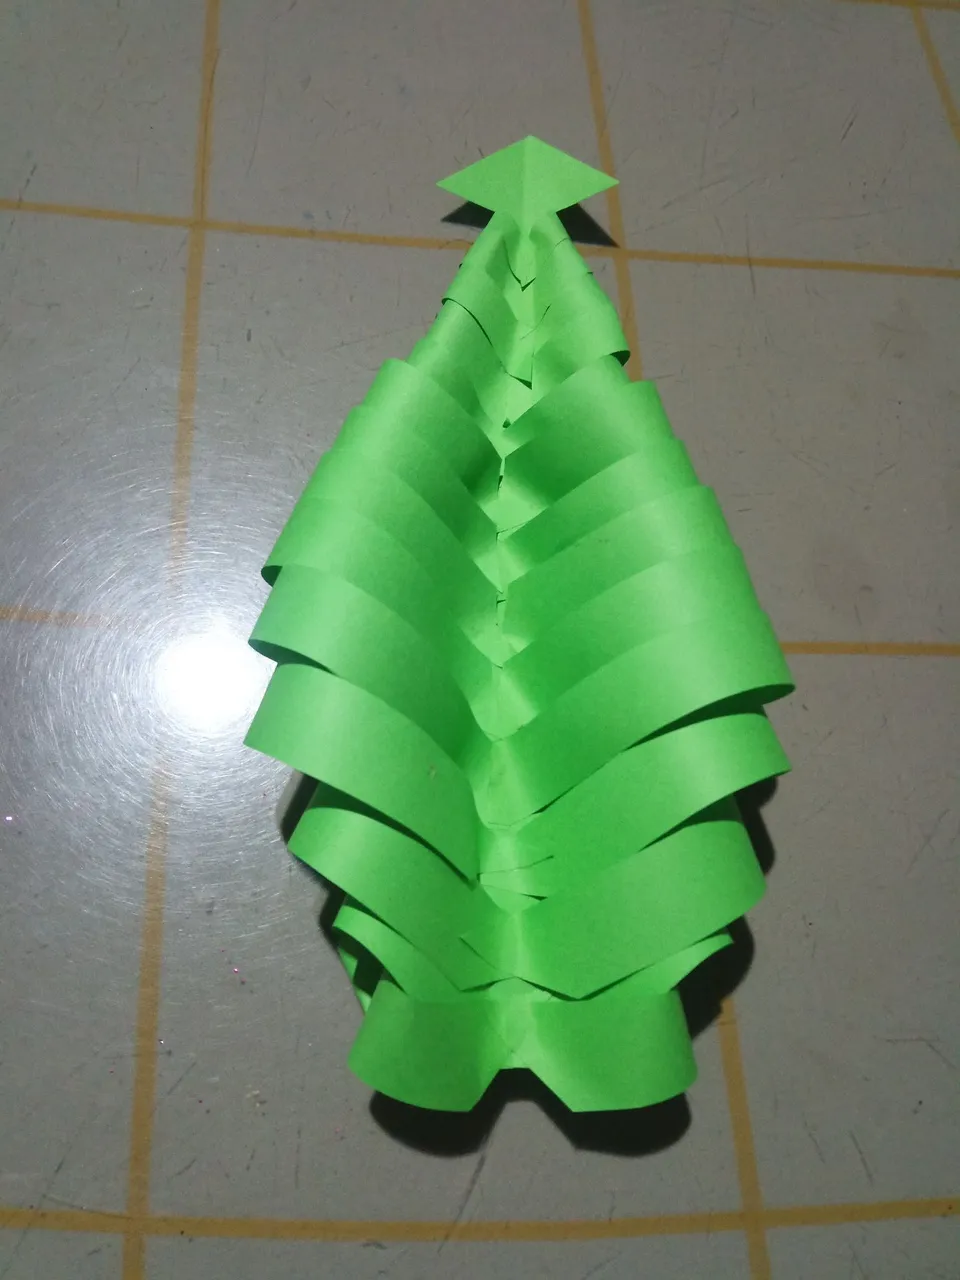
Al tener recortada cada una de las líneas, comencé agregarle en cada una de las puntas pega de barra, seguidamente comencé a pegar cada una en el centro de la hoja, cada punta de las líneas recortadas van una sobre la otra, después repetí el mismo proceso hasta pegar todas las puntas en el centro.
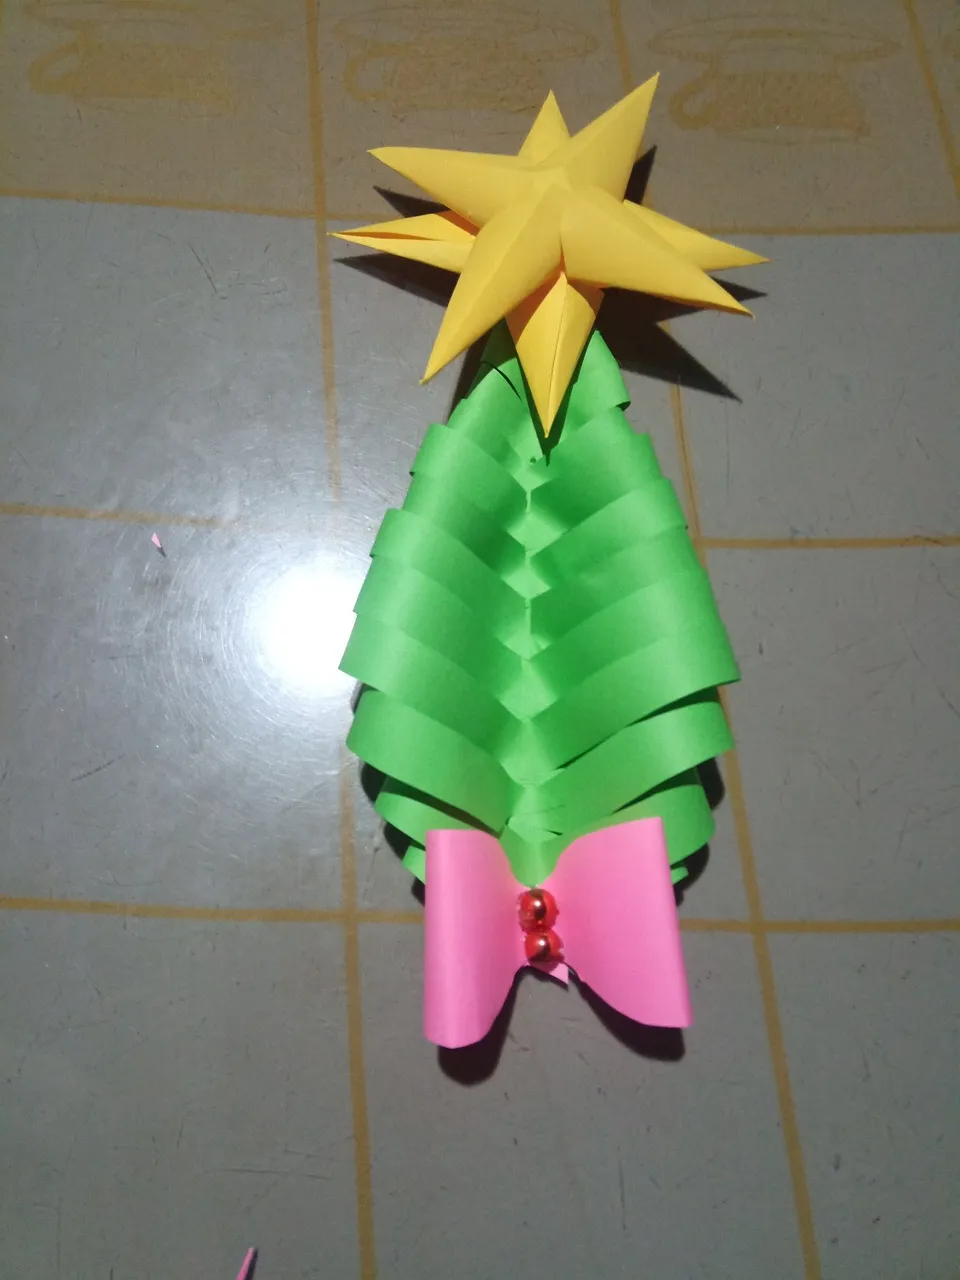
Por último pegué una estrella con una hoja de color amarillo (más adelante te enseño como hice la estrella) he hice un pequeño listón de papel de color rosado.
When finished with the Christmas flower, the next decoration will be a Christmas tree.
First I took a green leaf, then I folded it in the shape of a triangle.
Then with a scissors I proceeded to make some cutting lines in both parts of the triangle without cutting the whole leaf, leaving also both of the tips untrimmed, these have one longer than the other, the separation of each line is preferences. This is because one will be the trunk of the tree and the other will be the base of the star.
Once I had cut out each of the lines, I began to add glue to each of the ends of the lines, then I began to glue each one in the center of the leaf, each end of the cut lines go one on top of the other, then I repeated the same process until I glued all the ends in the center.
Finally I glued a star with a yellow sheet (later I will show you how I made the star) and I made a small pink paper ribbon.
 |  |  |
|---|---|---|
| Paso /Step 1 | Paso/Step 2 | Paso/Step 3 |
 |  |  |
|---|---|---|
| Paso /Step 4 | Paso/Step 5 | Paso/Step 6 |
Ahora te explicaré como hice las estrellas.
Primero tomé dos hojas de color amarillo, estas estrellas son las que están en la parte superior del árbol que anteriormente he realizado y explicado.
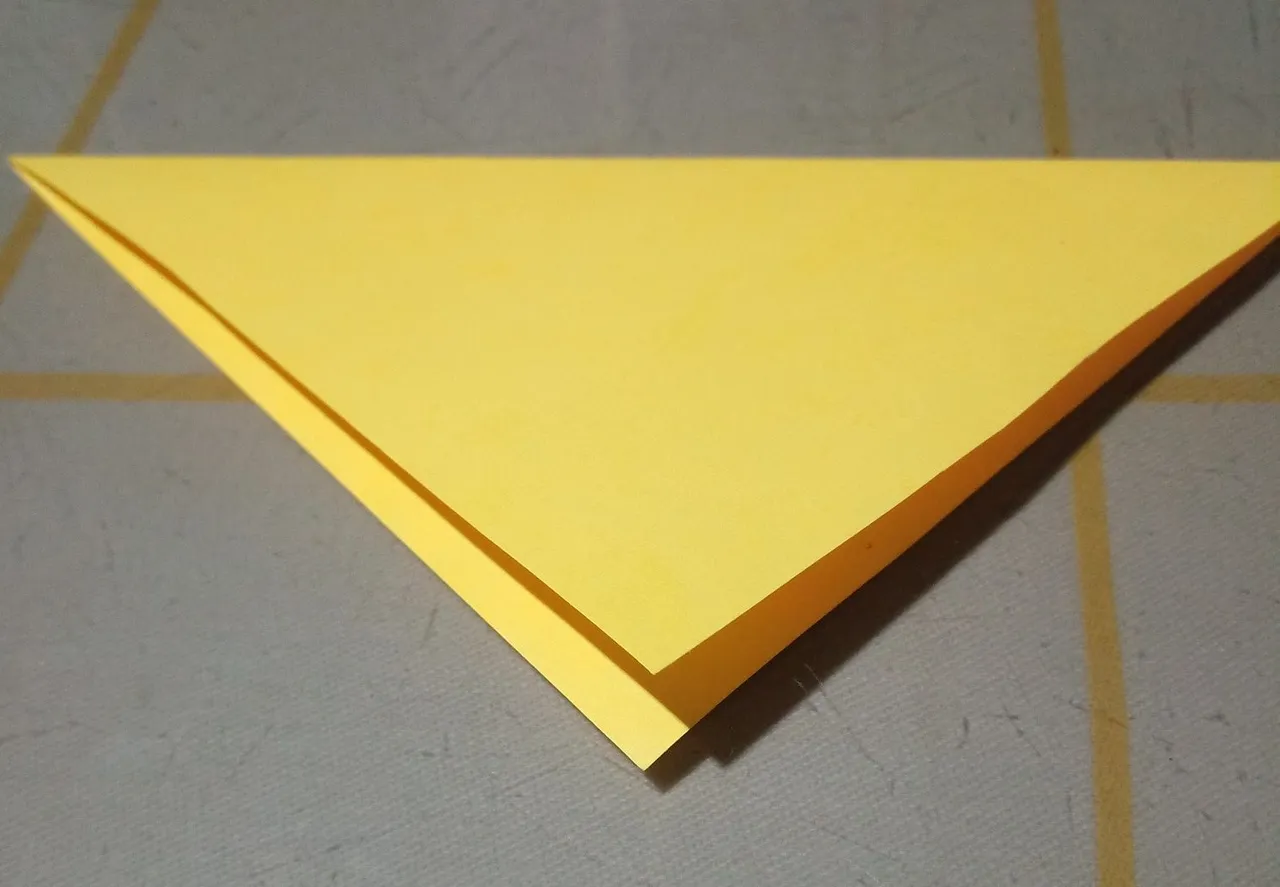
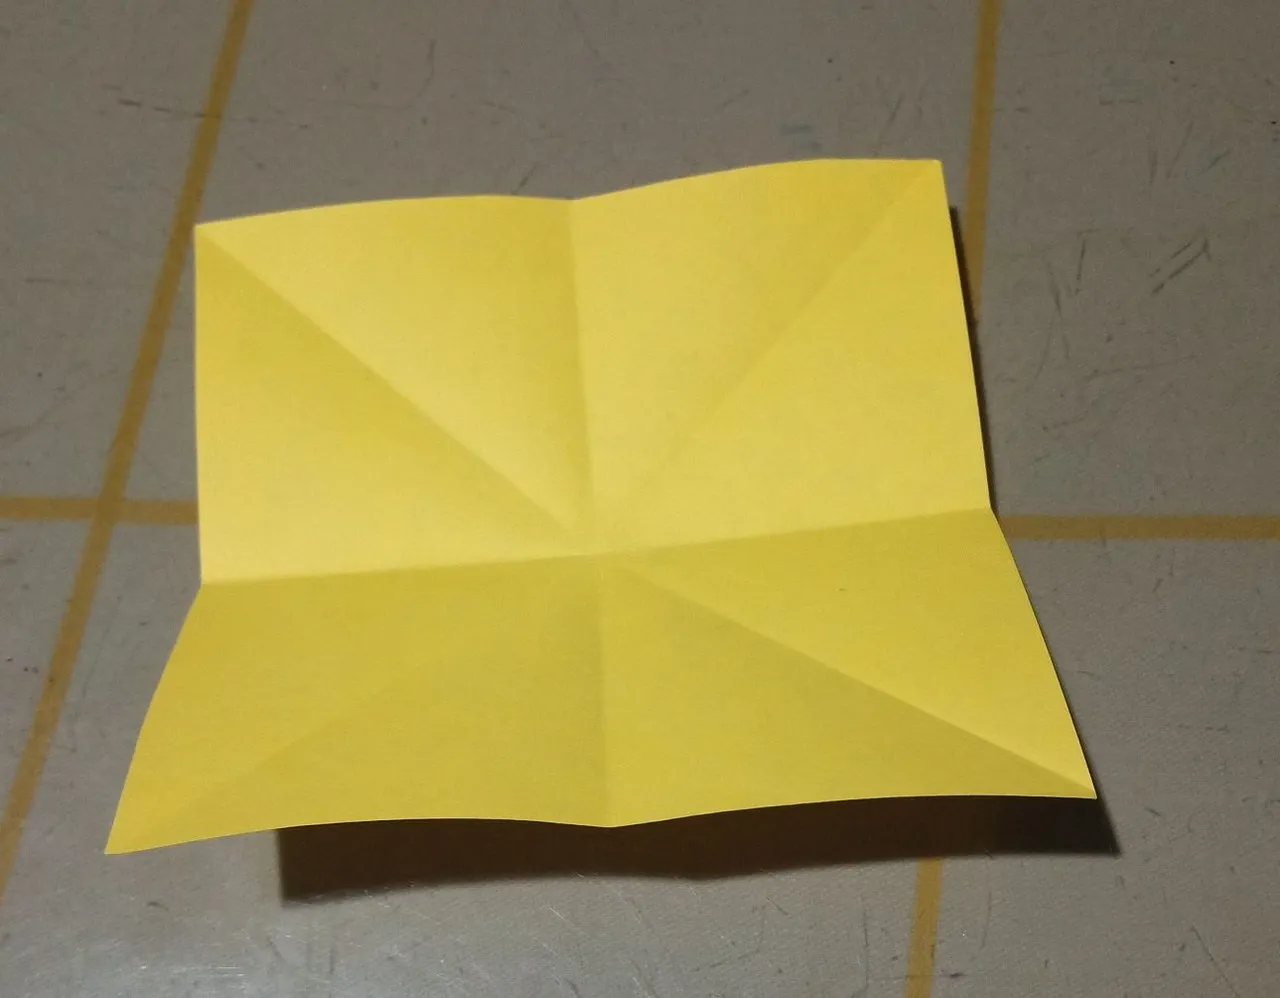
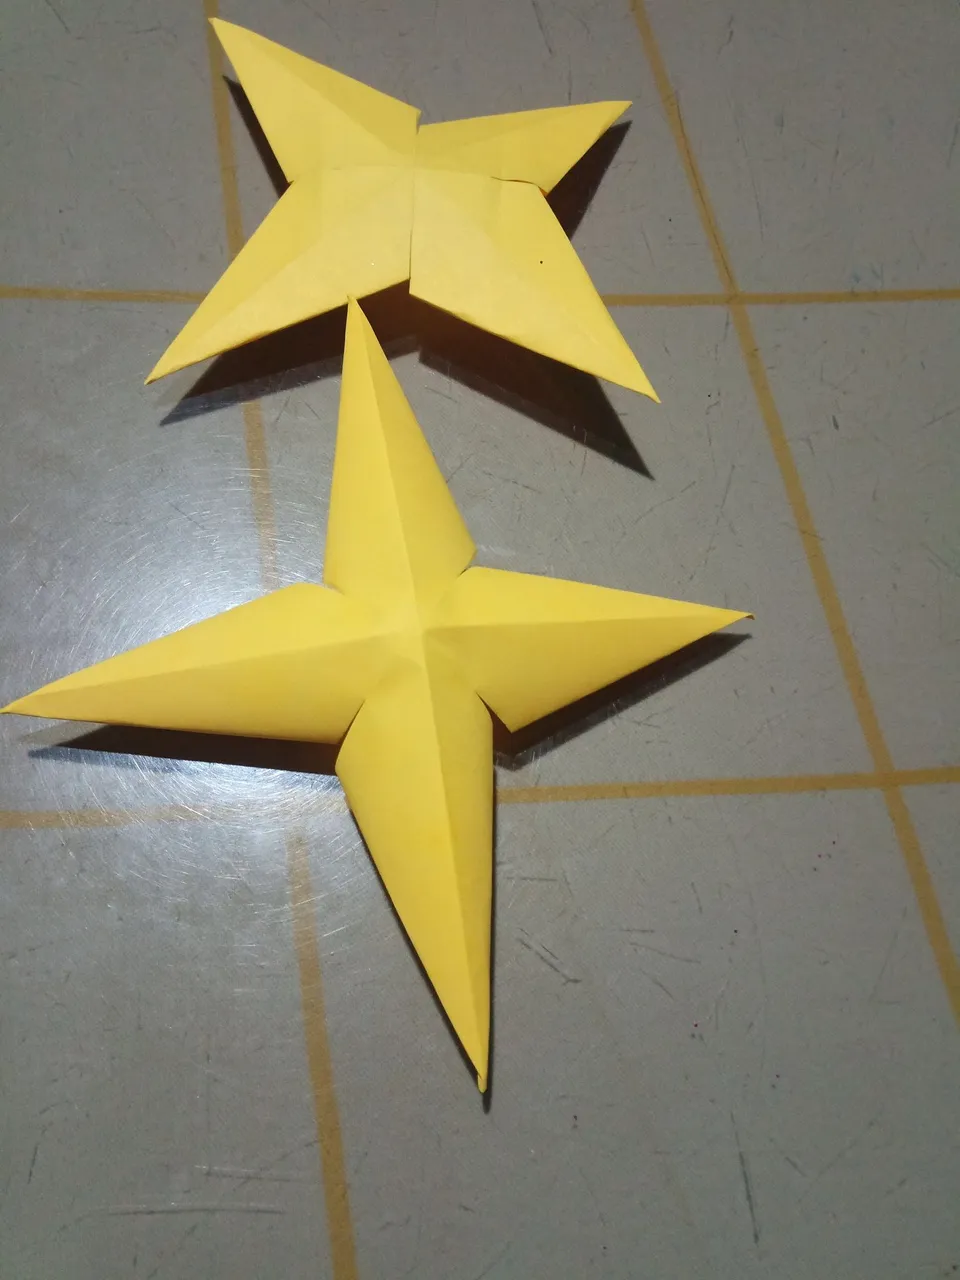
Ambas hojas las doble en forma de triángulo, después repetí el mismo proceso, pero desdoblándola y doblándola en otra dirección para crear un cuadrado con cuatro formas de triángulo, los mismos están marcados por la dobladura de la hoja.
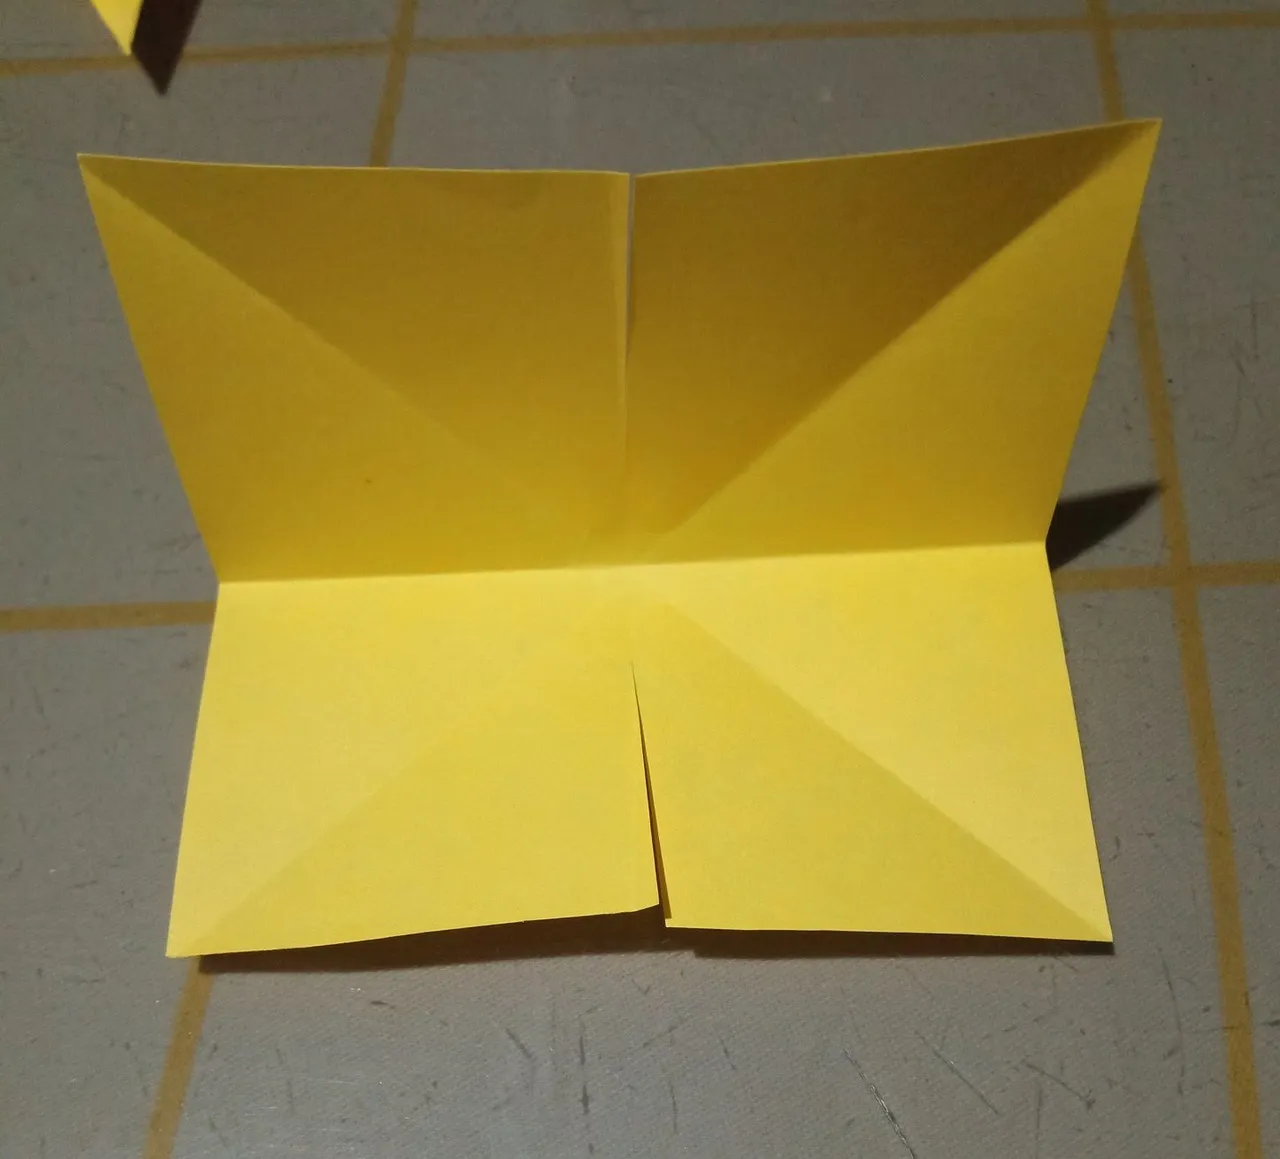
Después recorte en los cuatro lados de cada una de las esquinas céntricas de la hoja. Estos recortes no deben llegar hasta el centro de la hoja, sino un poco antes.
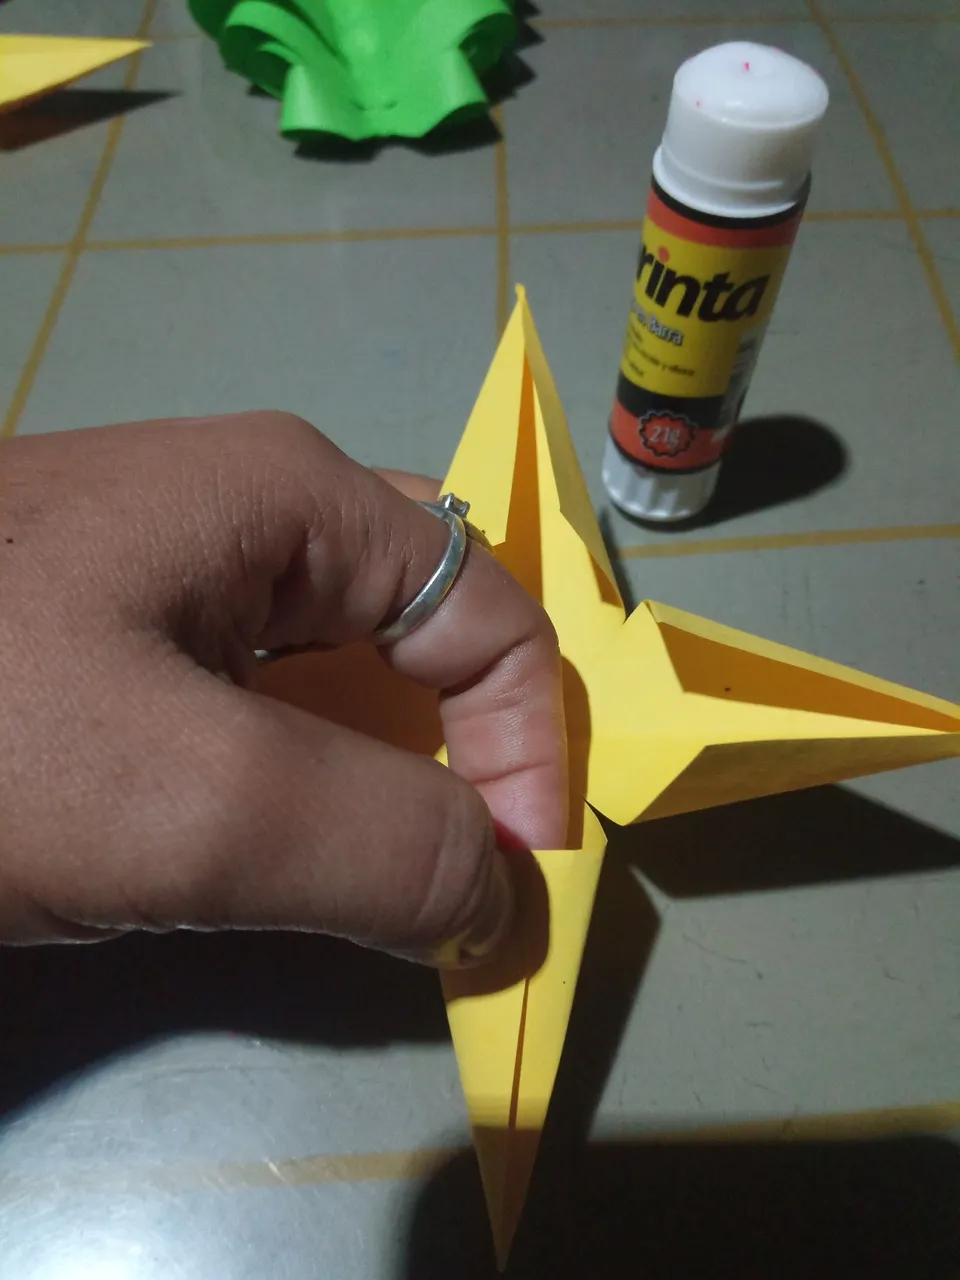
Estas líneas nos servirán para doblarlas y crear las puntas de las estrellas, las mismas están pegadas con pega de barra y ya podemos notar como nos va quedando nuestras hermosas estrellas.
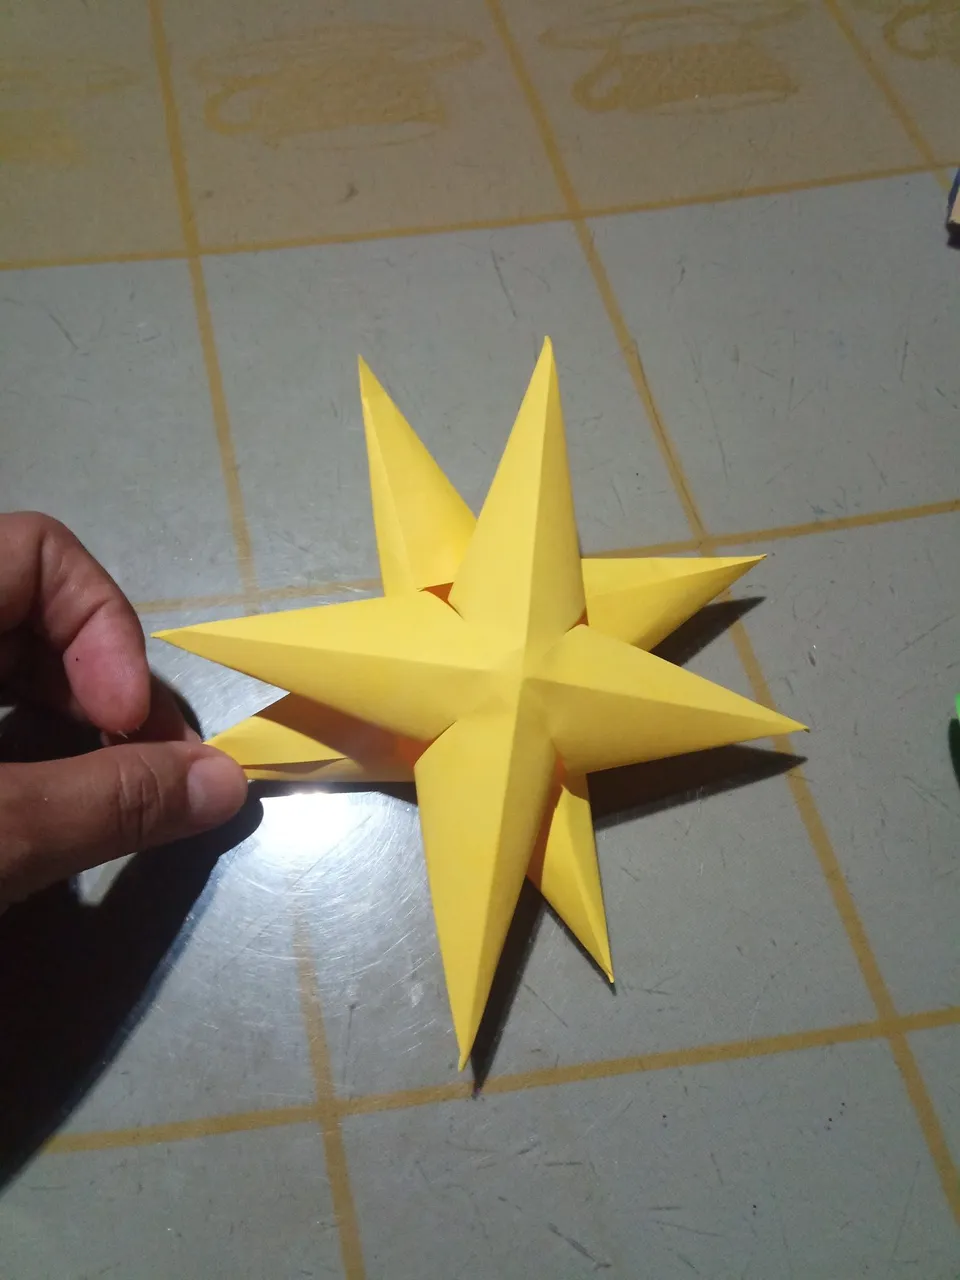
Por último las pegué una sobre otra en direcciones opuestas para crear una estrella de 8 puntas, las mismas fueron pegadas con silicona caliente, esto se debe a que la silicona adhiere más el material que la pega de barra.
Now I will explain how I made the stars.
First I took two yellow leaves, these stars are the ones at the top of the tree that I have previously made and explained.
I folded both leaves in the shape of a triangle, then I repeated the same process, but unfolding and folding it in another direction to create a square with four triangle shapes, these are marked by the folding of the leaf.
Then cut out the four sides of each of the center corners of the sheet. These cuts should not reach the center of the sheet, but a little before.
These lines will help us to fold them and create the tips of the stars, they are glued with glue stick and we can see how we are getting our beautiful stars.
Finally I glued them one on top of the other in opposite directions to create an 8-pointed star, they were glued with hot silicone, this is because the silicone adheres more to the material than the glue stick.
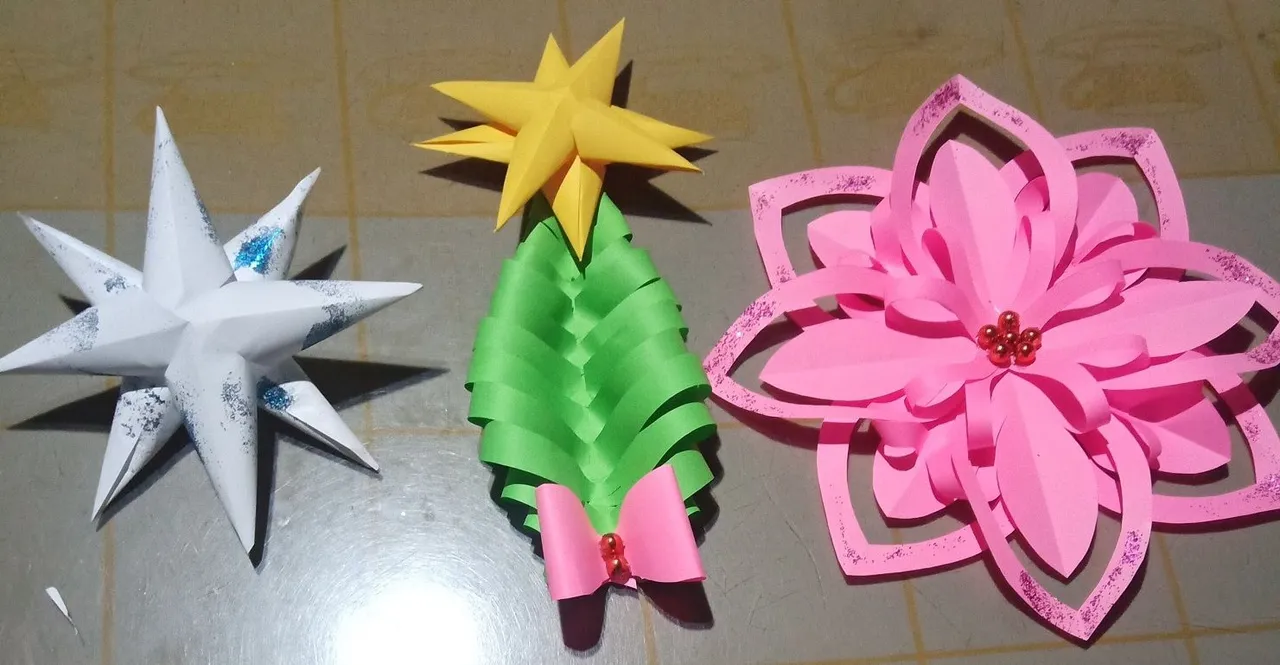
Después de haber terminado con la estrella del árbol de navidad, hice otra, pero con una hoja de color blanco, el cual le agregue escarcha de color azul para embellecerla un poco más.
Ya tendremos listo nuestras tres decoraciones.
After finishing with the Christmas tree star, I made another one, but with a white leaf, which I added blue frosting to embellish it a little more.
Now we have our three decorations ready.
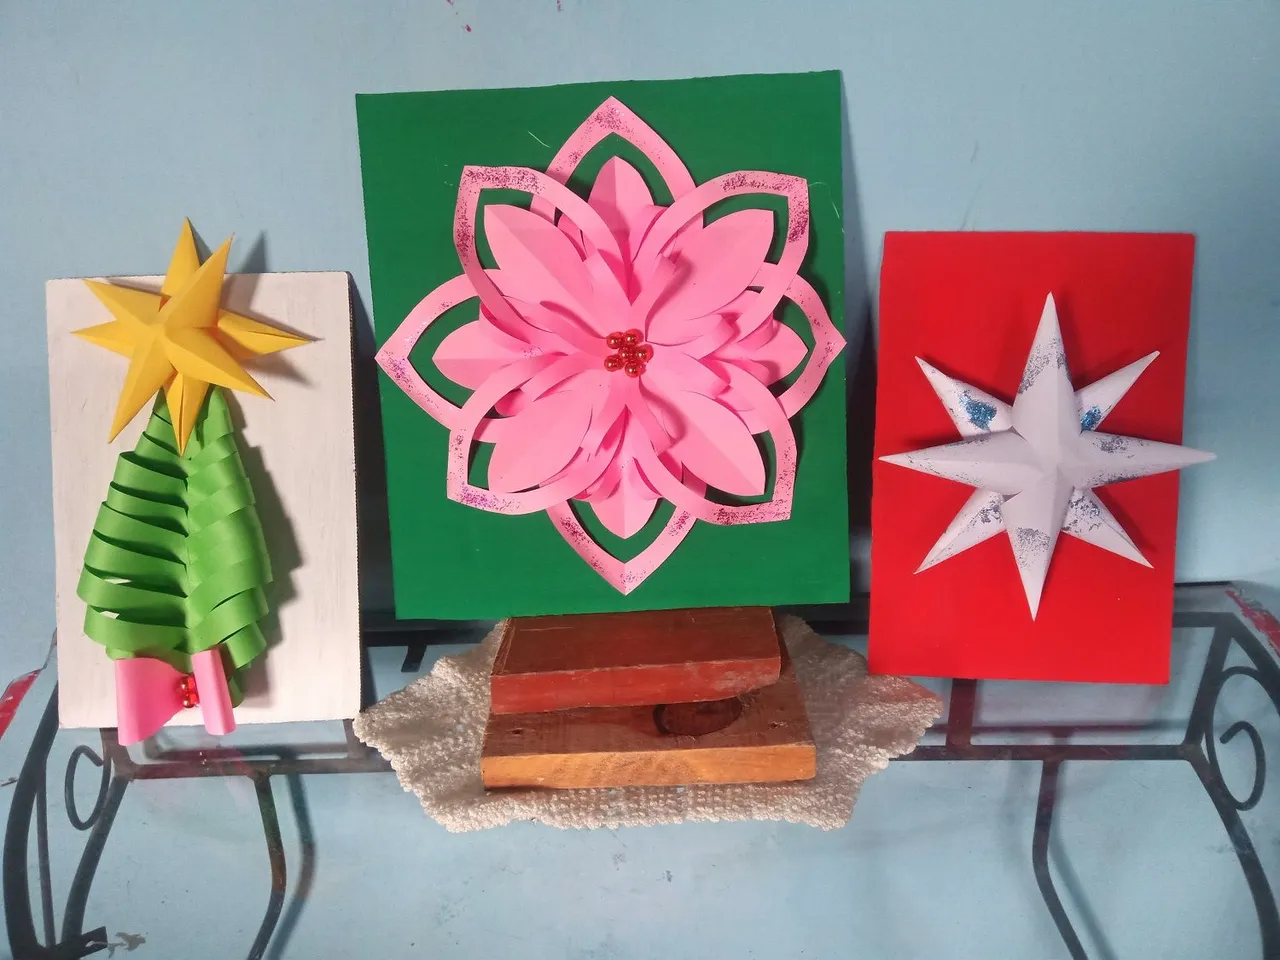
Por último, adherí todas las manualidades sobre los cartones que mencione al principio de esta publicación.
Quedaron hermosas, fue un trabajo muy delicado, pero valió la pena el esfuerzo, toda obra que toma su tiempo dan mejores resultados.
Más abajo te presentó las fotografías de cada una de ellas por separado.
Muchas gracias por tomarte tu tiempo en leer mi publicación, espero que te haya gustado mi manualidad, nos vemos en otra de mis publicaciones sobre manualidades.
Finally, I adhered all the crafts on the cardboard that I mentioned at the beginning of this publication.
They turned out beautiful, it was a very delicate work, but it was worth the effort, all work that takes time gives better results.
Below are the pictures of each one of them separately.
Thank you very much for taking your time to read my publication, I hope you liked my craft, see you in another of my publications on crafts.


social networks / redes sociales
![]()
![]()
Traductor Deepl
Translated Deepl
Ediciones Canva
Editions Canva