Hola, holaaa!! Saludos a todos los Hivers Creativos de esta maravillosa plataforma que nos permite comunicarnos día día para presentar esas espectaculares creaciones dónde demostramos valiosas ideas y las compartimos, mostrando lo que sabemos y aprendiendo lo nuevo que cada uno de nosotros .
Hoy estoy un poco más temprano debido a que tuve que realizar hermosos arreglos con flores naturales para la decoración de las capillas y distintas iglesias de la comunidad, de verdad quedaron hermosos, pues aquí hay flores bellísimas ;exóticas como las orquídeas, las aves del paraíso, las heliconias, calas, y pare de contar, además son duraderas, los arreglos duran más de una semana sin marchitarse; así que como tuve mano de obra ayudándome se me facilito el trabajo y pude salir más temprano.
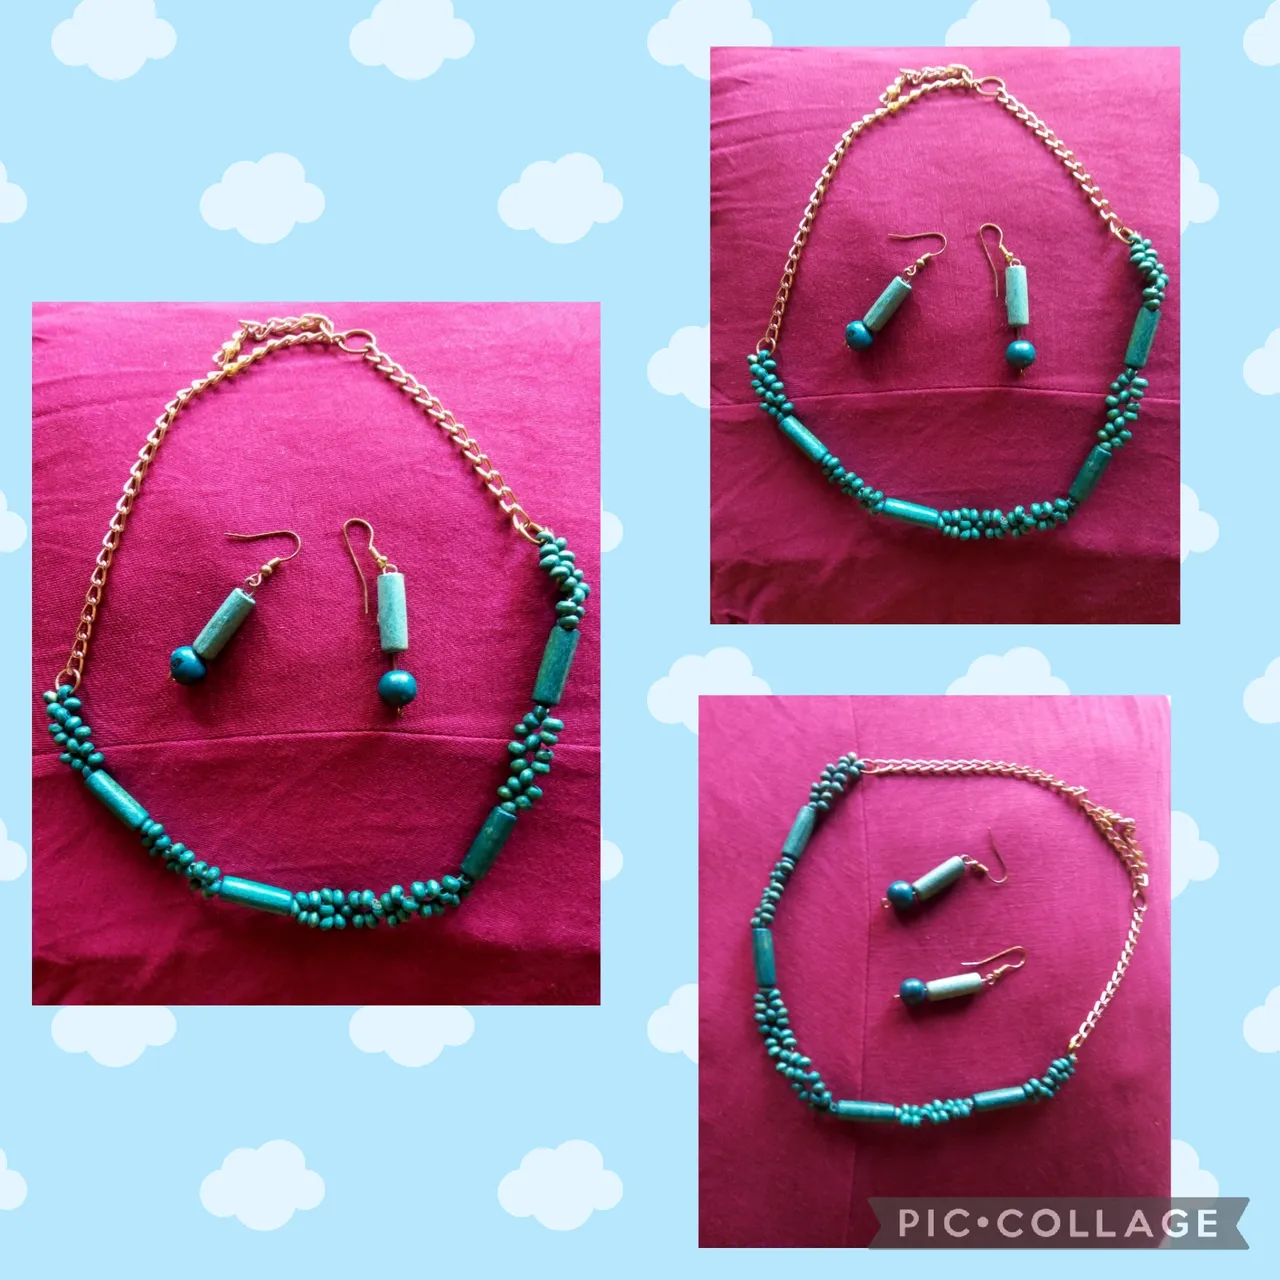
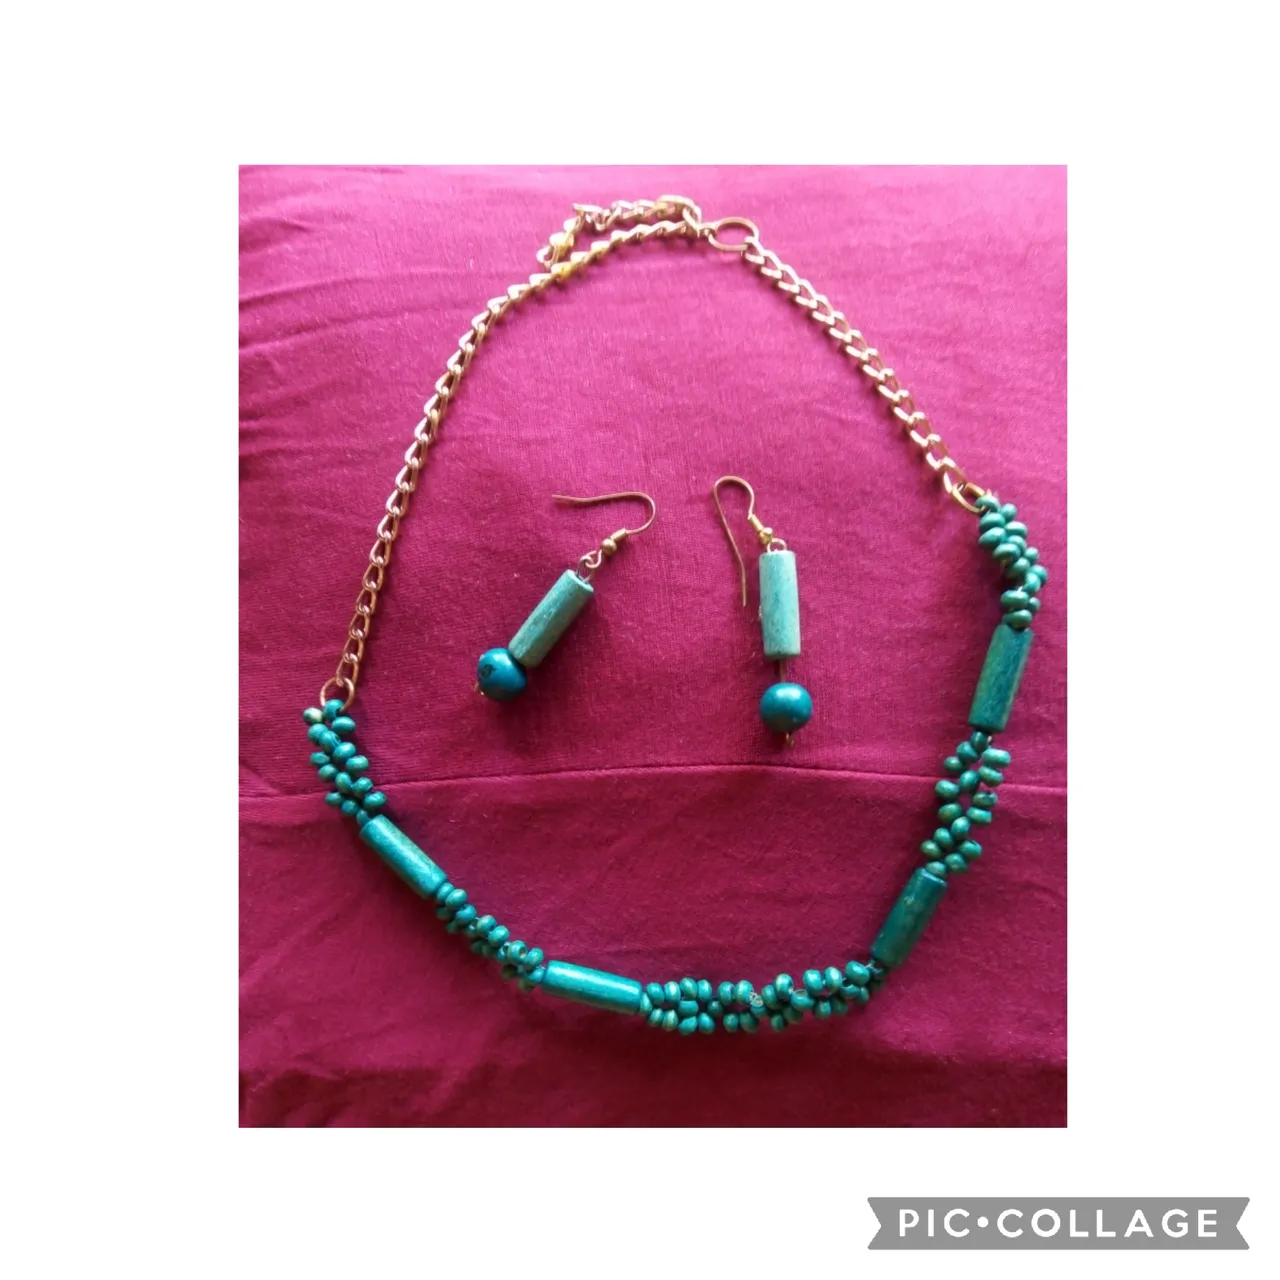
Bueno después de esta platica, les comento que mi manualidad creativa de hoy tiene que ver con los abalorios, como ustedes saben son cuentas perforadas de madera y con ellas se elaboran distintas clases de bisutería y adornos. En este caso haré un hermoso juego de collar y pendientes para regalar a una de mis amigas que está de cumpleaños y me invitó a picar el pastel que también se lo hizo mi hermana; escogí el color turquesa porque es su favorito y le queda muy bien. Que les parece si leen hasta el final para que vean como con unos sencillos y pocos pasos lo hice,?
Hello, hello!! Greetings to all the Creative Hivers of this wonderful platform that allows us to communicate day by day to present those spectacular creations where we demonstrate valuable ideas and share them, showing what we know and learning the new that each of us.
Today I am a little early because I had to make beautiful arrangements with natural flowers for the decoration of the chapels and different churches in the community, they really turned out beautiful, because here there are beautiful flowers, exotic such as orchids, birds of paradise , the heliconias, coves, and stop counting, they are also durable, the arrangements last more than a week without withering; so since I had labor helping me, my work was easier and I was able to leave earlier.
Well after this talk, I tell you that my creative craft today has to do with beads, as you know they are perforated wooden beads and with them different kinds of jewelry and ornaments are made. In this case I will make a beautiful set of necklace and earrings to give to one of my friends who has her birthday and she invited me to bite the cake that my sister also made for her; I chose the turquoise color because it is her favorite and it suits her very well. What do you think if you read until the end so you can see how I did it with a few simple steps?
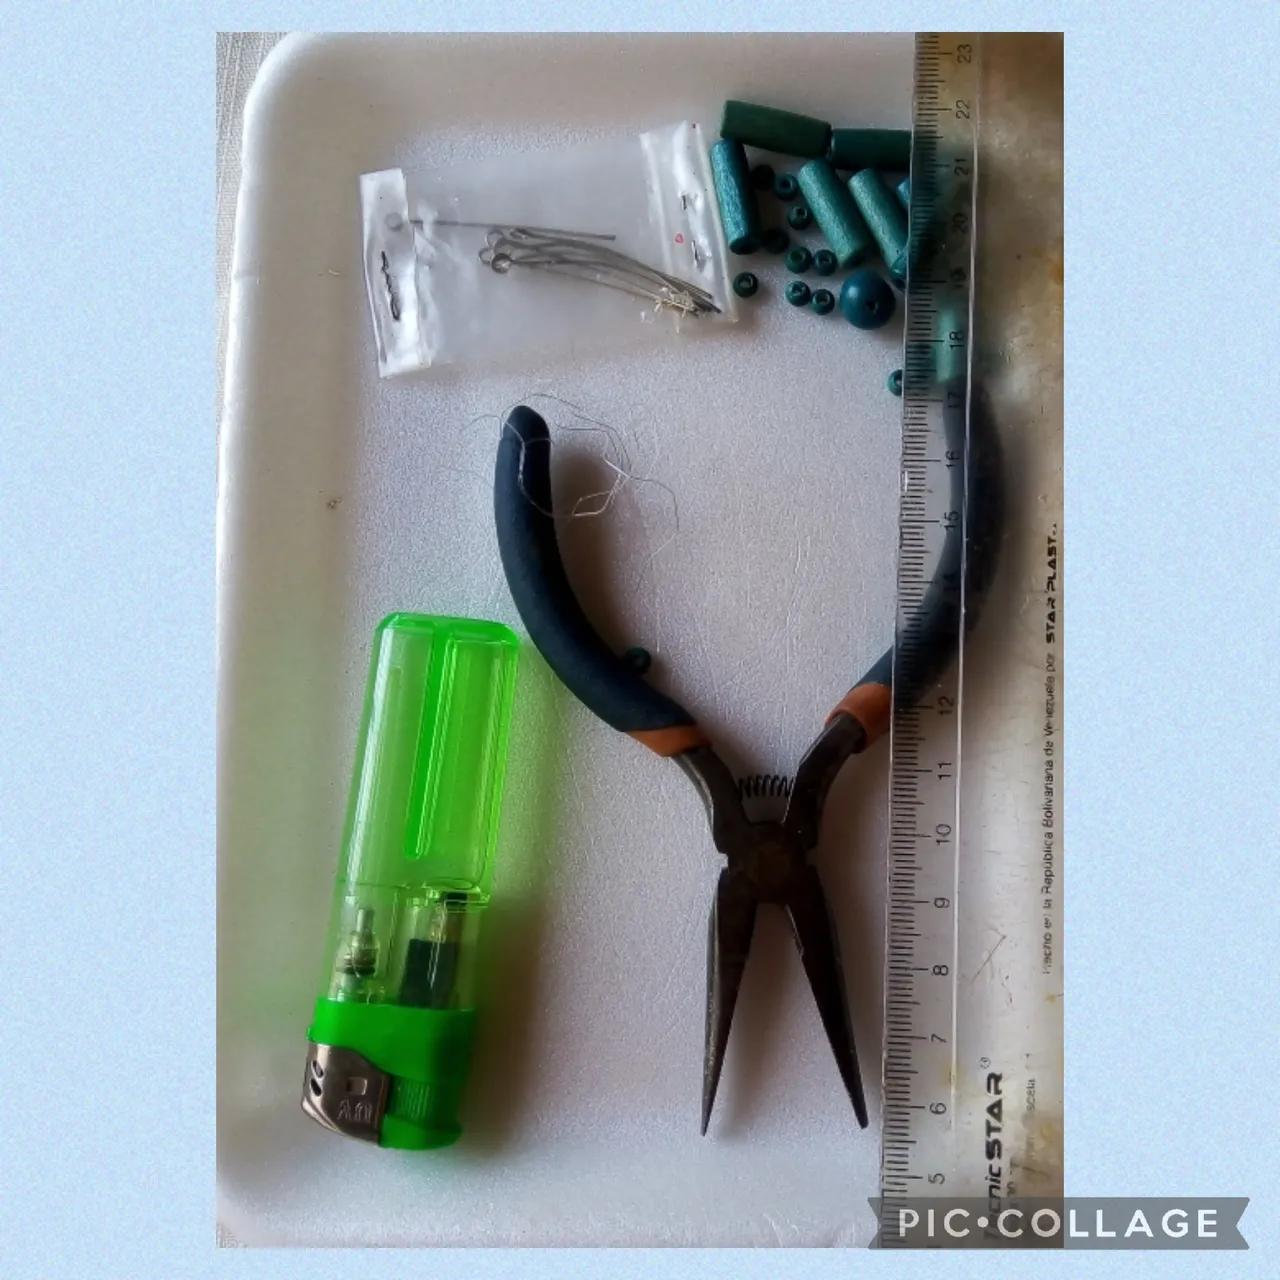
Los materiales que usé:
Para el collar:
Setenta y ocho chaquiras pequeñas color turquesa.
Cuatro cilindros del mismo color.
Cuarenta centímetros de nylon.
Dos argollas pequeñas
Una argolla grande.
Quince centímetros de cadena dorada.
Para los aretes:
Dos chaquiras más grandes de las que usé para el collar.
Dos cilindros de los mismos que usé para el collar.
Dos anzuelos.
Dos herrajes.
Yesquero.
Pinza.
Tijeras.
The materials I used:
For the necklace:
Seventy-eight small turquoise beads.
Four cylinders of the same color.
Forty centimeters of nylon.
Two small rings
A big ring.
Six inches of gold chain.
For the earrings:
Two beads larger than the ones I used for the necklace.
Two cylinders of the same ones I used for the necklace.
Two hooks.
Two hardware.
tinderbox
Gripper.
Pair of scissors.
Empezamos con la elaboración:
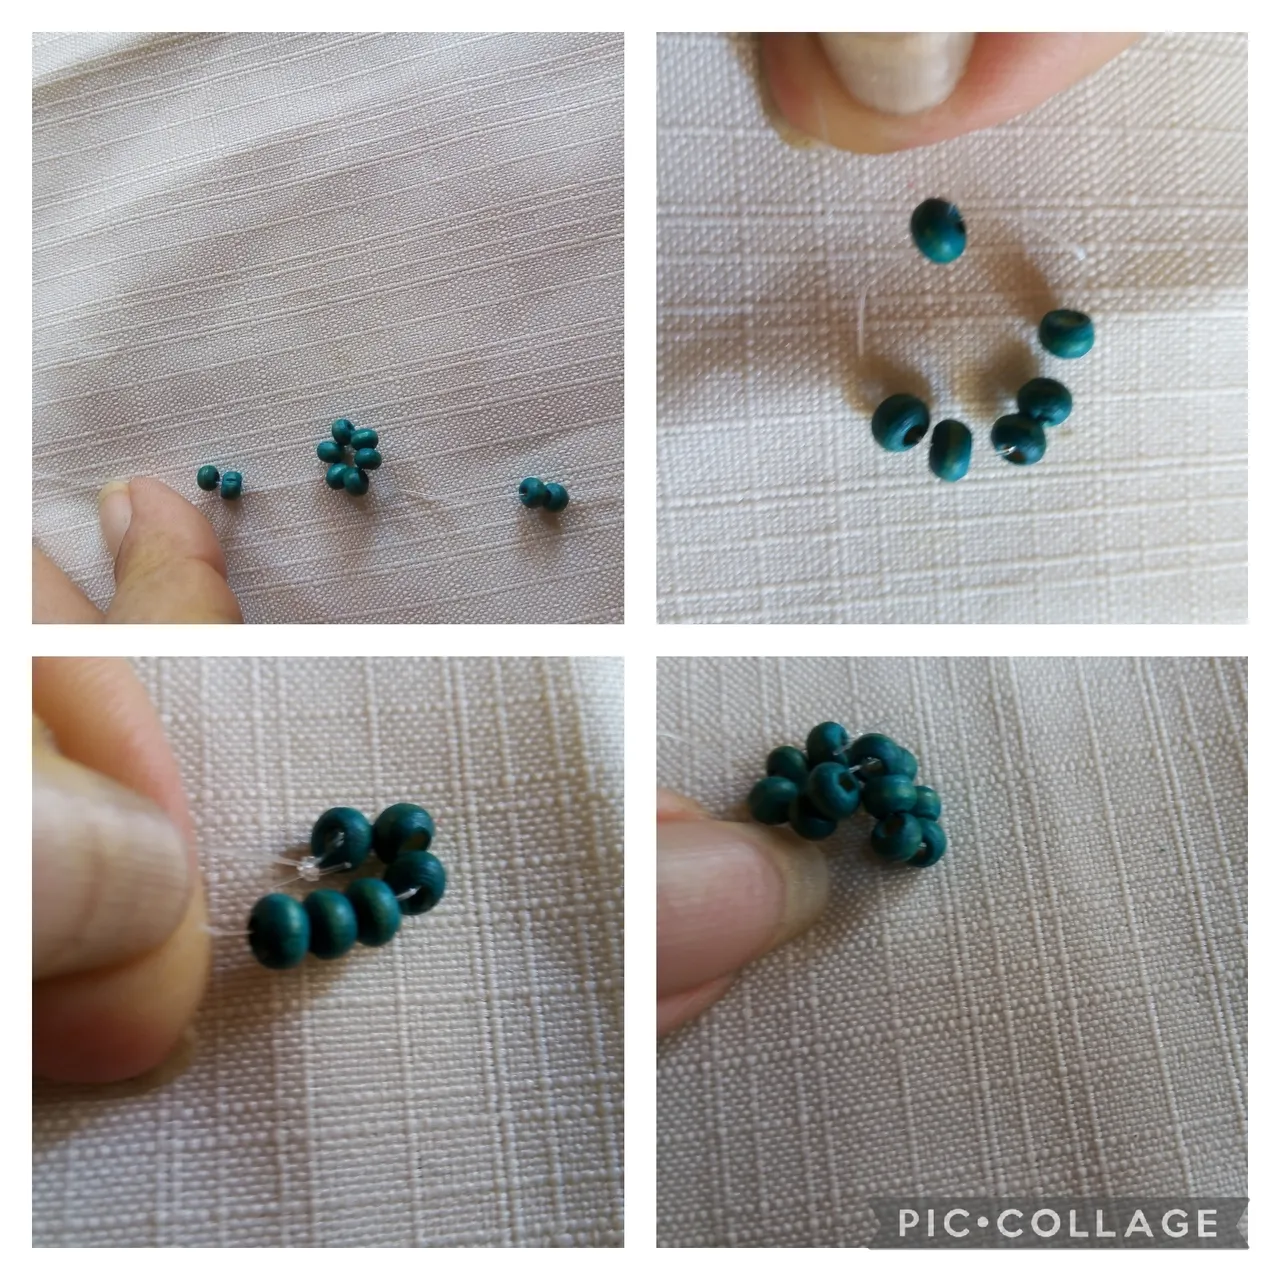
Primer Paso:
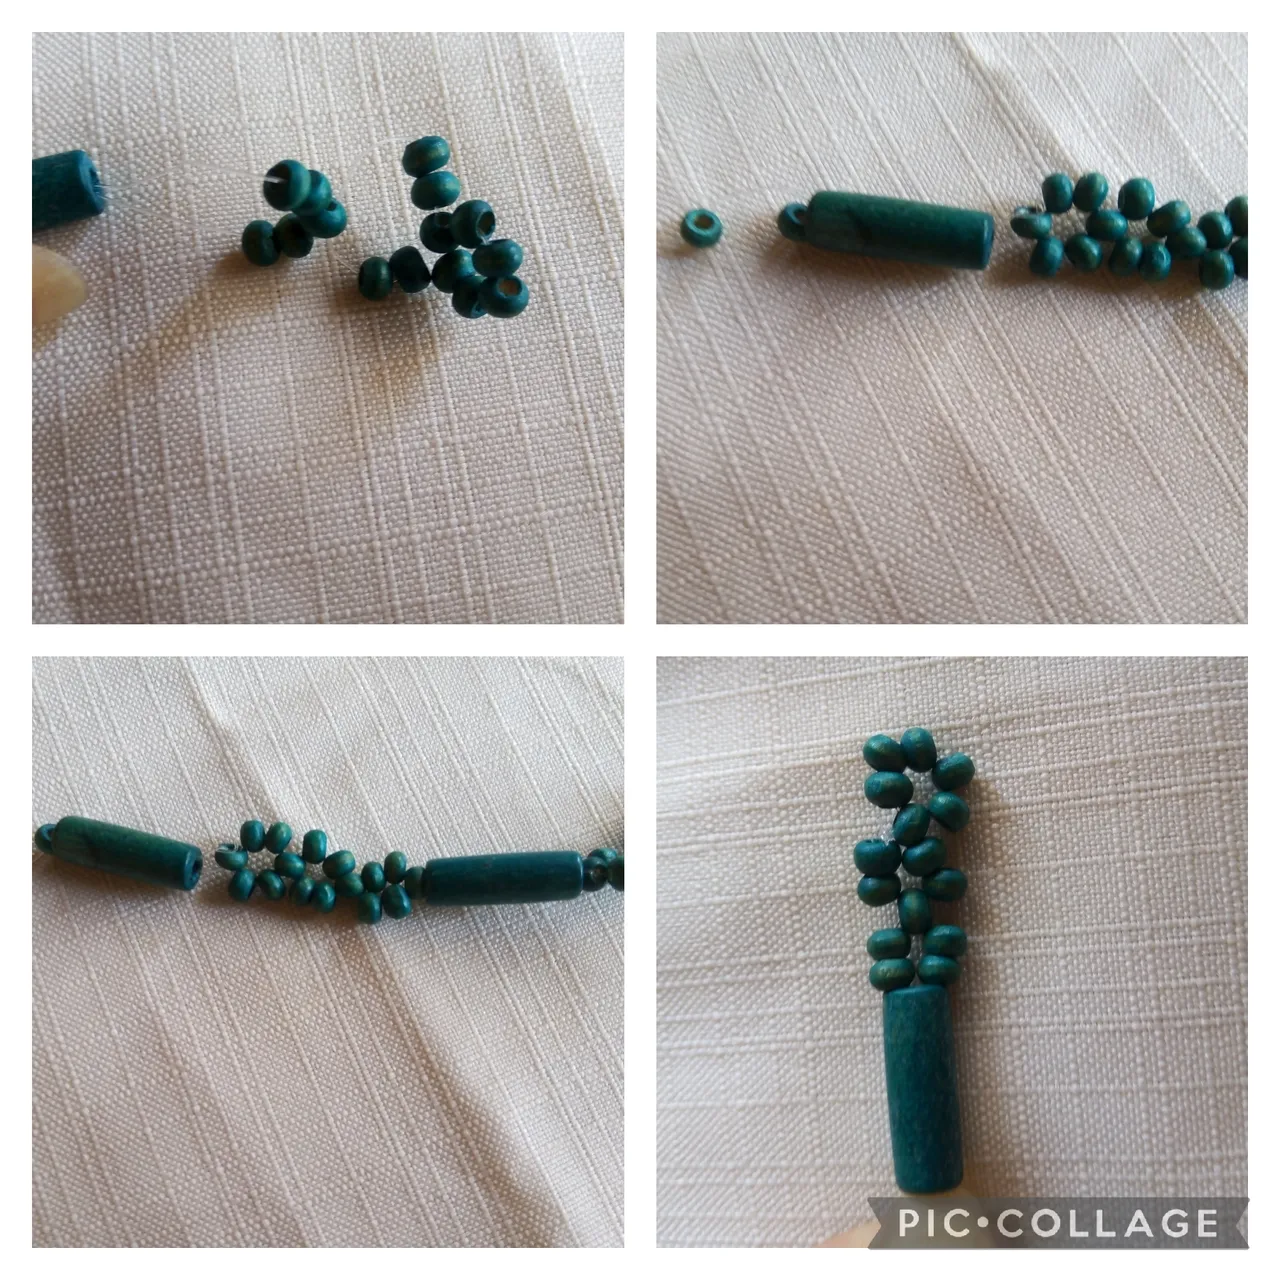
Tomamos el nylon y lo doblamos a la mitad, luego vamos a introducir seis chaquiras, en la última cruzamos el nylon y formamos una flor, aquí vamos hacer tres flores para la segunda dos chaquiras de cada lado y cerramos cruzando la quinta chaquira como el paso anterior y repetimos el mismo paso para la tercera flor.
We start with the preparation:
First step:
We take the nylon and fold it in half, then we are going to introduce six beads, in the last one we cross the nylon and form a flower, here we are going to make three flowers for the second two beads on each side and close by crossing the fifth bead as in the step above and repeat the same step for the third flower.
Segundo Paso:
En este paso una vez realizadas las tres flores tomo el cilindro azúl junto las puntas del nylon en un solo hilo y lo introduzco (como se ve las fotos) ahora realizó de nuevo tres flores, introduzco el cilindro y hago este mismo paso cuatro veces.
Second step:
In this step, once the three flowers have been made, I take the blue cylinder together with the ends of the nylon in a single thread and insert it (as you can see in the photos) now make three flowers again, insert the cylinder and do this same step four times.
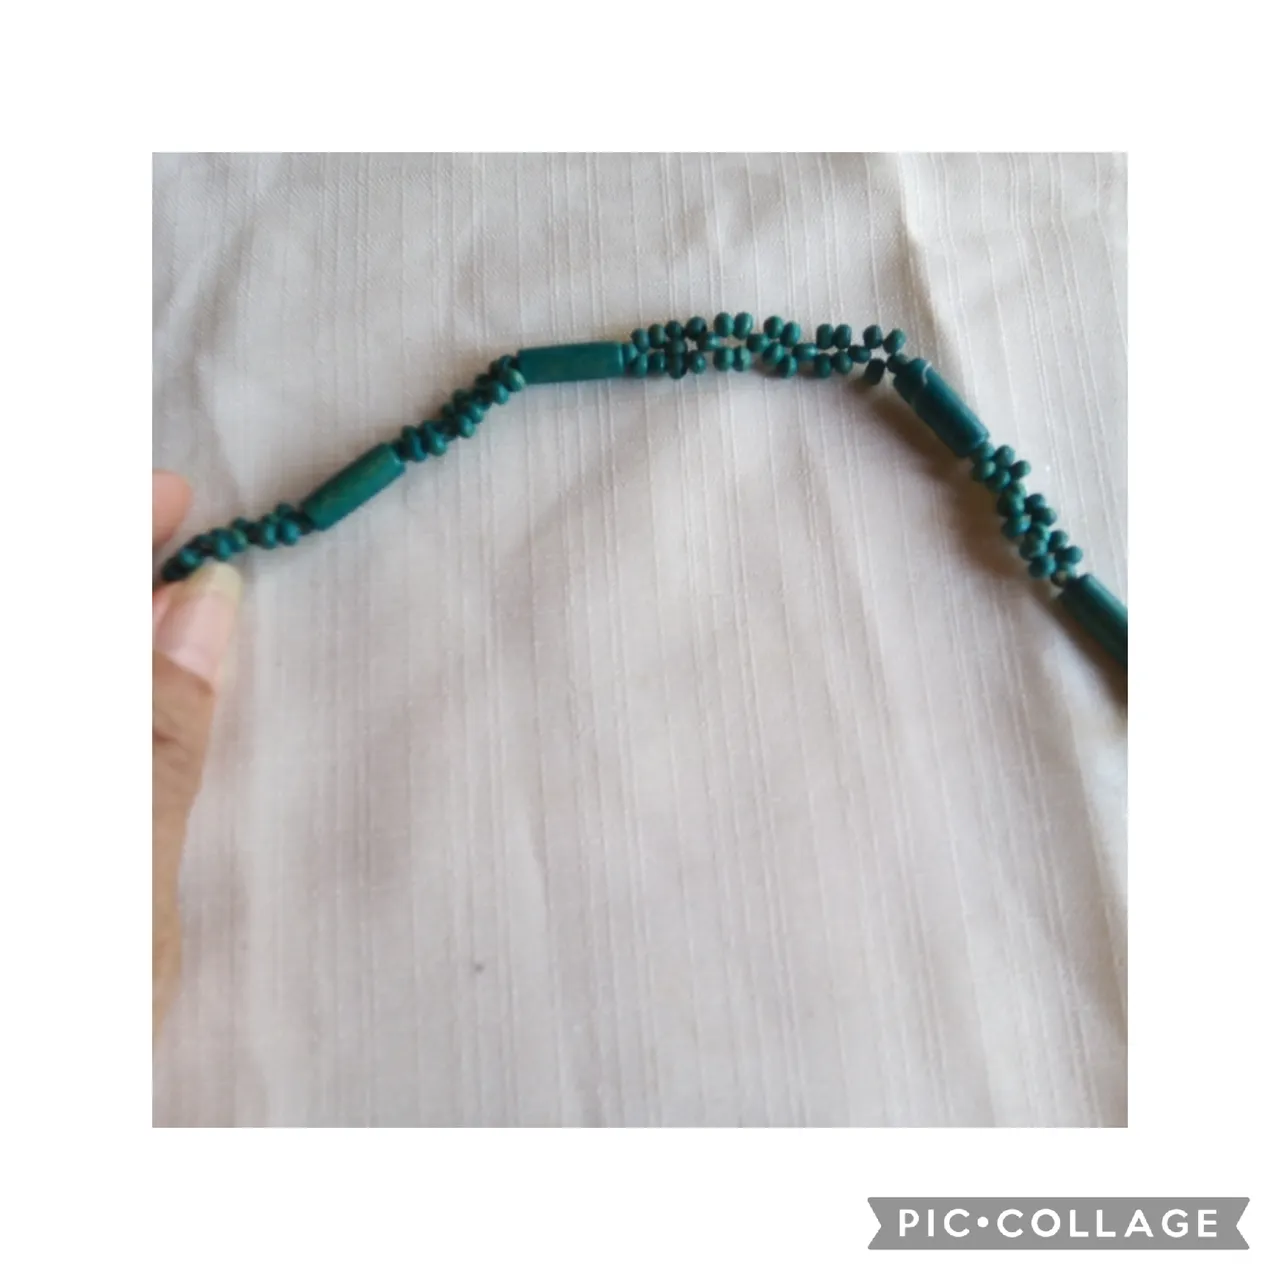
Tercer Paso:
Ahora uso las dos argollas para fijar la cadena en la elaboración del tejido anterior, como se ve en las fotos utilizando la pinza, coloco también la argolla grande para el cierre y así va quedando.
Third step:
Now I use the two rings to fix the chain in the elaboration of the previous fabric, as seen in the photos using the clamp, I also place the large ring for the closure and that's how it stays.

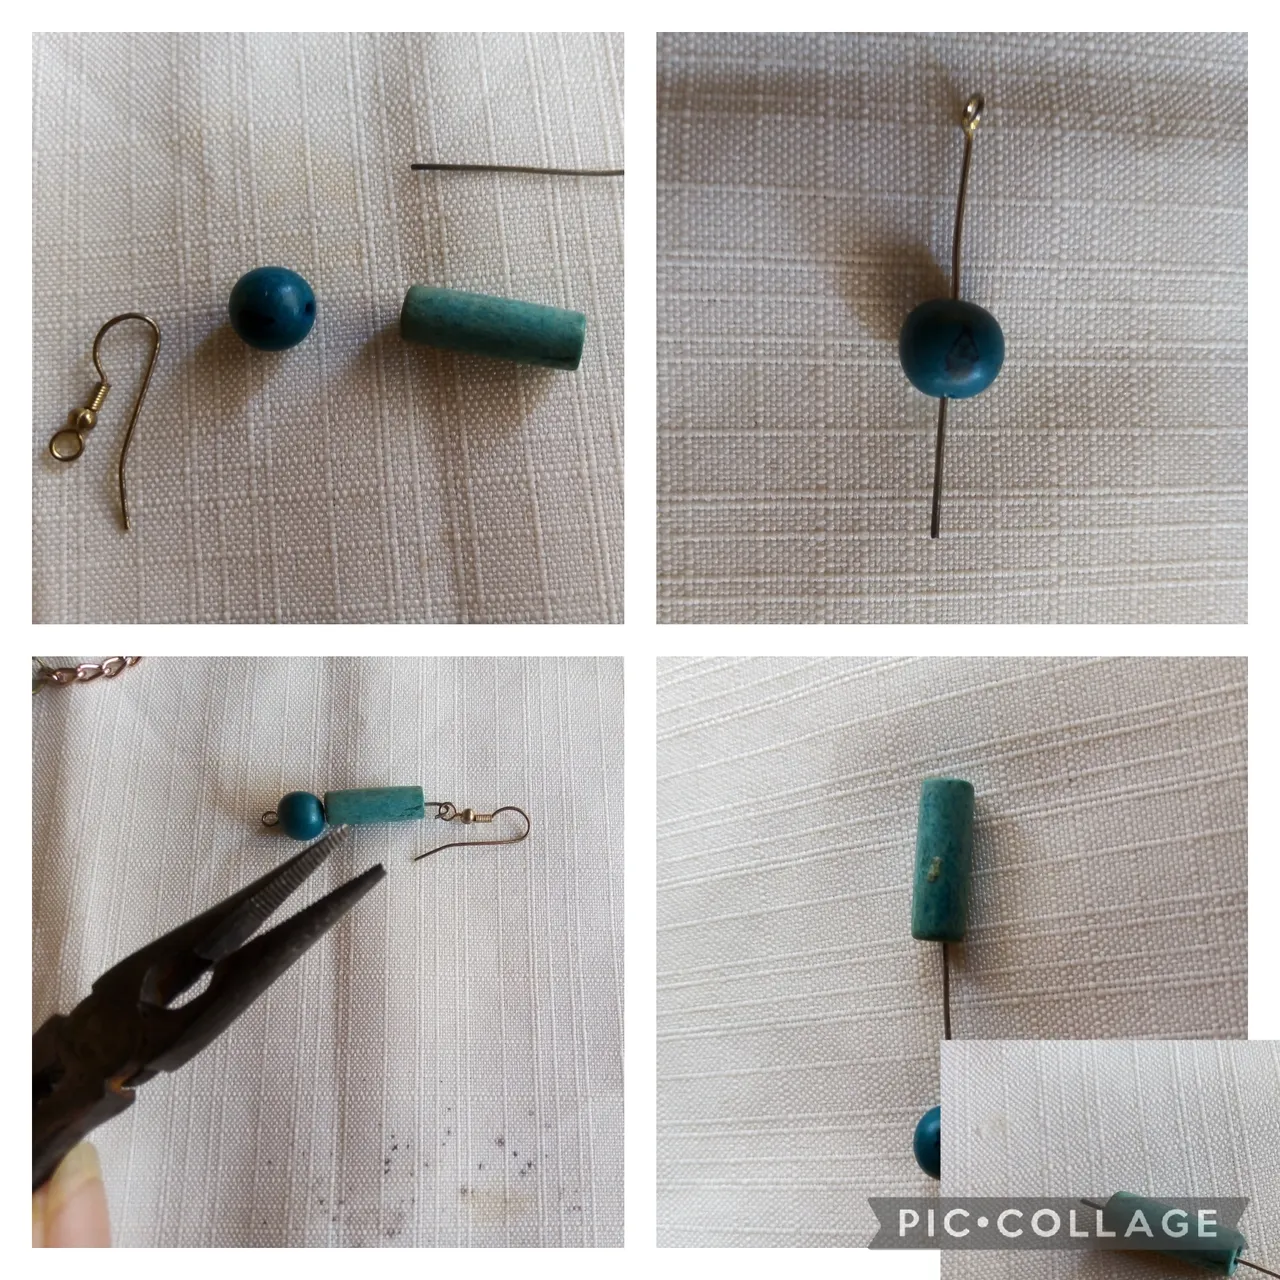
Cuarto Paso:
Vamos a usar este cuarto paso, para realizar los aretes. Para ello usamos un alfiler e introducimos una chaquira turquesa mediana, luego un cilindro turquesa, ahora con la pinza hacemos una argolla alargada dónde colocamos el anzuelo y así elaboramos los pendientes.
Fourth step:
We are going to use this fourth step, to make the earrings. To do this we use a pin and insert a medium turquoise bead, then a turquoise cylinder, now with the clamp we make an elongated ring where we place the hook and thus we make the earrings.
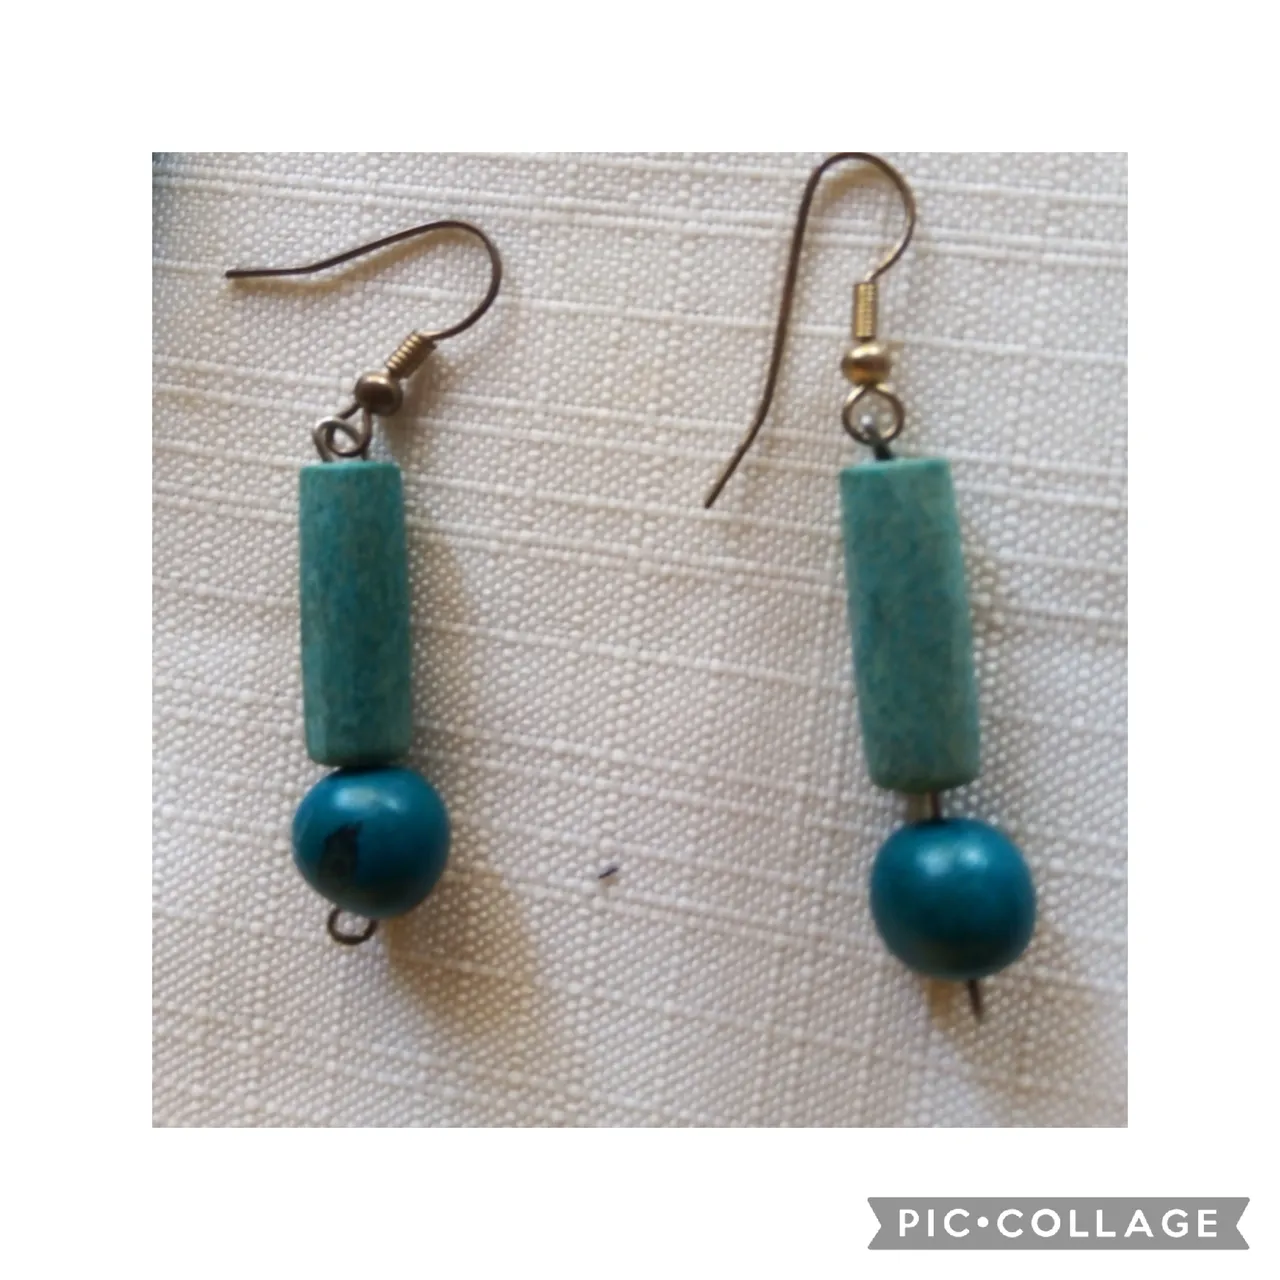
Artistas Creativos este es el resultado final de mi manualidad que presentó en el día de hoy, como siempre agradecida a todos los ven , leen y comentan mis publicaciones espero seguir contando con su apoyo y nos vemos en la próxima manualidad
Creative Artists, this is the final result of my craft that I presented today, as always, I am grateful to all of you who see, read and comment on my publications, I hope to continue counting on your support and see you in the next craft
Las imágenes de este tutorial son de mi propiedad. Las fotos las tomé con mi celular Motorola E6, y las edite con una aplicación gratis del mismo.
Para traducir texto usé geogle traduuctor.
The images in this tutorial are my property. I took the photos with my Motorola E6 cell phone, and I edited them with a free application of it.
To translate text I used geogle translator.