Hola, holaaa!! Saludos para todos mis vecinos hivedianos, fin de semana otra vez y la semana mayor aquí cerquitica; primer día del mes más bonito que tiene el año ABRIL, les cuento que en este mes nací Yo, y no es que sea engreída pero ustedes deben haber oido que cuando una niña cumple quince años dicen: va a cumplir "quince abriles", nada de quince mayos ni quince agostos y mucho menos quince noviembres, comparto con ustedes mi alegría porque estoy volviendo a ser Yo misma, eso de estar acostada todo el tiempo no va conmigo pero cuando no puedes hacer otra cosa porque tienes el ejército detrás de ti te aguantas o te aguantas. Así que cuando el doctor dijo que iba a seguir usando mis zapatos 37 me entro no un fresquito un vendaval, porque todavía estoy muy joven para morir cien años eso no es nada así que la señora del garabato que busque en otro lado, jajaja.
Cómo les dije ayer tengo que colaborar en la escuela porque viene mayo y desde ahora hay que empezar hacer los detalles para el día de las madres y la mayoría de lo que se estila son flores, así que ya me dieron los nombres de las flores que tengo que hacer .
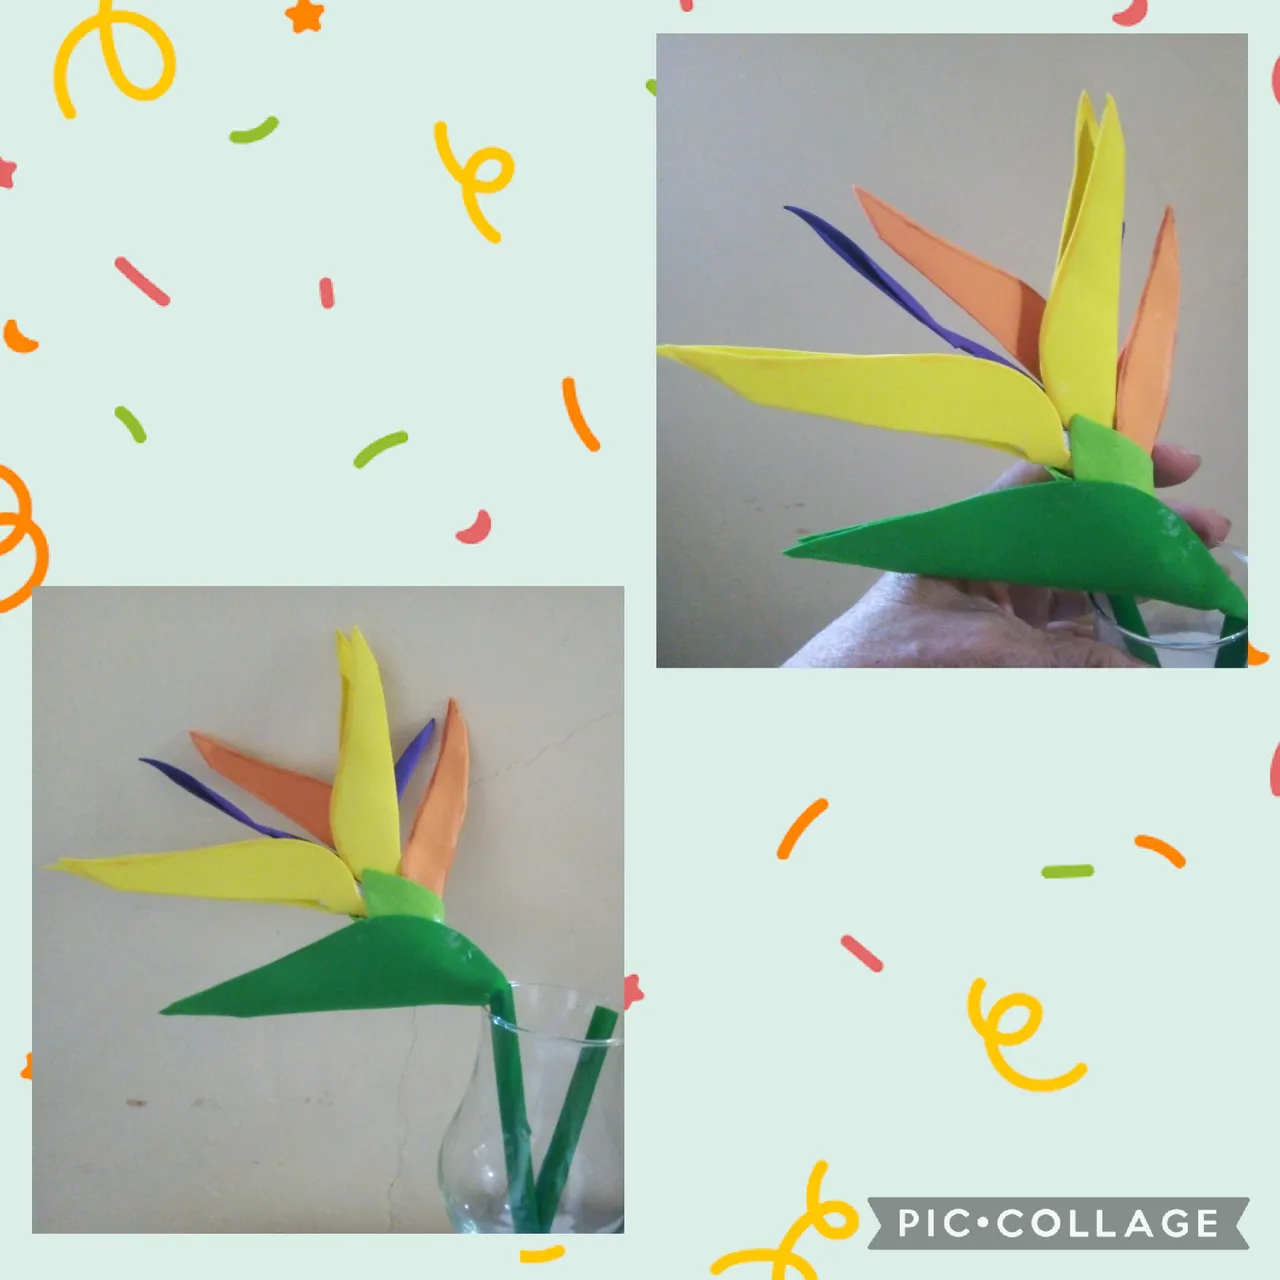
La primera que voy a elaborar es una Strelitzia Reginae; esta es una planta de la especie de las herbáceas; originaria de sudafrica, dónde por sus costumbres tienen la creencia de que por sus colores y forma representa la supremacía del paraíso. Si, les hablo de la flor pájaro,o como se le conoce popularmente Ave del Paraíso. Esta exótica flor se la dedico a mi amiga Isabella @equipodelta porque me gustó mucho el dibujito del colibrí que recientemente público le quedó muy lindo, espero que su salud este mejorcita.
Bueno sigan leyendo y acompañenme a ver cómo la realice:
Hello, hello!! Greetings to all my hivedian neighbors, weekend again and the biggest week here close; first day of the most beautiful month that APRIL has, I tell you that in this month I was born, and it's not that I'm conceited but you must have heard that when a girl turns fifteen they say: she's going to be "fifteen years old", nothing fifteen May or fifteen August, much less fifteen November, I share with you my joy because I am becoming myself again, that thing of lying down all the time does not suit me but when you cannot do anything else because you have the army behind you hold on or hold on So when the doctor said that I was going to continue wearing my shoes 37 I got in, not a cold one, a gale, because I'm still too young to die a hundred years, that's nothing, so the lady with the doodle should look elsewhere, hahaha.
As I told you yesterday, I have to collaborate at school because May is coming and from now on we have to start making the details for Mother's Day and most of what is in style are flowers, so they already gave me the names of the flowers that I have to do .
The first one I am going to make is a Strelitzia Reginae; this is a plant of the herbaceous species; Originally from South Africa, where because of their customs they have the belief that because of its colors and shape it represents the supremacy of paradise. Yes, I am talking about the bird flower, or as it is popularly known Bird of Paradise. I dedicate this exotic flower to my friend Isabella @equipodelta because I really liked the little drawing of the hummingbird that was recently published, it was very cute, I hope her health is better.
Well keep reading and come with me to see how I do it:
Estos fueron los materiales que usé para su elaboración:
Foamis: verde, amarillo, naranja, morado.
Silicón frío.
Tijeras.
Pitillo verde.
Alambre.
Marcadores.
These were the materials I used to make it:
Foamis: green, yellow, orange, purple.
Cold sylicon.
Pair of scissors.
Green cigarette.
Wire.
Markers

Empecemos a la elaboración:
Primer Paso:
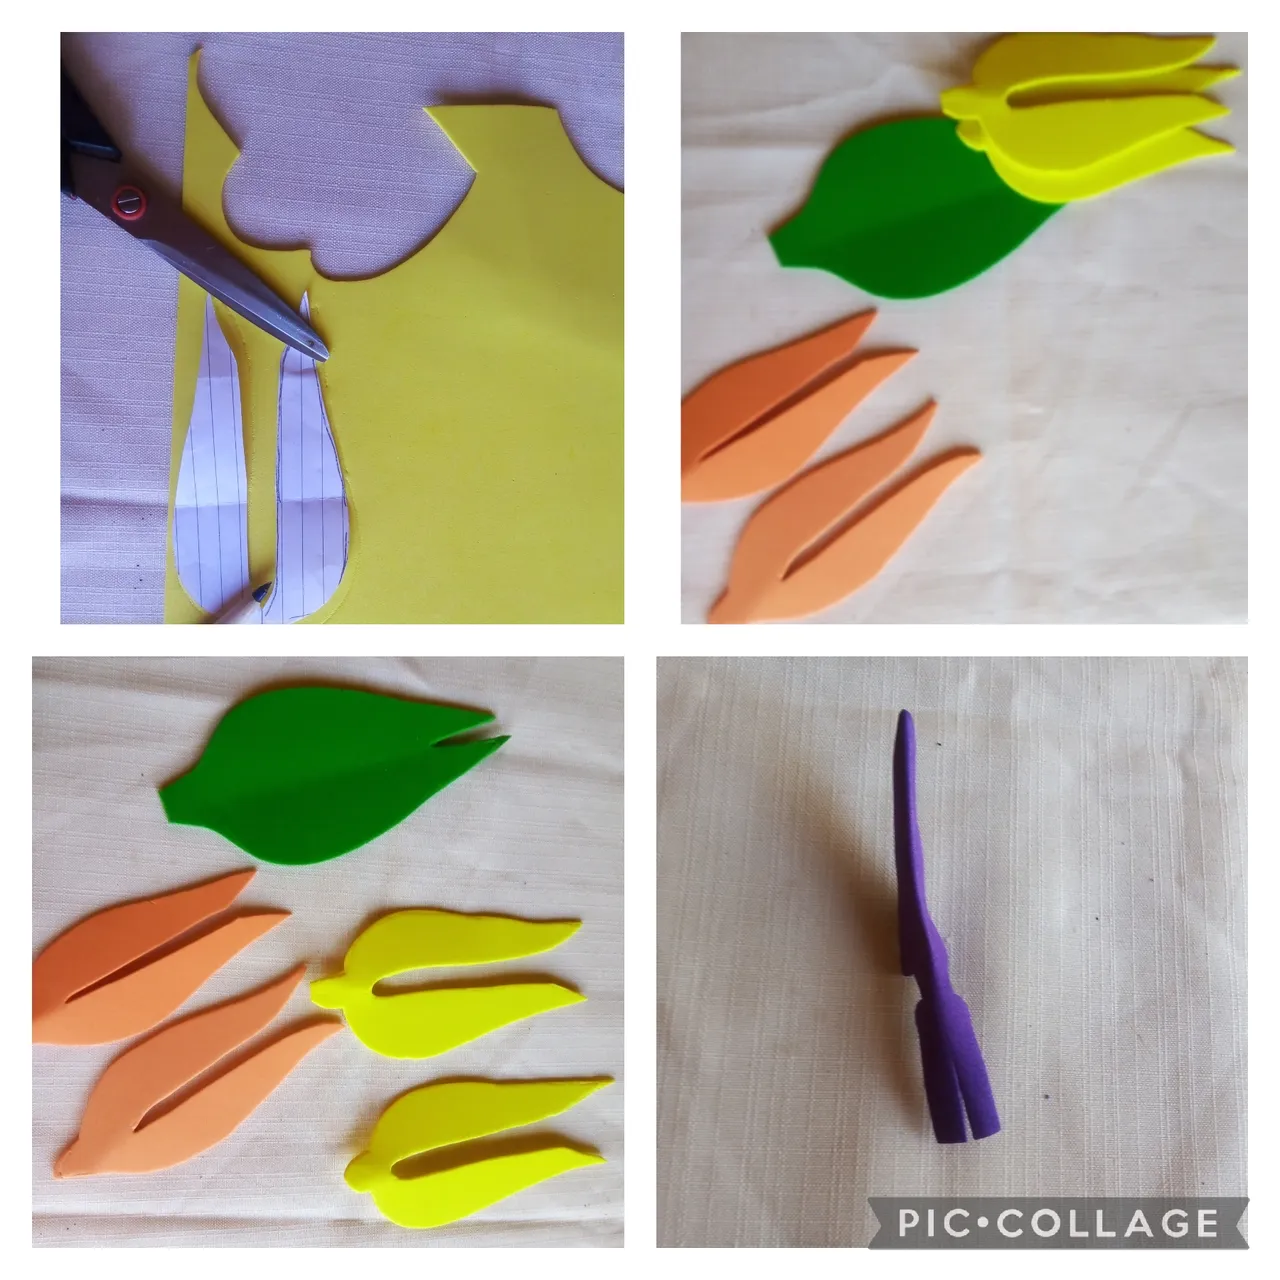
Para este primer paso, con los moldes que previamente había copiado; corto los pétalos para formar la flor: dos amarillos , dos naranja, dos morados, y uno verde.
Let's start crafting:
First step:
For this first step, with the molds that I had previously copied; I cut the petals to form the flower: two yellow, two orange, two purple, and one green.
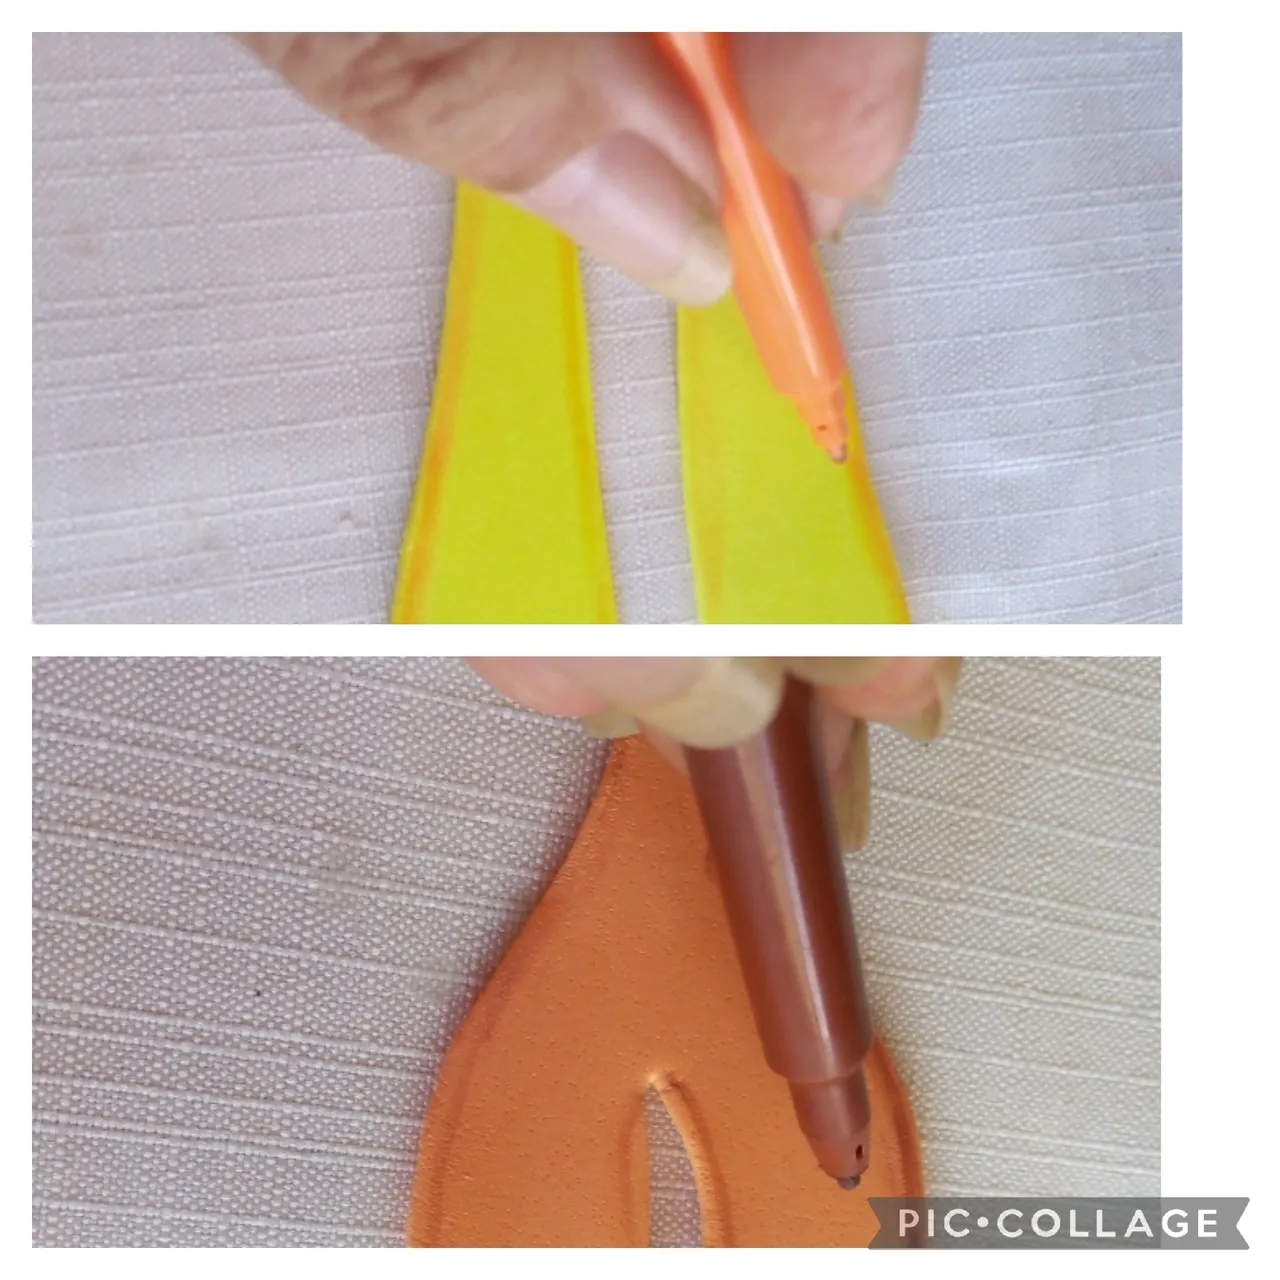
Segundo paso: en este paso, con el marcador marrón hago sombras en los bordes de los pétalos naranja, y con marcador naranja sombreo los pétalos amarillos.
Second step: in this step, with the brown marker I make shadows on the edges of the orange petals, and with the orange marker I shade the yellow petals.
Tercer paso: ya elaborado los petalos; empiezo a formar la flor: tomo el alambre y pongo un pedazo de papel floratex blanco para fijar los petalos, con el silicón frío pegó de manera siguiente: un pétalo amarillo luego uno morado que es diferente a los otros tiene forma de flecha y es como los pistilos después coloco otro amarillo, luego uno naranja, uno morado y un último naranja (ver las fotos explicativas,)
Third step: already elaborated the petals; I start to form the flower: I take the wire and put a piece of white floratex paper to fix the petals, with the cold silicone I glued it as follows: a yellow petal then a purple one that is different from the others it has the shape of an arrow and it is like the pistils then I put another yellow one, then an orange one, a purple one and a last orange one (see the explanatory photos,)
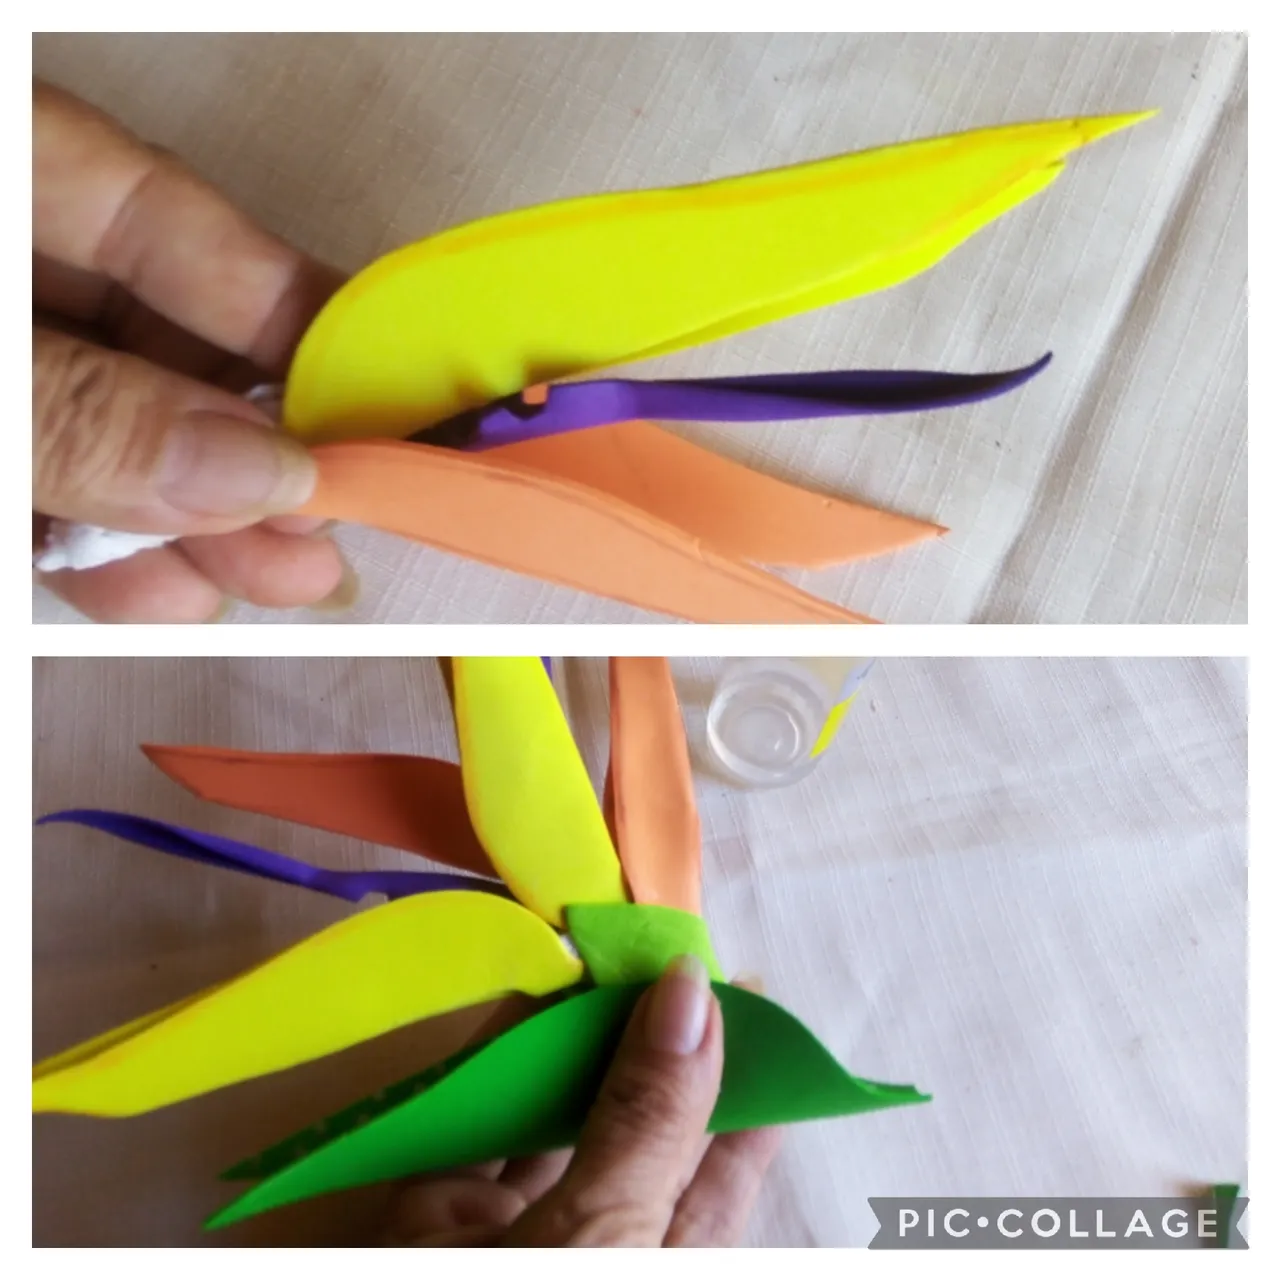
Cuarto paso: voy a explicar la colocación del pétalo verde: una vez que uni los demás pétalos con las hojitas que había picado antes cubro los pétalos y el alambre, para luego tomar el pétalo verde y cubrir todos los pétalos como se ve en las fotos.
Fourth step: I am going to explain the placement of the green petal: once I have joined the other petals with the leaves that I had chopped before, I cover the petals and the wire, and then take the green petal and cover all the petals as seen in the photos .

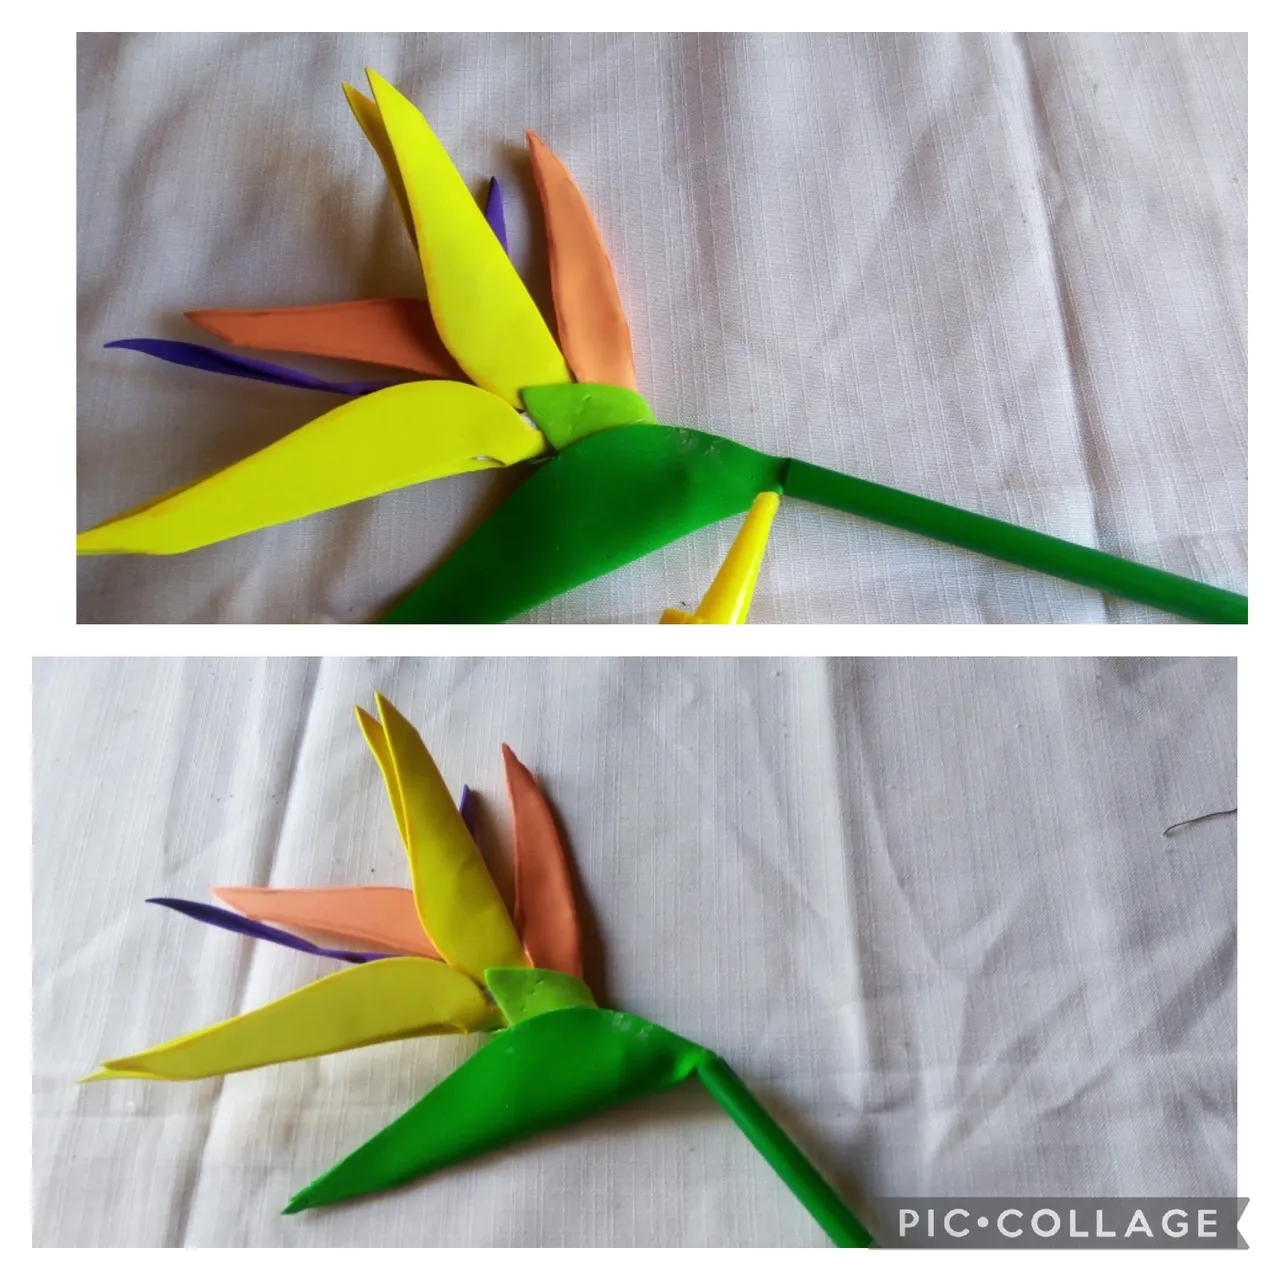
Quinto paso: elaborada la flor pájaro tomo el pitillo verde que será el ramo dónde va la flor, y doblo un poco para darle caída y simular una verdadera ave del paraíso, como en las fotos.
Fifth step: elaborated the bird flower, I take the green cigarette that will be the bouquet where the flower goes, and bend it a little to give it fall and simulate a true bird of paradise, as in the photos.
Apreciados artistas, este es el resultado final de mi manualidad creativa. Cómo siempre espero que la idea les guste y la apoyen con sus comentarios.
Gracias a todos los que ven y leen mis publicaciones, nos vemos en la próxima manualidad.
Dear artists, this is the final result of my creative craft. How always I hope you like the idea and support it with your comments.
Thanks to everyone who watches and reads my posts, see you in the next craft.

Las imágenes de este tutorial son de mi propiedad las fotos las tomé con mi celular Motorola E6 y las edite con una aplicación gratis del mismo.
Para traducir texto usé geogle traduuctor.
Las imágenes de este tutorial son de mi propiedad las fotos las tomé con mi celular Motorola E6 y las edite con una aplicación gratis del mismo.
Para traducir texto usé geogle traduuctor.